No worries you are right has many roles
As noted on wiki
" The project's aim was to produce an aircraft capable of undertaking missions in the tactical strike, reconnaissance, air defence, and maritime roles"
Air Campaigns
Want to start or join a group build? This is where to start.
Hosted by Frederick Boucher, Michael Satin
OFFICIAL: Bombers 2 Campaign
panzerIV
England - North West, United Kingdom
Joined: January 02, 2007
KitMaker: 781 posts
AeroScale: 65 posts
Joined: January 02, 2007
KitMaker: 781 posts
AeroScale: 65 posts
Posted: Monday, May 21, 2018 - 11:41 PM UTC
Antilles
Nordrhein-Westfalen, Germany
Joined: March 22, 2015
KitMaker: 671 posts
AeroScale: 614 posts
Joined: March 22, 2015
KitMaker: 671 posts
AeroScale: 614 posts
Posted: Monday, May 21, 2018 - 11:53 PM UTC
Torsten: I never heard of a putty with glue and flour. how does it work and how can You grind and paint it? Btw Your kit is coming along nicely!
Bob: Great progress on Your Fokker. Please tell me about closing this window with glue. I never tried this before. Any experience what diameter of space can be closed by this technique?
Shrimpman: I would try a post shading effect with some strongly diluted grey. I would use a mask along the panel lines cross to the directionn of flight and spray this paint into the direction of flight. Than, I would use some black or dark brown wash to restore the panel lines. I did this on my Dornier Wal and it worked quite well.
Oliver
BlackWidow
European Union
Joined: August 09, 2009
KitMaker: 1,732 posts
AeroScale: 1,336 posts
Joined: August 09, 2009
KitMaker: 1,732 posts
AeroScale: 1,336 posts
Posted: Tuesday, May 22, 2018 - 12:06 AM UTC
Tony, Michael is right, a "Toni" isn't a bomber, it was designed as a MRCA (Multi Role Combat Aircraft), so it wouldn't fit in this campaign. But I'm sure there's a real bomber hiding somewhere in your stash ....
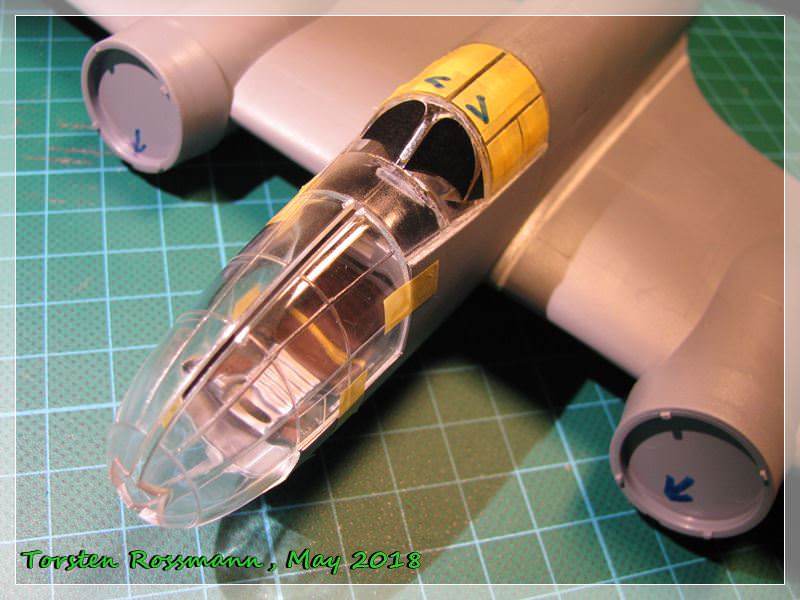
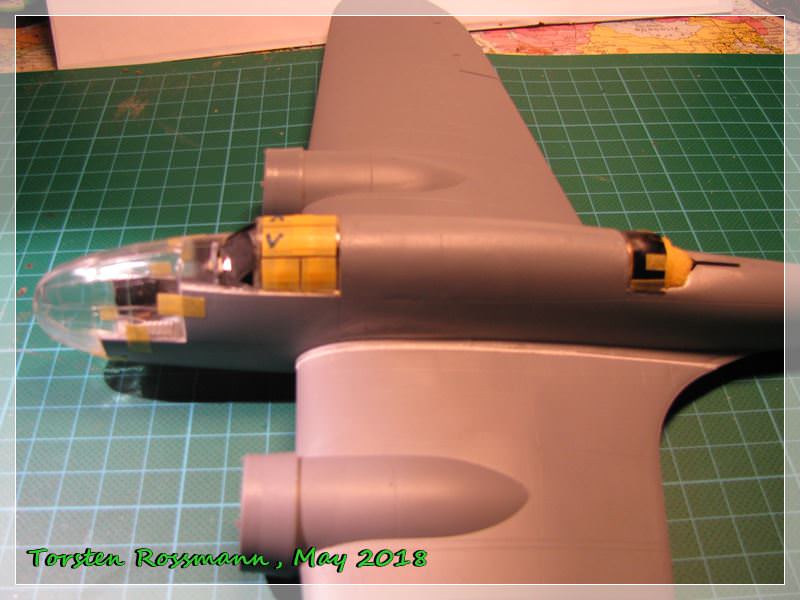
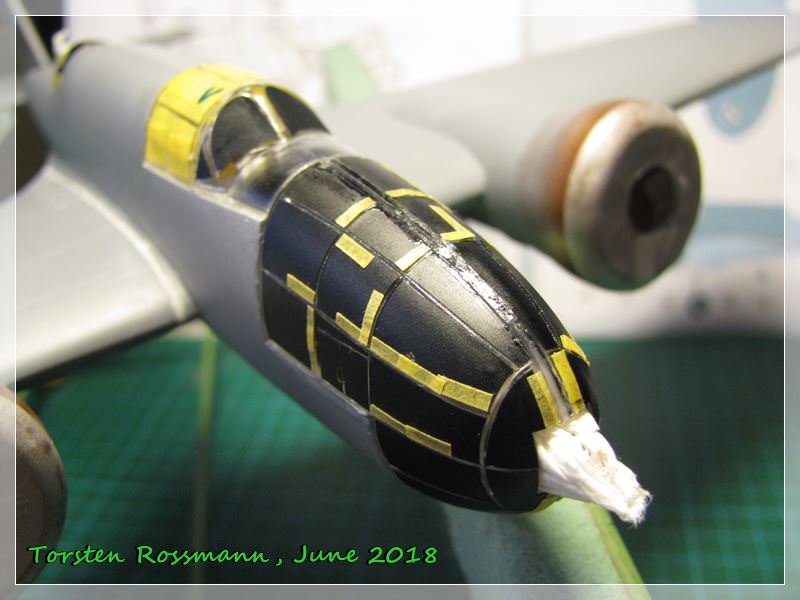
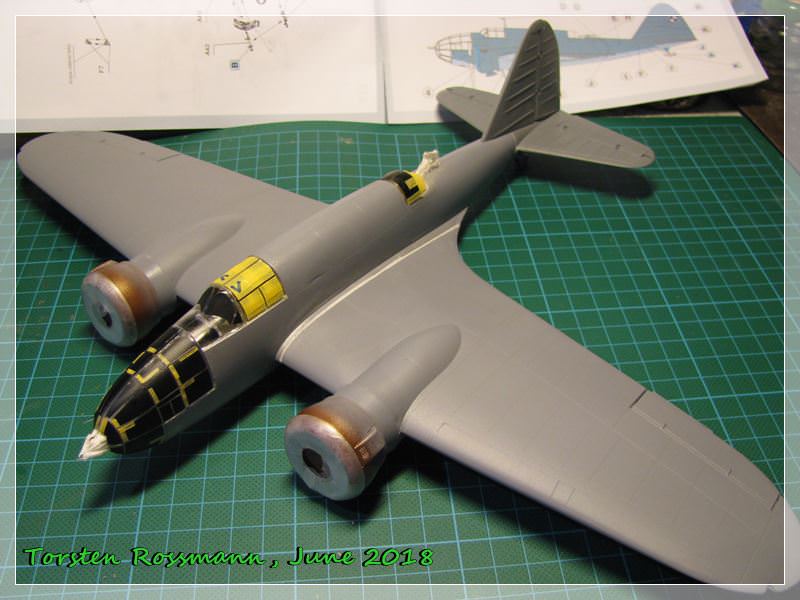
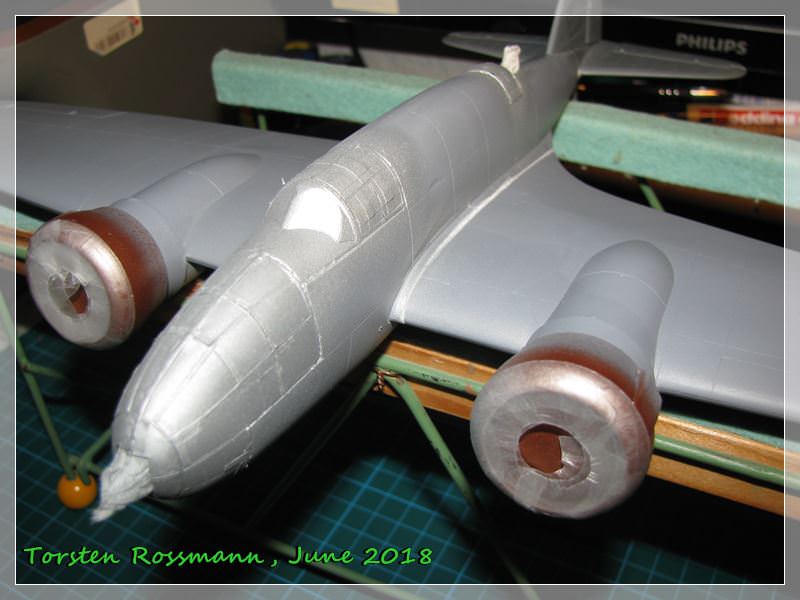
Anyway, another update from my PZL. As I have expected, there are some fitting problems with the clear parts, especially the nose parts ....
.... this evening I phoned my LHS and ordered that Microscale Cristal Klear thing to fill the gap between both parts. Of course he has that stuff not in stock right now and will order it at Hannants. I hope to have it on my bench by mid next week ...
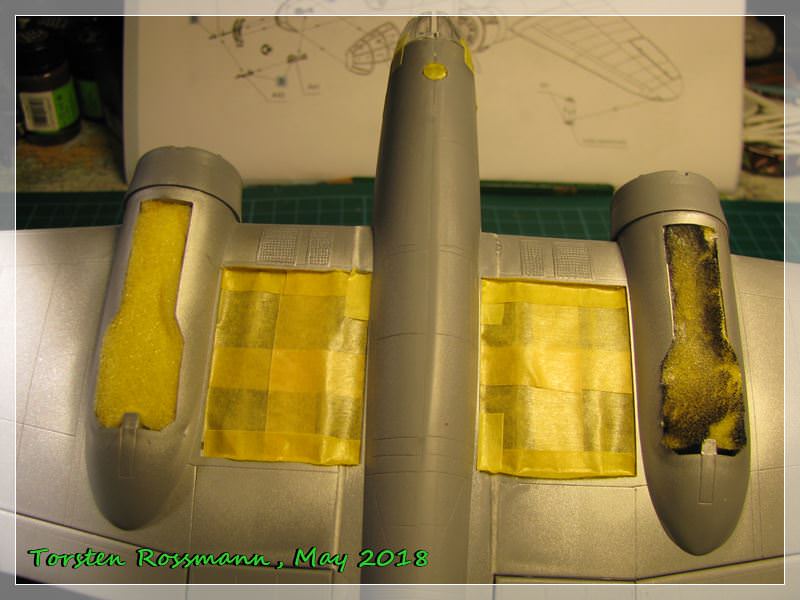
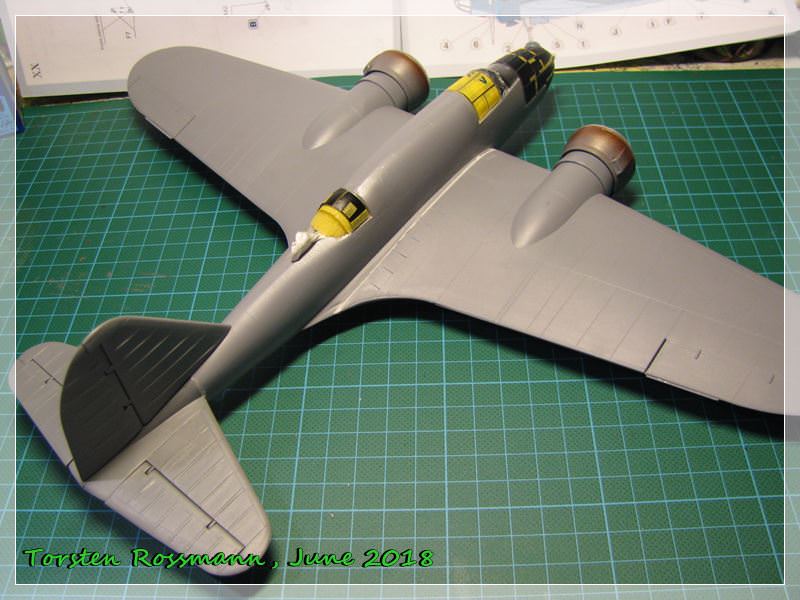
.... some parts of the Montex mask don't fit, they are too small, so I have to use some additional Tamiya Tape or have to replace Montex with it. Also not a nice feature, but, hey, it was only 5 €uros for the mask. Bomb bays and landing gear bays are also masked or filled with sponge ....
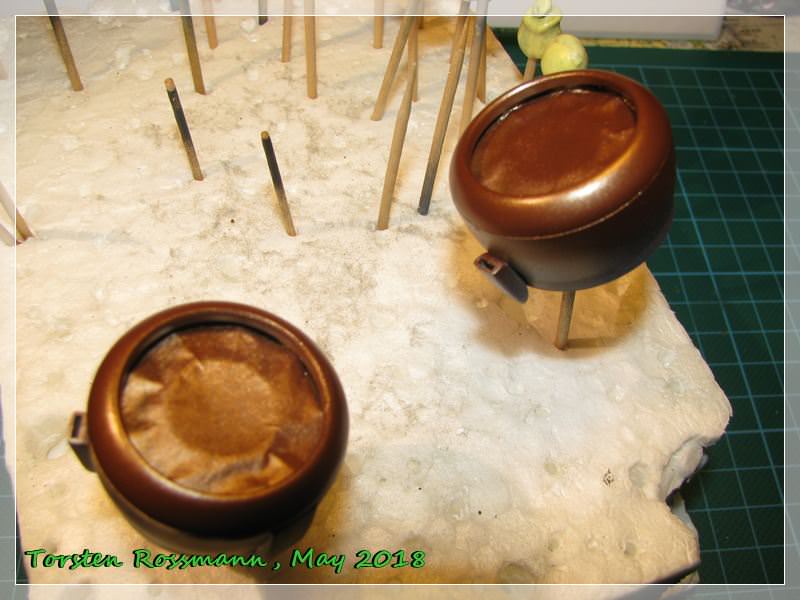
.... and the cowling rings of the engines are already painted with Copper from Vallejo 71068. Before I glue them to the engine nacelles I will cover them with Parafilm M and it will stay right until the end of the assembly ....
Now I wait for Cristal Klear to arrive and in the meantime will mask the last clear parts. I want to have this bird finished for the expo in Leipzig early in July. Keep your fingers crossed for me ....
Torsten
Bigrip74
Texas, United States
Joined: February 22, 2008
KitMaker: 5,026 posts
AeroScale: 2,811 posts
Joined: February 22, 2008
KitMaker: 5,026 posts
AeroScale: 2,811 posts
Posted: Tuesday, May 22, 2018 - 08:41 AM UTC
Torsten, she is looking good and I see that there is a lot of glass work. WOW!
Bob
Bob
Bigrip74
Texas, United States
Joined: February 22, 2008
KitMaker: 5,026 posts
AeroScale: 2,811 posts
Joined: February 22, 2008
KitMaker: 5,026 posts
AeroScale: 2,811 posts
Posted: Wednesday, May 23, 2018 - 11:52 PM UTC
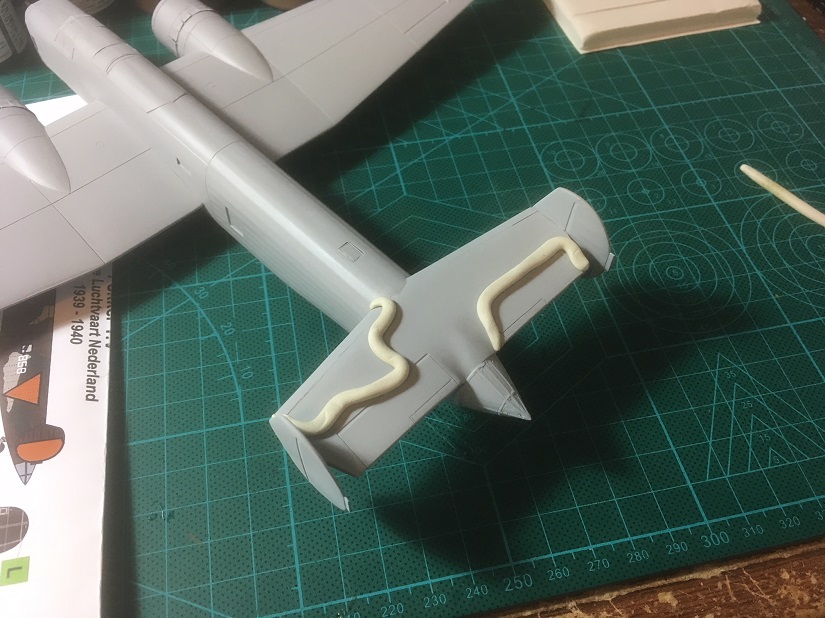
I started the paint process with some poster putty and pulled out the airbrushes after 4 or 5 months and they need to be taken apart and cleaned again. The weather here is also very humid making my filter work over time and spitting every once and a while. Was able to put some paint on the Fokker, but it is still drying before it hits the plastic. Guess I need to add more retarder.
Bigrip74
Texas, United States
Joined: February 22, 2008
KitMaker: 5,026 posts
AeroScale: 2,811 posts
Joined: February 22, 2008
KitMaker: 5,026 posts
AeroScale: 2,811 posts
Posted: Sunday, May 27, 2018 - 09:50 AM UTC
Antilles
Nordrhein-Westfalen, Germany
Joined: March 22, 2015
KitMaker: 671 posts
AeroScale: 614 posts
Joined: March 22, 2015
KitMaker: 671 posts
AeroScale: 614 posts
Posted: Saturday, June 02, 2018 - 10:05 AM UTC
Torsten: Wow, the fit of the nose is really challenging to say at least! Good luck with curing this one!
Bob: Nice progress on the paint job. Did the Fokker had a dark lower surface?
On my Dornier I started with the interior work. The Airfix kit is nicely detailed, so I did not really needed the PE Parts.
The fitting of both fuselage halves was a bit tricky. But now, the cockpit looks really nice. Hopefully, something of the interior work is visible after glueing all parts together.
The instruments panel was enhanced with some additional wiring, as this area is clearly visible through the front windscreen.
Oliver
Bigrip74
Texas, United States
Joined: February 22, 2008
KitMaker: 5,026 posts
AeroScale: 2,811 posts
Joined: February 22, 2008
KitMaker: 5,026 posts
AeroScale: 2,811 posts
Posted: Saturday, June 02, 2018 - 03:36 PM UTC
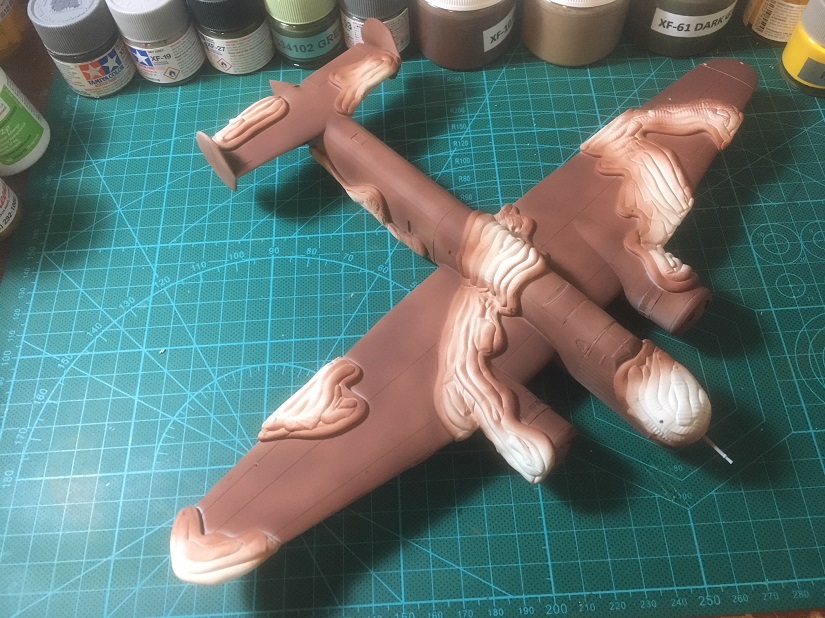
Oliver, I am using Valoms art in their instructions as a guide and they show the dark brown on the entire under surface. So with out any real research I am at the mercy of VALOM.
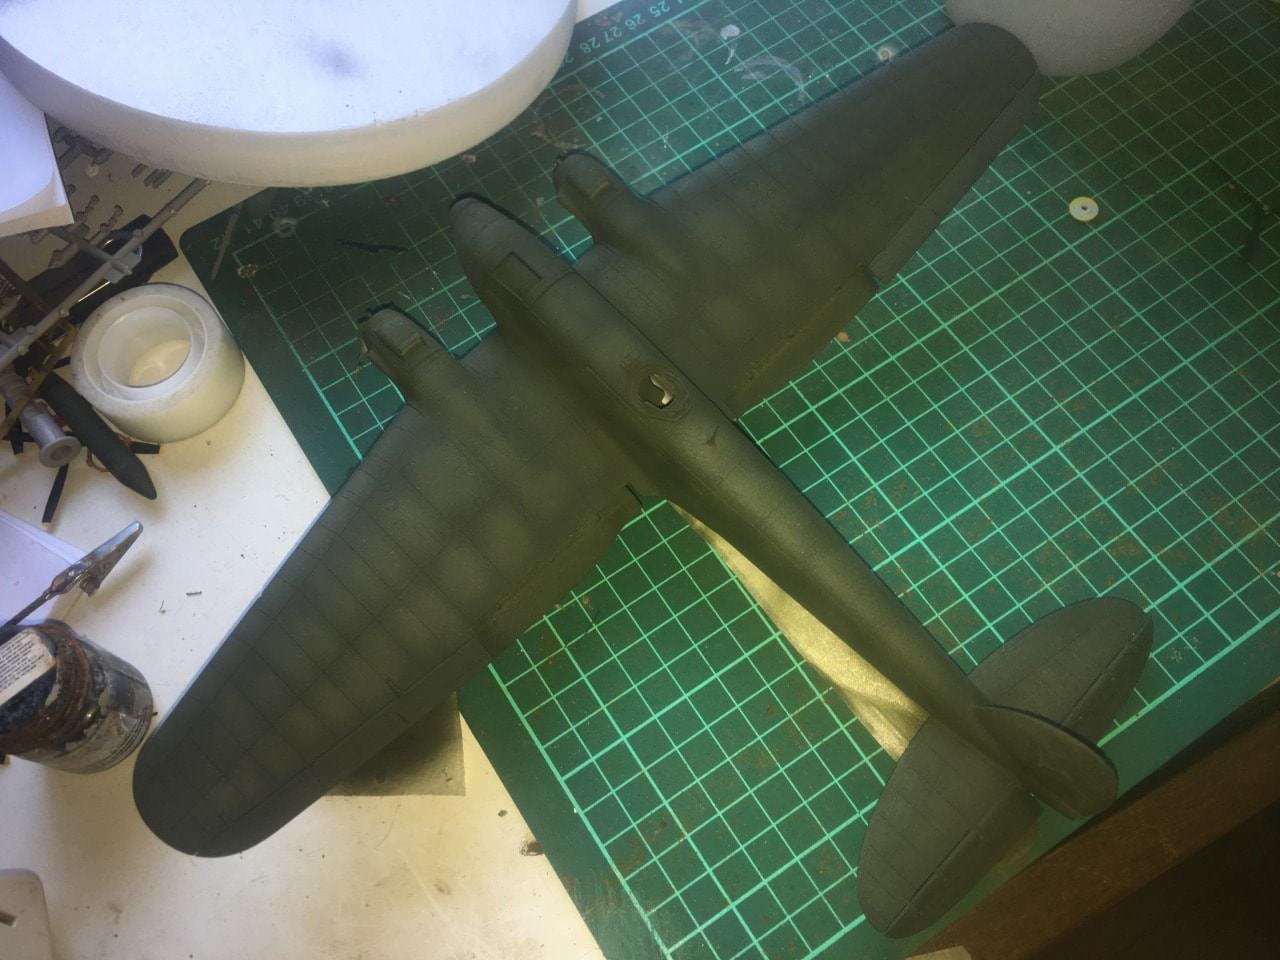
Here is a little update of the Fokker color scheme. I am not happy with the seperation of the (3) colors. If you look closely you can see the brown inbetween the green and gray. I will need to fix this, but not sure how just yet.
Bob
Here is a little update of the Fokker color scheme. I am not happy with the seperation of the (3) colors. If you look closely you can see the brown inbetween the green and gray. I will need to fix this, but not sure how just yet.
Bob
Shrimpman
Dublin, Ireland
Joined: August 14, 2016
KitMaker: 148 posts
AeroScale: 123 posts
Joined: August 14, 2016
KitMaker: 148 posts
AeroScale: 123 posts
Posted: Saturday, June 02, 2018 - 11:04 PM UTC
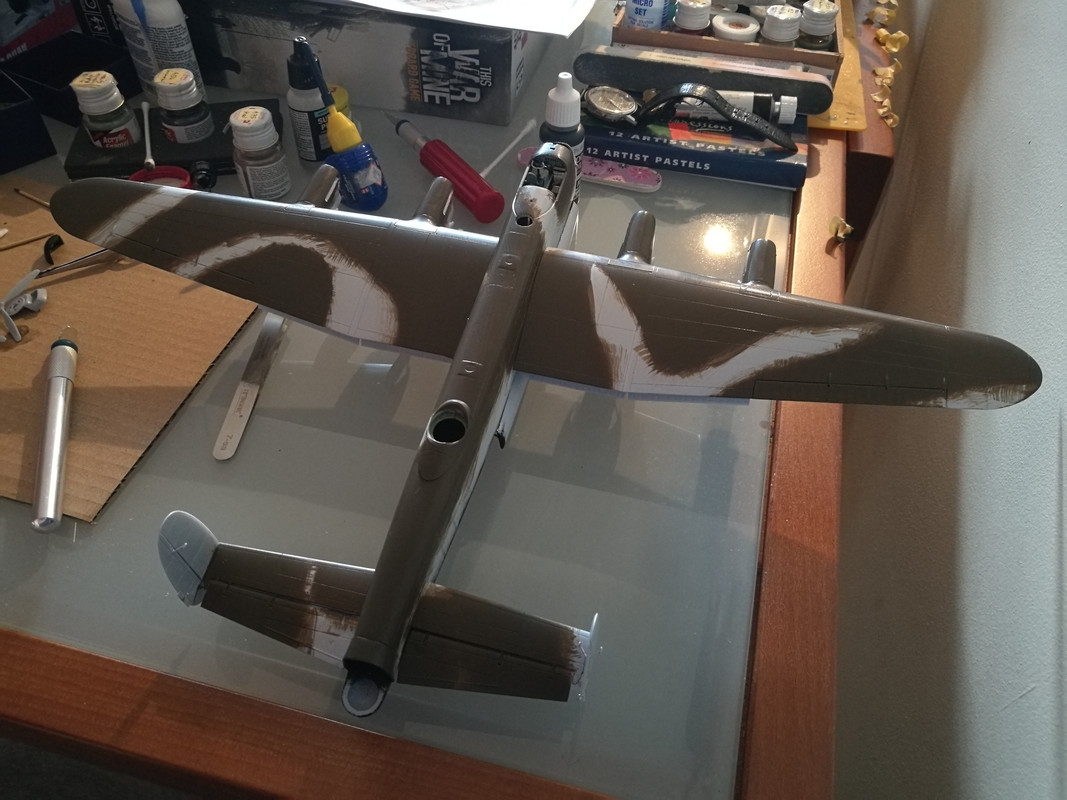
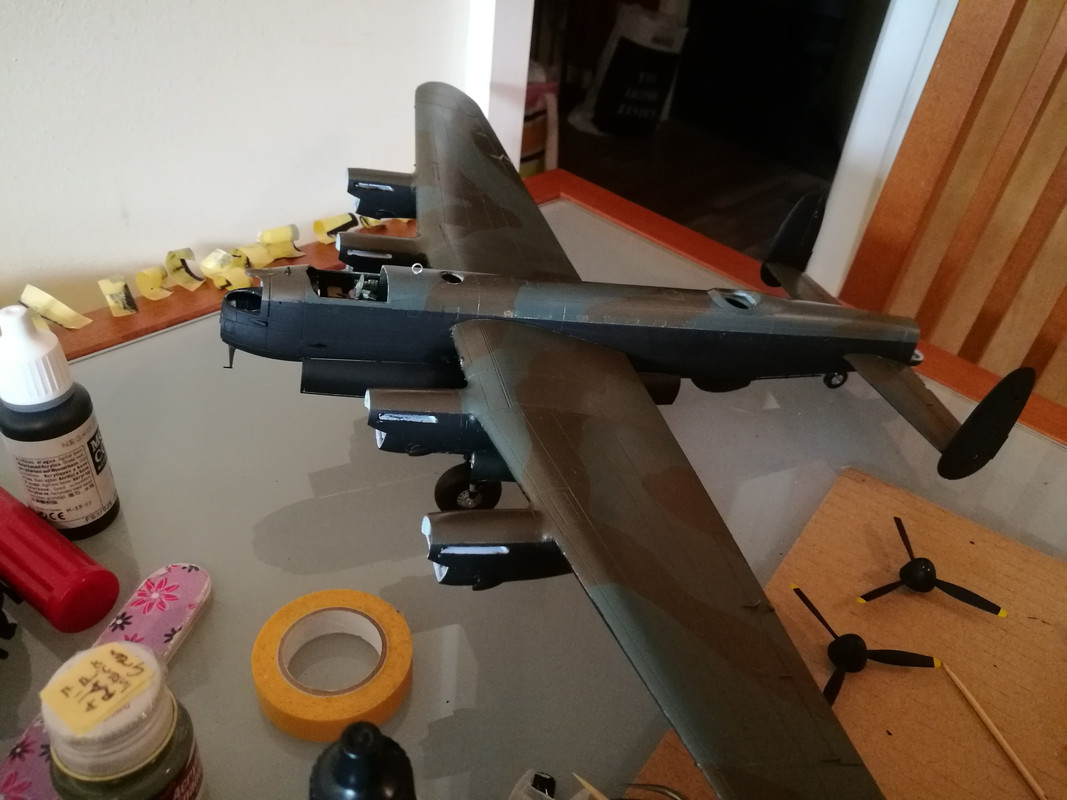
Some progress pictures of my Lancaster. I've started the camo with brown. I've discovered Vallejo Air works very well with brush. It is already very well thinned, so after adding a drop of water as a retardant I can paint without any visible brush strokes. The end results is 5 layers, as thin as I could possibly manage. I'm quite happy with the effect, surface is as smooth as if sprayed on.
Below is the prep for green colour. I used Humbrol Maskol thingy (still wet on the picure). By shortsightedness I used my favourite brush for this, doh! I think brush is ruined, but I will try to get this stuff off it.
BlackWidow
European Union
Joined: August 09, 2009
KitMaker: 1,732 posts
AeroScale: 1,336 posts
Joined: August 09, 2009
KitMaker: 1,732 posts
AeroScale: 1,336 posts
Posted: Tuesday, June 05, 2018 - 06:21 AM UTC
Quoted Text
Torsten, she is looking good and I see that there is a lot of glass work. WOW!
Bob
Thanks Bob! It's 32 windows to cover, 16 per side. Took me an evening to do that.
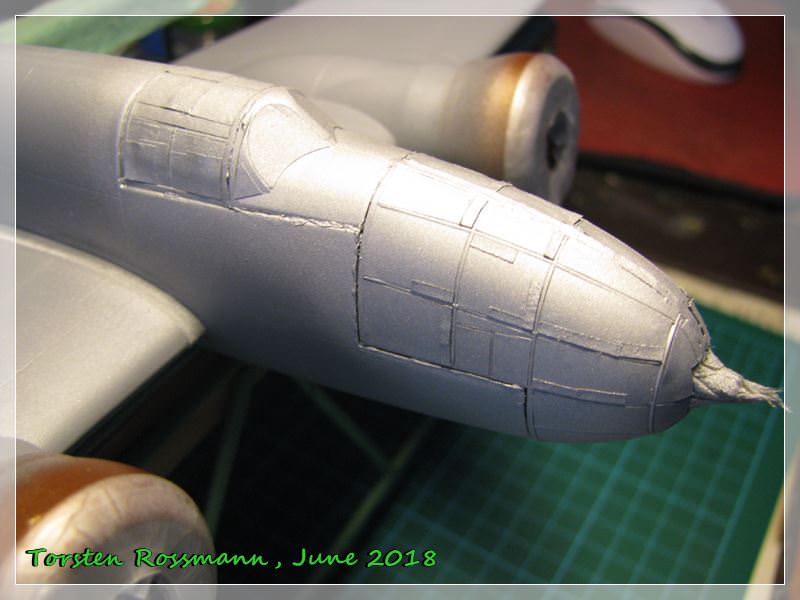
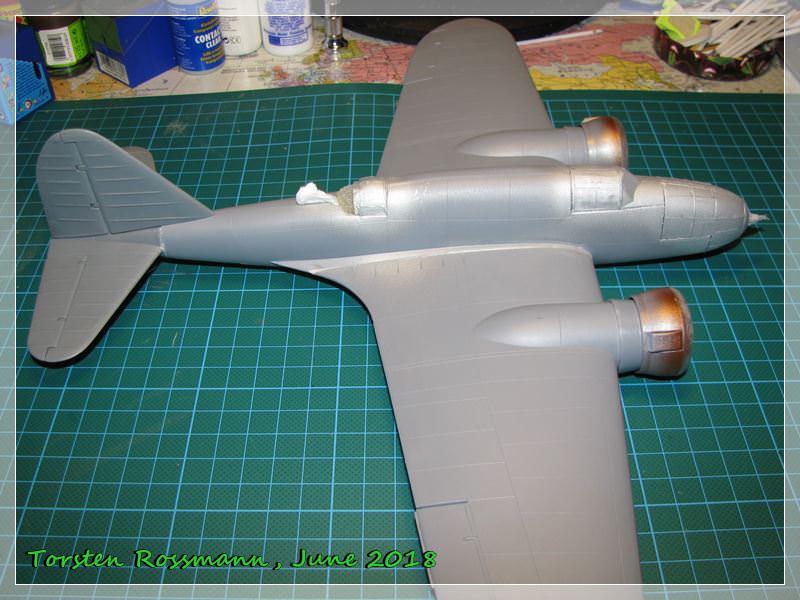
Well folks, only a small update today as I had to wait nearly 2 weeks for that Micro Kristal Klear to arrive at my door. Last weekend I was able to fill the gap with it. Did it 3 times and it worked really fine. It looks as clear as I wanted it. As you can see the Montex mask also don't fit here, so I had to use small stripes of Tamiya Tape to correct the flaws ....
... today I sprayed to cockpit section with Aluminium (Revell No. 99) and noticed some small gaps between the fuselage and the clear parts. I'll try to fill them with some white glue tomorrow ....
.... she's now slowly coming into shape and the next step will be the primer. Usually it takes me 4-5 weeks to complete a build. With this one I'm already in week 6 but finally I can see a small silverlining at the horizont. But it will be again on hold for a couple of days, because we have our own expo in Mannheim this coming weekend and I still have to do some organisation work. So it will be Monday when I take the next step on the Los. By the way, a few days ago I found a nice vid on Youtube showing a beautifully made replica of the PZL 37. It's all in polish but it shows some interesting details of the real deal. Enjoy it!
Torsten
FirstSergeant
Michigan, United States
Joined: January 02, 2012
KitMaker: 139 posts
AeroScale: 70 posts
Joined: January 02, 2012
KitMaker: 139 posts
AeroScale: 70 posts
Posted: Wednesday, June 06, 2018 - 10:30 AM UTC
Greetings,
I've made some progress on the Ju88A-4.
Cheers,
Firstsergeant
I've made some progress on the Ju88A-4.
Cheers,
Firstsergeant
dcook11
Georgia, United States
Joined: November 28, 2012
KitMaker: 216 posts
AeroScale: 35 posts
Joined: November 28, 2012
KitMaker: 216 posts
AeroScale: 35 posts
Posted: Thursday, June 07, 2018 - 02:22 AM UTC
I am following this with a lot of interest. I am doing a B-25 as a first aircraft (usually do ships). Do you leave the clear parts masks on during the whole painting process? Primer, OD top, gray bottom, clear for decals and then a matt? Probably a dumb question, just wondering how long the masking will last and still peel off OK.
BlackWidow
European Union
Joined: August 09, 2009
KitMaker: 1,732 posts
AeroScale: 1,336 posts
Joined: August 09, 2009
KitMaker: 1,732 posts
AeroScale: 1,336 posts
Posted: Thursday, June 07, 2018 - 04:19 AM UTC
Darrell, yes, you're right. Mask the clear parts before the first coating and leave the masks on until you've completely finished your model. It's usually the last thing to do. You can have a look at my Peshka and other builds during the Soviet Phoenix Campaign. If you have more questions, don't hesitate to ask. There are no dumb questions, only (sometimes) dumb answers. Oh, and show us your B-25!
Torsten
Torsten
Posted: Thursday, June 07, 2018 - 07:13 AM UTC
FWIW, on my Boeing Clipper, I masked the windows before primer, left the mask in place through the silver coat, overcoat, and future. Pulled them off after decaling and before final overcoat. When I pulled them off, in a couple of cases they pulled up the adjacent paint. I had to touch them up before the final overcoat. Next time, I'll try pulling them up before the Future and see how that works.
Posted: Thursday, June 07, 2018 - 03:27 PM UTC
Hi all,
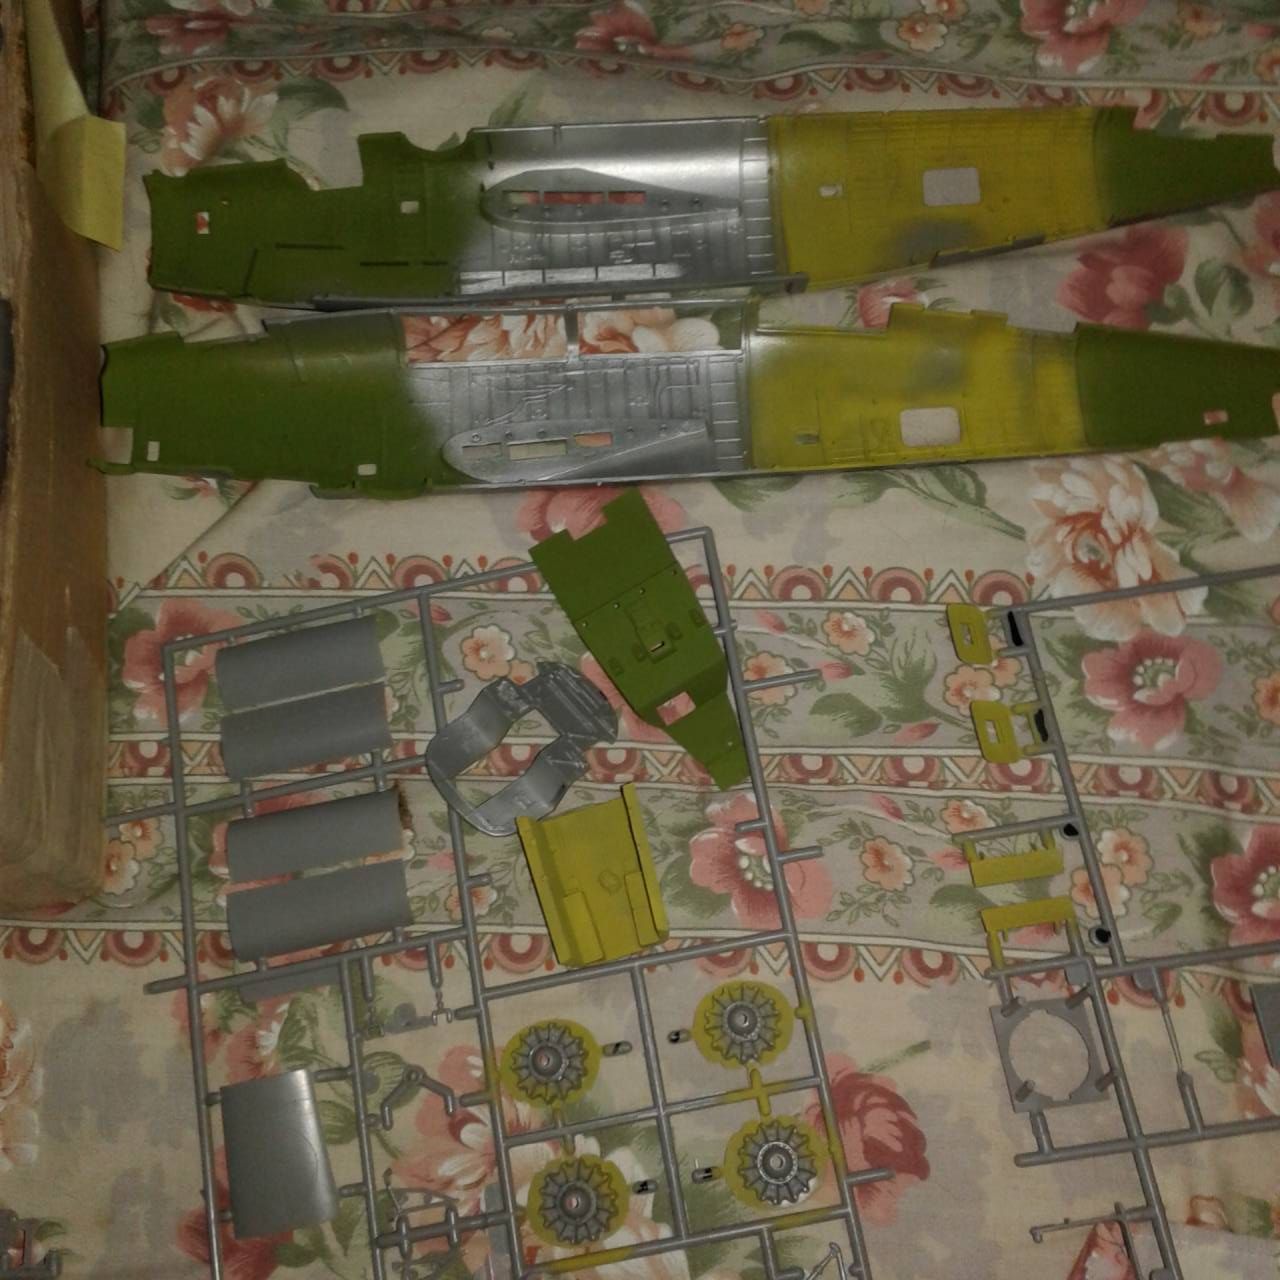
Just a quick update on my B-24. Painted the interior using a mix of Tamiya XF-3 (yellow) and XF-5 (flat green) 2:1, then diluted 1:4 with Mr. Leveling lacquer thinner for the interior green. I think it looks the part. I find, for airbrushing, the lacquer works very well with Tamiya paints, and well, it levels it all out! For the Zinc chromate yellow I used XF-4 yellow-green, and for the aluminium I tried XF-16 flat aluminium. All thinned to a 1:4 dilution, I've also used plain lacquer thinner and have gotten similar results. However, given that off the shelf lacquer thinner here also contains toluene, I'm inclined not to chance damaging the plastic. I then picked out instruments and other interior detail using NATO black and Neutral Grey.
Since I don't have an inexpensive supplier for paints, I've gone the path of Tamiya and Mr. Color. I'm also modifiying a method on brush painting with Tamiya paints, more on that later.
Darrell, Welcome! I agree with Torsten, and no, there are no dumb questions. Torsten, I like using the Krystal Klear as well, you did a bang up job closing that gap.
Enjoy, and have fun!
John
Posted: Thursday, June 14, 2018 - 04:09 AM UTC
Hey Everyone,
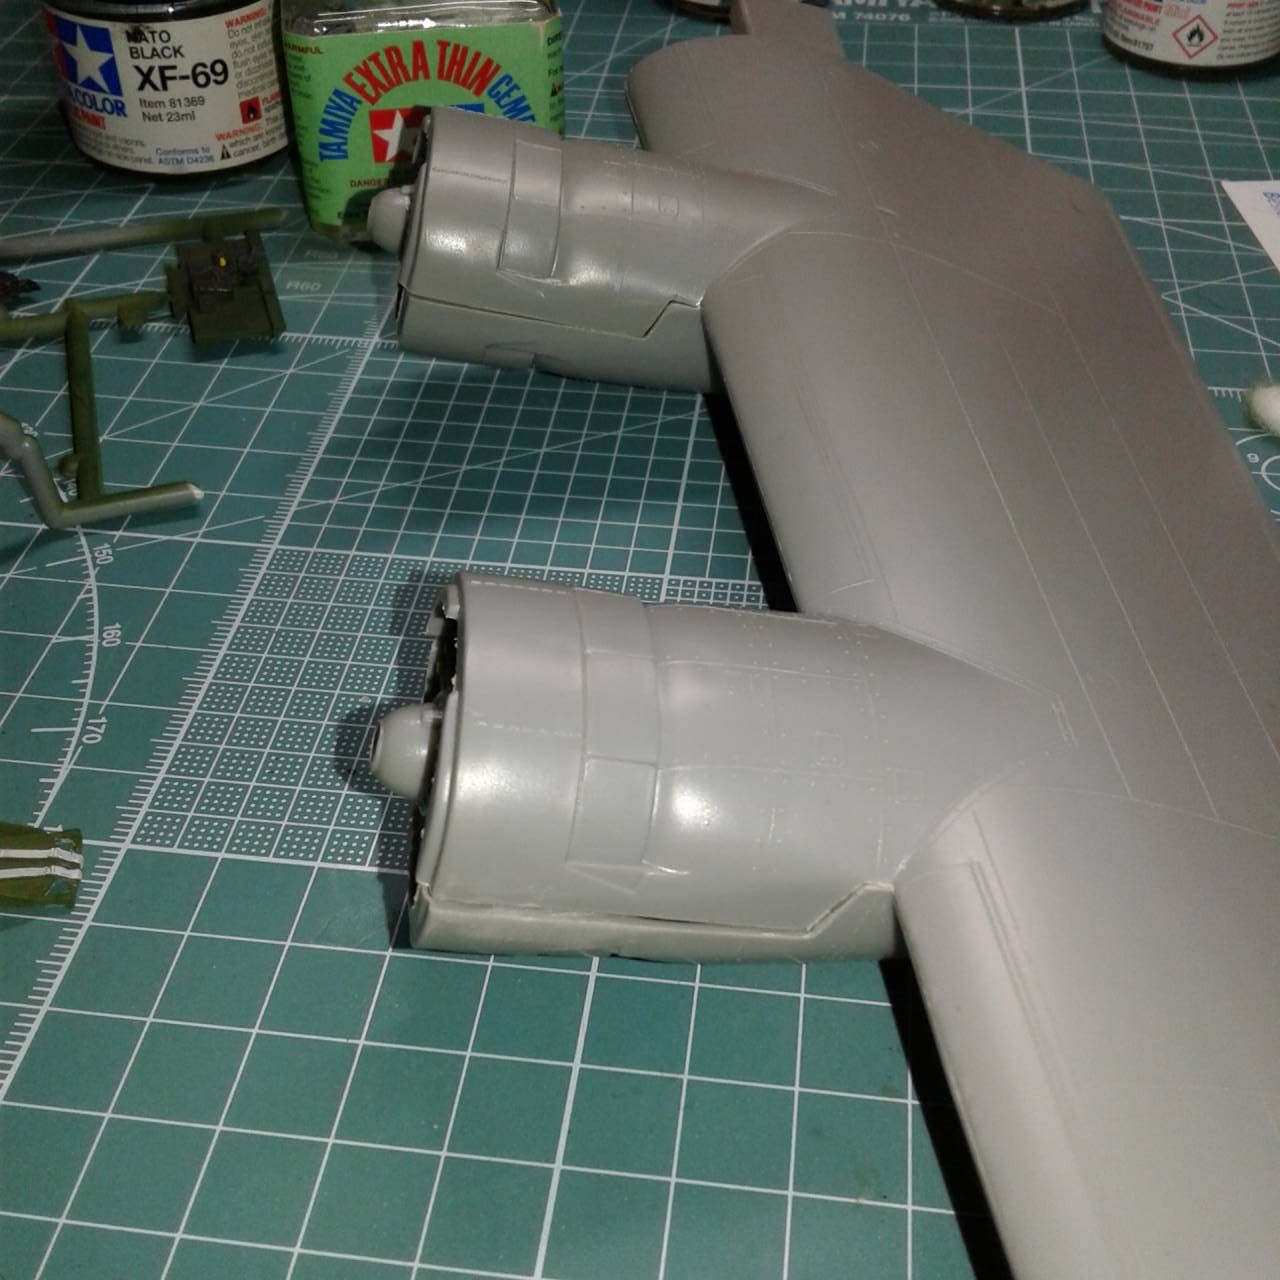
Another update! Since doing all the interior base colors, I turned my attention to the wings, as these will be the hardest part of the build.
So, it would seem that all the practice on seams from the C-47 will be paying off! These will be a challenge to say the least. Also, in my zeal to get going, I neglected to put in the brass tubing for the props (I tend to do this on older kits that I think will have prop droop). Not a killer, but another challenge of my own making.
Have fun!
John
Bigrip74
Texas, United States
Joined: February 22, 2008
KitMaker: 5,026 posts
AeroScale: 2,811 posts
Joined: February 22, 2008
KitMaker: 5,026 posts
AeroScale: 2,811 posts
Posted: Thursday, June 14, 2018 - 01:38 PM UTC
PasiAhopelto
Uusimaa, Finland
Joined: October 01, 2016
KitMaker: 514 posts
AeroScale: 239 posts
Joined: October 01, 2016
KitMaker: 514 posts
AeroScale: 239 posts
Posted: Sunday, June 17, 2018 - 01:50 AM UTC
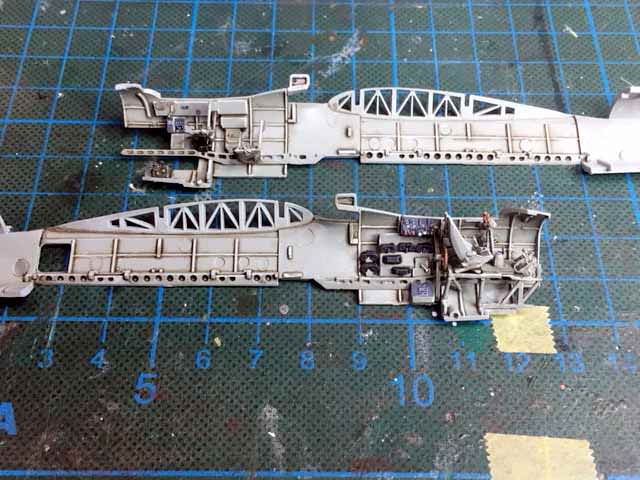
Betty's crew compartment:
There's quite lot of room for crew.
Next I'll face least favorite part, which is removal of ejector pin marks from insides of fuselage halves.
There's quite lot of room for crew.
Next I'll face least favorite part, which is removal of ejector pin marks from insides of fuselage halves.
Shrimpman
Dublin, Ireland
Joined: August 14, 2016
KitMaker: 148 posts
AeroScale: 123 posts
Joined: August 14, 2016
KitMaker: 148 posts
AeroScale: 123 posts
Posted: Sunday, June 17, 2018 - 06:28 PM UTC
Some progress on my Lanc over the last couple of weeks, next step is decals.
SHAKY962
Buenos Aires, Argentina
Joined: May 21, 2012
KitMaker: 765 posts
AeroScale: 316 posts
Joined: May 21, 2012
KitMaker: 765 posts
AeroScale: 316 posts
Posted: Tuesday, June 19, 2018 - 01:17 PM UTC
Hi all,
I´m happy with the progress of a group of modellers.....
@Bob: I´m happy with your progress. About the Fokker, I think you need to love the plane.....
@Oliver: The Do-17 its a beaty..... I don´t know how beatifull was the Airfix kit. I prefer to buy the ICM some time ago.
@Torsten: 37 windows for mask...... I heat the He-111
@John: I will follow with interest your progress in the B-24
@Iwan: The Lanc look good!!!! Its one of my favorite bombers
Pasi: Excellent interior of the Betty
A little progress
bomber14
New Jersey, United States
Joined: February 02, 2015
KitMaker: 330 posts
AeroScale: 286 posts
Joined: February 02, 2015
KitMaker: 330 posts
AeroScale: 286 posts
Posted: Wednesday, June 20, 2018 - 04:03 AM UTC
Quoted Text
FWIW, on my Boeing Clipper, I masked the windows before primer, left the mask in place through the silver coat, overcoat, and future. Pulled them off after decaling and before final overcoat. When I pulled them off, in a couple of cases they pulled up the adjacent paint. I had to touch them up before the final overcoat. Next time, I'll try pulling them up before the Future and see how that works.
mark/ darrell: next time try running a scalpel or exacto blade along the edge of the masks to break the seal before pulling off the masks
Posted: Wednesday, June 20, 2018 - 06:50 AM UTC
@ Joe D'Oh. Should have thought about that. Well I've got a lot of windows coming up on some new projects. I'll try that trick soon.
BlackWidow
European Union
Joined: August 09, 2009
KitMaker: 1,732 posts
AeroScale: 1,336 posts
Joined: August 09, 2009
KitMaker: 1,732 posts
AeroScale: 1,336 posts
Posted: Thursday, June 21, 2018 - 06:51 AM UTC
Nice work on your builds, guys! Like it!
This is the longest time ever I need to build a kit. I'm now entering my 3. month for it ....
Anyway, have done some major progress on the "Los" in the past 2 weeks after the end of our expo.
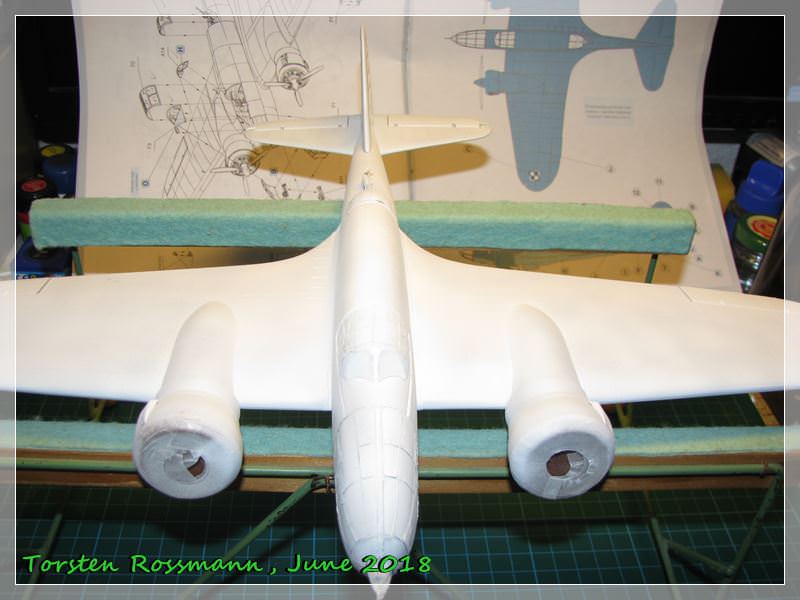
First white primer over all ....
.... I wasn't sure what kind of blue to use for the underside. First I thought of RAF Azure Blue but that is far too bright, I also have a Russian Light Blue which I have used on my Pe-2 but there was not enough paint left in the bottle. I ended up using RLM 65 from Agama which in my opinion is a bit too bright to use for german aircraft but here it looks fine to me ....
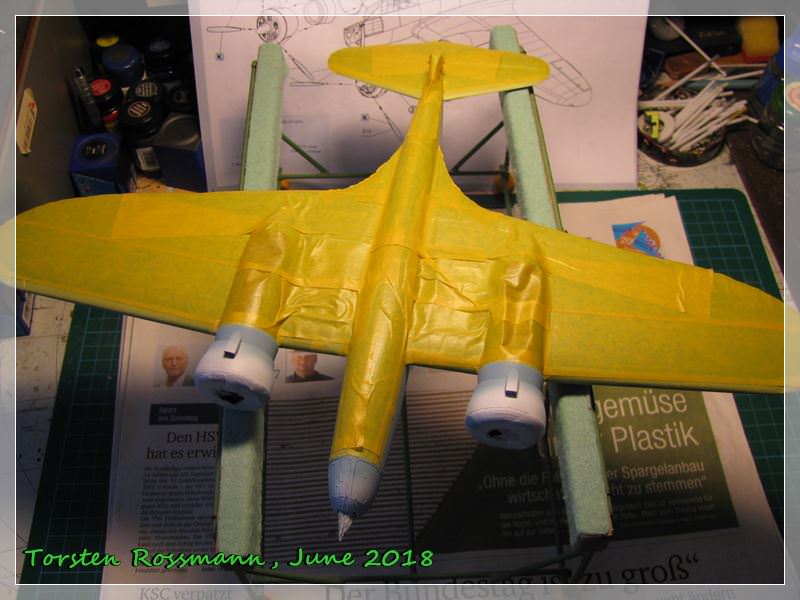
.... then I had a 3 days masking session this week to cover the parts of the underside ....
.... and here fresh from the paint shop this evening .... The instruction says it should be painted in "Polski Khaki", whatever that is .... Judging from the photos and informations I have and the painting guide I went for Brown RAL 8025 (Revell No. 381). I think it suits quite well ....
Finally there's some light at the end of the tunnel (or assembly line). I'll leave the bird to dry thoroughly until tomorrow and then will take away most masks. Next step will be painting and assembling the landing gear. I hope to have Future on it by end of next week. So stay tuned and have a great mid summer night today ....
Torsten
This is the longest time ever I need to build a kit. I'm now entering my 3. month for it ....
Anyway, have done some major progress on the "Los" in the past 2 weeks after the end of our expo.
First white primer over all ....
.... I wasn't sure what kind of blue to use for the underside. First I thought of RAF Azure Blue but that is far too bright, I also have a Russian Light Blue which I have used on my Pe-2 but there was not enough paint left in the bottle. I ended up using RLM 65 from Agama which in my opinion is a bit too bright to use for german aircraft but here it looks fine to me ....
.... then I had a 3 days masking session this week to cover the parts of the underside ....
.... and here fresh from the paint shop this evening .... The instruction says it should be painted in "Polski Khaki", whatever that is .... Judging from the photos and informations I have and the painting guide I went for Brown RAL 8025 (Revell No. 381). I think it suits quite well ....
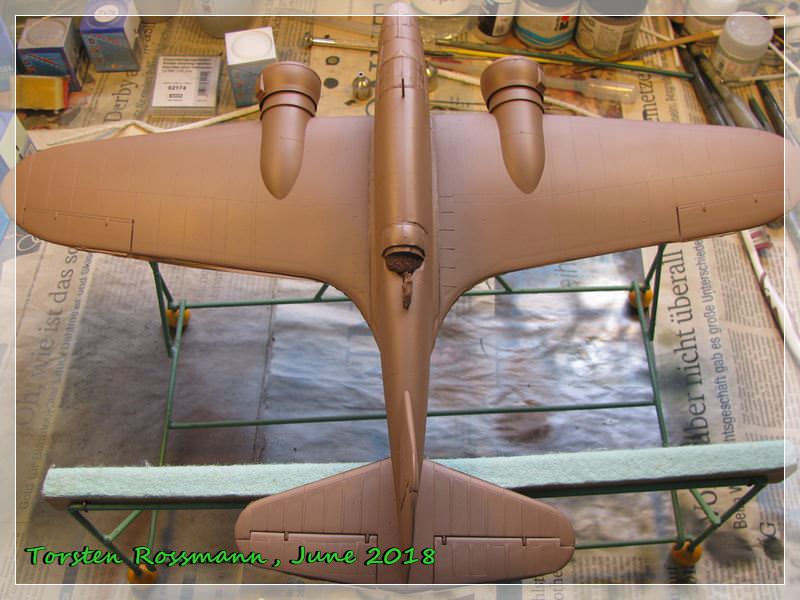
Finally there's some light at the end of the tunnel (or assembly line). I'll leave the bird to dry thoroughly until tomorrow and then will take away most masks. Next step will be painting and assembling the landing gear. I hope to have Future on it by end of next week. So stay tuned and have a great mid summer night today ....
Torsten
SHAKY962
Buenos Aires, Argentina
Joined: May 21, 2012
KitMaker: 765 posts
AeroScale: 316 posts
Joined: May 21, 2012
KitMaker: 765 posts
AeroScale: 316 posts
Posted: Friday, June 22, 2018 - 01:17 PM UTC
Torsten
Nice..............
Nice..............
Bigrip74
Texas, United States
Joined: February 22, 2008
KitMaker: 5,026 posts
AeroScale: 2,811 posts
Joined: February 22, 2008
KitMaker: 5,026 posts
AeroScale: 2,811 posts
Posted: Saturday, June 23, 2018 - 02:31 PM UTC