OFFICIAL: Eastern Front Campaign
Nordrhein-Westfalen, Germany
Joined: March 22, 2015
KitMaker: 671 posts
AeroScale: 614 posts
Posted: Saturday, May 04, 2019 - 05:01 AM UTC
Thomas: Wow! You will have to be very careful not to loose some of the fine details. But the cockpit of the Heller kit seems to have more Detail than my Fujimi one. My rear gunner still has no radio.
FirstSergeant: Nice Progress. The color looks spot on!
Torsten: Yes it is more a trench fighter than a tin opener

.
The putty and sanding process look good from here.
RadekZ: Sorry, I am not an armor guy, so I cannot answer Your Question. Maybe anyone else knows about this topic.
On the desk: Probably a Panzer III.

#305
Christchurch, New Zealand
Joined: February 01, 2006
KitMaker: 1,673 posts
AeroScale: 1,517 posts
Posted: Saturday, May 04, 2019 - 01:42 PM UTC
Radek as far as I know the schurzen were painted the camo base colour but who's to say that the schurzen weren't painted when the crew got them and only painted the outside face?
Warszawa, Poland
Joined: March 12, 2013
KitMaker: 125 posts
AeroScale: 85 posts
Posted: Sunday, May 19, 2019 - 07:13 AM UTC
Hi,
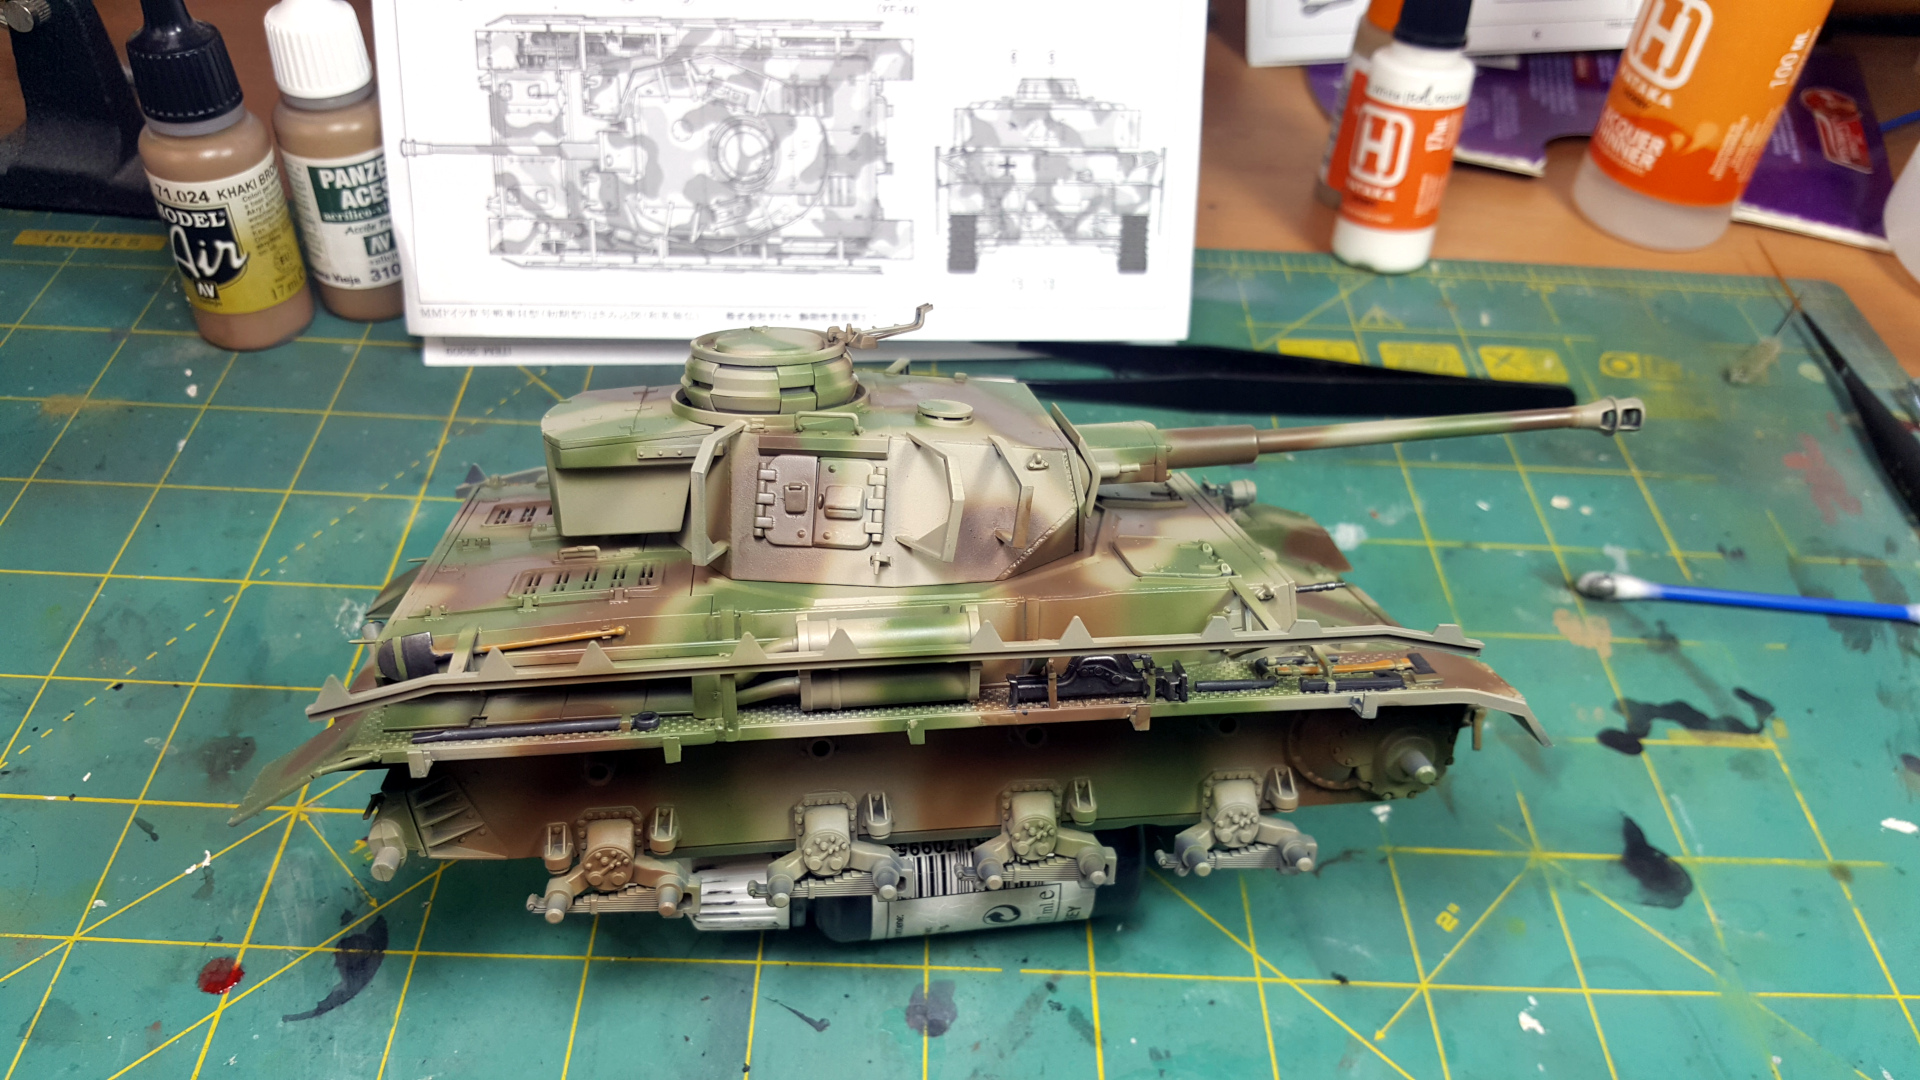
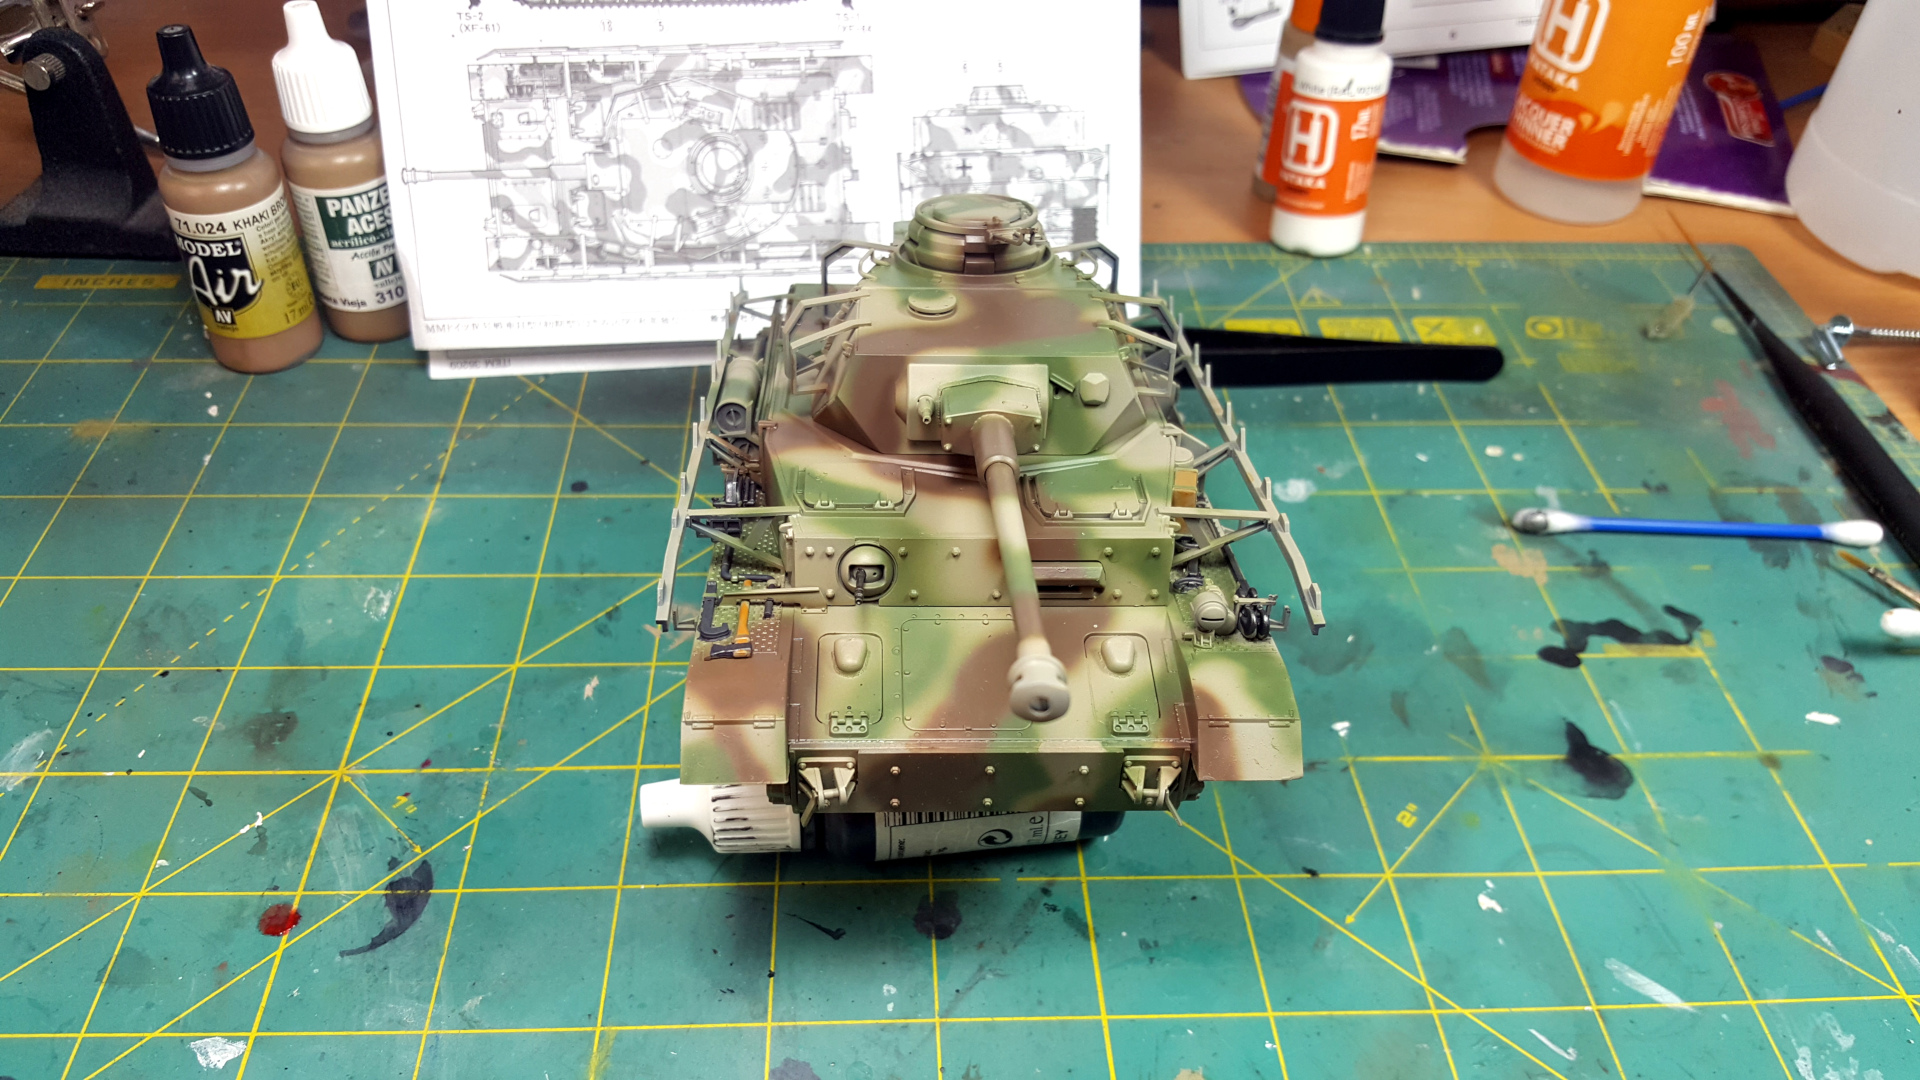
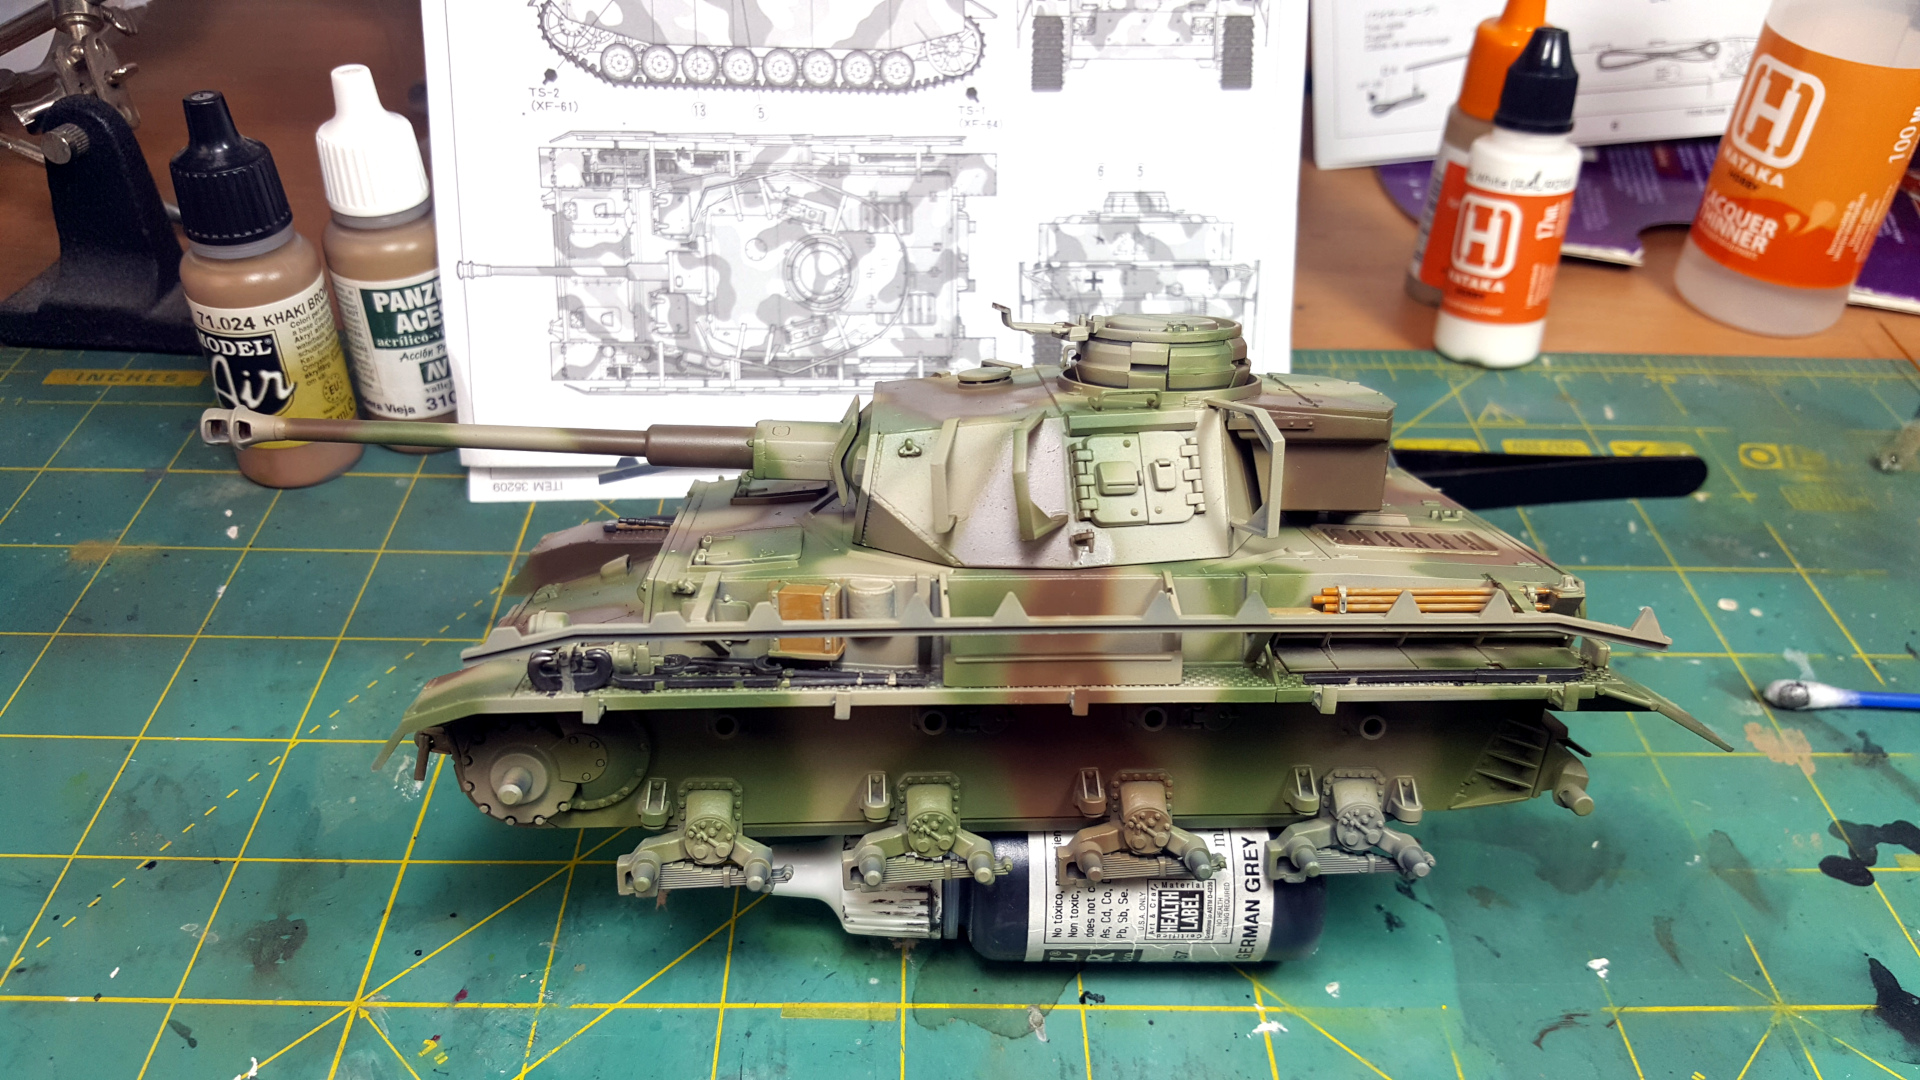
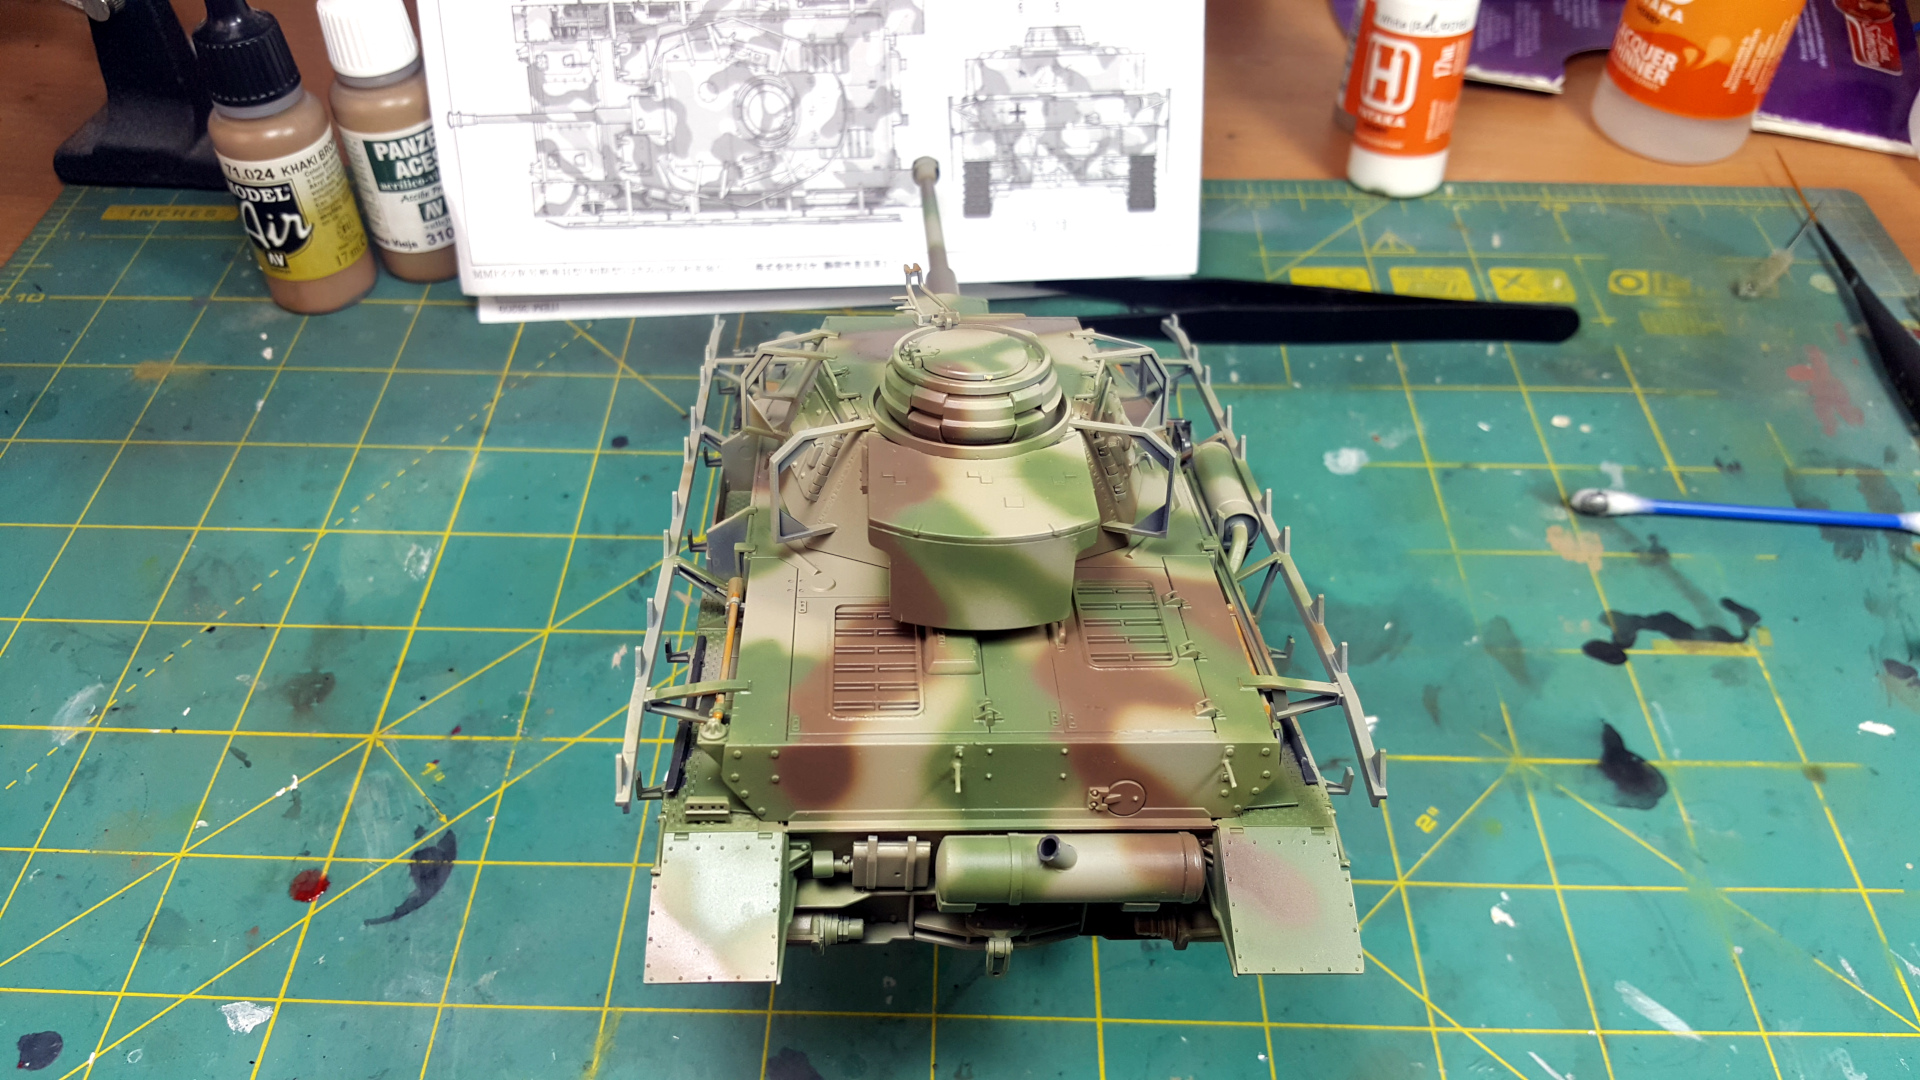
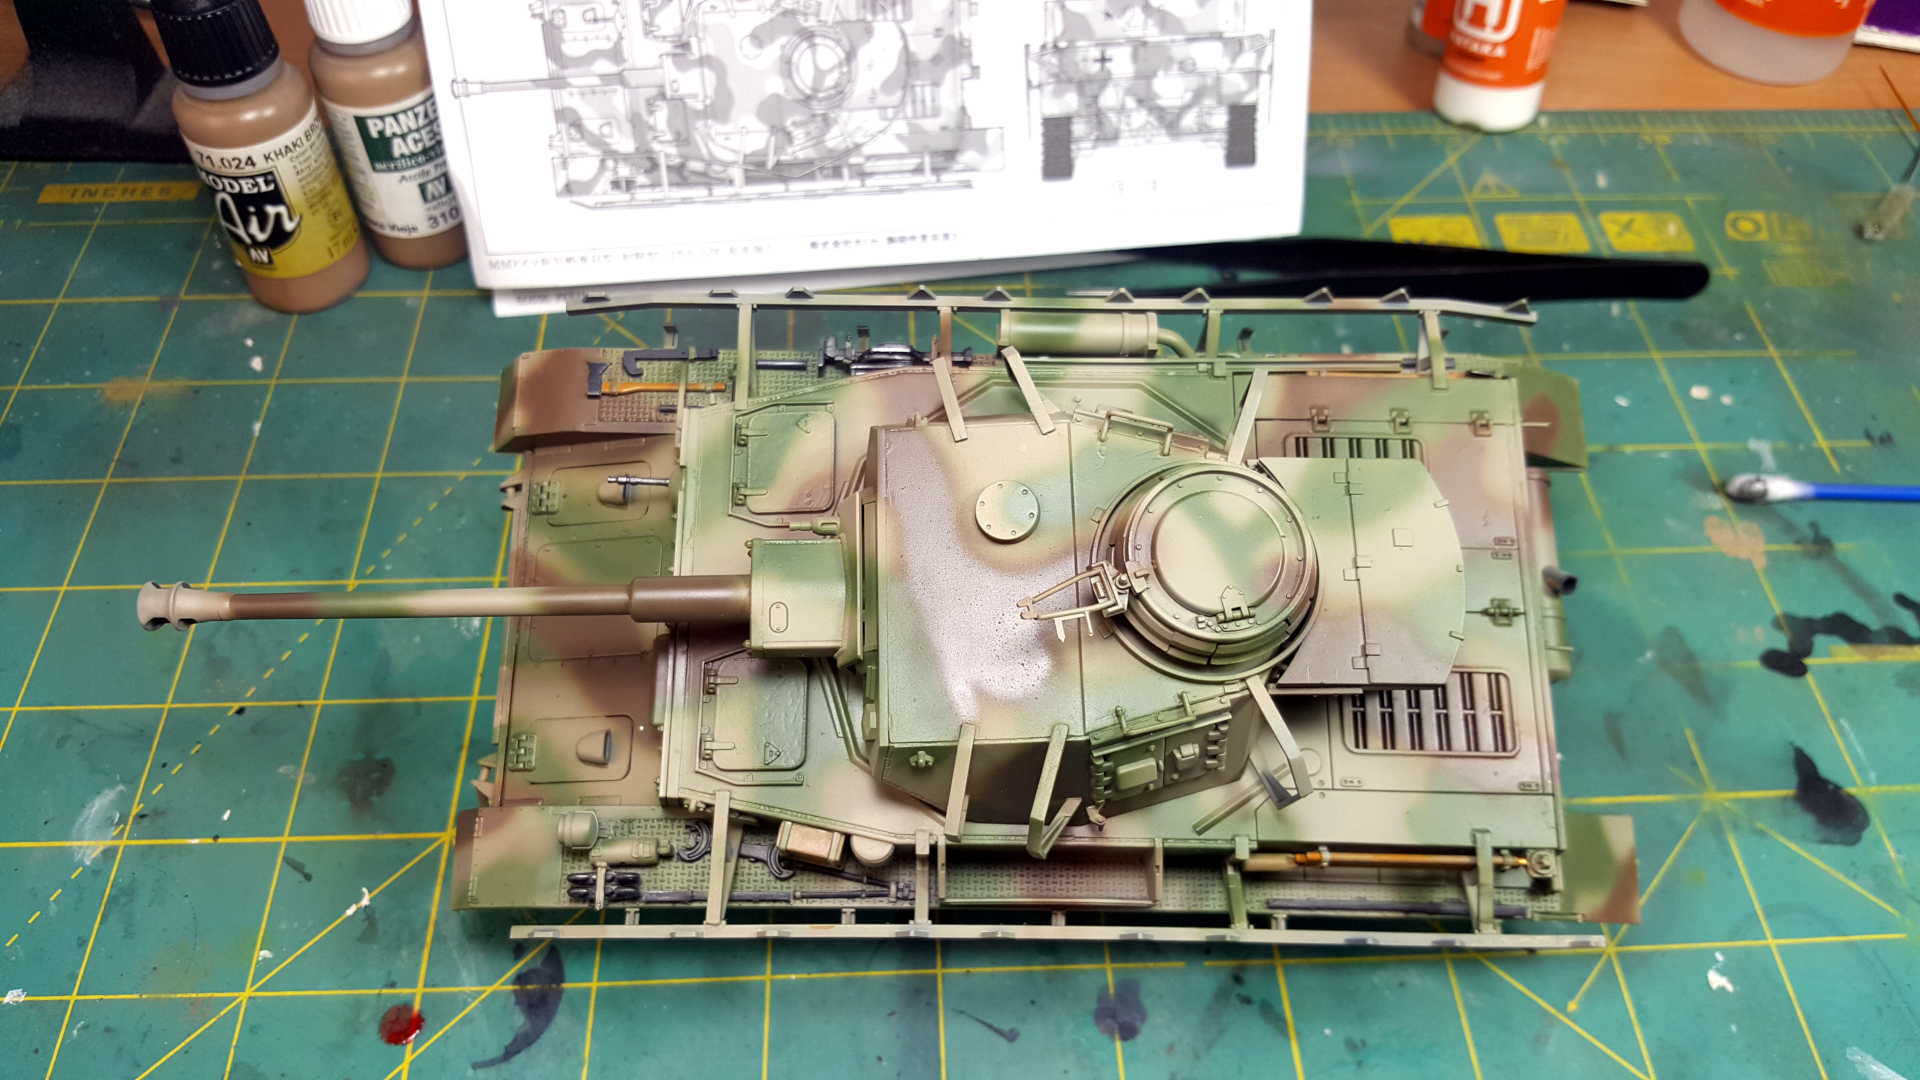
Short update on Pz.Kpfw IV.
I have managed to finalize painting camo & details. Camo was painted with Hataka Orange series paints. Paints are little challenging but definitely give a very good looking results. I mistook green with brown colours on instruction sheet at beginning, so it's my own "exclusive" camo pattern instead of what instructions suggest.
Details were painted with various Vallejo paints.
Here's current state:
Cheers,
Radek
On the bench: some armour ... and a plane... Oh and you would probably find some unfinished ships somewhere around the mancave ;)
New Jersey, United States
Joined: February 02, 2015
KitMaker: 330 posts
AeroScale: 286 posts
Posted: Sunday, May 19, 2019 - 03:45 PM UTC
ice work radek. what was challenging about the hataka paint? i was intending to try some of their lacquer series.
joe
Warszawa, Poland
Joined: March 12, 2013
KitMaker: 125 posts
AeroScale: 85 posts
Posted: Sunday, May 19, 2019 - 06:44 PM UTC
Quoted Text
ice work radek. what was challenging about the hataka paint? i was intending to try some of their lacquer series.
joe
Joe, the most challenging thing is probably me

. Apart of that I had some issues concerning thinning paint. I'm used to Tamiya or Gunze acrylics I usually thin 1:1 while Hataka tend to like more thinner ratio (70-30, original thinner). In addition lighter colours have very light coverage (e.g. Dunkelgelb I used), which implies painting in several thin layers.
More thinnning caused of course I had to be very careful with overspraying in one place and some strange behaviour of the paint - like it wasn't exactly super smooth. It might be caused however by other factor - too low pressure (I sprayed with 15 PSI) or maybe I had some water residues in air pressure tank of my compressor.
But as said at beginning - I definitely lack training, so it might be the main reason of my issues

Cheers,
Radek
On the bench: some armour ... and a plane... Oh and you would probably find some unfinished ships somewhere around the mancave ;)
Warszawa, Poland
Joined: March 12, 2013
KitMaker: 125 posts
AeroScale: 85 posts
Posted: Sunday, May 19, 2019 - 06:58 PM UTC
Quoted Text
Radek as far as I know the schurzen were painted the camo base colour but who's to say that the schurzen weren't painted when the crew got them and only painted the outside face?
Hi Chris,
I did some research on subject and crew or "local" maintenance teams painted the tanks including schurzen. Scanning some colour or coloured pictures indicates that inner part of shurzen were painted either base colour (which in 1943 was 7028 - dunkelgelb) or even painted incl. camo colours. So I went for the second option

Cheers,
Radek
On the bench: some armour ... and a plane... Oh and you would probably find some unfinished ships somewhere around the mancave ;)
Sofiya, Bulgaria
Joined: November 26, 2017
KitMaker: 393 posts
AeroScale: 24 posts
Posted: Thursday, May 23, 2019 - 06:28 AM UTC
Hello everyone!
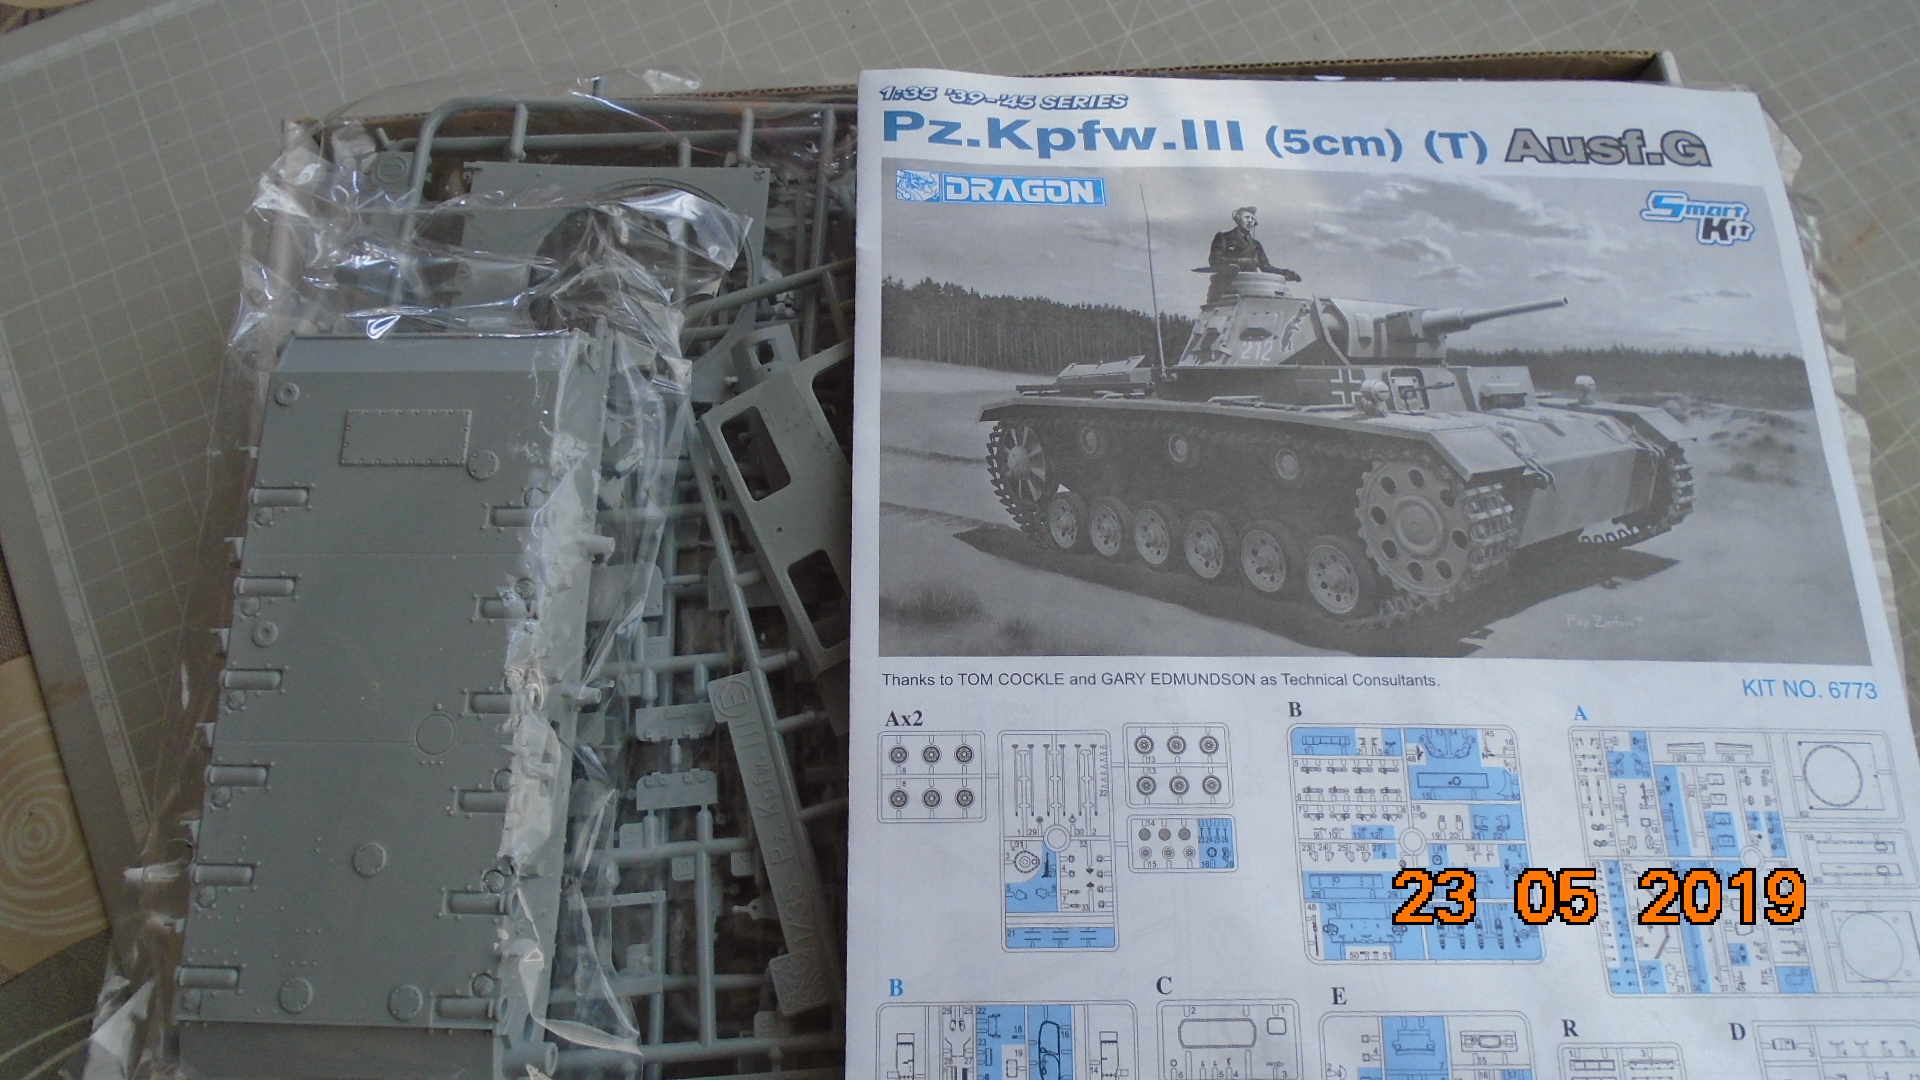
I will participate in the campaign with Pz.Kpfw.III Ausf.G (T).
In the spring of 1941, the 4.Panzer Division included several Tauchpanzer (modifications G and H).
They were used at the beginning of the war on the Eastern Front, and by the end of 1941 they were destroyed.
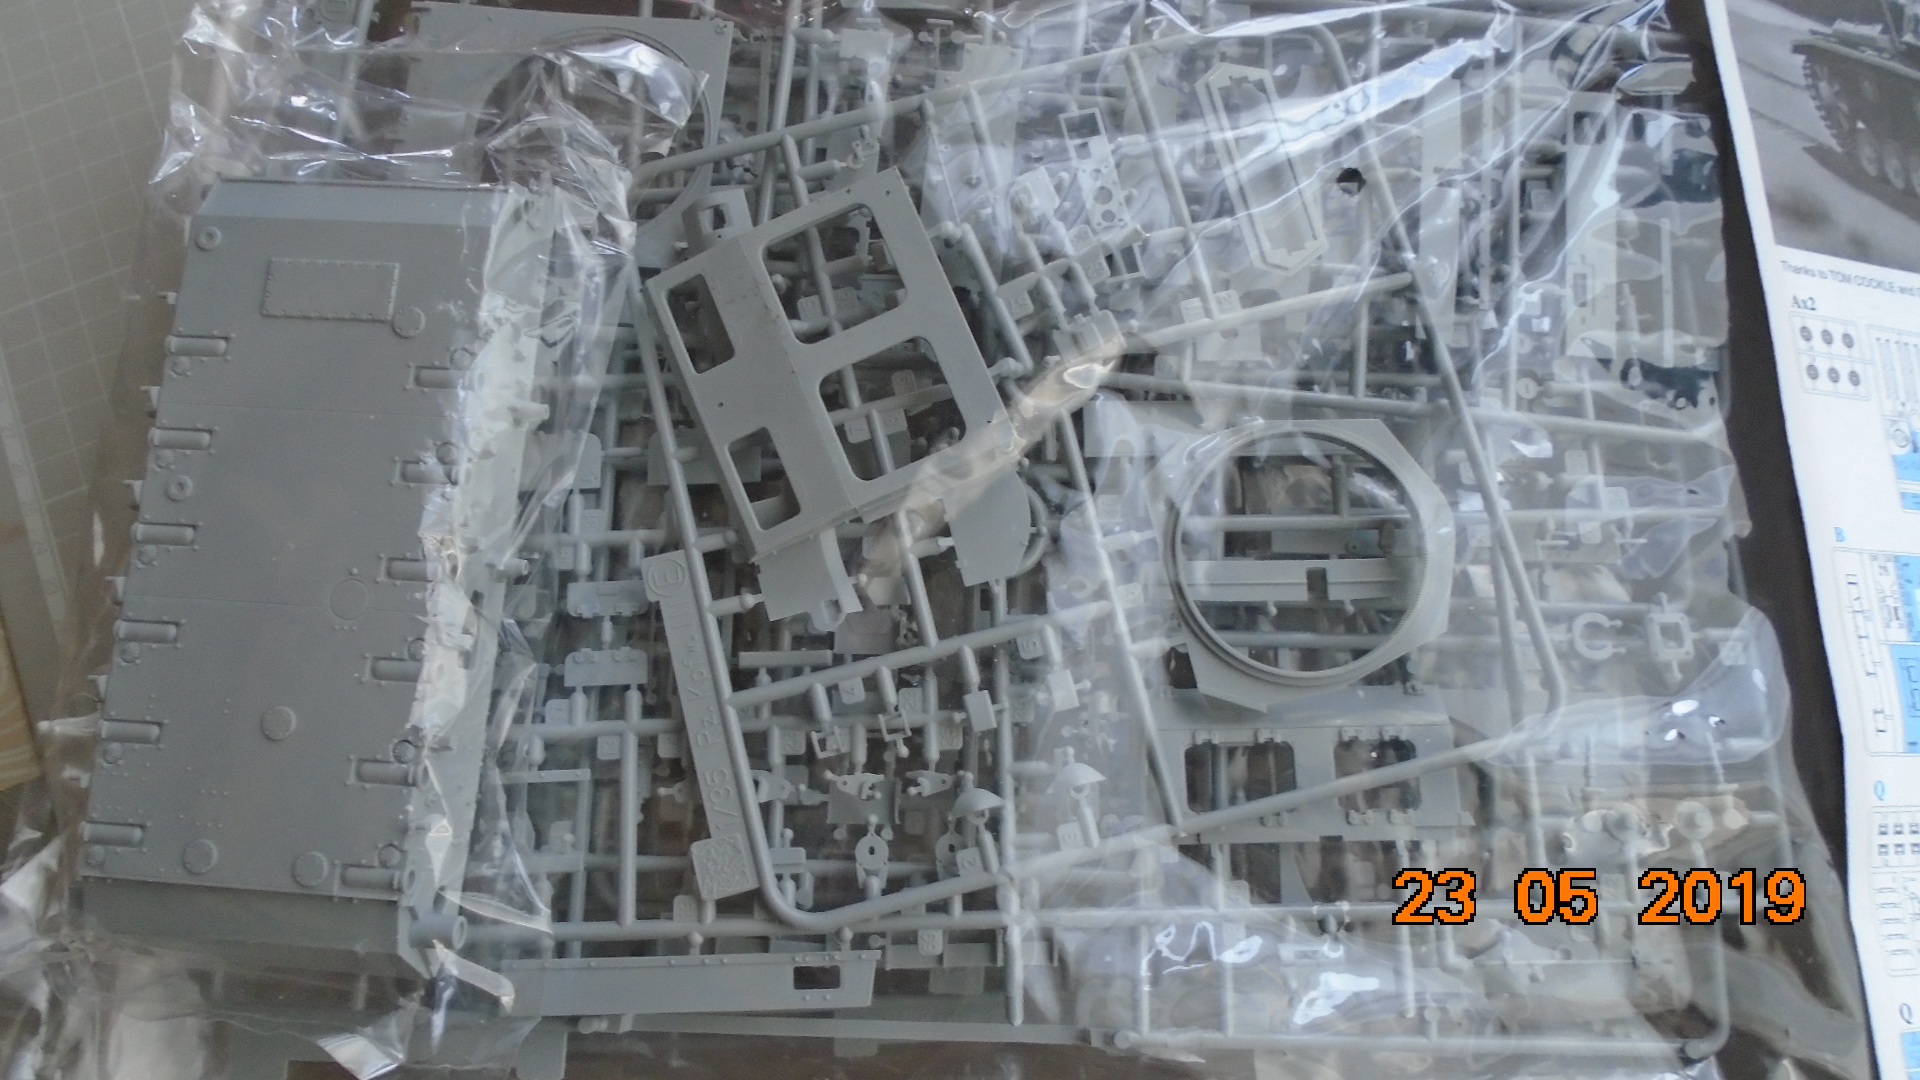
This is a model of Dragon (catalog number 6773). Here are starting photos.
Good luck to all.
Kalin
New Jersey, United States
Joined: February 02, 2015
KitMaker: 330 posts
AeroScale: 286 posts
Posted: Thursday, May 23, 2019 - 07:44 AM UTC
Quoted Text
Quoted Text
ice work radek. what was challenging about the hataka paint? i was intending to try some of their lacquer series.
joe
Joe, the most challenging thing is probably me  . Apart of that I had some issues concerning thinning paint. I'm used to Tamiya or Gunze acrylics I usually thin 1:1 while Hataka tend to like more thinner ratio (70-30, original thinner). In addition lighter colours have very light coverage (e.g. Dunkelgelb I used), which implies painting in several thin layers.
More thinnning caused of course I had to be very careful with overspraying in one place and some strange behaviour of the paint - like it wasn't exactly super smooth. It might be caused however by other factor - too low pressure (I sprayed with 15 PSI) or maybe I had some water residues in air pressure tank of my compressor.
But as said at beginning - I definitely lack training, so it might be the main reason of my issues 
Cheers,
Radek
thanks radek. i don't think the pressure was an issue for you unless it was the opposite, too high a pressure causing the paint droplets to start drying before they hit the surface.
joe
Texas, United States
Joined: February 22, 2008
KitMaker: 5,026 posts
AeroScale: 2,811 posts
Posted: Thursday, May 23, 2019 - 07:53 AM UTC
Everyone here has done such a great job on their buijlds. I have enjoyed myself, but will need to bow out due to life getting in the way again.
Bob
If it aint broke dont fix it.

#136
Distrito Federal, Mexico
Joined: April 06, 2002
KitMaker: 437 posts
AeroScale: 29 posts
Posted: Saturday, May 25, 2019 - 04:01 PM UTC
Hello friends!
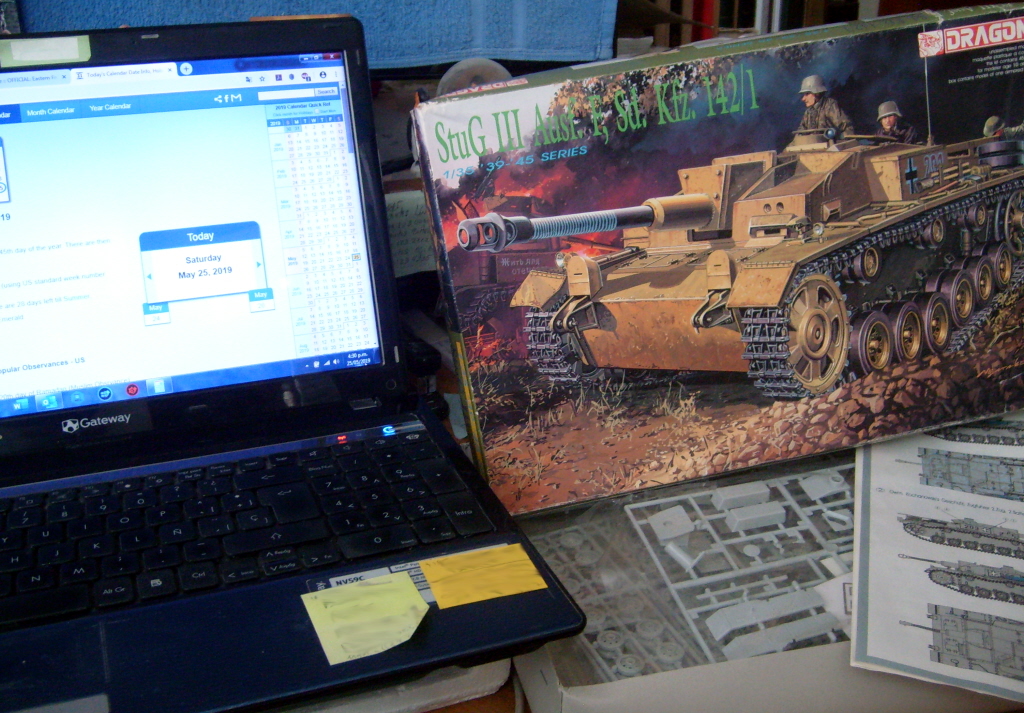
Nice works here!. I will go with the older Dragon Stug III Ausf F, 142/1
Regards!
Rodolfo
Current Project:
I am building a Kingtiger Ausf. B, Version: March 1945 - AMMO/MIG, 1/35
Sofiya, Bulgaria
Joined: November 26, 2017
KitMaker: 393 posts
AeroScale: 24 posts
Posted: Saturday, May 25, 2019 - 11:51 PM UTC
Good choice. Congratulations. I would be interested in tracking its construction.
Kalin


#136
Distrito Federal, Mexico
Joined: April 06, 2002
KitMaker: 437 posts
AeroScale: 29 posts
Posted: Monday, May 27, 2019 - 07:58 AM UTC

Thanks Kalin!
I will start to cleaning the drive wheels and idler wheels
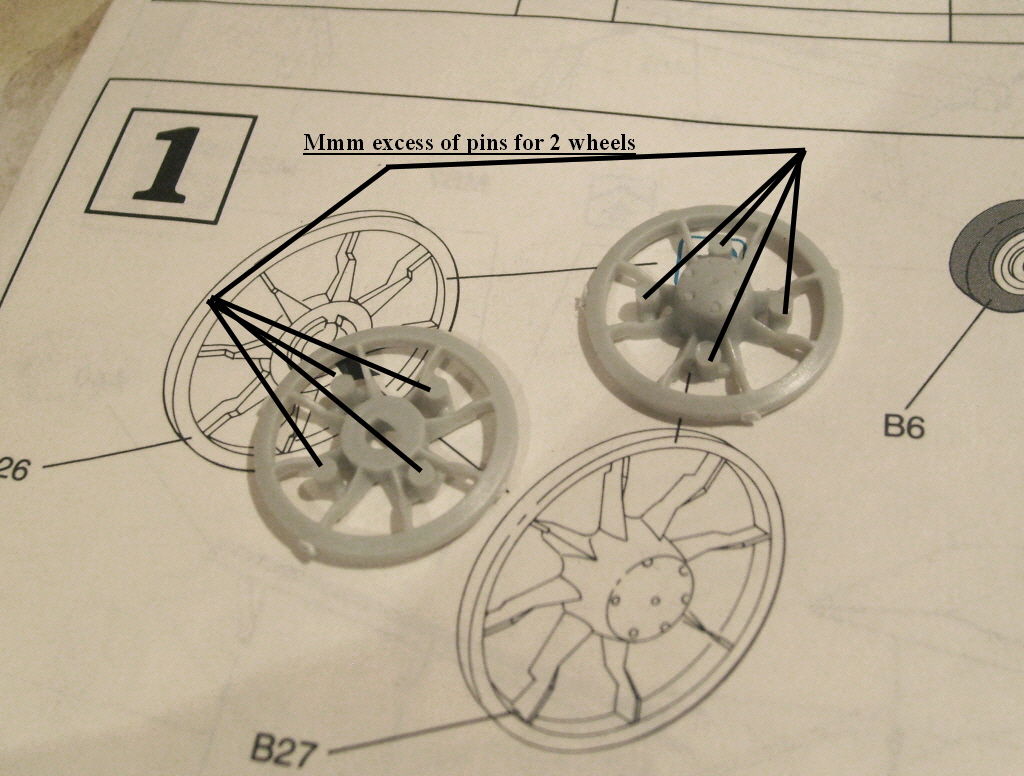
Regards!
Rodolfo
Current Project:
I am building a Kingtiger Ausf. B, Version: March 1945 - AMMO/MIG, 1/35

#136
Distrito Federal, Mexico
Joined: April 06, 2002
KitMaker: 437 posts
AeroScale: 29 posts
Posted: Monday, May 27, 2019 - 08:01 AM UTC
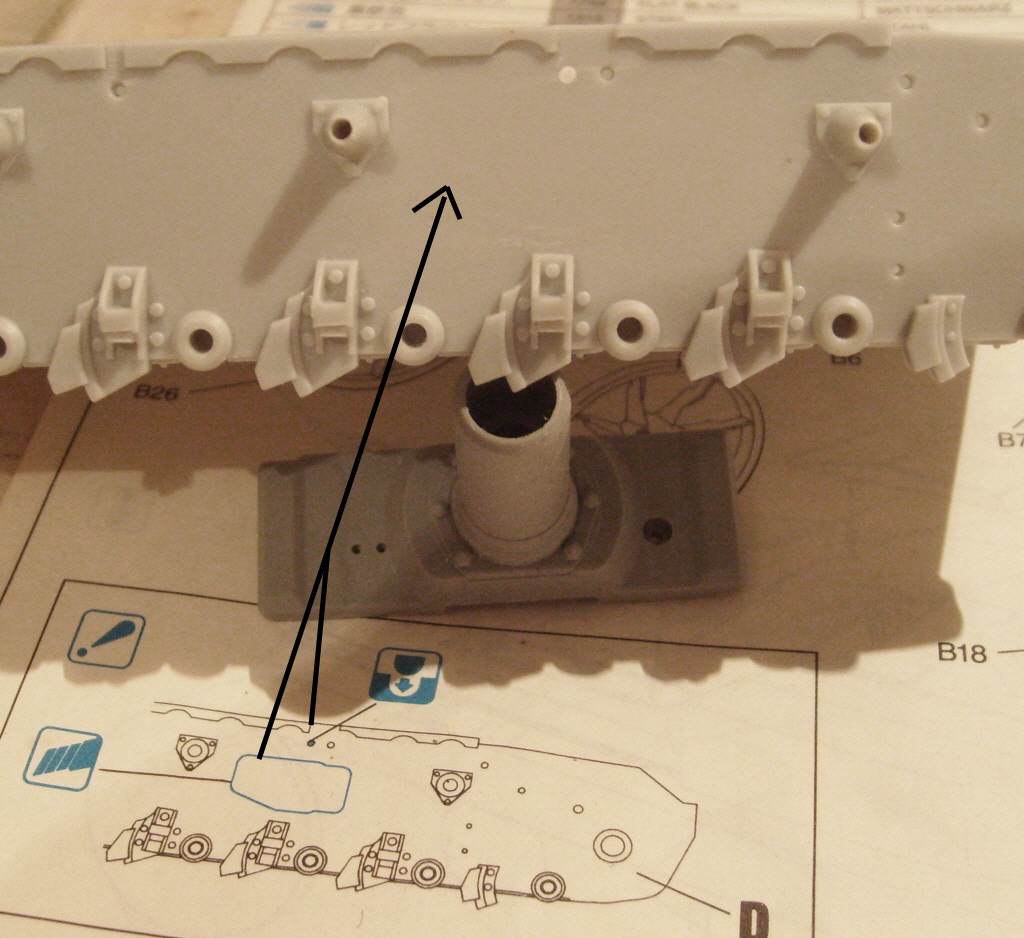
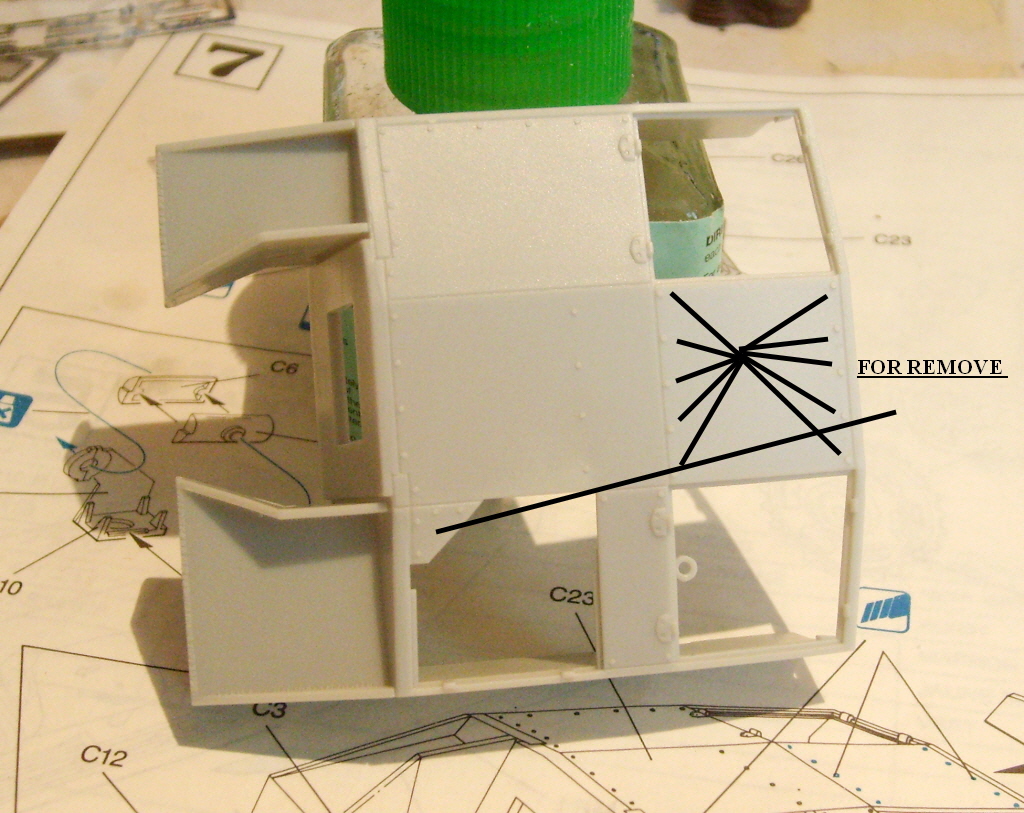
The instructions indicate that it is necessary to remove the simulated hatch line and fill a hole (in both sides).
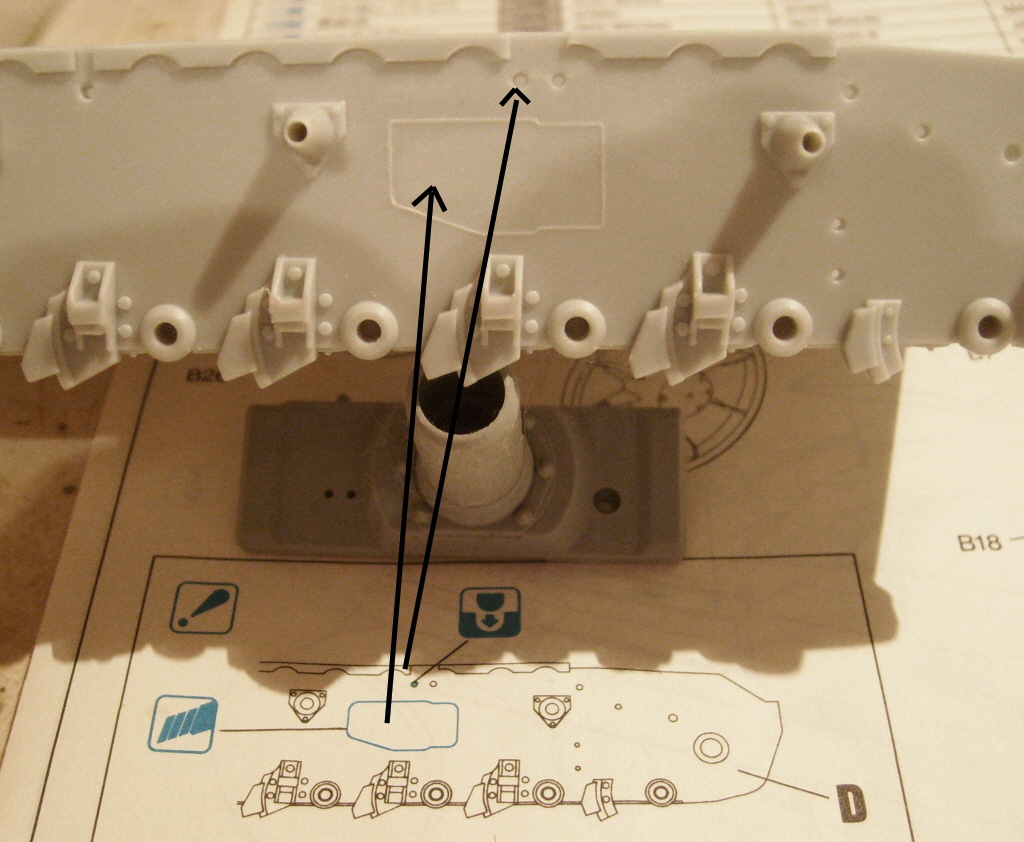
Ready, I filled the hole using Putty de Vallejo
Regards!
Rodolfo
Current Project:
I am building a Kingtiger Ausf. B, Version: March 1945 - AMMO/MIG, 1/35

#490
Sofiya, Bulgaria
Joined: September 22, 2016
KitMaker: 1,432 posts
AeroScale: 13 posts
Posted: Tuesday, May 28, 2019 - 12:28 AM UTC
Some progress on my Bulgarian StuG III Ausf.G:
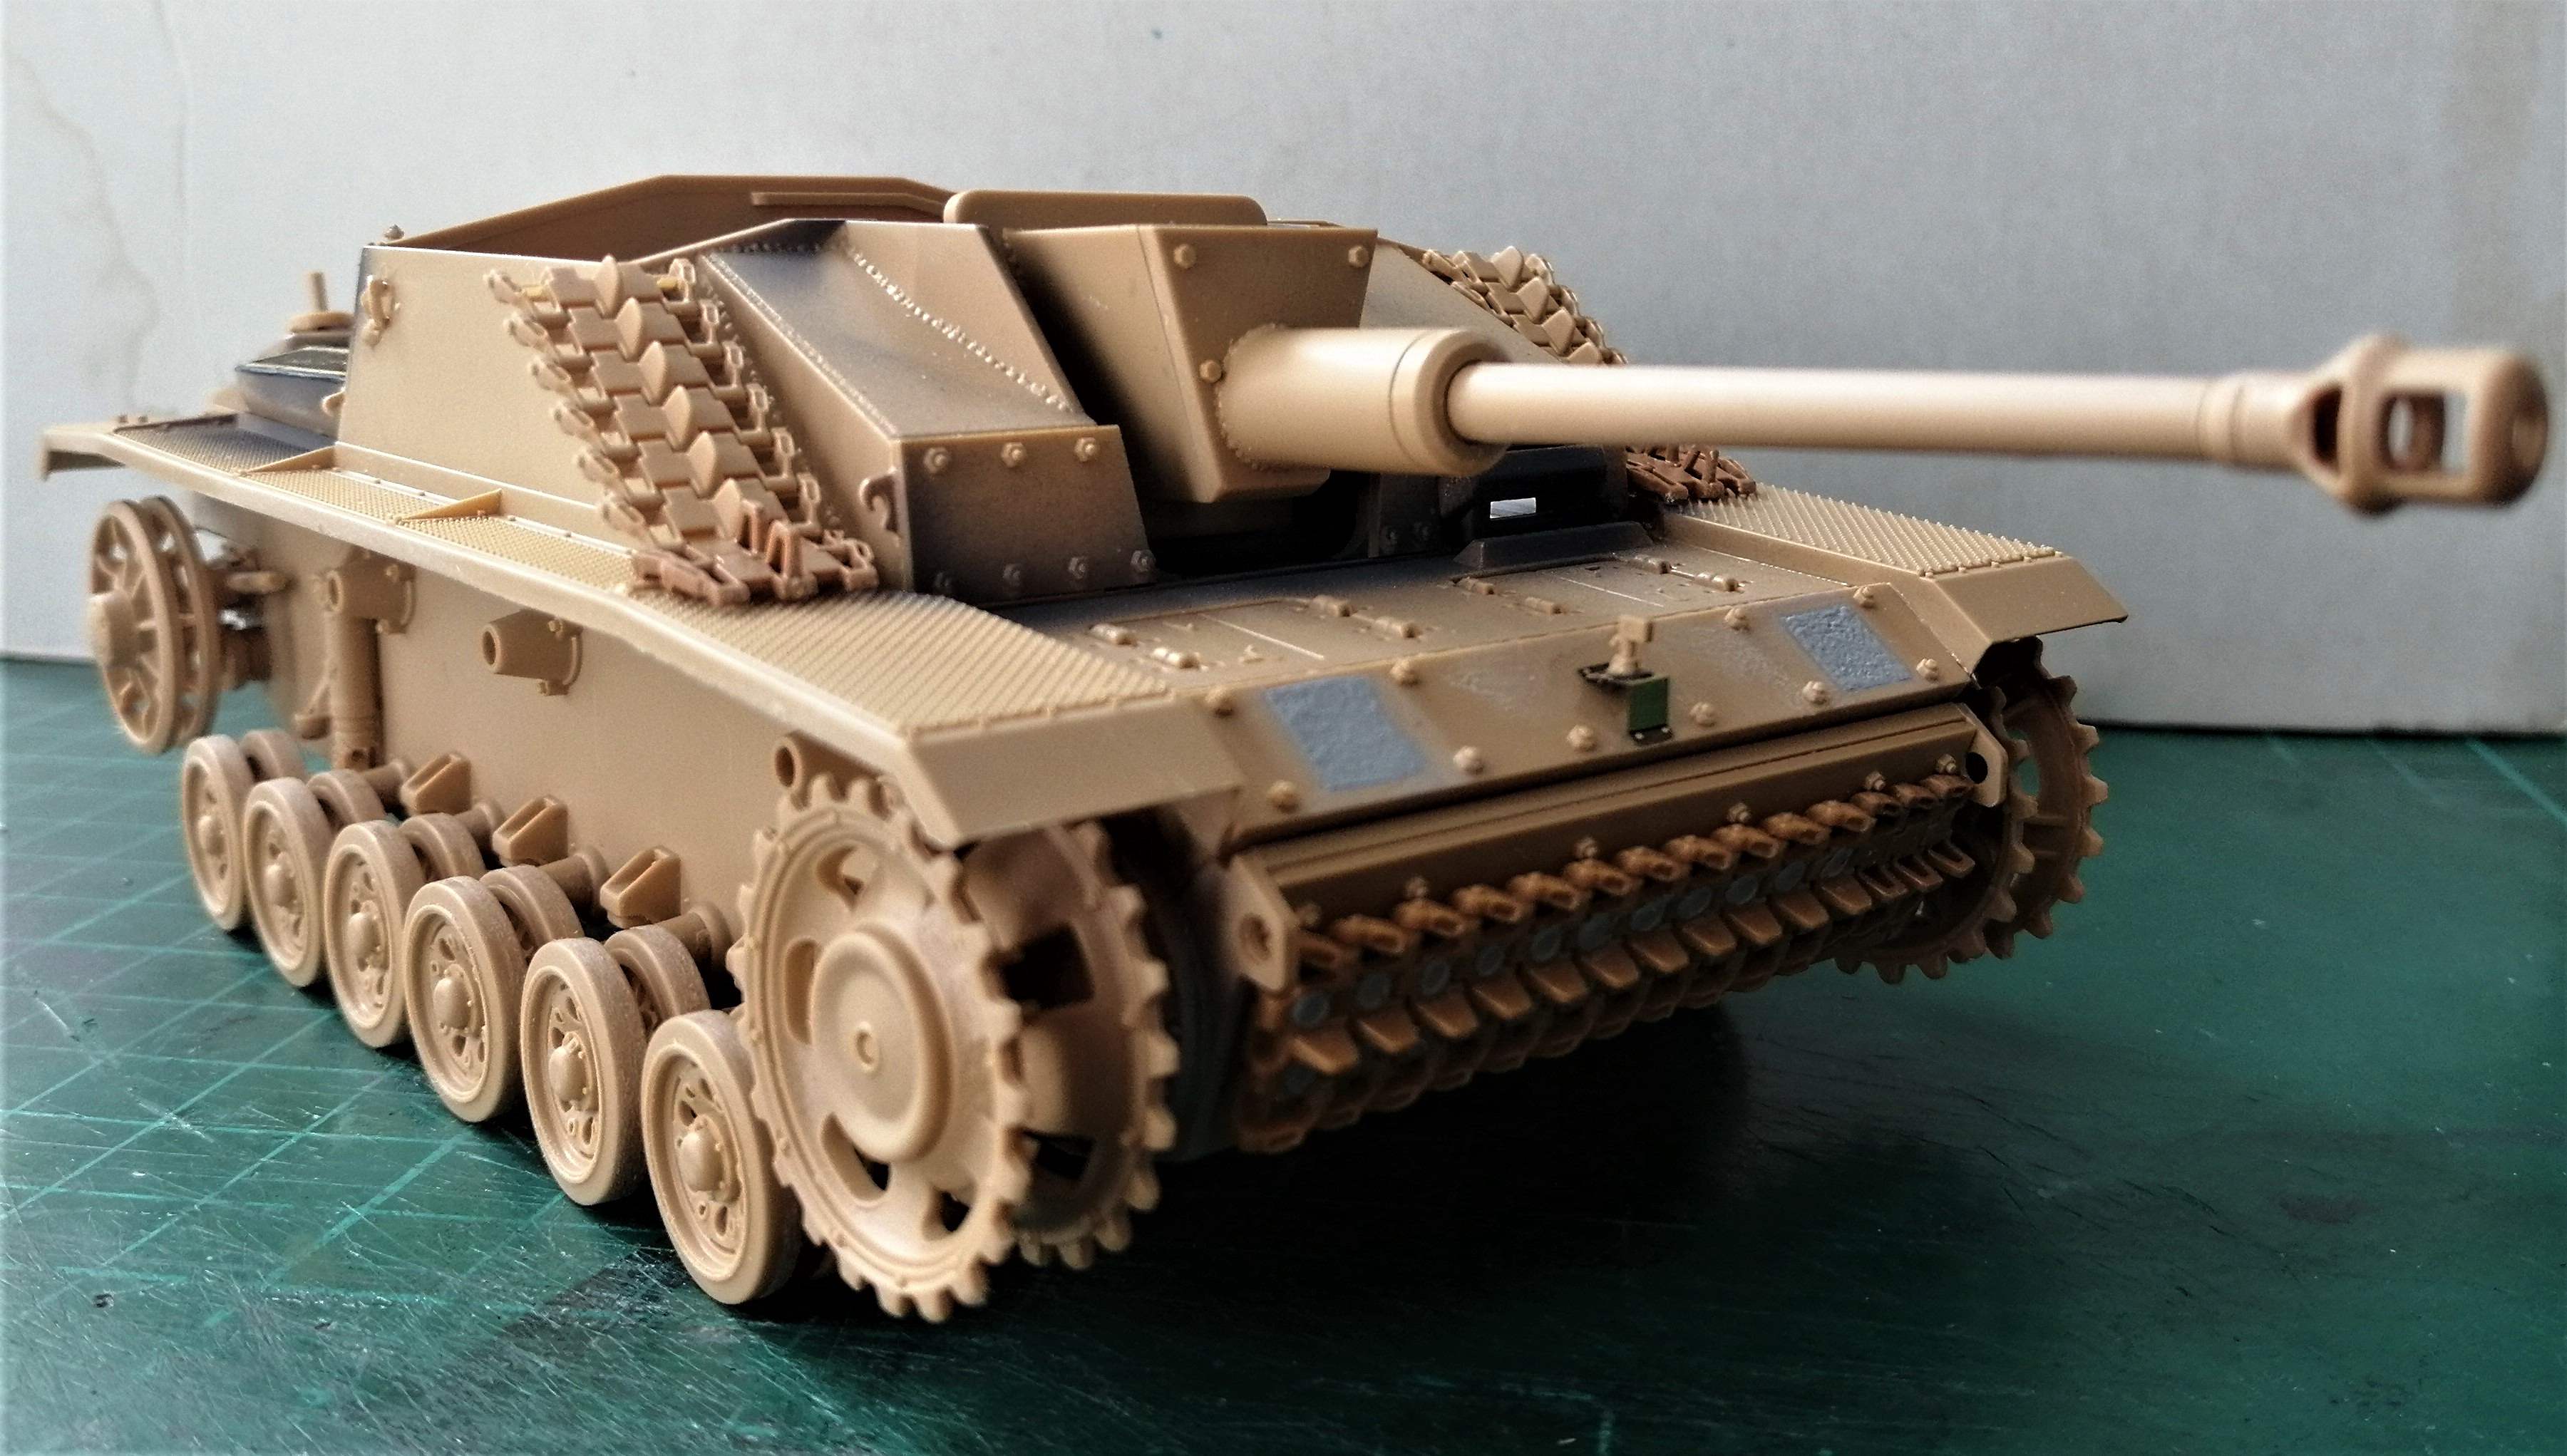
I'm building Tamiya's (shake and bake) kit with Eduard's PE set for it.
Track links(Italeri and Zvezda) come from my spares.
Happy modellbuilding!


#136
Distrito Federal, Mexico
Joined: April 06, 2002
KitMaker: 437 posts
AeroScale: 29 posts
Posted: Tuesday, May 28, 2019 - 03:41 AM UTC
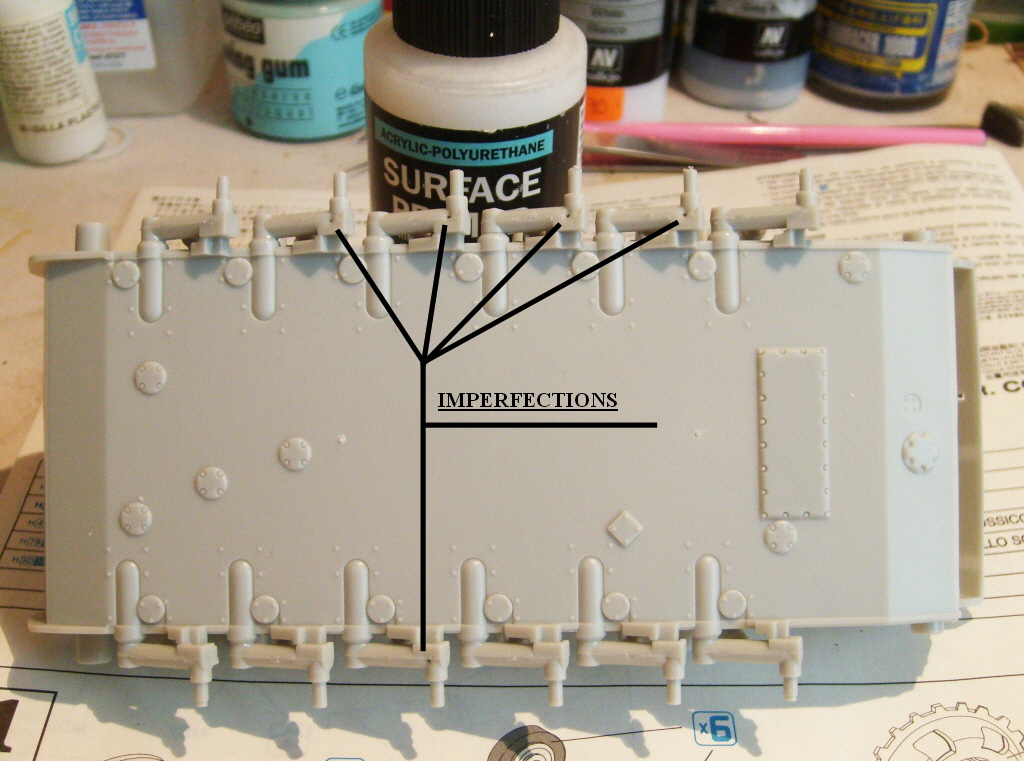
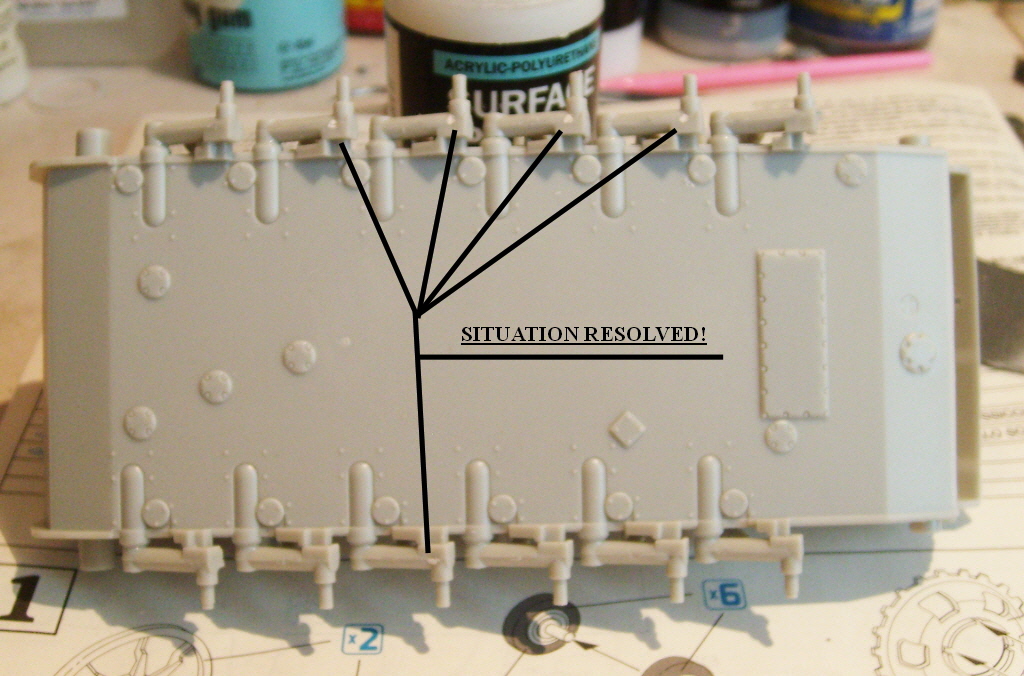
If you ir a beginner, you must be careful with the assembly of suspension arms because in the instruction sheet is inverted. Some pieces have an imperfections, but they were resolved using Putty of Vallejo.
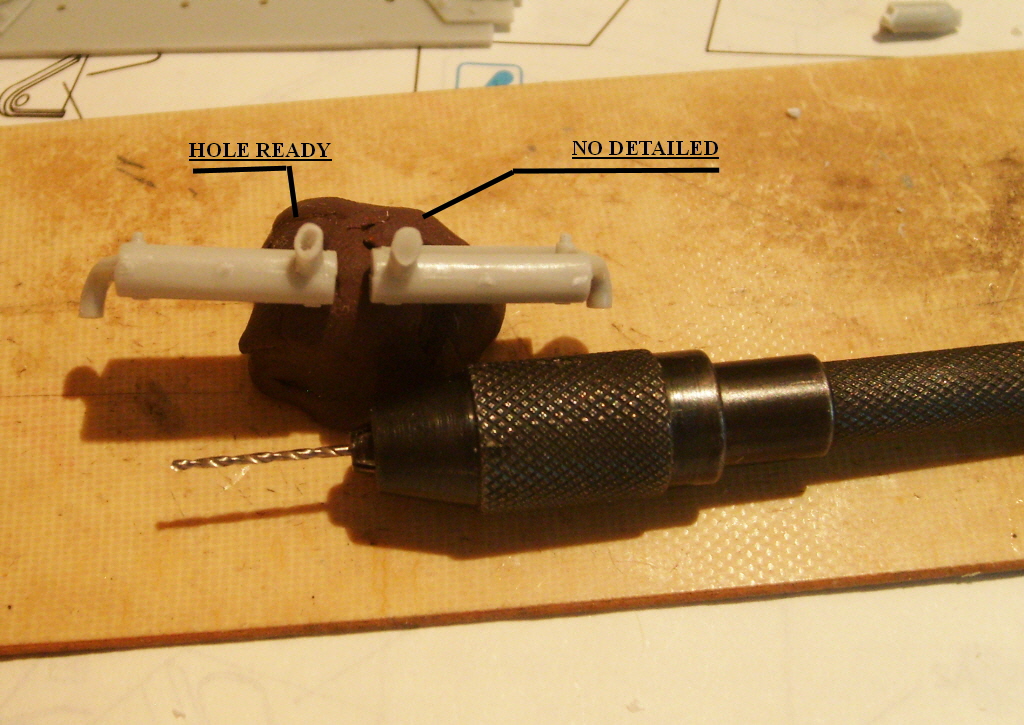
I added holes to the exhaust pipe with silencer.
Regards!
Rodolfo
Current Project:
I am building a Kingtiger Ausf. B, Version: March 1945 - AMMO/MIG, 1/35

#136
Distrito Federal, Mexico
Joined: April 06, 2002
KitMaker: 437 posts
AeroScale: 29 posts
Posted: Tuesday, May 28, 2019 - 06:16 AM UTC
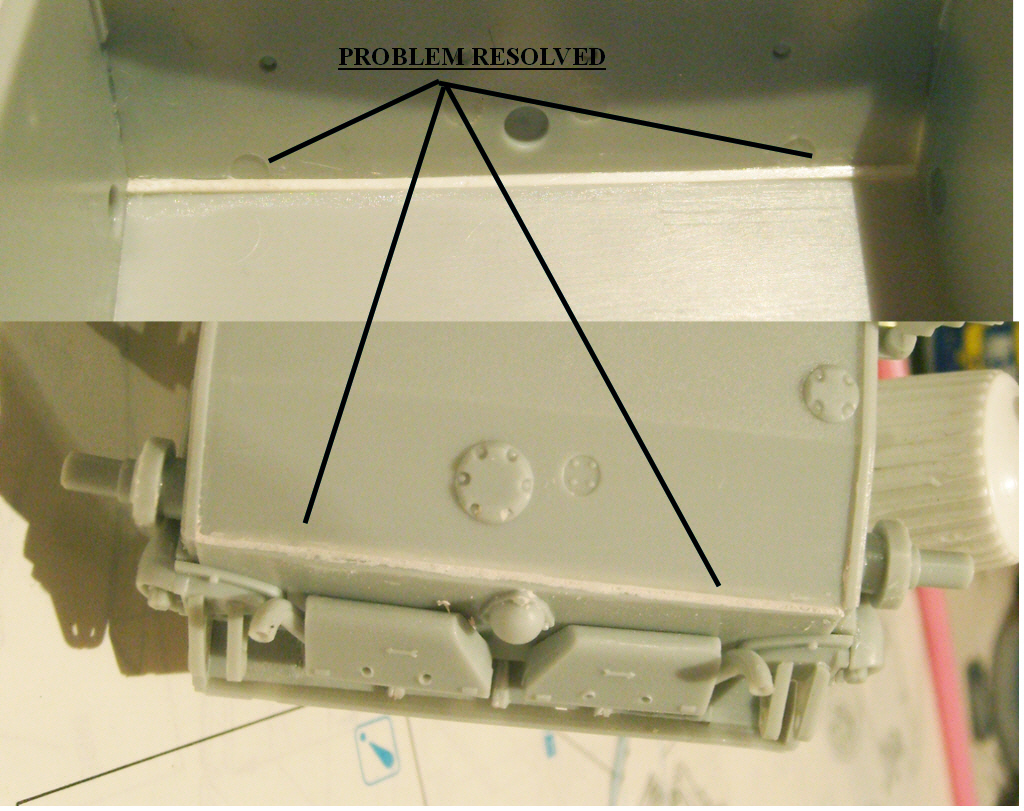
The rear part did not fit correctly, in order to arrange this, I used styrene into the chassis and filled with Putty of Vallejo on the out part
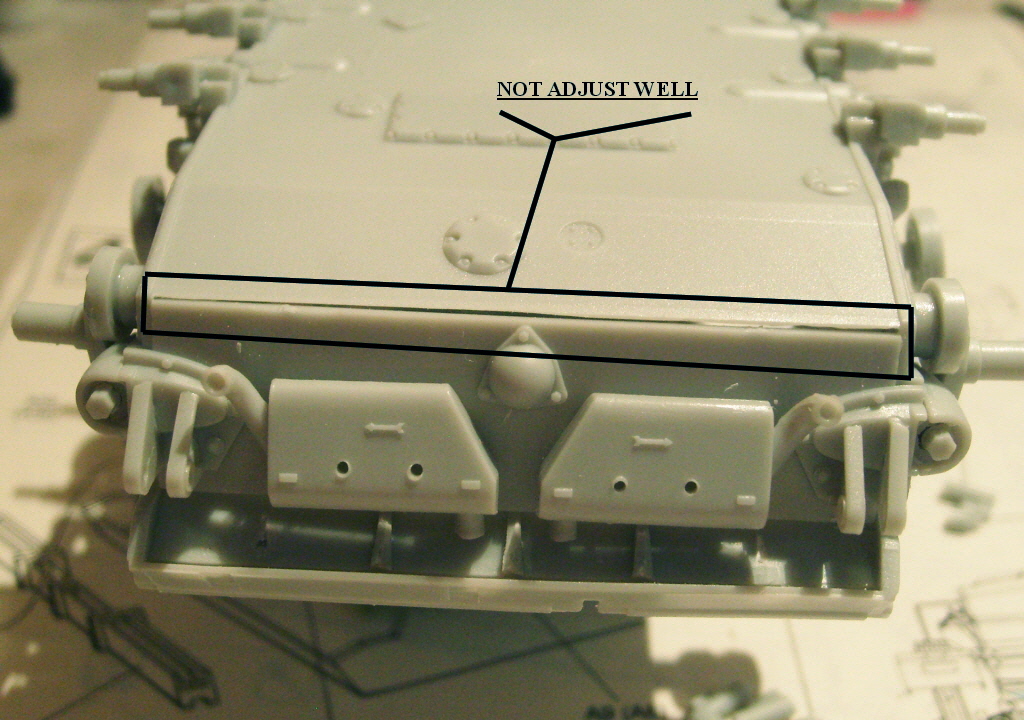
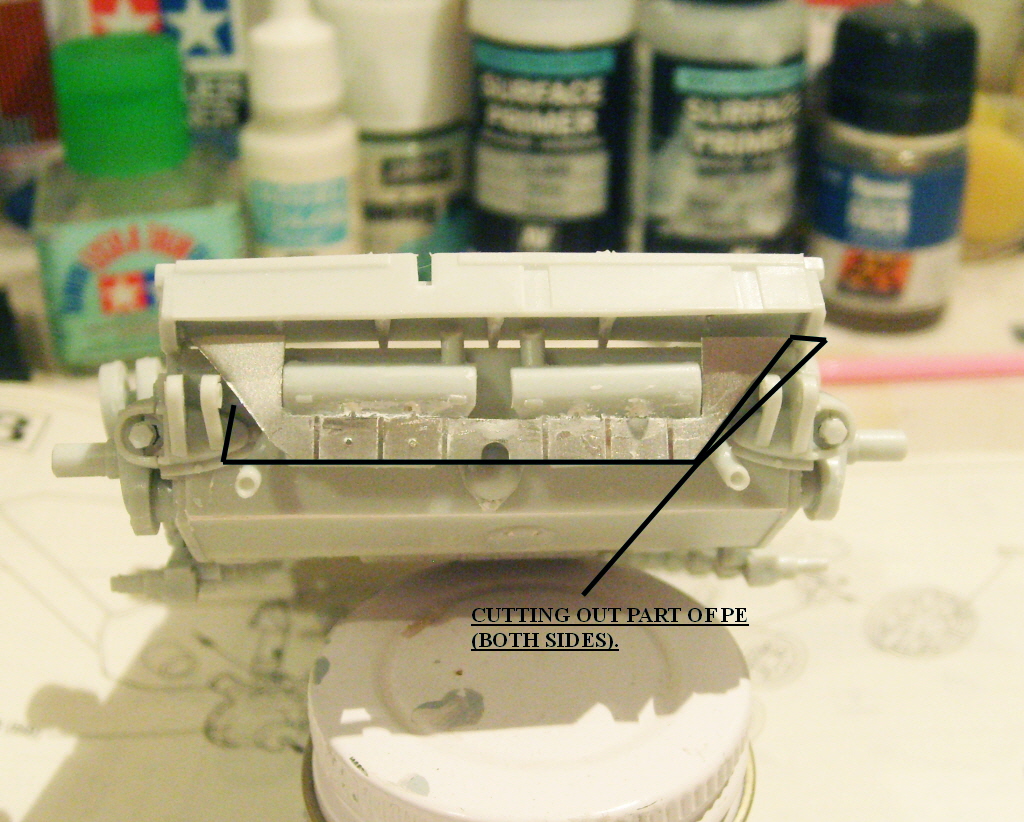
The plate of air intake grid it came too big, for adjust into the rear it was necessary to cut the sides.
The work with the chassis is ready. The plastic is a bit brittle, at the moment of sandering you must nedd more careful of the normal.
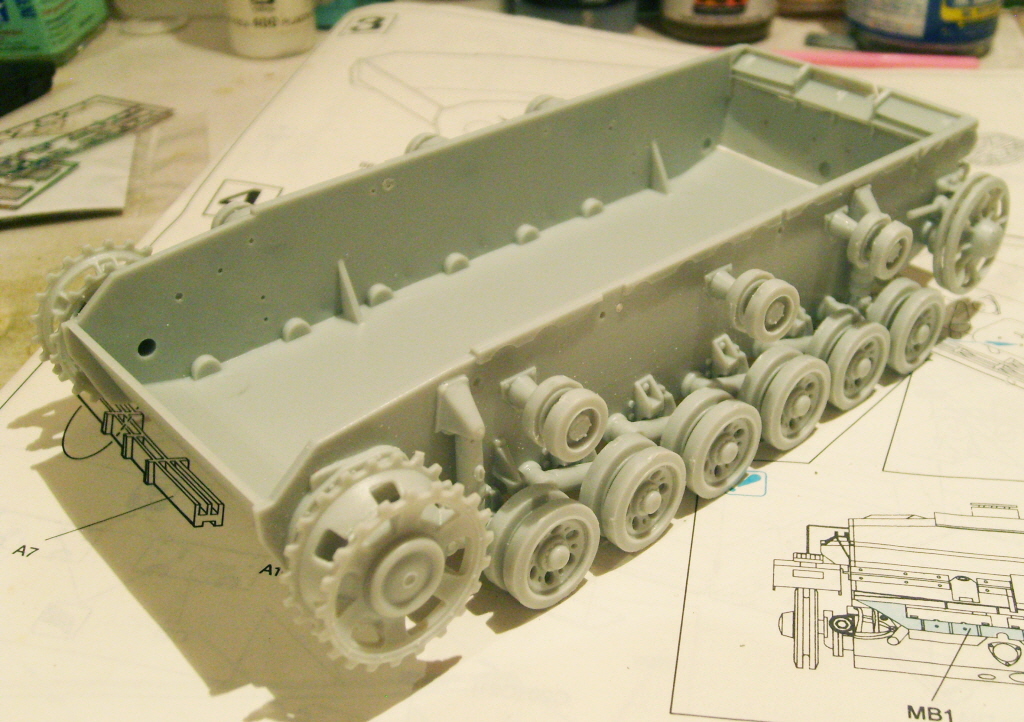
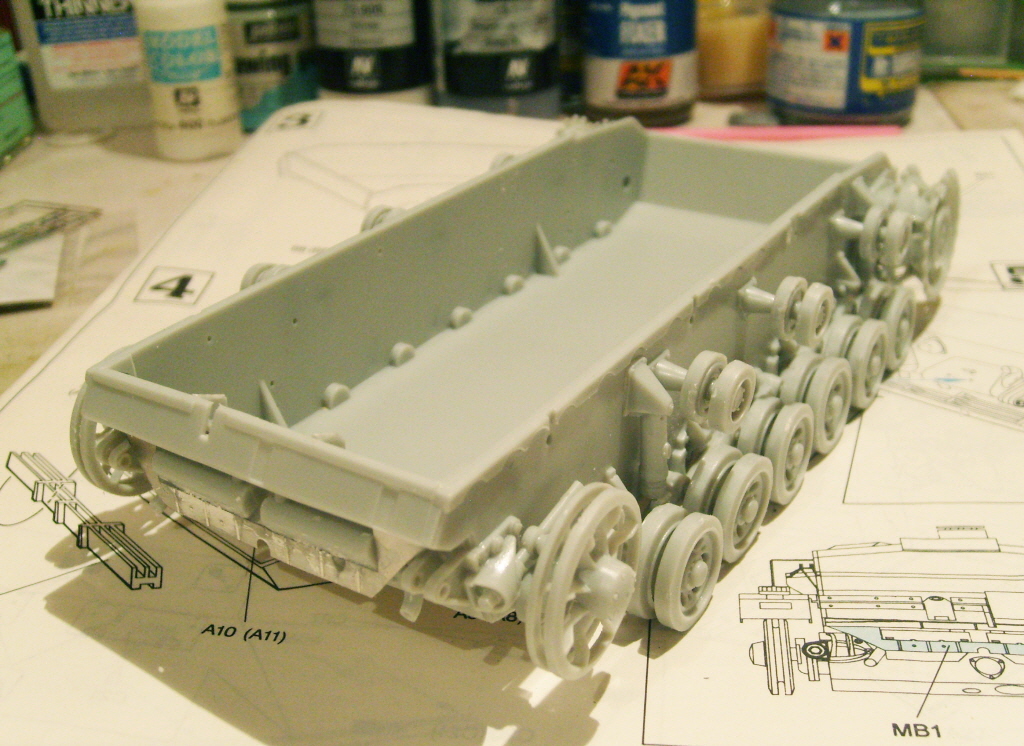
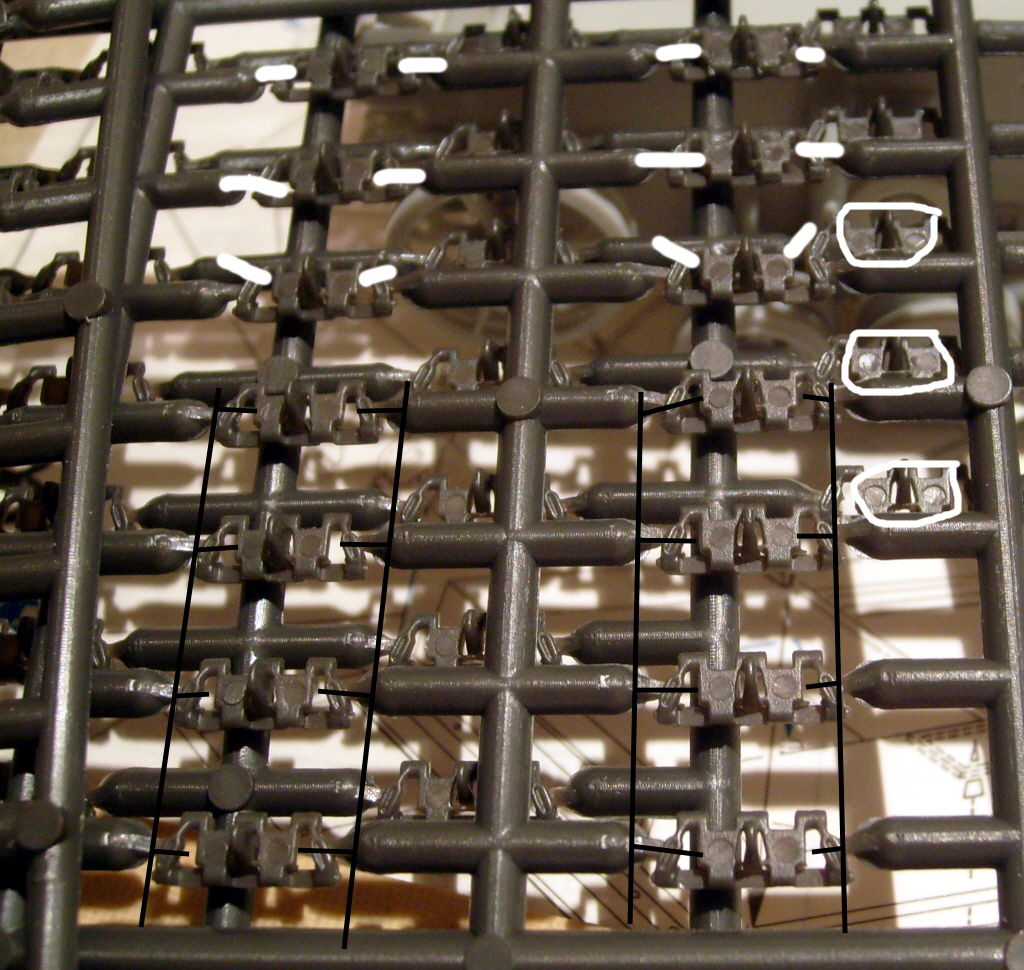
Next step: The tracks, here you can see that it came with 2 marks of pin in each link. After of this tedious work I will return with more updates.
Regards!
Rodolfo
Current Project:
I am building a Kingtiger Ausf. B, Version: March 1945 - AMMO/MIG, 1/35

#439
Washington, United States
Joined: November 05, 2005
KitMaker: 4,950 posts
AeroScale: 3,192 posts
Posted: Tuesday, May 28, 2019 - 07:22 AM UTC
Love the phrase "Putty of Vallejo".

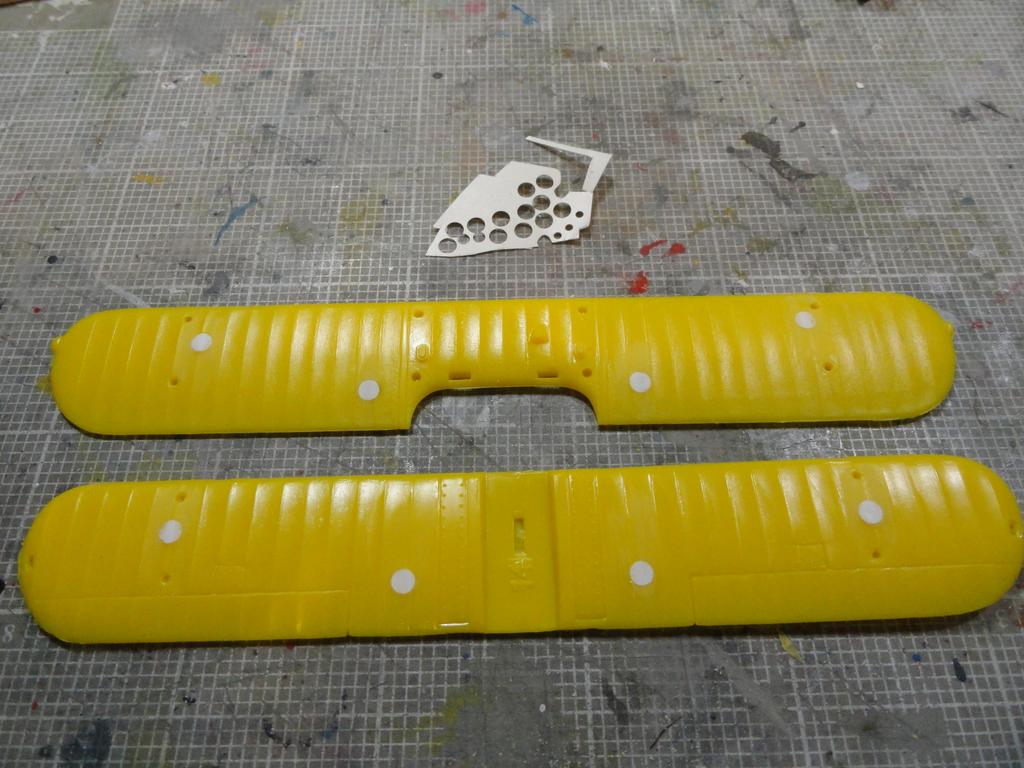
Do you have a small punch? It might be a LOT easier for those track links to just punch out scads of small diameter circles from 0.005" sheet and glue them in place.

Hanger Queens in Waiting:
Monogram 1/72 F8F-1
Corsair the Sky Pirate - 1/72 Ace A-7D
Century Series - Airfix 1/72 F-105G
Anti Shipping - Academy 1/72 PBJ-1D
Academy 1/72 F-84E

#136
Distrito Federal, Mexico
Joined: April 06, 2002
KitMaker: 437 posts
AeroScale: 29 posts
Posted: Tuesday, May 28, 2019 - 05:34 PM UTC
Many marks are in relief, maybe 60%, in this case is necessary to sandering

(I like more Putty of Vallejo that Vallejo Putty)

Regards!
Rodolfo
Current Project:
I am building a Kingtiger Ausf. B, Version: March 1945 - AMMO/MIG, 1/35

#439
Washington, United States
Joined: November 05, 2005
KitMaker: 4,950 posts
AeroScale: 3,192 posts
Posted: Tuesday, May 28, 2019 - 06:02 PM UTC
Best of luck with cleaning them up. Sounds like a small chisel blade would be a big help on cutting the bulk of the posts down before sanding.

Hanger Queens in Waiting:
Monogram 1/72 F8F-1
Corsair the Sky Pirate - 1/72 Ace A-7D
Century Series - Airfix 1/72 F-105G
Anti Shipping - Academy 1/72 PBJ-1D
Academy 1/72 F-84E

#136
Distrito Federal, Mexico
Joined: April 06, 2002
KitMaker: 437 posts
AeroScale: 29 posts
Posted: Tuesday, May 28, 2019 - 06:55 PM UTC

Thanks Mark!. I will use the old technic of the cutter, but finally I decided to continue the work with the hull and wait almost to final with the tracks

Regards!

Rodolfo
Current Project:
I am building a Kingtiger Ausf. B, Version: March 1945 - AMMO/MIG, 1/35

#136
Distrito Federal, Mexico
Joined: April 06, 2002
KitMaker: 437 posts
AeroScale: 29 posts
Posted: Thursday, May 30, 2019 - 07:32 AM UTC
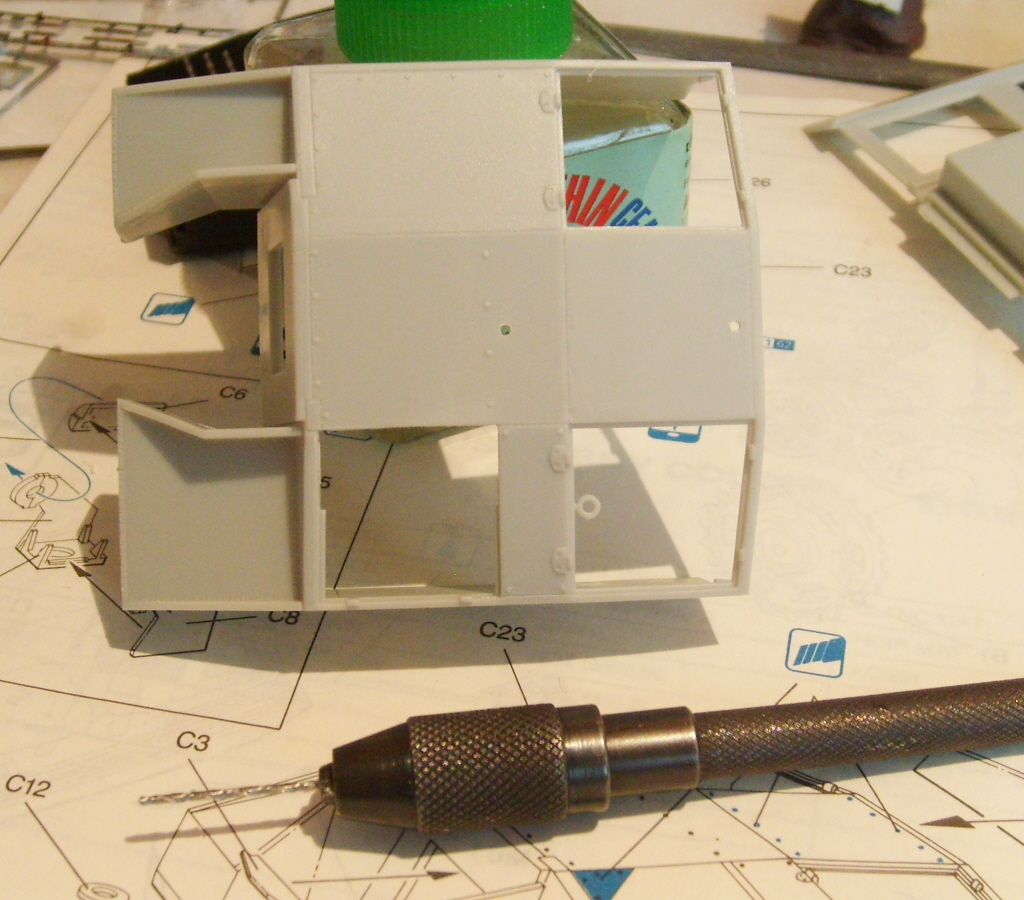
Removing 10 bolts + i plate with bolts and to drill 2 holes in order to add the plate of vent oppening (compartment roof).
Regards!
Rodolfo
Current Project:
I am building a Kingtiger Ausf. B, Version: March 1945 - AMMO/MIG, 1/35

#136
Distrito Federal, Mexico
Joined: April 06, 2002
KitMaker: 437 posts
AeroScale: 29 posts
Posted: Thursday, May 30, 2019 - 10:28 AM UTC
Mounted the Air-intake Covers, the plate of vent oppening (compartment roof), driver vision port and headlights.
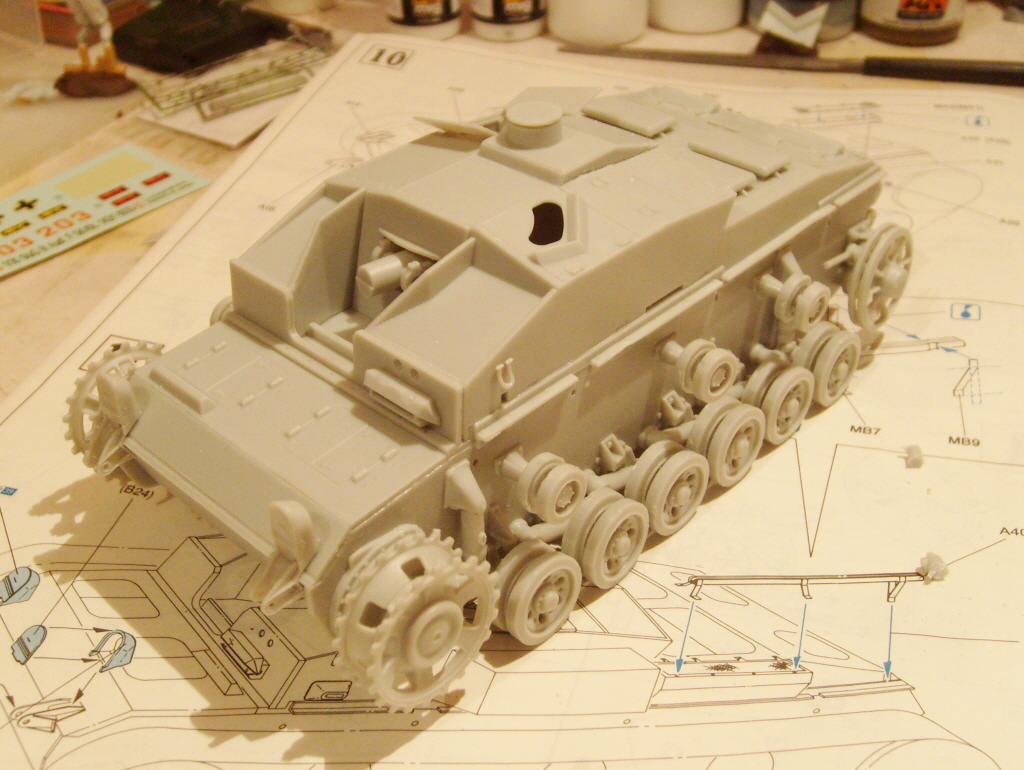
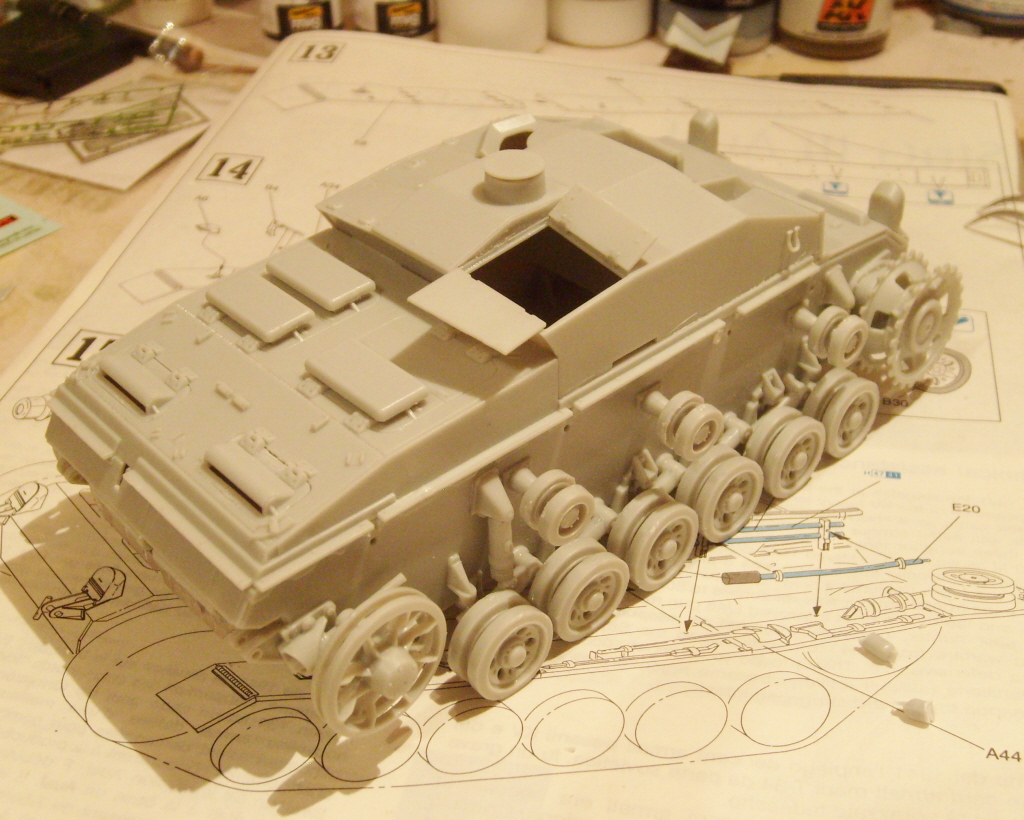
Making holes to the Periscope gun sight and ready!.
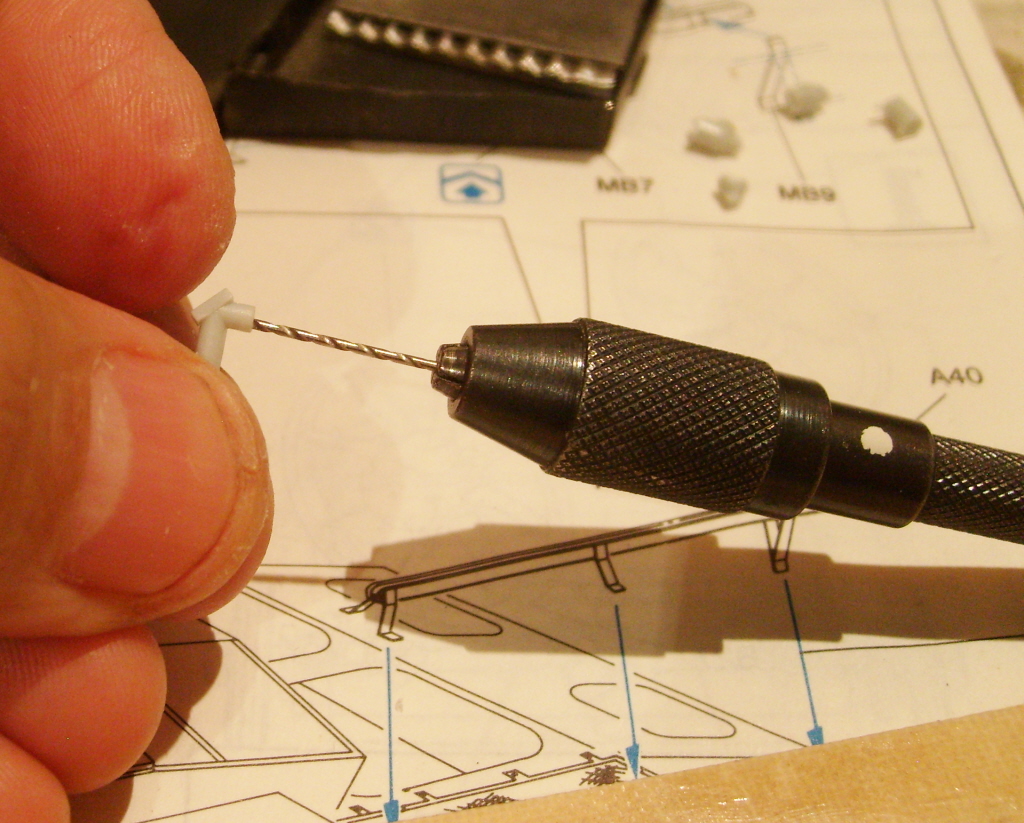
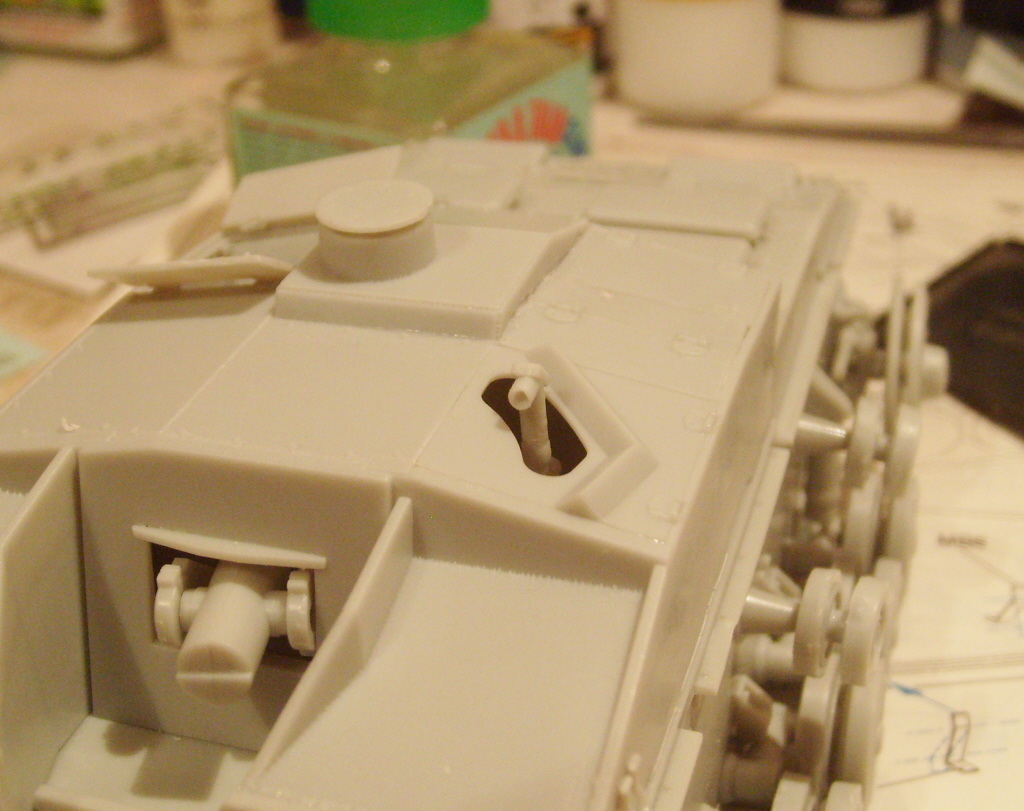
Regards!
Rodolfo
Current Project:
I am building a Kingtiger Ausf. B, Version: March 1945 - AMMO/MIG, 1/35

#136
Distrito Federal, Mexico
Joined: April 06, 2002
KitMaker: 437 posts
AeroScale: 29 posts
Posted: Thursday, May 30, 2019 - 05:46 PM UTC
Treating the tracks: 1) - cut the horizontal bars in order to give more space for the following step. 2) - Using a medium round (or round) tool file and filing along the tracks.
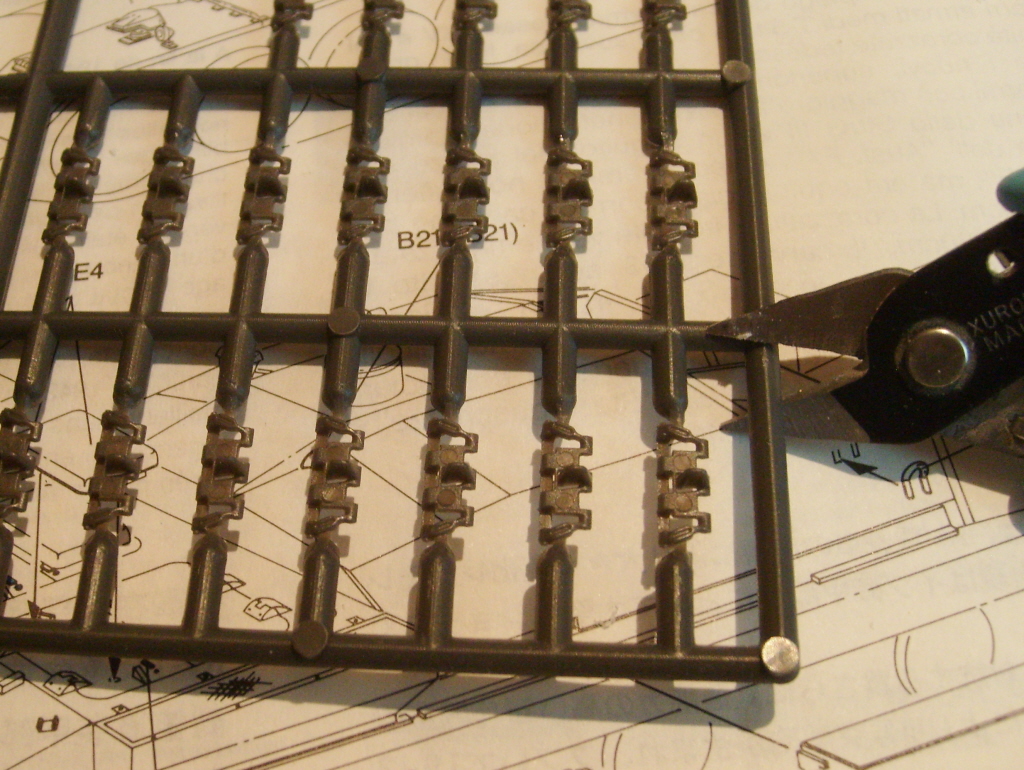
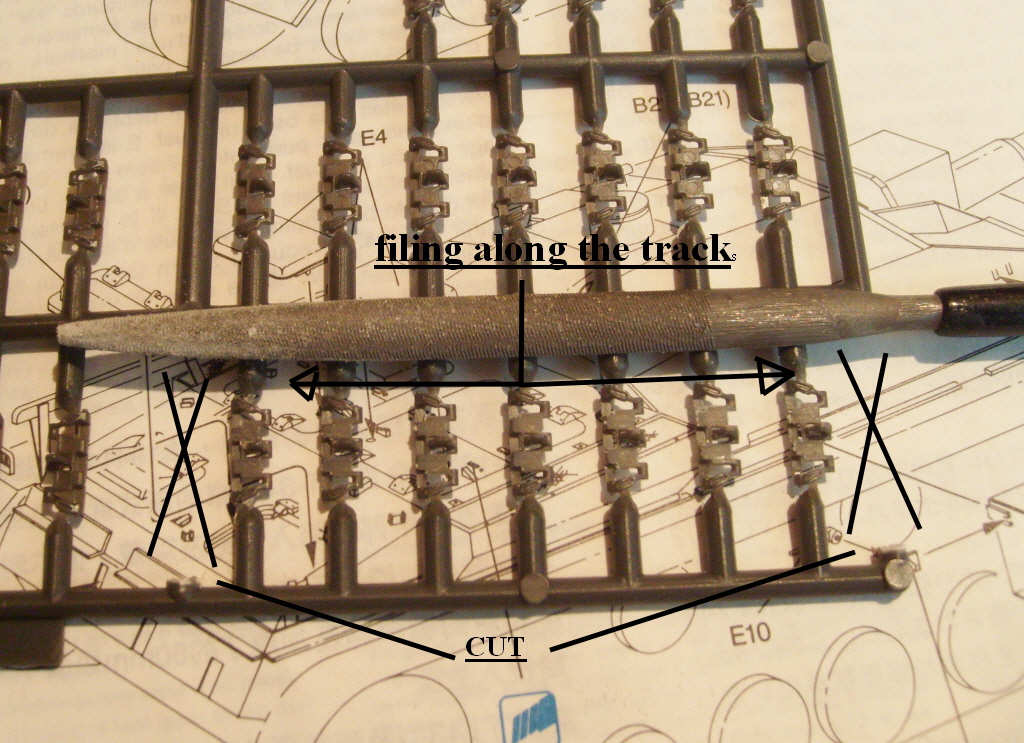
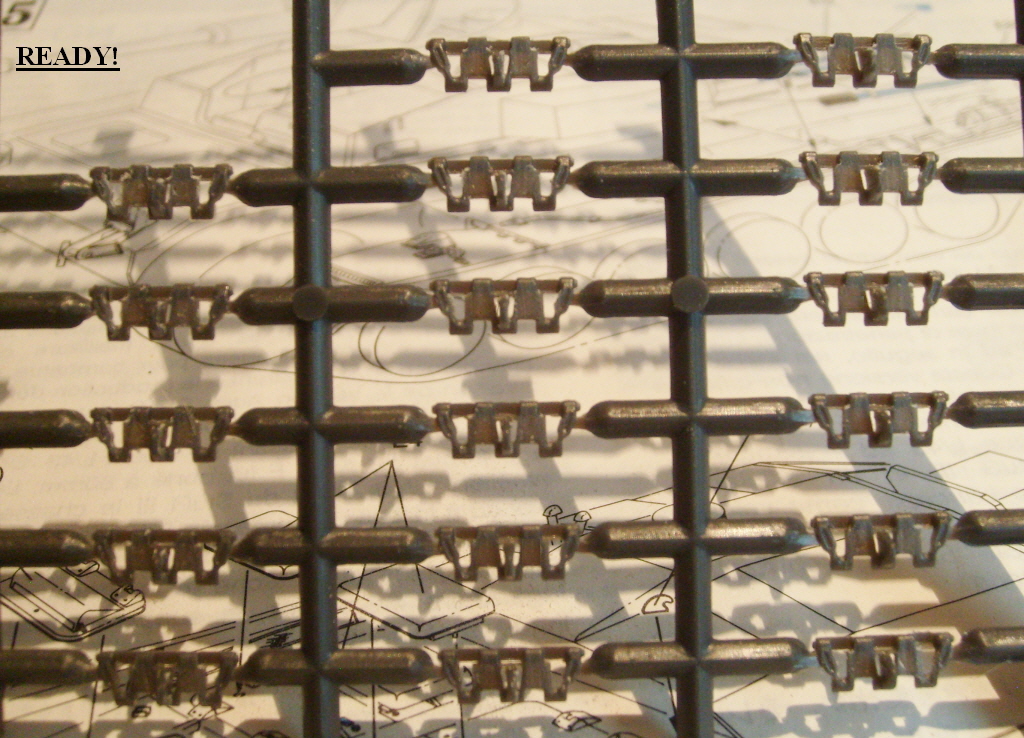
Ready 1 sheet of 76 tracks in less than 3 minutes!, after of this photo only I retouched 3 tracks, really useful and quick!!
Regards!
Rodolfo
Current Project:
I am building a Kingtiger Ausf. B, Version: March 1945 - AMMO/MIG, 1/35
Nordrhein-Westfalen, Germany
Joined: March 22, 2015
KitMaker: 671 posts
AeroScale: 614 posts
Posted: Friday, May 31, 2019 - 02:37 AM UTC
Radek:
The paint job on Your Panzer looks spot on!
Bob:
Sorry to hear this. All the best for You!
Angel:
The StuG looks good from here! Like to see some color on it.
Rodolfo:
You added some nice detail to this kit. And nice work on those tracks. Thank´s for posting how to deal with it.
I added some detail to the small cockpit of my Stuka. But, I guess most things will not be seen after closing the cockpit.
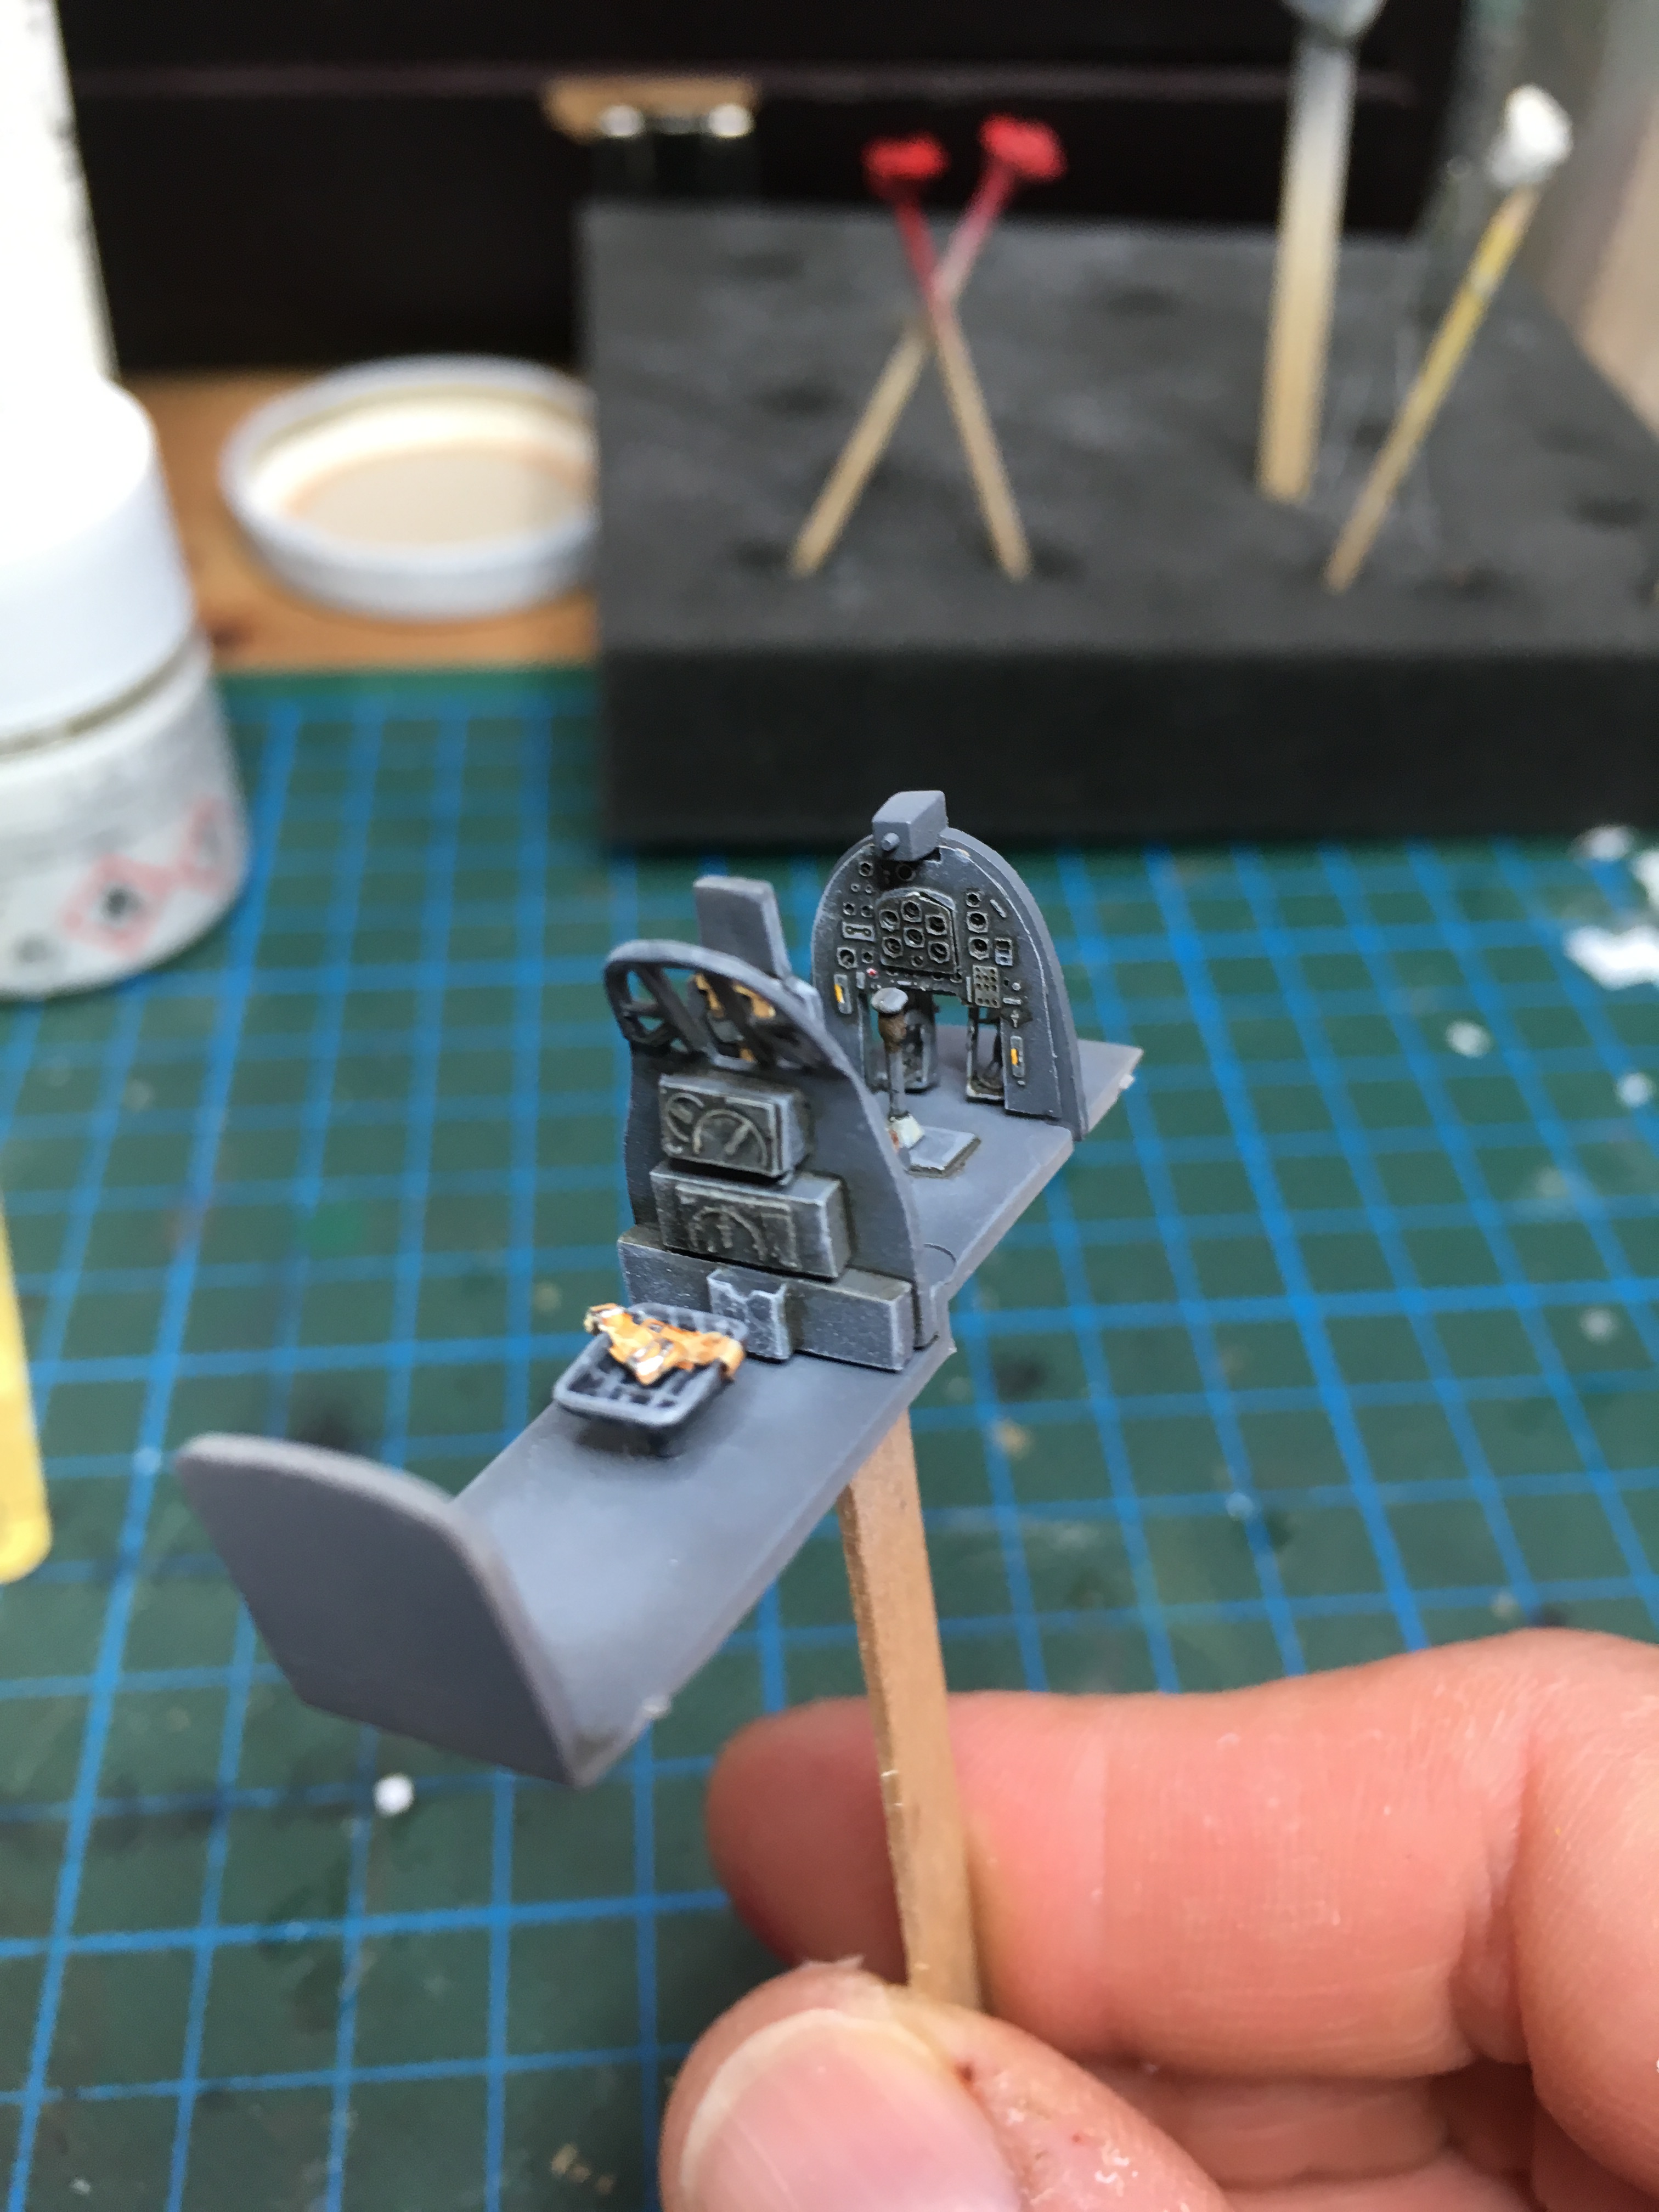
The model was primed and painted after some pre-shading.
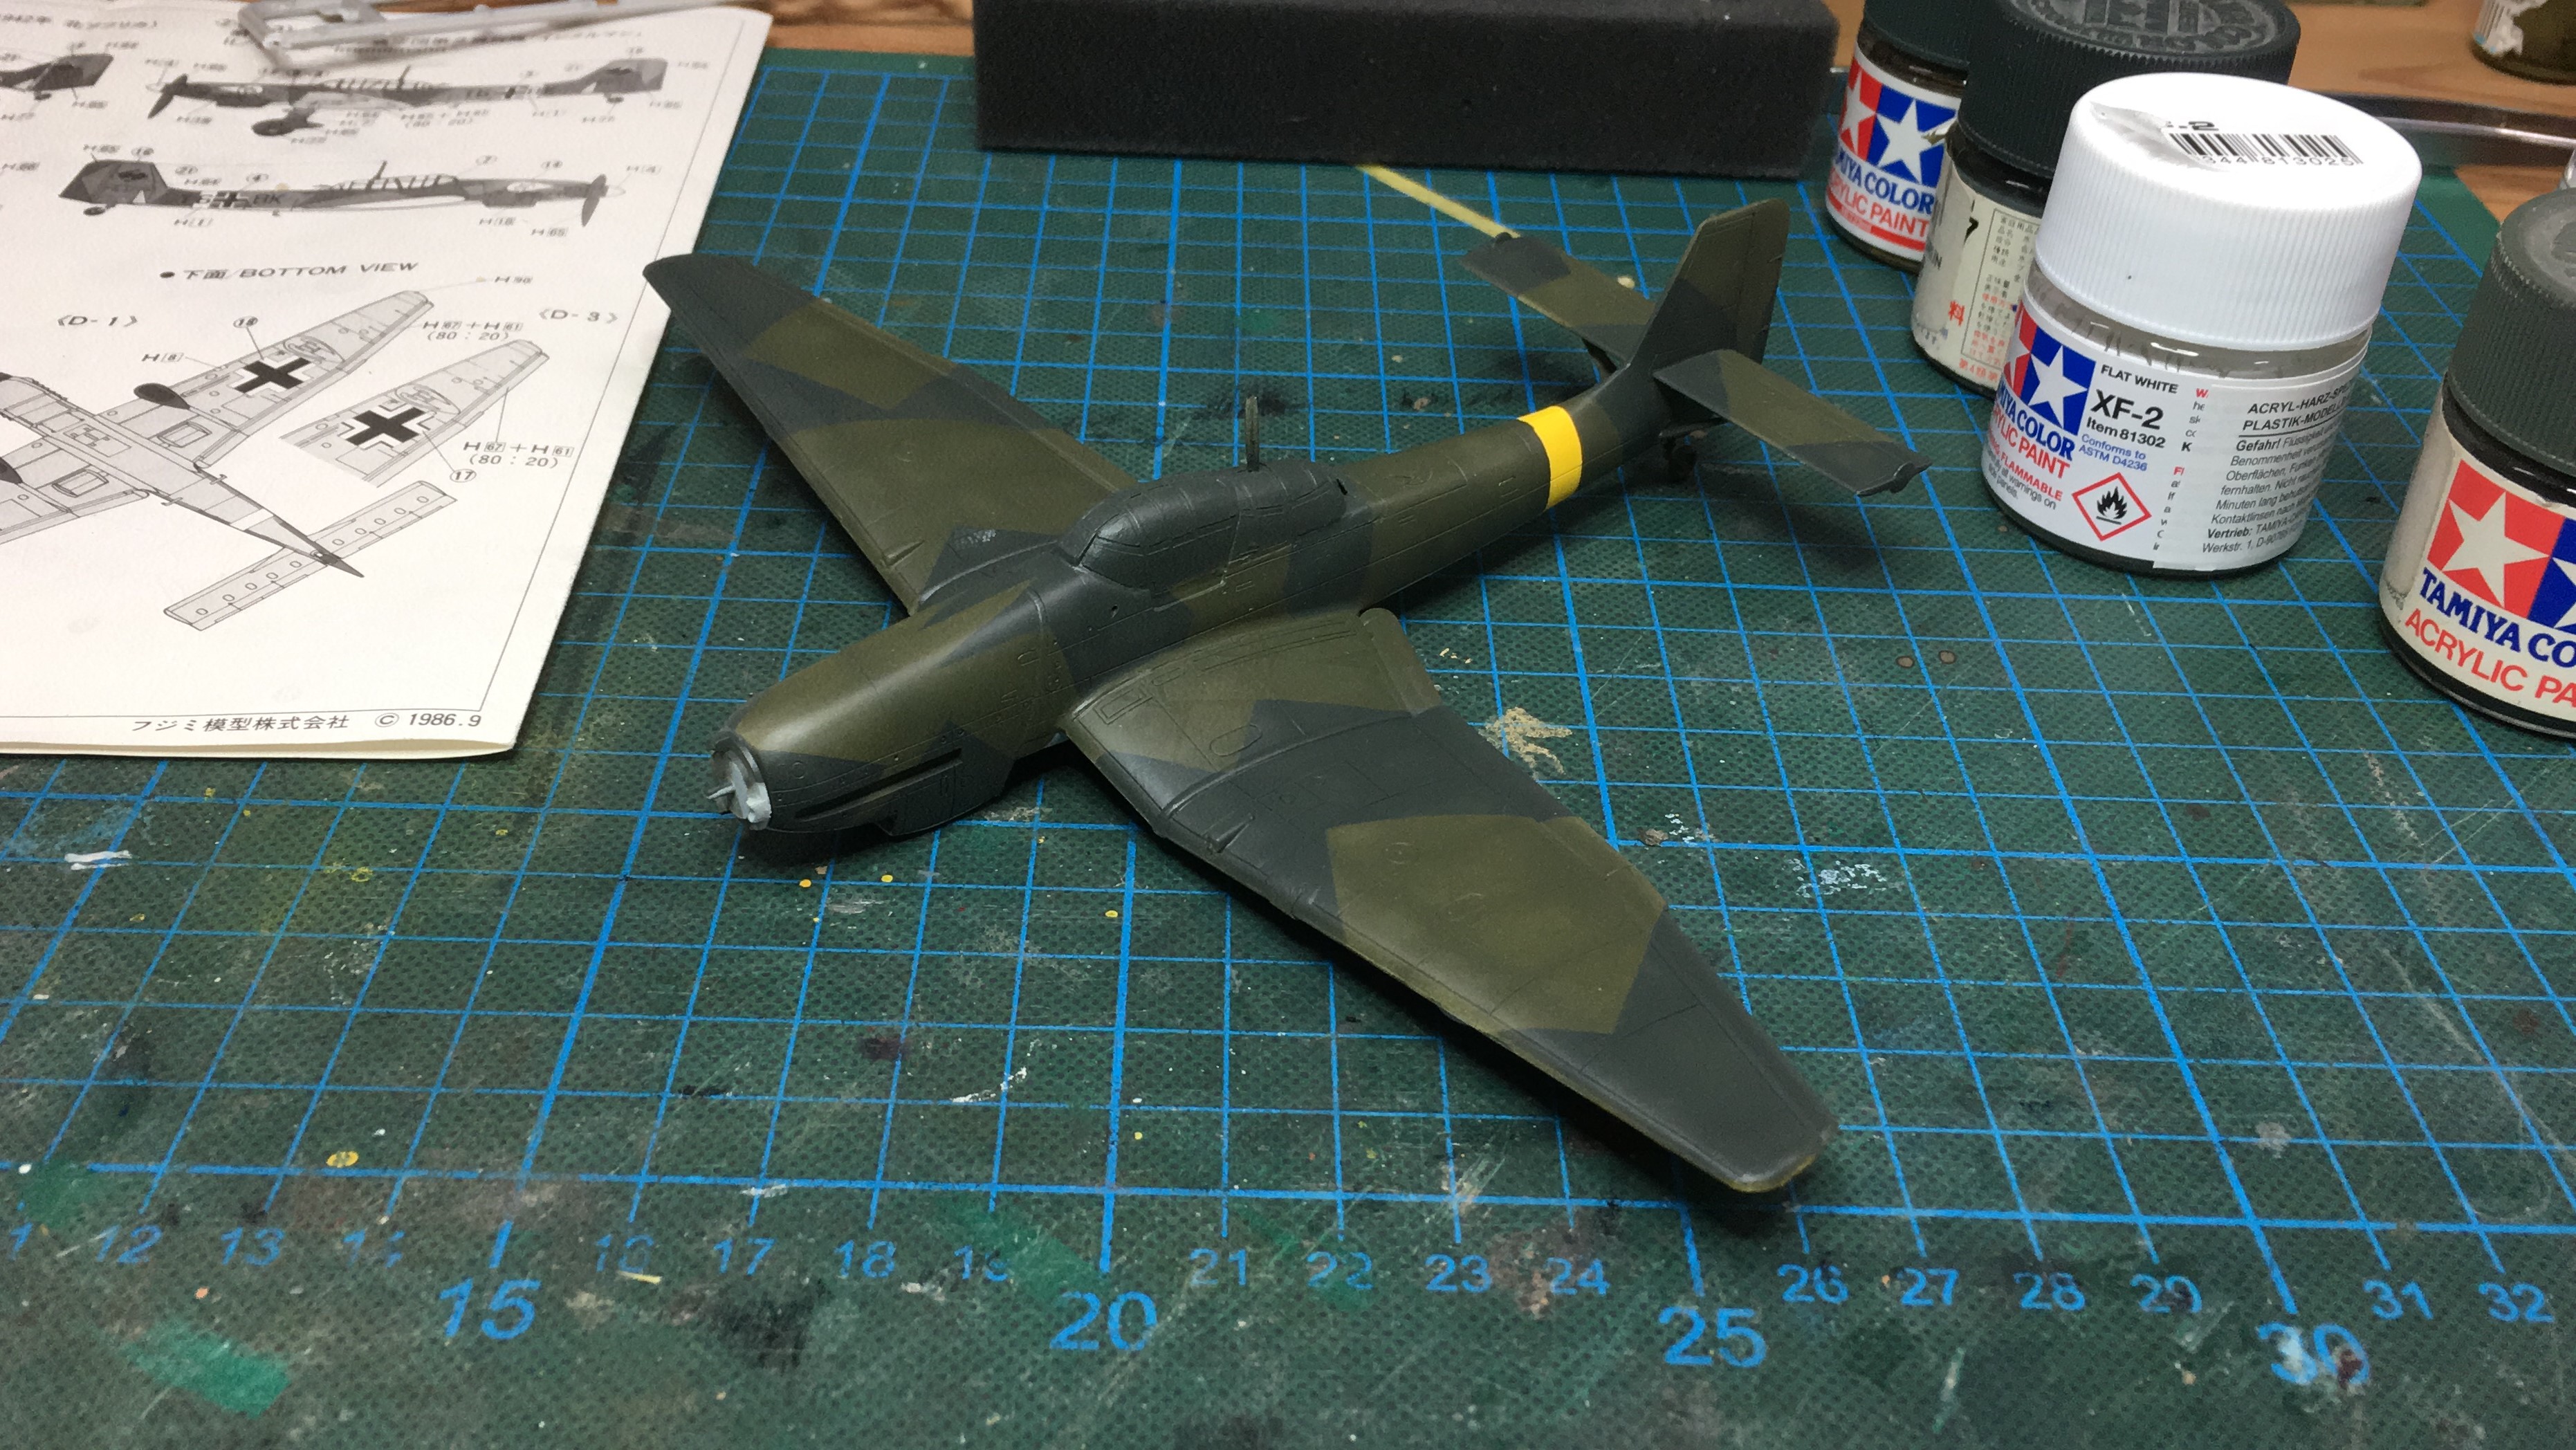
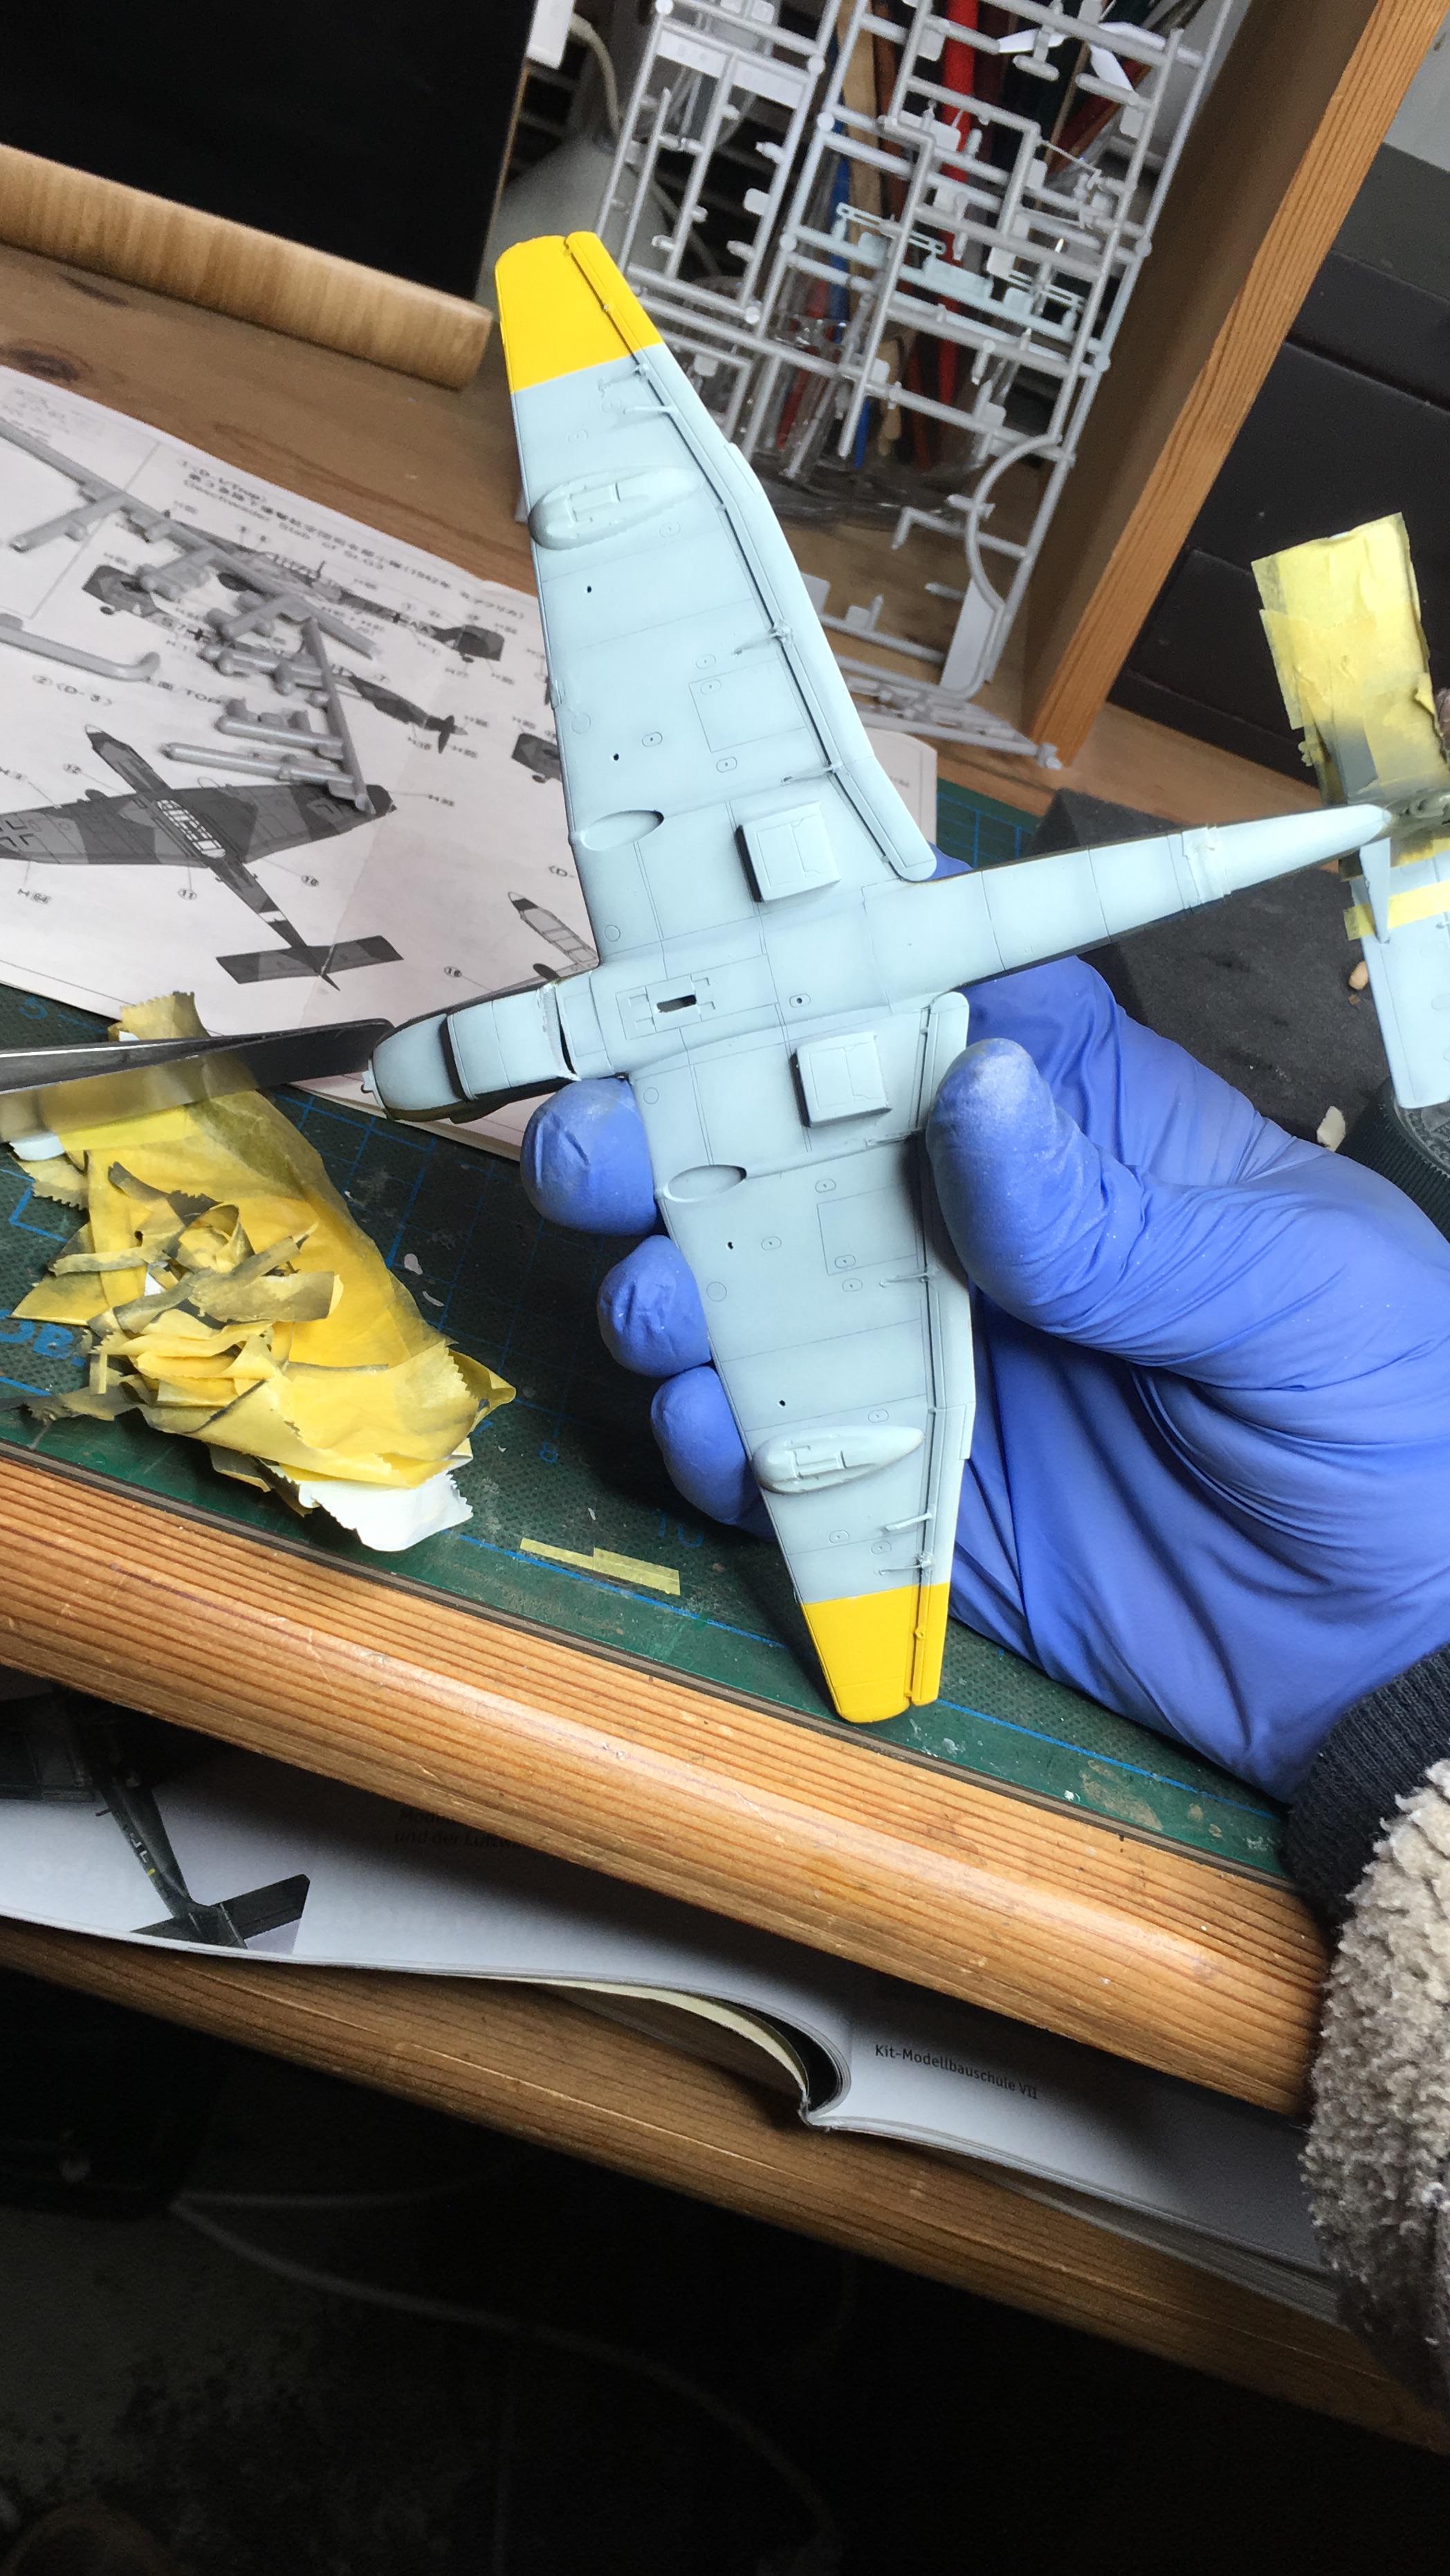
Oliver

On the desk: Probably a Panzer III.

#136
Distrito Federal, Mexico
Joined: April 06, 2002
KitMaker: 437 posts
AeroScale: 29 posts
Posted: Friday, May 31, 2019 - 05:32 PM UTC
Thanks for your kind comments Oliver. Your work is very fine, the interior of cabine looks great!
More updates!
The Photoetched are very rigid (hard), but can be worked without probems.
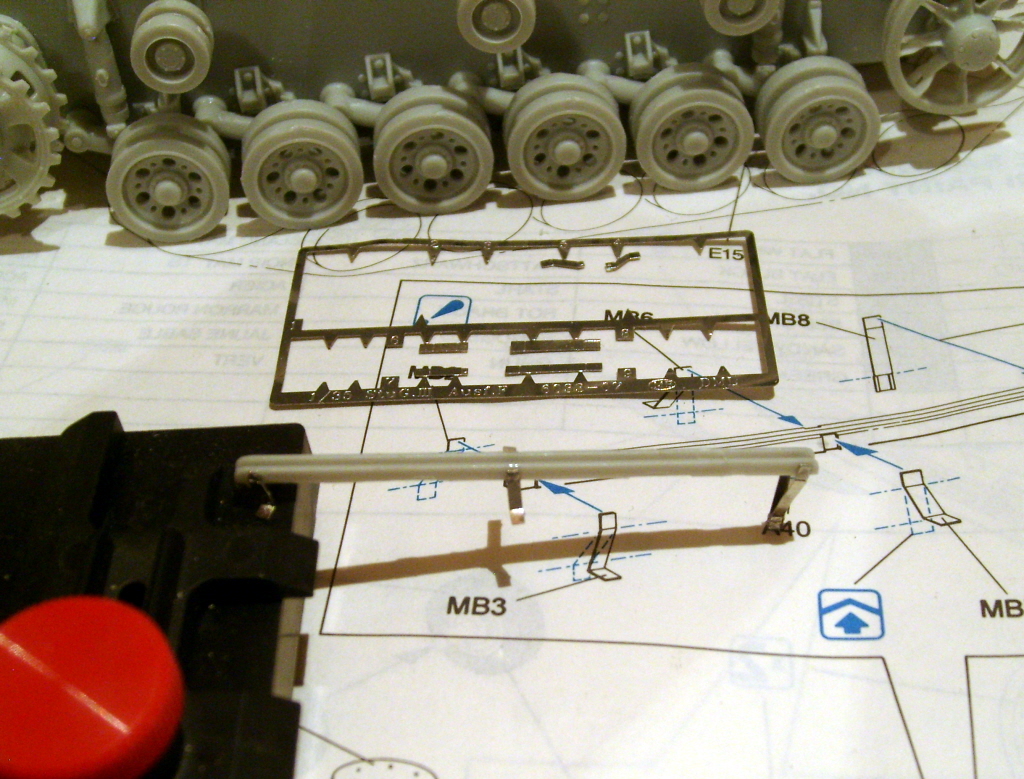
Tracks ready!, In the pic 4 I saw a desaligned track, but after of take the photo was arrenged.
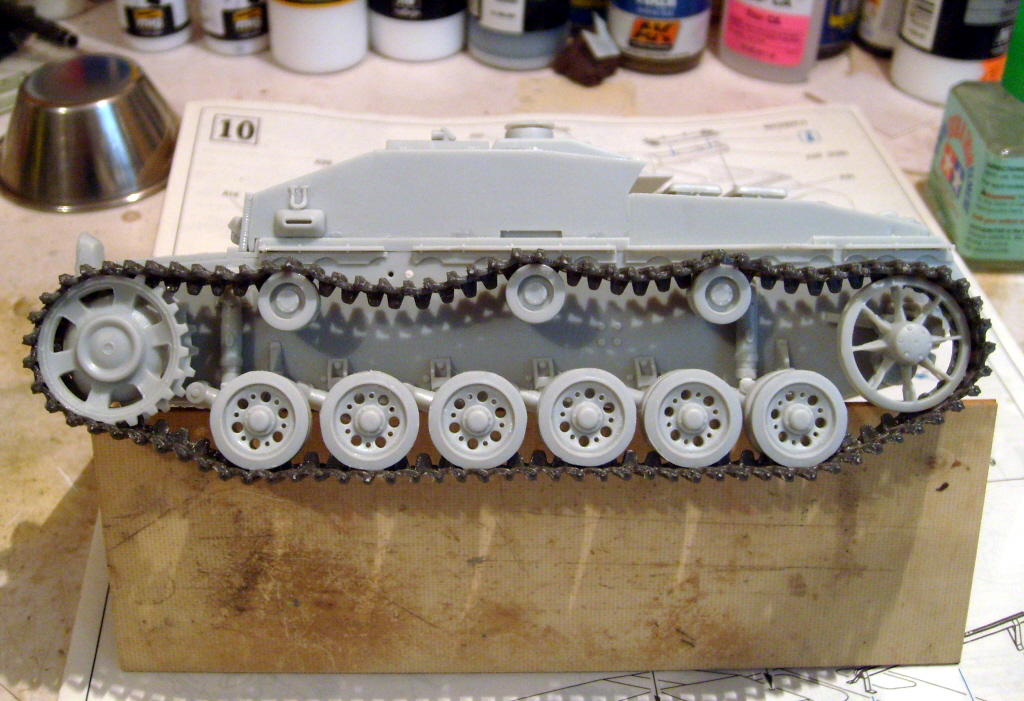
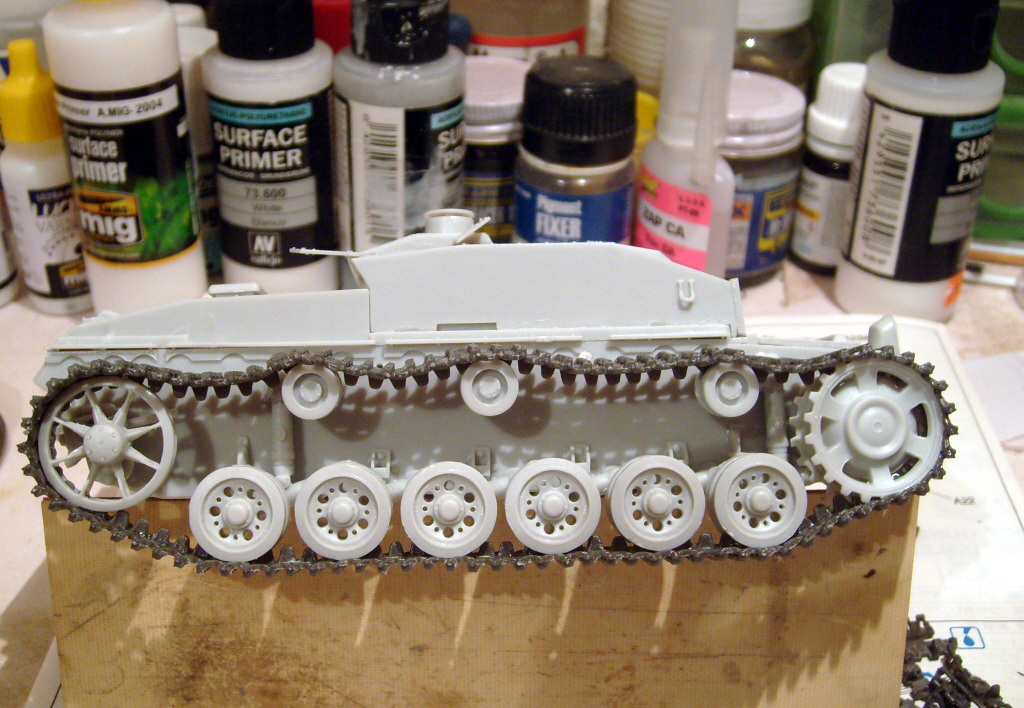
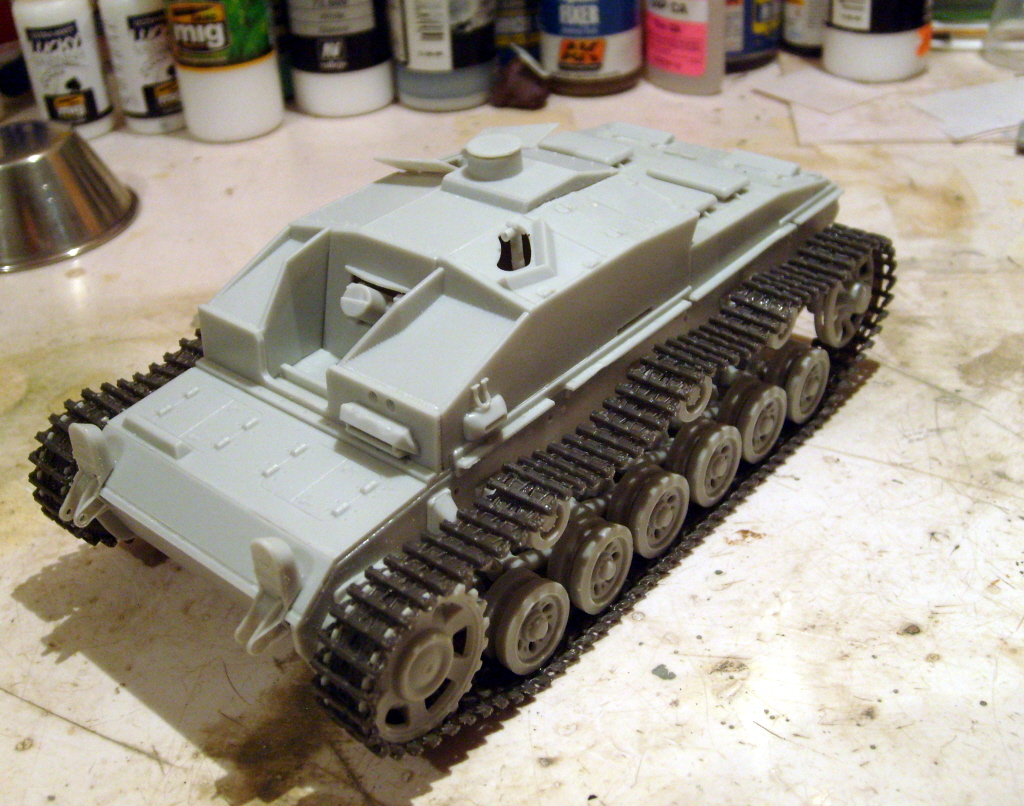
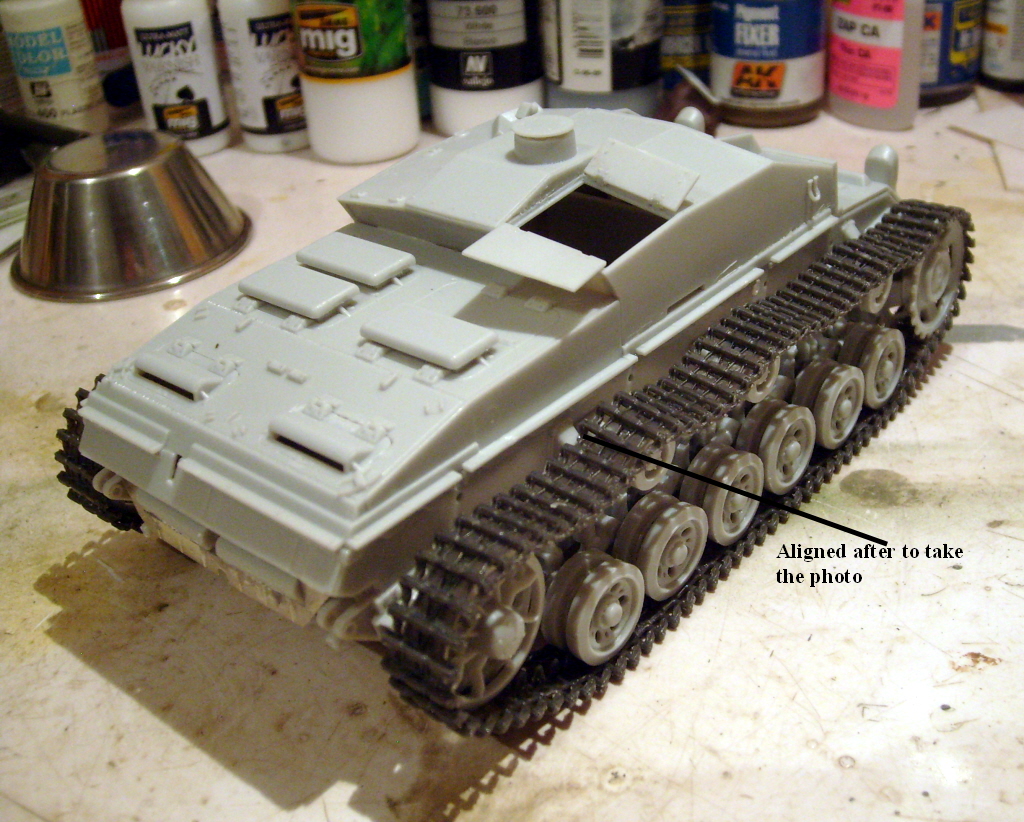
Regards!
Rodolfo
Current Project:
I am building a Kingtiger Ausf. B, Version: March 1945 - AMMO/MIG, 1/35
 .
.


