Very interesting choices here!
That was fast work Jupiterblitz, nice job!
Michael
Air Campaigns
Want to start or join a group build? This is where to start.
Hosted by Frederick Boucher, Michael Satin
OFFICIAL: Eastern Front Campaign
MichaelSatin
Campaigns Administrator
Colorado, United States
Joined: January 19, 2008
KitMaker: 3,909 posts
AeroScale: 2,904 posts
Joined: January 19, 2008
KitMaker: 3,909 posts
AeroScale: 2,904 posts
Posted: Friday, March 29, 2019 - 01:33 AM UTC
brekinapez
Georgia, United States
Joined: July 26, 2013
KitMaker: 2,272 posts
AeroScale: 158 posts
Joined: July 26, 2013
KitMaker: 2,272 posts
AeroScale: 158 posts
Posted: Friday, March 29, 2019 - 06:55 PM UTC
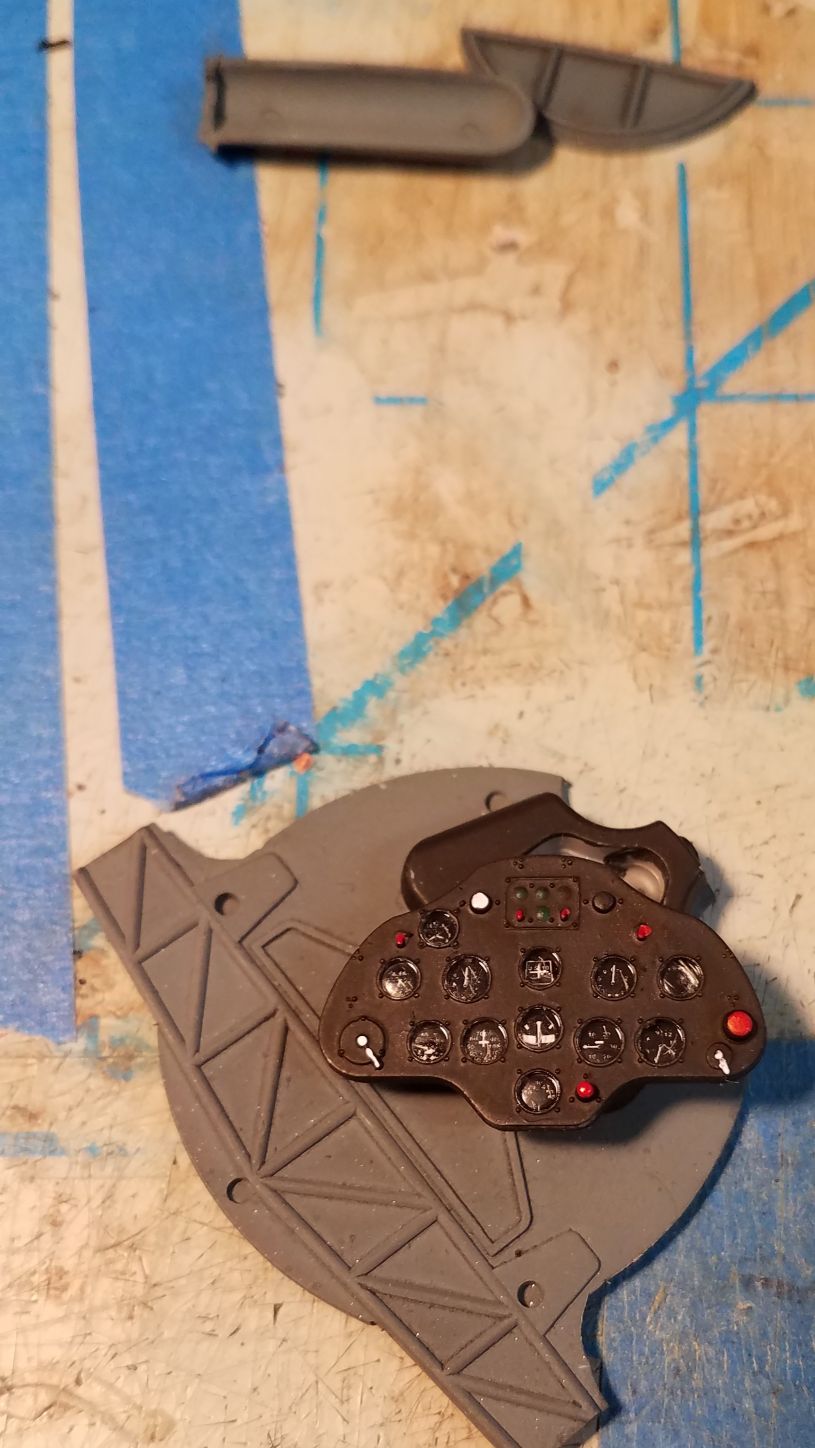
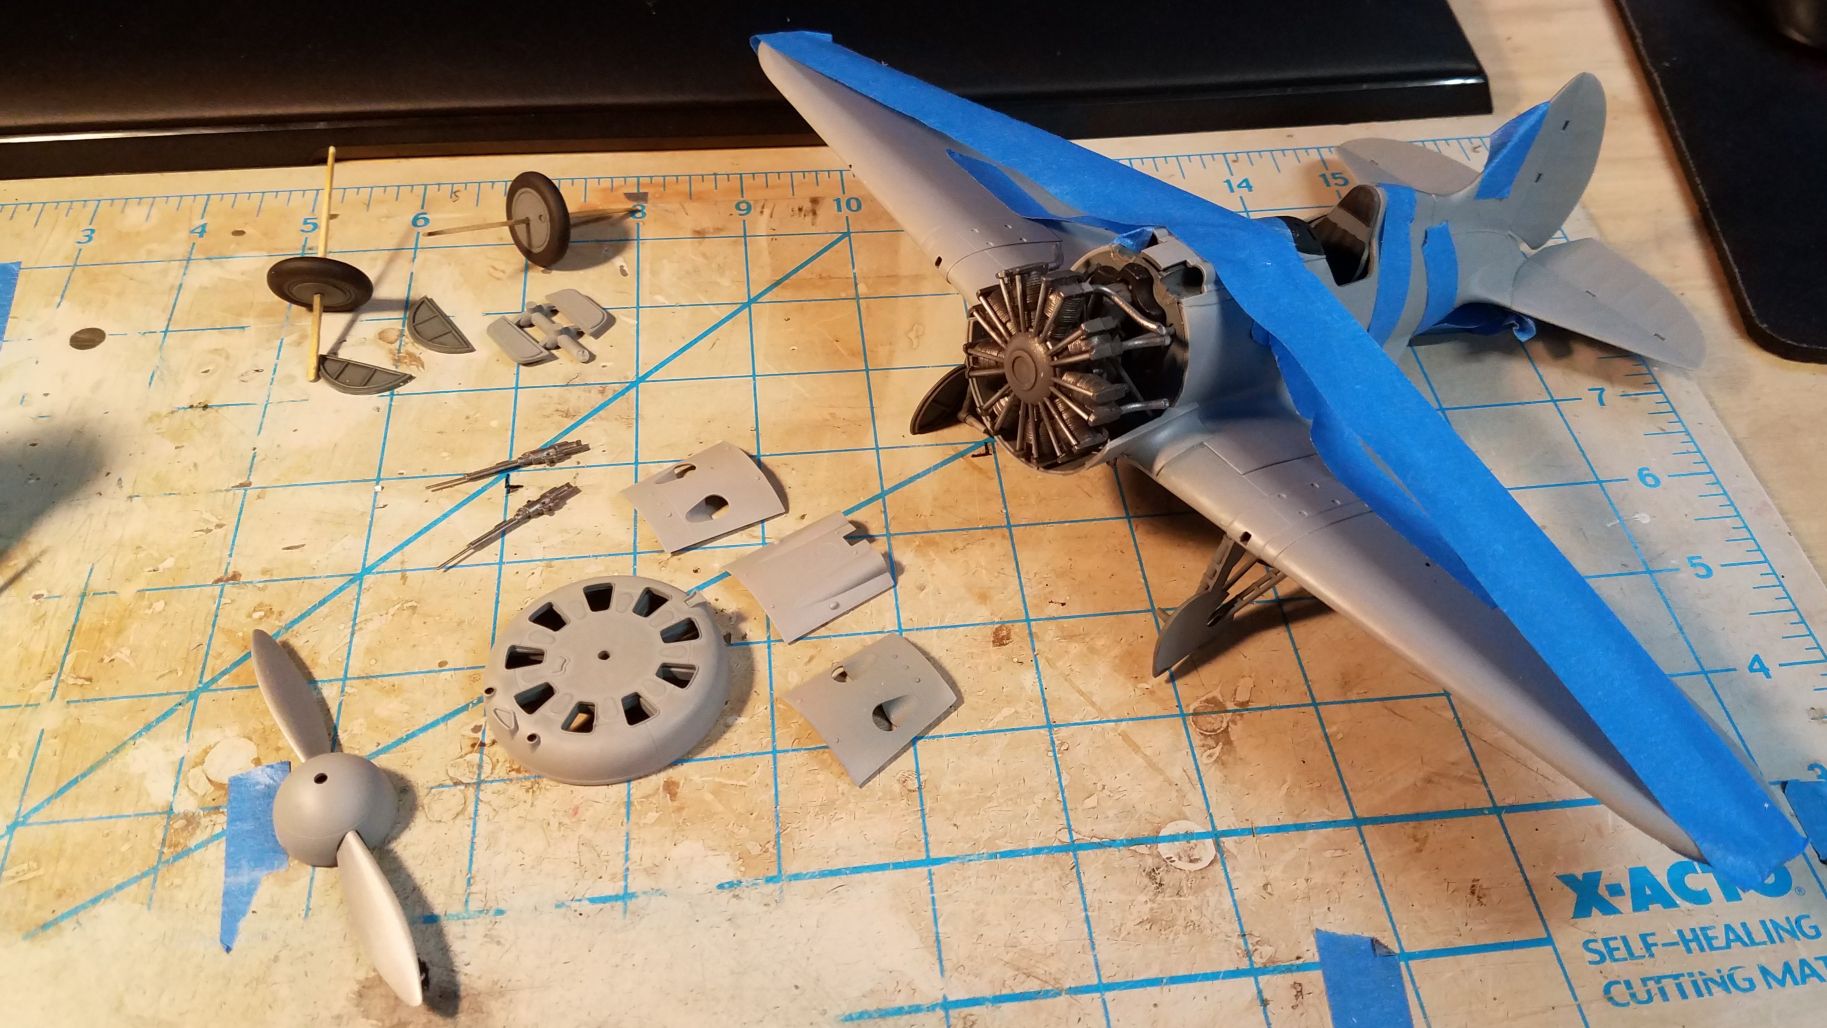
The current state of affairs:
bomber14
New Jersey, United States
Joined: February 02, 2015
KitMaker: 330 posts
AeroScale: 286 posts
Joined: February 02, 2015
KitMaker: 330 posts
AeroScale: 286 posts
Posted: Saturday, March 30, 2019 - 03:24 PM UTC
Quoted Text
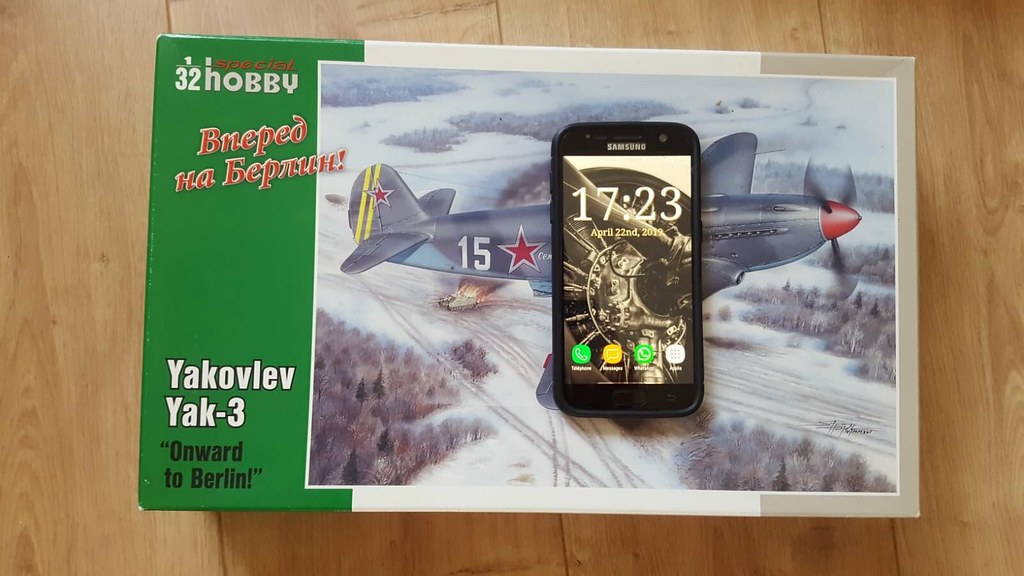
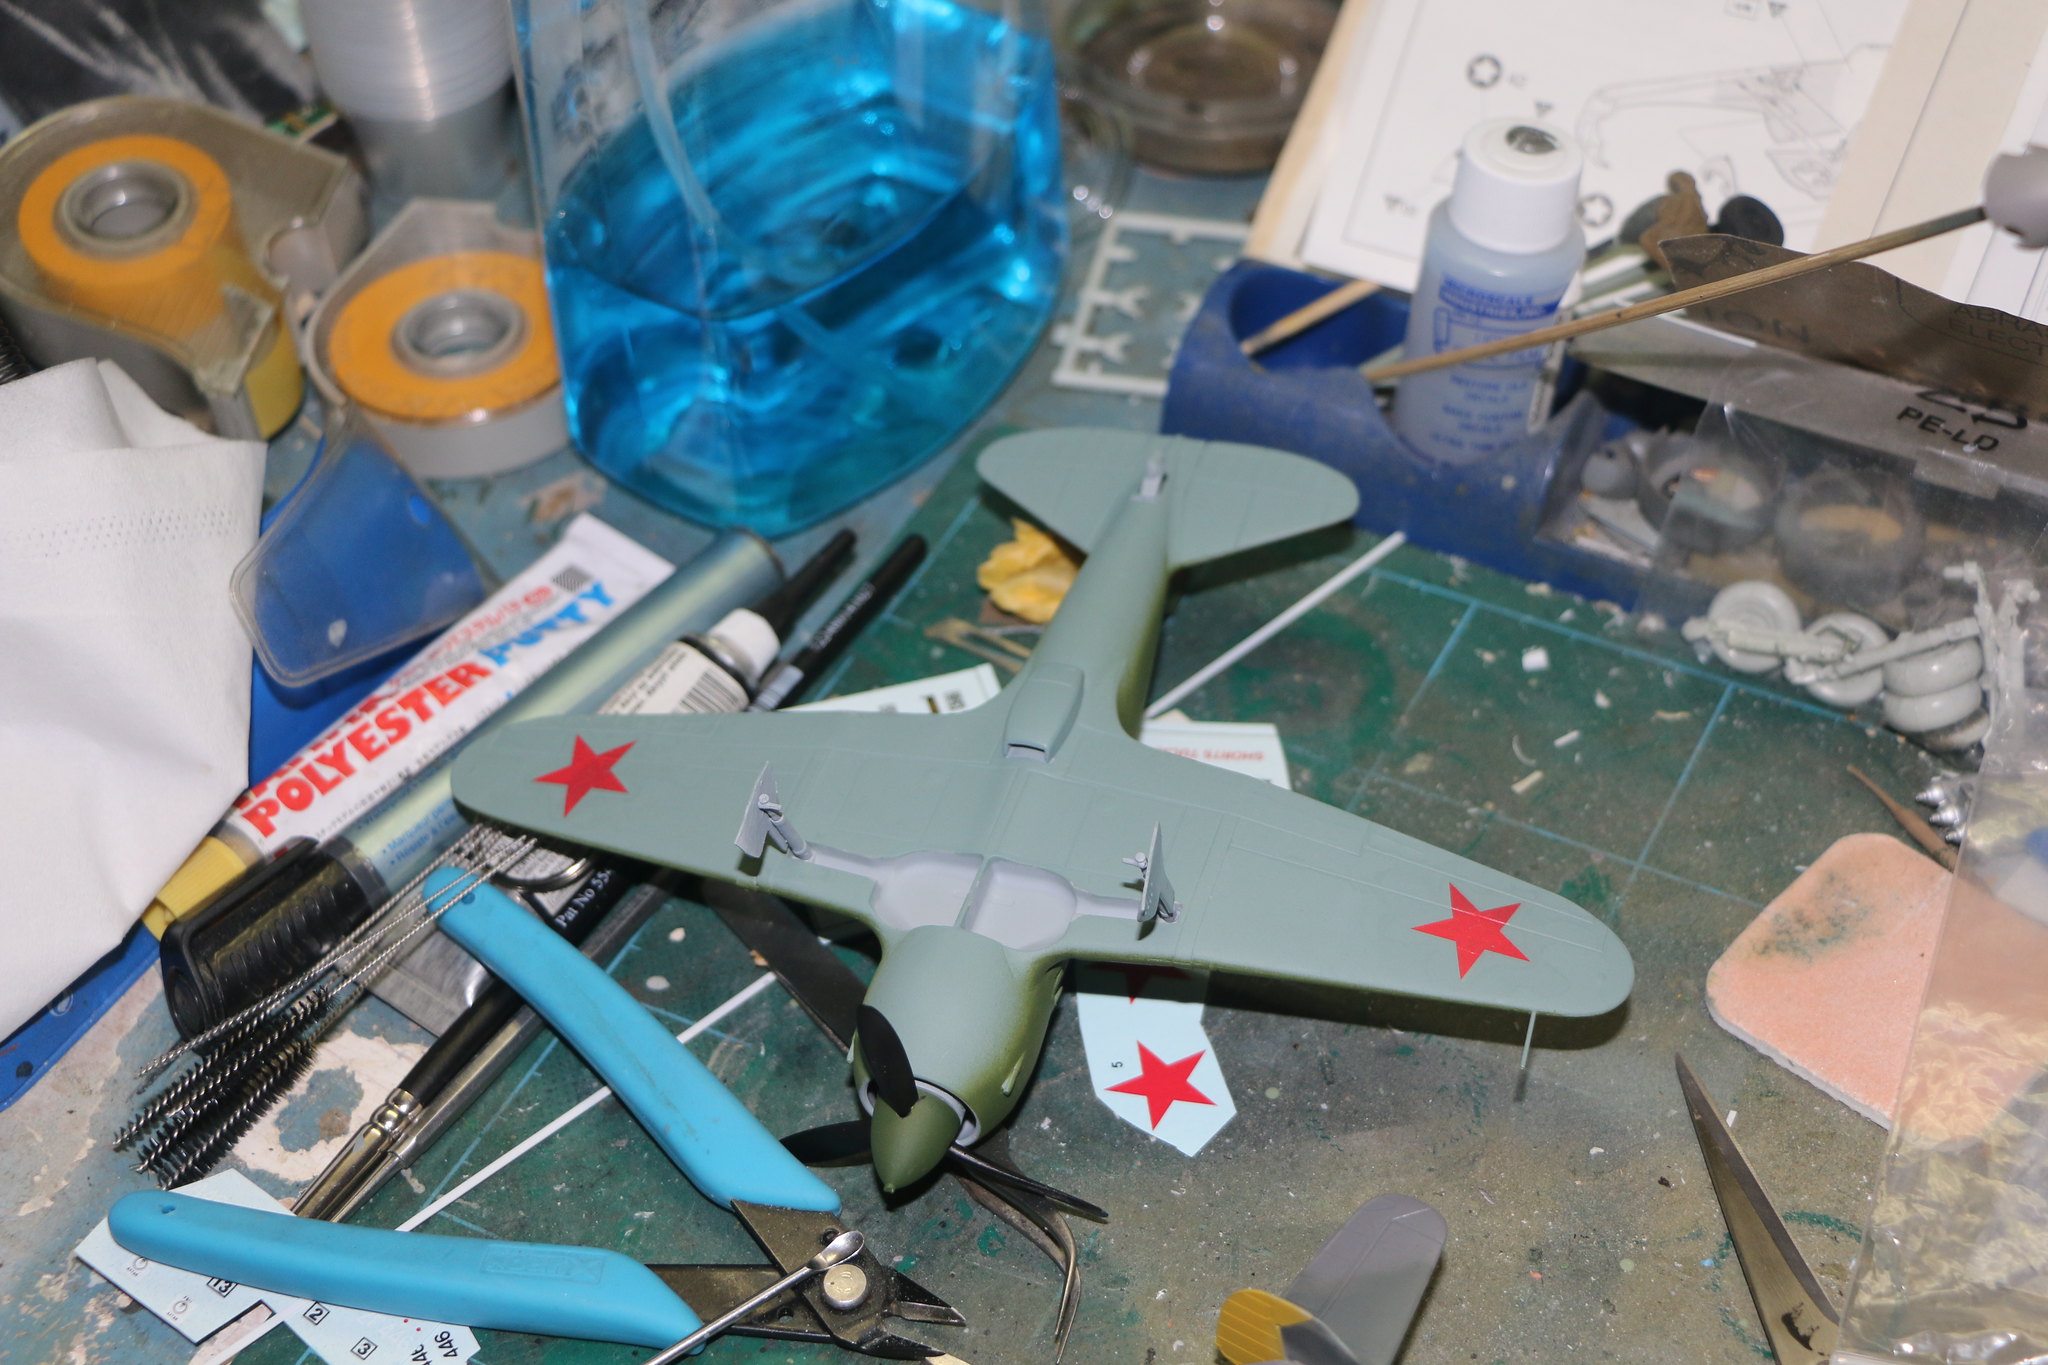
OK! Ill try again. Here is my new entry: Eduard Yak-3.
QUESTION: The plans call for a field gray (green/gray) to be applied to the interior, but IPMS STOCKHOLM state a steel gray. Which would be closer to what was used?
bob i would go with the field gray myself. seems more likely unless the cockpits were unpainted.
Posted: Monday, April 01, 2019 - 10:08 PM UTC
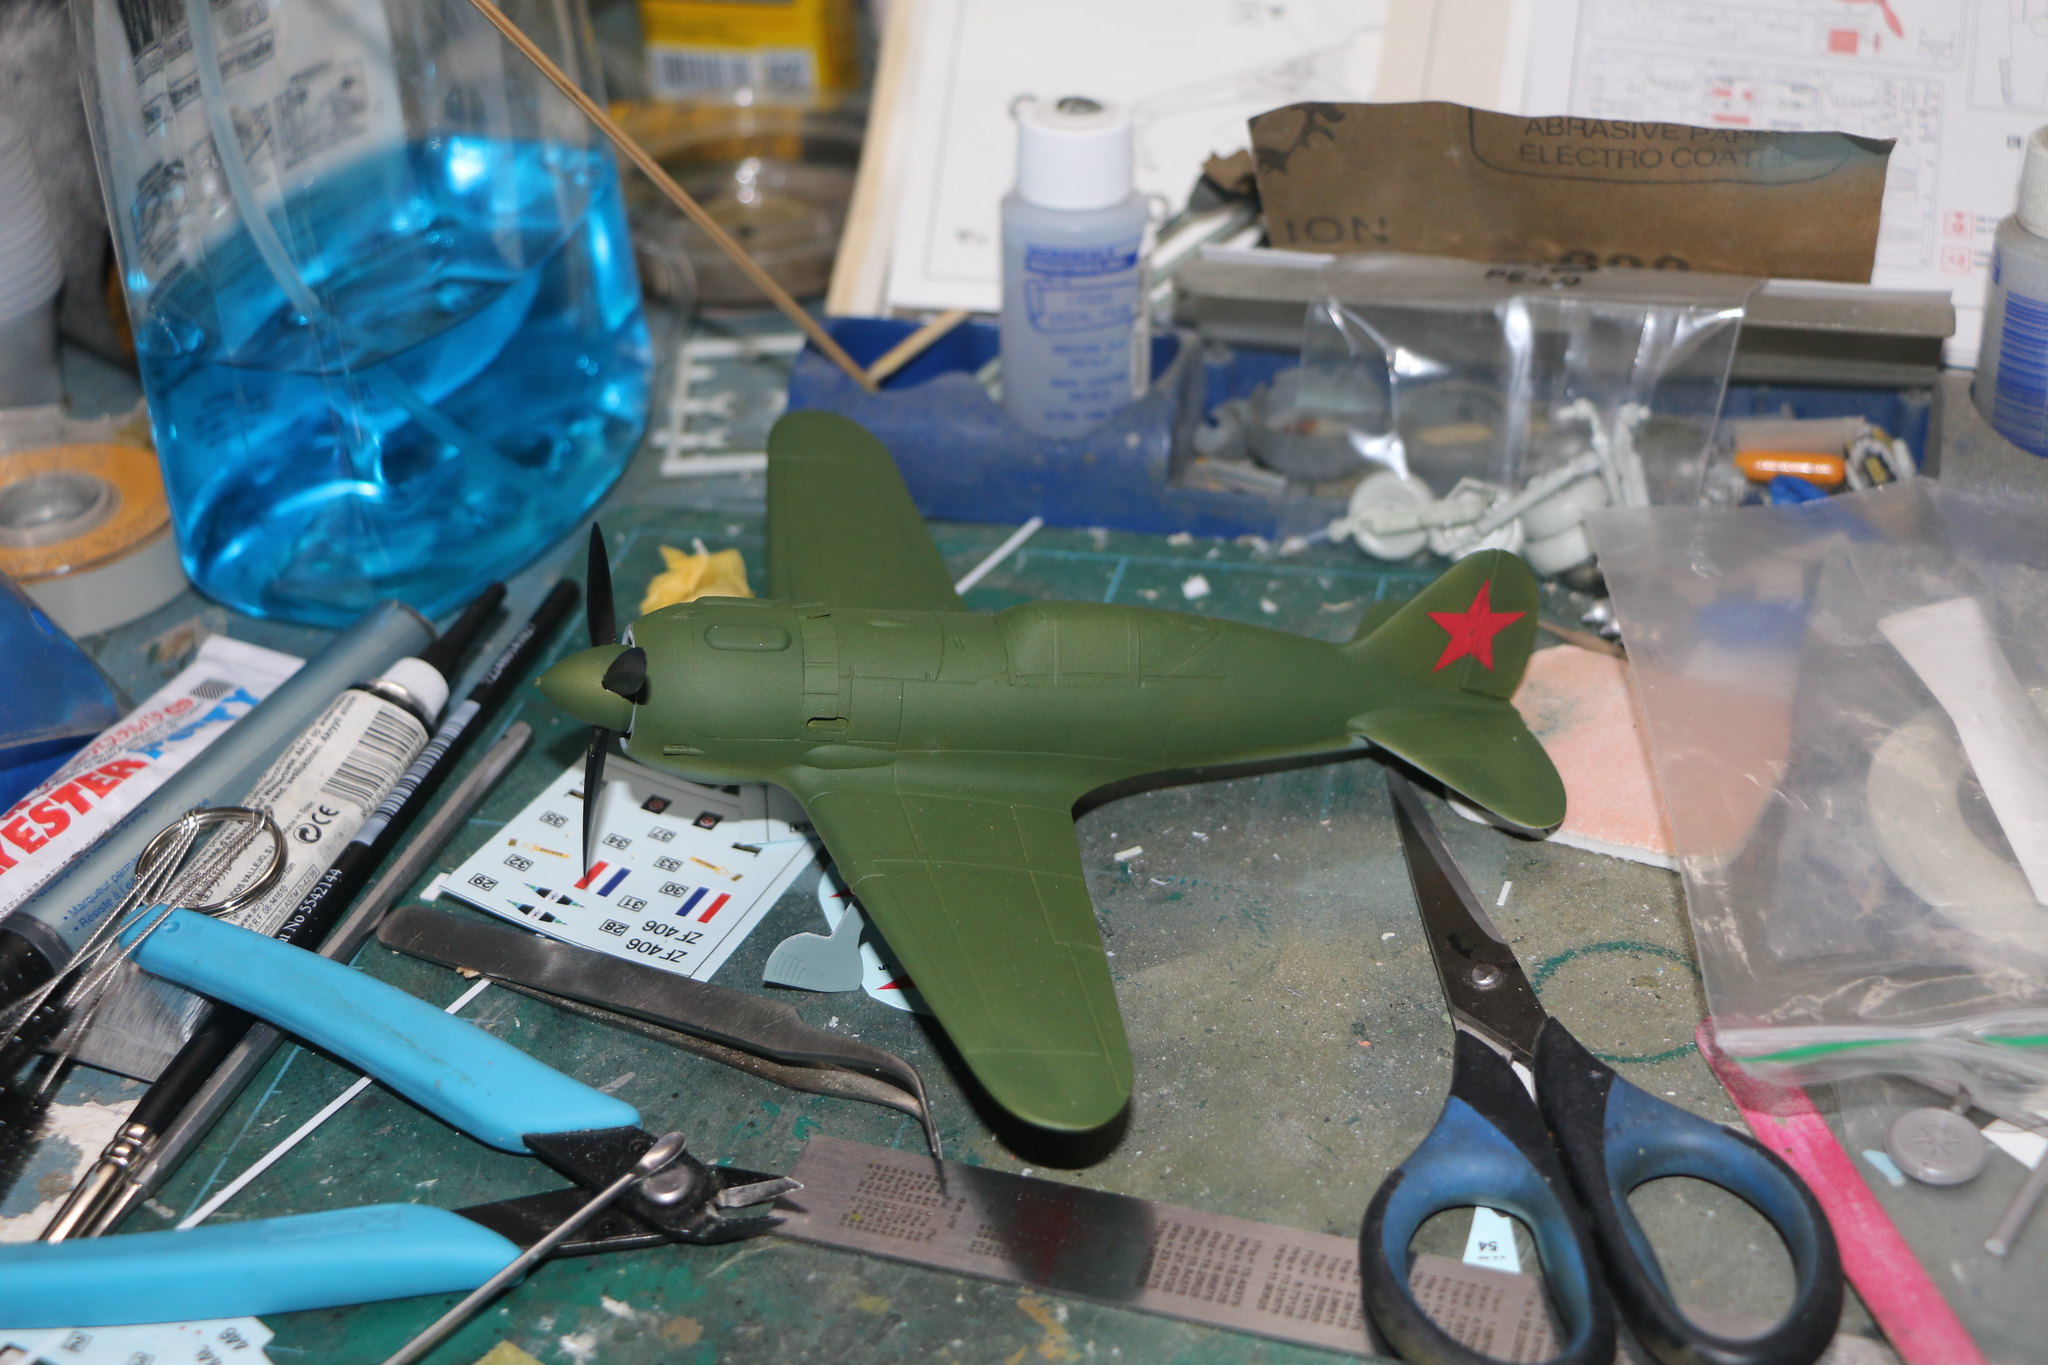
Okay so I'm finished most of the major assembly and I've got a coat of paint on. It's a pretty basic scheme just Russian green over Russian blue. While not exploding with detail it's a nice kit that went together remarkably well with little issues. And it should look great with a panel line wash and some light weathering.
IMG_2216 by Chris WIlson, on Flickr
IMG_2211 by Chris WIlson, on Flickr
IMG_2216 by Chris WIlson, on Flickr
IMG_2211 by Chris WIlson, on Flickr
BlackWidow
European Union
Joined: August 09, 2009
KitMaker: 1,732 posts
AeroScale: 1,336 posts
Joined: August 09, 2009
KitMaker: 1,732 posts
AeroScale: 1,336 posts
Posted: Thursday, April 11, 2019 - 06:28 AM UTC
Like Pasi, I have changed my mind about what to build for this campaign. I won't built another Bf 109 (even if it's Finnish), as I build one for the Foreign Fighters Campaign right now. Instead I'll build a "Büchsenöffner" (tin opener), a Henschel Hs 129 B-2, with quite an impressive scoreboard on the rudder. Show you pics when I start the build.
Until then, happy modelling!
Torsten
Until then, happy modelling!
Torsten
Posted: Thursday, April 11, 2019 - 09:23 AM UTC
Ohhhhhhhhh a Hs129! Whose kit is it Torsten?????
BlackWidow
European Union
Joined: August 09, 2009
KitMaker: 1,732 posts
AeroScale: 1,336 posts
Joined: August 09, 2009
KitMaker: 1,732 posts
AeroScale: 1,336 posts
Posted: Thursday, April 11, 2019 - 11:09 PM UTC
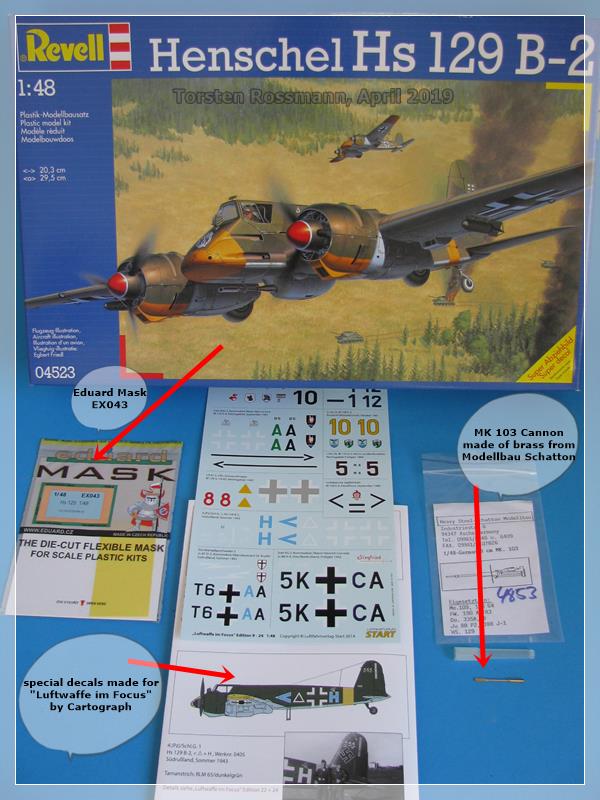
Hasegawa in the Revell Germany box. Chris. Decals are made by Cartograph for the "Luftwaffe im Focus" magazine.
Posted: Friday, April 12, 2019 - 08:28 AM UTC
If my memory serves me correctly the B-2 model had the Bk37 slung underneath?
BlackWidow
European Union
Joined: August 09, 2009
KitMaker: 1,732 posts
AeroScale: 1,336 posts
Joined: August 09, 2009
KitMaker: 1,732 posts
AeroScale: 1,336 posts
Posted: Saturday, April 13, 2019 - 02:31 AM UTC
I hope this helps, Chris.
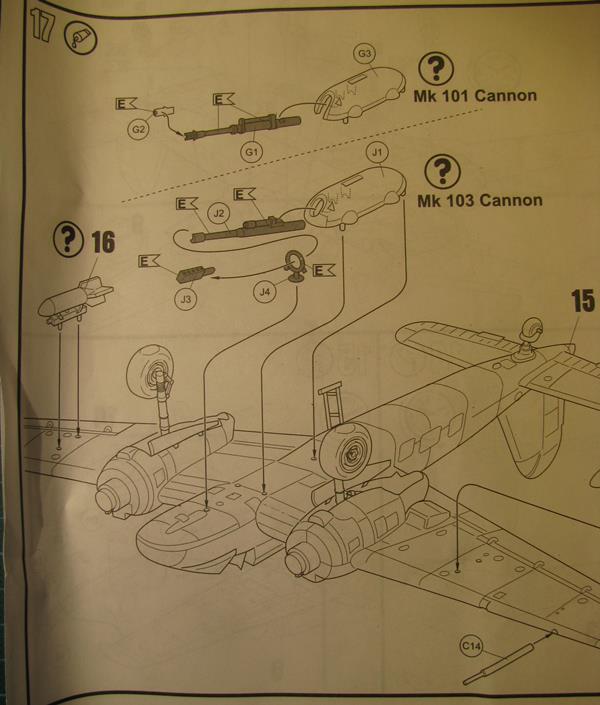
The original aircraft had the MK 103 underneath and I have bought one from Modellbau Schatton made of brass. Looks far more realistic than the plastic part.
Posted: Saturday, April 13, 2019 - 09:39 AM UTC
Yeah it does thanks Torsten I knew it was either the 30mm (Either Mk101 or Mk103)or the Bk37 as they were available in Rustsatz. I'm guessing it was up to the pilot which kit they used. I've also just seen that Zoukei Mura are planning on releasing a 1/32 kit of the Hs129B-2/B-3. Another kit I'd dearly love to buy but can't really justify the cost.
Posted: Saturday, April 13, 2019 - 09:55 AM UTC
Michael, I believe that a PZL 11c from early days would also be included?
MichaelSatin
Campaigns Administrator
Colorado, United States
Joined: January 19, 2008
KitMaker: 3,909 posts
AeroScale: 2,904 posts
Joined: January 19, 2008
KitMaker: 3,909 posts
AeroScale: 2,904 posts
Posted: Saturday, April 13, 2019 - 10:57 AM UTC
Quoted Text
Michael, I believe that a PZL 11c from early days would also be included?
Absolutely Chaz!
Michael
Posted: Saturday, April 13, 2019 - 01:18 PM UTC
I was just looking for an excuse!!
PZL P.11c is underway!!
RadekZ
Warszawa, Poland
Joined: March 12, 2013
KitMaker: 125 posts
AeroScale: 85 posts
Joined: March 12, 2013
KitMaker: 125 posts
AeroScale: 85 posts
Posted: Sunday, April 14, 2019 - 08:04 PM UTC
Hi,
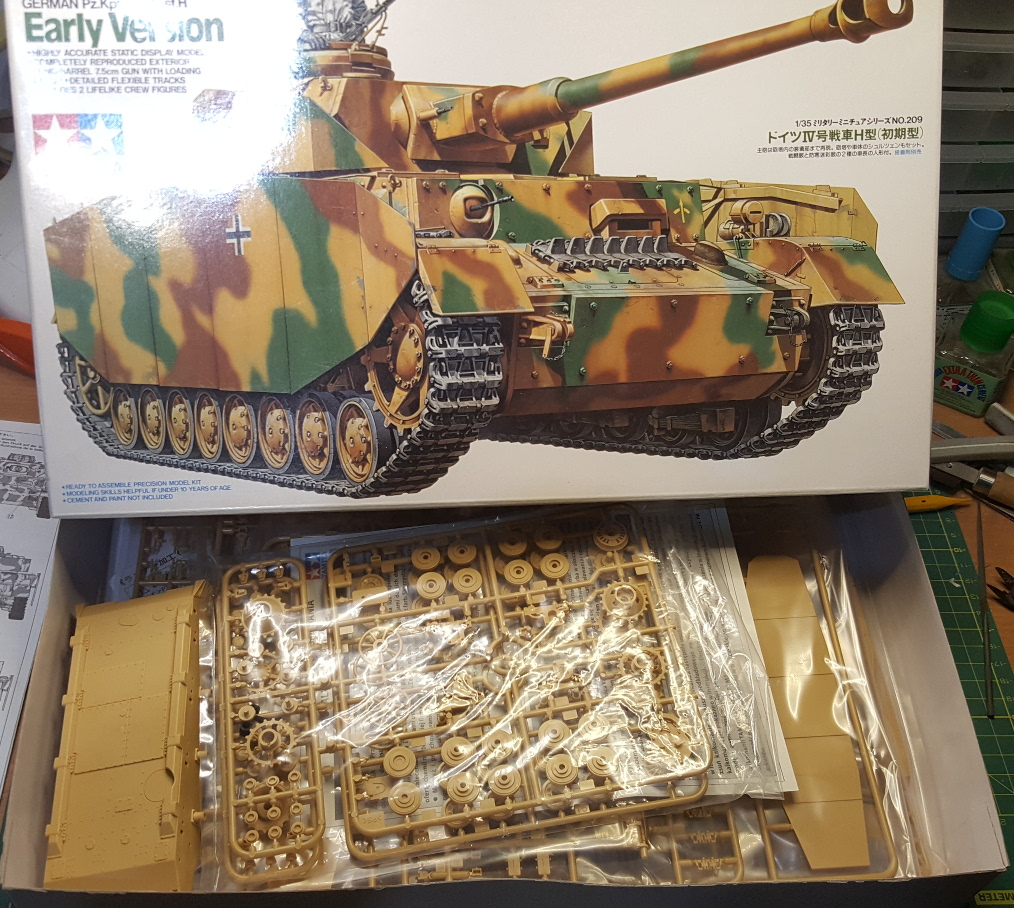
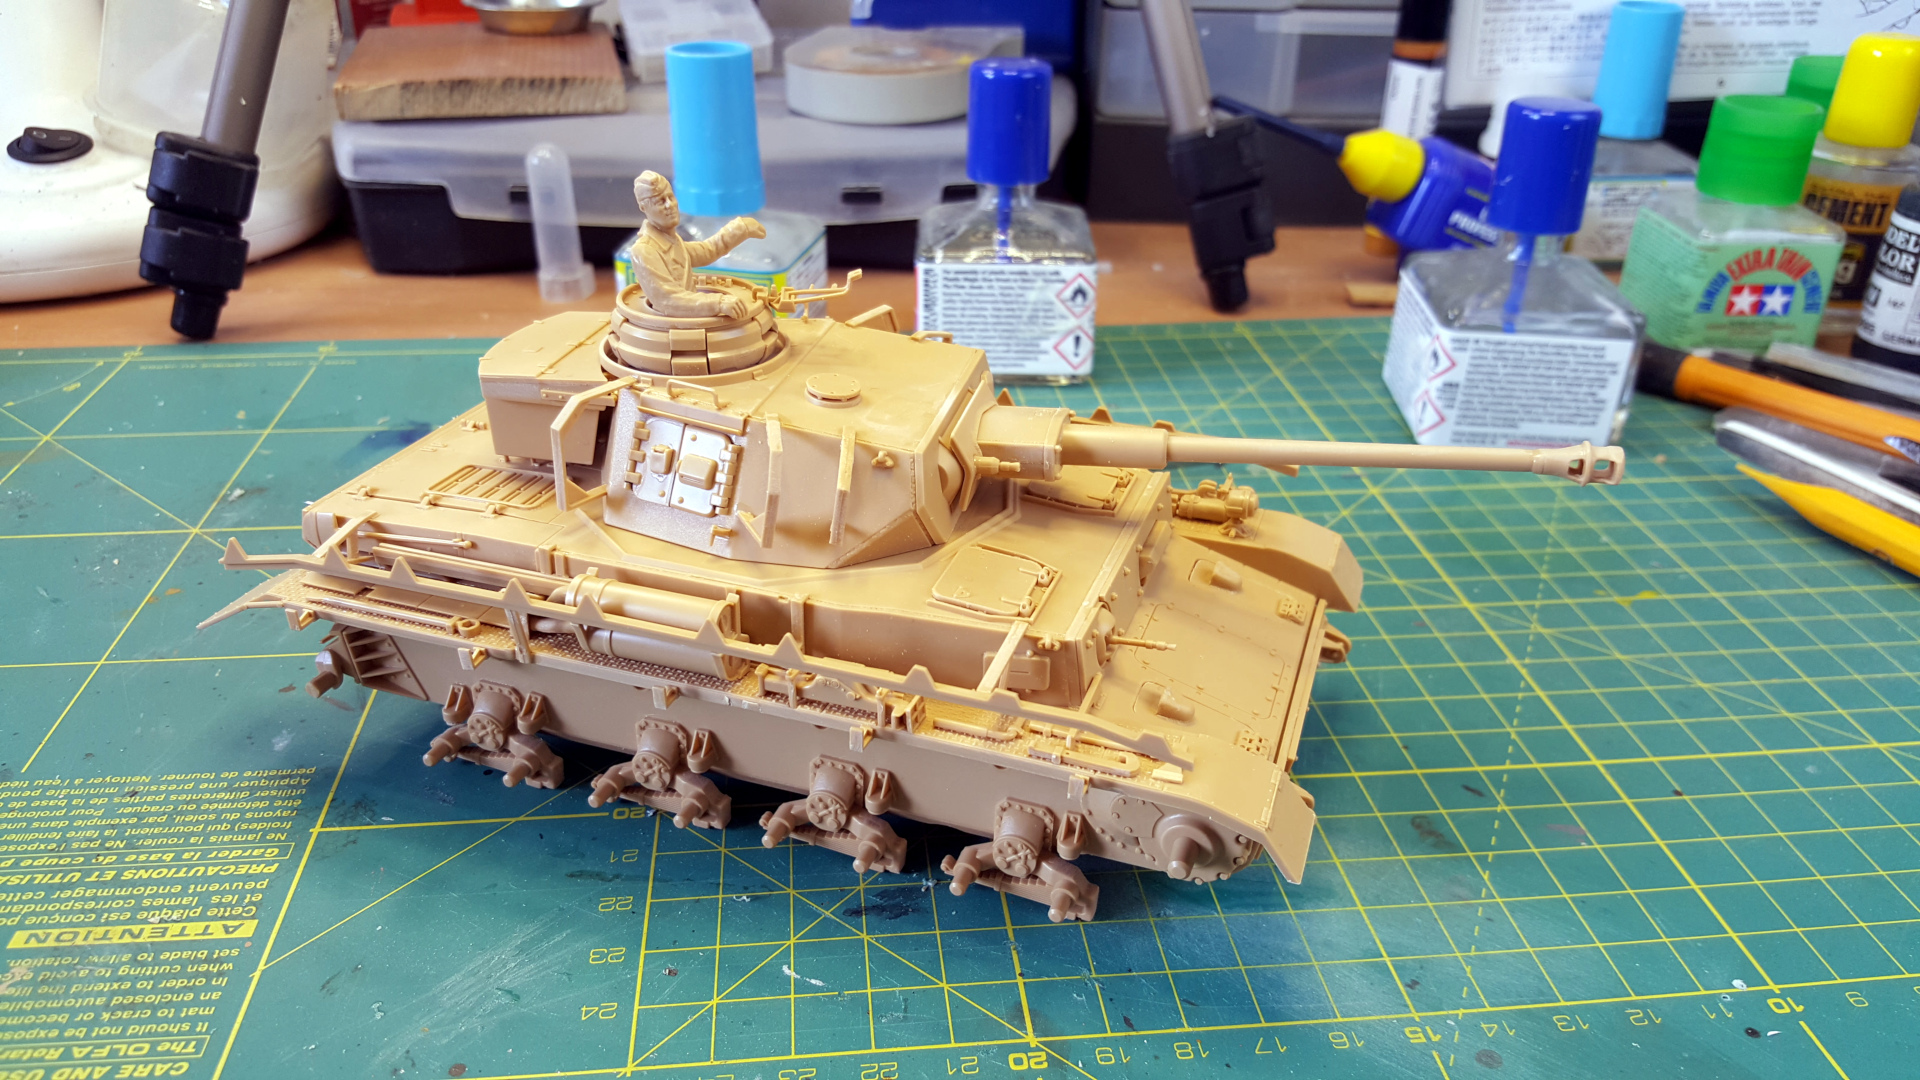
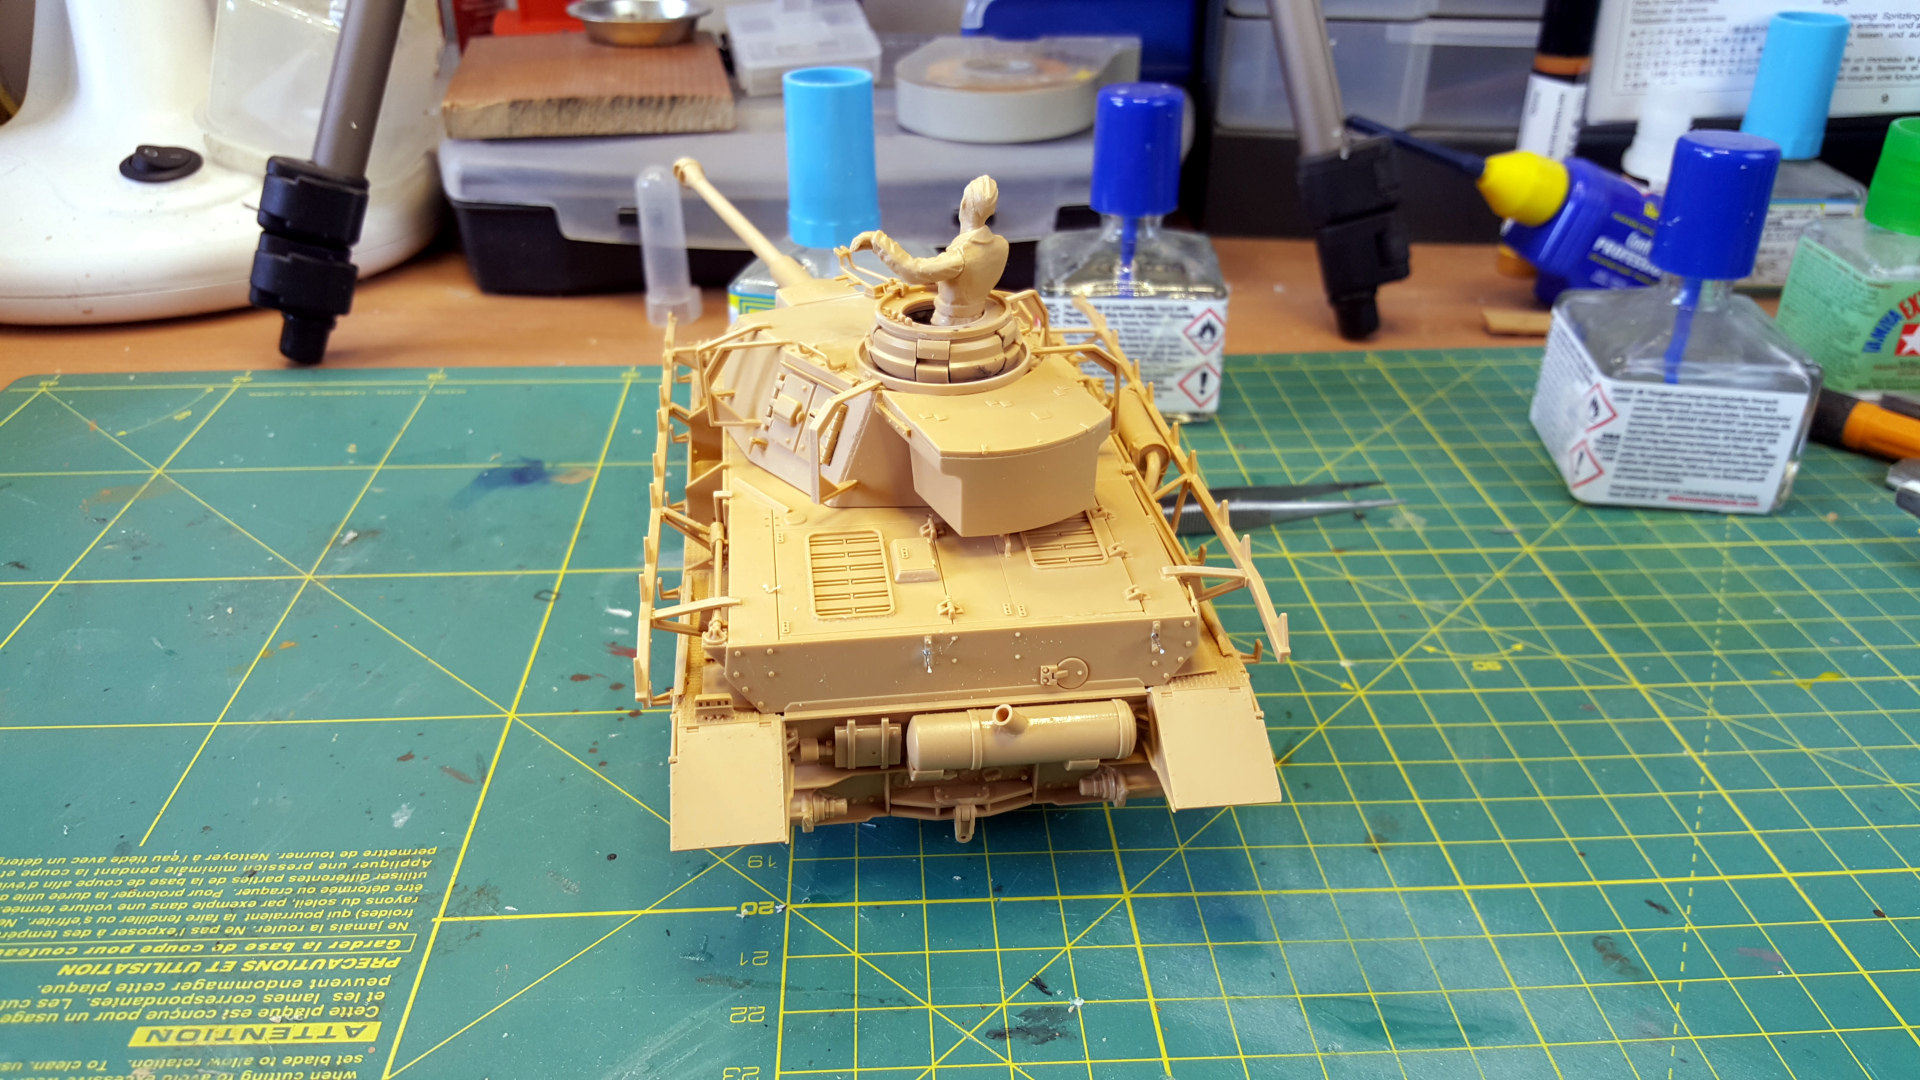
I'll be joining the campaign with Tamiya's Pz.Kpfw IV :
I wanted to build other other stuff (PZL P.23 Karas from IBG), but it would probably lead to another unfinished buil , so I need to turn on easy mode
Cheers,
Radek
I'll be joining the campaign with Tamiya's Pz.Kpfw IV :
I wanted to build other other stuff (PZL P.23 Karas from IBG), but it would probably lead to another unfinished buil , so I need to turn on easy mode
Cheers,
Radek
FirstSergeant
Michigan, United States
Joined: January 02, 2012
KitMaker: 139 posts
AeroScale: 70 posts
Joined: January 02, 2012
KitMaker: 139 posts
AeroScale: 70 posts
Posted: Tuesday, April 16, 2019 - 11:23 AM UTC
Greetings,
Making progress on my Yak-9. Photos show some detail, usual fare for this type kit. Primer, cockpit color, some minor assembly. More to follow.
Cheers,
Firstsergeant
Making progress on my Yak-9. Photos show some detail, usual fare for this type kit. Primer, cockpit color, some minor assembly. More to follow.
Cheers,
Firstsergeant
BlackWidow
European Union
Joined: August 09, 2009
KitMaker: 1,732 posts
AeroScale: 1,336 posts
Joined: August 09, 2009
KitMaker: 1,732 posts
AeroScale: 1,336 posts
Posted: Sunday, April 21, 2019 - 01:22 AM UTC
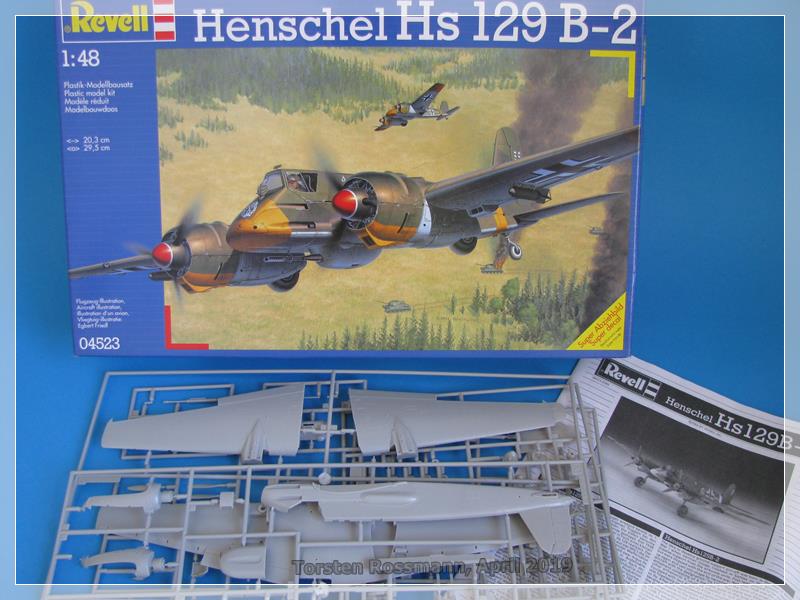
This will be my build for this campaign:
Henschel Hs 129 B-2 from Revell Germany (ex Hasegawa) in 1/48. I was surprised to read that this kit was issued by Revell in 2003 and I bought it when it came out .... Man, I'm old ....
.... some extra goodies for this build ....
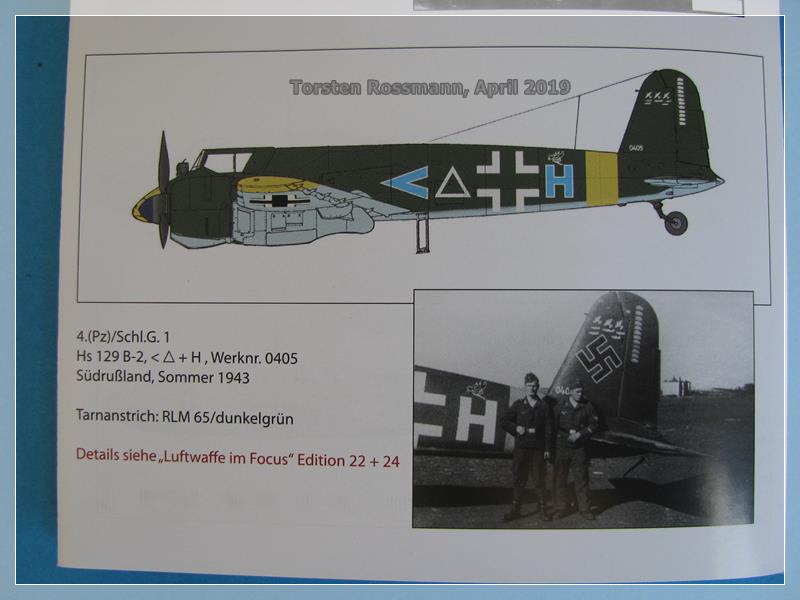
.... and a closer look at the decals ....
.... I've written an e-mail to the publisher Axel Urbanke about the upperside camo, because here it says just "Dunkelgrün", which would be RLM 71 but in the magazine the profile is painted in Schwarzgrün RLM 70 and Dunkelgrün RLM 71. Just got an answer from Mr. Urbanke and he told me that fresh from the factory the camo would most likely have been RLM 70/71 but during it's long service and the weather conditions (this aircraft got lost only on the 14. January 1945!) both colours would look more or less alike. As I build my models fresh from the factory with a dozen kill marks I'll paint this bird in 70/71.
Happy modelling and happy Easter!
Torsten
Posted: Sunday, April 21, 2019 - 10:32 AM UTC
Quoted Text
Hi all,
..... The kit seems to have everything except a decent instrument panel...
Hi John, interesting choice, I think about doing this fighter, too, but in 1:72. Have one by MPM in my stash.
For the instrument panel you can try Yahu Models, they should have it, but I don't know for sure yet.
RhinoSpit
Bas-Rhin, France
Joined: September 22, 2016
KitMaker: 224 posts
AeroScale: 191 posts
Joined: September 22, 2016
KitMaker: 224 posts
AeroScale: 191 posts
Posted: Monday, April 22, 2019 - 09:10 AM UTC
My entry for this campaign
Antilles
Nordrhein-Westfalen, Germany
Joined: March 22, 2015
KitMaker: 671 posts
AeroScale: 614 posts
Joined: March 22, 2015
KitMaker: 671 posts
AeroScale: 614 posts
Posted: Thursday, April 25, 2019 - 03:28 AM UTC
Hello fellow modelers,
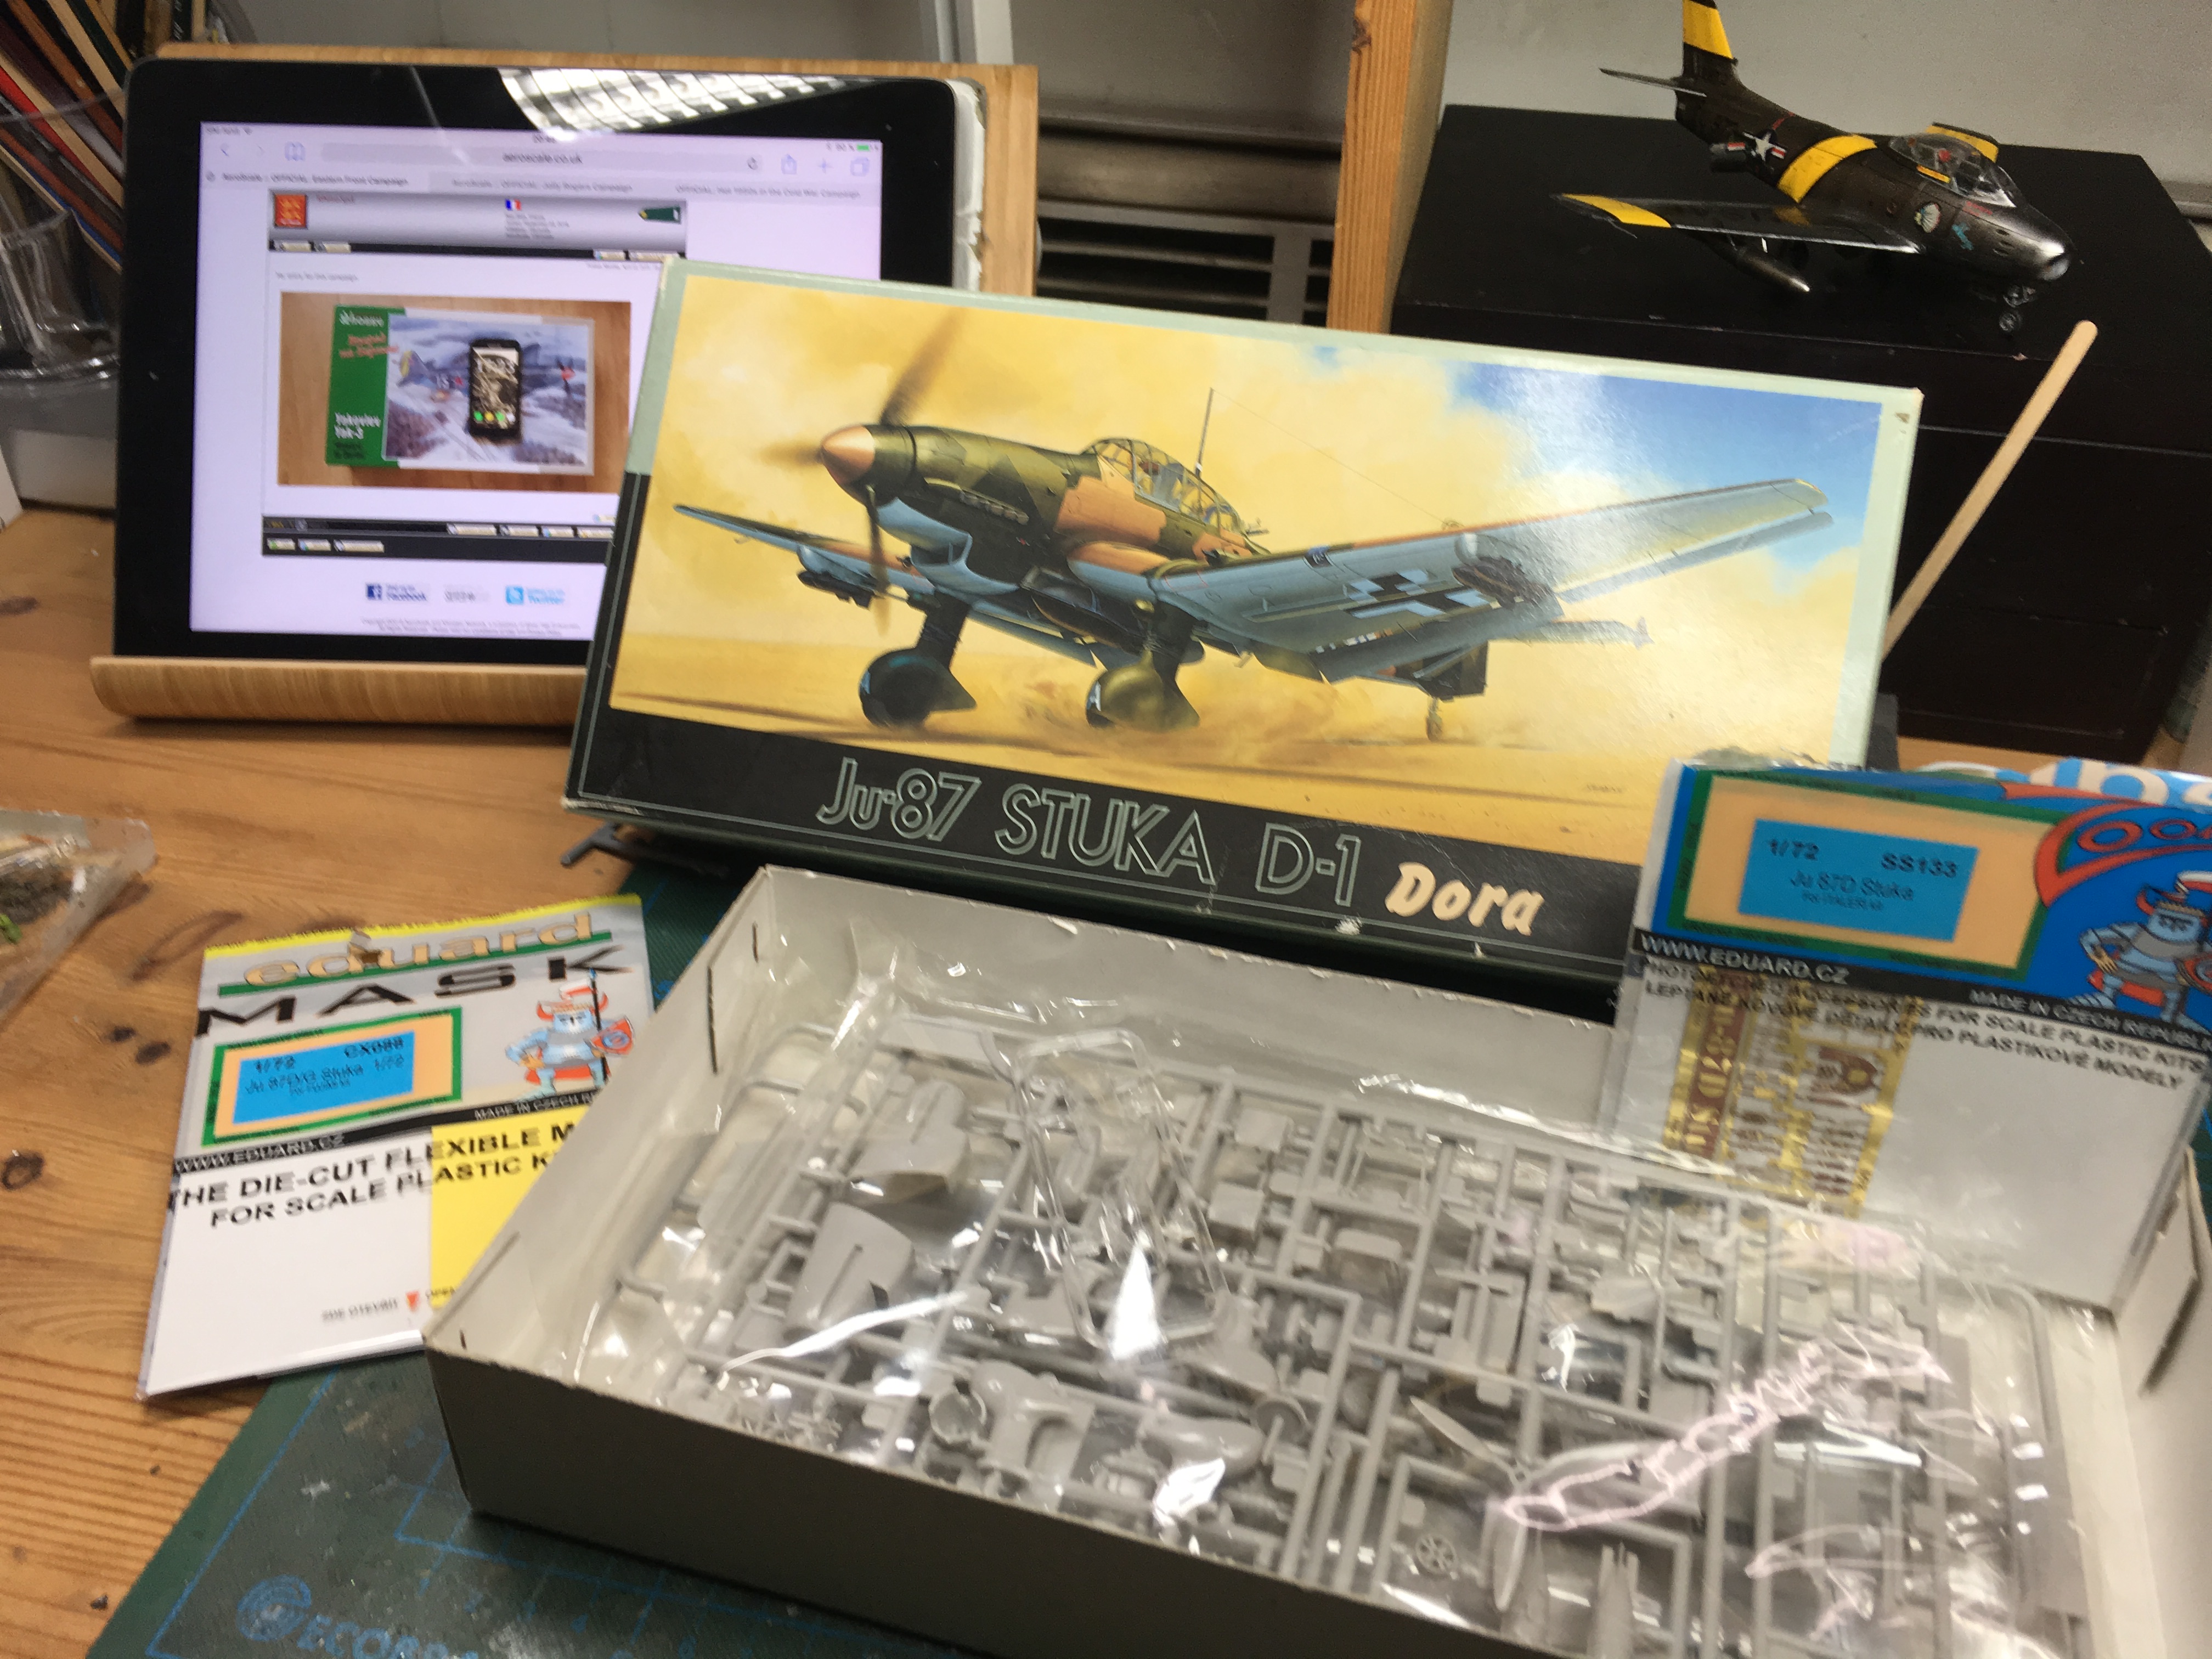
there are lots of lovely kits in this campaign. I will add a Junker Ju87 D. It is the old Fujimi kit in 1/72 scale. I will go for the markings of 2./St.G2 Immelmann though,the markings of Fujimi seem not entirely correct to me.
Here is the start picture:
Have fun
Oliver
there are lots of lovely kits in this campaign. I will add a Junker Ju87 D. It is the old Fujimi kit in 1/72 scale. I will go for the markings of 2./St.G2 Immelmann though,the markings of Fujimi seem not entirely correct to me.
Here is the start picture:
Have fun
Oliver
BlackWidow
European Union
Joined: August 09, 2009
KitMaker: 1,732 posts
AeroScale: 1,336 posts
Joined: August 09, 2009
KitMaker: 1,732 posts
AeroScale: 1,336 posts
Posted: Sunday, April 28, 2019 - 06:09 AM UTC
Nice choice, Oliver. I think I also need to build a Ju 87 in the future. Have a B and a D (Romanian AF) in stash - both 1/48.
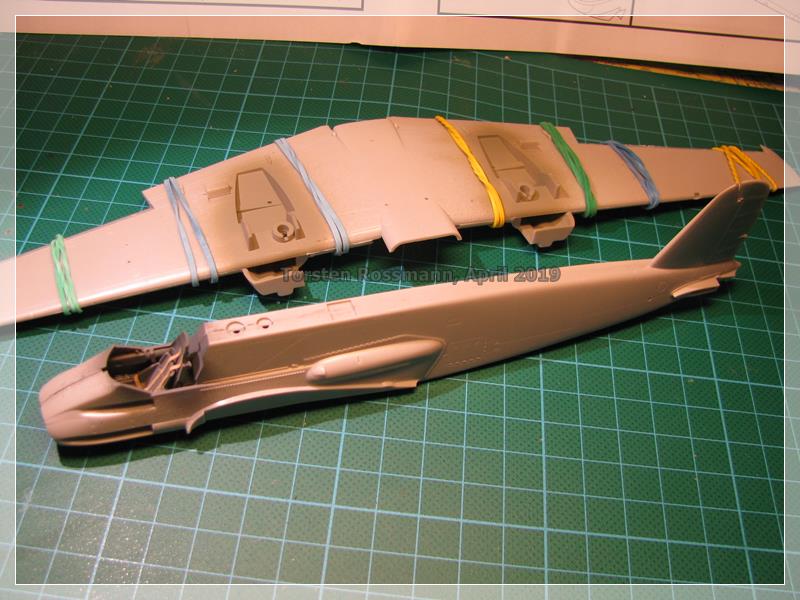
Have started my build on Friday and this is how far I've come today. The fit of the cockpit in the fuselage is veeery tight, so I couldn't use "ordinary" glue. First I was happy when I got both halves well together for a test fit and then I decided to use ethylacetate to glue the halves together step by step. The cockpit is not glued to anything but it won't get lost .... In the real aircraft the cockpit was also so narrow that some of the instruments where placed outside on the engine nacelles. Tomorrow I will sand the parts.
Have a nice Sunday!
Torsten
goodn8
Berlin, Germany
Joined: October 12, 2008
KitMaker: 709 posts
AeroScale: 651 posts
Joined: October 12, 2008
KitMaker: 709 posts
AeroScale: 651 posts
Posted: Sunday, April 28, 2019 - 07:33 AM UTC
Hi there!
Very fine choices and work here, guys!
I planned a Ju87 too but forgot to show up ( Oliver , btw: NICE Sabre!) and will start with Heller`s old 1/72(?) kit.
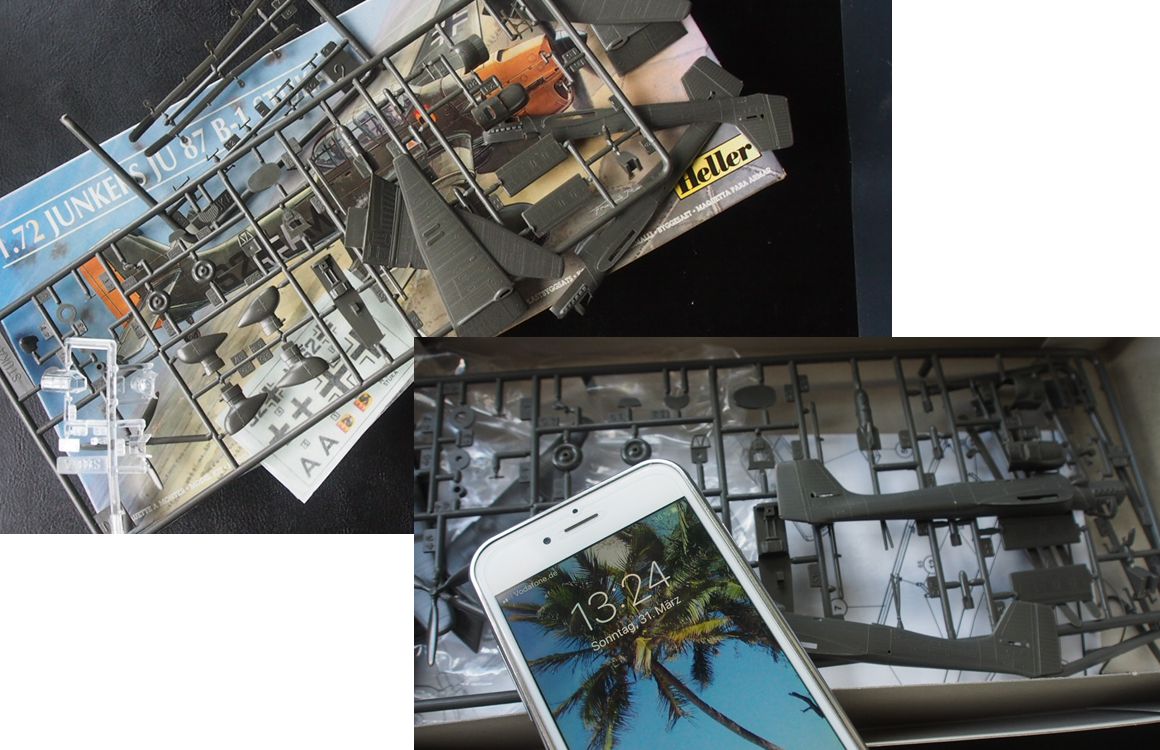
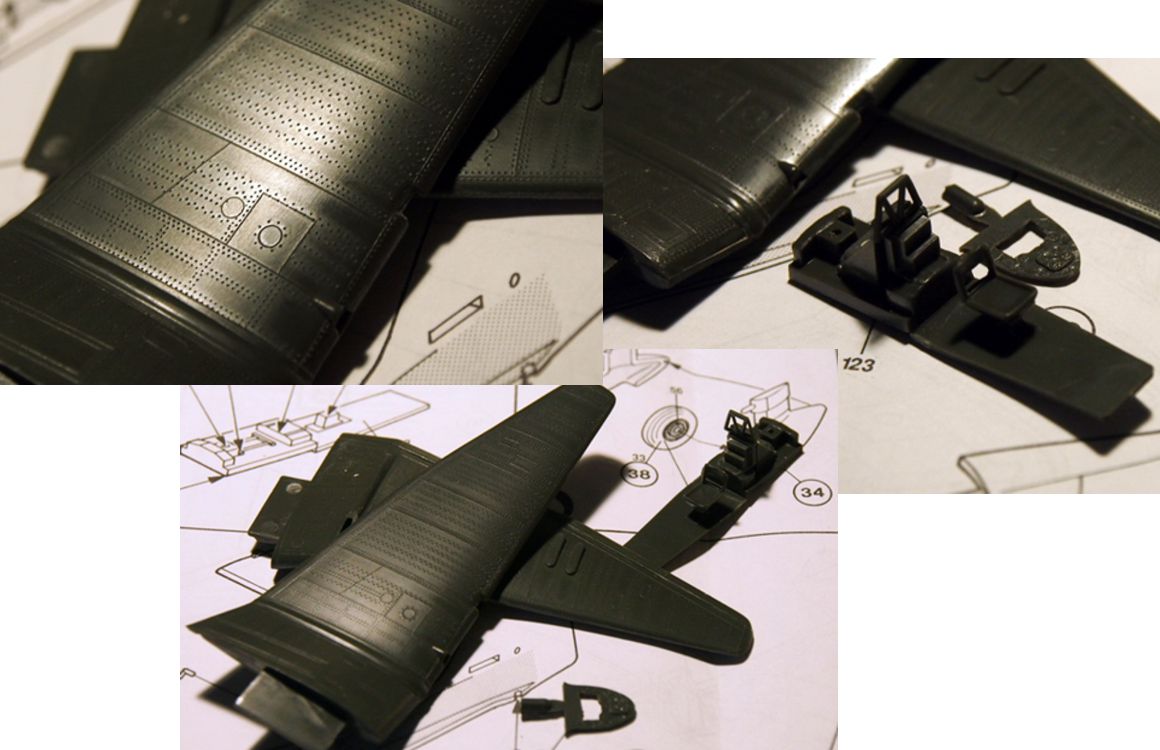
Despite it's known issues (scale is more 1/100, missing/wrong details, Type? and decals) it should represent with ist's yellow markings a unit from the Balkan/Eastern front.
Full of raised rivets but they are fantastic molded as the whole kit is for it's age. Very crisp styrene and only a bit of flash, good fit so far.
small start...
Th mas
FirstSergeant
Michigan, United States
Joined: January 02, 2012
KitMaker: 139 posts
AeroScale: 70 posts
Joined: January 02, 2012
KitMaker: 139 posts
AeroScale: 70 posts
Posted: Sunday, April 28, 2019 - 11:31 AM UTC
Greetings,
I'm reporting in with more progress...
Filler applied from nose to cockpit and from tail wheel to where wing joins fuselage. Primed, painted underside with Tamiya light blue, top side flat earth, camo olive green. Masking was done with graph paper and pencil, cut out with scissors, tape to airplane. Markings will be white 14, Marcel Lefevre of Normandy-Nieman Group. Researched several websites, camo is a good representation of what I have observed. More to follow.
Cheers,
Firstsergeant
BlackWidow
European Union
Joined: August 09, 2009
KitMaker: 1,732 posts
AeroScale: 1,336 posts
Joined: August 09, 2009
KitMaker: 1,732 posts
AeroScale: 1,336 posts
Posted: Friday, May 03, 2019 - 06:49 AM UTC
Thomas, that's quite a "Nietenmonster" ....
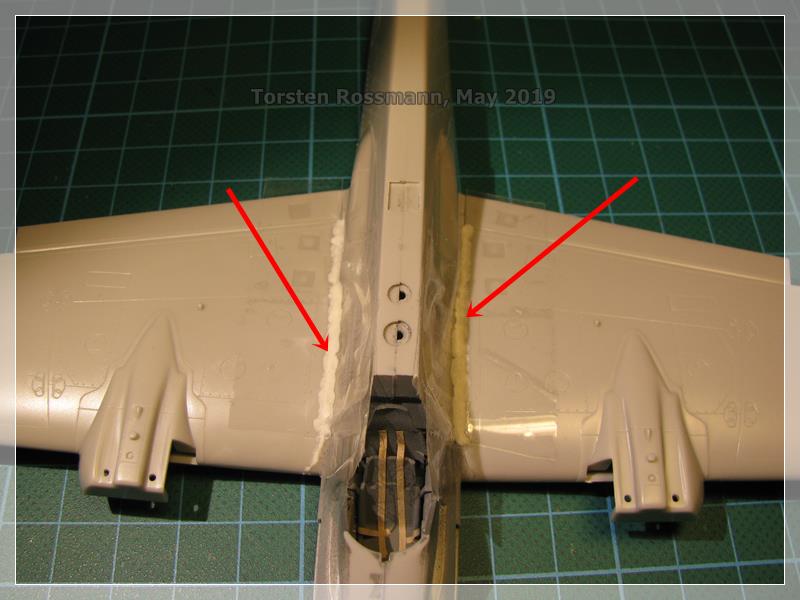
Well, I came a bit further with my "Tin Opener" and it gives me a lot of filling and sanding fun ....
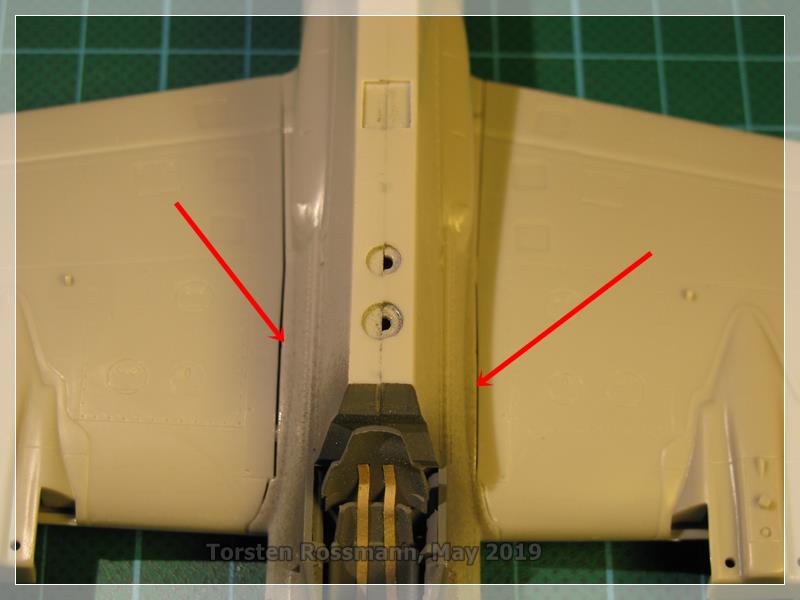
There are big gaps on both sides of the wing root area which can compete with WW 1 trenches ....
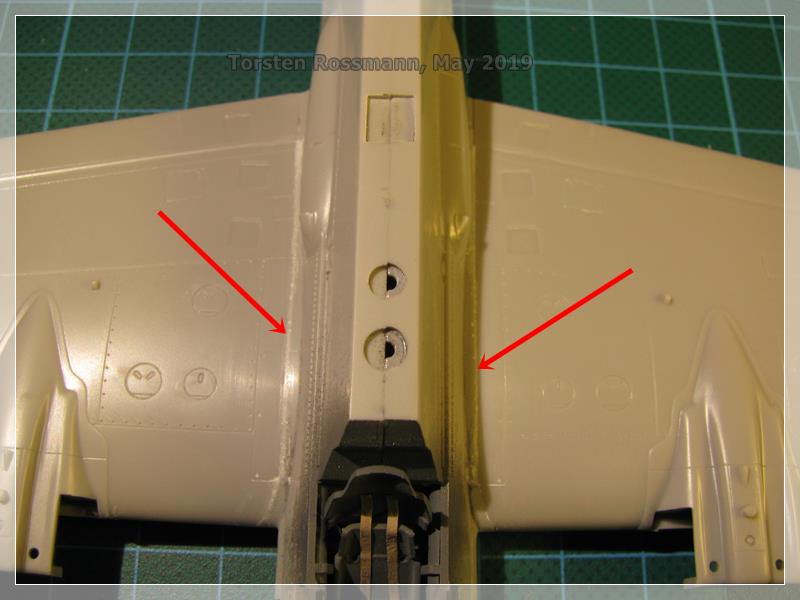
.... okay, here I go. First clear tape around the area of the gaps to save panels and engravings when sanding. Afterwards my self made putty. Looks horrible but it works. Have done it on several other builds ....
.... the next day it's sanding fun. Doesn't take long, maybe 15 to 20 minutes and it looks like this. Sanding on the clear tape is possible for some time until it tears apart ....
.... nearly no damage to the engravings ....
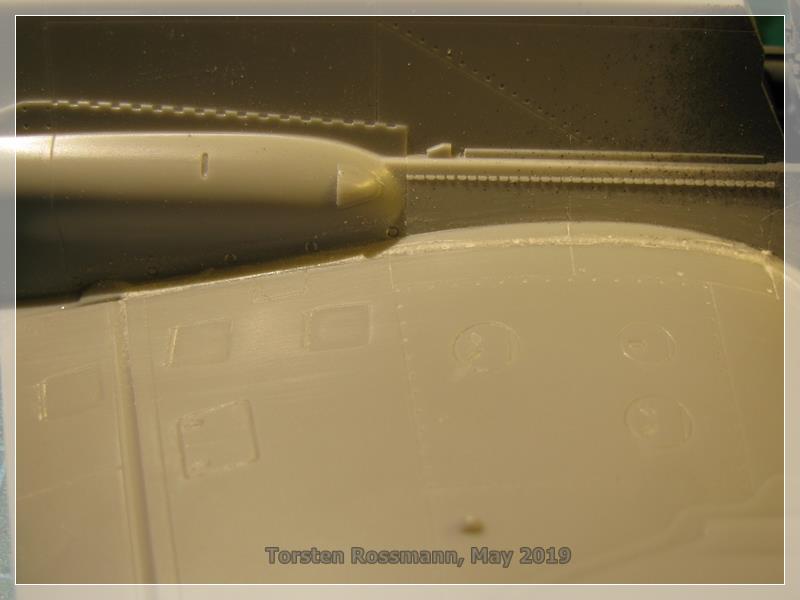
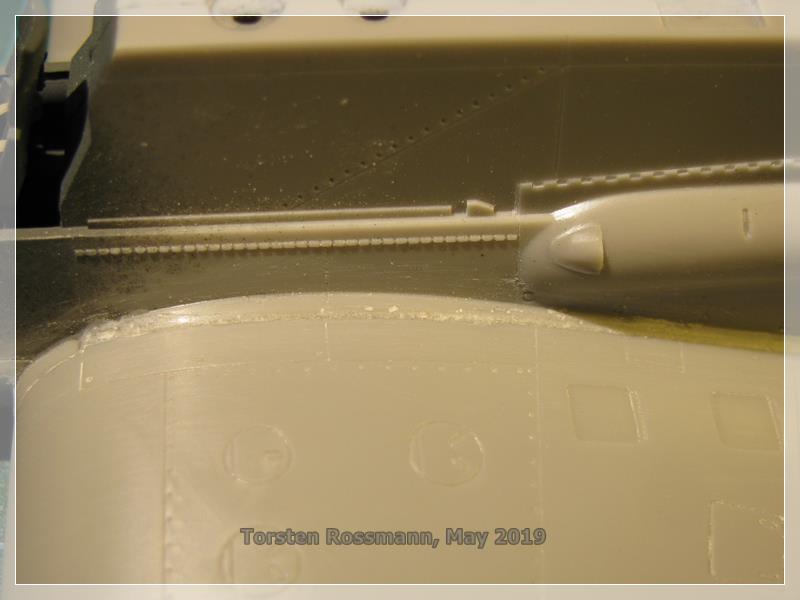
.... yesterday evening during the football match Frankfurt-Chelsea I came a bit further and noticed another trap ....
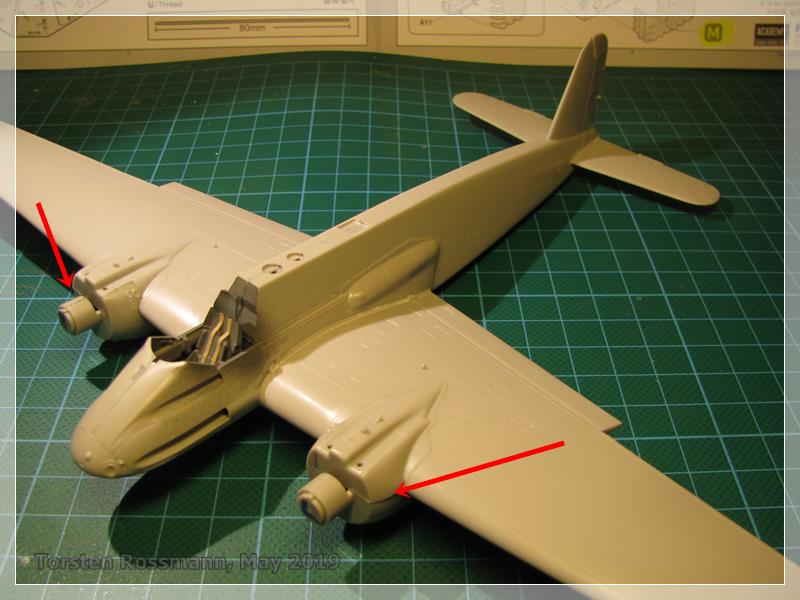
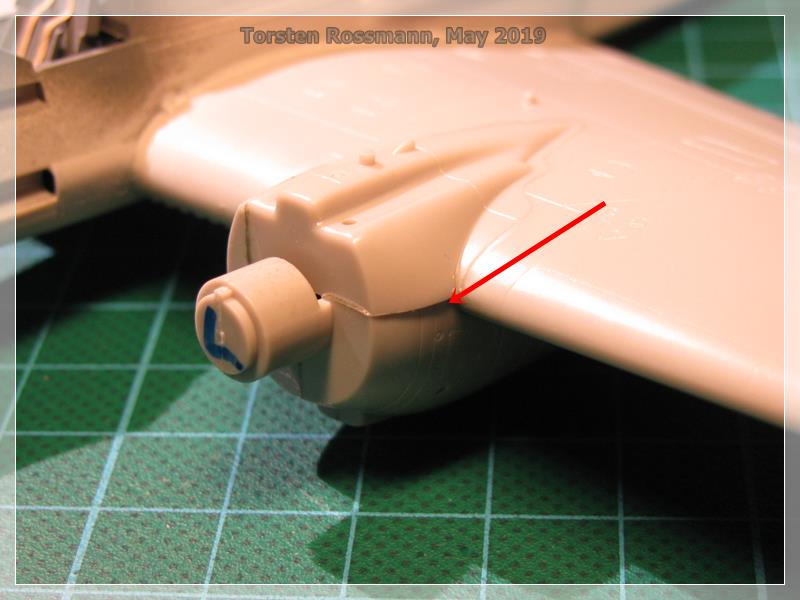
.... quite a step on the outside of both engine nacelles ....
.... after checking my references I noticed that I don't need to sand much here because these steps are nearly completly covered by the engine cowlings. But I will do some sanding on the inside of the nacelles just for leveling.
Happy modelling
Torsten
Posted: Friday, May 03, 2019 - 08:01 AM UTC
I've heard of the tape trick, just never with the cello, or magic tape. Looks like it works better than good ole masking tape. I my try it soon.
RadekZ
Warszawa, Poland
Joined: March 12, 2013
KitMaker: 125 posts
AeroScale: 85 posts
Joined: March 12, 2013
KitMaker: 125 posts
AeroScale: 85 posts
Posted: Friday, May 03, 2019 - 11:23 PM UTC
Hi,
I see lot of nice kits already in the build, so it's time to move the Pz IV build towards the finish line
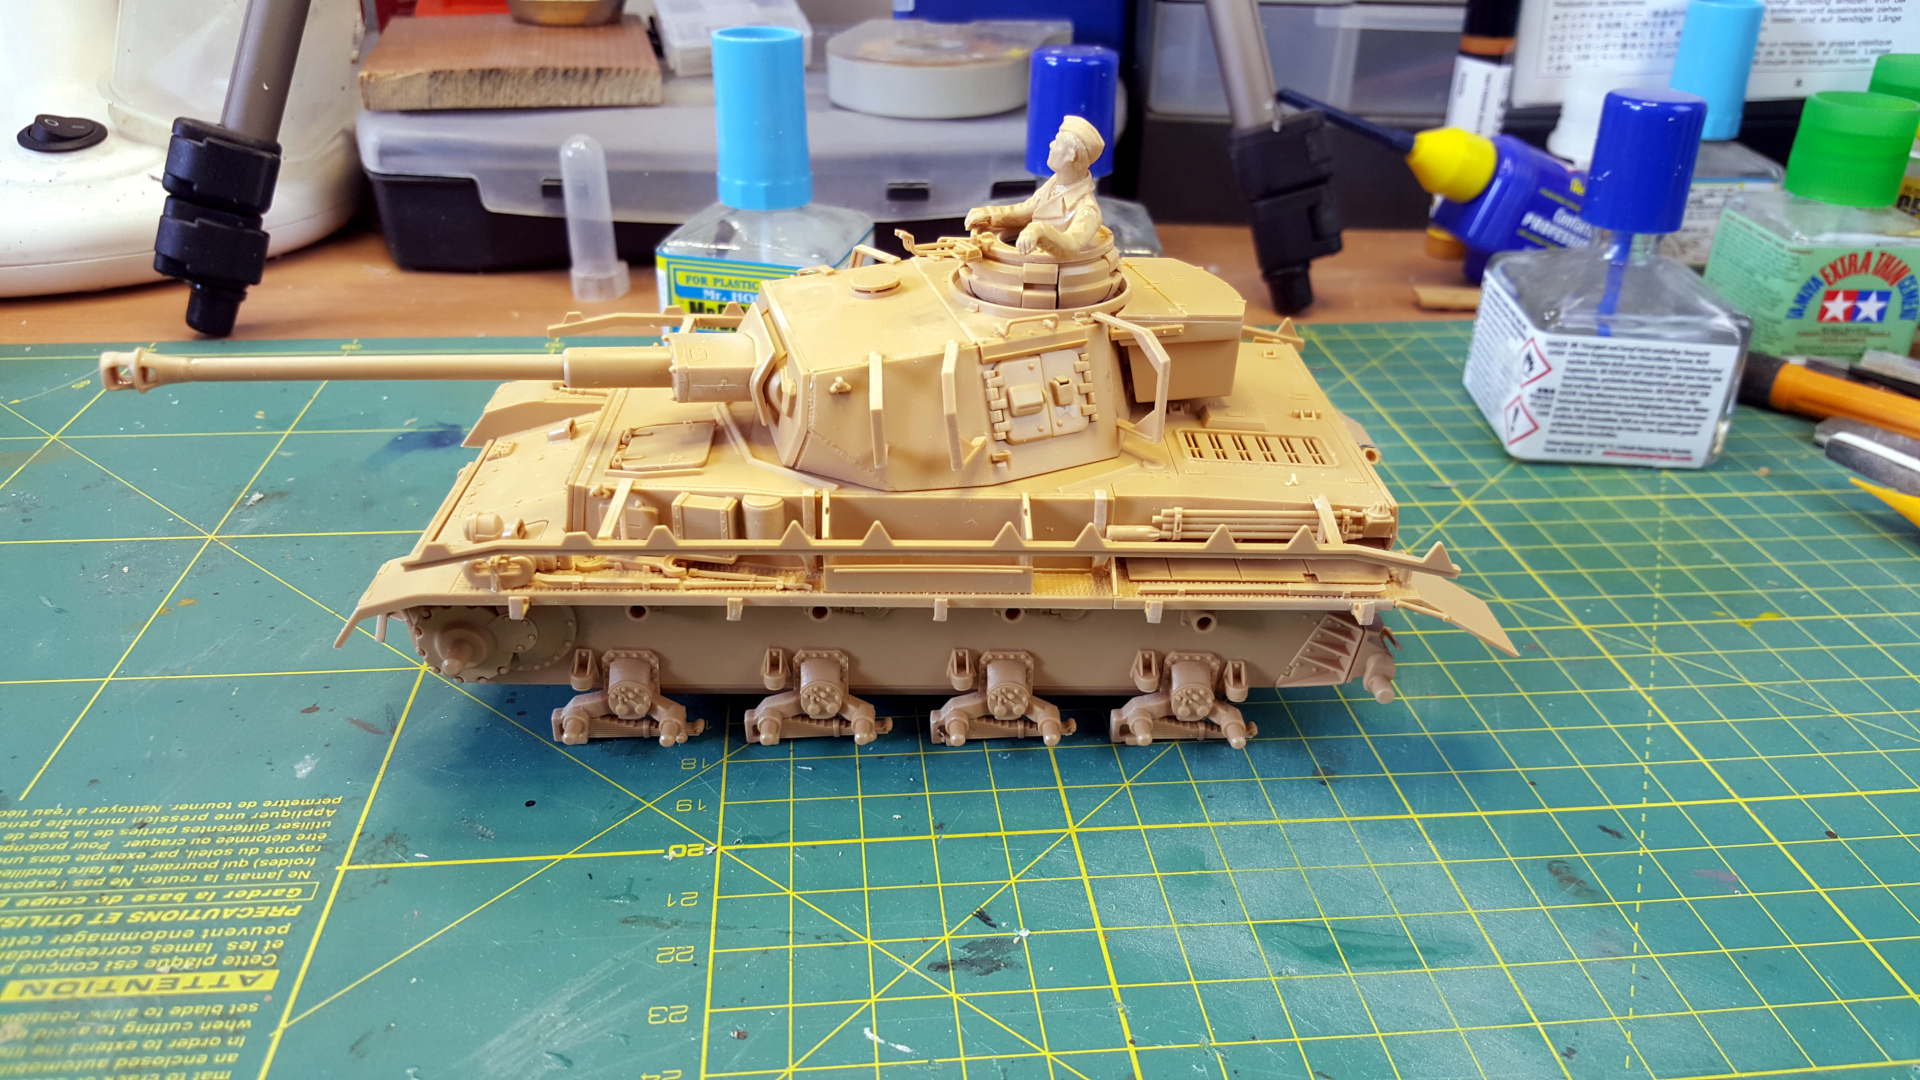
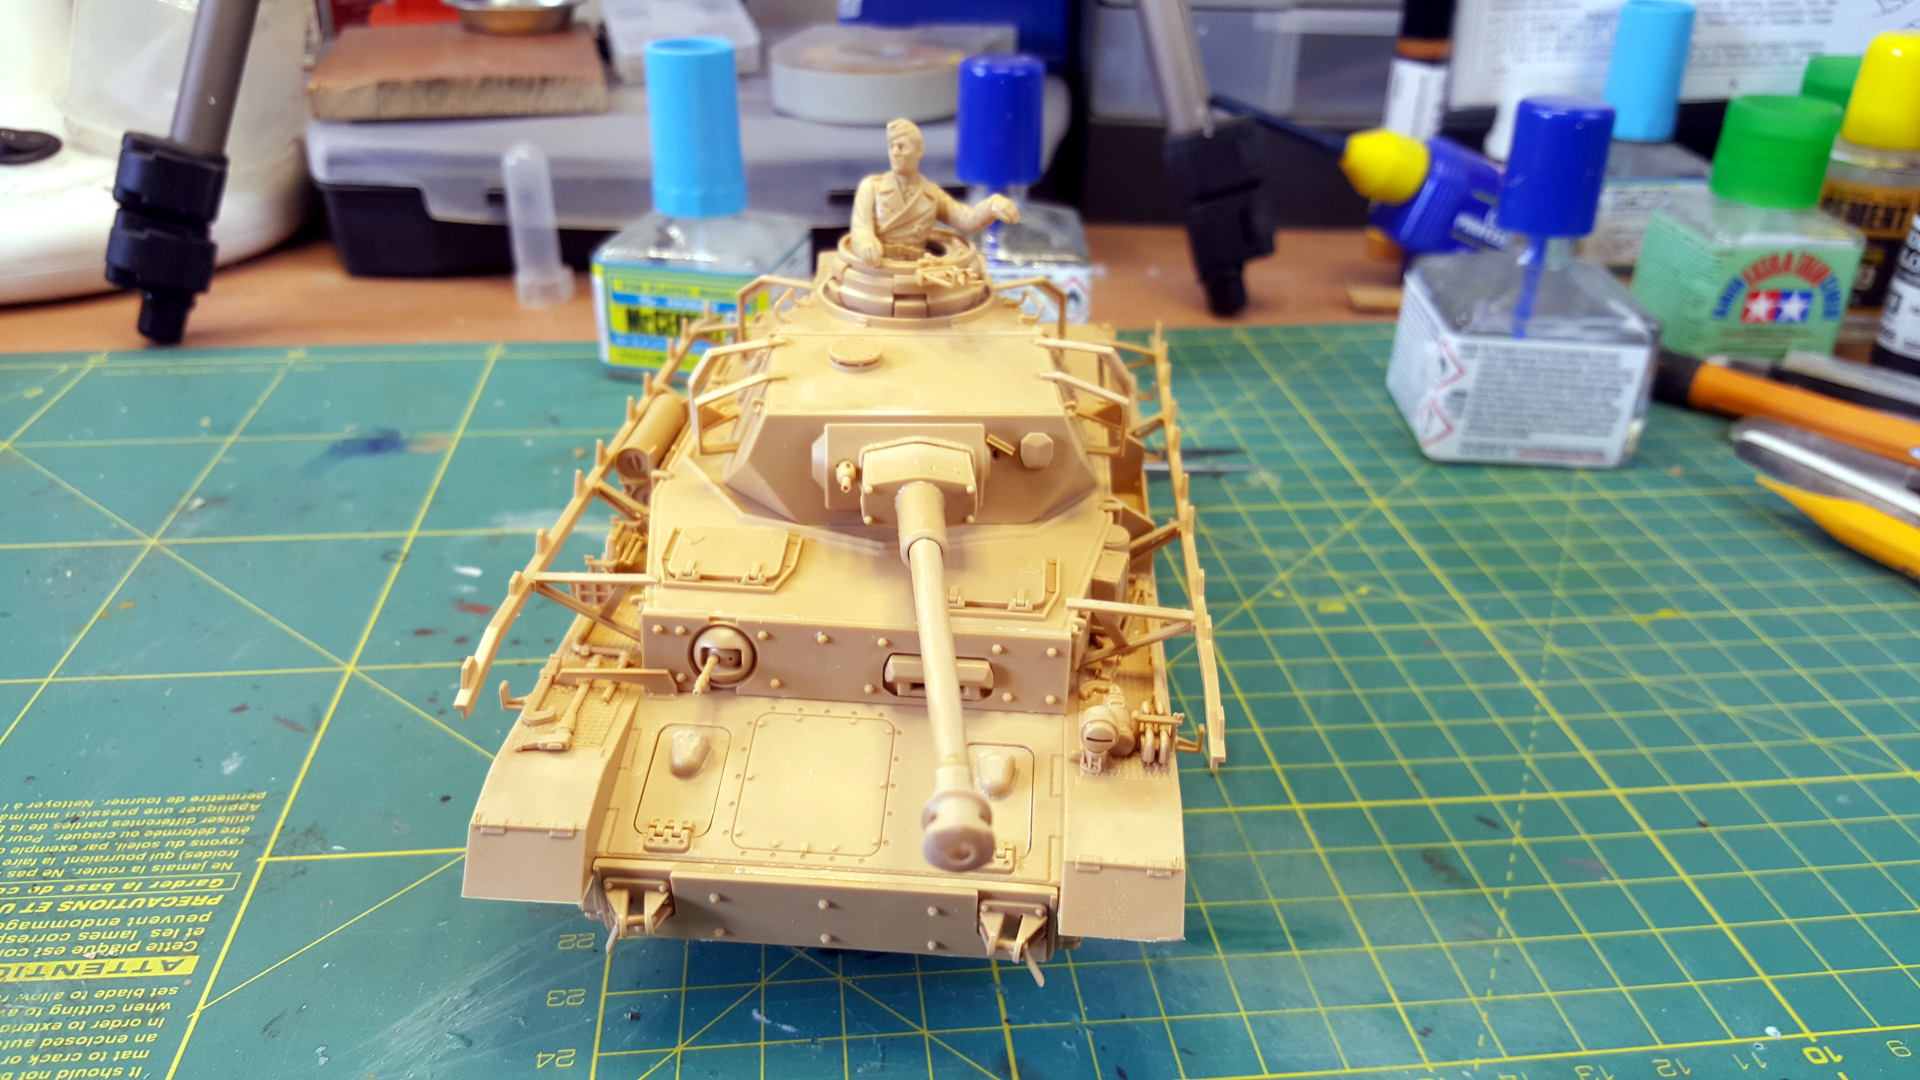
So far I managed only to construct the kit. It's Tamiya, so nothing fancy. The only thing I'm struggling with are some intended empty spaces Tamiya left on the bottom side of sponsons (under fenders). They're generally invisible, so I'll probably leave them as they are.
Here's the assembled kit prior to priming:
One question to you guys - do you know what colours Germans used to paint "Schürzen" from inner part (from hull side), was it camo colour or hull red?
Cheers,
Radek