Air Campaigns
Want to start or join a group build? This is where to start.
OFFICIAL: Battle of Britain 80 Campaign
Lillen
_VISITCOMMUNITY
Jönköping, Sweden
Joined: March 01, 2020
KitMaker: 19 posts
AeroScale: 19 posts
Posted: Monday, August 10, 2020 - 12:07 AM UTC
Finally worked up the courage to mottle the fuselage sides. I fuond a tip elsewhere on the web (model railroaders) where a slice of sponge was taped in a rolled up and dabbed sligthly on the surface in question.


The sponge-roll lies on the post-it and gave reasonable patches of paint. Only stabilizer, undercarriage and canopy left to fit, before decals and weathering. Rather light, but some panelwash and fuelstains would do.

The 1:144-seat looks dangerously miniscule. I guess it could dissapear under a nail.

Lillen
petbat
_VISITCOMMUNITY
Queensland, Australia
Joined: August 06, 2005
KitMaker: 3,353 posts
AeroScale: 93 posts
Posted: Monday, August 10, 2020 - 06:53 AM UTC
That is some seriously small etch Tim. Almost as small as the blob of glue that will secure it!

Mottling looks good Tony. An interesting method of applying it. That is probably a tip armour builders could use too.
Merlin
Staff MemberSenior Editor
AEROSCALE
#017
_VISITCOMMUNITY
United Kingdom
Joined: June 11, 2003
KitMaker: 17,582 posts
AeroScale: 12,795 posts
Posted: Monday, August 10, 2020 - 07:44 AM UTC
Hi everyone

Apologies for being very late to the table! There's some wonderful progress evident already!

I feel almost duty-bound to join this campaign, because a Battle of Britain campaign was the very first thing I participated in on the original Armorama (long before the days of Aeroscale) way back over 15 years ago!

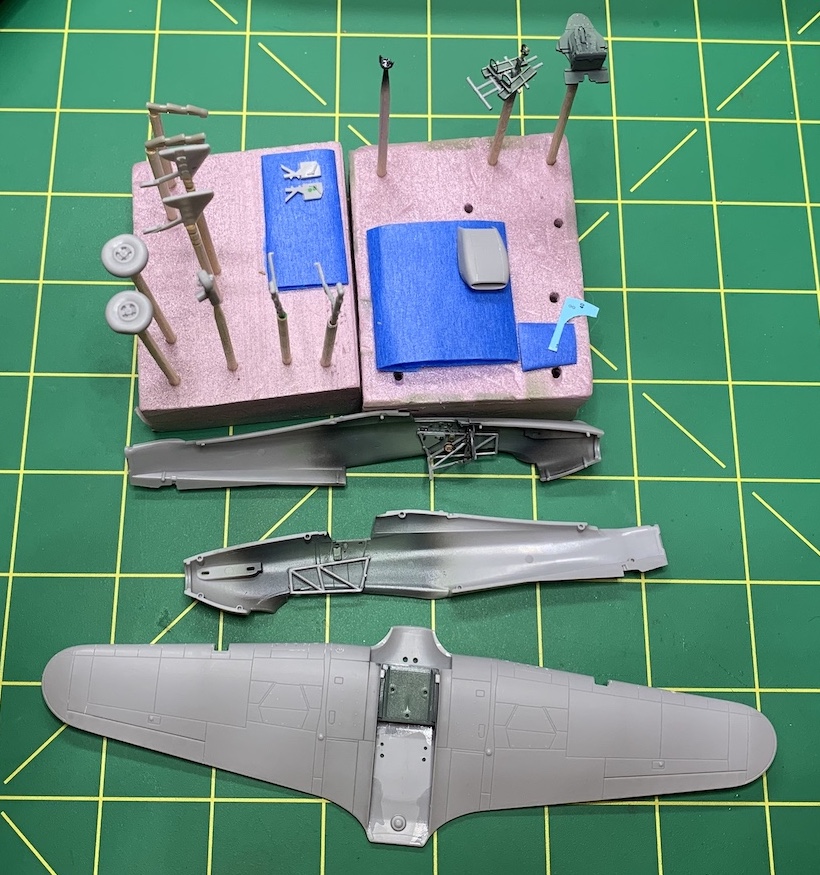
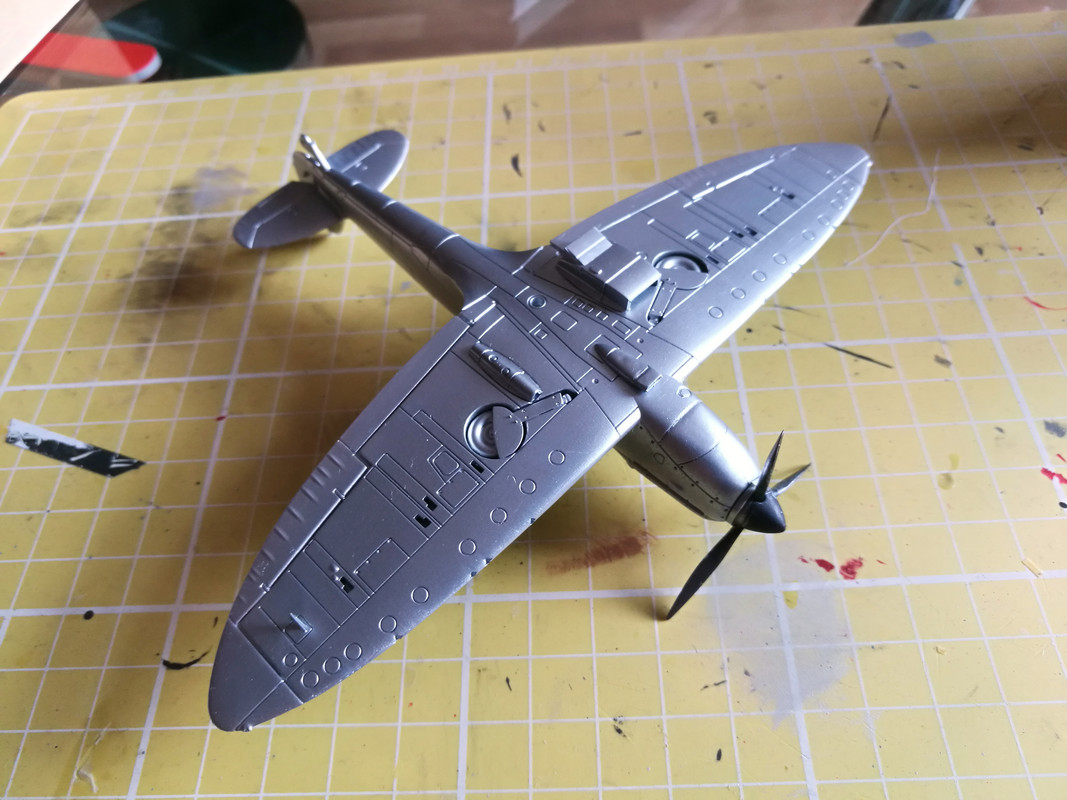
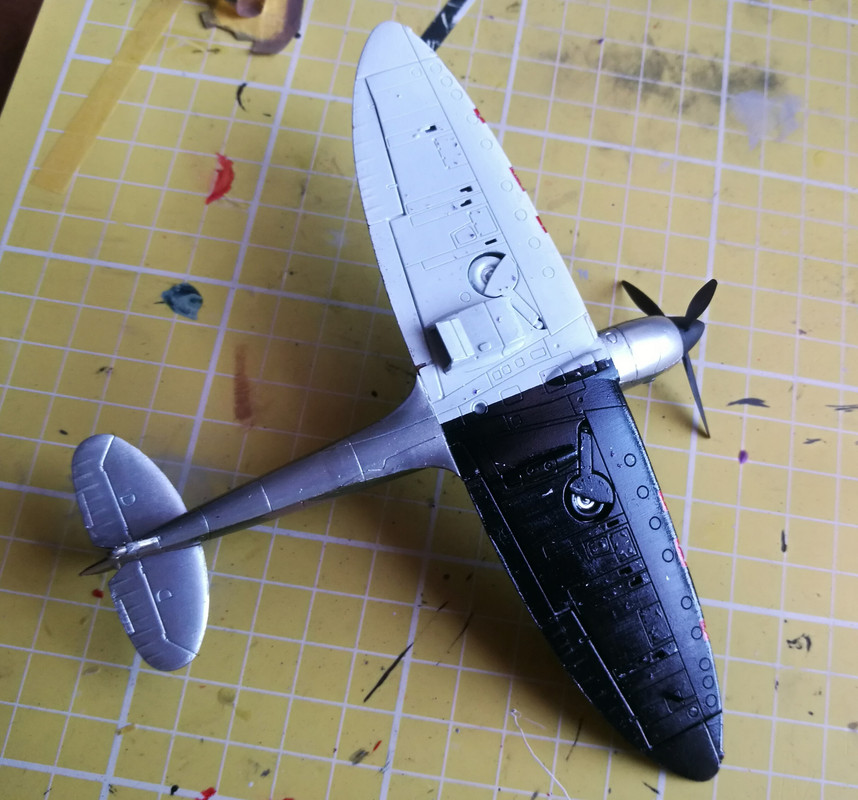
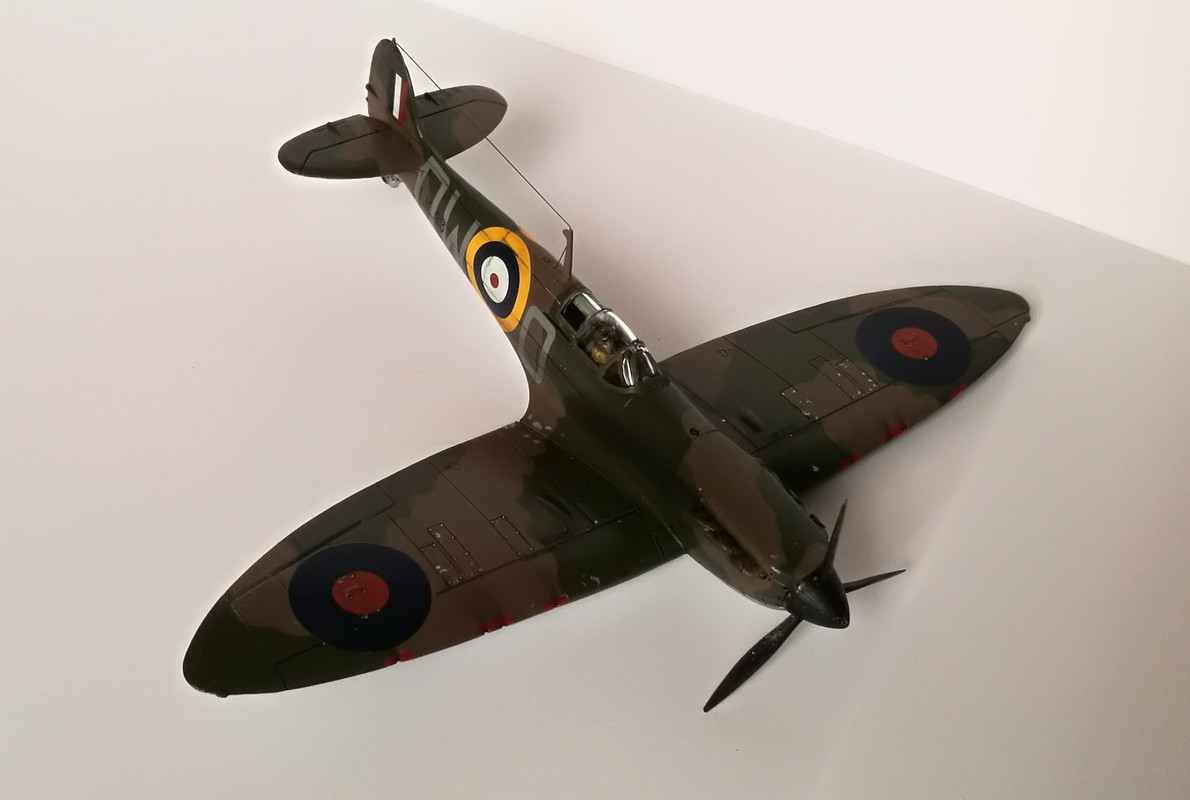
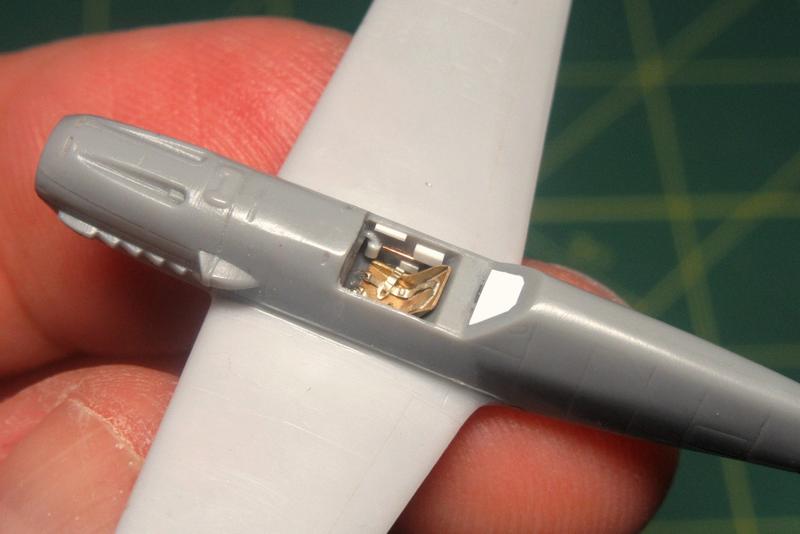
Coincidentally, I've just received a sample of Eduard's new 1:48 Spitfire Mk. I, so it would just plain wrong not to include it in the campaign!


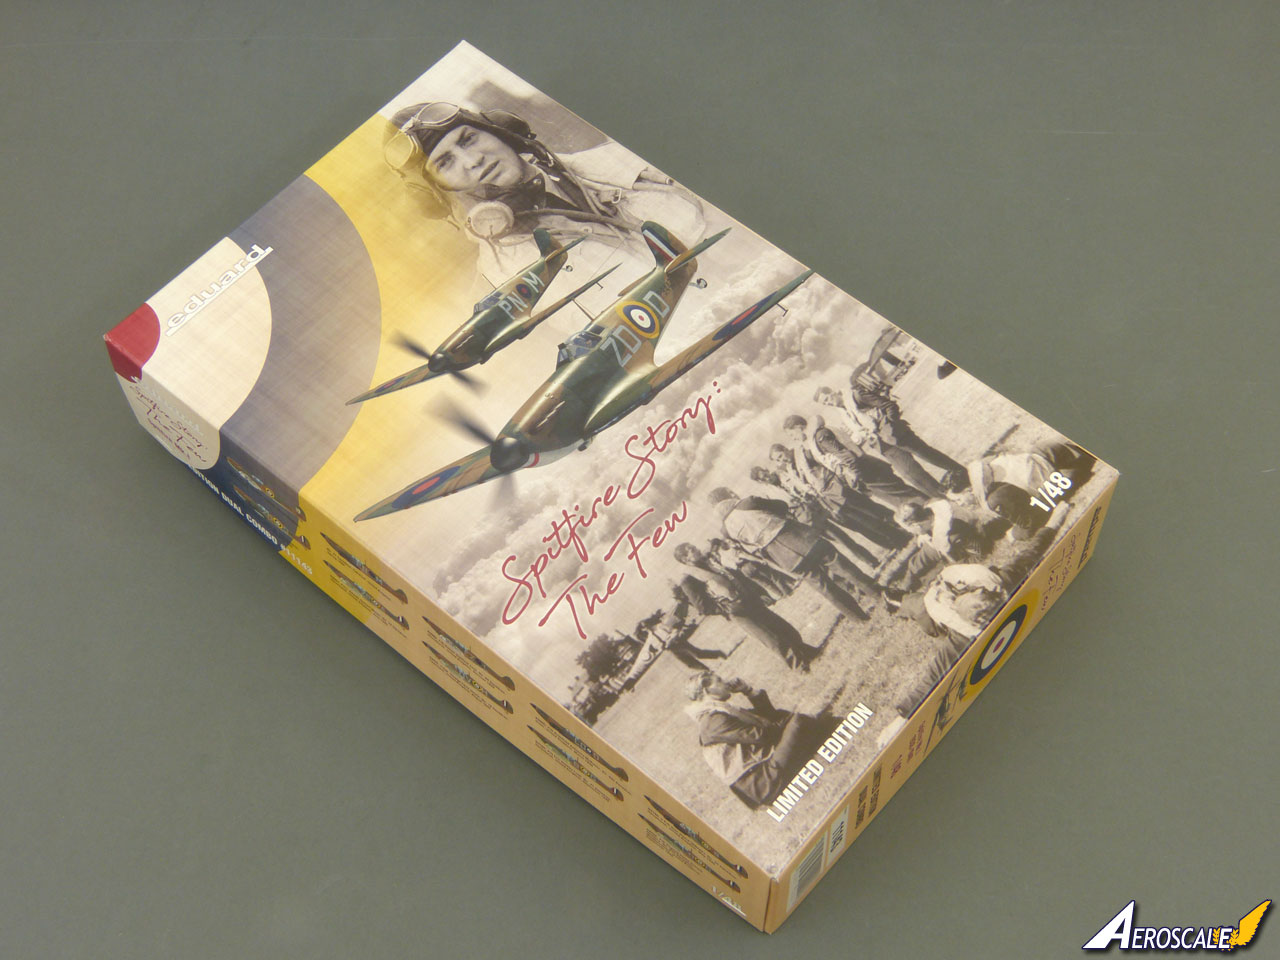
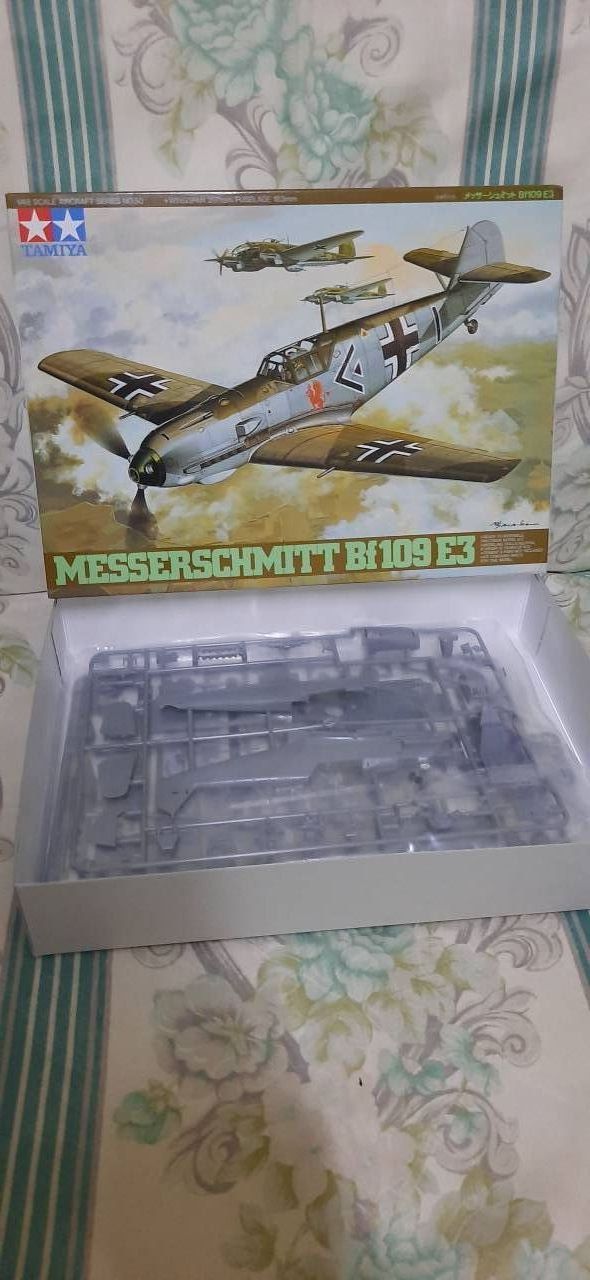
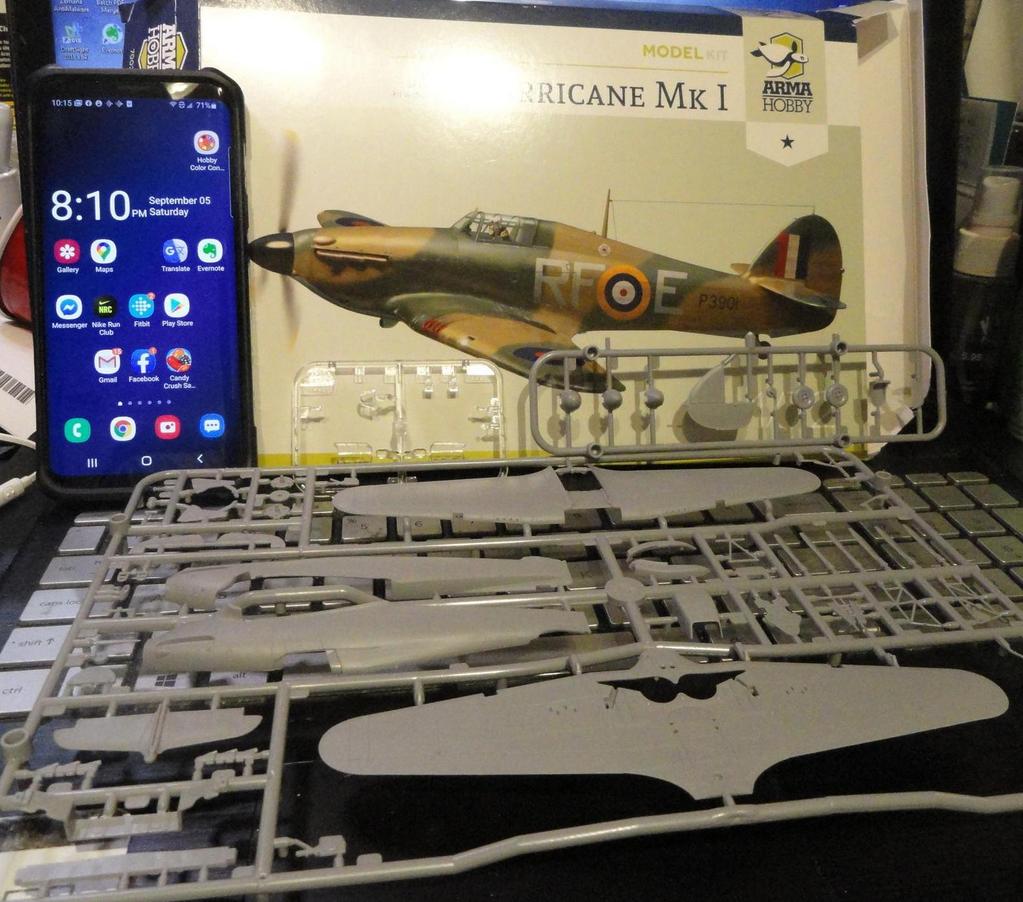
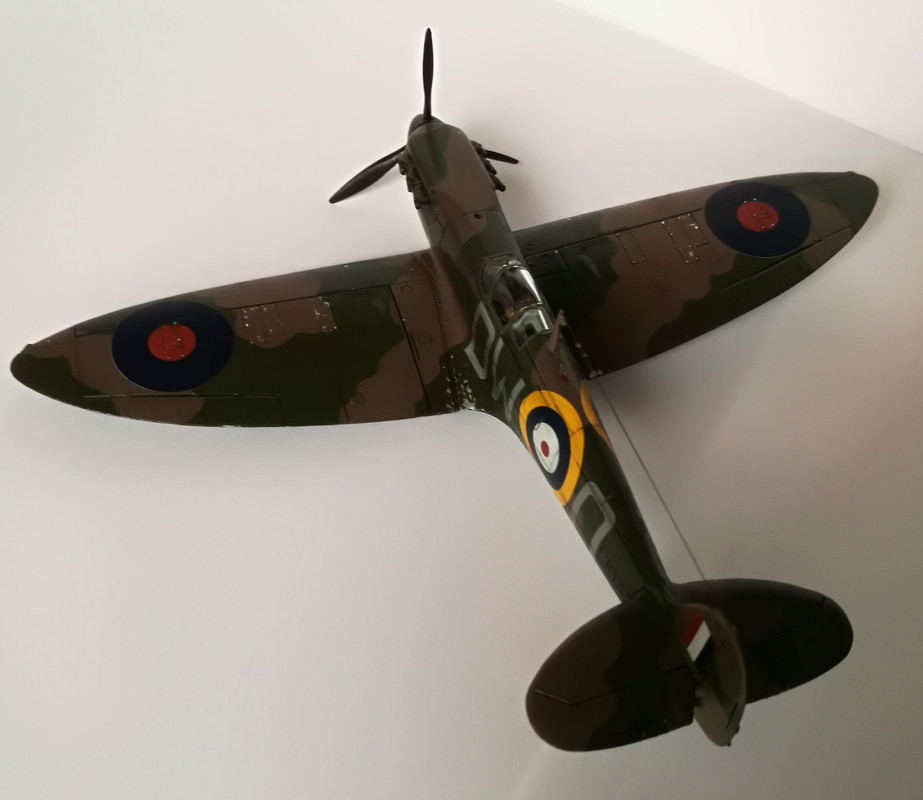
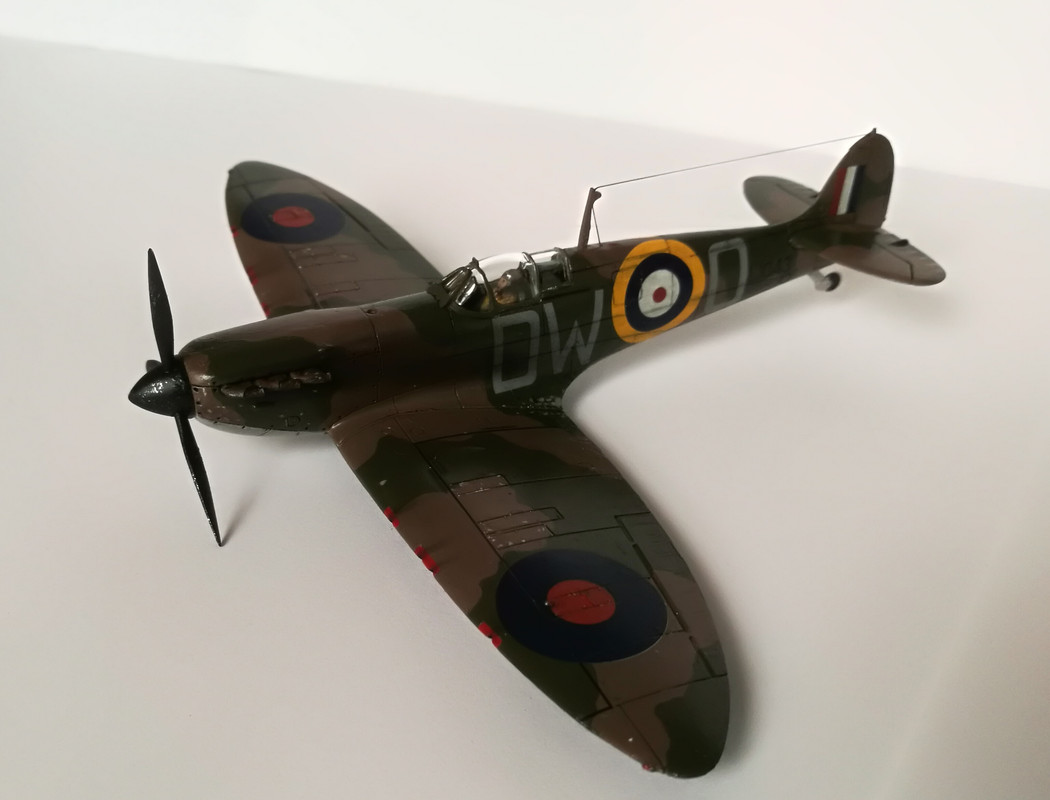
So, I'll do a hasty rethink on which colour scheme to go for. I was planning to do Douglas Bader's "ZD-D" as one of the options in the dual-build kit, but that's just too early to be eligible for this campaign (he transferred to 242 Sq. on Hurricanes on June 28th).

The bonus of the change of mind is that it saves me from the embarrassment of trying to paint the resin figure of Bader (this time 'round, anyway ).

That still leaves four bona fide contenders among the remaining colour schemes, so I'm spoilt for choice.

No guarantees - but I'll try to include some unique content for the campaign that doesn't appear in my review-build. I don't want to push my luck, though, and end up not finishing anything by trying to do too much. (When have I ever been guilty if that?
)

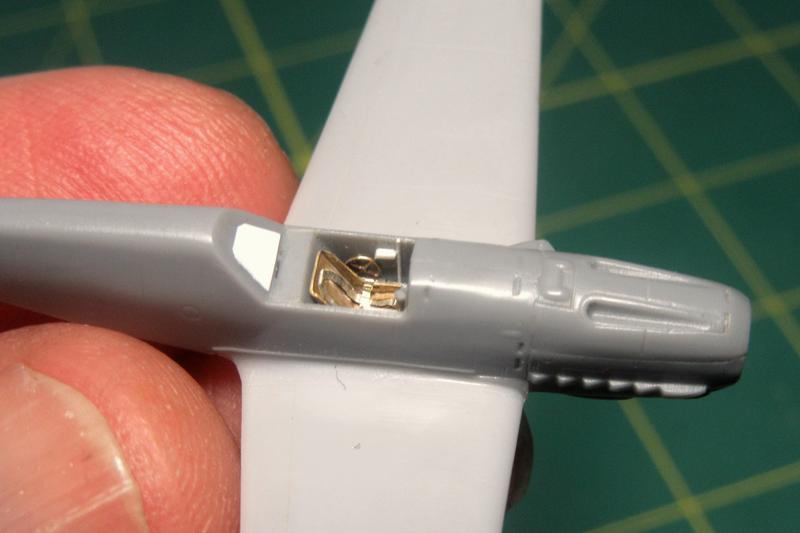
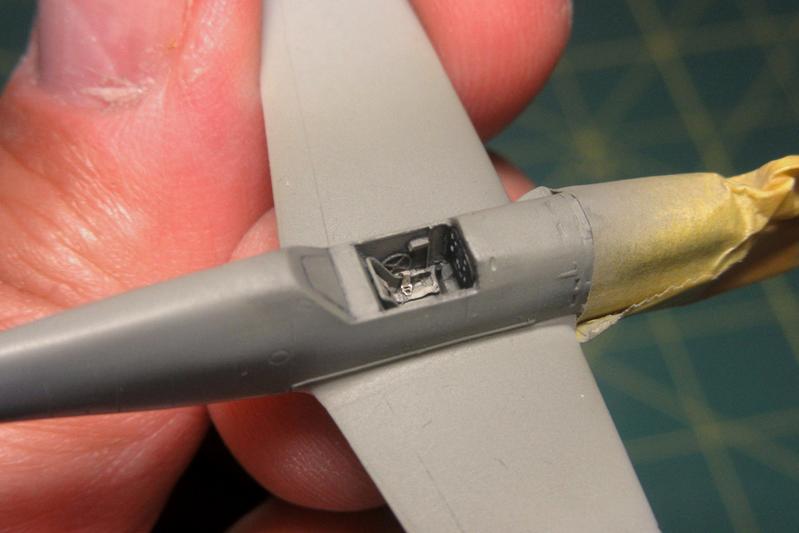
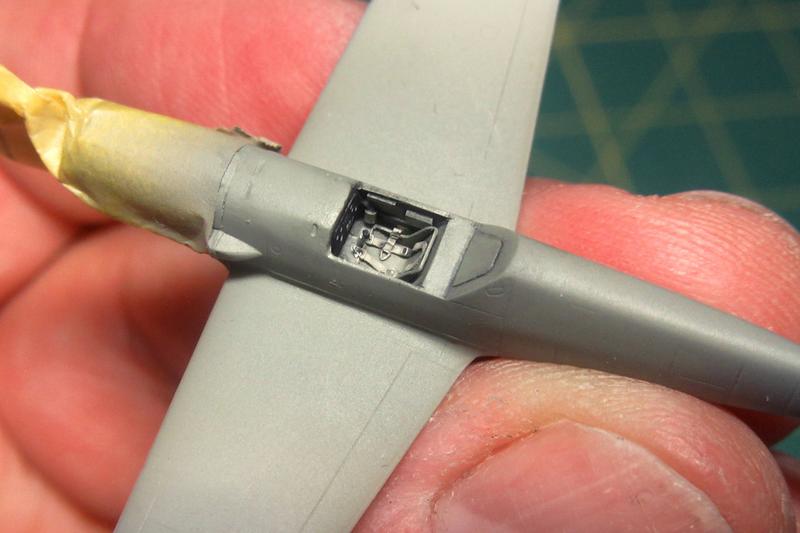
I'm hoping to start painting the cockpit parts on Wednesday.

All the best

Rowan
petbat
_VISITCOMMUNITY
Queensland, Australia
Joined: August 06, 2005
KitMaker: 3,353 posts
AeroScale: 93 posts
Posted: Tuesday, August 11, 2020 - 07:05 PM UTC
Okay everyone. I'm calling the Bofors done. I'll add some weathering when I get to the dio base I plan to build. It may not be an aircraft, but I hope you like it. Thanks for letting me join in with this Michael.

I'm looking forward to see how all your builds progress too guys. Apart from 2 sorry attempts to build some Matchbox aircraft kits I haven't ventured into the genre in decades, but I'm getting tempted.

From the Gallery:
Lillen
_VISITCOMMUNITY
Jönköping, Sweden
Joined: March 01, 2020
KitMaker: 19 posts
AeroScale: 19 posts
Posted: Tuesday, August 11, 2020 - 11:52 PM UTC
Wow Peter. The bofors 40 may not be an aircraft, but as the son of a proud AAA-gunner when these were still fairly up to scratch, and Swedish in general, I like it. It's a very nice representation!
If you take the leap and go into aircraft I have a few tips. Go for a mainstream manufacturer and a popular kit. That way it is well designed (Tamiya, Hasegawa, modern Airfix) and there are loads of tips and tricks out here.
Another thing, if you go Swedish there too, our airforce allways have kept their planes redicuosly tidy, so you don't have to break your neck Weathering the crate.
A Hasegawa J-35 Draken would therefore be my heartly advice.
TimReynaga
Staff MemberAssociate Editor
MODEL SHIPWRIGHTS
_VISITCOMMUNITY
California, United States
Joined: May 03, 2006
KitMaker: 2,500 posts
AeroScale: 318 posts
Posted: Wednesday, August 12, 2020 - 01:00 AM UTC
Peter, super job on the Bofors. I built the 1/76 Airfix version as a kid, always wanted to do a bigger one. Yours is a fine rendition!
petbat
_VISITCOMMUNITY
Queensland, Australia
Joined: August 06, 2005
KitMaker: 3,353 posts
AeroScale: 93 posts
Posted: Wednesday, August 12, 2020 - 07:51 AM UTC
Thanks guys.

Tony, I built an Airfix Drakken and the Matchbox Viggen and Tunnen sometime in the last century. Loved the splinter camo on the Viggen. All 1/72nd scale.

I still have an untouched Hasegawa 1/72nd scale F-111 and 1/48th scale Northrop F- 5E, plus a Phantom F-4G Wild Weasel that is part started, in the stash still. Bought when they were recent releases, they are old moulds but still make up pretty good out of the box I am told. I just need to take the plunge, dust them off, and get into them. Get my skills back before venturing into new purchases.

Tim, I would have thought you would be more keen on a 1/144th scale one

The AFV Club kit is nice, just a bit tricky in places. You have to be very careful removing parts from the sprues, as some have huge attachment points on very fine parts. Seam lines are quite heavy on parts too. As always, test fit first and trim to fit. They also do the US M1 version too.

Bronco does a Bofors too, and it has the parts to do the old sight set up and shield-less Mk 1 platform version in the box, as well as the version with Stiffkey sights and Mk 3 shield.
YankeeSteve
#511
_VISITCOMMUNITY
Michigan, United States
Joined: July 10, 2018
KitMaker: 52 posts
AeroScale: 51 posts
Posted: Thursday, August 13, 2020 - 08:30 AM UTC
Stuff on Sticks.....Arma Hurc Mk.1 well underway.

md72
#439
_VISITCOMMUNITY
Washington, United States
Joined: November 05, 2005
KitMaker: 4,950 posts
AeroScale: 3,192 posts
Posted: Thursday, August 13, 2020 - 10:03 AM UTC
I'm building that one too, I ought to steal all of your ideas.
Shrimpman
_VISITCOMMUNITY
Dublin, Ireland
Joined: August 14, 2016
KitMaker: 148 posts
AeroScale: 123 posts
Posted: Saturday, August 15, 2020 - 07:55 PM UTC
Progress report on the Spitfire Mk I A. All primed and ready for painting.
petbat
_VISITCOMMUNITY
Queensland, Australia
Joined: August 06, 2005
KitMaker: 3,353 posts
AeroScale: 93 posts
Posted: Sunday, August 16, 2020 - 08:12 AM UTC
The 'stuff' is looking good Chaz. Delicious

Very nice shiny Spit Krzysztof.
Torpon
_VISITCOMMUNITY
Spain / España
Joined: February 28, 2012
KitMaker: 103 posts
AeroScale: 102 posts
Posted: Monday, August 17, 2020 - 02:03 AM UTC

Tim, I absolutely love the details in the tiny 109. Great job!

Tony, fantastic mottling, I have never tried the sponge technique but it is looking very credible.

Peter, excellent Bofors. After seeing it, I am very much tempted to do something that is not an airplane... maybe soon.

Chaz, great choice! I really have enjoyed with mine. The assembly of the two halves is a bit fiddly and the assembly of the wings requires encouragement but the detail is magnificent.

Speaking of which, I am done with my Hurricane Mk.1, Arma Hobby 1/72. I had a great time. It is the first time I try to do some weathering I know I have over done the smoke stain but I am happy and this has open so many creative possibilities.

Anyway, here we go:


Carlos
Lillen
_VISITCOMMUNITY
Jönköping, Sweden
Joined: March 01, 2020
KitMaker: 19 posts
AeroScale: 19 posts
Posted: Thursday, August 20, 2020 - 07:07 PM UTC
Iwan: Crisp Spitfire. I'm intreagued by the silver primer. Is it as a base to see imperfections better os to have a base for chipping?

Carlos: I like the Hurricane. The exhaust might be a bit on the heavy side, but it says "hey, my handler haven't even got time for a haircut, so don't expect a polish!" The underwings have a weathering balance that I will aim for. Nice work.

I myself are fighting decals. No pics yet, but Hasegawas decals don't seem to like time, but comforms well to fingerprints. I hope i manage to stop the efforts in time to quit before the size are too small to handle.

Lillen
Lillen
_VISITCOMMUNITY
Jönköping, Sweden
Joined: March 01, 2020
KitMaker: 19 posts
AeroScale: 19 posts
Posted: Sunday, August 23, 2020 - 02:18 AM UTC
Decalling continues. I just hope I've got the judgement to play it safe and quit before i screw it up.


So far it has only been small corrections. Balkencreuzer are ok, and not too prone to run away, but the red lines around walkways were a b*ch.


I might keep patience down to finish the cowling latches, but the bulkhead numbering feels too scary with shaky fingers. However, another day and we'll see.

Lillen
petbat
_VISITCOMMUNITY
Queensland, Australia
Joined: August 06, 2005
KitMaker: 3,353 posts
AeroScale: 93 posts
Posted: Sunday, August 23, 2020 - 10:22 PM UTC
Nicely done Carlos. A very neatly turned out Hurricane. Your weathering underneath is very convincing. The smoke stain may a bit overdone, but it really doesn't take that much away from the overall build. I would be very happy if it were mine.

The decals may be trying your patience Tony, but it is certainly worth the effort.
Shrimpman
_VISITCOMMUNITY
Dublin, Ireland
Joined: August 14, 2016
KitMaker: 148 posts
AeroScale: 123 posts
Posted: Thursday, August 27, 2020 - 04:50 AM UTC
[quote]Iwan: Crisp Spitfire. I'm intreagued by the silver primer. Is it as a base to see imperfections better os to have a base for chipping?

Both! I used a regular silver paint over a real primer. It is quite sticky, so I had an idea to try an experiment: use the silver coat as a primer + to check if everything is even + for chipping.
Since then I have placed tiny specks of humbrol liquid mask in the strategic places, then i have put on proper paint and then gloss coat for the decals and wash. Unfortunately some of those liquid mask specks have come off in the meantime. I wanted to keep them in place until after I put on a matt coat on top and then peel them off for a realistic chipping effect, but I guess it won't matter much in the end.


john41492
#442
_VISITCOMMUNITY
Malacca, Malaysia
Joined: July 20, 2015
KitMaker: 363 posts
AeroScale: 335 posts
Posted: Sunday, August 30, 2020 - 09:33 PM UTC
Hi all,

I finally got some time to work on the He-111. I painted the resin cockpit in RLM 02, and was in the process of starting to mask all the windows. I began by dipping the clear parts in future, and did they really turn out nice! Though looking through the box, I could not find the dorsal glazing so prominent on the 111. I did find a glazed turret. A little research and I discovered that the He-111 H-6 I picked up on eBay, was really a H-26. And it didn't have the V-1 either! Well you do get what you pay for, and this is a wonderful kit, though I'll not be able to do it as a Battle of Britain He-111. Rats! Grrrhhhh!

That said, I'm switching to doing a Bf-109 E-3 as Adolf Galland's mount.


This should be a relatively stress free and fun build. However, I do wish to build the He-111, and will at sometime soon. I will have to repaint the resin cockpit though. Oh well, onward and upward!

Take care and have fun!!
md72
#439
_VISITCOMMUNITY
Washington, United States
Joined: November 05, 2005
KitMaker: 4,950 posts
AeroScale: 3,192 posts
Posted: Saturday, September 05, 2020 - 05:28 PM UTC
Oh I'd better get started.

THe Arma Hobby 1/72 Hurricane Mk. I. Doesn't seem like a bad kit. A bit involved for a 'Beginner' kit, I think it has one less sprue than the 'Pro' kit. It's only supposed to have markings for 2 planes, but it looks like they snuck in 2 extra planes. Interestingly 3 of the 4 are for 303 Squadron, and the fourth one is from RCAF 1 squadron that was loaned to 303 when it had a probable kill.
TimReynaga
Staff MemberAssociate Editor
MODEL SHIPWRIGHTS
_VISITCOMMUNITY
California, United States
Joined: May 03, 2006
KitMaker: 2,500 posts
AeroScale: 318 posts
Posted: Monday, September 07, 2020 - 03:56 AM UTC

Brengun’s 1/144 scale seats are excellent, but there are no belts!


Provided separately, their relief-etched belts are even more amazing than the seats with clearly discernable buckles and open clasps.


Installing these tiny things on the seat can bring one to the edge of madness, but they do look cool!


petbat
_VISITCOMMUNITY
Queensland, Australia
Joined: August 06, 2005
KitMaker: 3,353 posts
AeroScale: 93 posts
Posted: Monday, September 07, 2020 - 10:51 AM UTC
The insanity sets in when you try and paint them Tim. the tip of the brush must be wider than the belt!
md72
#439
_VISITCOMMUNITY
Washington, United States
Joined: November 05, 2005
KitMaker: 4,950 posts
AeroScale: 3,192 posts
Posted: Tuesday, September 08, 2020 - 03:59 AM UTC
Easing on into this campaign. Laid down a bunch of RAF interior green on my Hurricane tonight. Most fun I've head with an airbrush lately.
Shrimpman
_VISITCOMMUNITY
Dublin, Ireland
Joined: August 14, 2016
KitMaker: 148 posts
AeroScale: 123 posts
Posted: Tuesday, September 08, 2020 - 05:52 AM UTC
Hi everybody! I've reached the finish line. It was great fun. I've decided on wheels-up and also black and white wings, as it will be hanging from the celiling in the living room, so I wanted a something that looks cool from below. All in all, very nice kit. Did I go overboard with paint chipping? I don't like heavy weathering and I think I may have overdone this one.
Cheers!
Kris


TimReynaga
Staff MemberAssociate Editor
MODEL SHIPWRIGHTS
_VISITCOMMUNITY
California, United States
Joined: May 03, 2006
KitMaker: 2,500 posts
AeroScale: 318 posts
Posted: Tuesday, September 08, 2020 - 10:55 AM UTC
Krzysztof Iwan, that is a nice looking Spit! And for what it's worth, I think the paint chipping is spot on, especially considering that it will be viewed frim below as it hangs from the ceiling. Nice job!

TimReynaga
Staff MemberAssociate Editor
MODEL SHIPWRIGHTS
_VISITCOMMUNITY
California, United States
Joined: May 03, 2006
KitMaker: 2,500 posts
AeroScale: 318 posts
Posted: Friday, September 11, 2020 - 03:56 PM UTC
On the theory that anything worth doing is worth overdoing, I added further details to the tiny cockpit including a map holder, electric switch panel, oxygen regulator, and throttle mount from bits of plastic scrap.


The etched brass trim wheel on the port side came from a 1/192 scale watertight door – I am primarily a ship modeler, after all!

TimReynaga
Staff MemberAssociate Editor
MODEL SHIPWRIGHTS
_VISITCOMMUNITY
California, United States
Joined: May 03, 2006
KitMaker: 2,500 posts
AeroScale: 318 posts
Posted: Sunday, September 13, 2020 - 01:15 AM UTC
I shot the cockpit with Gunze RLM 02 Gray followed by a flat black pin wash.

The instrument panel is a decal from the kit, and the seatbelts were painted a light tan with the paint scraped away to show off the metal buckles. The only other addition was a control column made from a bit of .010 inch plastic rod.