_GOTOBOTTOM
Air Campaigns
Want to start or join a group build? This is where to start.
Part two Down low tank busting official tread
SGTJKJ
#041
_VISITCOMMUNITY
Kobenhavn, Denmark
Joined: July 20, 2006
KitMaker: 10,069 posts
AeroScale: 3,788 posts
Posted: Saturday, April 28, 2007 - 09:51 PM UTC
Hi everybody

This is the second official tread for the Down low - WWII tank busting campaign. Please use this tread and not the old tread. This second tread is to keep the forum running faster.

I was planning to wait with starting the official tread until the campaigns were up and running. However, since we do not really know how long that will take, I thought I might go ahead anyway and start them up with the details of the campaign in the first post.

Let me know if you are ready for some tank busting down low and personal

I will be running this campaign with some help from Patrick (Blackwulf). Here are the general rules of the campaign:

Operational Overview
WWII was the conflict where the tank really came of age and was incorporated in huge numbers in armies as a true weapon system in its own. No longer was the tank only supporting infantry and providing cover through no mans land. In WWII the tank was used to break the front and rip through the enemy’s weak rear areas.
To counter this threat many countries developed dedicated aircraft to seek out and destroy enemy armoured vehicles on the ground. This was usually done by using cannons and/or bombs in low level attacks.

Rules and Regulations
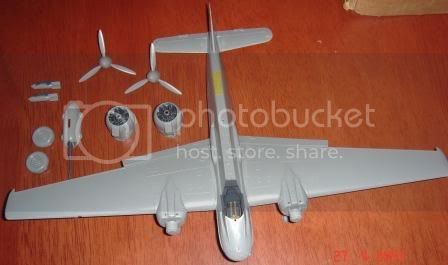
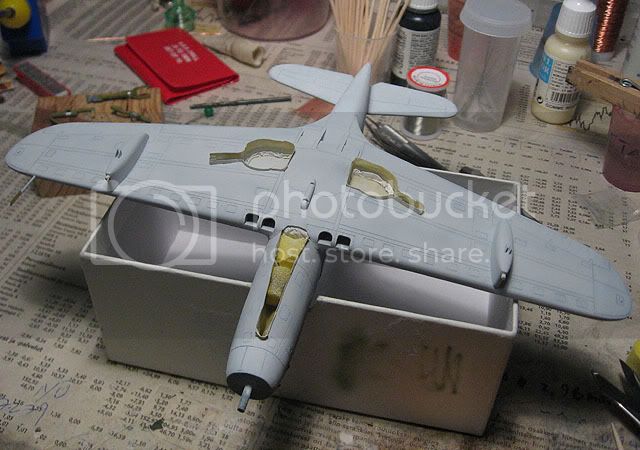
This campaign is supposed to concern WWII aircraft used in the Tank bursting role. The aircraft could be from any of WWII battlefields and from any country participating in WWII.
A tank busting aircraft is defined as an aircraft that could be used to take out enemy tanks on the battlefield in low level attacks. This means that the aircraft should be designed or adopted for low level battlefield attacks armed with either large calibre guns and/or cannons and/or bombs/rockets. The weapons for destroying tanks should be visible on the aircraft. A FW 190 fighter bomber without a bomb does not qualify.

Here are some examples of planes that would fit into this campaign:
Stuka armed with bombs or 37mm cannons
Henschel 129 armed with 30mm cannon or bombs
Hawker Tempest with missiles or bombs
P-47 Thunderbolt armed with bombs or 115mm rockets
Il-2 Sturmovic armed with bombs/missiles
FW-190 fighter bomber armed with bomb
JU-88 P-1 armed with the 75mm PaK 40
ME 262 armed with bombs

There are many more airplanes that qualify than the above examples. If you have any doubts, just ask.

Examples of planes that cannot be included into the tank busting campaign:
Lancaster, B-17 etc. as these planes were not intended as low level attack aircraft for destroying individual tanks.
Spitfire, ME 109, FW 190 etc. as long as these fighters do not include the weapons capable of destroying tanks i.e. heavy cannons or bomb/rockets.

Dioramas and figures are welcome. All scales are fine.

Contest Element
A ribbon will be given for all entries completed before the end of the deadline.

SGTJKJ
#041
_VISITCOMMUNITY
Kobenhavn, Denmark
Joined: July 20, 2006
KitMaker: 10,069 posts
AeroScale: 3,788 posts
Posted: Sunday, April 29, 2007 - 10:28 PM UTC
Dear all participants.

Please upload at between 1-5 pictures of your finished model in the campaign gallery.

The gallery can be found HERE
Emeritus
_VISITCOMMUNITY
Uusimaa, Finland
Joined: March 30, 2004
KitMaker: 2,845 posts
AeroScale: 1,564 posts
Posted: Wednesday, May 02, 2007 - 02:43 PM UTC
My Airacobra's ready for painting. Here's some pics.

The landing gears didn't get much PE. The only part I used was the oleo scissor for the front gear. The brake lines I made with thin wire, instead of the flat PE. Apart from looking more realistic, the wire is also much stronger than the thin PE.


An overall shot of the airframe. With this model I took no risks of getting the canopy smudged, so I protected it with masking tape, applied sticky side up over the glass panels. Also notice the puttied seam on the left wing. This is entirely my own fault. I don't what got into me, but I applied liquid cement between the top of the left wing and the roof of the main gear well. As you may guess, it attached the wing a bit lower than it should have, requiring puttying, sanding and having to rescribe the panel line running between the fuselage and the upper wing. If I hadn't goofed like this, the fit would have been perfect with the wings.


Here's the results of another goof I made with the nose. The separate upper nose panel wasn't long enough, leaving a gap between the spinner and fuselage if left untreated. I glued styrene sheet on the gap and started filing. near the end, I chipped off a piece of styrene from the gap. I filled that with superglue and sanded some more. Then I realized that I had sanded too much, resulting in the spinner being undersized. Finally, I got everything back on track by gluing a piece of styrene to the nose and sanding it to the right shape. Now I don't if I should try and drill a hole in the center for the prop shaft. Usually when I try to drill a hole in the exact middle of something, I don't get it right. Perhaps I should just go own and glue the spinner on permanently in the end? (Look, my first attempt wasn't succesful...)
I prepared the machine gun openings by stuffing green stuff putty inside the opened bulges, then drilling holes for the MG barrels when dry.


Finally, something that didn' go wrong one bit!
The kit-supplied pitot tube got damaged in the sprue due to my handling, and it looked overscale too. That added to my habit of knocking off pitot tubes and antenna masts, I made a robust replacement from a hypodermic needle and some steel wire.

Now, there's only one mystery to solve before I start to paint this bird. Did this aircraft have an antenna mast or not?
The instructions tell to attach the mast for the 'devastating devil', but the box art shows the particular aircraft without it. Searching the web for references was fruitless, the only thing I found on the subject was the review of a cutting edge decal sheet.
I guess I'll just leave it out, at least I won't be knocking it off while painting.
SGTJKJ
#041
_VISITCOMMUNITY
Kobenhavn, Denmark
Joined: July 20, 2006
KitMaker: 10,069 posts
AeroScale: 3,788 posts
Posted: Wednesday, May 02, 2007 - 11:09 PM UTC
Eetu, looks good. Can't help you with the antenna question though. Looking forward to see it with some colours.

Here is a small update on my build. It is progressing slowly, but surely.
Construction is almost finished and then it is time to bring out the paint.

Phantom2
_VISITCOMMUNITY
Östergötland, Sweden
Joined: April 18, 2006
KitMaker: 708 posts
AeroScale: 678 posts
Posted: Saturday, May 05, 2007 - 03:56 PM UTC

Quoted Text


Please upload at between 1-5 pictures of your finished model in the campaign gallery.


Ooops...

I managed to upload six pictures on my Hs-129, sorry!

Jesper; can I submit another build to this Campaign?

I got my 1/32 Hasegawa P-47D Thunderbolt a few days ago, and I´m itching to building the "Big Jug".

Needless to say but I will build it anyway, but It would be fun to do so as a part of this Campaign, and I believe I can do It within the timeframe too.

My build would be "Gabby" Gabreskis HV-A (full D-day stripes, black tailstripes over a Ocean Grey/Dark Green/Medium Grey camouflage, with red cowling front and rudder).

Ordinance will be a flat centreline tank and bombs, for a devastating "Rhubarb" tank/train strafing mission!

Pic to follow (if allowed!).

Jesper and Eetu, Nice Builds from you both!

Cheers!

Stefan E
Emeritus
_VISITCOMMUNITY
Uusimaa, Finland
Joined: March 30, 2004
KitMaker: 2,845 posts
AeroScale: 1,564 posts
Posted: Saturday, May 05, 2007 - 09:01 PM UTC
I have my P-39 primed and I'm putting on the masks now. It's such a good thing that the mask materials was changed to the yellow tape similar to Tamiya's. These earlier vinyl ones are good for flat surfaces and nothing else!
Their edges start to lift within minutes after putting them on a burnishing down with a cocktail stick.
Instead of simply discarding the masks, I'll use them as templates for cutting snuggly fitting masks from tamiya tape.
camogirl
_VISITCOMMUNITY
England - North East, United Kingdom
Joined: October 20, 2005
KitMaker: 1,045 posts
AeroScale: 622 posts
Posted: Sunday, May 06, 2007 - 12:54 AM UTC
Good news my Thunderbolt is now complete just did the finishing touches on it today. It is the Tamiya Bubbletop kit and it was a joy to build and really quick to construct and spray up.


Blackwulf
_VISITCOMMUNITY
Ohio, United States
Joined: April 20, 2004
KitMaker: 215 posts
AeroScale: 120 posts
Posted: Sunday, May 06, 2007 - 09:40 PM UTC
@ Samantha--Love your Jug--looks great

@ Stefan--I'm not speaking for Jesper, but multiple builds are welcome. There is a special ribbon going out to multiple builds--Oak Leaves will be added to the ribbon to show that you have built multiple aircraft for this campaign.

I haven't done an aircraft count lately but I'm pretty sure the P-47's are the most popular so far. You have your work cut out for you Stefan--there have been some nice P-47's built as of this time.
SGTJKJ
#041
_VISITCOMMUNITY
Kobenhavn, Denmark
Joined: July 20, 2006
KitMaker: 10,069 posts
AeroScale: 3,788 posts
Posted: Monday, May 07, 2007 - 06:10 PM UTC

Quoted Text

@ Samantha--Love your Jug--looks great


I agree with Patrick - another great one for you, Samantha!


Quoted Text


@ Stefan--I'm not speaking for Jesper, but multiple builds are welcome. There is a special ribbon going out to multiple builds--Oak Leaves will be added to the ribbon to show that you have built multiple aircraft for this campaign.


Well, Patric is actually speaking for me on this one. Once again I totally agree. Get those itching fingers on that tank buster And there are oak leaves for multiple entries.
No problem about the 6 pictures of yor Hs 129. We will manage
Emeritus
_VISITCOMMUNITY
Uusimaa, Finland
Joined: March 30, 2004
KitMaker: 2,845 posts
AeroScale: 1,564 posts
Posted: Monday, May 07, 2007 - 08:12 PM UTC
I have made some more progress on my P-39. Just got the undersides painted light grey.

I think it came out okay, although I'm not 100% satisfied with the results. Well, it could be just because it's my first ever attempt at airbrushing Lifecolor acrylics. Next I'll put on the sand color for the upper side.
camogirl
_VISITCOMMUNITY
England - North East, United Kingdom
Joined: October 20, 2005
KitMaker: 1,045 posts
AeroScale: 622 posts
Posted: Tuesday, May 08, 2007 - 02:54 AM UTC
Thanks for the comments, really enjoyed doing this build especially as i opted to do it oob rather than getting too involved. Im happy i managed to get another kit finished and got rid of another box from the pile.
Blackwulf
_VISITCOMMUNITY
Ohio, United States
Joined: April 20, 2004
KitMaker: 215 posts
AeroScale: 120 posts
Posted: Wednesday, May 09, 2007 - 10:14 PM UTC
Here is a little clip i found on youtube for you P-47 builders. First part is dogfighting--but big portion is strafing attacks on vehicles and Planes. Added bonus is that the footage is accompanied by Iron Maidens "Aces High".

http://www.youtube.com/watch?v=JhreZIk07pI
Emeritus
_VISITCOMMUNITY
Uusimaa, Finland
Joined: March 30, 2004
KitMaker: 2,845 posts
AeroScale: 1,564 posts
Posted: Thursday, May 10, 2007 - 01:27 PM UTC
^ Cool vid!
What's that thing that explodes into a huge fireball when strafed, around 2:10? A fuel tank maybe?
Also, I noticed that tracer bullets are visible in the dog fight and strafing material until around the middle of the vid, but later in the video, nothing. Why?
Or is this just a pilots' preference thing? I've heard that some had tracers mixed with normal ammo all the way, some had them only near the end of the belts, so they knew they were about to run out.

some progress again on my P-39. Now I got the airframe painted, as well as the black wing walk areas, which I painted black before spraying on the sand. I didn't trust the vinyl material, so I cut a new pair of masks from tamiya tape using the originals as templates.
Phantom2
_VISITCOMMUNITY
Östergötland, Sweden
Joined: April 18, 2006
KitMaker: 708 posts
AeroScale: 678 posts
Posted: Friday, May 11, 2007 - 01:06 AM UTC
Hi all!

OK, we got a green light from the CO....

So here we go with my next "Tank buster Build", this time I have switched to the Allied side and will build this;


It´s the new Hasegawa 1/32 P-47D, I got it just a few days ago.
Jesper was right, I couldn´t hold my itching fingers from it!

I have waited a LOOONG time for a new tool P-47 in 1/32.
Was this kit worth waiting for?
You bet It was!

Detail is crisp and clear and the whole kit is clearly inspired by Tamiyas new P-47 series, and NOT just a blown-up version of their own 1/48 kit!

But it Is not a copy of the Tamiya kits either, even If the parts breakdown is very similar.

This is really a completly new Hasegawa tooling of the quality we have come to expect, but with a Tamiyan twist!

Some good points;

Plenty of options;

Cowling gills open or closed, flaps up or down, cooling outlets on the sides open or closed, seperate panel inserts for landing light and compressability(?) flaps, spoked or covered wheel hubs, two different props (Curtiss Electric or Hamilton Standard) and tanks or bombs under the wings.

The canopy comes in either two parts (open) or as a single part (closed),
alredy polished and redy to use, no seam line to remove!

Wheel wells comes as seperate inserts, no seams inside.

Almost not a ejector pin mark on any visible part of any detail or the airframe.

Nice recessed and raised surface detail.

Very nice decals with two (three as there´s two versions of Gabby´s mount) very interesting options.

Some nitpicking;

One option (Gabby´s P-47D-RE-25) should have the corrugated floor, but only the flat one (used from RE-27 and onward) is supplied.

Wheels seems a bit "skinny" to me and are not bulged.

Cannon barrells are not drilled out, a tough job to do right!

Small ejection pin marks on the pylons.

Considering a very fair price, I payed about €30, this kit Is a bargain!

Looking at the sprues shows that several versions are possible, in fact, with the parts in this kit all versions from D to M can be made with some minor additions.
The crankcase and magnetos are on a separate sprue, easily changed for a M version.
A small fin fillet are included, as is a later gunsight and the rear view mirrors (two styles).

I have already begun assembling the small subassemblies as; Cockpit, wings, flaps, wheel well inserts, tailplanes, bombs (2x), tanks (2x P-38 style wing tanks and one flat belly tank), pylons and prop.

So far fit has been excellent, I have done all this in only two sittings (about four hours total).

I have also started basic painting as Cockpit and all interior surfaces.

Pics coming soon....

Cheers!

Stefan E
Blackwulf
_VISITCOMMUNITY
Ohio, United States
Joined: April 20, 2004
KitMaker: 215 posts
AeroScale: 120 posts
Posted: Friday, May 11, 2007 - 02:29 AM UTC
Hello All Low Down Builders!!

I will be maintaining the campaign until the end of the month since Jesper has gone on holiday until then. I'm sure no major issues will pop up--but if you have any questions--I will answer them to the best of my ability. I put in a request that Jesper buy all of us in the Tank Killer Campaign souvenir T-shirts from his trip. (Just kidding of course! )
Blackwulf
_VISITCOMMUNITY
Ohio, United States
Joined: April 20, 2004
KitMaker: 215 posts
AeroScale: 120 posts
Posted: Friday, May 11, 2007 - 02:31 AM UTC
LOL--I screwed up--its "DOWN LOW" builders---I guess I should start taking my dyslexia medicine again! DOH!
Removed by original poster on 05/13/07 - 19:11:56 (GMT).
csch
_VISITCOMMUNITY
Buenos Aires, Argentina
Joined: December 27, 2002
KitMaker: 1,941 posts
AeroScale: 1,040 posts
Posted: Saturday, May 12, 2007 - 05:13 PM UTC

Quoted Text

Hi all!

OK, we got a green light from the CO....

So here we go with my next "Tank buster Build", this time I have switched to the Allied side and will build this;


Hi Stefan:

It seems to be a fantastic kit ! What about the size? How big it is ?
spongya
Staff MemberAssociate Editor
MODELGEEK
_VISITCOMMUNITY
Budapest, Hungary
Joined: February 01, 2005
KitMaker: 2,365 posts
AeroScale: 71 posts
Posted: Sunday, May 13, 2007 - 12:24 AM UTC
Hi,
I've been building an IL-2 lately, but will not be able to finish (I think; I don't want to rush it). I'm building a P-51 too, which is actually close to competition. This aircraft was used as close-support airplane (pretty big mistake, I guess, because it was not suited for that), but I'm not sure about actual tank-busting. What kind of weapons would make this kit acceptable?
Blackwulf
_VISITCOMMUNITY
Ohio, United States
Joined: April 20, 2004
KitMaker: 215 posts
AeroScale: 120 posts
Posted: Sunday, May 13, 2007 - 09:44 PM UTC
@Andras

I dont think the P-51 was ever fitted with an anti-tank cannon of sorts so you would have to place bombs on the aircraft for it to be eligible in this campaign. I'm pretty sure that Jesper didn't have any strict guidelines other than the bombs must be attached to the finished aircraft. If you can find a variant of the P-51 that had cannons, rockets or some other type of tank killing weaponry then I'm sure jesper wouldn't mind if you built it showing this special weaponry but I would have a picture of the aircraft available to show Jesper. Jean-Luc has built a P-51 tank killer for this campaign and you could probably go view his model to get some ideas. Plus, Jean-Luc did an excellent job on his entry and it is worth looking at just to see good craftsmanship. I found a pic of Jean-Lucs P-51 on page 7 of the first Down Low thread but there are many more pics you can find of it. Hope this helps.
TedMamere
_VISITCOMMUNITY
Moselle, France
Joined: May 15, 2005
KitMaker: 5,653 posts
AeroScale: 4,347 posts
Posted: Sunday, May 13, 2007 - 10:27 PM UTC
Hi Patrick and Andras!


Quoted Text

Jean-Luc has built a P-51 tank killer for this campaign


My P-51 D "Tank Killer" can be found here. I'm not quite sure if "Petie 2nd" ever carried rockets though... probably not. But since they are included in the Dragon kit I thought I could use them for this Campaign.

Jean-Luc
bf443
_VISITCOMMUNITY
Idaho, United States
Joined: May 16, 2003
KitMaker: 895 posts
AeroScale: 457 posts
Posted: Monday, May 14, 2007 - 09:56 AM UTC

Quoted Text


I'm building a P-51 too, which is actually close to competition. This aircraft was used as close-support airplane (pretty big mistake, I guess, because it was not suited for that), but I'm not sure about actual tank-busting.


Hello Andras,

The original Allison powered versins (P-51A & A-36 Apache) were used in ground support role. The "A" had 4 20mm cannon and the "36" had 6 50. machine guns and two hard points for 500 bombs. Here is picture of a well used A-36 from the US Air Force Museum;

Accurate Miniatures produced a A-36 and it is still available on ebay and swap meets or it may be available by retail as well. Here is the box art of it;

Hope this helps you out.

Brian
spongya
Staff MemberAssociate Editor
MODELGEEK
_VISITCOMMUNITY
Budapest, Hungary
Joined: February 01, 2005
KitMaker: 2,365 posts
AeroScale: 71 posts
Posted: Tuesday, May 15, 2007 - 05:56 AM UTC
Thank you for the answers and suggestions. I'll stick a bomb to my Mustang
Emeritus
_VISITCOMMUNITY
Uusimaa, Finland
Joined: March 30, 2004
KitMaker: 2,845 posts
AeroScale: 1,564 posts
Posted: Tuesday, May 15, 2007 - 12:28 PM UTC
I've made some progress on my P-39, I'm about half way through with decaling. I'll post some pics when I get all of them on.
But damn those instructions.
...And me.
The stencil placing guide said "stencils on olive drab base used only for the us. version".
I had already applied all the markings to the upper wings when I started thinking. Black text on dark greenish base isn't very visible. The only reference I could find was a photo set of a built model, which had the simple black text stencils applied. I went and ripped off all the olive drab-based decals and applied the normal ones. Then I started looking around for the airframe information stencil that goes on the left side of the fuselage just ahead of the wing. That one was only supplied with and olive drab base... I guess it really was meant to have the other stencils.
Well, it looks good that way and I couldn't find any other reference than that one built model and a review of a cutting edge decal (which portrays the spinner being painted sand, eduard black..), so I'll just leave it that way and be happy with it.

But now to other, but still down & low related things. I recalled having a 1:72 scale revell P-47 in my stash, in very early stages of construction (parts off the sprues, wing halves glued together, cockpit assembled ready for painting).
Does this still make an entry?

But speaking of the kit, could someone help me out with some colors?
Being a revell kit, the instructions have this bloody annoying way of referring colors with only revell paints, some mixed from several shades.
The kit I'm talking about is this one:


You can't go wrong with the underside, aluminium. But what would be the right colors for the blue upperside camo?
Thankfully the instructions have FS codes for the two blues, 35231 and 35052. IPMS Stockholm's color charts say the latter is ANA 609 Azure Blue, but 35052 can't even be found on the chart.
And just to make sure I don't mess up with interior colors, it's zinc chromate for the landing gear wells and interior green for the cockpit, right?

Another options would be using left-over French decals from another revell P-47 for this one, that one having a light grey/green scheme. The instructions don't bother providing FS codes for this one, only their own paint numbers, 76 and 39. For starters, is this supposed to be an American scheme, or something the French came up with themselves after recieving the planes?
lampie
#029
_VISITCOMMUNITY
England - East Midlands, United Kingdom
Joined: December 23, 2005
KitMaker: 6,249 posts
AeroScale: 3,270 posts
Posted: Tuesday, May 15, 2007 - 12:51 PM UTC
H Eetu!
For your P47 I would use Humbrol 117 for the cockpit and Tamiya XF4 for the wheel wells etc.
As for the very nice blue camouflage scheme I cant be so precise.
A build review I have for the recent Tamiya P47-M used FS35189 for the lighter colour and FS35044 French Blue darkened with 10% black for the dark blue.Both of the colours were sprayed with Lifecolor acrylics.
If anyone has the Tamiya 1:48 P47-M in their stash they should be able to give you the Tamiya colours that the instructions recomend.
Hope this helps.
Nige
 _GOTOTOP