OFFICIAL: Hangar Queen 2 Campaign
British Columbia, Canada
Joined: September 03, 2009
KitMaker: 6,965 posts
AeroScale: 6,247 posts
Posted: Saturday, July 21, 2012 - 12:03 PM UTC
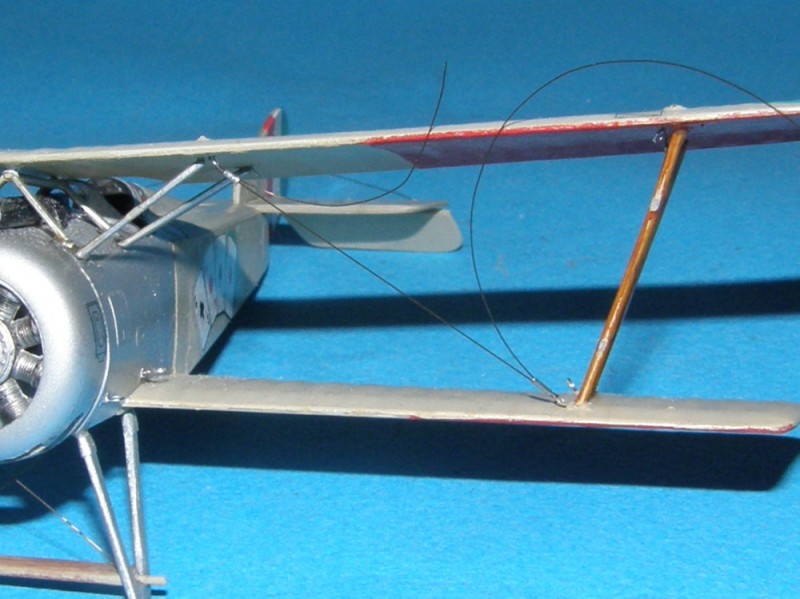
Decals on
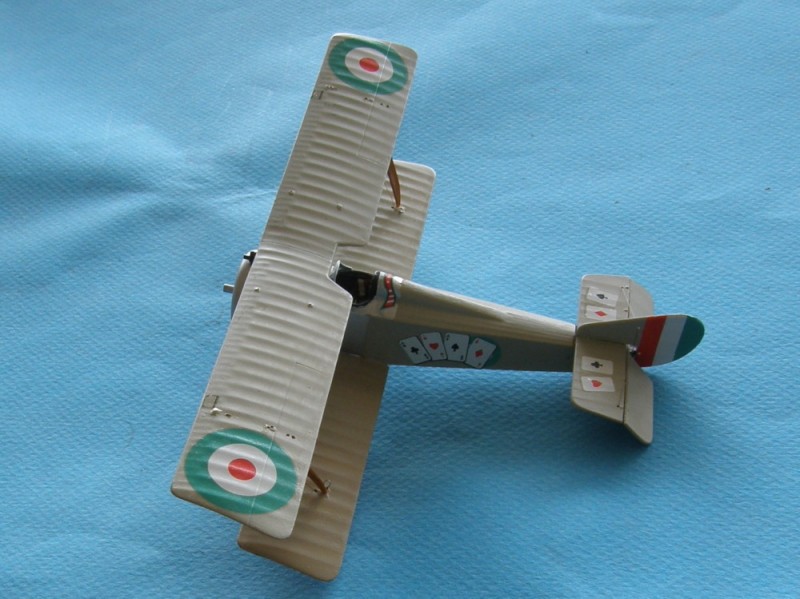
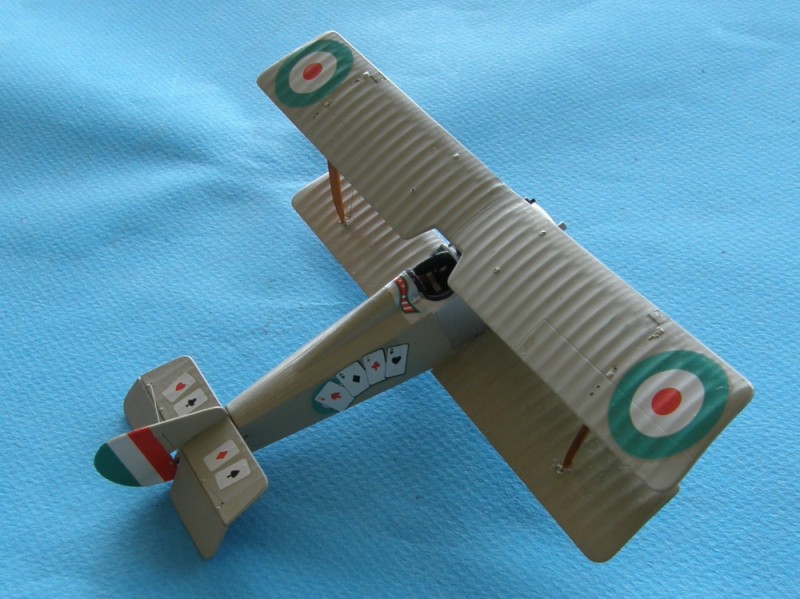
Getting started with the rigging
That glob of glue is going to be fun to repair.
When once you have tasted flight you will walk the Earth with your eyes turned skyward.
For there you have been, and there you will always long to return.
-Leonardo Da Vinci

#259
Massachusetts, United States
Joined: October 23, 2011
KitMaker: 2,265 posts
AeroScale: 1,715 posts
Posted: Sunday, July 22, 2012 - 08:38 PM UTC
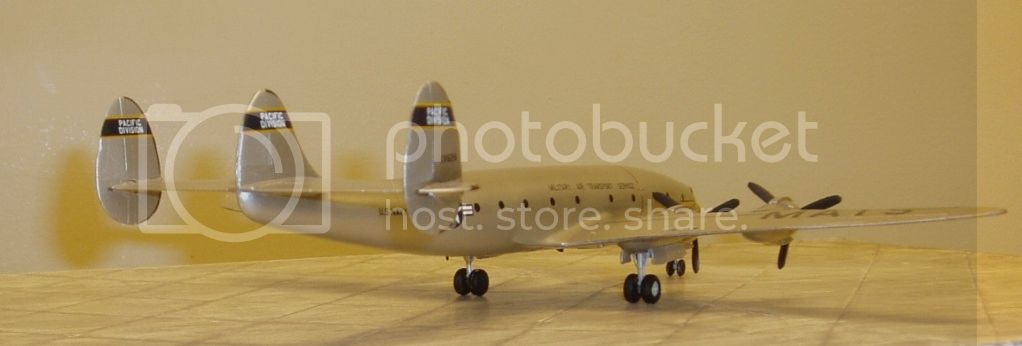
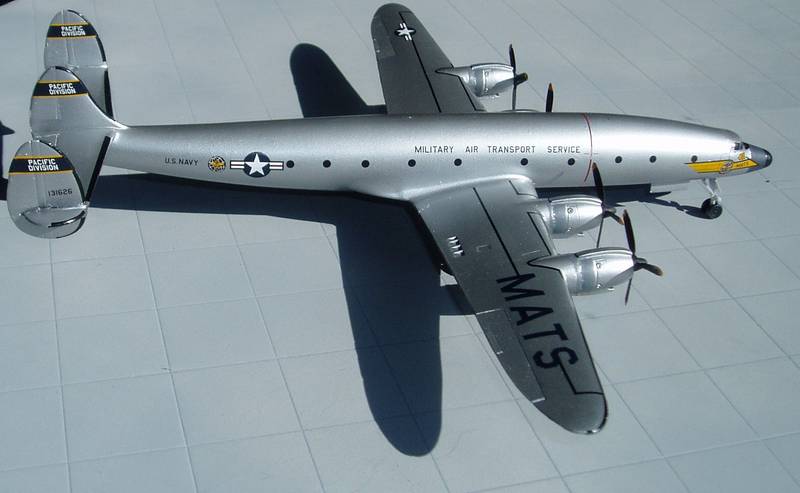
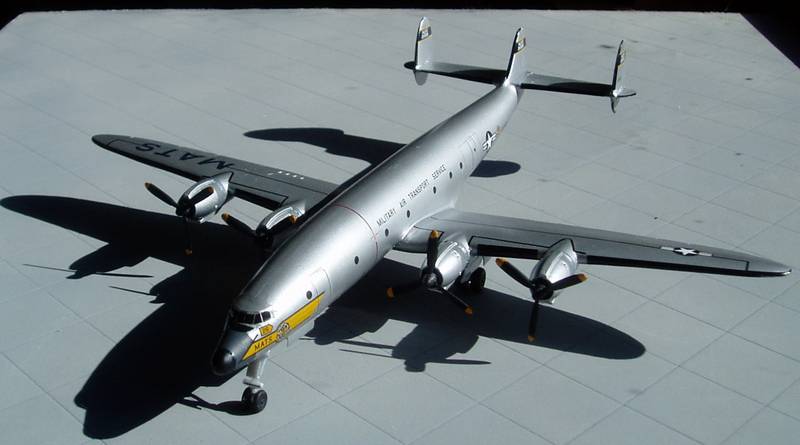
I'm pretty happy with this Connie now that its done. there are actually a few minor touches needed before I can take gallery pics, prop tips, and a few minor touch ups, but I couldnt resist taking pictures.
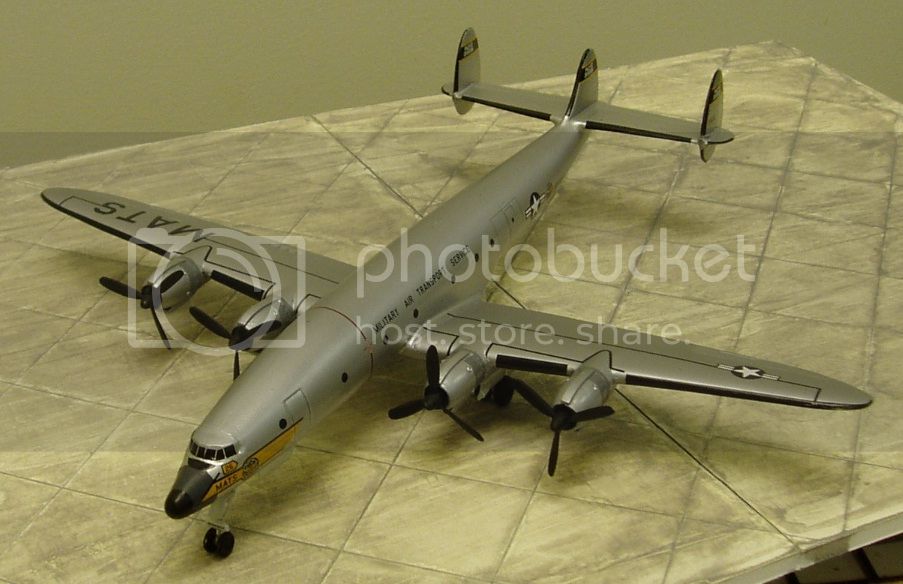
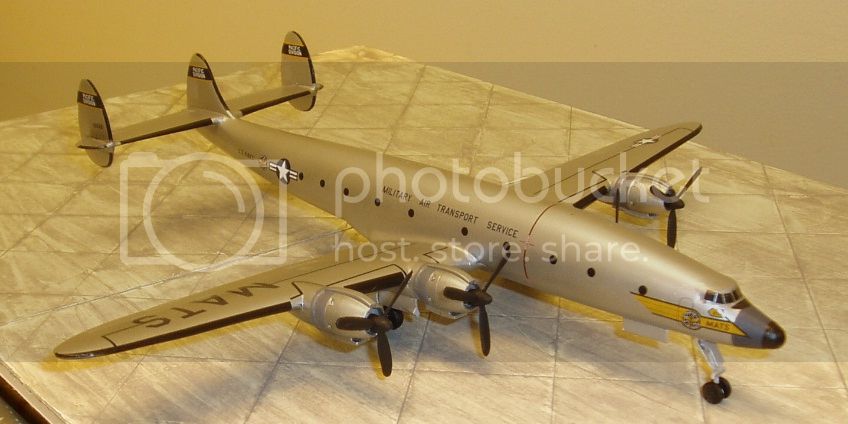
a favorite view...
and for reference
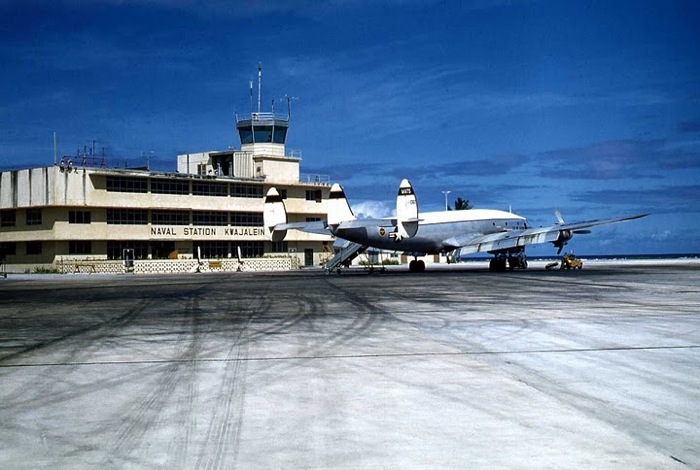
On Kwajalein in Navy days, probobly late 1950s.
Wisconsin, United States
Joined: September 11, 2009
KitMaker: 1,917 posts
AeroScale: 563 posts
Posted: Monday, July 23, 2012 - 12:38 AM UTC
Jessie and Jonathan, those are some beauty queens. Really good modeling going on here, everyone!
Jonathan, I'm also watching your "My Hometown" Kwajalein coming along with great interest. Are you going to piece together that frail rolling staircase?

Keep it coming.

-Sean H.
Current: model railroad layout
Stalled a while ago:
. 1950's Chrome, WW II Twins
Last completed: Police Car
#259
Massachusetts, United States
Joined: October 23, 2011
KitMaker: 2,265 posts
AeroScale: 1,715 posts
Posted: Monday, July 23, 2012 - 04:59 AM UTC
Quoted Text
...
Are you going to piece together that frail rolling staircase?
Keep it coming.
-Sean H.
yes indeed, but mercifully, there is a PE kit, so I dont need to scratch build it. I bought one last fall from
Martola.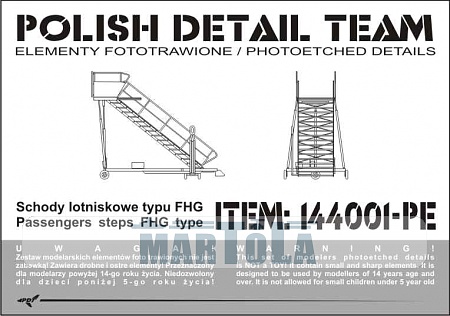
havent openned the package yet...
Alabama, United States
Joined: January 04, 2009
KitMaker: 45 posts
AeroScale: 31 posts
Posted: Friday, July 27, 2012 - 10:27 AM UTC
Jonathan-- Never try to resist taking pictures!!
Nice Biplane Jess!! Love those cards.
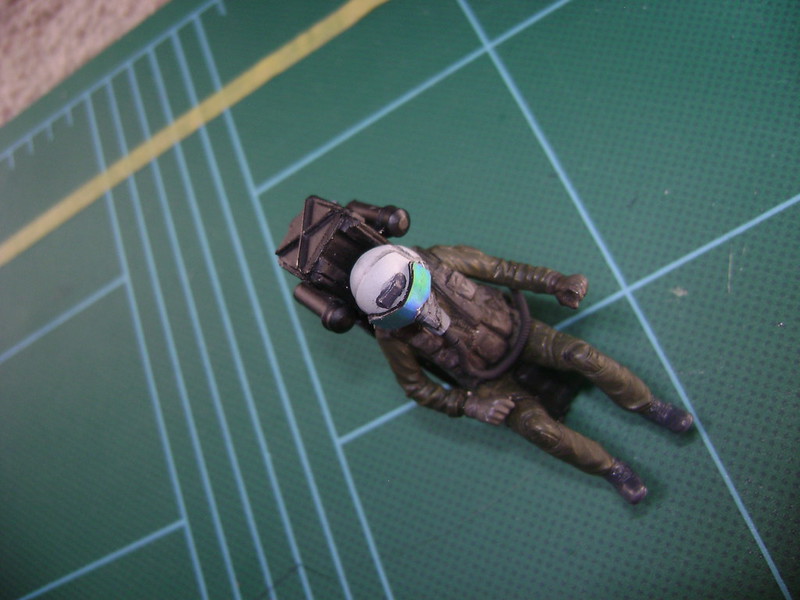
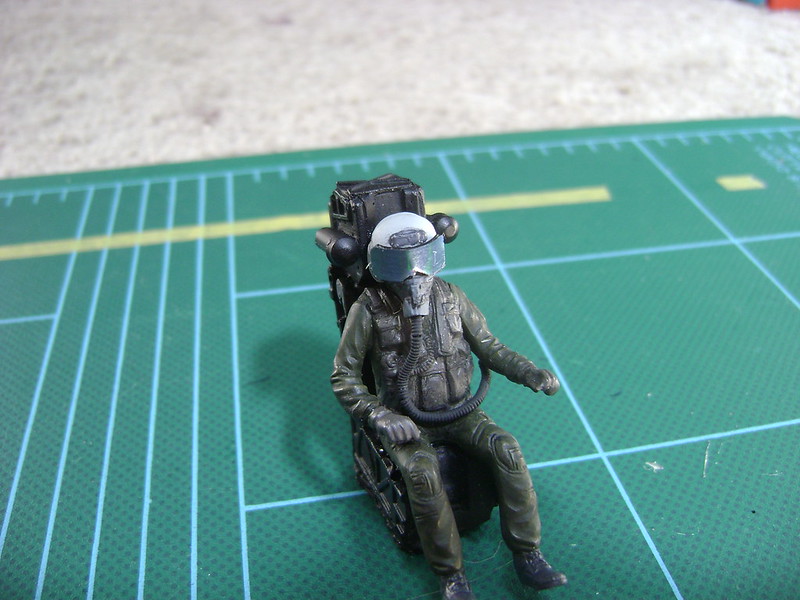
Here is my chief complainer and coffee consumption animal... Err i mean "pilot"
Armor is neatly divided into two catergories: German, and then the other 10 percent.
#259
Massachusetts, United States
Joined: October 23, 2011
KitMaker: 2,265 posts
AeroScale: 1,715 posts
Posted: Monday, July 30, 2012 - 09:27 AM UTC
I finished a hanger queen. images in gallery.
feels good.
There are others, of course.
Bayern, Germany
Joined: January 02, 2011
KitMaker: 279 posts
AeroScale: 239 posts
Posted: Wednesday, August 01, 2012 - 04:43 AM UTC

@ Jonathan: A real beauty! Nice!
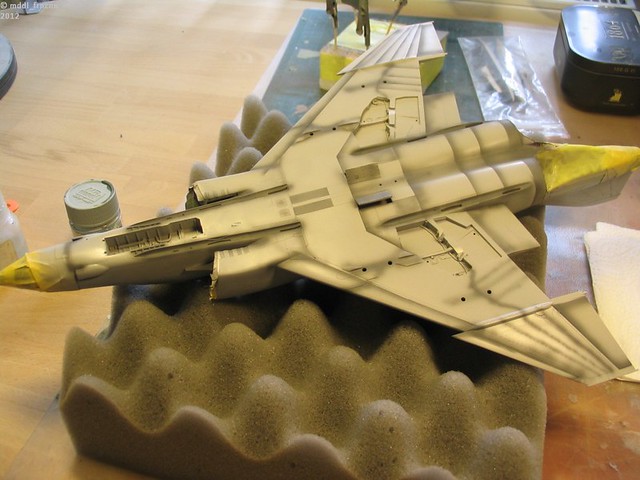
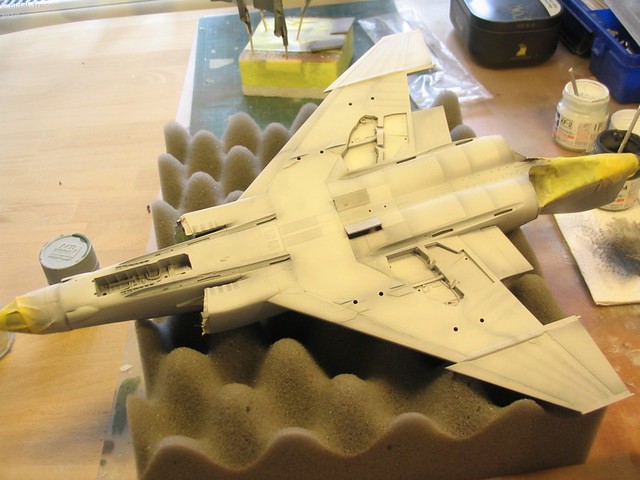
Some update of my 1:48 Revell (Hasegawa) RAF F-4M:
The weaponry is ready: 4 x AIM-7E, 4 x AIM-9D, 1 x SUU-20 gun pod and 2 x fuel tanks. The Sidewinders are from the spare parts box. I always wanted to build a fully armed British Phantom...
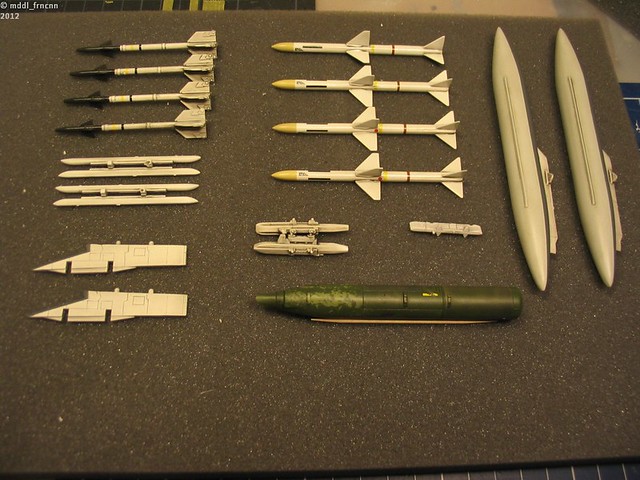
Also all other snall parts are already painted and weathered, ready to be built in (in a model airfarme which is itself far from being finished!). This time I wanted to have every small part ready when also the airframe is done. I think everybody of us knows that: you have finished the fuselage with complete paint job and all, you are ready for adding the final pieces. But a lot of them are still on the sprues, not painted and so on...

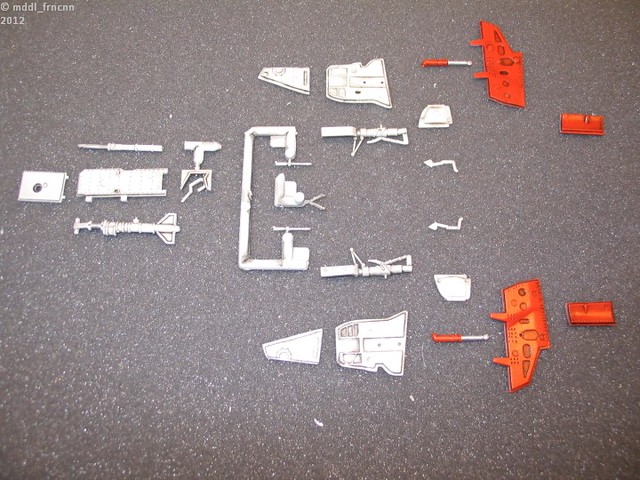
A testfit of the resin seats (Trudetail I think...)
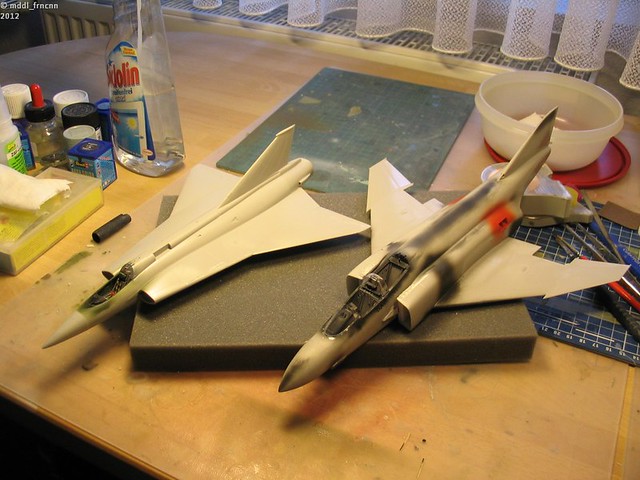
A big plane: The F-4 dwarfing a 1:48 Hasegawa Saab Draken
More photos next time!
Thanks for watching!
Regards,
Sebastian
LtCol Henry Blake: "Radar, whatever it is: sign it, cancel it or order five more!"
#259
Massachusetts, United States
Joined: October 23, 2011
KitMaker: 2,265 posts
AeroScale: 1,715 posts
Posted: Wednesday, August 01, 2012 - 06:26 AM UTC
Quoted Text
This time I wanted to have every small part ready when also the airframe is done. I think everybody of us knows that: you have finished the fuselage with complete paint job and all, you are ready for adding the final pieces. But a lot of them are still on the sprues, not painted and so on...
haha yes, you're right! we all know this is the way to prevent a hanger queen, but leave it for last anyway.

Bayern, Germany
Joined: January 02, 2011
KitMaker: 279 posts
AeroScale: 239 posts
Posted: Wednesday, August 01, 2012 - 08:13 AM UTC
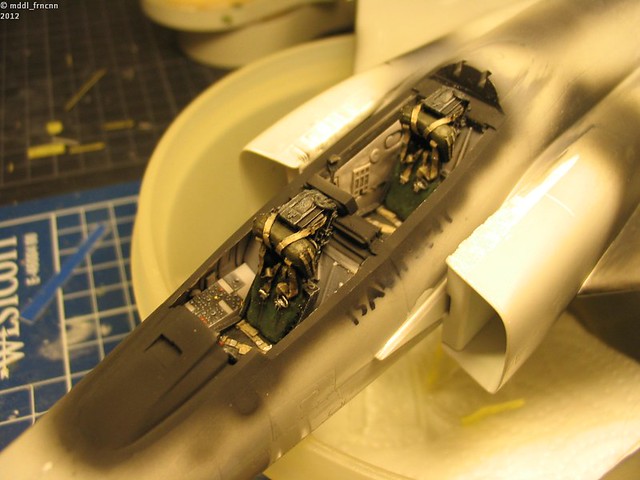
Cockpit is closed:
Ready for paint: a milestone is reached!
Regards,
Sebastian
LtCol Henry Blake: "Radar, whatever it is: sign it, cancel it or order five more!"
England - East Midlands, United Kingdom
Joined: February 07, 2004
KitMaker: 911 posts
AeroScale: 415 posts
Posted: Wednesday, August 01, 2012 - 05:50 PM UTC
Quoted Text
Some update of my 1:48 Revell (Hasegawa) RAF F-4M:
The weaponry is ready: 4 x AIM-7E, 4 x AIM-9D, 1 x SUU-20 gun pod and 2 x fuel tanks. The Sidewinders are from the spare parts box. I always wanted to build a fully armed British Phantom...
Also all other snall parts are already painted and weathered, ready to be built in (in a model airfarme which is itself far from being finished!). This time I wanted to have every small part ready when also the airframe is done. I think everybody of us knows that: you have finished the fuselage with complete paint job and all, you are ready for adding the final pieces. But a lot of them are still on the sprues, not painted and so on...
As an older, wiser modeller once told me, "the last 10% takes 90% of the time." He taught me the trick of doing all the weapons and landing gear first.
Your Phantom is looking excellent btw

"Nelson be damned.......Lets get the hell out of here!"
Georgia, United States
Joined: August 08, 2011
KitMaker: 410 posts
AeroScale: 409 posts
Posted: Thursday, August 02, 2012 - 04:57 AM UTC
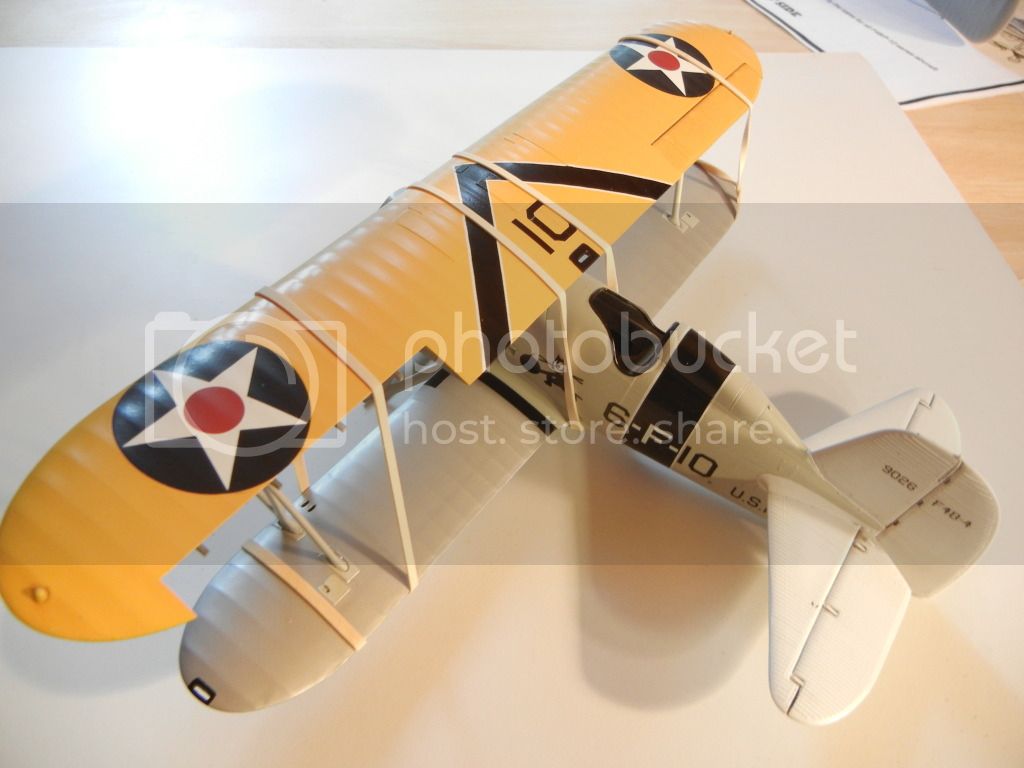
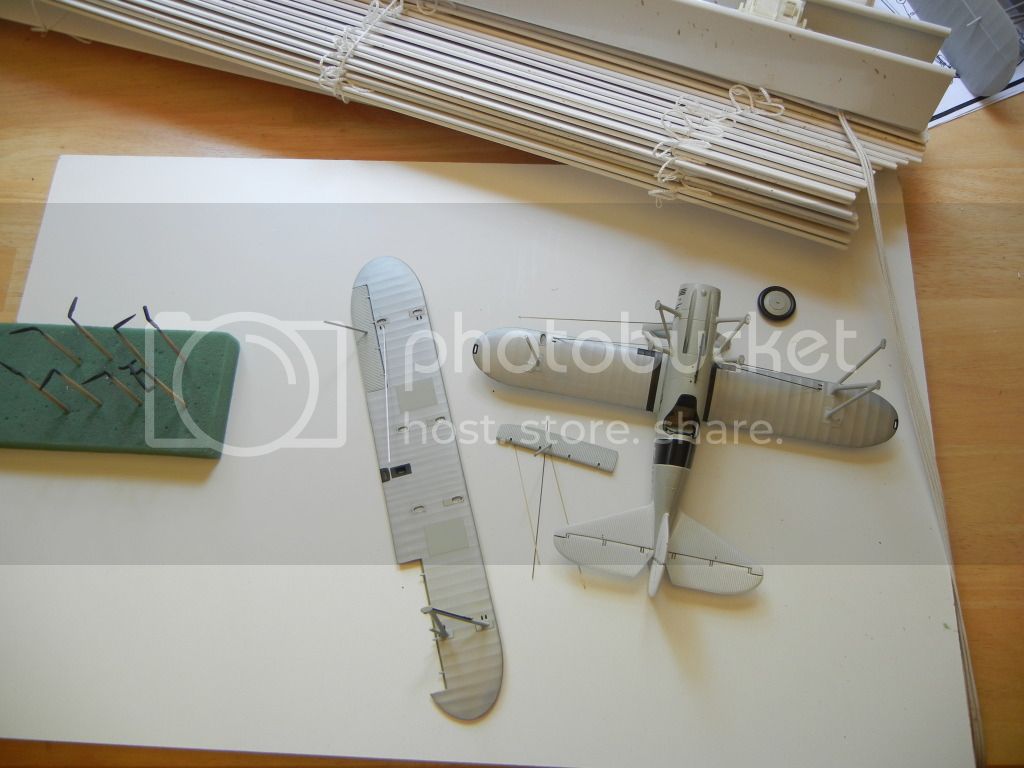
All the great work here has inpsired me to take up a stalled project of my own, my 13/2 Hasegawa F4B-4, last seen awaiting the upper wing to be attached (and rigging, engine, small details, etc):
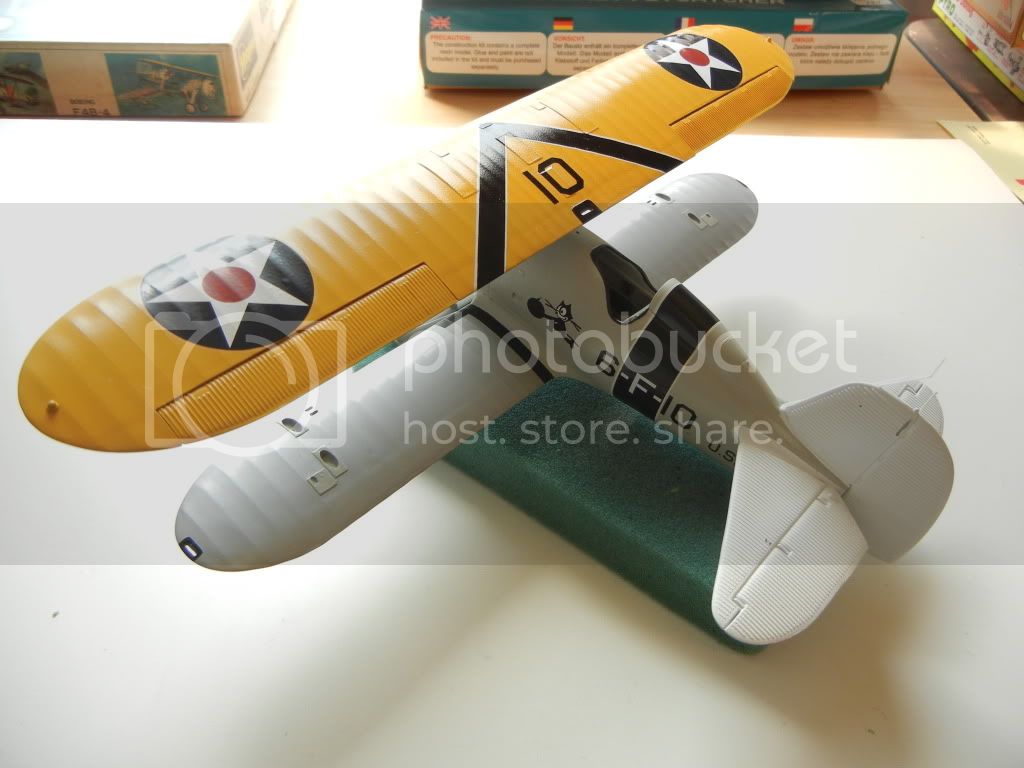
I hadn't gotten anything done since April, and I had spent to much time pondering whether or not to attach the flat rigging wires to the wing before or after I permanently attached it, as well as whether or not to put the windscreen/gunsight on first. In the end, once I started playing with it, it turns out it has to be after it is permanently attached since they will not be the proper lengths otherwise.
So, I took the big step of attaching the wings!
Please see
My Build Blog for more info/photos of the complete build.
Doug
Bayern, Germany
Joined: January 02, 2011
KitMaker: 279 posts
AeroScale: 239 posts
Posted: Thursday, August 02, 2012 - 07:05 AM UTC
!
@ Neil:
Quoted Text
As an older, wiser modeller once told me, "the last 10% takes 90% of the time." He taught me the trick of doing all the weapons and landing gear first.
Yeah, I feel that´s a very good tactic. Let´see for how many projects I can abide by that rule...
@ Doug: That´s a very nice subject you are working on! A rare kit of a rare plane. Looks good!
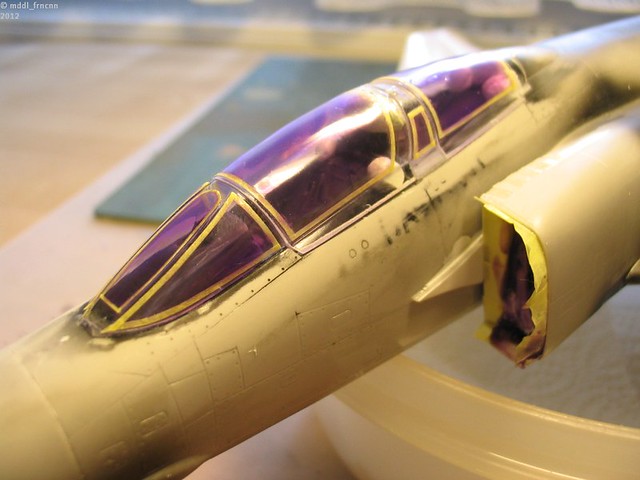
In the mentime I have painted the characteristic exhaust area. I sprayed silver first. Then I masked several panels and shaded with Gunze smoke.
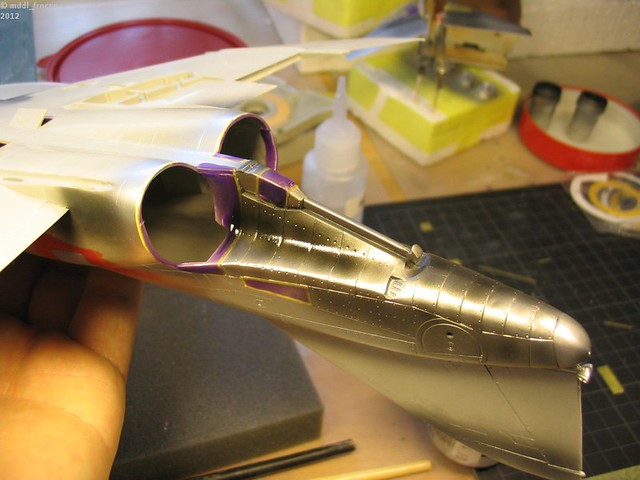
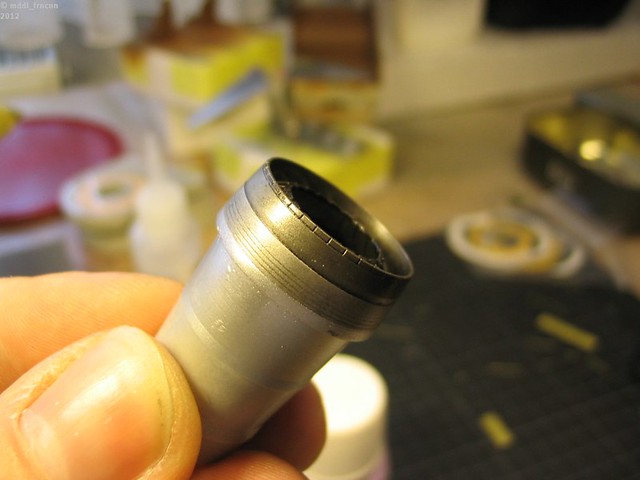
More pictures tomorrow!
Regards,
Sebastian
LtCol Henry Blake: "Radar, whatever it is: sign it, cancel it or order five more!"
British Columbia, Canada
Joined: September 03, 2009
KitMaker: 6,965 posts
AeroScale: 6,247 posts
Posted: Thursday, August 02, 2012 - 08:36 AM UTC
Hi Sebastian,
What's that purple masking liquid you're using? It looks like a useful addition to the tool box.
When once you have tasted flight you will walk the Earth with your eyes turned skyward.
For there you have been, and there you will always long to return.
-Leonardo Da Vinci
Bayern, Germany
Joined: January 02, 2011
KitMaker: 279 posts
AeroScale: 239 posts
Posted: Thursday, August 02, 2012 - 05:26 PM UTC
Hi Jessie,
that´s Maskol from Humbrol. I use that for years.
Usually I apply it with a toothpick.
Regards,
Sebastian
LtCol Henry Blake: "Radar, whatever it is: sign it, cancel it or order five more!"
Bayern, Germany
Joined: January 02, 2011
KitMaker: 279 posts
AeroScale: 239 posts
Posted: Friday, August 03, 2012 - 05:29 PM UTC
!
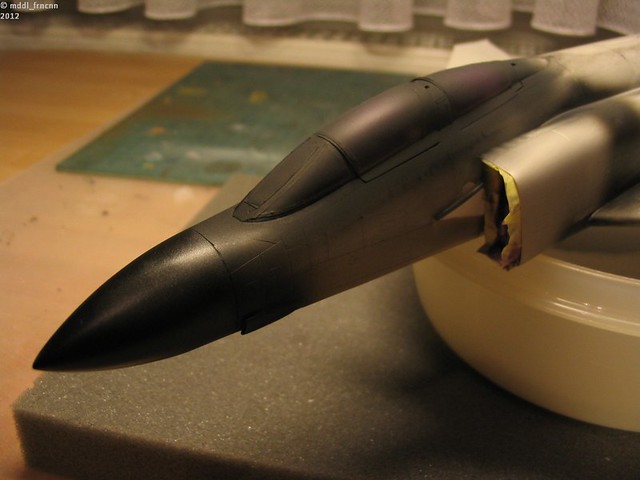
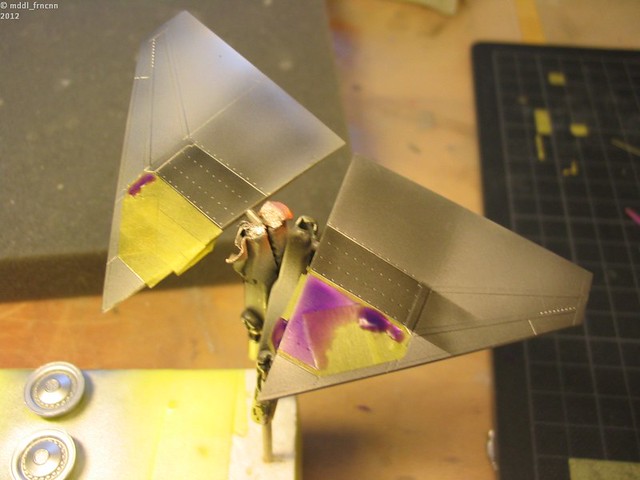
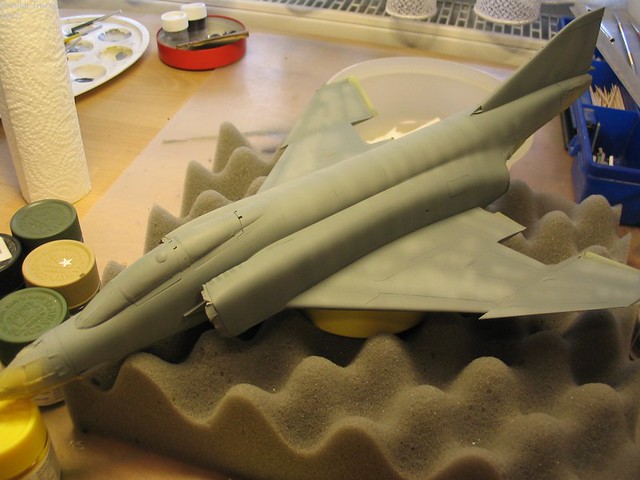
Now the real paint job starts. My F-4 FGR.2 gets the early grey-green camo with light grey underside.
I have done the pre-shading of the bottom side:
The result after a light spray of Light Aircraft Grey: a subtle weathering effect. For homogenous areas of only one shade of color I really like preshading. On the top side with the grey and green I prefer post-shading. Pictures will follow.
For painting, I use a combination of Tamiya, Gunze and Revell acrylics. I do not cling to exact colors, it just has to look right at the end to me

Regards,
Sebastian
LtCol Henry Blake: "Radar, whatever it is: sign it, cancel it or order five more!"
Georgia, United States
Joined: August 08, 2011
KitMaker: 410 posts
AeroScale: 409 posts
Posted: Saturday, August 04, 2012 - 06:40 AM UTC
Looks like you're making good progress Sebastian!
I had a slight mishap with my entry:
More details in my
Build Blog Ontario, Canada
Joined: November 14, 2009
KitMaker: 270 posts
AeroScale: 264 posts
Posted: Sunday, August 05, 2012 - 01:48 PM UTC
Moving my Rafale build over from the Delta Dawn campaign. It almost made it but a busy work week interfered.
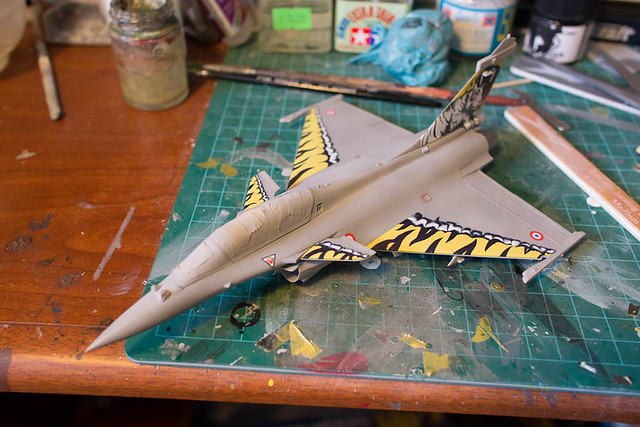 Hobby Boss Rafale B 1/72
 by
mawz_models, on Flickr
Main scheme is down, just need to finish the stencilling, paint the gear and ordnance and hang the fiddly bits.
Wisconsin, United States
Joined: September 11, 2009
KitMaker: 1,917 posts
AeroScale: 563 posts
Posted: Monday, August 06, 2012 - 12:03 AM UTC
Doug, a little frustrating to take a few steps back on a decent model build. Chin up! Move ahead. Is that window shade in the photo not supposed to be there?
Adam, you only have the pesky little bits to go, but that's what makes so many of our builds move back to the hangar/shelf, as Neil mentioned above. You've got support here.
Excellent work so far. Carry on!
-Sean H.
Current: model railroad layout
Stalled a while ago:
. 1950's Chrome, WW II Twins
Last completed: Police Car
Bayern, Germany
Joined: January 02, 2011
KitMaker: 279 posts
AeroScale: 239 posts
Posted: Monday, August 06, 2012 - 05:26 AM UTC
@ Welcome! Your Rafale looks good so far!
@ Doug: Ouch! I hope your F4 can recover soon from this impact!
I have painted my Phantom in Dark Sea Grey:
I ligthened up in the middle of the panels to give it a "patchy" look.
Best regards,
Sebastian
LtCol Henry Blake: "Radar, whatever it is: sign it, cancel it or order five more!"
Bayern, Germany
Joined: January 02, 2011
KitMaker: 279 posts
AeroScale: 239 posts
Posted: Tuesday, August 07, 2012 - 07:43 AM UTC
Small update: the camo is finished!
Starts to look like a RAF Phantom!

A light wash with diluted oil paint will follow.
Regards,
Sebastian
LtCol Henry Blake: "Radar, whatever it is: sign it, cancel it or order five more!"
Wisconsin, United States
Joined: September 11, 2009
KitMaker: 1,917 posts
AeroScale: 563 posts
Posted: Tuesday, August 07, 2012 - 10:36 AM UTC
Sebastian, you do great work with that airbrush. I'm almost convinced to pick one up finally! I really like the effects you've accomplished.
-Sean H.
Current: model railroad layout
Stalled a while ago:
. 1950's Chrome, WW II Twins
Last completed: Police Car
Tennessee, United States
Joined: September 20, 2005
KitMaker: 1,747 posts
AeroScale: 1,673 posts
Posted: Tuesday, August 07, 2012 - 10:55 AM UTC
Sebastian, that is great work! I really enjoyed looking at the Phantom. Sean, if you have any questions about airbrushing just ask, I know I would be happy to help. I recommend the Aztek line of airbrushes. They are very easy to use and give good results. Some may want a more "advanced" airbrush, but I am happy with mine and the results it has given me. Just look at my gallery of photos to see some models, all done with the Aztek 4709. Take care one and all, Russell
To Thine Own Self Be True
Siderius
A.K.A., RTA
British Columbia, Canada
Joined: September 03, 2009
KitMaker: 6,965 posts
AeroScale: 6,247 posts
Posted: Wednesday, August 08, 2012 - 03:49 AM UTC
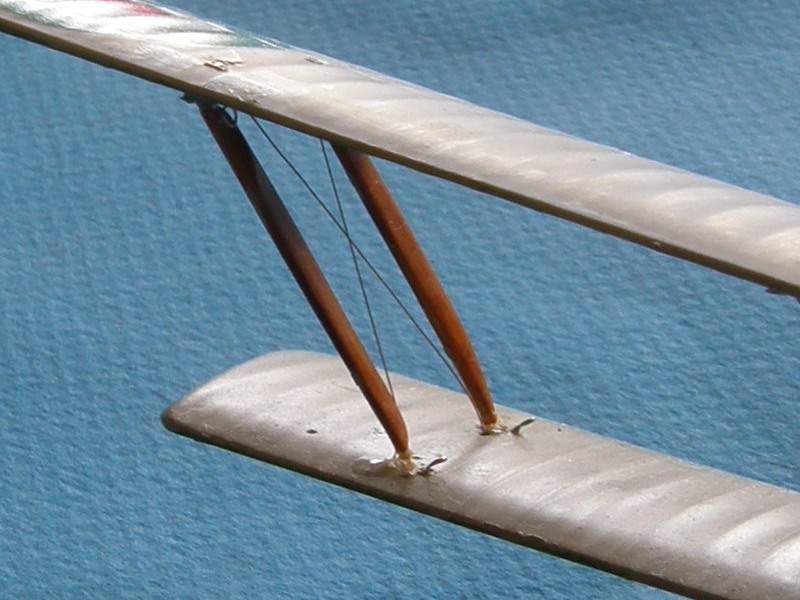
Getting back to the Hanriot, I turn my attention to the interplane rigging. The technique I'm using makes actual working rigging with representations of the turnbuckles. I have a supply of hypotube that I acquired from a medical device company I worked at back in the late '90s. I cut the tube by filing a weak point into one side then snapping it off with my needlenose pliers. Now comes the stressful part.
Carefully thread a piece of smoke-coloured invisible monofilament thread through the tube and hold it in place with one hand. Picking up the model in another hand, loop the thread through one of your previously positioned wire anchor point loops with yet another hand. Then, thread it back through the little piece of tube that you haven't allowed to slide off the free end of the thread. With another hand, slide the tube up to the anchor point and hold it in place while you pick up a drop of superglue with still another hand and allow it to run up into the tube through capillary action between the threads. Don't let any get onto any other part of the model nor any of the myriad fngers cluttering up the work area. Now repeat that whole process with the other end of the wire, this time making sure to pull everything tight before gluing.
Since the action I've just described requires at least 5 hands and I'm handicapped by having only two, one may easily see the potential for stress.
Once you've stopped shaking, trim off the free ends and tidy everything up. Repeat 7 more times...
When once you have tasted flight you will walk the Earth with your eyes turned skyward.
For there you have been, and there you will always long to return.
-Leonardo Da Vinci
#439
Washington, United States
Joined: November 05, 2005
KitMaker: 4,950 posts
AeroScale: 3,192 posts
Posted: Wednesday, August 08, 2012 - 05:50 AM UTC
I haven't had enough coffee yet to read that description......

Hanger Queens in Waiting:
Monogram 1/72 F8F-1
Corsair the Sky Pirate - 1/72 Ace A-7D
Century Series - Airfix 1/72 F-105G
Anti Shipping - Academy 1/72 PBJ-1D
Academy 1/72 F-84E
British Columbia, Canada
Joined: September 03, 2009
KitMaker: 6,965 posts
AeroScale: 6,247 posts
Posted: Wednesday, August 08, 2012 - 06:34 AM UTC
Oh dear. I'll try and make it simpler:
Step 1: Make anchor rings by winding thin gauge wire like a twist tie around a small mandrel (I use a piece of piano wire). Cut the wound ends so you have a loop on a short straight stem;
Step 2: Drill holes where you want the rigging lines to anchor and glue in the rings you made in step 1;
Step 3: Cut your tube into 3 mm lengths to make the turnbuckle bodies;
Step 4: Thread your rigging line[1] through the tube, loop it through an anchor ring and back through the tube. Slide the tube up the line until it's right next to the anchor ring. Apply a drop of superglue to the end away from the anchor ring to fix it in place;
Step 5: Repeat step 4 on the other end of the rigging line except before applying the glue, make sure to pull all the slack out of the line. Trim the loose ends off to make it all neat;
Step 6: Admire your freshly applied rigging wire, then do it all over again until all the rigging is in place
[1] I use smoke coloured invisible mending thread, but this technique works with the rigging material of your choice.
When once you have tasted flight you will walk the Earth with your eyes turned skyward.
For there you have been, and there you will always long to return.
-Leonardo Da Vinci


