

Air Campaigns
Want to start or join a group build? This is where to start.
Want to start or join a group build? This is where to start.
Hosted by Frederick Boucher, Michael Satin
OFFICIAL: National Pride Campaign

Mcleod

Joined: April 07, 2010
KitMaker: 1,028 posts
AeroScale: 939 posts
Posted: Wednesday, January 28, 2015 - 10:26 AM UTC
That will do nicely, Lap. Welcome
SGTJKJ

#041

Joined: July 20, 2006
KitMaker: 10,069 posts
AeroScale: 3,788 posts

Posted: Wednesday, January 28, 2015 - 12:59 PM UTC
Nice choice, Lapman. Based on your Seaplane campaign entry, this should look equally great in overall aluminium.
Looking forward to see how it comes together.
Looking forward to see how it comes together.


scribbles101

Joined: May 25, 2013
KitMaker: 137 posts
AeroScale: 103 posts
Posted: Thursday, January 29, 2015 - 02:21 AM UTC
Quoted Text
Thinking about colours I'm not sure what the interior should be. I'm thinking it should be brick-red dope with the frame and upper parts (not fabric) in green. If anyone can confirm this that would be great.
Stephen,
I can confirm that the interior faces should indeed be brick red dope, as for the frame work, I am pretty sure that should be varnished wood, not 100% sure as while I have worked on the tiger moth at the De Havilland museum, I did not get a good look inside so I am going on my somewhat unreliable memory, but I am pretty sure that frame work is varnished wood.
Hope this helps


phantom_phanatic309

#372

Joined: March 10, 2010
KitMaker: 2,568 posts
AeroScale: 1,619 posts

Posted: Friday, January 30, 2015 - 01:44 AM UTC
Wish I'd seen that earlier Simon.
I did some googling and found photo's of preserved Tigers with the red dope and framing in RAF interior grey-green. So that's how I've done mine. I'll keep your suggestion in mind if I build another. Probably will as it's a great little model.
There are some annoying ejector pin marks but I'm hoping they'll be hidden by the seats and crew when I fit them in. I also should have filled those dimples just below the doors. They are supposed to be drilled through to make locating holes for the optional open doors. Something else to remember in future.
I did some googling and found photo's of preserved Tigers with the red dope and framing in RAF interior grey-green. So that's how I've done mine. I'll keep your suggestion in mind if I build another. Probably will as it's a great little model.

There are some annoying ejector pin marks but I'm hoping they'll be hidden by the seats and crew when I fit them in. I also should have filled those dimples just below the doors. They are supposed to be drilled through to make locating holes for the optional open doors. Something else to remember in future.

air-aset

Joined: March 25, 2004
KitMaker: 84 posts
AeroScale: 42 posts

Posted: Friday, January 30, 2015 - 07:19 PM UTC
Good Morning Fellow campaign members  .
.
Here is My entry an A-37 of the Ecuadorian Air Force.

.Here is My entry an A-37 of the Ecuadorian Air Force.
Mcleod
Joined: April 07, 2010
KitMaker: 1,028 posts
AeroScale: 939 posts
Posted: Saturday, January 31, 2015 - 01:41 AM UTC
Hi, Gonzalo. I'm happy to see you bring in an Ecuadorian Dragonfly. It really is the kind of interesting variety I was hoping for in this campaign. The Cessna A37 in your home colors is a welcome campaign addition. 
@Stephen- I don't know if you ever built the old-tool Airfix DH.82, but, I can assure you the new kit is light years ahead. Yours is coming along very well, indeed.
I'm glad the probable true Moth interior colors are being pointed out here; I would have just wound up painting mine a very pale yellow, thinking the interior was a doped fabric color.
There are some very notable builds happening here. Its still early in the campaign, so I'm sure we'll see more.
phantom_phanatic309
#372
Joined: March 10, 2010
KitMaker: 2,568 posts
AeroScale: 1,619 posts
Posted: Saturday, January 31, 2015 - 02:55 AM UTC
Ben, yes I did indeed build the old tool Tiger Moth in the late 90's. It was the first bipe I ever built and knowing how bad the kit was I'm surprised I managed to get it together. It was later put on top of a tall cabinet in the living room and then pulled apart by our pet hamster when he escaped one night and managed to climb up the back of it. I've got whats left of it somewhere and there are chew marks on the upper wing. He also attacked a 1/35 Panther tank at the same time and mauled the commander 
Dragon164
#226
Joined: February 20, 2012
KitMaker: 1,909 posts
AeroScale: 508 posts

Posted: Saturday, January 31, 2015 - 07:47 AM UTC
I may have to change my planned kit,  having opened the box I found that the clear parts are not in it
  I am sure they are around somewhere.
Cheers Rob.
having opened the box I found that the clear parts are not in it I am sure they are around somewhere. Cheers Rob.

Mcleod
Joined: April 07, 2010
KitMaker: 1,028 posts
AeroScale: 939 posts
Posted: Saturday, January 31, 2015 - 09:01 AM UTC
Quoted Text
I may have to change my planned kit,
Cheers Rob.
You must have one doozy of a carpet monster, Rob, to loose something as big as a 48 scale F-101B canopy. Hope you find it
 I was looking forward to a Voodoo in Canadian colors.
b17-peter
#392

Joined: January 09, 2013
KitMaker: 696 posts
AeroScale: 608 posts

Posted: Friday, February 06, 2015 - 03:48 AM UTC
Hello mates,
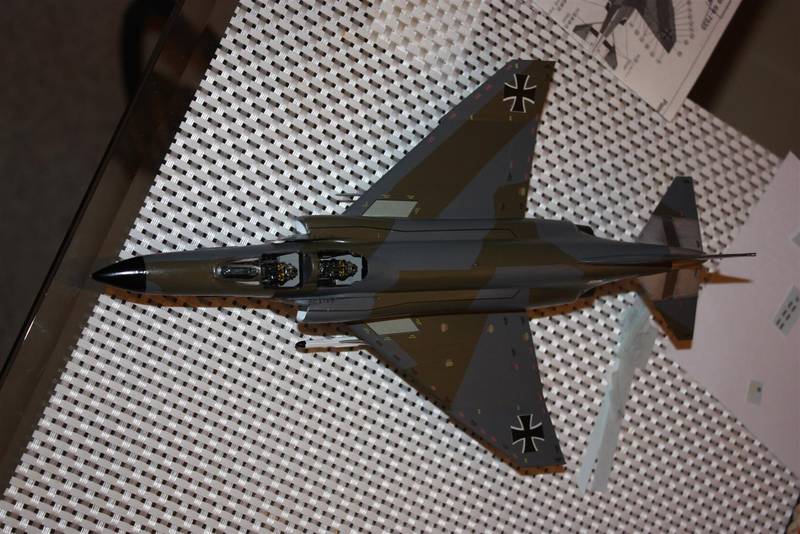
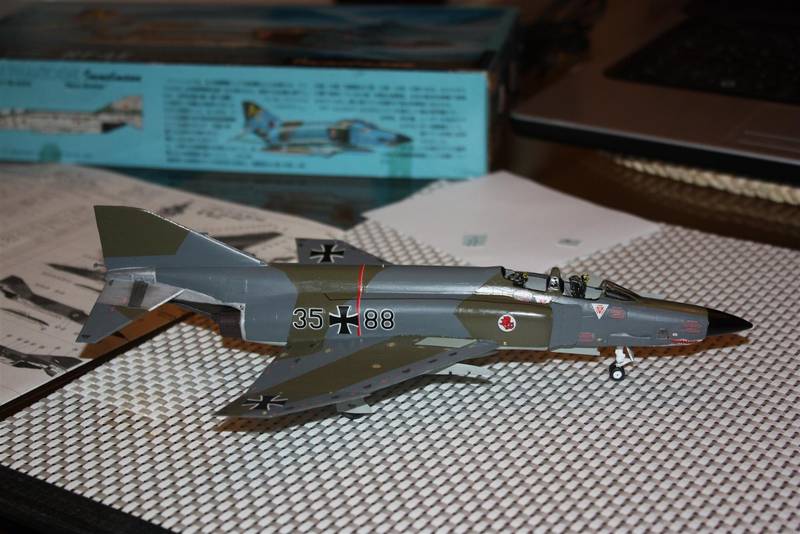
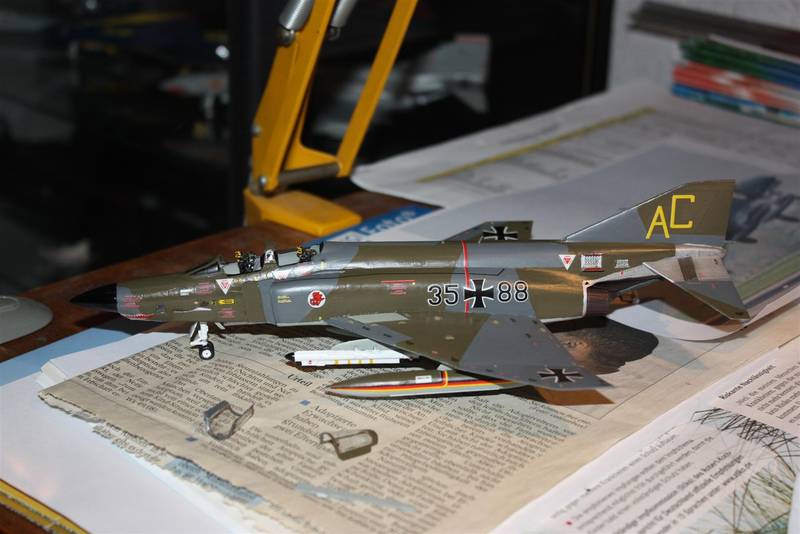
my Luftwaffe Phantom is nearly done now, I'm planning to get me a metal tip for the nose, so it will be a few weeks till I call this thing really finished. Here are the latest photos anyway.
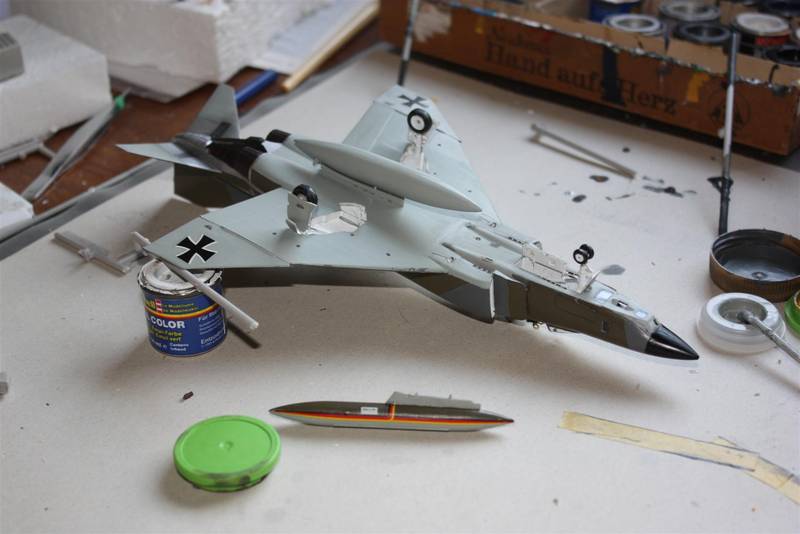

my Luftwaffe Phantom is nearly done now, I'm planning to get me a metal tip for the nose, so it will be a few weeks till I call this thing really finished. Here are the latest photos anyway.
b17-peter
#392
Joined: January 09, 2013
KitMaker: 696 posts
AeroScale: 608 posts
Posted: Friday, February 06, 2015 - 03:50 AM UTC
b17-peter
#392
Joined: January 09, 2013
KitMaker: 696 posts
AeroScale: 608 posts
Posted: Friday, February 06, 2015 - 03:58 AM UTC
Well, that's all for now. Will put the canopies on this weekend and then order the metal pitot tube. Probably will collect it in March at a model exhibition. Then I'll take better photos for the gallery.
I liked that build a lot, could just start the next one (Fujimi's colorful "25 years Phantom in the RAF" kit)
Looking forward to your finished models and new entries still.
Have fun!
I liked that build a lot, could just start the next one (Fujimi's colorful "25 years Phantom in the RAF" kit)
Looking forward to your finished models and new entries still.
Have fun!

c4willy
#305

Joined: February 01, 2006
KitMaker: 1,673 posts
AeroScale: 1,517 posts

Posted: Friday, February 06, 2015 - 05:07 AM UTC
Great looking phantom Peter, the camo job reminds me of the WW2 British day fighter scheme. look forward to seeing it in the gallery.
Mcleod
Joined: April 07, 2010
KitMaker: 1,028 posts
AeroScale: 939 posts
Posted: Friday, February 06, 2015 - 05:43 AM UTC
Well done, Peter. It looks great in that splinter pattern: so much more interesting than the straight greys these birds also sported.
SGTJKJ
#041
Joined: July 20, 2006
KitMaker: 10,069 posts
AeroScale: 3,788 posts
Posted: Friday, February 06, 2015 - 12:58 PM UTC
Nice camo and cool markings. The splinter cano is perfectly complemented by the break of the colorful markings.
Looking forward to see it in the gallery.
Looking forward to see it in the gallery.
Joel_W

Joined: December 04, 2010
KitMaker: 11,666 posts
AeroScale: 7,410 posts
Posted: Friday, February 06, 2015 - 06:43 PM UTC
Peter,
Excellent build on your F4 with a German camo scheme. Back in the mid 70's the only F4 I remember building had a similar German scheme. Brought back some really nice memories.
Joel
Excellent build on your F4 with a German camo scheme. Back in the mid 70's the only F4 I remember building had a similar German scheme. Brought back some really nice memories.
Joel

b17-peter
#392
Joined: January 09, 2013
KitMaker: 696 posts
AeroScale: 608 posts
Posted: Saturday, February 07, 2015 - 02:12 PM UTC
@ Chris
@ Ben
@ Jesper
@ Joel
Many thanks for your kind words! Cheers Peter
@ Ben
@ Jesper
@ Joel
Many thanks for your kind words! Cheers Peter
Joel_W
Joined: December 04, 2010
KitMaker: 11,666 posts
AeroScale: 7,410 posts
Posted: Monday, February 09, 2015 - 08:21 PM UTC
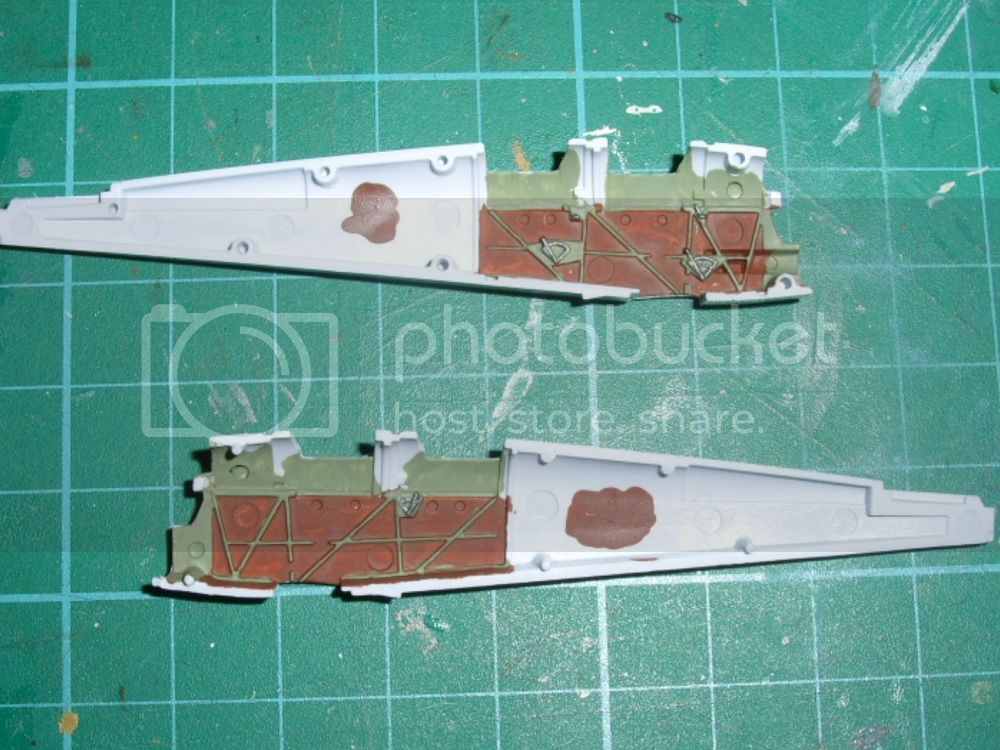
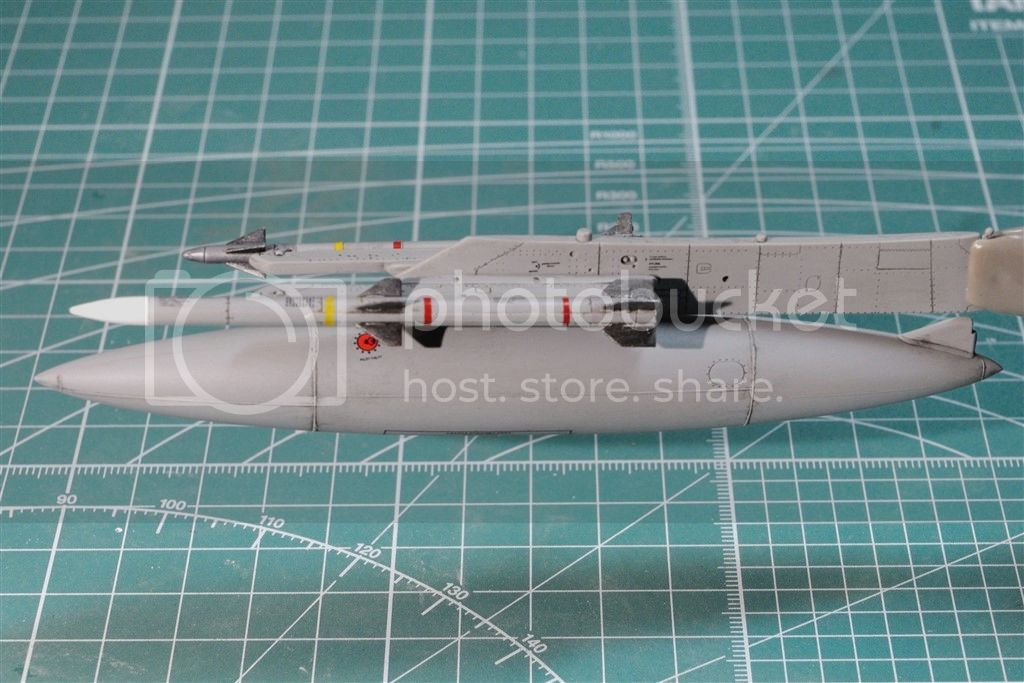
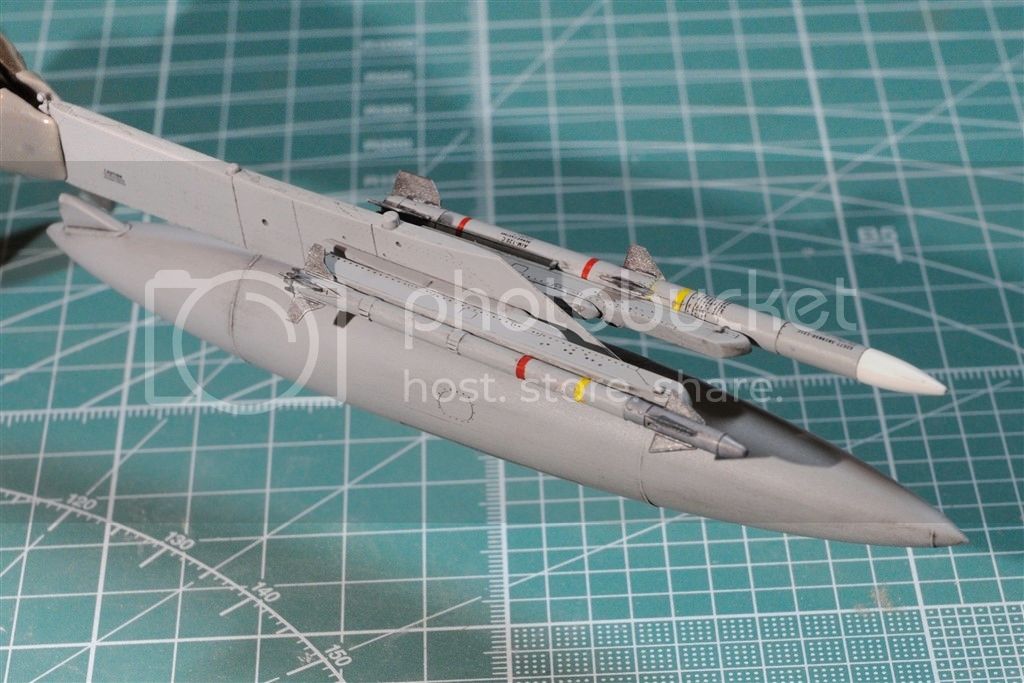
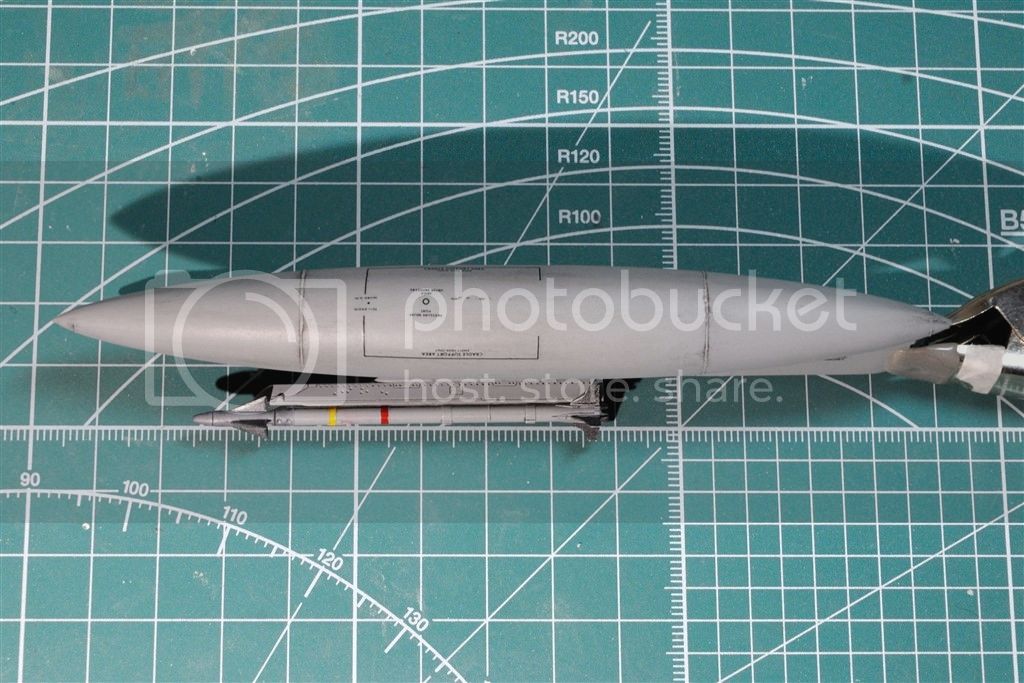
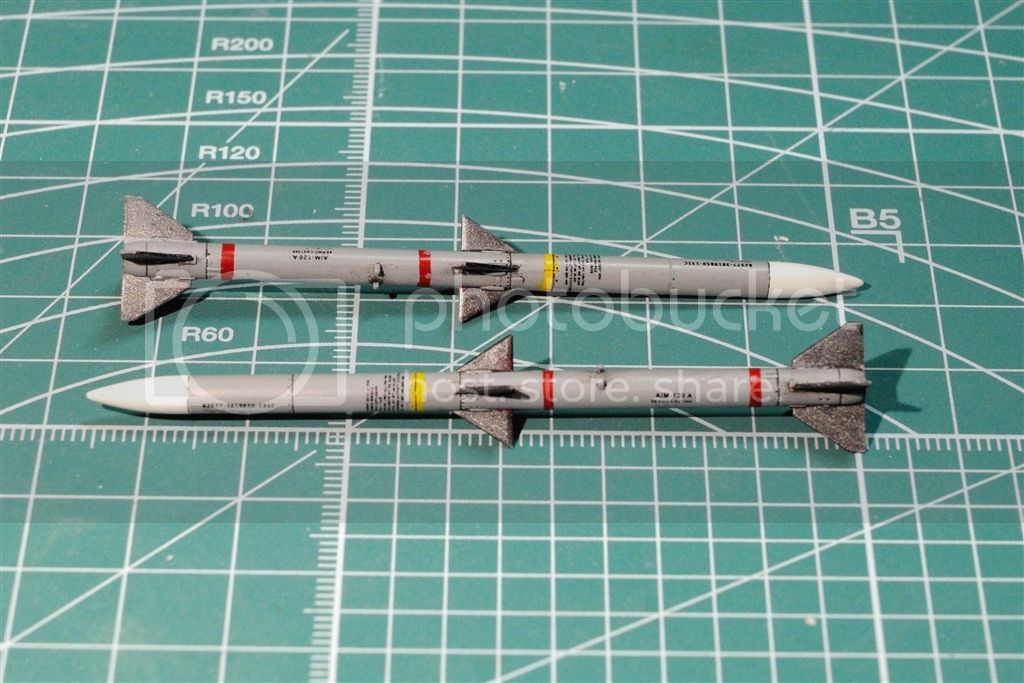
It's been a little while since I last updated my progress on the F-15C build. Work has concentrated on completing both wing stations and the centerline station for just the 300 gallon drop tank. All 3 stations have been painted with Model Master FS36375 Light Ghost Gray. The AIM-9X Sidewinders, as well as the AIM-120A AMRAAMs & AIM-120C AMRAAMs have also been painted. The Yellow and Red stripes were masked and air brushed on as the kit decals just didn't want to lay down. Honestly, it was faster to mask, paint, and cleanup, then deal with each of those stripes.
All the various components received a coating of Glosscoat as a base for the kit decal stencils. With a little effort and using Paul Budziks 3 step decaling procedure of Micro Set under and over, then Micro Sol, followed by Solvaset, worked perfectly. This has been the 1st model ever that I've used Solvaset, and I'm more then impressed.
Once the decals had dried overnight, a 2nd coat of Glosscoat was applied. I let that dry for several hours, then I applied a Sludge was of Flories Dark wash. To make it flow into the shallow panel recesses, I thinned it 2 parts wash to 1 part warm tap water. 15 min later I very carefully removed the excess with damp Qtips, then sealed with Dullcoat.
Finally after a few hours of drying time, I glued up the stations with Gorilla glue. Just amazing stuff.
I'm really quite happy how the homemade wield seams turned out after the wash. Honestly, they look better then the smooth kit wield seams.
Here's a few pictures of the stations and loads.
Joel


Mcleod
Joined: April 07, 2010
KitMaker: 1,028 posts
AeroScale: 939 posts
Posted: Tuesday, February 10, 2015 - 12:19 AM UTC
Joel, thank-you for explaining your process in depth.
Your ordinance looks real enough to me; real enough to make a Mig worry. Well done
Your ordinance looks real enough to me; real enough to make a Mig worry. Well done
SGTJKJ
#041
Joined: July 20, 2006
KitMaker: 10,069 posts
AeroScale: 3,788 posts
Posted: Tuesday, February 10, 2015 - 03:02 PM UTC
Beautiful underwing stores, Joel. Really cool details and small models in their own right.
scribbles101
Joined: May 25, 2013
KitMaker: 137 posts
AeroScale: 103 posts
Posted: Wednesday, February 11, 2015 - 07:45 PM UTC
Peter - That Phantom of yours looks really good, nice job!
Joel - If the ordinance is anything to go by, that F15 is going to be a really impressive looking model when its done! Can't wait to see the finished product
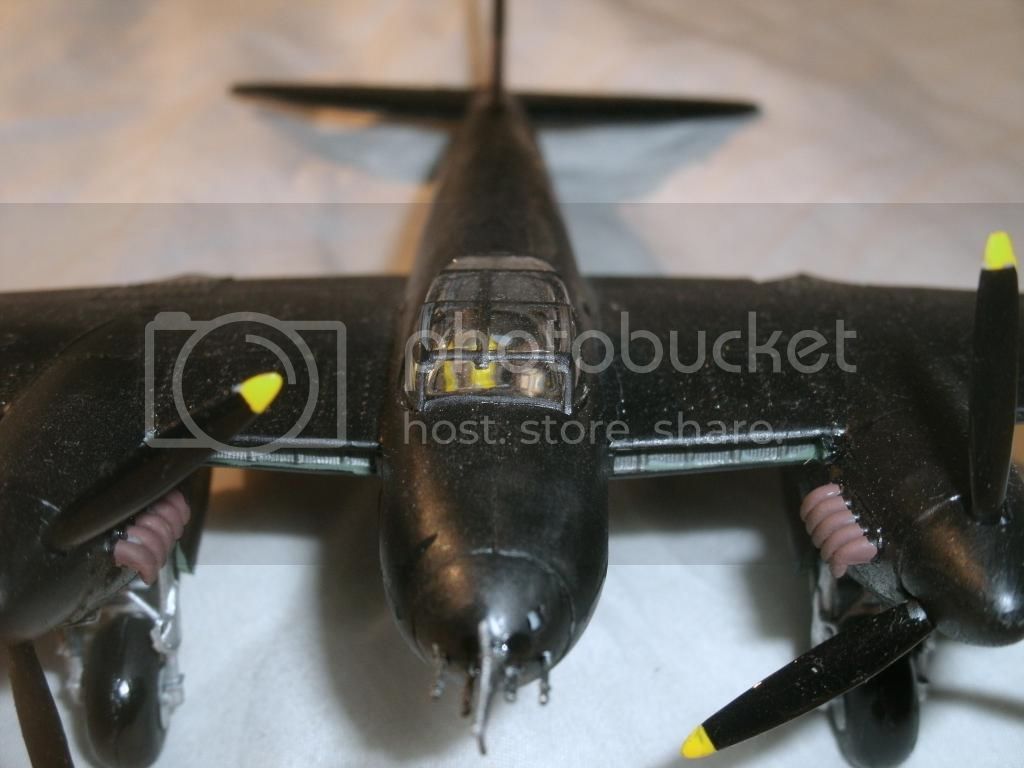
So, Finally, the Mosquito n.f mk2 is done. I have to say that there are some parts that I am not too happy with, for example the navigation lights on the wing tips are a bit iffy because I just painted them on with clear red or green over aluminium. Here are the pics of the finished product

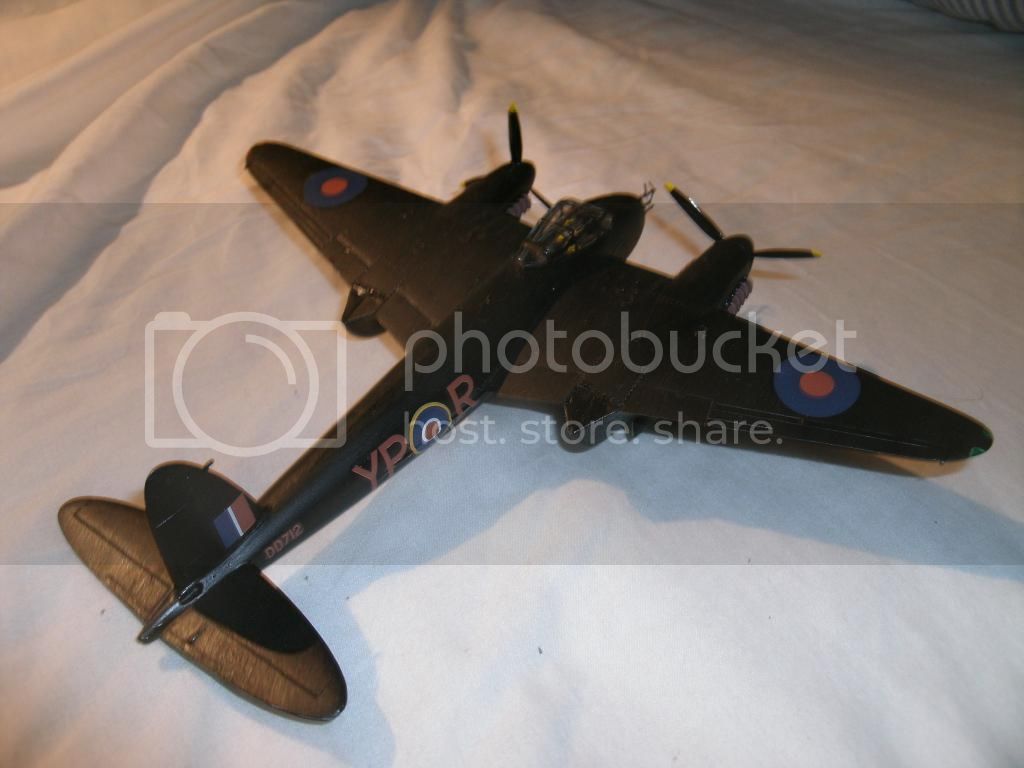
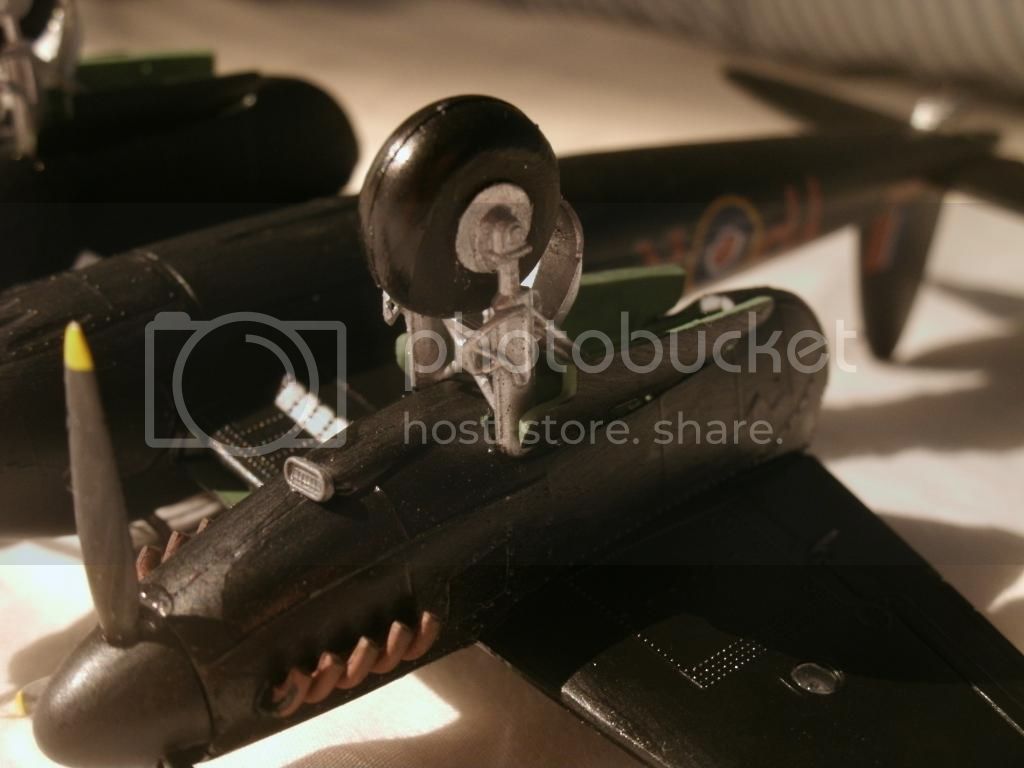
Sorry that backdrop is a bit rough, but a piece of white fabric on the floor was the best I could do
Hope you like the result, even though I am not particularly skilled, and this is quite an old kit now, but it still goes together well and looks pretty good in the end. I did find that some of the decals were very slightly out of register but it is only apparent if you look closely, so it's not so bad really.
anyway, constructive criticism is most welcome, and I am looking forward to seeing the finished products from this campaign, there are some really interesting builds going on here!
Joel - If the ordinance is anything to go by, that F15 is going to be a really impressive looking model when its done! Can't wait to see the finished product
So, Finally, the Mosquito n.f mk2 is done. I have to say that there are some parts that I am not too happy with, for example the navigation lights on the wing tips are a bit iffy because I just painted them on with clear red or green over aluminium. Here are the pics of the finished product
Sorry that backdrop is a bit rough, but a piece of white fabric on the floor was the best I could do
Hope you like the result, even though I am not particularly skilled, and this is quite an old kit now, but it still goes together well and looks pretty good in the end. I did find that some of the decals were very slightly out of register but it is only apparent if you look closely, so it's not so bad really.
anyway, constructive criticism is most welcome, and I am looking forward to seeing the finished products from this campaign, there are some really interesting builds going on here!
b17-peter
#392
Joined: January 09, 2013
KitMaker: 696 posts
AeroScale: 608 posts
Posted: Wednesday, February 11, 2015 - 10:36 PM UTC
Great job, Joel, like it very much! I will follow that build 
@Simon Thank you! And this Mossie really looks mean and business Well done! I built that kit back in the 90ies, chose the silver finish of an Australian day fighter then. Now it's resting in a box in my basement.
Cheers Peter
@Simon Thank you! And this Mossie really looks mean and business
Well done! I built that kit back in the 90ies, chose the silver finish of an Australian day fighter then. Now it's resting in a box in my basement.Cheers Peter
Mcleod
Joined: April 07, 2010
KitMaker: 1,028 posts
AeroScale: 939 posts
Posted: Thursday, February 12, 2015 - 12:11 AM UTC
A very nice Mosquito night fighter, Simon. It's really good to see you complete; well done!
c4willy
#305
Joined: February 01, 2006
KitMaker: 1,673 posts
AeroScale: 1,517 posts
Posted: Thursday, February 12, 2015 - 04:42 AM UTC
Great looking stores Joel and in 1/32 scale the decals and oil washes make them look like they could jump off the rails and take out an angry looking Mig!
Joel_W
Joined: December 04, 2010
KitMaker: 11,666 posts
AeroScale: 7,410 posts
Posted: Thursday, February 12, 2015 - 06:01 AM UTC
Quoted Text
Great looking stores Joel and in 1/32 scale the decals and oil washes make them look like they could jump off the rails and take out an angry looking Mig!
Chris,
Thanks so much for that great comment. I'm even more impressed since the build is in 1/48 scale.
Joel
 |

WEB HOSTING BY


Copyright ©2021 AeroScale and Kitmaker Network, a subsidiary of Silver Star Enterprises
All Rights Reserved. Please read our Conditions of Use and Privacy Policy.
All Rights Reserved. Please read our Conditions of Use and Privacy Policy.