Air Campaigns
Want to start or join a group build? This is where to start.
Stars of the VVS Official Thread
lampie
#029
_VISITCOMMUNITY
England - East Midlands, United Kingdom
Joined: December 23, 2005
KitMaker: 6,249 posts
AeroScale: 3,270 posts
Posted: Thursday, August 02, 2007 - 02:36 AM UTC
Nice work on the MIG Todd!
Looks like your on course for being the first finished entry.
Jean-Luc
Another one of your fabulous Campaign Tables. I like those,it makes it very easy to keep track of the campaigns progress.
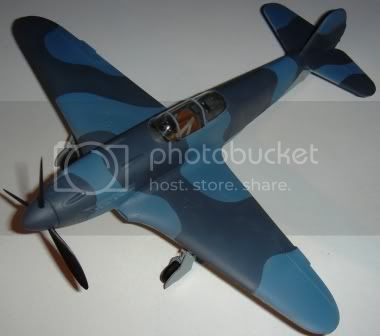
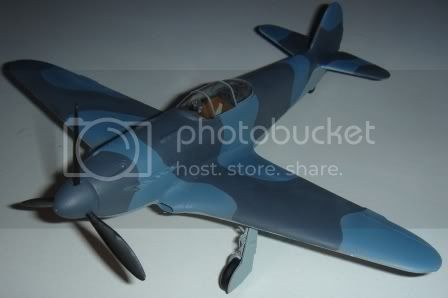
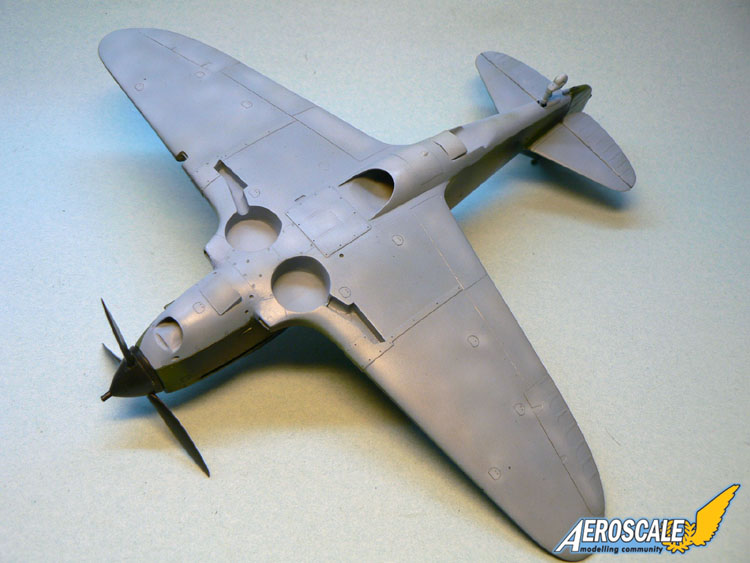
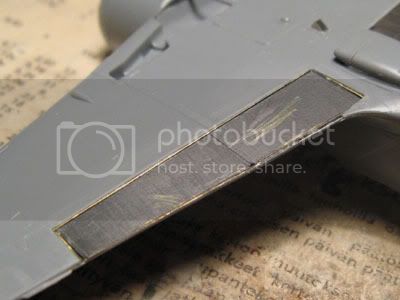
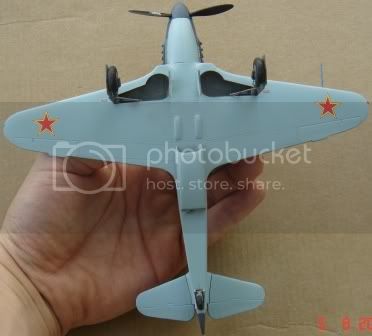
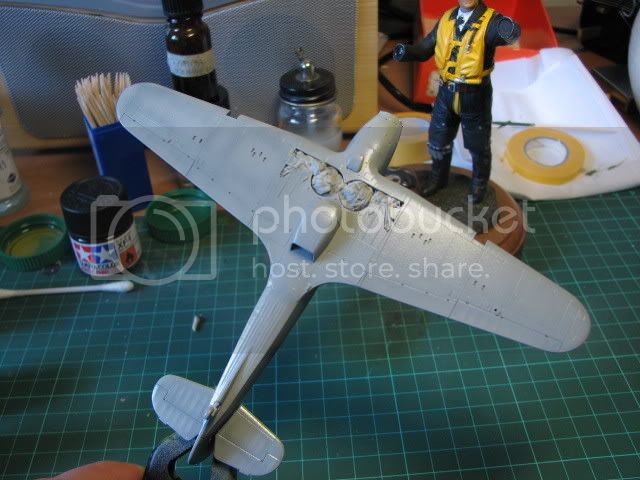
Speaking of progress, after the bun fight I had in the last week or so getting the Hurricane looking something like presentable Im into the main painting stage. Im having to use enamels on this build for the first time in over a year.Its certainly made me realise how much I prefer working with acrylics.
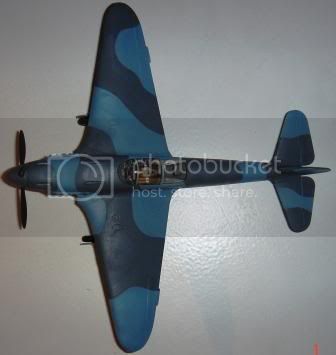
Today Ive sprayed the underside. Downside is Ive now got to wait at least 24 hours before I can mask it and start on the upper surface colours.

Plenty to be working on while Im waiting for it to dry though
Nige
oleander13
_VISITCOMMUNITY
Tennessee, United States
Joined: October 29, 2006
KitMaker: 30 posts
AeroScale: 28 posts
Posted: Thursday, August 02, 2007 - 08:40 AM UTC
Hey Jean-Luc,

I've got my P-39 almost ready to go into the booth for the interior painting. I'll post some photos whenver I can. Just wanted to let you know I have started.
TedMamere
_VISITCOMMUNITY
Moselle, France
Joined: May 15, 2005
KitMaker: 5,653 posts
AeroScale: 4,347 posts
Posted: Thursday, August 02, 2007 - 10:58 AM UTC
Hi all!


Quoted Text

Looks like your on course for being the first finished entry.


Nigel, don't forget me! And you seem to be pretty advanced too...


Quoted Text

I've got my P-39 almost ready to go into the booth for the interior painting. I'll post some photos whenver I can. Just wanted to let you know I have started.


Mark, let's see those pictures!

I made some progress on my LaGG-3, mainly rescribing panel lines and adding details. Those wooden Soviet aircraft are too smooth for my taste so I reproduced the fabric effect on the ailerons using Tamiya masking tape. This way there will be some relief to play with later. I applied a strong coat of undiluted acrylic paint to obtain a more subtle effect...


I then applied a light coat of grey over the whole kit and after some additional sanding I think it will be ready for the camouflage colors...


I will probably use the Masking Tape method to reproduce the fabric of the rudder and elevators as well.

Jean-Luc
oleander13
_VISITCOMMUNITY
Tennessee, United States
Joined: October 29, 2006
KitMaker: 30 posts
AeroScale: 28 posts
Posted: Thursday, August 02, 2007 - 03:03 PM UTC
Well I got part of the cockpit done. I sprayed my P-39 with Pollyscale U.S. Interior Green, and I'm pretty happy with the results. This is my first attempt at airbrushing, first time using photoetch, and basically my first kit in about 11 years (when I was 13). Let me know what kind of areas I need to improve on so I can work on them.

Thanks guys.


Next up is spraying all the photoetch instrument panels black and getting those installed.
Tigerbait
_VISITCOMMUNITY
North Carolina, United States
Joined: September 28, 2005
KitMaker: 347 posts
AeroScale: 179 posts
Posted: Thursday, August 02, 2007 - 03:11 PM UTC
Oh I doubt that I'll be the first one to finish. I've got a couple of builds for the Pacific campaign to get started on. That and the weathering of this beast is gonna take me a few days at the very least.

Good progress gentlemen. Looks like we'll all have time for multiple builds ... maybe
SGTJKJ
#041
_VISITCOMMUNITY
Kobenhavn, Denmark
Joined: July 20, 2006
KitMaker: 10,069 posts
AeroScale: 3,788 posts
Posted: Thursday, August 02, 2007 - 06:19 PM UTC
@Jean-Luc: your build seems to get quite complex. A lot of things to correct, but it will look stunning as always I am sure. Maybe it would have been better to just build the plane from plastic card and filler from the start

@Todd: I love that camo on the MiG. Very very cool Are you making a MiG from the timeperiod were red stars were added to the upper wings again? It would look cool with some red stars on the wings to add contrast to the camo.

I have managed to save the camouflage paint work on my YAK-3. A little sanding to take away two place were the paint "build up" in layers and then I finished it up with my trusty paint brush Now it is just to correct a few minor mistakes and add some red stars


Emeritus
_VISITCOMMUNITY
Uusimaa, Finland
Joined: March 30, 2004
KitMaker: 2,845 posts
AeroScale: 1,564 posts
Posted: Thursday, August 02, 2007 - 09:02 PM UTC
Not much to report this time. The airframe of my La-7 is almost done.

For some reason, there was a small gap between the cowling and the front of the wing. Well, nothing that a shim of styrene can't fix.

Another case of putty being generously applied. According to my references, there doesn't appear to be a seam between the fuselage and wing on the underside so that was filled and will soon be treated.

But after such a smooth building experience so, there has to be troublemaker, right? This time it appears to be the main landing gear. The main gear legs attach to the wells with no locators, pins or anything. Well, at least you can't go wrong on the placement. But then comes the funny part, the main landing gear's correct angle isn't pointed in the instructions, and the smaller struts that attach to the main gear legs and the bottom of the wheel well don't look any easier to place. There's nothing to help placement. No pins & locators, markings in the parts, nothing.
The good thing is however is that La-7's main gear legs appear to be perpendicular to the ground, not like Fw-190's for example. A simple jig should be enough to get the right angle to the main gear legs, then the secondary struts can be glued on.
lampie
#029
_VISITCOMMUNITY
England - East Midlands, United Kingdom
Joined: December 23, 2005
KitMaker: 6,249 posts
AeroScale: 3,270 posts
Posted: Friday, August 03, 2007 - 06:52 AM UTC
Hi all.
Some stunning builds in progress already.
Nice colours on the Yak-3 Jesper and I really that masking tape trick Jean-Luc. Poor mans PE
Ive sprayed 2 out of 3 of the main colours on my Hurricane, but because Im having to use enamels on this build its going to take me 3 or 4 days to finish the camo!
Its made me realise how much I prefer acrylics!
I'll post more pics when the camo is finished.
Nige
TedMamere
_VISITCOMMUNITY
Moselle, France
Joined: May 15, 2005
KitMaker: 5,653 posts
AeroScale: 4,347 posts
Posted: Friday, August 03, 2007 - 11:38 AM UTC

Quoted Text

Poor mans PE


Hi Nigel!

A poor man! That's really what I am! I never thought a baby would cost that much!

Actually the masking tape is better than PE for this because it's thinner.

The rudder and the elevators got the same "treatment" as the ailerons...


Below is a picture of the model in it's current status. I couldn't resist to test fit the propeller. It starts to look like an early LaGG-3 at last!


Now that I'm ready to apply the camouflage, if only I could decide on a paintsheme! Winter camouflage or Black/Green camouflage...

Jean-Luc
Tigerbait
_VISITCOMMUNITY
North Carolina, United States
Joined: September 28, 2005
KitMaker: 347 posts
AeroScale: 179 posts
Posted: Friday, August 03, 2007 - 12:42 PM UTC
Nice Jean-Luc. I like the winter schemes myself. Here's a little more on my MiG. lightened panels. Can you guys tell a difference in the right and left wings. if you can't that tells me what needs to be done...

oleander13
_VISITCOMMUNITY
Tennessee, United States
Joined: October 29, 2006
KitMaker: 30 posts
AeroScale: 28 posts
Posted: Friday, August 03, 2007 - 02:45 PM UTC
haha...I guess my cockpit was so bad everyone is too scared to tell me.

In all seriousness, everyone's kit looks great!

Good job guys!
TedMamere
_VISITCOMMUNITY
Moselle, France
Joined: May 15, 2005
KitMaker: 5,653 posts
AeroScale: 4,347 posts
Posted: Friday, August 03, 2007 - 07:33 PM UTC
Hi all!


Quoted Text

haha...I guess my cockpit was so bad everyone is too scared to tell me.


No Mark, it's probably because it is too good in fact! I remember having built the Eduard P-39 kit when I returned to the hobby, like you. I have two more waiting to be build for an Aleutian diorama. Its' a great kit with a lot of potential. Did you considered applying a wash in the cockpit? It would add depth to the interior green finish...


Quoted Text

Can you guys tell a difference in the right and left wings. if you can't that tells me what needs to be done...


Todd, the two greens and the light brown color look good. The Dark Brown of the left wing seems less lightened than on the right wing... but only slightly. Overall I think you achieved a very nice and subtle effect.

Jean-Luc
_H_Dori
_VISITCOMMUNITY
England - East Anglia, United Kingdom
Joined: November 09, 2006
KitMaker: 295 posts
AeroScale: 276 posts
Posted: Friday, August 03, 2007 - 08:51 PM UTC
Wow!! Some really nice kits & some awesome paint schemes coming together on this campaign. I love the variety it's great to see and is really inspiring to a relative newbie builder!
I'm just going to finish my Tamya Beaufighter and I'm in.
Better get researching

H
lampie
#029
_VISITCOMMUNITY
England - East Midlands, United Kingdom
Joined: December 23, 2005
KitMaker: 6,249 posts
AeroScale: 3,270 posts
Posted: Friday, August 03, 2007 - 10:21 PM UTC
Mark,,that cockpit looks great.
All the builds are looking really good!

Its strange Jean-Luc,,when you hack away at a kit for a few days, and it seems like your just sanding away at a piece of plastic and not really getting anywhere, suddenly you dry fit the propellor and suddenly it looks like an aeroplane and you get a new burst of energy and enthusiasm!
This afternoon will be a blutac sausage afternoon and I'll spray the final main camoflage colour on my Hurricane
Nige
camogirl
_VISITCOMMUNITY
England - North East, United Kingdom
Joined: October 20, 2005
KitMaker: 1,045 posts
AeroScale: 622 posts
Posted: Friday, August 03, 2007 - 11:54 PM UTC
Ive joined up and i will be building the Hobby Boss 1/72 Soviet Mig-3 i hope to get some pictures of it and make a start on it tomorrow.
Tigerbait
_VISITCOMMUNITY
North Carolina, United States
Joined: September 28, 2005
KitMaker: 347 posts
AeroScale: 179 posts
Posted: Saturday, August 04, 2007 - 01:03 AM UTC
Thanks Jean-Luc. That's what I thought too, but sometimes you need someone else's perspective on it.
oleander13
_VISITCOMMUNITY
Tennessee, United States
Joined: October 29, 2006
KitMaker: 30 posts
AeroScale: 28 posts
Posted: Saturday, August 04, 2007 - 01:46 AM UTC
Thanks for the nice comments.


Quoted Text

Did you considered applying a wash in the cockpit? It would add depth to the interior green finish...


Yes, I'm planning on doing a wash. But first I have to finish up spraying the photoetch instrument panel and getting that installed. Then I'll read up on washes and then we'll see what happens!

My biggest problem is finding a place to spray...the wife doesn't want me spraying in the house and we live in an apartment, so it makes it tough
TedMamere
_VISITCOMMUNITY
Moselle, France
Joined: May 15, 2005
KitMaker: 5,653 posts
AeroScale: 4,347 posts
Posted: Saturday, August 04, 2007 - 07:46 AM UTC
Hi all!


Quoted Text

My biggest problem is finding a place to spray...the wife doesn't want me spraying in the house and we live in an apartment, so it makes it tough


So we had that in common too Mark! Fortunately I now live in a house with a dedicated modelling room in the basement!


Quoted Text

Its strange Jean-Luc,,when you hack away at a kit for a few days, and it seems like your just sanding away at a piece of plastic and not really getting anywhere, suddenly you dry fit the propellor and suddenly it looks like an aeroplane and you get a new burst of energy and enthusiasm!


... and it's even better when the camouflage is painted on the model! Guess what camouflage scheme I have chosen?


Quoted Text

Ive joined up and i will be building the Hobby Boss 1/72 Soviet Mig-3 i hope to get some pictures of it and make a start on it tomorrow.


Nice to have you with us Samantha! I can't wait to see your progress on the Mig!

Wow, I think I will have to update my status table sooner than I expected!

Jean-Luc
lampie
#029
_VISITCOMMUNITY
England - East Midlands, United Kingdom
Joined: December 23, 2005
KitMaker: 6,249 posts
AeroScale: 3,270 posts
Posted: Saturday, August 04, 2007 - 08:03 AM UTC

Quoted Text

Quoted Text
--------------------------------------------------------------------------------


Its strange Jean-Luc,,when you hack away at a kit for a few days, and it seems like your just sanding away at a piece of plastic and not really getting anywhere, suddenly you dry fit the propellor and suddenly it looks like an aeroplane and you get a new burst of energy and enthusiasm!

--------------------------------------------------------------------------------


... and it's even better when the camouflage is painted on the model! Guess what camouflage scheme I have chosen?


Aha Jean-Luc.
It looks like we have had a very similar day to each other,,except I havent finished the propeller yet!


This is the first full blutac sausage paint job Ive done for a long time. Its worked very well with just a couple of very minor touch ups needed.
I'll Klear it all tomorrow and it'll soon be time for some Red Stars!
Nige
Emeritus
_VISITCOMMUNITY
Uusimaa, Finland
Joined: March 30, 2004
KitMaker: 2,845 posts
AeroScale: 1,564 posts
Posted: Saturday, August 04, 2007 - 09:51 AM UTC
Everybody, take a look at this and try to guess what happened.


Yes, I did mess up the flaps.
Well, it doesn't look that bad flaps-up either. The PE parts have subtle recesssed detail while the styrene wing's flaps were all smooth (or so I recall). Modifying the flaps to go up was the as simple as removing all unnecessery metal, leaving only the plate that's visible when the flaps are up.

I should have this thing ready for priming soon. Yesterday I finished the cockpit by painting the instrument panel coaming black (nothing was said about the color of this in the instructions, so I assumed it was black to reduce glare). Now there's just the gunsight and a piece of armored glass behind the seat to attach and I'm ready to glue on the canopy (I was thinking about a closed canopy on this build, to keep it sleek, nice and simple)

-Jean-luc-
Your "varnished coffin" is turning out very nice.
Looking at all those WIP pics, I started thinking about clear parts.
Have you test fitted them yet? And more, are you going to pose the cockpit to show off that detailed office space?
I've noticed that you have the style of leaving clear parts off until after painting.

-Nigel-
Nice-looking hurrice you have there. Is that a british dark green / grey paint scheme?
lampie
#029
_VISITCOMMUNITY
England - East Midlands, United Kingdom
Joined: December 23, 2005
KitMaker: 6,249 posts
AeroScale: 3,270 posts
Posted: Saturday, August 04, 2007 - 10:07 AM UTC
Looking very good Eetu,,despite the flaps "modification",,at least it was an easy fix.
The Hurricane is indeed the RAF scheme. I have a set of Red Star decals with the kit, and also the remaining decals from the set that you sent me for the FUMS Hurricane. I havent decided which ones to use yet,( Im not sure where "yours" are).
Although on the instructions its just decalled as is,Im very tempted to "paint out" the RAF roundels and fin stripes.Probably not historically accurate for this aircraft but I like the look.
Hopefully I'll decal this tomorrow night. The canopy will be a pain as Im terrible at masking Hurricane canopies so I might have to do it a frame at a time.Shouldnt hold the build up though.
Who will be the first over the finishing line?,,,my moneys on Jean-Luc at the moment
Nige
SGTJKJ
#041
_VISITCOMMUNITY
Kobenhavn, Denmark
Joined: July 20, 2006
KitMaker: 10,069 posts
AeroScale: 3,788 posts
Posted: Sunday, August 05, 2007 - 01:08 AM UTC
HI everybody

Sorry, Nige. You put your money on the wrong horse or should I say plane I have just finished my YAK-3 a couple of hours ago.

It was a really quick build with the cockpit requiring around 75% of the time and 75% of the parts of the construction process.

I messed up the paint work at some point but was able to recover all of it so I am very satisfied with the end result. The decals were also a vast improvement over my last plane with only a few minor decals not setting properly.

This time I had a go with some pastels at the Yak to make it look a little dirty and the paintwork a little used. Also pastels were used for the exhaust stains. I was careful to keep this subtle and not as heavy as on some of my tanks

The plane is build in the markings of Major Sergej S. Shthirow, Hero of the Soviet Union and an ace. I just could not resist building an aircraft with a cartoon of Hitler dressed like a rabit getting caught by an eagle. Also all the ribbons on the fuselage and the red stars outlined in yellow look cool.

I am very satisfied with the finished result. My planes keep getting better and better for each build. One day I will catch up with the rest of you It was a joy to participate in this campaign and I might just find another bird to enter just for the fun of it.

This time I tried going out into the street to take photos in daylight. I also experimented a little indoors with some lighting. The last picture is from indoors. Let me know what type of photos you think look best?


SGTJKJ
#041
_VISITCOMMUNITY
Kobenhavn, Denmark
Joined: July 20, 2006
KitMaker: 10,069 posts
AeroScale: 3,788 posts
Posted: Sunday, August 05, 2007 - 01:20 AM UTC
Hi Jean-Luc and/or administrators

I can find the VVS campaign gallery and see the three pictures already uploaded there. However, I cannot choose this gallery for uploads of my YAK-3 pictures for this campaign. Do I need special rights to be able to upload to the gallery?

Emeritus
_VISITCOMMUNITY
Uusimaa, Finland
Joined: March 30, 2004
KitMaker: 2,845 posts
AeroScale: 1,564 posts
Posted: Sunday, August 05, 2007 - 01:33 AM UTC
Congrats on the first finished entry! Looks go.
With the pics, I'd say the outdoor ones are better. The lighting is softer and doesn't create harsh contrast and shadows.

Third time's the charm, that apparently applies to gunsights as well.

My third time gluing the sight in place and now it looks good and the canopy fits too. The first two times it sat too high and was also too long. I had to trim the front of the part and enlarge the slot in the coaming to get it sit right.
Then I was about to lie that it's ready for the canopy when I stumbled upon some screenshots from IL2, showing the round part in the rear being a leather padding. That I'll paint next.
Apparently the sight was also black, not interior grey as Eduard's instructions say. I'm going to stick with the grey however (RLM02 actually, to make it stand out a little of the neutral grey I used for the rest of the interior).
Emeritus
_VISITCOMMUNITY
Uusimaa, Finland
Joined: March 30, 2004
KitMaker: 2,845 posts
AeroScale: 1,564 posts
Posted: Sunday, August 05, 2007 - 05:08 AM UTC
Okay, seriously. I stop kidding myself and you.
Now it's ready for the canopy.

The leather padding is painted (not visible in the pic, though) in the gunsight and I've also attached a scratch-built radio mast. The kit-supplied styrene part was very delicate and didn't much in the way of attaching it to the fuselage. Being so flimsy, it would have been very challenging to attach an antenna wire, let alone two as on this one.