World War II
Discuss WWII and the era directly before and after the war from 1935-1949.
Discuss WWII and the era directly before and after the war from 1935-1949.
Hosted by Rowan Baylis
Aeroscale P-47 Thunderbolt SIG
hkshooter

Joined: May 04, 2006
KitMaker: 78 posts
AeroScale: 72 posts

Posted: Monday, October 22, 2007 - 10:41 AM UTC
That tank is so cool, Nige! I'd love to come across one of those, though it's unlikely as I live in a country where they were never used. Thanks for posting!

f1matt

Joined: August 13, 2006
KitMaker: 1,021 posts
AeroScale: 184 posts

Posted: Monday, October 22, 2007 - 07:06 PM UTC
The stripes look great Lars.
I noticed the drop tank at the museum didn't mention P-47's. It mentions the P-51, P-39, P-40 and the P-63. No P-47? Did I miss something?
There are so many great P-47's all in one spot thanks to this thread. And so much great info too. You guys are making it hard for me to choose between a 1/32 Mustang or T-bolt. They are both such great looking warbirds. What to do? ...What to do? Or build both I guess.
Posted: Monday, October 22, 2007 - 10:13 PM UTC
Yes its odd that the P-47 isnt mentioned on the actual drop tank, but I do have reference photos showing Luftwaffe drop tanks filled with waste oil and attached to P-47's, so I wouldnt worry too much about attaching one to a model.
Its amazing whats still being discovered, both stored in barns etc and also dug up.
Matt,,I would have thought the choice was obvious,,LOL,,grab yourself either a Hasegawa Bubbletop or a Trumpeter Razorback and join in the SIG
Recently I mentioned a "special build". Now Ive finished the MUSTANG Ive cleared the bench and made a start.
Its a presentation piece for the Halesworth Airfield Museum. The home of the 56FG Wolfpack and also used by the 489 BG and later by the 5th ERS.
The kit is the Tamiya Razorback and its also my first ever 1:48 build.
BUILD THREAD
Nige
Its amazing whats still being discovered, both stored in barns etc and also dug up.
Matt,,I would have thought the choice was obvious,,LOL,,grab yourself either a Hasegawa Bubbletop or a Trumpeter Razorback and join in the SIG

Recently I mentioned a "special build". Now Ive finished the MUSTANG Ive cleared the bench and made a start.
Its a presentation piece for the Halesworth Airfield Museum. The home of the 56FG Wolfpack and also used by the 489 BG and later by the 5th ERS.
The kit is the Tamiya Razorback and its also my first ever 1:48 build.
BUILD THREAD
Nige


hkshooter

Joined: May 04, 2006
KitMaker: 78 posts
AeroScale: 72 posts

Posted: Tuesday, October 23, 2007 - 02:32 PM UTC
NMF is not my arena of choice but I finally completed one I'm mostly happy with. This is Hasegawa's 1/48. Built mostly OOB, I added detail to the main gear, and added a resin gunsight. Oh, and PE belts.

Paint is Alclad, Tamiya acryls, MM enamels. Weather is MIG oils and pigments. Flat is Polyscale.

Heck, OOB is out the window. I used Pyn-up decals from Cutting Edge. I also scratch built the cowl flaps to be shown in the open position.

Somehow I managed to muck up the nose art decal on the left side. After I had it in register I noticed that the image had some spots flaked off of it. Never knew it happened until later. So we wont look at that one to closely. I'm not sure if the plane was supposed to have nose art on both sides or not but I applied it to both sides anyway. The CE instruction with the cals made no comment about it.

I also cut the tail wheel strut away and made one from brass wire. Learning experiance, the raw brass rod could not be bent tight enough and kept breaking. A few seconds under the torch and the rod was like putty in my hands.[;)]

The plane is supposed to have covers on the wheels that are painted red but I had some Ultracast wheels in the parts box and could not resist using them. I guess that pretty well kills the OOB comment. I was not aware until now how much AM I used on this build. It was fun and I have two more to build, both with Pyn-Up decals. I was looking forward to this one being complete, not so much to be done with it but to see the final product. And I just now noticed I forgot the links that attach the gear doors to the struts. Eh, maybe someday.
Thanks for looking, comments welcome.

Paint is Alclad, Tamiya acryls, MM enamels. Weather is MIG oils and pigments. Flat is Polyscale.

Heck, OOB is out the window. I used Pyn-up decals from Cutting Edge. I also scratch built the cowl flaps to be shown in the open position.

Somehow I managed to muck up the nose art decal on the left side. After I had it in register I noticed that the image had some spots flaked off of it. Never knew it happened until later. So we wont look at that one to closely. I'm not sure if the plane was supposed to have nose art on both sides or not but I applied it to both sides anyway. The CE instruction with the cals made no comment about it.

I also cut the tail wheel strut away and made one from brass wire. Learning experiance, the raw brass rod could not be bent tight enough and kept breaking. A few seconds under the torch and the rod was like putty in my hands.[;)]

The plane is supposed to have covers on the wheels that are painted red but I had some Ultracast wheels in the parts box and could not resist using them. I guess that pretty well kills the OOB comment. I was not aware until now how much AM I used on this build. It was fun and I have two more to build, both with Pyn-Up decals. I was looking forward to this one being complete, not so much to be done with it but to see the final product. And I just now noticed I forgot the links that attach the gear doors to the struts. Eh, maybe someday.
Thanks for looking, comments welcome.

glamdring
Joined: May 21, 2007
KitMaker: 77 posts
AeroScale: 76 posts
KitMaker: 77 posts
AeroScale: 76 posts

Posted: Tuesday, October 23, 2007 - 03:24 PM UTC
Wow hkshooter.
Looks really sharp! A very nice job.
Allen
Looks really sharp! A very nice job.
Allen

f1matt

Joined: August 13, 2006
KitMaker: 1,021 posts
AeroScale: 184 posts

Posted: Tuesday, October 23, 2007 - 07:31 PM UTC
A very handsome T-bolt.
So I'll throw this question out there since I have yet to build a BMF aircraft. Or NMF if you prefer. To clear coat your bare metal or not to clear coat? Probably not as simple as that but I'd like to hear what you guys think. Also, other then being very careful when trimming decals can anything be done to hide decal film? Cause you won't be able to remove it all sometimes. Think I am finally going to try a natural/bare metal finish. They can look absolutely stunning. As has been shown here with many great examples already.
So I'll throw this question out there since I have yet to build a BMF aircraft. Or NMF if you prefer. To clear coat your bare metal or not to clear coat? Probably not as simple as that but I'd like to hear what you guys think. Also, other then being very careful when trimming decals can anything be done to hide decal film? Cause you won't be able to remove it all sometimes. Think I am finally going to try a natural/bare metal finish. They can look absolutely stunning. As has been shown here with many great examples already.
Posted: Wednesday, October 24, 2007 - 06:05 AM UTC
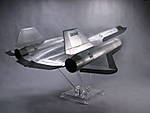
Stunning Bubbletop HK!
Great finish,thanks for sharing.
I reckon you ought to take some more photos without the base and get it entered in MoM!
Hi Matt.
When I use Alclad I always give the model a couple of coats of Klear/Future before and after I decal. This has the double action of protecting the decals from the panel wash, and also eliminates any silvering. ( Not guaranteed with the horrible Academy Decals).
After the oil wash has been applied well,,Im still experimenting.
On the RAF T'bolt, I gave the airframe another couple of coats of Klear, then masked and matt varnished the blue stripes and olive drab anti-glare panel.
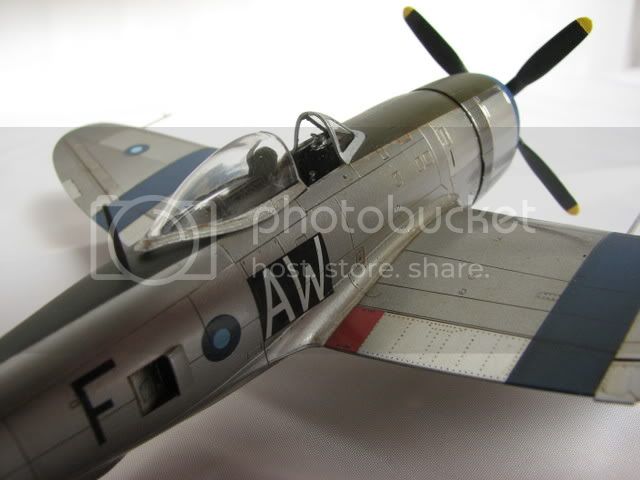
With the Mustang, I used the same shades of Alclad and blue acrylic, also the same burnt umber oil wash.This time however, I gave the whole model a couple of coats of satin varnish.
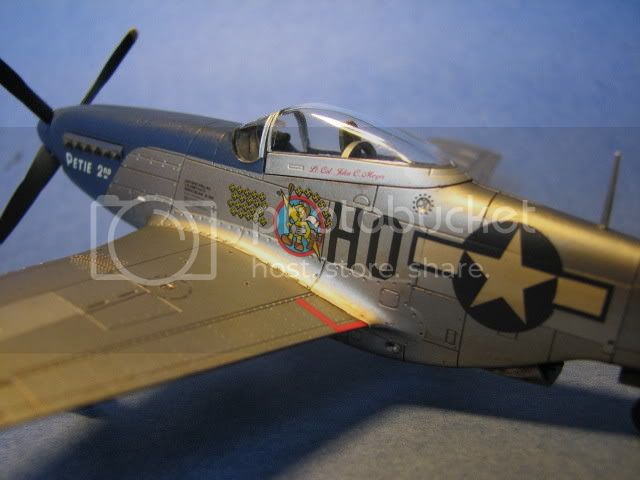
The photos were taken in the same light so this is about as good a comparrison between the two finished NMF's as I can show,unless of course you see the two models side by side.
Hope this answers some of your questions.
Nige

Sorry to post a Mustang pic here but its for reference purposes so I'll allow myself to do it
Great finish,thanks for sharing.
I reckon you ought to take some more photos without the base and get it entered in MoM!
Hi Matt.
When I use Alclad I always give the model a couple of coats of Klear/Future before and after I decal. This has the double action of protecting the decals from the panel wash, and also eliminates any silvering. ( Not guaranteed with the horrible Academy Decals).
After the oil wash has been applied well,,Im still experimenting.
On the RAF T'bolt, I gave the airframe another couple of coats of Klear, then masked and matt varnished the blue stripes and olive drab anti-glare panel.

With the Mustang, I used the same shades of Alclad and blue acrylic, also the same burnt umber oil wash.This time however, I gave the whole model a couple of coats of satin varnish.

The photos were taken in the same light so this is about as good a comparrison between the two finished NMF's as I can show,unless of course you see the two models side by side.
Hope this answers some of your questions.
Nige

Sorry to post a Mustang pic here but its for reference purposes so I'll allow myself to do it


Repainted

Joined: April 04, 2006
KitMaker: 1,058 posts
AeroScale: 1,004 posts

Posted: Wednesday, October 24, 2007 - 06:16 AM UTC
A Mustang in this SIG. Get another Sig man 

when Trumpeter delivers the New Mustangs, then we can have a SIg for them to
This problem with or without clear on the Alclad is just what´s I have in front off me

thanks
Larsa


when Trumpeter delivers the New Mustangs, then we can have a SIg for them to
This problem with or without clear on the Alclad is just what´s I have in front off me


thanks
Larsa

hkshooter

Joined: May 04, 2006
KitMaker: 78 posts
AeroScale: 72 posts

Posted: Wednesday, October 24, 2007 - 10:06 AM UTC
I'm with Nige on the clear coat. I used Future (Klear?) on the NMF jug above. After weathering with oils I used Polyscale flat then added the MIG pigments. None of the clear finishes made any substantial difference to the apearance of the Alclad.
Posted: Wednesday, October 24, 2007 - 10:10 AM UTC
Ok Lars I'll consider myself told off for posting a P-51 photo 
HK, many P-47s of the 368FG carried the nose art on both sides of the cowling. Some pilots had their nose art on the port side and allowed the ground crew to decorate the starboard side, which made for some interesting paint jobs.
The 368th Fighter Group Website has literally hundreds of photographs and is well worth browsing.
I couldnt find any photos of the starboard side of Sleepy Jean The 3rd on a first look.
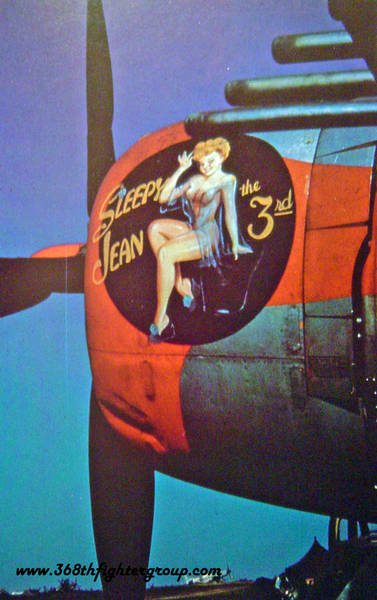
Looks like the bottom panel of the cowlings not as streamlined as Kartvelli intended.
Nige


HK, many P-47s of the 368FG carried the nose art on both sides of the cowling. Some pilots had their nose art on the port side and allowed the ground crew to decorate the starboard side, which made for some interesting paint jobs.
The 368th Fighter Group Website has literally hundreds of photographs and is well worth browsing.
I couldnt find any photos of the starboard side of Sleepy Jean The 3rd on a first look.

Looks like the bottom panel of the cowlings not as streamlined as Kartvelli intended.
Nige

Posted: Wednesday, October 24, 2007 - 11:53 AM UTC
Howdy,
1/48 Academy P-47N. NMF with Floquil railroad colors.
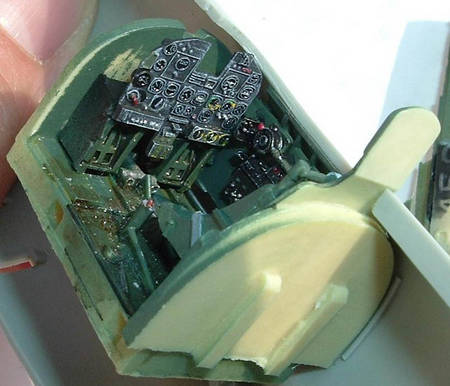
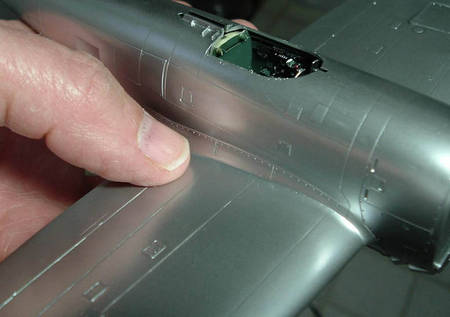
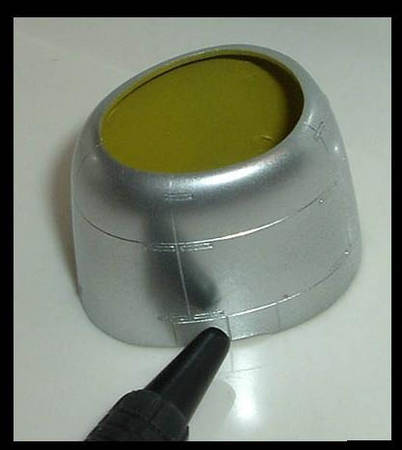
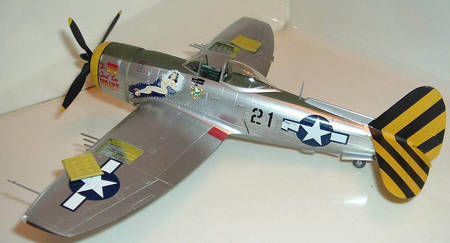
1/48 Academy P-47N. NMF with Floquil railroad colors.


Posted: Wednesday, October 24, 2007 - 12:01 PM UTC
Quoted Text
Looks like the bottom panel of the cowlings not as streamlined as Kartvelli intended.
Nige
Such a poor example of workmanship would be laughed out of any decent IPMS show; obviously this crew chief did not properly use his glue and the plastic melted; he should have filled and sanded it so it would look realistic.


hkshooter

Joined: May 04, 2006
KitMaker: 78 posts
AeroScale: 72 posts

Posted: Wednesday, October 24, 2007 - 02:38 PM UTC
I actually considered trying to duplicate that dent. I've tried it in the past and it's hard to believe how hard it is to make damage and dents look right. After considerable thought I dropped the idea. Nige, that shot actually comes with the decal set. Neat to see a bigger shot.

f1matt

Joined: August 13, 2006
KitMaker: 1,021 posts
AeroScale: 184 posts

Posted: Wednesday, October 24, 2007 - 04:35 PM UTC
Such a poor example of workmanship would be laughed out of any decent IPMS show; obviously this crew chief did not properly use his glue and the plastic melted; he should have filled and sanded it so it would look realistic.


 [/quote]
LOL! You should have seen my Apache from many years back.
Thanks for the info on the clear coat guys. And Fred, I love the N model. Yours looks wonderful.
Hey Allen. Where did you get the decals with George Rarey art work? I wonder what they have in 1/48 or 1/32?
Posted: Thursday, October 25, 2007 - 01:00 AM UTC
Sweet "N" Fred.
Thanks for sharing
Recently Rowan (Merlin) was kind enough to send me a couple of Eduard PE Sets for the Hasegawa 1:32 Bubbletop to review.
Eduard PE sets for Hasegawa Bubbletop
Nige

Thanks for sharing

Recently Rowan (Merlin) was kind enough to send me a couple of Eduard PE Sets for the Hasegawa 1:32 Bubbletop to review.
Eduard PE sets for Hasegawa Bubbletop
Nige

dogsbody

Joined: October 23, 2007
KitMaker: 9 posts
AeroScale: 7 posts

Posted: Thursday, October 25, 2007 - 03:05 AM UTC
There are some absolutely stunning Tbolts here. You all do wonderful work. The Thunderbolt is one of my favorite fighters.
Posted: Thursday, October 25, 2007 - 05:55 AM UTC
Quoted Text
There are some absolutely stunning Tbolts here. You all do wonderful work. The Thunderbolt is one of my favorite fighters.
Hi Chris,
Welcome to Aeroscale


Im glad you found our little P-47 club. I hope your going to join in the fun and post some photos of your work. The forums are the heartbeat of Aeroscale.
Nige

Posted: Friday, October 26, 2007 - 10:31 AM UTC
P-47 Trivia Question
Seeing as how the forums are as quiet as a doctors waiting room at the moment Ive decided to start the Trivia Question branch of the Aeroscale P-47 SIG.
So,,here we go with question #1.
The first aeroplane shot down by a member of the 56FG "Zemkes Wolfpack" was a ....................................??
Happy
Nige
Seeing as how the forums are as quiet as a doctors waiting room at the moment Ive decided to start the Trivia Question branch of the Aeroscale P-47 SIG.
So,,here we go with question #1.
The first aeroplane shot down by a member of the 56FG "Zemkes Wolfpack" was a ....................................??
Happy

Nige


f1matt

Joined: August 13, 2006
KitMaker: 1,021 posts
AeroScale: 184 posts

Posted: Friday, October 26, 2007 - 02:32 PM UTC
A "190"? Either that or a "109"? Or are you trying to get real specific?
Posted: Friday, October 26, 2007 - 10:15 PM UTC
Quoted Text
A "190"? Either that or a "109"? Or are you trying to get real specific?
It was neither of those Matt. Im not being too specific, as its just a bit of fun.I dont even have an exact date for it,,just the month. Although I do have a good reference

Nige

Posted: Friday, October 26, 2007 - 11:14 PM UTC
Hi all!
My first contribution to the P-47 SIG is... a question!
I want to build this particular aircraft (I already have the decal sheet):
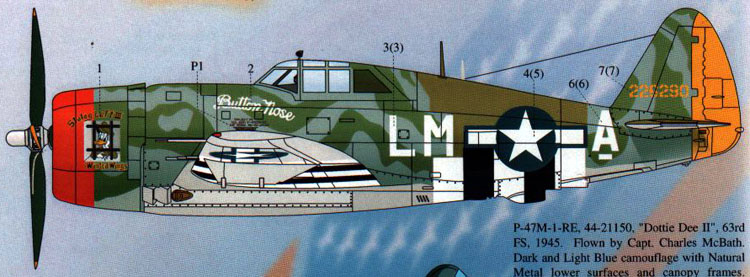
I've searched the web for original pictures of it but found nothing. Can anyone point me to the right direction? Or maybe does someone have the refs I need? Any help would be great...
Jean-Luc
My first contribution to the P-47 SIG is... a question!

I want to build this particular aircraft (I already have the decal sheet):

I've searched the web for original pictures of it but found nothing. Can anyone point me to the right direction? Or maybe does someone have the refs I need? Any help would be great...
Jean-Luc

Posted: Saturday, October 27, 2007 - 12:21 AM UTC
Bonjour Jean-Luc.
Welcome to the P-47 SIG
Your P-47 was flown by Lt Albert Knafelz.
Whats not helped your quest for information is the probably incorrect serial number on the decal sheet. My research shows it to be 422629 8.
As for pictures..hopefully these will help.
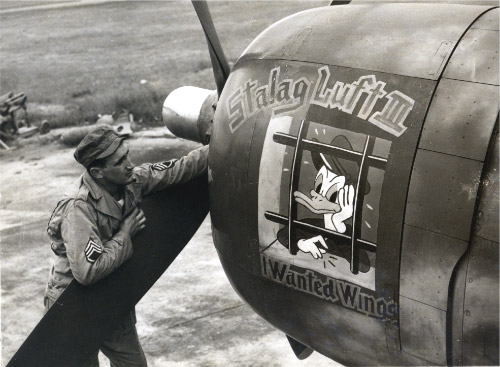
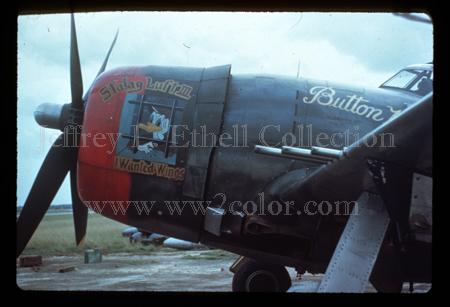
What were the specific references you were looking for Jean-Luc?
Nige
Welcome to the P-47 SIG

Your P-47 was flown by Lt Albert Knafelz.
Whats not helped your quest for information is the probably incorrect serial number on the decal sheet. My research shows it to be 422629 8.
As for pictures..hopefully these will help.


What were the specific references you were looking for Jean-Luc?
Nige

Posted: Saturday, October 27, 2007 - 01:10 AM UTC
Quoted Text
What were the specific references you were looking for Jean-Luc?
Hi Nigel!
Well, for a start, the pictures you've posted for example! Thanks a lot!

I wanted to know how the green camouflage patches looked like. Hard or soft edges like on the profile. I have the answer now: very soft edges!
I also wanted to know how the D-Day stripes looked like. It seems that the ones on the rear fuselage top have been covered with fresh Olive Drab (see profile). What about the upper wings stripes?
For the serial number, do you mean I should replace the 0 with an 8?
Jean-Luc

P.S. the pictures also show what propeller I have to choose in the kit...

Posted: Saturday, October 27, 2007 - 01:31 AM UTC
Hi Jean-Luc
All the references I can find point to the correct serial number being 42-26298, although I havent yet found a photograph to support this.
As for the "invasion stripes". I would think that if the upper fusalage stripes had been painted out that the upper wing ones would have recieved the same treatment.
Again,,I havent found any photos to prove this.
Nige

Posted: Saturday, October 27, 2007 - 01:59 AM UTC
Jean-Luc.
I can confirm that the correct serial number for your P-47 is 42-26298
You can see it at the bottom of this combat report dated July 4th 1944.
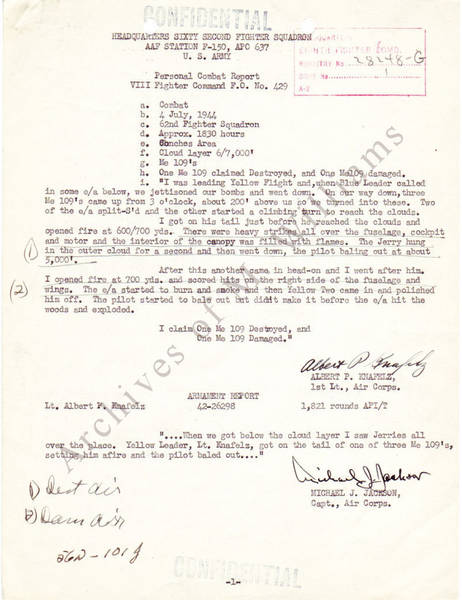
Nige
I can confirm that the correct serial number for your P-47 is 42-26298

You can see it at the bottom of this combat report dated July 4th 1944.

Nige

 |


