

Thanks Robert!
no it is from the kit .. I found it quite thin and IMO cutting the vac canopy (that is intended for another kit) to shape was more difficult than polishing the mold seam ...
all the best
Steffen
Air Campaigns
Want to start or join a group build? This is where to start.
Want to start or join a group build? This is where to start.
Hosted by Frederick Boucher, Michael Satin
Rumblings in the Dark

alpha_tango

Joined: September 07, 2005
KitMaker: 5,609 posts
AeroScale: 5,231 posts
Posted: Thursday, August 20, 2009 - 07:15 AM UTC


Bigrip74

Joined: February 22, 2008
KitMaker: 5,026 posts
AeroScale: 2,811 posts

Posted: Thursday, August 20, 2009 - 07:48 AM UTC
Quoted Text
Thanks Robert!
no it is from the kit .. I found it quite thin and IMO cutting the vac canopy (that is intended for another kit) to shape was more difficult than polishing the mold seam ...
all the best
Steffen
That is the best kit canopy that I have ever seen, what and or how did you polish it with?
Robert
alpha_tango
Joined: September 07, 2005
KitMaker: 5,609 posts
AeroScale: 5,231 posts
Posted: Thursday, August 20, 2009 - 07:55 AM UTC
i just use normal sanding sticks .. the best I had so far were from Master Casters .. but these are worn out so I just use what i have. A finel bqth in Klear (Future) does the rest ... nothing special ...
all the best
Steffen
all the best
Steffen
rtvmodeler

#136

Joined: April 06, 2002
KitMaker: 437 posts
AeroScale: 29 posts
Posted: Thursday, August 20, 2009 - 07:17 PM UTC
 Robert, thanks for your comprehension. About the topic of the situation of combat, yes,
  I recognize my mistake and if you want to retire my participation, no problem, the important is that I enjoyed my second aircraft as beginner
  . (my first was the Fw190D)
I started to reading some books
 I bought and soon will receive more principally about Me's and Fw's.
Steffen you have done a great work with your Diorama
Regards,
Rodolfo

alpha_tango
Joined: September 07, 2005
KitMaker: 5,609 posts
AeroScale: 5,231 posts
Posted: Thursday, August 20, 2009 - 08:05 PM UTC
Hello Rodolfo
Many thanks!
Please understand that my comment was not aimed against you or your model! I just thought about how it fit the Night Fighter theme. Robert already granted your entry and it is o.k. no need to take it back! In general this campaings are about doing a special themed model. I am sure your next entry for a campaign will be even better and a bit more fitting
all the best
Steffen
Removed by original poster on 09/30/09 - 06:10:52 (GMT).

Phantom2

Joined: April 18, 2006
KitMaker: 708 posts
AeroScale: 678 posts
Posted: Saturday, August 29, 2009 - 04:47 AM UTC
Hi all!
Time to get this campaign rolling!
This time it is a Nakajima J1N1 Gekko (Moonlight) , or Irving as it was called by the allied forces.
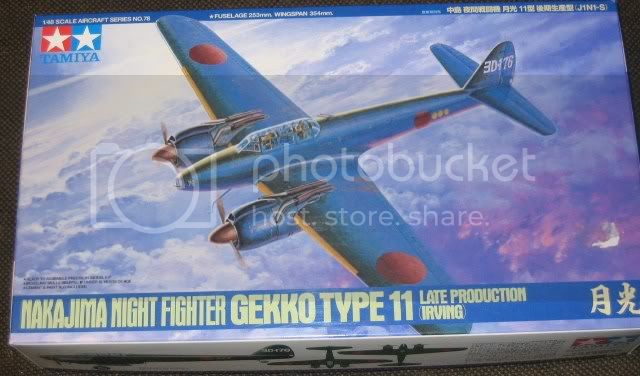
This box is crammed with parts!
This is typical Tamiya fare, crisp and well precisely moulded, no flash can be seen, and the canopies are clear and scratch free with almost no distortion bagged separately and a set of well printed decals.
I know that some dislike these decals because they are a bit thick.
My experience is that they will go down nice and the thickness will disappear as soon as they are on the model.
As they usually behave very well and are opaque and printed in register, I do like these decals!
Only addition I will add is a pair of seatbelts from Eduard.

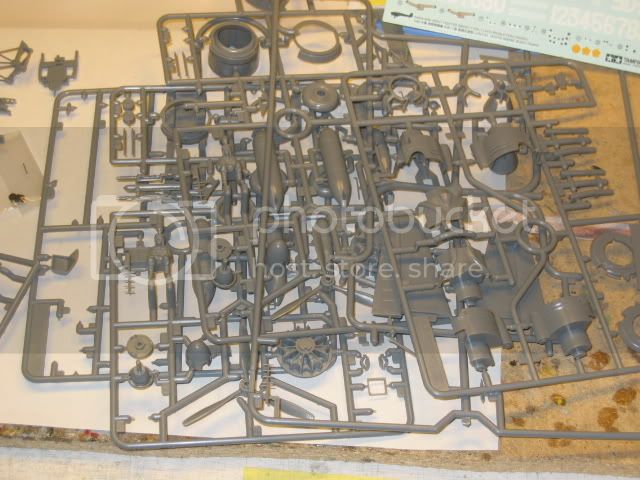
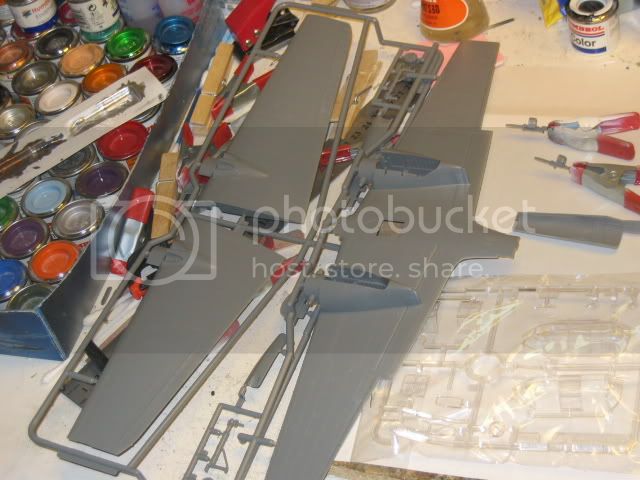
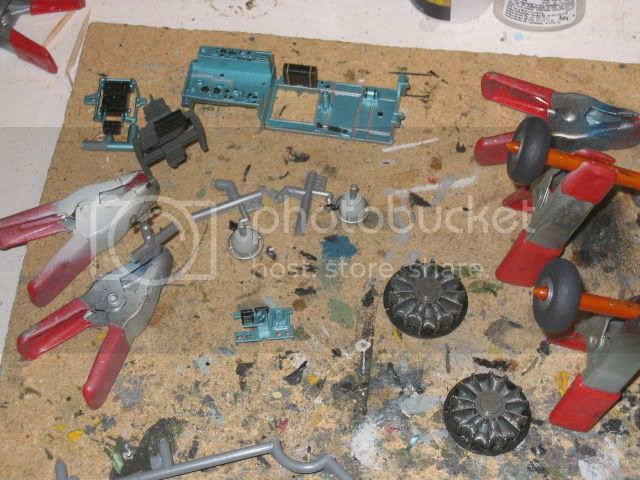
As usual for me, I start with all the sub-assemblies before I have to paint.
Soon I have quite a pile of parts!
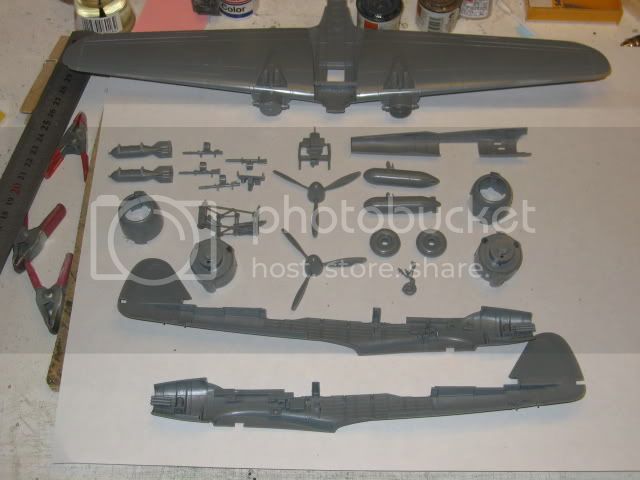
Now Its time to get to the paint booth!
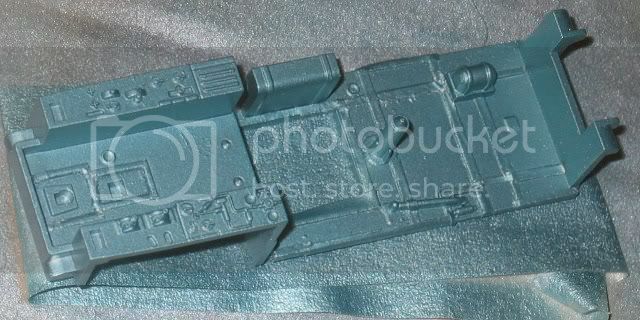
All interior will be either Aluminium or Aotake, this very special blue-green metallic primer.
I start with the Alclad Aluminium;
The cockpit floor consists of plates (whish is Aotake) with Aluminium ridges in-between, so I had to mask these.

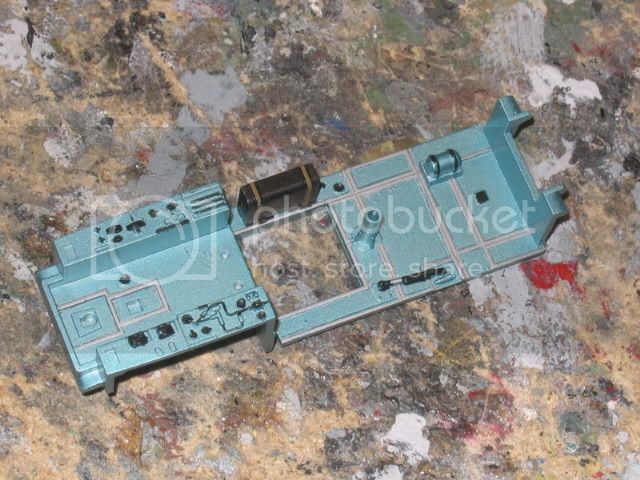
I masked all surfaces that would remain Aluminium and painted the Aotake (White Ensign) surfaces.

Then I grabbed my brushes and started painting the small-details.

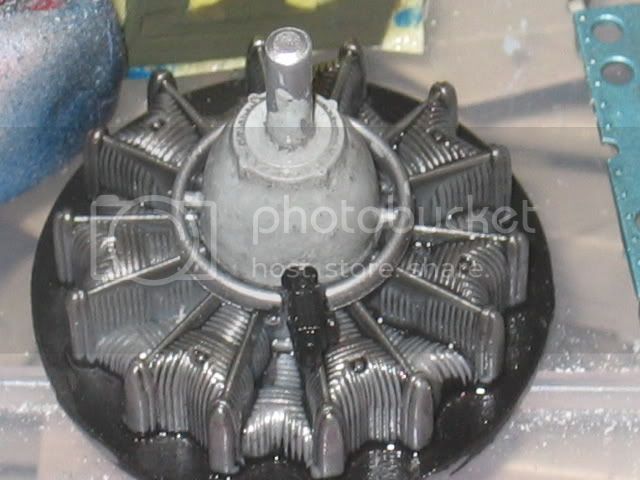
The engines was painted in Alclad Steel, and the backing flat black.
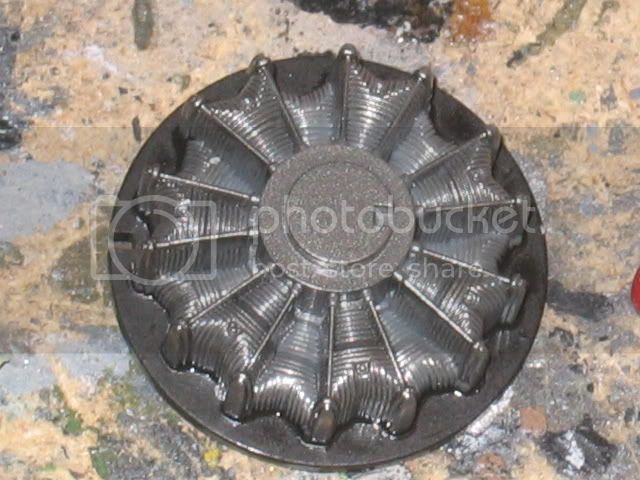
Now were getting somewhere;
The crank-house casings were painted with Humbrol light grey (#40), and a heavy black wash to pick out the details.
Here´s the pilot and navigator seats.
I drilled out the holes in the pilot-seat, it looks much better!

Finally, a pic of the (not yet fully dry!) instrument panel, now I can see that I missed by a fraction of a millimetre, bummer

More pics to come soon!
Cheers!
Stefan
Time to get this campaign rolling!
This time it is a Nakajima J1N1 Gekko (Moonlight) , or Irving as it was called by the allied forces.
This box is crammed with parts!
This is typical Tamiya fare, crisp and well precisely moulded, no flash can be seen, and the canopies are clear and scratch free with almost no distortion bagged separately and a set of well printed decals.
I know that some dislike these decals because they are a bit thick.
My experience is that they will go down nice and the thickness will disappear as soon as they are on the model.
As they usually behave very well and are opaque and printed in register, I do like these decals!
Only addition I will add is a pair of seatbelts from Eduard.
As usual for me, I start with all the sub-assemblies before I have to paint.
Soon I have quite a pile of parts!
Now Its time to get to the paint booth!
All interior will be either Aluminium or Aotake, this very special blue-green metallic primer.
I start with the Alclad Aluminium;
The cockpit floor consists of plates (whish is Aotake) with Aluminium ridges in-between, so I had to mask these.
I masked all surfaces that would remain Aluminium and painted the Aotake (White Ensign) surfaces.
Then I grabbed my brushes and started painting the small-details.
The engines was painted in Alclad Steel, and the backing flat black.
Now were getting somewhere;
The crank-house casings were painted with Humbrol light grey (#40), and a heavy black wash to pick out the details.
Here´s the pilot and navigator seats.
I drilled out the holes in the pilot-seat, it looks much better!
Finally, a pic of the (not yet fully dry!) instrument panel, now I can see that I missed by a fraction of a millimetre, bummer
More pics to come soon!
Cheers!
Stefan
Bigrip74
Joined: February 22, 2008
KitMaker: 5,026 posts
AeroScale: 2,811 posts
Posted: Saturday, August 29, 2009 - 06:02 AM UTC
Great thread Stefen, I really liked what you did to the cockpit.
Robert
Robert

bilko

Joined: April 22, 2003
KitMaker: 584 posts
AeroScale: 96 posts

Posted: Sunday, August 30, 2009 - 12:05 AM UTC
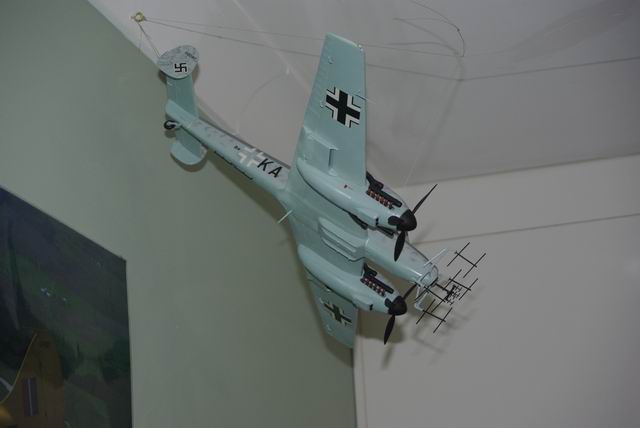
Well after a tough couple of weeks I am calling the Revell 1/32 Bf110G4 DONE!!!
The canopy was masked with frisket film - a first for me - and it left goo behind when removed after painting. I tried some citrus goo cleaner and that stuffed the canopy and made it go milky then I thought Isopropyl alcohol may help. NUP
  So then to the good old aussie favourite for removing bandaid goo from skin - Eucalyptus . Canopy is now clear of goo and as clear as it will ever get.
Bit of a bother getting the main radar aerials into place. I used super glue and zapper to try and get them set in the correct positions but I see that the tension in the plastic has moved them a bit so they now appear slightly offfset.
As Stefan said to my earlier posting the cammo is not correct ( I was experimenting with my airbrush from memory and got a bit carried away) it should be speckled/spotted not rings, and there should be spirals on the spinners but I haven't been able to work out how to mask them. There were no masks/decals for the spiral in the kit - although speaking of decals for 30 year ole items they went on very well with only 1 silvering.
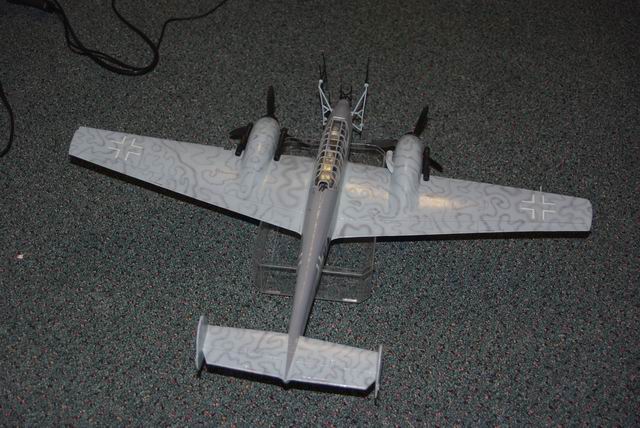
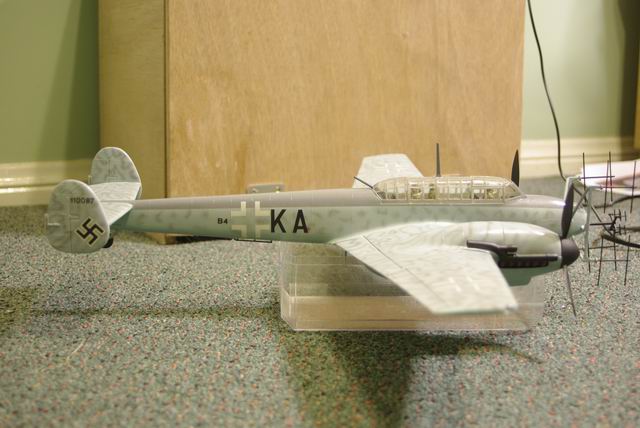
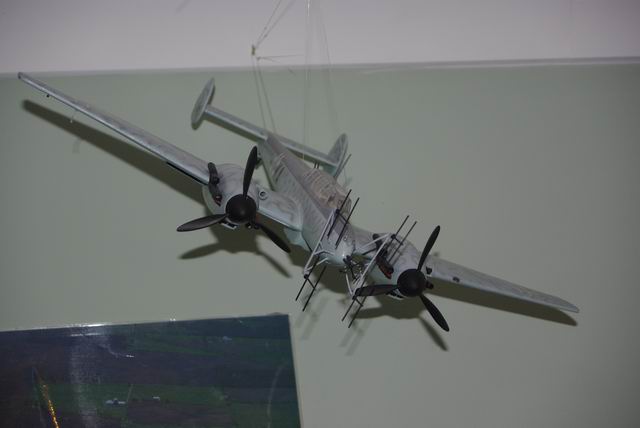
Are these 4 photos suitable, and are the OK here? Or do you require them placed in another gallery/folder somewhere?
Thanks for organising this campaign - I have enjoyed it immensly - and I am jealous of the abilities of many of the other posters - something to aspire to.
Brian
The canopy was masked with frisket film - a first for me - and it left goo behind when removed after painting. I tried some citrus goo cleaner and that stuffed the canopy and made it go milky
then I thought Isopropyl alcohol may help. NUP So then to the good old aussie favourite for removing bandaid goo from skin - Eucalyptus . Canopy is now clear of goo and as clear as it will ever get.Bit of a bother getting the main radar aerials into place. I used super glue and zapper to try and get them set in the correct positions but I see that the tension in the plastic has moved them a bit so they now appear slightly offfset.
As Stefan said to my earlier posting the cammo is not correct ( I was experimenting with my airbrush from memory and got a bit carried away) it should be speckled/spotted not rings, and there should be spirals on the spinners but I haven't been able to work out how to mask them. There were no masks/decals for the spiral in the kit - although speaking of decals for 30 year ole items they went on very well with only 1 silvering.
Are these 4 photos suitable, and are the OK here? Or do you require them placed in another gallery/folder somewhere?
Thanks for organising this campaign - I have enjoyed it immensly - and I am jealous of the abilities of many of the other posters - something to aspire to.
Brian

warreni
Joined: August 14, 2007
KitMaker: 5,926 posts
AeroScale: 2,201 posts

Posted: Sunday, August 30, 2009 - 09:14 AM UTC
Build models the way you want mate. Id you are happy with a model then it is great!
Bigrip74
Joined: February 22, 2008
KitMaker: 5,026 posts
AeroScale: 2,811 posts
Posted: Sunday, August 30, 2009 - 04:34 PM UTC
Quoted Text
Build models the way you want mate. Id you are happy with a model then it is great!
Exactly Warren:

klimmer

Joined: May 16, 2003
KitMaker: 250 posts
AeroScale: 207 posts
Posted: Thursday, September 03, 2009 - 05:18 AM UTC
Hi everyone
I must apologize for being away so long, and not being very active during this campain, but as always life gets in the way. Anyway I have made some progress on my P-61, hopefully I can finish it before time runs out.
I have completed the major assembly of the kit

I tried installing weights behind the radar assembly in the hopes that it would be enough, but alas not!!!!!
Installed the radar
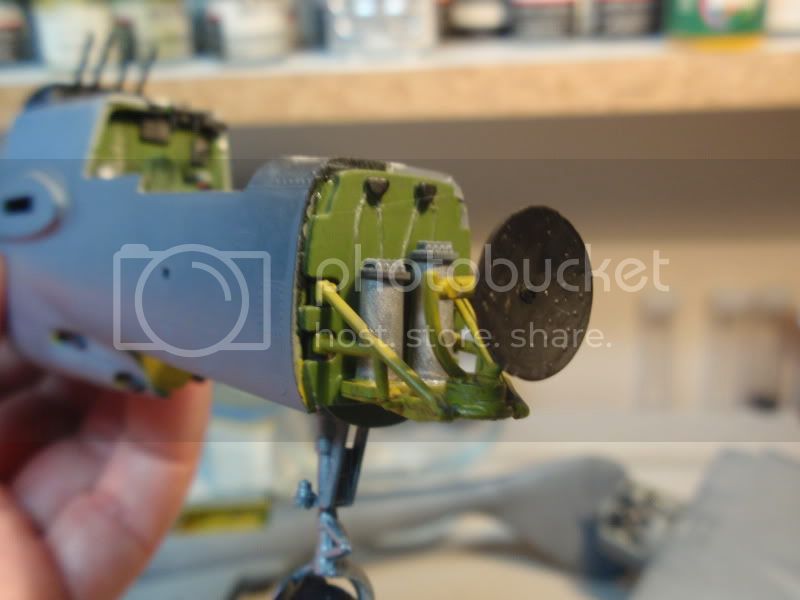
But it still ended up tailsitting, so off came the radar and I filled the nose with weights in the hopes of getting enough in to remedy the problem.

Well it worked out ok and now I have it about ready to put into the paint booth.
I have almost all the canopies masked and ready to go.
Hopefully I will have some time this coming weekend to get some work done
 Ted
Ted
I must apologize for being away so long, and not being very active during this campain, but as always life gets in the way. Anyway I have made some progress on my P-61, hopefully I can finish it before time runs out.
I have completed the major assembly of the kit
I tried installing weights behind the radar assembly in the hopes that it would be enough, but alas not!!!!!
Installed the radar
But it still ended up tailsitting, so off came the radar and I filled the nose with weights in the hopes of getting enough in to remedy the problem.
Well it worked out ok and now I have it about ready to put into the paint booth.
I have almost all the canopies masked and ready to go.
Hopefully I will have some time this coming weekend to get some work done
TedBigrip74
Joined: February 22, 2008
KitMaker: 5,026 posts
AeroScale: 2,811 posts
Posted: Thursday, September 03, 2009 - 07:32 AM UTC
Welcome back Ted that should keep the nose on the ground. Here is a pic of where I am at, next step is to mask the canopy then paint.

Robert

Robert
klimmer
Joined: May 16, 2003
KitMaker: 250 posts
AeroScale: 207 posts
Posted: Friday, September 04, 2009 - 01:43 PM UTC
Nice work Robert.
I am glad to be back.
I am looking forward to seeing your spit painted up.
Ted
I am glad to be back.
I am looking forward to seeing your spit painted up.
Ted
Grenadier37
Joined: June 02, 2008
KitMaker: 232 posts
AeroScale: 155 posts
Posted: Monday, September 21, 2009 - 07:15 AM UTC
Looks good to me Brian! That squiggle-camo pattern is a real pain in the a...neck to get just right. It looks like you did a great job.
My advice, for what it's worth, don't use other's work as a measure of your own ability. Compare your last build to your newest build. If you see improvment, you've won. And don't be afraid to experiment.
FYI, liquid drain cleaner removes paint without harming the plastic. You just have to let your model soak in it for a little while (guess how I know).

AirLedge

Joined: July 26, 2007
KitMaker: 292 posts
AeroScale: 265 posts

Posted: Saturday, September 26, 2009 - 10:07 AM UTC
Hi all,
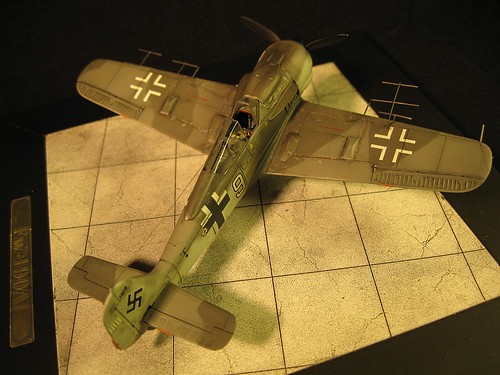
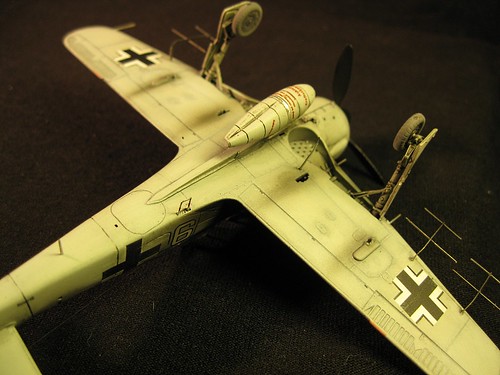
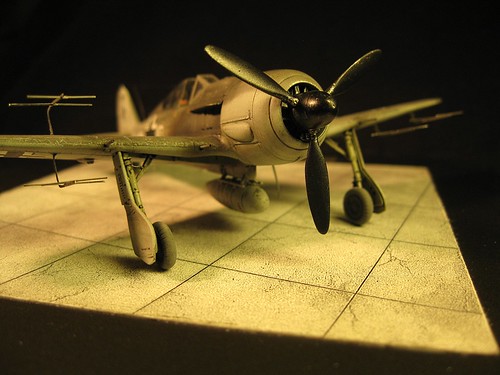
Here's my finished entry for the campaign:
Revell Fw-190 A-8/R11 in 1/72. Scratch-built canopy and Eduard Zoom set for the interior and radar antenna.


Here's my finished entry for the campaign:
Revell Fw-190 A-8/R11 in 1/72. Scratch-built canopy and Eduard Zoom set for the interior and radar antenna.

jaypee

Joined: February 07, 2008
KitMaker: 1,699 posts
AeroScale: 1,384 posts

Posted: Saturday, September 26, 2009 - 10:43 AM UTC
scrolling up from the bottom i thought oh someones done the
eduard night fighter, only to find you claiming it is the revell 1/72
No way. great finish and very inspiring Mike. Thanks for showing it.
eduard night fighter, only to find you claiming it is the revell 1/72
No way. great finish and very inspiring Mike. Thanks for showing it.


amegan
#243

Joined: March 21, 2008
KitMaker: 996 posts
AeroScale: 915 posts

Posted: Monday, September 28, 2009 - 12:40 PM UTC
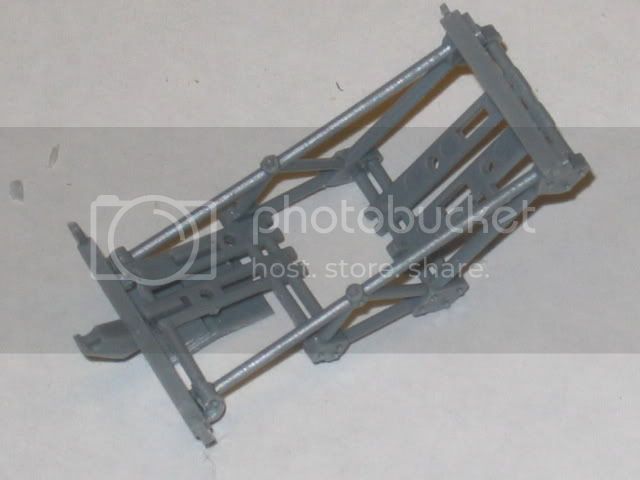
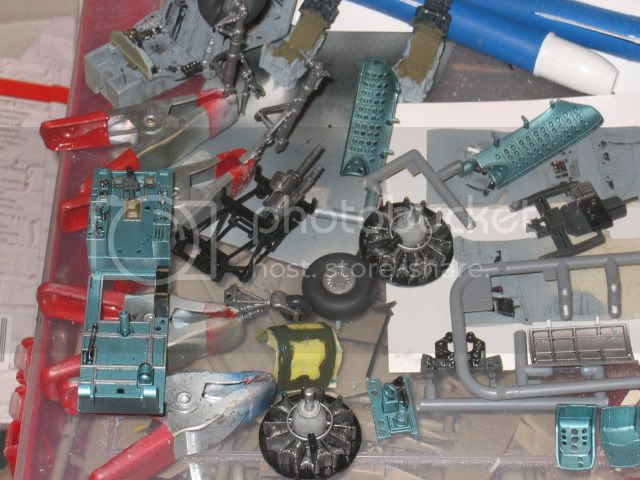
Finally got the Strutter to something approaching finished, having lost motivation on the way as well as a couple of parts. Most seriously I lost a spoke cover from the wheels, so tonight have moulded a new one using the remaining one as a pattern, copying is by coating in 8 coats of latex then moulding using fibreglass resin. Tomorrow I'll paint it after it is fully hardened and fit it. Meanwhile 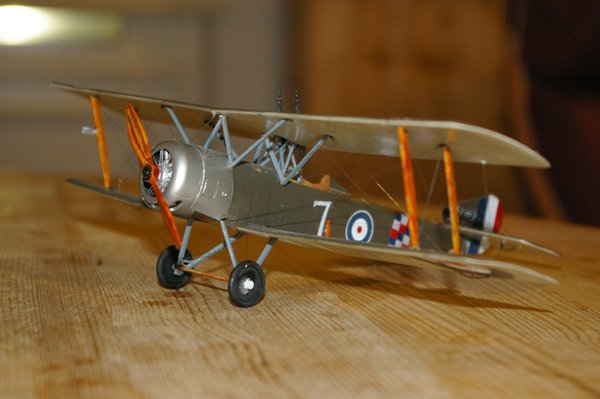
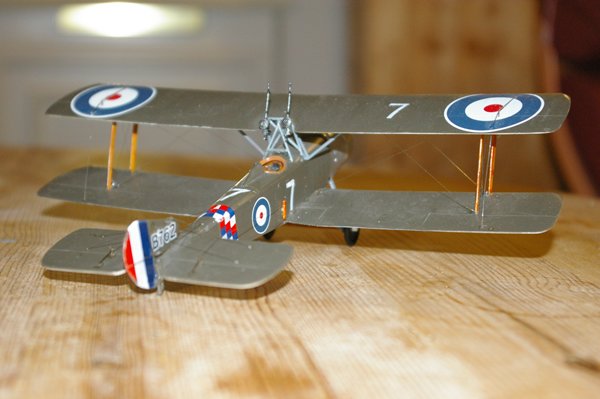

Not my best work, can't fault the kit, just the builder.
This aircraft was used by 78(HD) Sqn RFC at Martlesham Heath during the summer and autumn 1917. It is a typical night fighter, converted from a bomber, with "Shrage Musik" armament 25 years before the German Airforce re-invented it.
Not my best work, can't fault the kit, just the builder.
This aircraft was used by 78(HD) Sqn RFC at Martlesham Heath during the summer and autumn 1917. It is a typical night fighter, converted from a bomber, with "Shrage Musik" armament 25 years before the German Airforce re-invented it.
jaypee
Joined: February 07, 2008
KitMaker: 1,699 posts
AeroScale: 1,384 posts
Posted: Tuesday, September 29, 2009 - 12:35 AM UTC
That's kinda interesting. I like the strutter but the comic version looks
a bit ungainly don't you think? Are the tailplane controls specific to the
comic version I don't remember ever seeing them before.
Good idea to mould the spoke cover.
a bit ungainly don't you think? Are the tailplane controls specific to the
comic version I don't remember ever seeing them before.
Good idea to mould the spoke cover.
amegan
#243
Joined: March 21, 2008
KitMaker: 996 posts
AeroScale: 915 posts
Posted: Tuesday, September 29, 2009 - 01:29 AM UTC
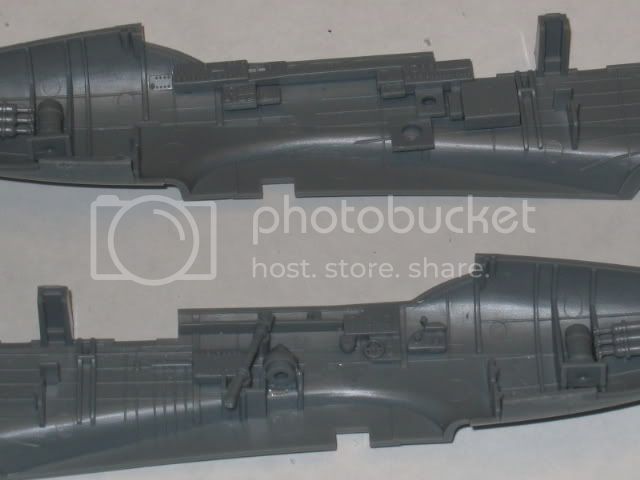
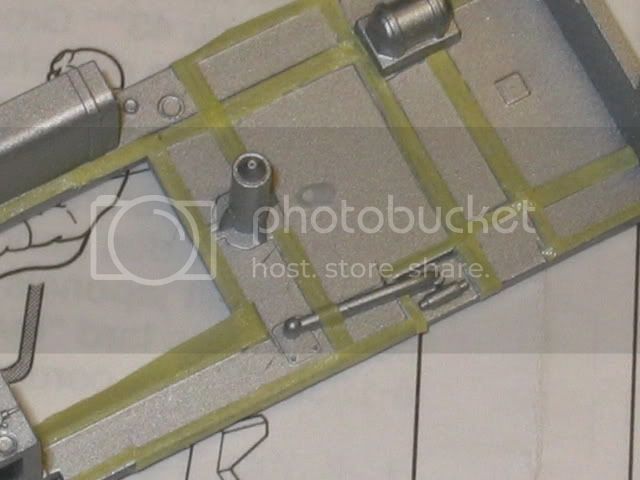
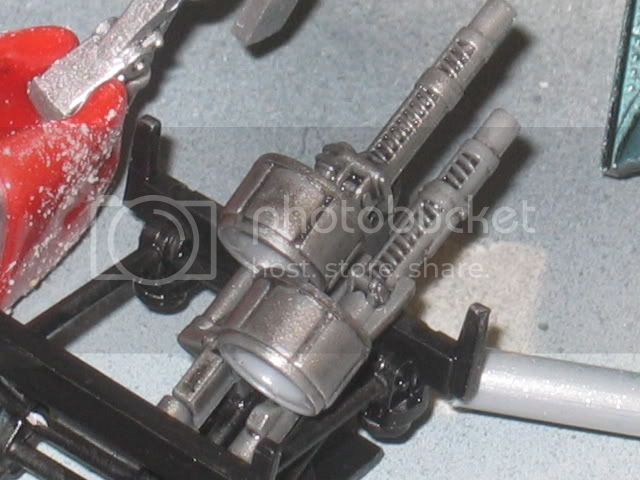
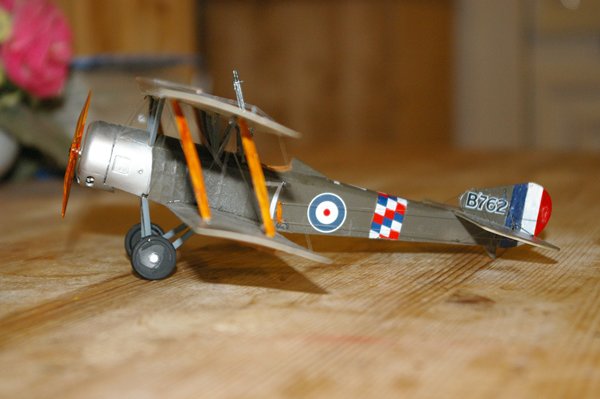
The COMIC strutters were a conversion from aircraft considered obsolete on the Western Front. This aircraft was unusual in the armament which was probably fitted on the squadron, the twin Lewis mounted near verically imposed a large drag and weight penalty on the aircraft and meant it was a failure, being even more limited than the other aircraft on the squadron. Other strutters were converted with a single fixed Vickers on top of the cowling, firing through the prop. None of the Strutter were good night fighters as they were too slow and couldn't climb high or fast enough, plus lack of detection systems made any interception difficult.
The single seat bombers and the two seater strutters were usually flown from the front cockpit and the control layout is different, the COMIC fighters were flown from the rear cockpit to improve visibility. The elevator controls are logical and the location of the control horns means that some wires must run from the elevator although these usually connect to the control column inside the fuselage. The instructions are not clear but the box art is, and this is as shown.
The single seat bombers and the two seater strutters were usually flown from the front cockpit and the control layout is different, the COMIC fighters were flown from the rear cockpit to improve visibility. The elevator controls are logical and the location of the control horns means that some wires must run from the elevator although these usually connect to the control column inside the fuselage. The instructions are not clear but the box art is, and this is as shown.
Bigrip74
Joined: February 22, 2008
KitMaker: 5,026 posts
AeroScale: 2,811 posts
Posted: Tuesday, September 29, 2009 - 05:59 AM UTC
@ Mike: nice Fw-190 and lots of anntenae.
@ Andrew: pretty little 11/2 Strutter. I am impressed with how you scratched the wheel hub.
Robert
@ Andrew: pretty little 11/2 Strutter. I am impressed with how you scratched the wheel hub.
Robert
amegan
#243
Joined: March 21, 2008
KitMaker: 996 posts
AeroScale: 915 posts
Posted: Tuesday, September 29, 2009 - 10:58 AM UTC
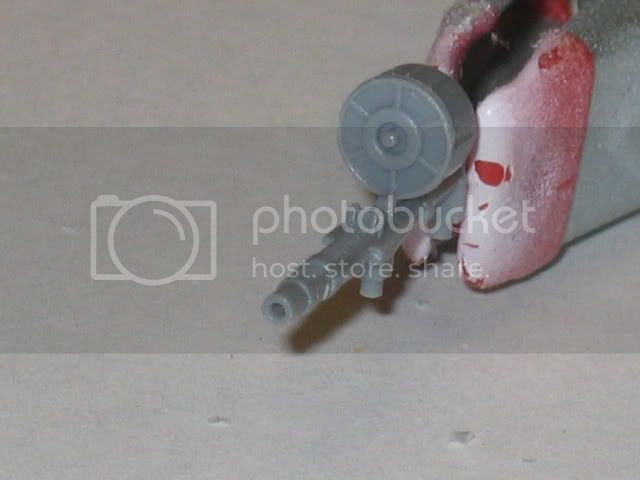
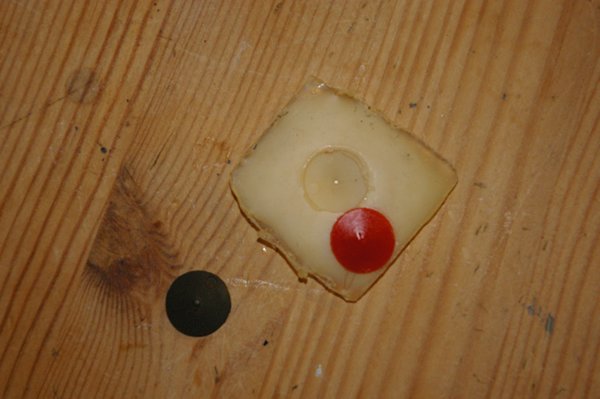
Final pic of the strutter, not happy with either hub (too big), but this is finished (for now). This is the moulded hub but the original is no better


JollyRoger

Joined: December 22, 2004
KitMaker: 1,241 posts
AeroScale: 616 posts

Posted: Wednesday, September 30, 2009 - 12:51 AM UTC
I apologise guys. I blasted it again. My P-70 recieved its all black paint but couldn't progress beyond it last night. I am dealing with a light flue. I will post pics here as soon as I finish it. Sorry again. Have fun all pf you. Cool models by the way.
klimmer
Joined: May 16, 2003
KitMaker: 250 posts
AeroScale: 207 posts
Posted: Wednesday, September 30, 2009 - 03:30 AM UTC
Hello everyone,
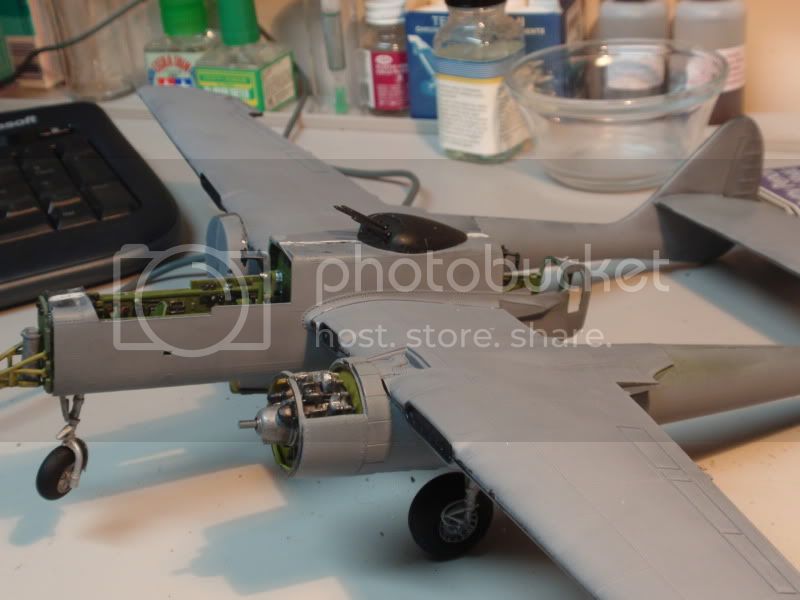
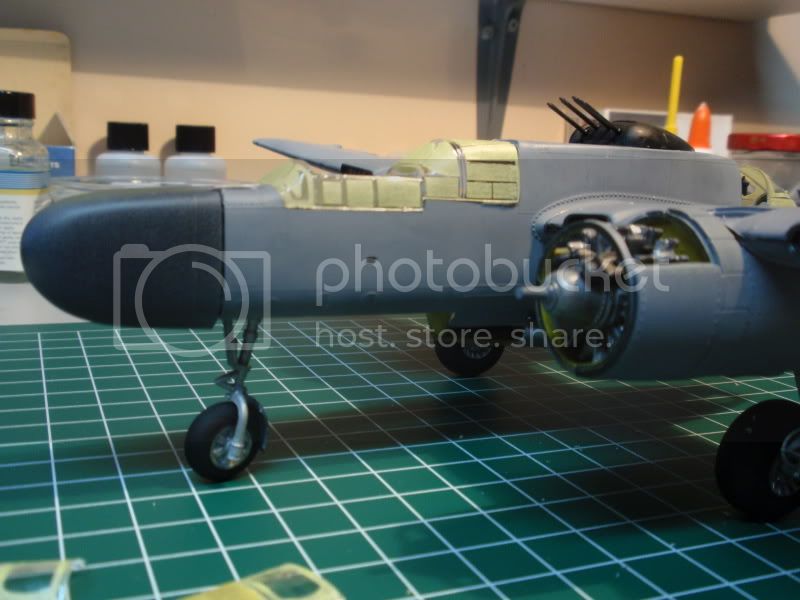
I managed to get my P-61 decaled, sealed and dullcoated last night, the majority of the decals were unuseable due to thier age and yellowing|:(, but on the black finsh of this beast you can't really see them anyway. All I have left to is attach the clear parts, which I will do tonight. Anyway here are some pic's of where I am at. Sorry for the quality.


I repositioned the flaps to what I think is a more appropriate position instead of the "barn door" look from the kit.


I am planning on using this as part of my first diorama, hence all the maintenance covers in the open position.
I will post some additional pictures once I have all the glass installed.
I hope you like it.
Happy Modeling
Ted
I managed to get my P-61 decaled, sealed and dullcoated last night, the majority of the decals were unuseable due to thier age and yellowing|:(, but on the black finsh of this beast you can't really see them anyway. All I have left to is attach the clear parts, which I will do tonight. Anyway here are some pic's of where I am at. Sorry for the quality.
I repositioned the flaps to what I think is a more appropriate position instead of the "barn door" look from the kit.
I am planning on using this as part of my first diorama, hence all the maintenance covers in the open position.
I will post some additional pictures once I have all the glass installed.
I hope you like it.
Happy Modeling
Ted
Bigrip74
Joined: February 22, 2008
KitMaker: 5,026 posts
AeroScale: 2,811 posts
Posted: Wednesday, September 30, 2009 - 07:12 AM UTC
@Yalym: I also have been dealing with personal problems (total teeth extraction for dentures) hopefuly I will be able to finish my build today.
@Ted: The P61 is coming along nicely.
Robert
@Ted: The P61 is coming along nicely.
Robert
 |

WEB HOSTING BY


Copyright ©2021 AeroScale and Kitmaker Network, a subsidiary of Silver Star Enterprises
All Rights Reserved. Please read our Conditions of Use and Privacy Policy.
All Rights Reserved. Please read our Conditions of Use and Privacy Policy.