1/32 Roden GB 2008 SE5a - Steve
North Carolina, United States
Joined: June 17, 2006
KitMaker: 478 posts
AeroScale: 391 posts
Posted: Tuesday, August 12, 2008 - 10:10 AM UTC
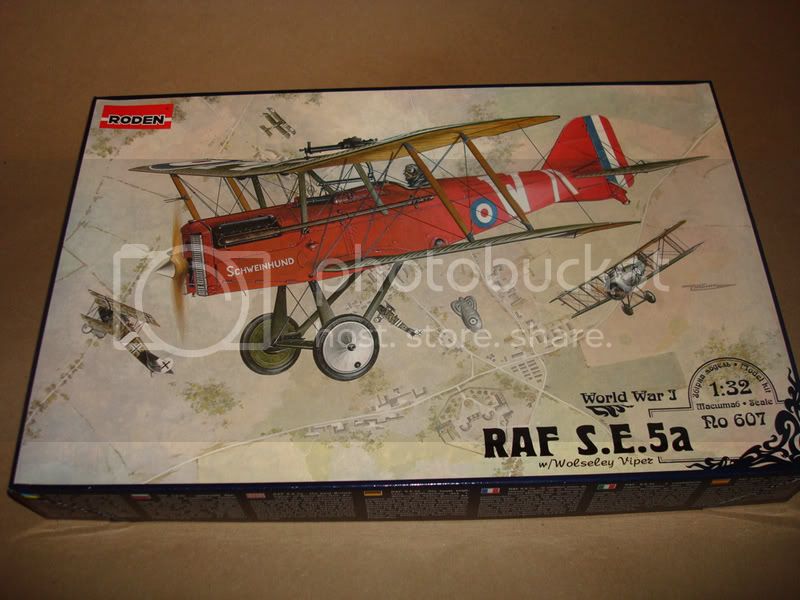
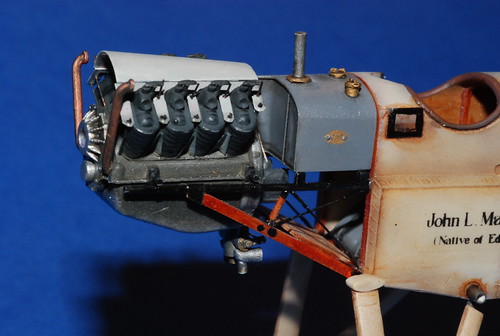
I'm the guy that blamed you all for getting me into this WWI stuff. Well, I started my Roden 1/32 S.E.5a Kit #607. I'm very pleased with the basics of the kit. My first biplane after WWII and helicopter subjects. Every step brings up questions that take me all over the internet to find a reasonable answer. Some remain unanswered or in a dark corner.
No weathering yet except to some of the black areas that are going to get buried under wires and Carburator. Not all the parts are incorporated yet. The carb is still just holding down it's space. All tubes and wires replaced with copper and solder.
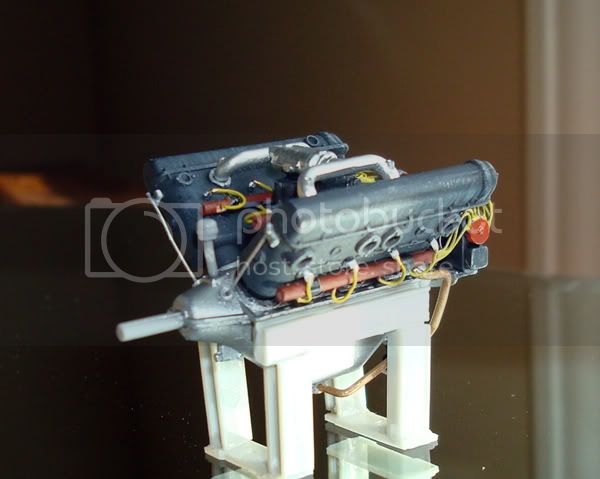
This engine is about 1 1/2 inches long on the kit, having to use a magnifying glass just to see it. Blowing it up was frightening............

By the way, thats just a temporary engine stand while I do the build.
Regards
Steve
1/350 USS San Francisco on Slipways
1/350 HMS Warspite in Research Mode
1/32 P-39D stalled
Victoria, Australia
Joined: November 26, 2006
KitMaker: 608 posts
AeroScale: 602 posts
Posted: Tuesday, August 12, 2008 - 11:22 AM UTC
Hi Steve,
Nicely done. That will look beaut with a wash or three.
I would darken up the induction pipes somewhat and the throttle chamber. Otherwise... Great!
Cheers,
Hugh
North Carolina, United States
Joined: June 17, 2006
KitMaker: 478 posts
AeroScale: 391 posts
Posted: Tuesday, August 12, 2008 - 12:10 PM UTC
Thank you Hugh.....3 or 4 washes a 'coming.
Got an engine question for the experts here. Before starting this machine, I did a lot of studying how the x-perts did them on this site as well as how I've done it in the past.......what are your views of detailing and gluing the engine and it's parts THEN doing the paint. I just couldn't do that with the SE5a. Too much would have been covered up prior to paint.
I note that Stephen in his SE5 build did like i did...........major component build, then paint, then complete engine.......then finish off.
I note that RAGIII in his Albatros build "looked like" he built it ALL then painted. (I shouldn't even bring his Albatros into this because it is way over the top.....

)
I've built a number of Radials and they are much easier to nearly complete, then paint and get away with it. The V-8 killed me.
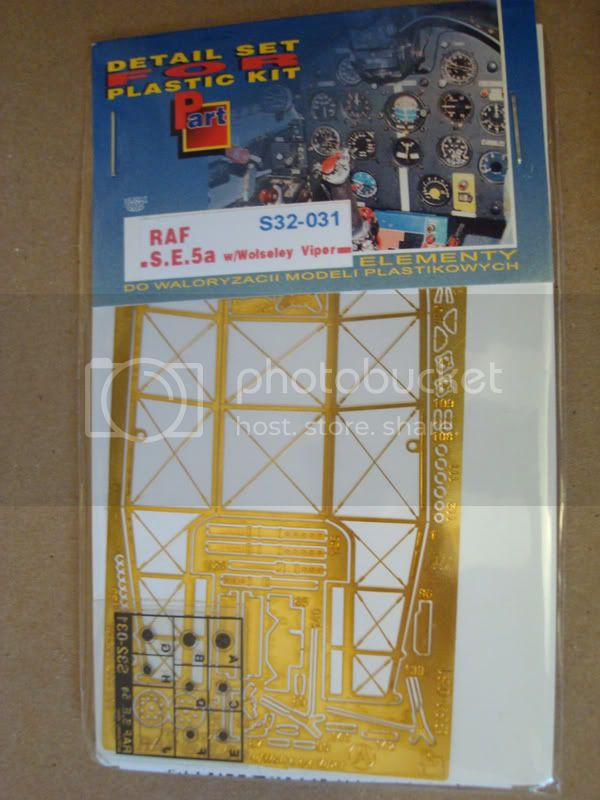
I will be starting with the Part of Poland fret shortly.
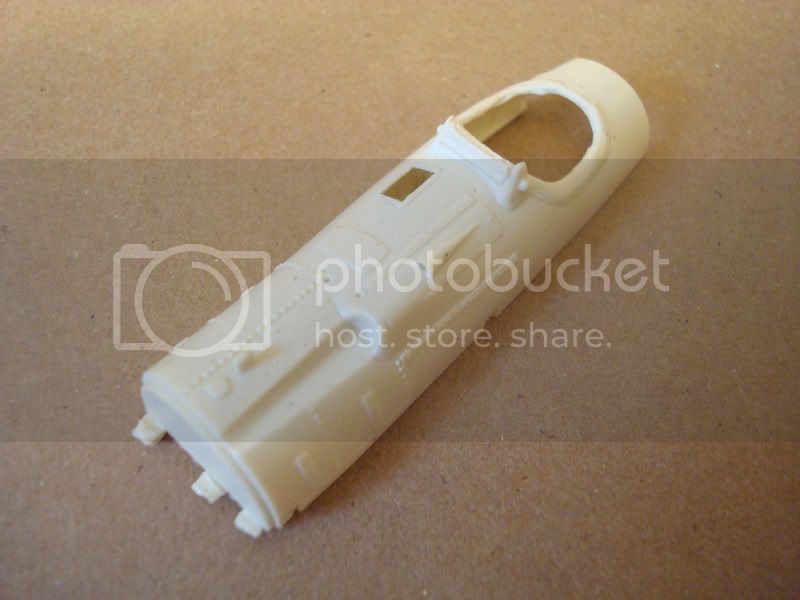
And I'll be using the Mastercasters SE5 Coaming.
Regards
Steve
1/350 USS San Francisco on Slipways
1/350 HMS Warspite in Research Mode
1/32 P-39D stalled
Victoria, Australia
Joined: November 26, 2006
KitMaker: 608 posts
AeroScale: 602 posts
Posted: Tuesday, August 12, 2008 - 03:25 PM UTC
I tend to do a bit of both. Depends on Access once the assembly has been done.
Certainly, with a V8, you really want to have every thing painted up pretty much before you add induction pipes etc.
Here are some shots of the RAF 1a that I detailed up (a bit) for the Roden BE2c that you can find (if you go way back to march) .
Cheers,
Hugh
Östergötland, Sweden
Joined: April 04, 2006
KitMaker: 1,058 posts
AeroScale: 1,004 posts
Posted: Tuesday, August 12, 2008 - 09:51 PM UTC

Just love the quality sharp pics you send in, this build from you I will follow,I´ve seen you Be2c build and that´s one for the book.
Cheers
Larsa Q
North Carolina, United States
Joined: June 17, 2006
KitMaker: 478 posts
AeroScale: 391 posts
Posted: Wednesday, August 13, 2008 - 01:26 AM UTC
Hugh,
What an outstanding build. And yes, I went back and found it. Took a while but I found it.
Regards
Steve
1/350 USS San Francisco on Slipways
1/350 HMS Warspite in Research Mode
1/32 P-39D stalled
North Carolina, United States
Joined: June 17, 2006
KitMaker: 478 posts
AeroScale: 391 posts
Posted: Wednesday, August 13, 2008 - 10:08 AM UTC
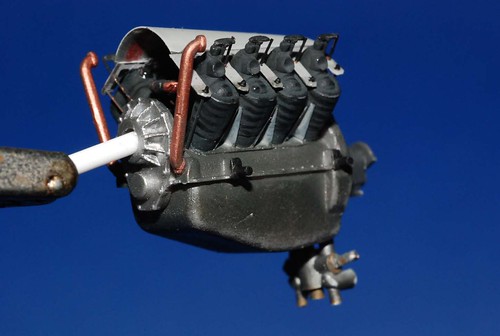
Well Hugh............a few washes. Let me know what you think.

Actually I did some fading of the Viper first, then did the washes. Let me know if i need more. Just of note, the oil pan is out of focus slightly so it looks a little weird, plain with that funny "line" under the nose....it's not there, trust me.

I already set the engine into a taped together fuselage and I see issues coming up, probably with the spark plug wires. I will thin the thick cowling on one side and i will be cutting off the cowling on the other as i'm going to have half the cowling off.
Question for an experts
1. I know that the upper cowling has the piano wire center line. Has anyone seen a photo of that cowling "folded up"? Is the wire in the hinge kept there, or is it pulled to get the cowling off? That cowl is a many piece affair.
2. How is that lower cowl attached? Is it one piece? Looks like it. Can it hang from just one side? I have seen the lower cowl "gone", or on, but never just hanging out around the aircraft.
I'm going to get getting into the Part of Poland internal structure next.
Regards
Steve
1/350 USS San Francisco on Slipways
1/350 HMS Warspite in Research Mode
1/32 P-39D stalled
Victoria, Australia
Joined: November 26, 2006
KitMaker: 608 posts
AeroScale: 602 posts
Posted: Wednesday, August 13, 2008 - 11:25 AM UTC
Looks good Steve.
I don't know that I have ever seen bakalite tubes attached for running the spark plug lines in any photo of the real engine... Maybe that is the interference that you are finding.
Regarding the cowels:
I have never seen the upper cowel folded over, only ever seen it removed completely.
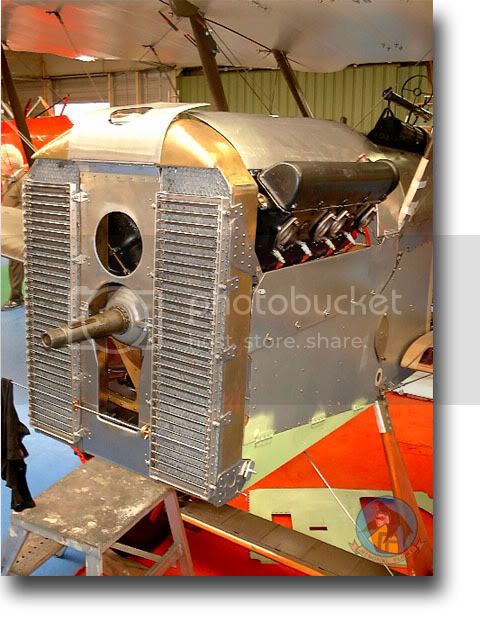
Here is a shot of the nose of the Restored machine living at the RAAF Museum at Point Cook (Melbourne).
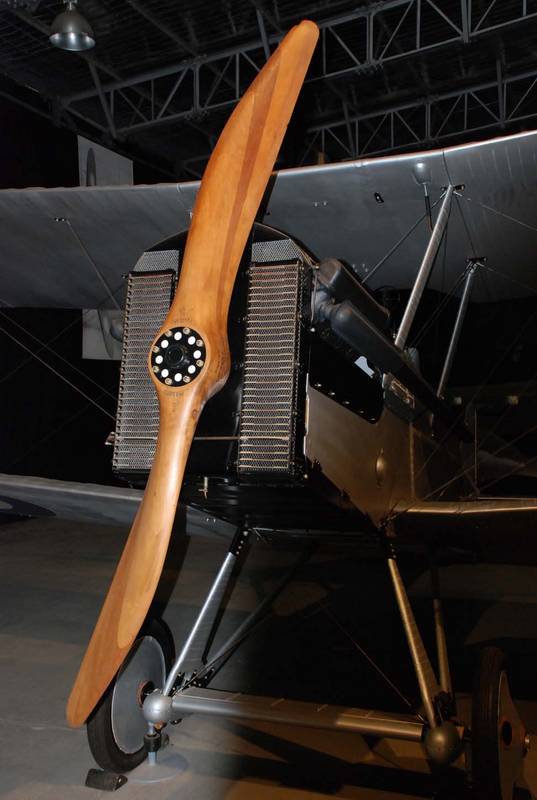
Cheers,
Hugh
North Carolina, United States
Joined: June 17, 2006
KitMaker: 478 posts
AeroScale: 391 posts
Posted: Wednesday, August 13, 2008 - 11:42 AM UTC
Hello Hugh,
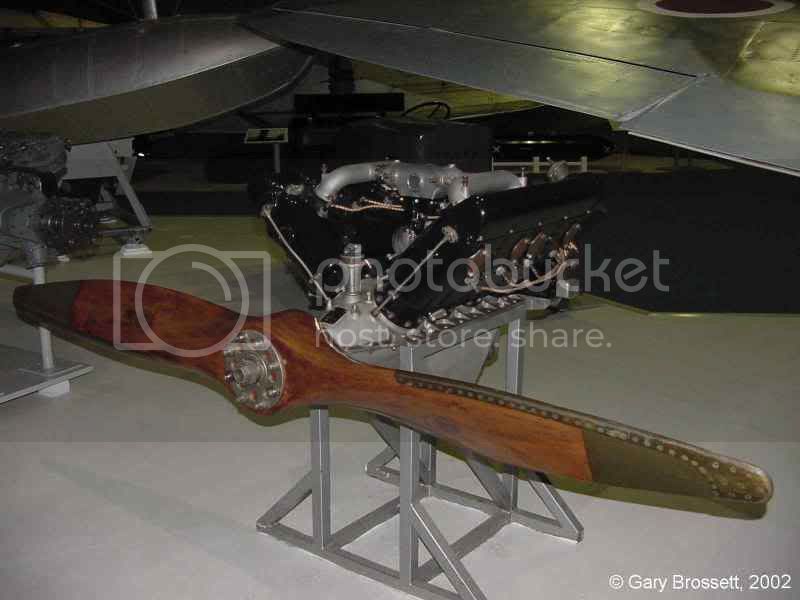
Thanks for the input. I've only seen the tubes on several engines. As I look at more of them, most are modern day builds such as this one:

If I were going to do it again, I would go without the tubes.
I left the fiddley parts off as it will get handled a lot during the fuselage fittings.
There is just a smattering of websites that have info and photos of the H-S engine. Originals that I've found are missing half the parts and the new restorations add other parts.
The one good thing is that I'm learning a lot about an era I knew little about. That is fun!

Regards
Steve
1/350 USS San Francisco on Slipways
1/350 HMS Warspite in Research Mode
1/32 P-39D stalled
Alberta, Canada
Joined: January 19, 2008
KitMaker: 6,743 posts
AeroScale: 6,151 posts
Posted: Wednesday, August 13, 2008 - 02:57 PM UTC
Steve , Fantastic craftsmanship out standing !
I'll be watching your build on this one with very keen interest .
Hugh , always a pleasure viewing your handy work . After my Fokker I'm thinking about building Rodens kit . It's a wonderful kit but it sure came in a big enough box !
Thanks to both of you for the pic's of the aircraft . I printed them off and add them to my ref's library .
Victoria, Australia
Joined: November 26, 2006
KitMaker: 608 posts
AeroScale: 602 posts
Posted: Wednesday, August 13, 2008 - 05:19 PM UTC
Hi Steve,
Yes, there are other things about that engine that look far from original. The pipes coming from the Induction Pipe (Bridge) and down to the Cylinder Block don't look right to me... I have never seen anything like them before.
Cheers,
Hugh
North Carolina, United States
Joined: June 17, 2006
KitMaker: 478 posts
AeroScale: 391 posts
Posted: Wednesday, August 13, 2008 - 11:06 PM UTC
Hugh,
I'm missing some terminology here.........

"induction block"......I'm reading that as the induction pipes/throttle/carburator assembly. As yet, that assembly is just sitting there with nothing attached.
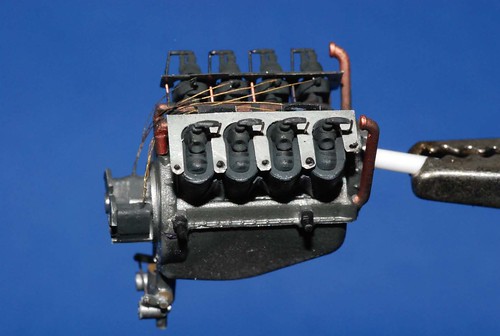
Now if your talking about those lines running from the the nose of each valve cover down to the crankcase, they are on all H-S engines I have found.
Regards
Steve
1/350 USS San Francisco on Slipways
1/350 HMS Warspite in Research Mode
1/32 P-39D stalled
Victoria, Australia
Joined: November 26, 2006
KitMaker: 608 posts
AeroScale: 602 posts
Posted: Wednesday, August 13, 2008 - 11:37 PM UTC
Nah, these have me confused.
I was actually very impressed with your addition of the pipes down the front of the cylinder block. Great attention to detail.
Cheers,
Hugh
North Carolina, United States
Joined: June 17, 2006
KitMaker: 478 posts
AeroScale: 391 posts
Posted: Thursday, August 14, 2008 - 12:52 AM UTC
Ahhhh, gotcha.
The two aft connections I have seen on several. Now that forward line is a new one to me also. The problem for ME, is that there are so few reference photos of these engines and I have seen no drawings of any kind (Unlike the Mercedes DIII which I can find all kinds a "stuff" for. The DIII seems to be a more "collectable" engine than the H-S.)
What I have had to do is put together the best "conglomerate" of parts to represent the best engine that I can. So, my washes and wear are more important to me right now. THATS what i want to make realistic. Suggestions as to my wear and tear are appreciated. I'm not looking to make a junk bucket, but not off the assembly line yet.
I will be using one of the kit schemes, not sure which yet.
Regards
Steve
1/350 USS San Francisco on Slipways
1/350 HMS Warspite in Research Mode
1/32 P-39D stalled
Colorado, United States
Joined: January 25, 2004
KitMaker: 11,669 posts
AeroScale: 11,011 posts
Posted: Thursday, August 14, 2008 - 03:32 AM UTC
Excellent thread and a stunning build! The oil feed lines at the front of the cylinder blocks are a nice touch.
". . .The most important thing is to know why you build and then get the most that you can out of building." via D.D.
North Carolina, United States
Joined: June 17, 2006
KitMaker: 478 posts
AeroScale: 391 posts
Posted: Thursday, August 14, 2008 - 04:40 AM UTC
Stephen,
Thanks.......I have looked at your SE5 build with more than passing interest. In fact, it's what got me into the SE5 myself.
You mentioned that you thought that the PoP fret for the fuselage structure was 1/8 too high. So your saying i should look very closely at the Fuselage/fret/wing fitting, as well as the lower engine/fret fitting? I plan on removing the lower cowling as well as 1/2 the upper cowling.
I finally figured out how the cowlings were attached..........
.......no quick disconnects there. It also appears that the upper cowling "piano hinge" pin is pulled to remove the cowling (as well as all the other pieces). The head of the pin is a 90 deg turn and the end of the pin is safety wired to preclude premature removal. Quite a bear to get back on I would guess.
Yes, the many different engine varieties have driven me mad. Gave up on making an exact varient as the ones left in museums seem to be a hodge podge of bits and pieces (if all the pieces are even there).
My bakalite spark plug wire tubes were a "guess". I have not seen any aviation rubber grommet wire connectors in any photo of old engines and certainly no zip ties. It was a best guess from references available.
Comments welcome. How much did this machine leak oil? I'm sure it's not as bad as a "round" engine.

Regards
Steve
1/350 USS San Francisco on Slipways
1/350 HMS Warspite in Research Mode
1/32 P-39D stalled
Colorado, United States
Joined: January 25, 2004
KitMaker: 11,669 posts
AeroScale: 11,011 posts
Posted: Thursday, August 14, 2008 - 04:52 AM UTC
Because Wolseley improved the oil lines the Viper was a superior engine to the Hisso. The inlines were of course close flow systems where the rotaries were open systems where the fuel mixed with the oil and wound up in the exhaust.
". . .The most important thing is to know why you build and then get the most that you can out of building." via D.D.
Wellington, New Zealand
Joined: March 19, 2007
KitMaker: 42 posts
AeroScale: 20 posts
Posted: Thursday, August 14, 2008 - 06:09 PM UTC
Quoted Text
Question for an experts
2. How is that lower cowl attached? Is it one piece? Looks like it. Can it hang from just one side? I have seen the lower cowl "gone", or on, but never just hanging out around the aircraft.
I'm going to get getting into the Part of Poland internal structure next.
Regards
Steve
Maybe this will work and answer question #2. It's on an earlier geared Hisso (most likely) engined SE.5a and hangs down from the back.

If the URL doesn't work go to
http://cas.awm.gov.au/ and do a search for 's.e.5a' and it'll show up.
Cheers
Edit: found another copy of the image I could link to.
North Carolina, United States
Joined: June 17, 2006
KitMaker: 478 posts
AeroScale: 391 posts
Posted: Thursday, August 14, 2008 - 10:45 PM UTC
Thank you Richard, very good find.
From detailed walkaround photos I "figured" out that there are hinges on all sides, with pull pins for cowl removal. Your RAAF photo is the very first I've seen of "period" maintenance. SUPURB! (Had to go to the URL, but got to see a bunch of others also)
My work yesterday was with the Part of Poland frets. Those are tricky lttle dudes......parts #7 8 and 9 are the lower engine support frames, watch your reference photos when doing these, they don't go together like the real laminated wood/plywood parts. The plan seems to call for a void in between. I made a mod with a piece of strene sandwiched in between two PE layers. The key is to be "solid" on the exterior edges and open on the interior cutouts. In other words "cut the holes larger than the PE holes. NOTE: don't even bother if the lower cowl will remain closed as you'd never see them anyway.
Pics when I get a little farther along. Prepping the PE for the cabin structure.
Regards
Steve
1/350 USS San Francisco on Slipways
1/350 HMS Warspite in Research Mode
1/32 P-39D stalled
North Carolina, United States
Joined: June 17, 2006
KitMaker: 478 posts
AeroScale: 391 posts
Posted: Friday, August 15, 2008 - 06:57 AM UTC
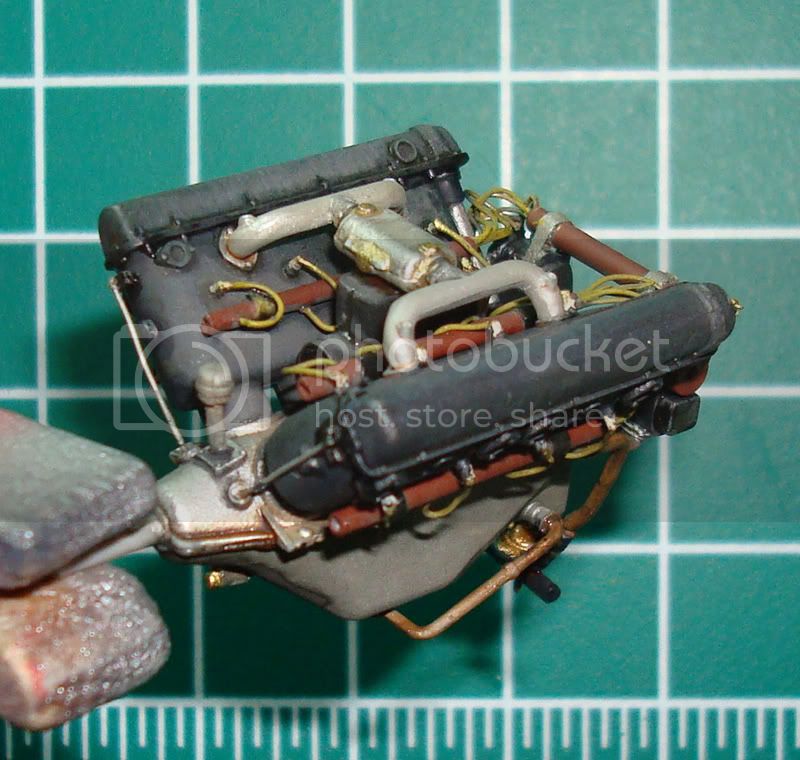
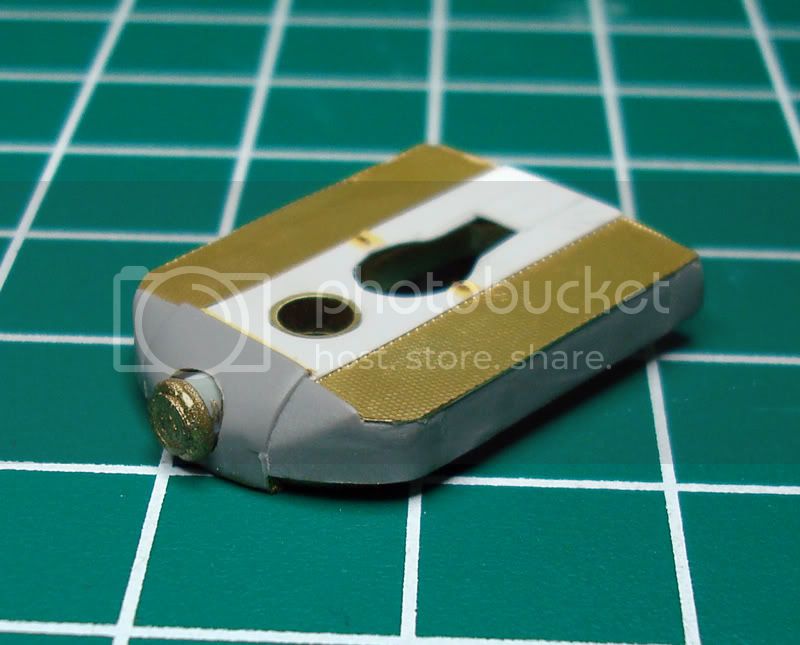
Here are photos of the Lower Engine support PE parts modified with styrene sheet sandwiched in between the PE.

And here is the reference photo of the same parts:
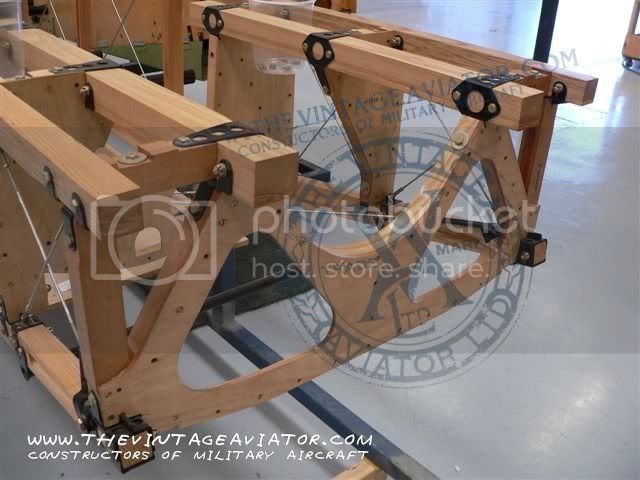
The PoP instructions lead one to have a space or void between thier PE parts. In reality, it is a solid wood laminate with a little more internal "void" around the lightening holes. This only really makes a hill of bean if one is going to open the lower engine cowling...........which i am going to do.
Also note that the reference photo does not yet have the "Front Lower Engine support's" aft layer of plywood installed, ( the same plate as in the front.)
Regards
Steve
1/350 USS San Francisco on Slipways
1/350 HMS Warspite in Research Mode
1/32 P-39D stalled
North Carolina, United States
Joined: June 17, 2006
KitMaker: 478 posts
AeroScale: 391 posts
Posted: Friday, August 15, 2008 - 11:21 PM UTC
Got a question for you Guys and Gals.............Does anyone HAVE or have you seen a photo of the SE5 Laced side panels pulled down for inspection or work?
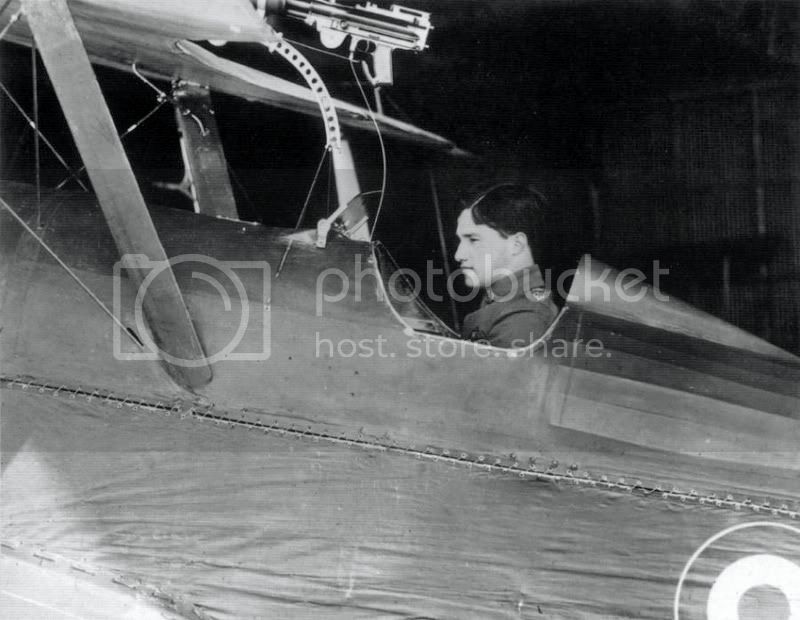
If so, could you post a pic or link it here? I really need to see that before i make up my mind on doing surgery on my SE5 to open that panel. I'm leaning more and more away from that thought.

Since most of my work so far has been in the engine area, I'm continuing there now with the radiator. Sliced all the front detail off readying for the PART components.
Regards
Steve
1/350 USS San Francisco on Slipways
1/350 HMS Warspite in Research Mode
1/32 P-39D stalled
North Carolina, United States
Joined: June 17, 2006
KitMaker: 478 posts
AeroScale: 391 posts
Posted: Tuesday, August 19, 2008 - 05:16 AM UTC
The Slow Build continues "Slowly".
I've been working in areas around the engine. With my desire to open 1/2 of the cowling, I had to do something with that 2 part kit radiator:

So I cut these pieces out of them:
Since I'm working in an area that doesn't lend itself well to references, I have been having to take peeks at resoration builds. Don't look TOO closely. I have the base coat of paint on the inside brass as well as 2 wash coats. Not done yet.

I will be tackling the 1/2 cowling, possibly making it out of soda can.
Regards
Steve
I
1/350 USS San Francisco on Slipways
1/350 HMS Warspite in Research Mode
1/32 P-39D stalled
Wellington, New Zealand
Joined: March 19, 2007
KitMaker: 42 posts
AeroScale: 20 posts
Posted: Tuesday, August 19, 2008 - 10:08 AM UTC
Steve,
FYI. Note in that image of the opened up lower cowl from the AWM image is for an early geared 'Hisso' engine type and has unevenly spaced wide vent holes. So the interior that you see will be different from what you need for your later, in line 'Viper', engined model. Just in case.
Nice build.
So long as the restoration you are following is from
The Vintage Aviator I'm sure you can't go wrong. It's really very good.
Cheers
North Carolina, United States
Joined: June 17, 2006
KitMaker: 478 posts
AeroScale: 391 posts
Posted: Tuesday, August 19, 2008 - 10:44 AM UTC
Hello Richard,
Most of my references do come from the Vintage Aviator. Now, I'm certainly no expert.......but my cutouts do SEEM to follow both the Roden part as well as the Vintage Aviator's build of the SE5. The front plate appears to be a 2 part hinged affair..again.......from the V-A.
If I am wrong here, I am at a point where I CAN make changes to that front plate.
Here is a shot from Vintage Aviator's SE5 radiator plate:
One more showing the "tube" I have installed:

Regards
Steve
1/350 USS San Francisco on Slipways
1/350 HMS Warspite in Research Mode
1/32 P-39D stalled
Wellington, New Zealand
Joined: March 19, 2007
KitMaker: 42 posts
AeroScale: 20 posts
Posted: Tuesday, August 19, 2008 - 04:41 PM UTC
That's the Memorial Flight SE.5a.
While still very good, you have to watch out for things like the oil tank hatch above the rear undercarriage strut.
Their one is of the style almost exclusively associated with geared Hisso engine types.


