

Very nice Daniel !
Really like nº13, which kit it is ? (brand / scale)
Air Campaigns
Want to start or join a group build? This is where to start.
Want to start or join a group build? This is where to start.
Hosted by Frederick Boucher, Michael Satin
Campaign Luftwaffe 1946

Nito74

Joined: March 04, 2008
KitMaker: 5,386 posts
AeroScale: 635 posts
Posted: Tuesday, June 09, 2009 - 04:14 PM UTC

AirLedge

Joined: July 26, 2007
KitMaker: 292 posts
AeroScale: 265 posts

Posted: Tuesday, June 09, 2009 - 07:59 PM UTC
Whao Daniel!
Some weird and wonderful model collection you got there, thanks for sharing. Nice detail highlighting on the cockpit, excellent stuff.
Mike
Some weird and wonderful model collection you got there, thanks for sharing. Nice detail highlighting on the cockpit, excellent stuff.
Mike

dcandal

Joined: September 07, 2006
KitMaker: 918 posts
AeroScale: 688 posts

Posted: Wednesday, June 10, 2009 - 12:46 AM UTC
Hi John,
I´m glad you like the models.
Red 13 is a 1/48 Antares Model Messerschmitt Me-262 HG II. It´s a convertion kit. I used it with the Tamiya kit.
I´m glad you like the models.
Red 13 is a 1/48 Antares Model Messerschmitt Me-262 HG II. It´s a convertion kit. I used it with the Tamiya kit.

dcandal
Joined: September 07, 2006
KitMaker: 918 posts
AeroScale: 688 posts
Posted: Wednesday, June 10, 2009 - 12:47 AM UTC
Thanks for your comments Mike 
Nito74
Joined: March 04, 2008
KitMaker: 5,386 posts
AeroScale: 635 posts
Posted: Thursday, June 11, 2009 - 01:08 PM UTC
The wheels , wheel bay doors, guns were added yesterday and finished the canopy this morning.
I will add a little wash and that's it ! Finished pics in the next few days.
I will add a little wash and that's it ! Finished pics in the next few days.
SGTJKJ

#041

Joined: July 20, 2006
KitMaker: 10,069 posts
AeroScale: 3,788 posts

Posted: Thursday, June 11, 2009 - 11:46 PM UTC
Looking forward to see it finished, John.
Very nice models, Daniel. I especially like the camouflage on "Red 13". What kit is the triebvogel? I am making the Huma kit of this bird for this campaign.
Very nice models, Daniel. I especially like the camouflage on "Red 13". What kit is the triebvogel? I am making the Huma kit of this bird for this campaign.


mj

Joined: March 16, 2002
KitMaker: 1,331 posts
AeroScale: 325 posts
Posted: Friday, June 12, 2009 - 06:39 AM UTC
Hello All . I had a lot of possibilities to chose from in my stash, but I'm a little pressed for time these days, and went the simple route. I pulled this from the stash:

And, as you can see, it has the benefit of being simple...if you call flashy, thick plastic parts simple...

I think I spent more time cleaning up the pieces than I did in construction, and the paint scheme was fairly quick as well. The kit decals were toast, so, my spares box provided them. Here is the completed project:


I thought I would throw in this as well. A friend gave it to me as a joke, and asked me to identify it, if I could. Take a look at the pics - do you know what it is??


It stumped me, and my friend finally gave in and told me.
He had been working on Revell's SR-71 kit, which comes with a "drone" which he wasn't using. He knows I do mostly WWII stuff, so he decided to do the drone up as a German "secret weapon", scratch a trolly for it, and give it to me. Pretty clever, actually.
Well, that's it for me, although I am still hoping I can find some time later in the Campaign to do another kit. Luftwaffe '46 stuff is really a fun topic. I hate it when "real life" interfers with my modeling .
.
Cheers all,
Mike
. I had a lot of possibilities to chose from in my stash, but I'm a little pressed for time these days, and went the simple route. I pulled this from the stash: And, as you can see, it has the benefit of being simple...if you call flashy, thick plastic parts simple...
I think I spent more time cleaning up the pieces than I did in construction, and the paint scheme was fairly quick as well. The kit decals were toast, so, my spares box provided them. Here is the completed project:
I thought I would throw in this as well. A friend gave it to me as a joke, and asked me to identify it, if I could. Take a look at the pics - do you know what it is??
It stumped me, and my friend finally gave in and told me.
He had been working on Revell's SR-71 kit, which comes with a "drone" which he wasn't using. He knows I do mostly WWII stuff, so he decided to do the drone up as a German "secret weapon", scratch a trolly for it, and give it to me. Pretty clever, actually.
Well, that's it for me, although I am still hoping I can find some time later in the Campaign to do another kit. Luftwaffe '46 stuff is really a fun topic. I hate it when "real life" interfers with my modeling
.Cheers all,
Mike
AirLedge
Joined: July 26, 2007
KitMaker: 292 posts
AeroScale: 265 posts
Posted: Friday, June 12, 2009 - 06:53 AM UTC
Well done Mike.
You've pipped everyone to the winning post, and in one forum post too!
Great choice with the Horten flying wing. It's probably my favourite Luft 46 subject so it's great to have it in this campaign.
Congratulations,
Mike.
You've pipped everyone to the winning post, and in one forum post too!
Great choice with the Horten flying wing. It's probably my favourite Luft 46 subject so it's great to have it in this campaign.
Congratulations,
Mike.
dcandal
Joined: September 07, 2006
KitMaker: 918 posts
AeroScale: 688 posts
Posted: Saturday, June 13, 2009 - 02:09 AM UTC
A very nice model Mike
dcandal
Joined: September 07, 2006
KitMaker: 918 posts
AeroScale: 688 posts
Posted: Saturday, June 13, 2009 - 02:13 AM UTC
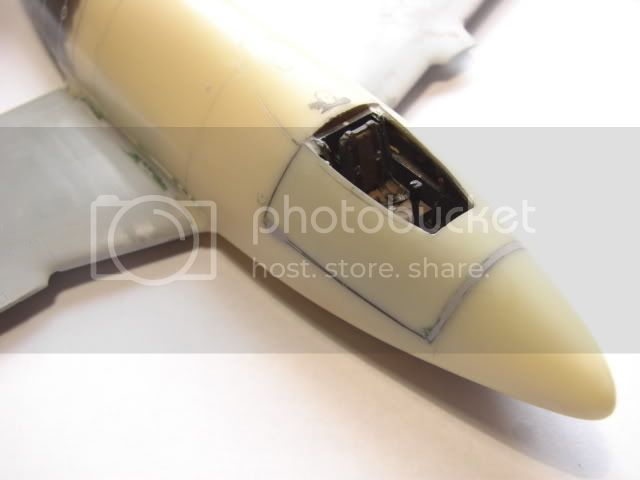
After I finished with the cockpit I put the sides panel piece and sand it,
Una vez terminada la cabina le coloque y masilla la parte lateral de la misma donde despues ira la carlinga,
Una vez terminada la cabina le coloque y masilla la parte lateral de la misma donde despues ira la carlinga,
dcandal
Joined: September 07, 2006
KitMaker: 918 posts
AeroScale: 688 posts
Posted: Saturday, June 13, 2009 - 02:17 AM UTC
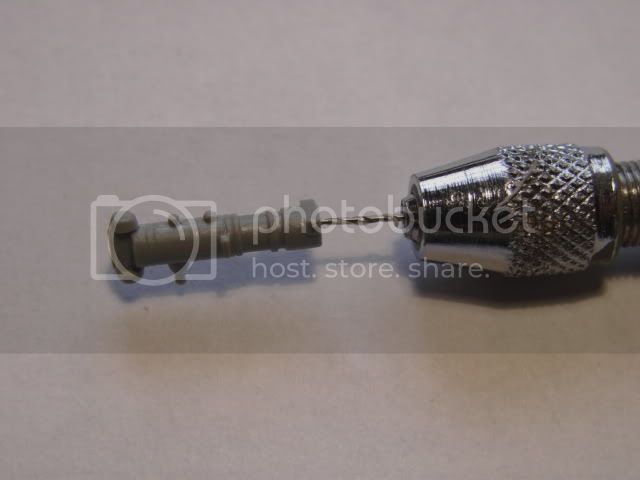
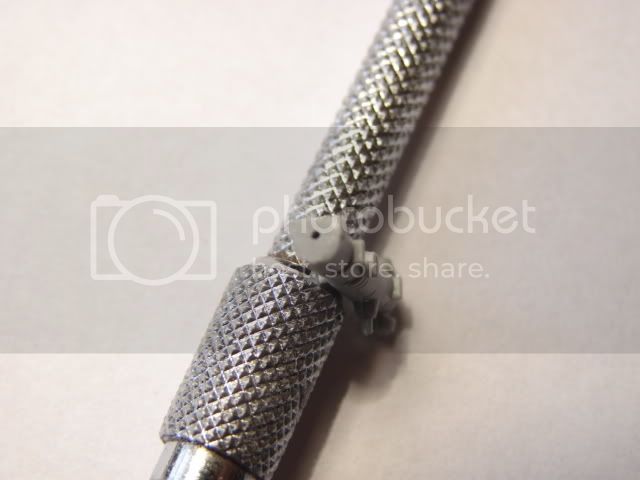
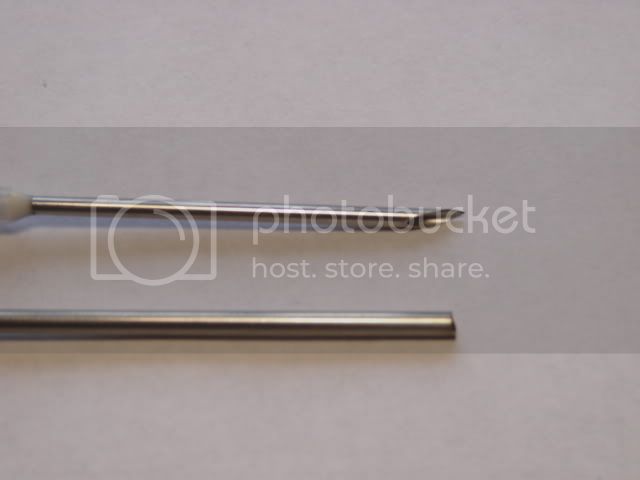
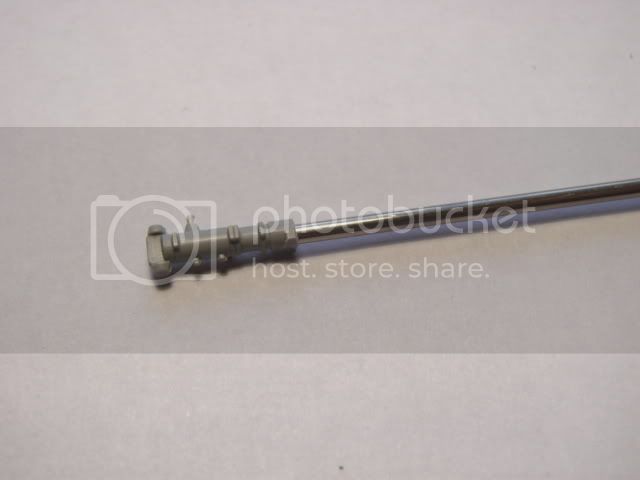
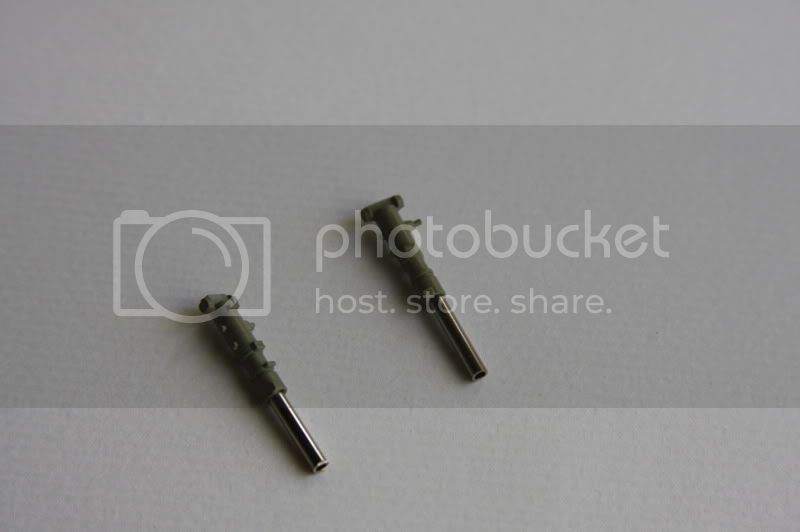
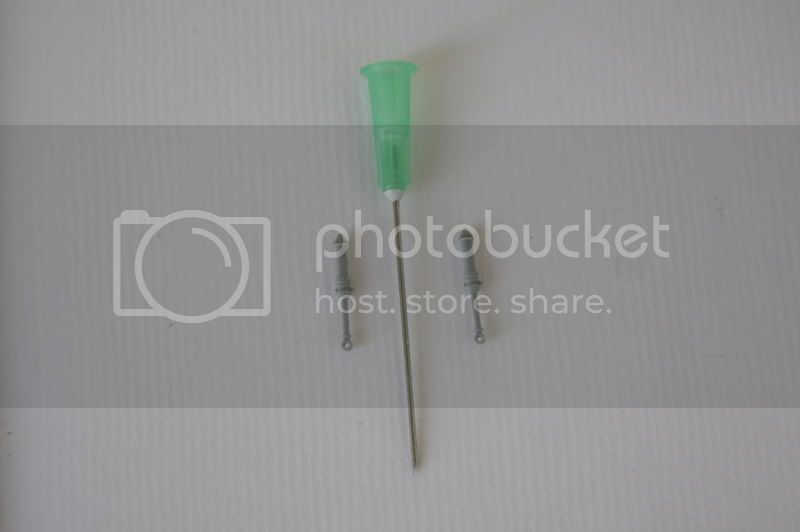
Then I continued with the landing gear. I´m going to add some details on it begining with the shock absorber. I´m going to use hypodermic needle ( I´m not sure if you call like this), if not with the photos you are going to undesrtand what I mean


mj
Joined: March 16, 2002
KitMaker: 1,331 posts
AeroScale: 325 posts
Posted: Saturday, June 13, 2009 - 02:58 AM UTC
That is some awesome work, Daniel. I look at what I did and think, " boy, I could really dress this simple kit up, do some scratch building, make it way better than an OOB build." And there is only one thing I would need that I don't have - your talent.
Great stuff, sir. One day I hope to progress to the level where I can do work like that. Keep it up, I am enjoying learning from your build.
Cheers,
Mike
Great stuff, sir. One day I hope to progress to the level where I can do work like that. Keep it up, I am enjoying learning from your build.
Cheers,
Mike
dcandal
Joined: September 07, 2006
KitMaker: 918 posts
AeroScale: 688 posts
Posted: Saturday, June 13, 2009 - 03:44 AM UTC
Hi Mike, thanks for all your words, I really appreciate your comments

LongKnife

Joined: April 25, 2006
KitMaker: 831 posts
AeroScale: 688 posts
Posted: Sunday, June 14, 2009 - 10:12 PM UTC
Great Daniel. I can't really decide what I think about the plane, but I do think your work is great. Looking forward to the next step.
Tony
TonySGTJKJ
#041
Joined: July 20, 2006
KitMaker: 10,069 posts
AeroScale: 3,788 posts
Posted: Monday, June 15, 2009 - 12:47 AM UTC
Good job on the Horten, Mike. A nice entry into the campaign.
Nice trick with the needle, Daniel. The running gear looks really good. Nothing looks as good as polished steel - like polished steel.
Nice trick with the needle, Daniel. The running gear looks really good. Nothing looks as good as polished steel - like polished steel.
dcandal
Joined: September 07, 2006
KitMaker: 918 posts
AeroScale: 688 posts
Posted: Monday, June 15, 2009 - 02:39 AM UTC
Hi Mike
Thanks for you comment. I understand what you mean about the plane. I think is an object that you like or not. In my case I like Luft 46, but if you see from an estrict point of view there not planes really, because they didn´t exist
Thanks for you comment. I understand what you mean about the plane. I think is an object that you like or not. In my case I like Luft 46, but if you see from an estrict point of view there not planes really, because they didn´t exist
dcandal
Joined: September 07, 2006
KitMaker: 918 posts
AeroScale: 688 posts
Posted: Monday, June 15, 2009 - 02:45 AM UTC
Hi Jesper, I´m glad you like how its getting. I found the big needle in a veterinary. They use them on horses.
dcandal
Joined: September 07, 2006
KitMaker: 918 posts
AeroScale: 688 posts
Posted: Monday, June 15, 2009 - 03:57 AM UTC
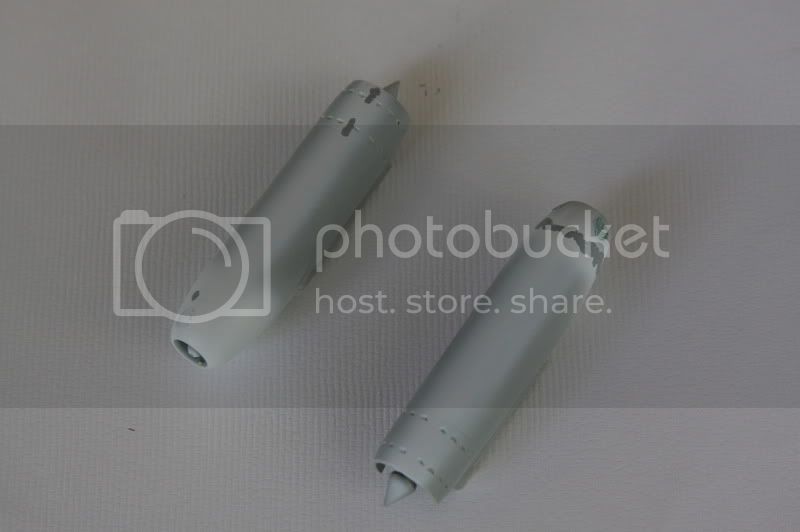
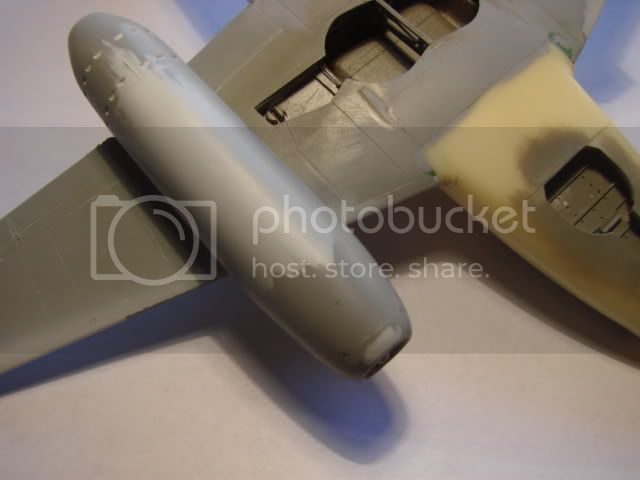
Now I´m going to put the engines,
dcandal
Joined: September 07, 2006
KitMaker: 918 posts
AeroScale: 688 posts
Posted: Monday, June 15, 2009 - 03:58 AM UTC
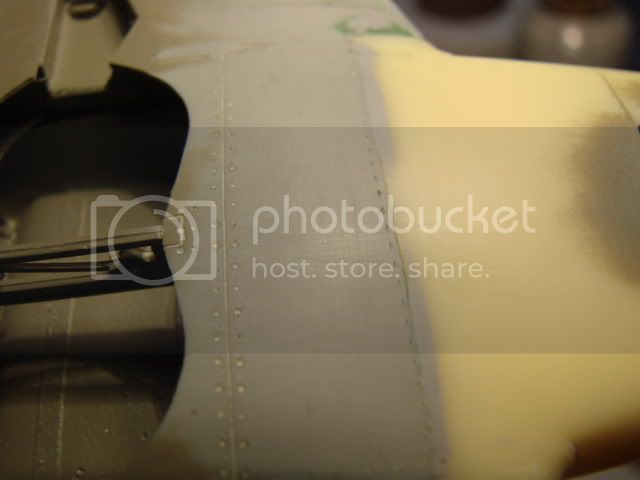
And re-making some riveting after sanded it,

dcandal
Joined: September 07, 2006
KitMaker: 918 posts
AeroScale: 688 posts
Posted: Monday, June 15, 2009 - 04:00 AM UTC
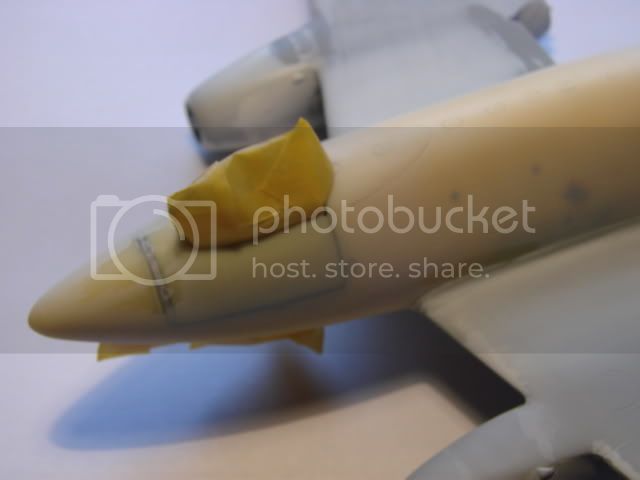
When I had finished with the differents parts I masked the landing gear holes and gave a first airbrush hand with Mr surface 1200,


AirLedge
Joined: July 26, 2007
KitMaker: 292 posts
AeroScale: 265 posts
Posted: Monday, June 15, 2009 - 08:58 PM UTC
Lightning fast progress Daniel!
Great idea using the syringe needle like that, can't wait to see it finished.
I've finally got round to opening the box to my Dragon Me 1101 kit. Even got as far as trying a dry fit of the main fuselage. What can I say except that I'm off to my LHS to buy more styrene sheets to fill those gaps.
All the best,
Mike.
Nito74
Joined: March 04, 2008
KitMaker: 5,386 posts
AeroScale: 635 posts
Posted: Tuesday, June 16, 2009 - 03:06 PM UTC
I finally took some pics of the finnished plane.
But the camera ran out of batteries (great timing...,), 3 pics taken, 2 little blurry.
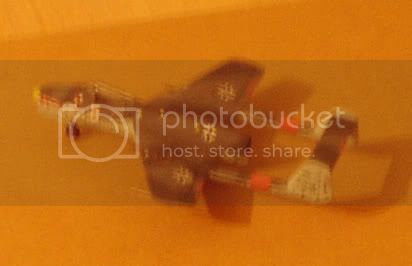

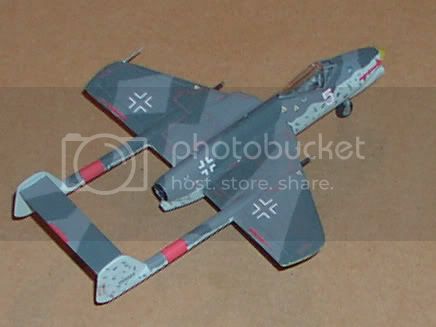
Posted the last one on the gallery, but since I might be running out of space I only posted one image.
If you need another 2 images on the gallery to consider a Campaign build let me know, i'll take another 2 pics .
Thanks !!
If I wasn't in so many Campaigns and with the real life messing with my Modeling, I would tackle another bird for this one
But the camera ran out of batteries (great timing...,), 3 pics taken, 2 little blurry.
Posted the last one on the gallery, but since I might be running out of space I only posted one image.
If you need another 2 images on the gallery to consider a Campaign build let me know, i'll take another 2 pics .
Thanks !!
If I wasn't in so many Campaigns and with the real life messing with my Modeling, I would tackle another bird for this one
dcandal
Joined: September 07, 2006
KitMaker: 918 posts
AeroScale: 688 posts
Posted: Wednesday, June 17, 2009 - 12:31 PM UTC
An excelent job John, it looks very nice
SGTJKJ
#041
Joined: July 20, 2006
KitMaker: 10,069 posts
AeroScale: 3,788 posts
Posted: Thursday, June 18, 2009 - 12:00 AM UTC
Looks very good, John. I guess the first two pictures were taken by a fast moving recon plane 
Are you going to keep it politically correct by not adding swastikas to the tail?
Thanks for participating.
Are you going to keep it politically correct by not adding swastikas to the tail?
Thanks for participating.
Nito74
Joined: March 04, 2008
KitMaker: 5,386 posts
AeroScale: 635 posts
Posted: Thursday, June 18, 2009 - 02:49 AM UTC
I used the decals provided for the kit Jesper, and there were no swastikas ... my decal stash is mostly 1:35 armour leftovers...
The only swastikas left are from an old Hasegawa 1:32 Me262 I think... too big for this one.
The crosses used on my Eastern front campaign a Su-85 with german markings has some of those decals.
I really enjoyed this build, thinkibg that a few years ago I was about to sell all my aircraft kits and turn over to the armour side..
 |

WEB HOSTING BY


Copyright ©2021 AeroScale and Kitmaker Network, a subsidiary of Silver Star Enterprises
All Rights Reserved. Please read our Conditions of Use and Privacy Policy.
All Rights Reserved. Please read our Conditions of Use and Privacy Policy.