
Air Campaigns
Want to start or join a group build? This is where to start.
Want to start or join a group build? This is where to start.
Hosted by Frederick Boucher, Michael Satin
OFFICIAL: Big Beautiful Bombers Campaign
Red4

Joined: April 01, 2002
KitMaker: 4,287 posts
AeroScale: 1,164 posts

Posted: Wednesday, December 08, 2010 - 02:36 AM UTC
Looking good folks. Still a few weeks left to complete your builds. Remember, post progress pics here for all to see and also to post pics of your completed builds in the gallery. Thanks for participating. "Q" 


Siderius

Joined: September 20, 2005
KitMaker: 1,747 posts
AeroScale: 1,673 posts

Posted: Wednesday, December 08, 2010 - 11:18 AM UTC
Hi all, well I dug up a couple of photos of my 24 under construction. Take a look if you like. Russell


Posted: Wednesday, December 08, 2010 - 01:38 PM UTC
howdy
did some more work on the arado 234 here are a couple of photo's of the cockpit. basicly lightened up a bit and details painted.. nothing accurate just pretting up the area using artistic lisince....


did some more work on the arado 234 here are a couple of photo's of the cockpit. basicly lightened up a bit and details painted.. nothing accurate just pretting up the area using artistic lisince....


RotorHead67

Joined: May 07, 2003
KitMaker: 1,174 posts
AeroScale: 226 posts

Posted: Friday, December 10, 2010 - 05:23 PM UTC
Big Beautiful Bombers:
Here are some in progress pics of my P-61 Fire bomber. All panel lines have been rescribed and I have added frame and bulkhead details in the wheel wells. Extra panels added to wings with evergreen sheet.
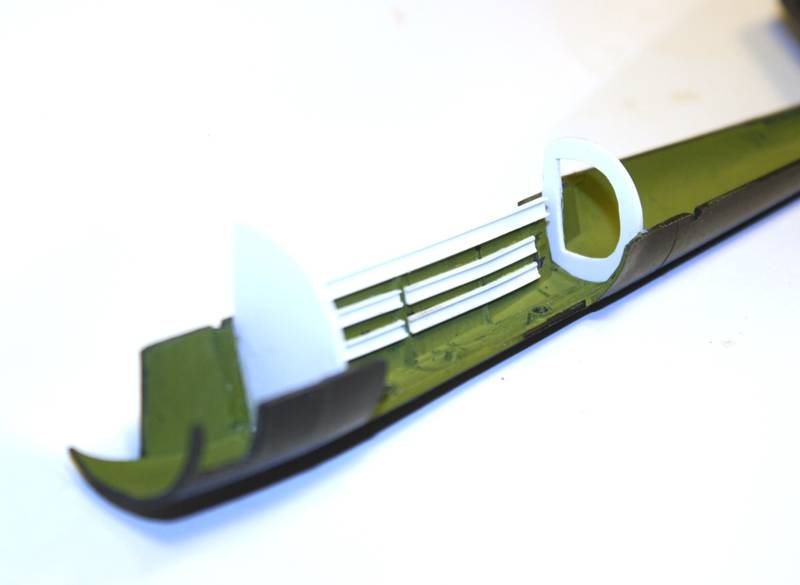
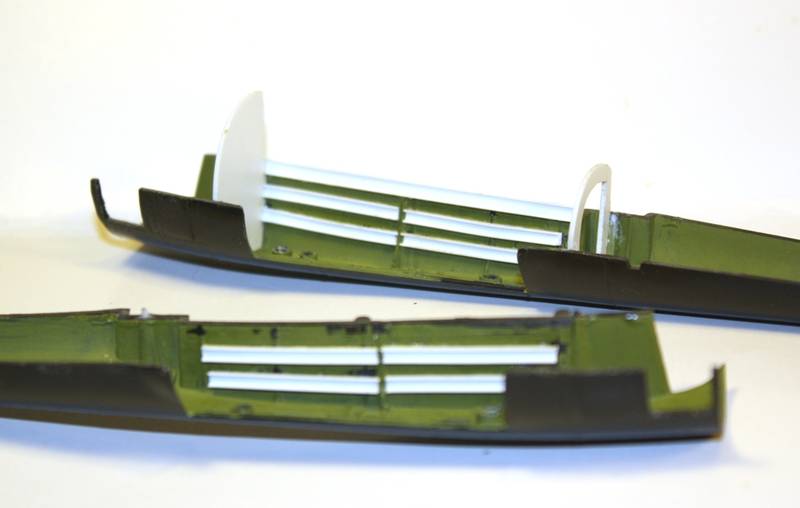
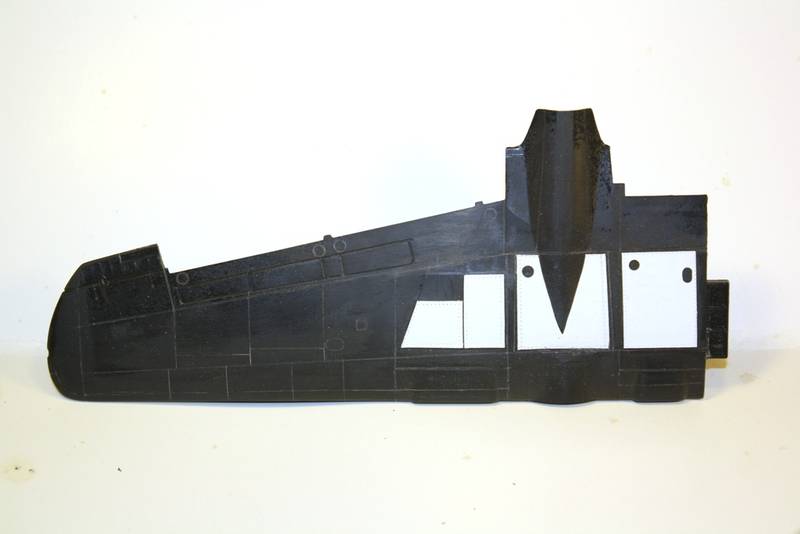
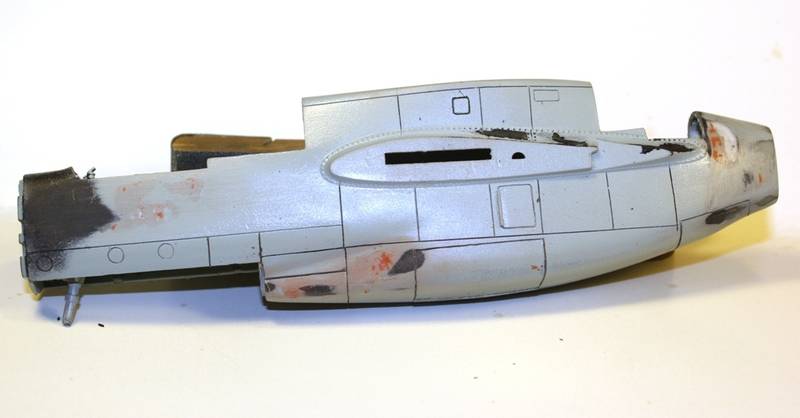
Im still working fevorouslly towards completion. I still have some scribing work to finish,but after that, I will be working on assembly of componants. I have new resin cowls and I need to scratch build my Retardant foam tank for the belly.
Here are some in progress pics of my P-61 Fire bomber. All panel lines have been rescribed and I have added frame and bulkhead details in the wheel wells. Extra panels added to wings with evergreen sheet.


Im still working fevorouslly towards completion. I still have some scribing work to finish,but after that, I will be working on assembly of componants. I have new resin cowls and I need to scratch build my Retardant foam tank for the belly.

Red4

Joined: April 01, 2002
KitMaker: 4,287 posts
AeroScale: 1,164 posts

Posted: Saturday, December 11, 2010 - 02:17 AM UTC
Todd....Dude! That is going to be sweet. I have some extra 61's on the shelves here. I might just be tempted to do something along these lines with one of them. Cool choice. Good luck on wrapping it up. "Q" 

AaronW

Joined: August 03, 2003
KitMaker: 197 posts
AeroScale: 42 posts

Posted: Saturday, December 11, 2010 - 10:04 AM UTC
I'm back to work on the Wellesley


Posted: Saturday, December 11, 2010 - 12:24 PM UTC
Todd, magnificent idea with the P-61 firebomber, please post some more progress pics. I have several in the stash and have been thinking about doing a Reporter and a firebomber conversion on a couple of them.
Cheers, D
Cheers, D
Watimena

Joined: May 09, 2010
KitMaker: 39 posts
AeroScale: 33 posts

Posted: Saturday, December 11, 2010 - 09:47 PM UTC
Quoted Text
Hi all, well I dug up a couple of photos of my 24 under construction. Take a look if you like. Russell
Looking alright, I'm hoping to get mine up to that point by the end of the week. Are those props fixed in or just sitting there? If so do you just mask them off when you do the main paint job?
Posted: Monday, December 13, 2010 - 12:59 AM UTC
Looks good, Aaron. How did it go together?
Looking forward to see more
Looking forward to see more

cinzano

Joined: January 13, 2009
KitMaker: 419 posts
AeroScale: 378 posts

Posted: Monday, December 13, 2010 - 12:25 PM UTC
I'm back (was I missed?!)
8^)
OK, here's the scoop. My cyclocross season just wrapped up last weekend. (It was a good one too!) My PZL project kept growing in ambition and has, therefore, languished .
Every Xmas I build a 1/48 WW2 aircraft for my brothers collection. I've been promising him a twin for quite a while now. Xmas is less than 2 weeks away and the campaign deadline is only a little bit past that. So...
What have I done in response to this challenge? Answer: Speed build!!!
Two days ago I started an AMT Douglas A20G kit (I've been looking for an excuse to bust out one of these kits from the closet for years now.) I've got all kinds of upgrades ready for it, however... I've forced myself to keep this OOB. All I've added are seat harnesses.
I'll post my progress to date. As of right now I'm chasing the Santa deadline as well as the campaign deadline.
Wish me luck.
Cheers,
Fred


cinzano

Joined: January 13, 2009
KitMaker: 419 posts
AeroScale: 378 posts

Posted: Monday, December 13, 2010 - 12:33 PM UTC
...Steady as she goes.


Bigrip74

Joined: February 22, 2008
KitMaker: 5,026 posts
AeroScale: 2,811 posts

Posted: Monday, December 13, 2010 - 01:56 PM UTC
Fred, your work bench looks as dirty as mine  the A20 is looking good so far how is the fit?
Bob
 the A20 is looking good so far how is the fit?
Bob

cinzano

Joined: January 13, 2009
KitMaker: 419 posts
AeroScale: 378 posts

Posted: Monday, December 13, 2010 - 02:05 PM UTC
Quoted Text
Fred, your work bench looks as dirty as minethe A20 is looking good so far how is the fit?
Bob
Under the circumstances, a "dirty bench" is unavoidable. The fit is surprisingly good. I read the whole build guide from Brett Green I have to admit to having none of the nose and fuselage fit problems he described.
Now then, a word of warning for those choosing to build one of the AMT A20 kits. There are ejector pin marks like mad all over the kit. Be patient and be prepared.
Cheers,
Fred

cinzano

Joined: January 13, 2009
KitMaker: 419 posts
AeroScale: 378 posts

Posted: Wednesday, December 15, 2010 - 01:44 AM UTC
Nacelles and main gear mounted, engines painted. The work continues...


Bigrip74

Joined: February 22, 2008
KitMaker: 5,026 posts
AeroScale: 2,811 posts

Posted: Wednesday, December 15, 2010 - 04:52 AM UTC
Fred, still looking good and it is taking over your cutting matt. Which areas gave you fit problems so I know what to look for.
Bob
Bob

cinzano

Joined: January 13, 2009
KitMaker: 419 posts
AeroScale: 378 posts

Posted: Wednesday, December 15, 2010 - 09:20 AM UTC
Quoted Text
Fred, still looking good and it is taking over your cutting matt. Which areas gave you fit problems so I know what to look for.
Bob
Wing fit into the root is pretty good but test fit just to be safe ( I sanded the trailing edges to improve the fit.
Vertical stab. needs sanding at aft end of the bottom to create a clean, even seam and joint.
Had to create tabs inside of bomb bay and sand doors carefully to get the fit correct.
Main gear are delicate (I epoxied them).
Hope this helps.
Cheers,
Fred

Siderius

Joined: September 20, 2005
KitMaker: 1,747 posts
AeroScale: 1,673 posts

Posted: Thursday, December 16, 2010 - 08:04 AM UTC
Hi Jeremy, Russell here. No the props are just sitting there in the holes where the engines are. I usually white glue them in, after I have finished the paint job on the rest of the aircraft. They are removable up to that point and so are not in position when painting the fuselage. Of course the fuselage, wings, and tail, horizontal and vertical stabilizers are built and painted then glued into place with a ca glue. Hope that explains it some for you. Russell 


Whitey

Joined: September 20, 2010
KitMaker: 137 posts
AeroScale: 28 posts

Posted: Thursday, December 16, 2010 - 01:45 PM UTC
Progress Pic

Lots left to do. Hope I can get it done for Christmas without rushing too much.

Lots left to do. Hope I can get it done for Christmas without rushing too much.

Whitey

Joined: September 20, 2010
KitMaker: 137 posts
AeroScale: 28 posts

Posted: Thursday, December 23, 2010 - 12:31 AM UTC
Off on Christmas vacation tonight. Sadly that means I had to rush it a bit. Anyway, here's the finished product:


Posted: Thursday, December 23, 2010 - 01:07 PM UTC
Howdy
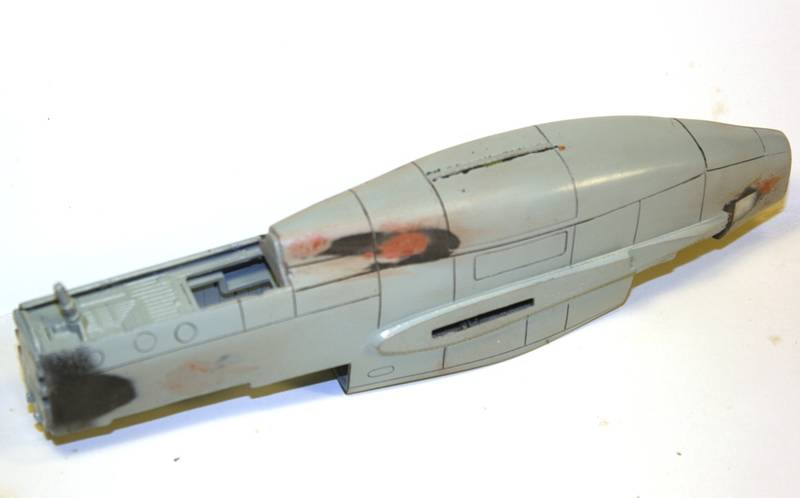
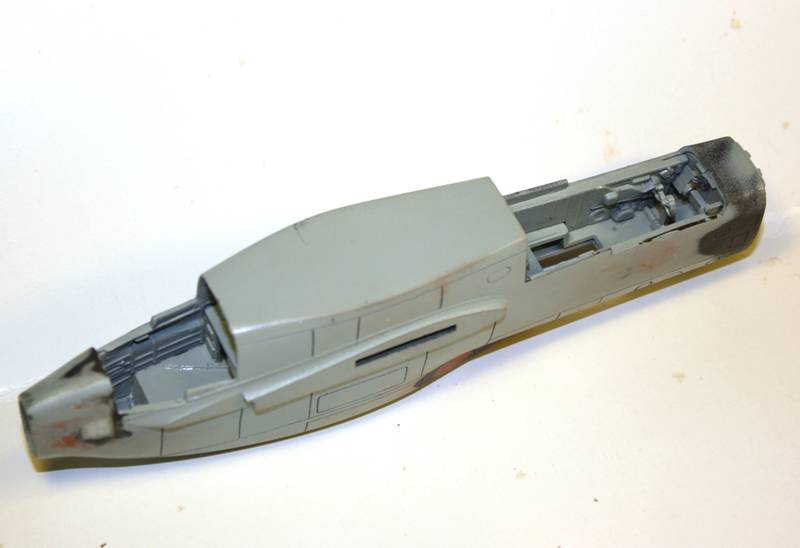
More progress on the Arado AR 234C
Its mainly glued together.. working on the canopies at the moment. The multiple peice nose section and the clear parts are giving me fit problems. The clear parts are slightly wider than the rest of the nose. I've super glued in some weights to keep the nose down.. the only place to put them was behind the cockpit section just forward of the main gear.
I've been spoiled by the Tamiya kits I've done recently.. the plastic on this revel monogram kit is very fragile esp for the more delicate parts..... This isn't going to be a perfect build, but it is a learning experience.... LOL


MikeMx

Joined: May 22, 2008
KitMaker: 649 posts
AeroScale: 434 posts

Posted: Sunday, December 26, 2010 - 04:13 AM UTC
My first entry is now in the gallery. It's the Hasegawa Heinkel HEIIIH-6 with added Eduard colour zoom etch and True Details weighted wheels. Eduard mask was used on the glazed areas.
thanks
Mike
thanks
Mike
Posted: Sunday, December 26, 2010 - 12:14 PM UTC
Still working for completion... got the RML 72 blue underside sprayed yesterday and tonight I did the RML 82 green main color.. tomorrow night the RML 81 camo color then I start puting the fiddly bits back on...
laters..
laters..
klimmer

Joined: May 16, 2003
KitMaker: 250 posts
AeroScale: 207 posts

Posted: Sunday, December 26, 2010 - 01:33 PM UTC
Hi there everyone.
I have been very negligent about posting in this campain, there have been sone truely wonderful builds.
I have managed to get my build painted, now for the decals. This has not been at the very least my best work, but it will look like a Liberator.


Let me close by saying, this thing is huge.
 Ted
Ted
I have been very negligent about posting in this campain, there have been sone truely wonderful builds.
I have managed to get my build painted, now for the decals. This has not been at the very least my best work, but it will look like a Liberator.


Let me close by saying, this thing is huge.

 Ted
TedPosted: Monday, December 27, 2010 - 03:02 PM UTC
Howdy
Here's my next update.. just finished spraying the RML 81 Brown Violet on the Ar 234. I will say these colors are a bit strange.. LOL..
The pic's are not that great since i just took a couple of quick snaps before I go to work..
Its coming down to the wire and I really want to finish this kit in time.. so wish me luck.


still a couple of area's I need to touch up and a couple of parts I forgot to paint... lol..

Here's my next update.. just finished spraying the RML 81 Brown Violet on the Ar 234. I will say these colors are a bit strange.. LOL..
The pic's are not that great since i just took a couple of quick snaps before I go to work..
Its coming down to the wire and I really want to finish this kit in time.. so wish me luck.


still a couple of area's I need to touch up and a couple of parts I forgot to paint... lol..

Posted: Tuesday, December 28, 2010 - 01:57 AM UTC
Ted, very nice Liberator. It looks like a beast - must have required some paint jars to turn it green.  Looking forward to see it with decals.
Delbert, nice looking machine although the camouflage pattern looks alternative. Looking forward to see more - hope you make it in time.
 Looking forward to see it with decals.
Delbert, nice looking machine although the camouflage pattern looks alternative. Looking forward to see more - hope you make it in time.

 |


