

Thanks Jesper
the colors in the photo are a little off...lol I guess that tends to happen when you snap a couple of quick pics with the flash..
The colors are RLM 82 Lichtgrun and RLM 81 Braunviolett which my color reference's say both are Late-war Camouflage colors.. over RLM76
I am thinking I might add little more of the darker color in some areas.. still thinking that one over..
now I'm off to touch up a couple of areas of the RLM82 lol laters.
Air Campaigns
Want to start or join a group build? This is where to start.
Want to start or join a group build? This is where to start.
Hosted by Frederick Boucher, Michael Satin
OFFICIAL: Big Beautiful Bombers Campaign

Delbert

#073

Joined: October 05, 2002
KitMaker: 2,659 posts
AeroScale: 209 posts
Posted: Tuesday, December 28, 2010 - 02:28 AM UTC
Delbert
#073
Joined: October 05, 2002
KitMaker: 2,659 posts
AeroScale: 209 posts
Posted: Tuesday, December 28, 2010 - 02:55 AM UTC
Ok fellows..
After taking a close look at the quick pic's I took last night I see how far off the flash made the colors... so here is a better pic, taken with macro, no flash in natural daylight...

much better lol
After taking a close look at the quick pic's I took last night I see how far off the flash made the colors... so here is a better pic, taken with macro, no flash in natural daylight...
much better lol
MikeMx

Joined: May 22, 2008
KitMaker: 649 posts
AeroScale: 434 posts

Posted: Wednesday, December 29, 2010 - 02:46 AM UTC
My 2nd completed build is in the gallery now. Something a little different that I didn't see anyone else making.
thanks
Mike
thanks
Mike

klimmer

Joined: May 16, 2003
KitMaker: 250 posts
AeroScale: 207 posts
Posted: Wednesday, December 29, 2010 - 02:17 PM UTC
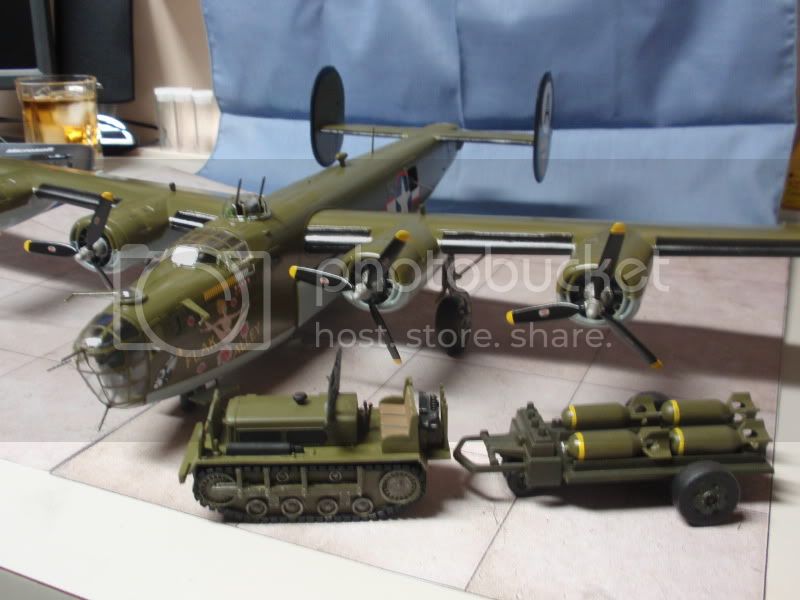
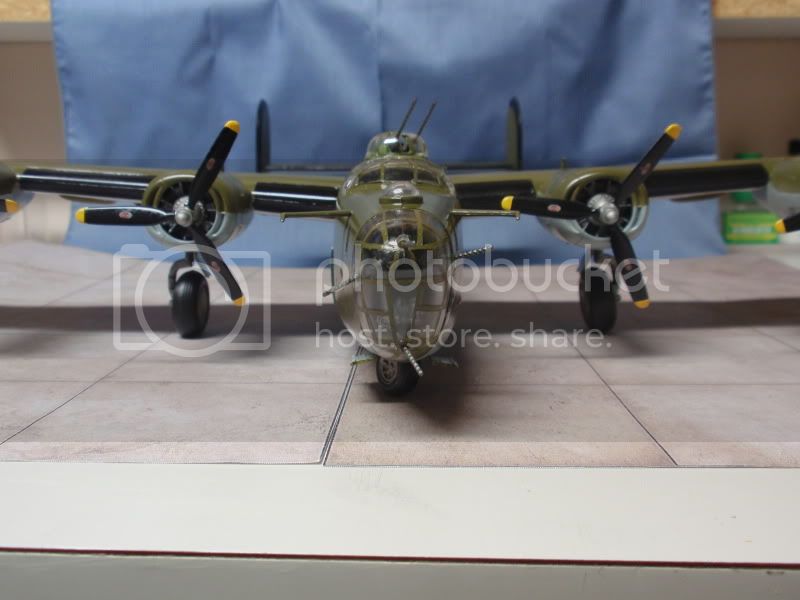
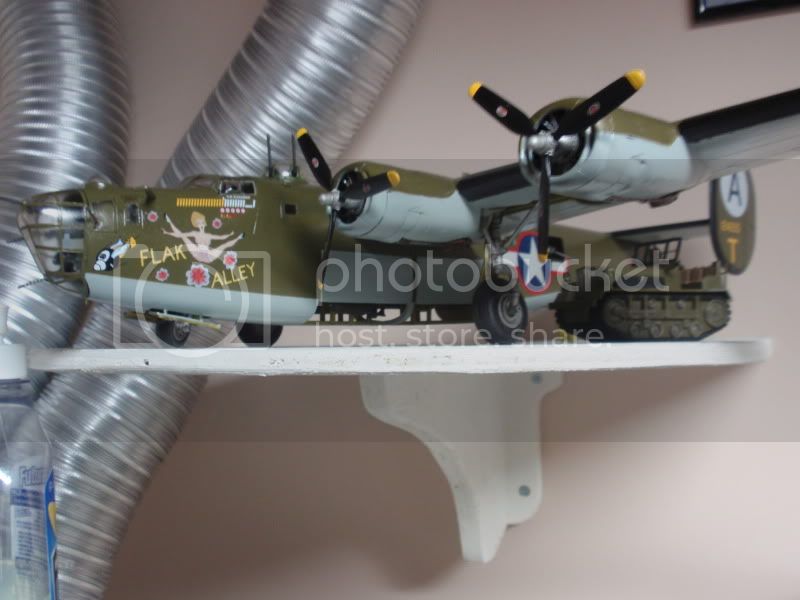
Well Ladies and Gentlemen,
I am calling my build complete for this campain. Although not what I consider my best work, and the fact that I took off all the masking prior to the dullcoat (which I may fix later) here is my completed B-24 Liberator.


 Ted
Ted
I am calling my build complete for this campain. Although not what I consider my best work, and the fact that I took off all the masking prior to the dullcoat
(which I may fix later) here is my completed B-24 Liberator. Ted
eMan

#298

Joined: August 08, 2002
KitMaker: 1,182 posts
AeroScale: 351 posts

Posted: Thursday, December 30, 2010 - 03:22 AM UTC
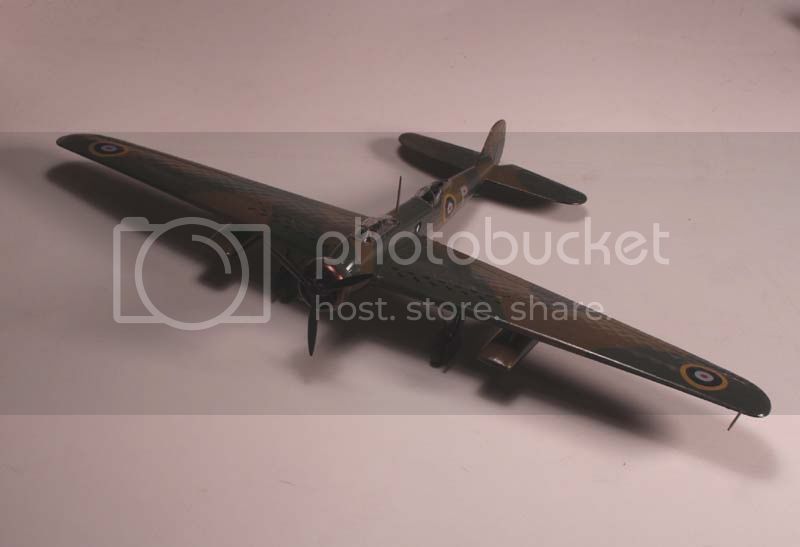
This model : Wellington Mk.IC, in 1:48 is completed. 

Mecenas
Joined: December 23, 2007
KitMaker: 1,596 posts
AeroScale: 1,275 posts
KitMaker: 1,596 posts
AeroScale: 1,275 posts

Posted: Thursday, December 30, 2010 - 06:17 AM UTC
I'm affraid I have to give up in this campaign and rise the white flag...shame on me... I tried my best to finish my big bomber but due to the break down of my compressor I have no chances to finish my B-17... anyway I just want to show where I am right now.
Some general views of the model primed with Mr. Surfacer 1200

The pre-shading begins...here you can see two first steps.


...and here is the part of the wing after step two and the other part after step three. I hope you see the difference...
I managed to finish the lower surfaces whith this final result...
Some general views of the model primed with Mr. Surfacer 1200
The pre-shading begins...here you can see two first steps.
...and here is the part of the wing after step two and the other part after step three. I hope you see the difference...
I managed to finish the lower surfaces whith this final result...
klimmer
Joined: May 16, 2003
KitMaker: 250 posts
AeroScale: 207 posts
Posted: Thursday, December 30, 2010 - 12:14 PM UTC
Michal,
Sorry to here about your compressor, your B-17 looks like it would have turned out very nice indeed.
Ted
Sorry to here about your compressor, your B-17 looks like it would have turned out very nice indeed.
TedDelbert
#073
Joined: October 05, 2002
KitMaker: 2,659 posts
AeroScale: 209 posts
Posted: Friday, December 31, 2010 - 02:44 AM UTC
Howdy
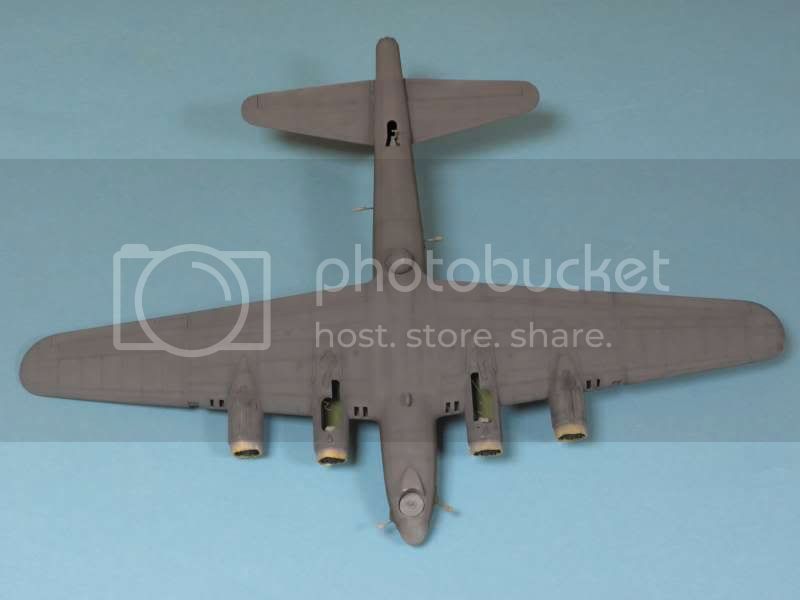
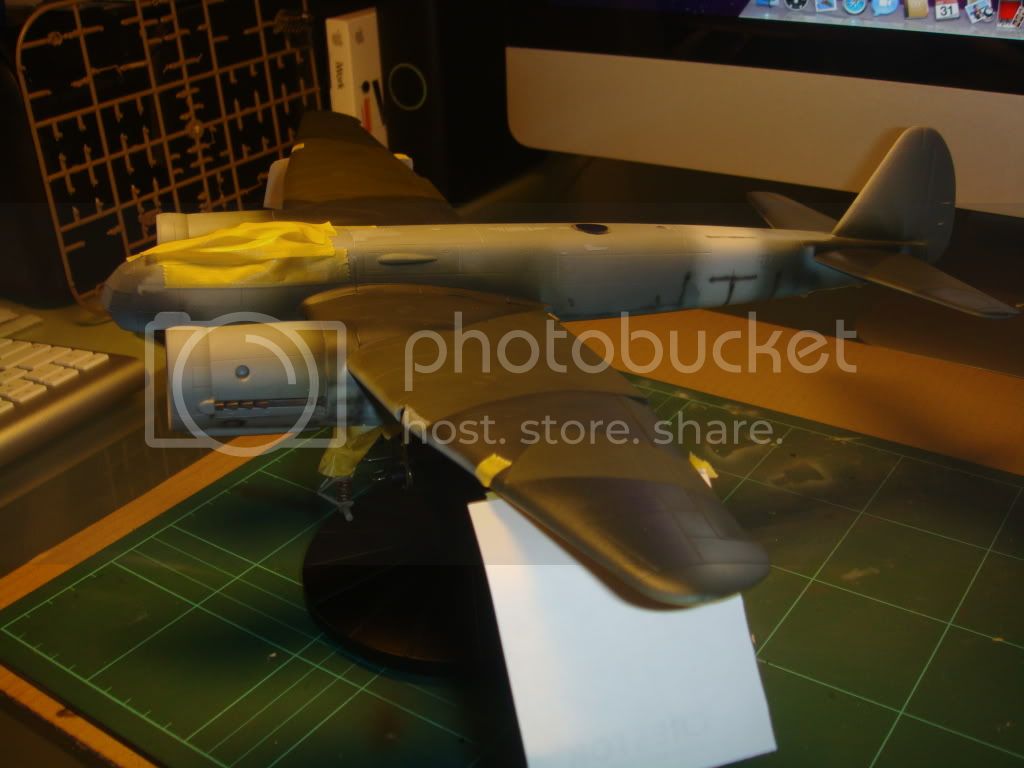
Here is my Bomber...
Revell-Monogram's Arado Ar 234C-3
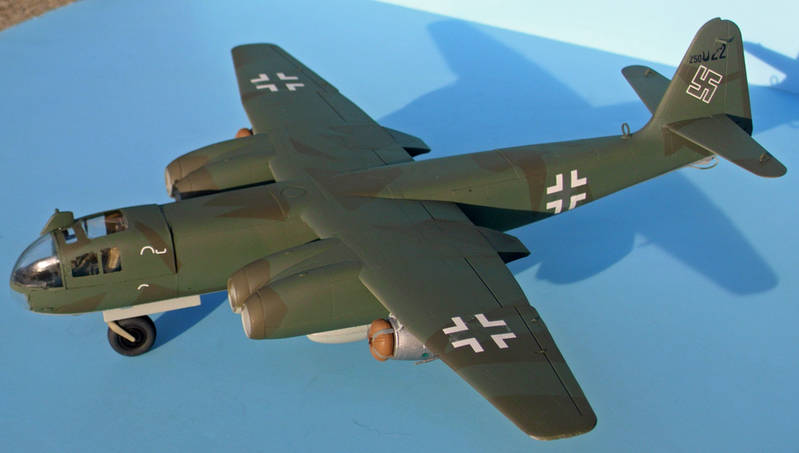
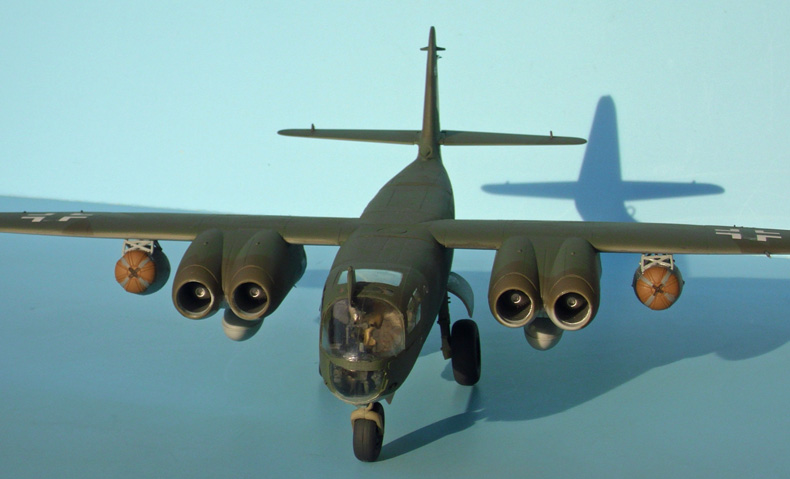
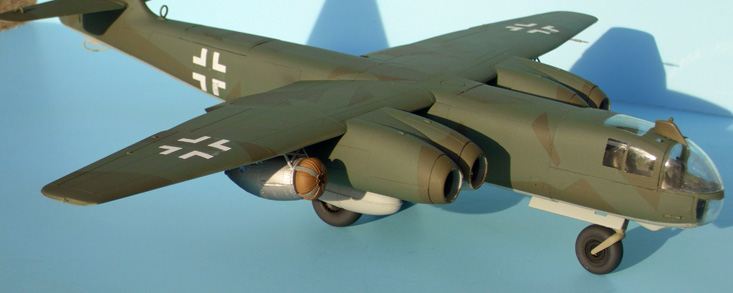
To me its an acceptable build, as I look on it as one of my learning projects. I mainly learned, that I don't like the Revell plastic as much as the tamiya plastic.
For me this kit had fit issues with attaching the cockpit area to the rest of the plane. the small parts were very fragile, and many of the darn decals just fell apart when I tried to use them.
But all in all I learned a lot too, I learned a lot on using my new airbrush the Badger Renegade Velocity. I learned ways to paint a aircraft with a lot of angles and odd shaped areas. And I learned a lot building this thing.
Although overall I'm not greatly thrilled with the kit, I am happy with the stuff I learned..
laters..
Delbert
Here is my Bomber...
Revell-Monogram's Arado Ar 234C-3
To me its an acceptable build, as I look on it as one of my learning projects. I mainly learned, that I don't like the Revell plastic as much as the tamiya plastic.
For me this kit had fit issues with attaching the cockpit area to the rest of the plane. the small parts were very fragile, and many of the darn decals just fell apart when I tried to use them.
But all in all I learned a lot too, I learned a lot on using my new airbrush the Badger Renegade Velocity. I learned ways to paint a aircraft with a lot of angles and odd shaped areas. And I learned a lot building this thing.
Although overall I'm not greatly thrilled with the kit, I am happy with the stuff I learned..
laters..
Delbert
Red4
Joined: April 01, 2002
KitMaker: 4,287 posts
AeroScale: 1,164 posts

Posted: Friday, December 31, 2010 - 03:14 AM UTC
Quoted Text
My 2nd completed build is in the gallery now. Something a little different that I didn't see anyone else making. thanks
Mike
Mike, do you have any progress pics of your builds? "Q"
Red4
Joined: April 01, 2002
KitMaker: 4,287 posts
AeroScale: 1,164 posts
Posted: Friday, December 31, 2010 - 03:19 AM UTC
Well folks, we are on final approach to the end of the campaign. There has been some really nice work done thus far. You still have a few hours to wrap things up if you can. I'll pull the plug on this when Mickey's big and little hands meet at midnight (Mountain Standard Time) here in Colorado. Thanks again to everybody who participated and don't forget to post a pic of your completed bomber in the gallery so I can award your ribbons. Thanks, "Q" 
MikeMx
Joined: May 22, 2008
KitMaker: 649 posts
AeroScale: 434 posts
Posted: Friday, December 31, 2010 - 04:27 AM UTC
I took one pic of the Heinkel during construction but didn't take any more as I re-read the campaign rules and couldnt see anywhere that we needed to take progress pics.
thanks
Mike
thanks
Mike

rochaped

Joined: August 27, 2010
KitMaker: 679 posts
AeroScale: 669 posts

Posted: Friday, December 31, 2010 - 05:49 AM UTC
Hi everyone,
Sadly I missed by far the deadline of this campaign, due to a excessive optimism on my modelling abilities and also due to the fact that this Revell/Dragon JU88 mould is far worse than I anticipated
However here goes some pics on the current status

Hope to post the end product somewhere next month on the WWII forum... Later is off to sea, to start my FW 200:)
Cheers and Happy New Year, full of modeling fun!
Pedro
Sadly I missed by far the deadline of this campaign, due to a excessive optimism on my modelling abilities and also due to the fact that this Revell/Dragon JU88 mould is far worse than I anticipated
However here goes some pics on the current status
Hope to post the end product somewhere next month on the WWII forum... Later is off to sea, to start my FW 200:)
Cheers and Happy New Year, full of modeling fun!
Pedro

AaronW
Joined: August 03, 2003
KitMaker: 197 posts
AeroScale: 42 posts
Posted: Friday, December 31, 2010 - 06:47 PM UTC
Nothing like waiting for the last minute right? 
Here is the Wellesley all done and ready to bomb some back water Italian garrison in East Africa.
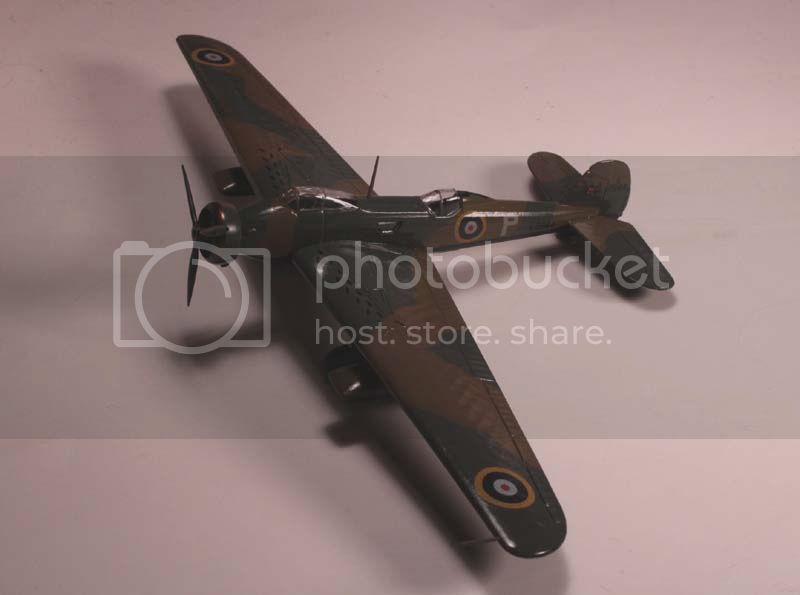
It was the first Vickers bomber to use the geodesic frame work used later on the Wellington. There were concerns about breaking the framework for a bomb bay, so it used under wing pods for the bombs.
It is a much larger plane than the single engine suggests, here it is compared to a Wellington.

Can someone tell me how to add it to the GB gallery? I'm not clear on that process. Thanks
Here is the Wellesley all done and ready to bomb some back water Italian garrison in East Africa.
It was the first Vickers bomber to use the geodesic frame work used later on the Wellington. There were concerns about breaking the framework for a bomb bay, so it used under wing pods for the bombs.
It is a much larger plane than the single engine suggests, here it is compared to a Wellington.
Can someone tell me how to add it to the GB gallery? I'm not clear on that process. Thanks
Red4
Joined: April 01, 2002
KitMaker: 4,287 posts
AeroScale: 1,164 posts
Posted: Friday, December 31, 2010 - 08:18 PM UTC
Nice build Aaron. Look under the photos tab. Find the Campaigns for 2010 and then search for the 3B campaign. You should be able to figure it out from there. Hope that helps. I'll award the ribbons here shortly....as soon as I sober up a bit..  Happy New Year everybody!...I'm as skunk as a drunk about now... lol
Happy New Year everybody!...I'm as skunk as a drunk about now... lolAaronW
Joined: August 03, 2003
KitMaker: 197 posts
AeroScale: 42 posts
Posted: Saturday, January 01, 2011 - 04:35 AM UTC
Thanks Matt, I'll try to get some better photos today and get them added to the gallery.
Sorry I haven't been around much so only saw this when I popped in long enough to squeeze under the wire.
The kit is typical Matchbox, fairly decent fit, not bad exterior detail, very little interior detail and terrible decals (I had to literally wash each one to get the paste like glue off of them).
Quoted Text
Looks good, Aaron. How did it go together?
Looking forward to see more
Sorry I haven't been around much so only saw this when I popped in long enough to squeeze under the wire.
The kit is typical Matchbox, fairly decent fit, not bad exterior detail, very little interior detail and terrible decals (I had to literally wash each one to get the paste like glue off of them).
Red4
Joined: April 01, 2002
KitMaker: 4,287 posts
AeroScale: 1,164 posts
Posted: Saturday, January 01, 2011 - 05:17 AM UTC
No problem. Hope it helps. Just wanted to thank everybody for participating in my campaign. Award ribbons have been posted. We had a whopping 26% completion rate.. 
 Oh well, life sometimes gets in the way of our hobby. Thanks again for the great participation and looking forward to seeing you all in 2011. "Q"
Oh well, life sometimes gets in the way of our hobby. Thanks again for the great participation and looking forward to seeing you all in 2011. "Q" 
doubtingthomas
Joined: March 17, 2009
KitMaker: 156 posts
AeroScale: 153 posts
Posted: Saturday, January 01, 2011 - 07:14 AM UTC
Hate that I missed out on completing my build for this campaign, Red. Just "a campaign too far" for 2010, I guess.
I'll still finish up my Promodeler 1:48 Do217E-5 (shown here in current state):

I'm surprised you don't see more of these things built...its a truly wonderful kit - would highly recommend it in terms of detail and fit.
Thanks to all who finished - you've done some nice work!
I'll still finish up my Promodeler 1:48 Do217E-5 (shown here in current state):
I'm surprised you don't see more of these things built...its a truly wonderful kit - would highly recommend it in terms of detail and fit.
Thanks to all who finished - you've done some nice work!

Dirkpitt289
Joined: May 24, 2008
KitMaker: 346 posts
AeroScale: 307 posts
Posted: Monday, May 16, 2011 - 07:44 AM UTC
Well its been some time since I added anything to this build. I was cirtan the GB had ended,.
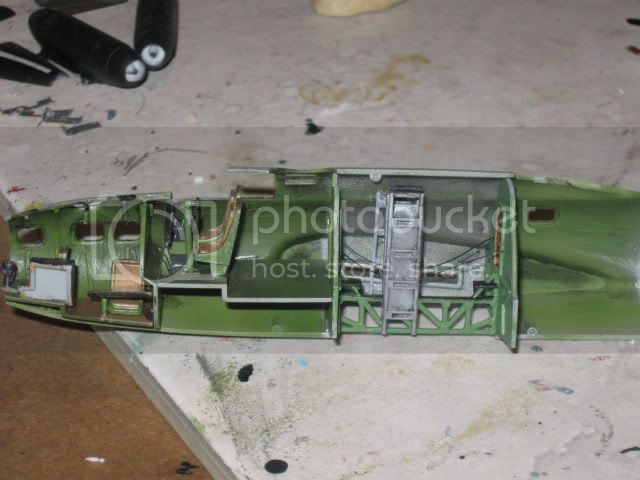
Ok guys I'm finally back with some progress to share. After looking at several B-17 books and numerous photos online I found another detail I wanted to add. What I found was that the model came with center bomb racks flanking the catwalk. What it doesn't have were the bomb racks attached to the fuselage. These I had to scratch build.
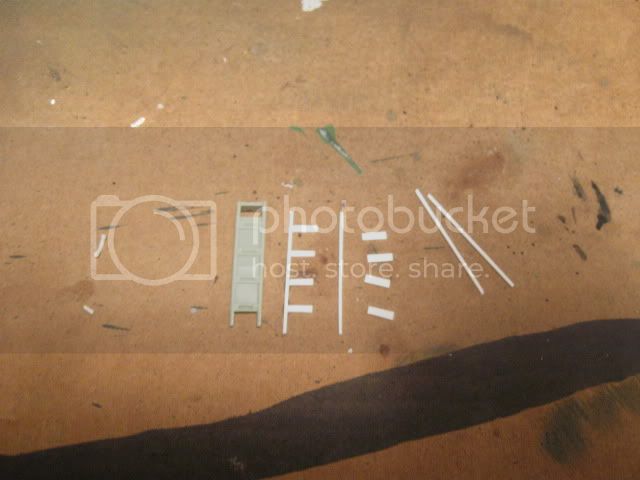
Next I had to make some adjustments to the interior color of the aircraft. What I hadn't realized the first time around was that the bombay was not interior green. With a lot of poking around on the Internet and talking to people with infinitely more knowledge then me was that the fuselage was commonly left bare metal like the waist gunners area. The bulkheads and the inside of the bombay doors were green zinc chromite. Also you can see I finished the frame work in the waist and nose of the both fuselage halves.

Here is the rest of the bombay area. After a lot of trial and error I found what I feel is a somewhat believable plywood. I first painted what is suppose to be wood with tan and let it dry. Later I came back with some brown and left it streaky allowing the tan to show through in places. Not perfect but not bad IMHO.

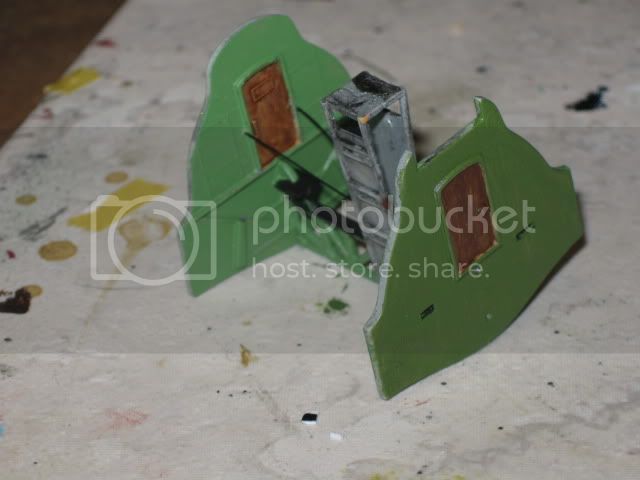
here we have the right fuselage with the assemblies in place.
Well that's it for now. After looking at the photos I noticed something I had forgotten to do and that is wash the Bombay bulkheads. Its late so I will address that tomorrow. Thanks for looking
Ok guys I'm finally back with some progress to share. After looking at several B-17 books and numerous photos online I found another detail I wanted to add. What I found was that the model came with center bomb racks flanking the catwalk. What it doesn't have were the bomb racks attached to the fuselage. These I had to scratch build.
Next I had to make some adjustments to the interior color of the aircraft. What I hadn't realized the first time around was that the bombay was not interior green. With a lot of poking around on the Internet and talking to people with infinitely more knowledge then me was that the fuselage was commonly left bare metal like the waist gunners area. The bulkheads and the inside of the bombay doors were green zinc chromite. Also you can see I finished the frame work in the waist and nose of the both fuselage halves.
Here is the rest of the bombay area. After a lot of trial and error I found what I feel is a somewhat believable plywood. I first painted what is suppose to be wood with tan and let it dry. Later I came back with some brown and left it streaky allowing the tan to show through in places. Not perfect but not bad IMHO.
here we have the right fuselage with the assemblies in place.
Well that's it for now. After looking at the photos I noticed something I had forgotten to do and that is wash the Bombay bulkheads. Its late so I will address that tomorrow. Thanks for looking
Dirkpitt289
Joined: May 24, 2008
KitMaker: 346 posts
AeroScale: 307 posts
Posted: Monday, May 16, 2011 - 07:45 AM UTC
Back to the model
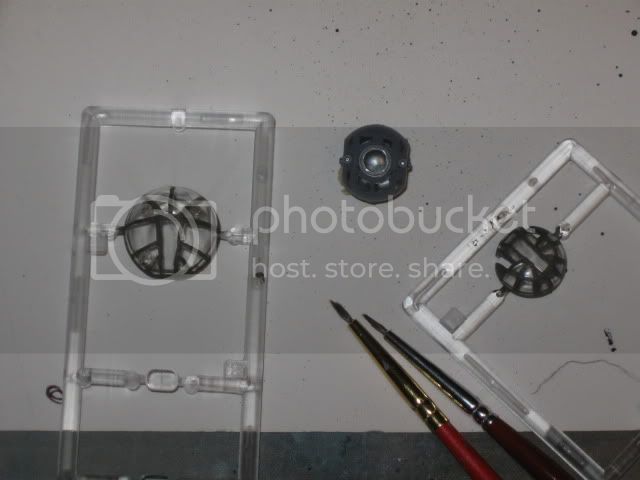
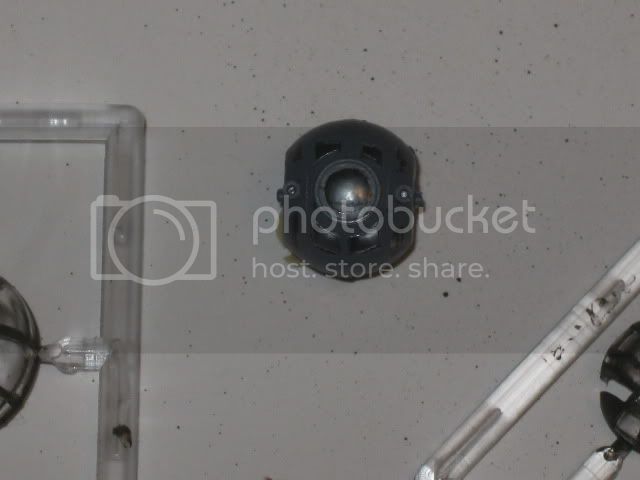
Here are the nose windows have been put in place along with other shots of the interior.


Nose Glass, Top Turret and the Ball Turret


Here are the nose windows have been put in place along with other shots of the interior.
Nose Glass, Top Turret and the Ball Turret
Dirkpitt289
Joined: May 24, 2008
KitMaker: 346 posts
AeroScale: 307 posts
Posted: Monday, May 16, 2011 - 07:46 AM UTC
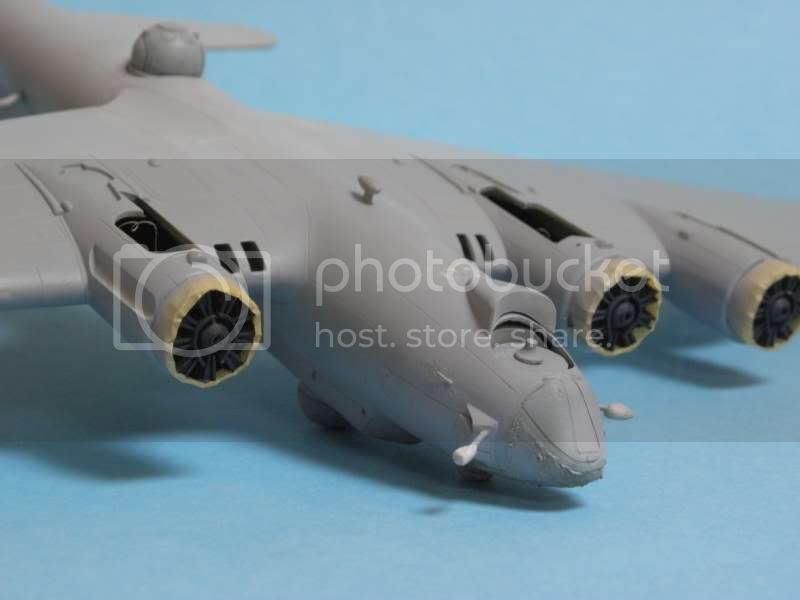
Wings put together

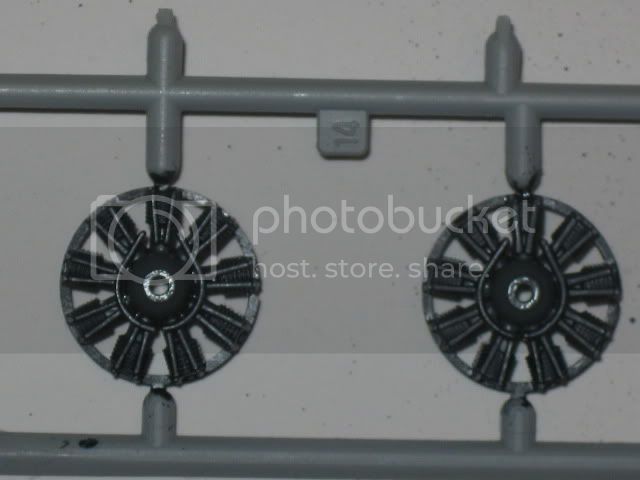
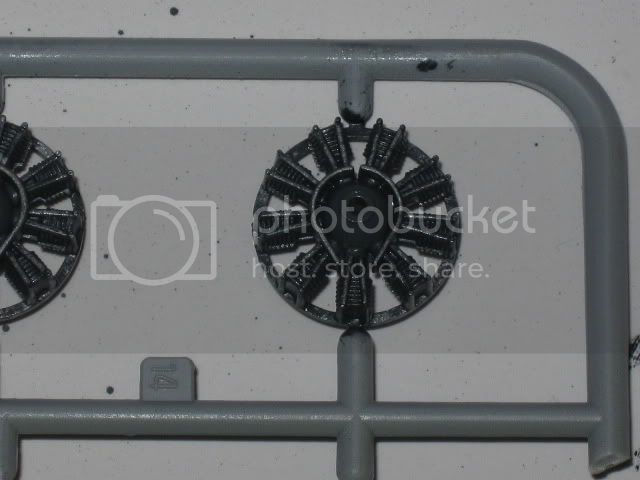
For the next phase I had to crack open my Academy B-17F and harvest its stash of weapons.


Painting the engines

Hopefully the next time I'll have something of more substance to share.
Thanks for taking the time to look at my work.
For the next phase I had to crack open my Academy B-17F and harvest its stash of weapons.
Painting the engines
Hopefully the next time I'll have something of more substance to share.
Thanks for taking the time to look at my work.
Dirkpitt289
Joined: May 24, 2008
KitMaker: 346 posts
AeroScale: 307 posts
Posted: Monday, May 16, 2011 - 07:47 AM UTC
Last we left old 666 I was having problems with the windows staying in place and the fuselage closing up cleanly. With file in hand I shaved down the aft bulkhead between the bombay and radio operators room. Did some dry fitting and we were back on track. But before I can reattach the fuselage halves I had to reinstall the 3 missing windows. This time instead of using the window glue I used regular liquid cement which I applied with a thin paint brush.
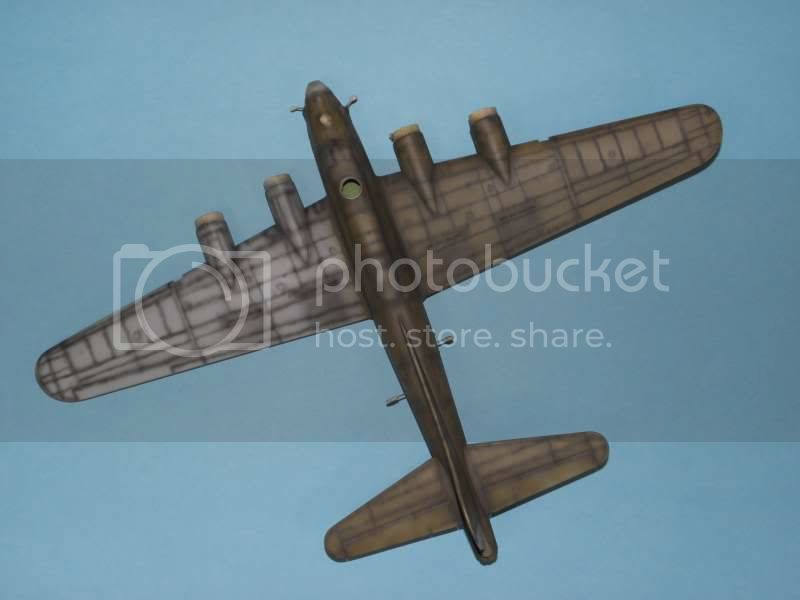
next the haves went together and clothes pins and tamiya tape was used to hold it together. next using my sons Legos I fashioned a cradle to hold and support the fort without damaging the bottom turret.

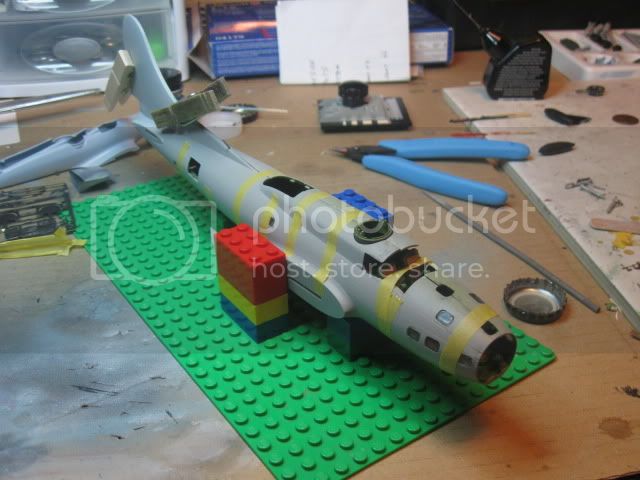
From the top you can see the fit is a lot better now. Before I reworked the bulkhead the gap was almost 1/16 of an inch.

From the bottom looking into the bombay

Did I ever tell you about this guy Murphy? Well he wrote some laws and wouldn't you know he came to visit me again. Just as i was placing the plane into the cradle I popped another window out. %&$*!!!! Fricken!! $&%*# FRICKEN Son of a... :evil: You get the point

Till next time, Thanks for taking the time to look at my work.
next the haves went together and clothes pins and tamiya tape was used to hold it together. next using my sons Legos I fashioned a cradle to hold and support the fort without damaging the bottom turret.
From the top you can see the fit is a lot better now. Before I reworked the bulkhead the gap was almost 1/16 of an inch.
From the bottom looking into the bombay
Did I ever tell you about this guy Murphy? Well he wrote some laws and wouldn't you know he came to visit me again. Just as i was placing the plane into the cradle I popped another window out. %&$*!!!! Fricken!! $&%*# FRICKEN Son of a... :evil: You get the point
Till next time, Thanks for taking the time to look at my work.
Dirkpitt289
Joined: May 24, 2008
KitMaker: 346 posts
AeroScale: 307 posts
Posted: Monday, May 16, 2011 - 07:48 AM UTC
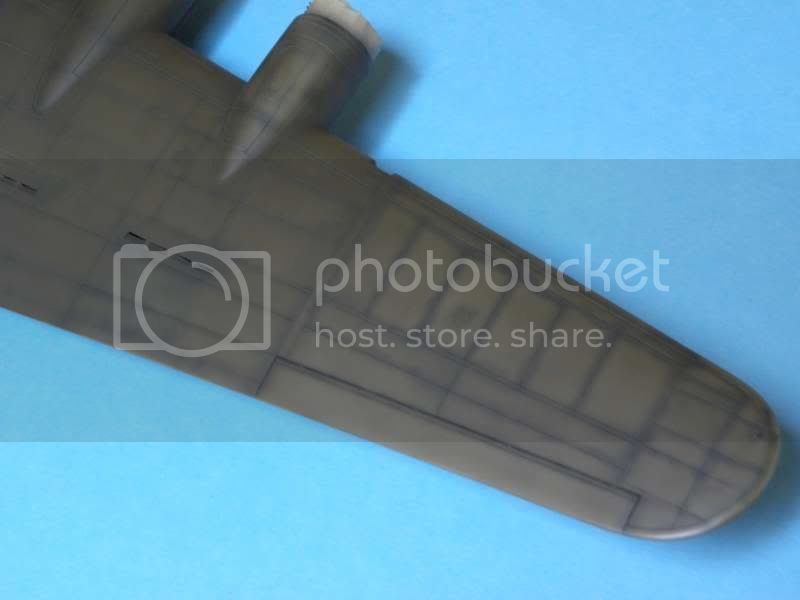
I started with filling and sanding the seams. :cry:


After multiple sessions of filling, sanding and repeat (about a weeks worth) I feel I'm ready to move forward.

Thanks for looking
After multiple sessions of filling, sanding and repeat (about a weeks worth) I feel I'm ready to move forward.
Thanks for looking
Dirkpitt289
Joined: May 24, 2008
KitMaker: 346 posts
AeroScale: 307 posts
Posted: Monday, May 16, 2011 - 07:49 AM UTC
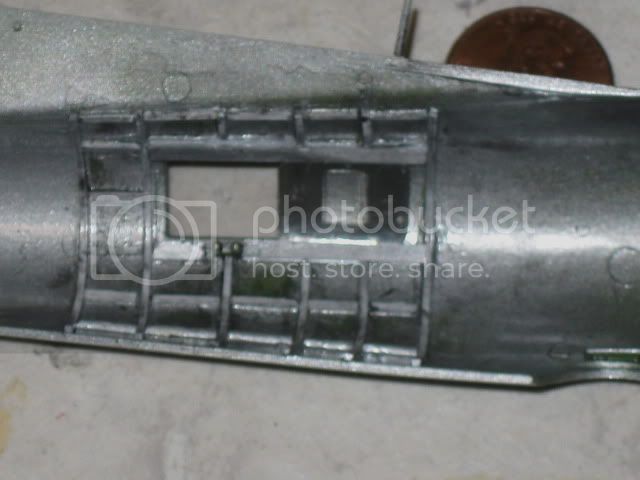
If you've been following the history along with the build you may recall the part of the story concerning George Kendrick. George was the ships only waist gunner. He had replaced the original single side mounted 30. cals with twin 50. cals in each window. He also had spare machine guns mounded to the fuselage and along the catwalks just in case any of them jammed. If a gun would jam he would toss it over board and replace it with one of the spares he brought along. According to Jay Zeamer George was the screwball of the crew. He even had a machine gun mounted behind the ball turret through the floor of the aircraft which brings me to the next part of the build.
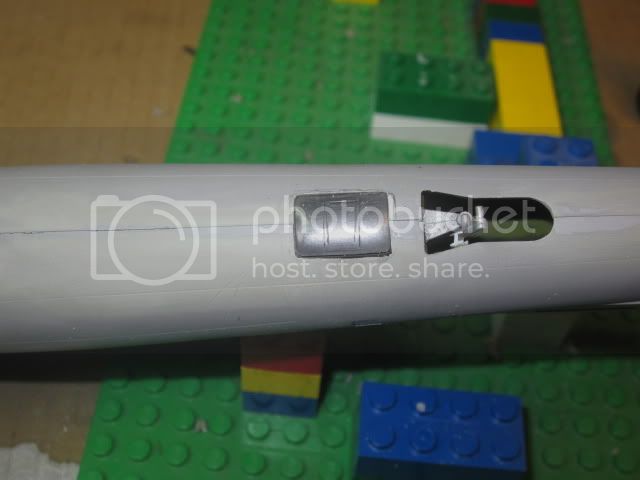
To the best of my knowledge no photos exist of Old 666 so the only thing I have to go by in the way things were setup are the eyewitness accounts of the crew. Now except for the passage I posted back in posted earlier from jay Zeamer I can only speculate how George set this gun through the floor. That along with some creative embellishments on my part will all I have to go by. So here we go. In order to have a gun usable through the floor one has to speculate he had also had some kind of window to see through.
Here I marked the area out using a spare waist gunners window. I thought about using a bubble window like on the top of the nose of the F model but decided not to.

Here is the window in place.I drilled and dry fitted the machine gun barrel but won't mount it till sometime after the beast has been painted
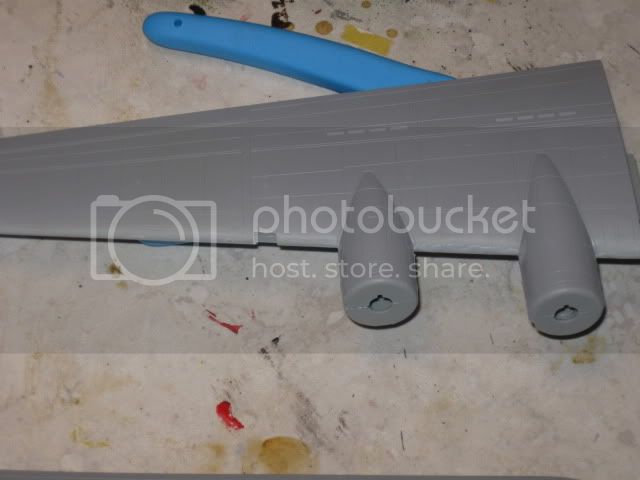
Next I moved onto the wings. I have a lot of seem work to do in this area. I also need to remove the carburetor intakes

Till next time, thanks for looking.
To the best of my knowledge no photos exist of Old 666 so the only thing I have to go by in the way things were setup are the eyewitness accounts of the crew. Now except for the passage I posted back in posted earlier from jay Zeamer I can only speculate how George set this gun through the floor. That along with some creative embellishments on my part will all I have to go by. So here we go. In order to have a gun usable through the floor one has to speculate he had also had some kind of window to see through.
Here I marked the area out using a spare waist gunners window. I thought about using a bubble window like on the top of the nose of the F model but decided not to.
Here is the window in place.I drilled and dry fitted the machine gun barrel but won't mount it till sometime after the beast has been painted
Next I moved onto the wings. I have a lot of seem work to do in this area. I also need to remove the carburetor intakes
Till next time, thanks for looking.
Dirkpitt289
Joined: May 24, 2008
KitMaker: 346 posts
AeroScale: 307 posts
Posted: Monday, May 16, 2011 - 07:50 AM UTC


That wasn't to bad

Dry fitting George Kendrick's floor mounted 50. cal
Dirkpitt289
Joined: May 24, 2008
KitMaker: 346 posts
AeroScale: 307 posts
Posted: Monday, May 16, 2011 - 07:52 AM UTC
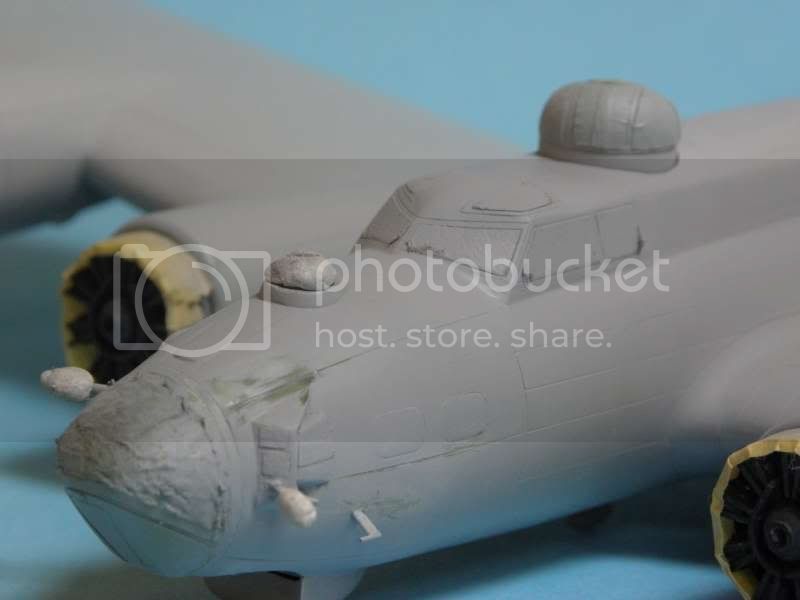
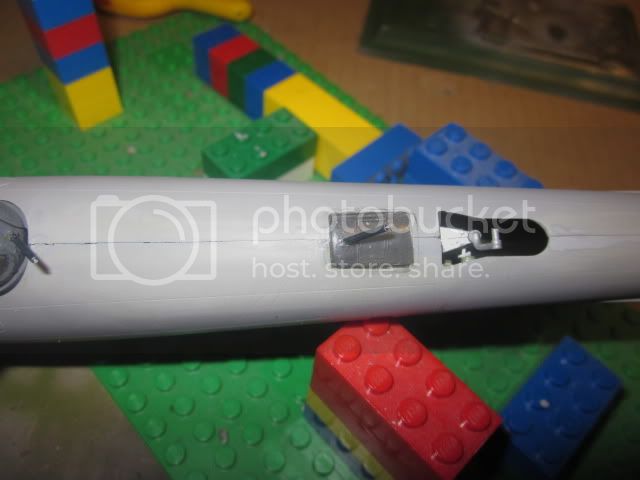
Back to Old 666
Here I masked off the area where a single .50 cal machine gun will be mounted for use by pilot Jay Zeamer. Because of the angle of the nose I needed to level out the attaching point so the the gun will fire straight and level. It's hard to see the difference in these photos but should be noticed when the gun is eventually mounted.


After more prep work the wings are ready to be installed

Here I masked off the area where a single .50 cal machine gun will be mounted for use by pilot Jay Zeamer. Because of the angle of the nose I needed to level out the attaching point so the the gun will fire straight and level. It's hard to see the difference in these photos but should be noticed when the gun is eventually mounted.
After more prep work the wings are ready to be installed
 |

WEB HOSTING BY


Copyright ©2021 AeroScale and Kitmaker Network, a subsidiary of Silver Star Enterprises
All Rights Reserved. Please read our Conditions of Use and Privacy Policy.
All Rights Reserved. Please read our Conditions of Use and Privacy Policy.