

Air Campaigns
Want to start or join a group build? This is where to start.
Want to start or join a group build? This is where to start.
Hosted by Frederick Boucher, Michael Satin
OFFICIAL: Big Beautiful Bombers Campaign

Dirkpitt289

Joined: May 24, 2008
KitMaker: 346 posts
AeroScale: 307 posts
Posted: Monday, January 25, 2010 - 03:36 AM UTC
That is an interesting bomber. I've never seen it before. I look forward to seeing the build

CMOT70

Joined: August 23, 2007
KitMaker: 629 posts
AeroScale: 539 posts
Posted: Monday, January 25, 2010 - 07:47 PM UTC
First progress pics of the Pe-8. An amazing model kit so far, it fits together like a Japanese kit. In just a day i pretty much have the entire kit into subassemblies as far as i can go ready for painting. Zvezda also provide excellent crew figures...they are so good that i'm going to break my tradition and actually put the crew in their postions. It should give a sense of scale and also how cramped the gunner postions were.
The detail is quite good for 1/72 scale, especially the landing gear bays. Included is one of the huge 8000lb bombs that the Russians were fond of. They had a bigger 12000lb bomb as well, but only the later radial engined Pe-8 could carry that one- and even then the bomb bays couldn't fully close.
The Russians didn't really see much use in strategic bombers, hence the big Pe had only 93 made. But it was quite a capable aircraft, especially considering it was first flown in 1936. Had it been needed and appreciated more, and developed accordingly, it could have been a much better known aircraft.


Andrew
The detail is quite good for 1/72 scale, especially the landing gear bays. Included is one of the huge 8000lb bombs that the Russians were fond of. They had a bigger 12000lb bomb as well, but only the later radial engined Pe-8 could carry that one- and even then the bomb bays couldn't fully close.
The Russians didn't really see much use in strategic bombers, hence the big Pe had only 93 made. But it was quite a capable aircraft, especially considering it was first flown in 1936. Had it been needed and appreciated more, and developed accordingly, it could have been a much better known aircraft.
Andrew
Red4
Joined: April 01, 2002
KitMaker: 4,287 posts
AeroScale: 1,164 posts

Posted: Tuesday, January 26, 2010 - 03:06 AM UTC
Very nice Andrew. Makes me rethink why I got rid of mine.  Looking forward to seeing more of your build. "Q"
Looking forward to seeing more of your build. "Q"
AiwaSoundSystem
Joined: February 01, 2008
KitMaker: 52 posts
AeroScale: 49 posts

Posted: Tuesday, January 26, 2010 - 07:45 AM UTC
Quoted Text
Sounds good Jason. Mike Reeves of Two Mikes does some good stuff. I'm good friends with him. I don't think you'll be disappointed with any of their offerings. Looking forward to seeing the build. "Q"
Heya Q was just wondering if you found out anything about this yet by any chance. I've got a couple more things I'm waiting on before I start. One of them is this so I can decide how I'm going to build it.
Red4
Joined: April 01, 2002
KitMaker: 4,287 posts
AeroScale: 1,164 posts
Posted: Wednesday, January 27, 2010 - 02:47 AM UTC
Hi Jason,
Unfortunately I haven't been in touch with him. My bad. I'll get something off to him asap. Just slipped my mind. Sorry.
"Q"
Unfortunately I haven't been in touch with him. My bad. I'll get something off to him asap. Just slipped my mind. Sorry.
"Q"
AiwaSoundSystem
Joined: February 01, 2008
KitMaker: 52 posts
AeroScale: 49 posts
Posted: Wednesday, January 27, 2010 - 03:48 AM UTC
Quoted Text
Hi Jason,
Unfortunately I haven't been in touch with him. My bad. I'll get something off to him asap. Just slipped my mind. Sorry.
"Q"
I actually just got a reply back from an email. Royale Resin is going to be doing the wheels and TwoMikes has some stuff lined up starting with the bomb bays.
 Depending on release times I may switch over to doing my B-29 for this build. I will keep you updated as to which I'm going to do. HMMMM... maybe both

Keeperofsouls2099
Joined: January 14, 2009
KitMaker: 2,798 posts
AeroScale: 2,443 posts
Posted: Wednesday, January 27, 2010 - 12:58 PM UTC
I finally started my B-1B Lancer over the last couple of days Ive got a lot done.....
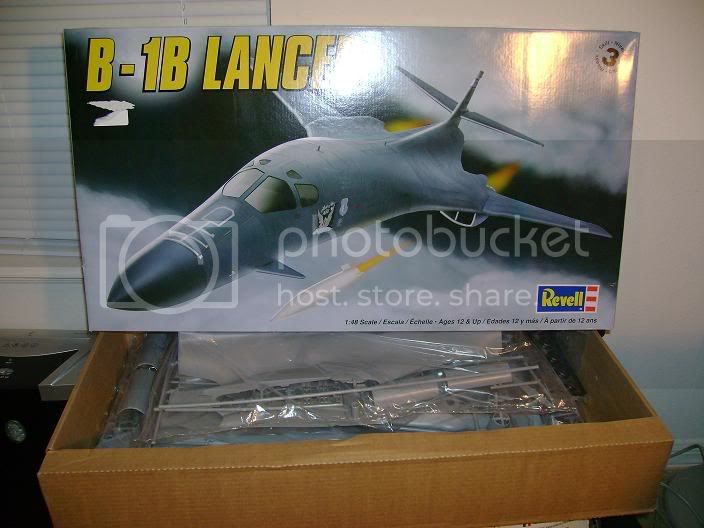

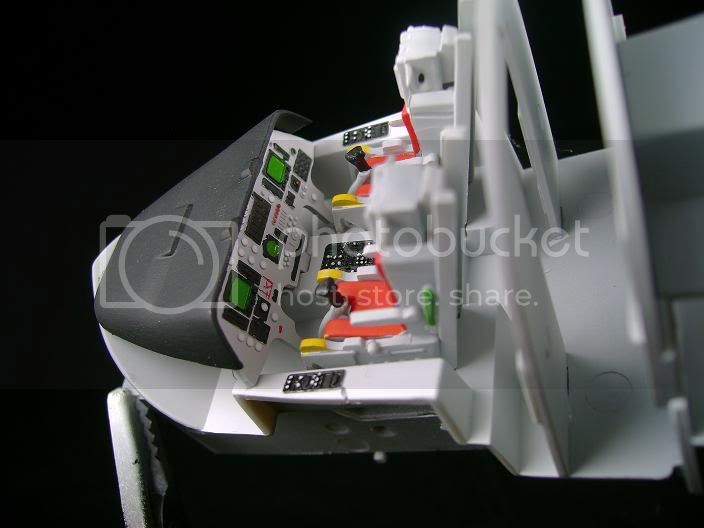
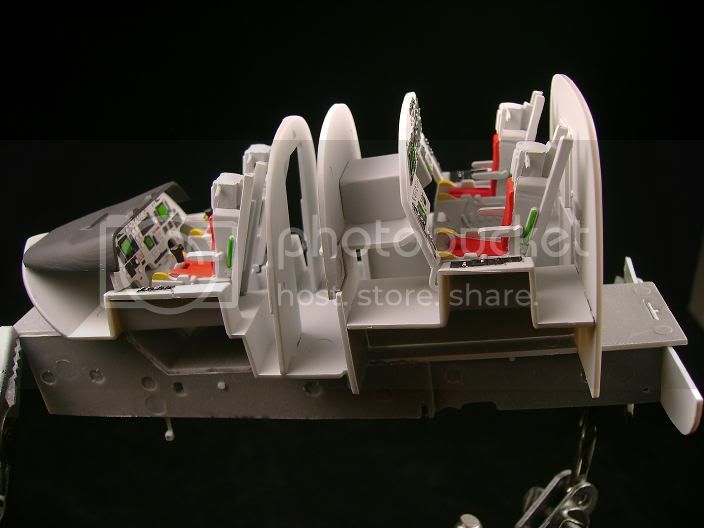

Didnt go for alot of detail because by the time its sealed up you wont be able to see it anyway.
compleated cockpit and installed a massive amount of .45 bullets in the rear to get the weight.
still dont know what marking's im going with so update soon.
Build On,
Justin
Didnt go for alot of detail because by the time its sealed up you wont be able to see it anyway.
compleated cockpit and installed a massive amount of .45 bullets in the rear to get the weight.
still dont know what marking's im going with so update soon.
Build On,
Justin

CMOT70
Joined: August 23, 2007
KitMaker: 629 posts
AeroScale: 539 posts
Posted: Wednesday, January 27, 2010 - 06:34 PM UTC
All reasy to close up the fuselage. The only place where really anything will be visible will be through the main canopy and the forward and aft gun turrets, and that is where Zvezda have put the detail. I really like the way they have done the wing and tail mounts...looks to be very secure and leaves little chance for error. There are still some nose and tail sections to add after the main fuselage is together, i'm doing it that way so that if there seems to be any poor fit then i can put the gap or step where it will be easiest to fix.

Won't be much progress for a week or so now, on holiday.
Andrew
Won't be much progress for a week or so now, on holiday.
Andrew

iflytb20

#501

Joined: August 25, 2009
KitMaker: 292 posts
AeroScale: 194 posts

Posted: Thursday, January 28, 2010 - 12:56 AM UTC
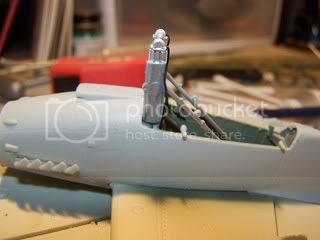
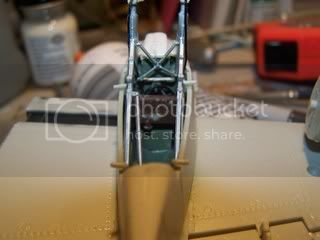
An update on the progress. I managed to finish the cockpit. Glued it to the fuselage. Also glued was the bomb bay. The masking of the clear parts drove me into the stone age  . Finished it finally
Next on the agenda is to finish all the armaments and attach all the turrets so that the fuselage half can be closed. Since i am building it for a friend and he wants it in the "Air" mode, the gear assemblies would be skipped.
Some pics of the progress :
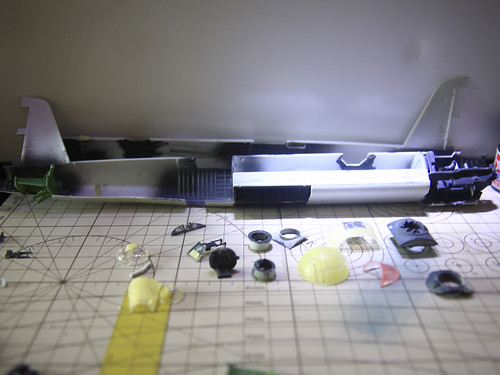

Dry fitting of the fuselage and wings. I see a lot of sanding in my near future
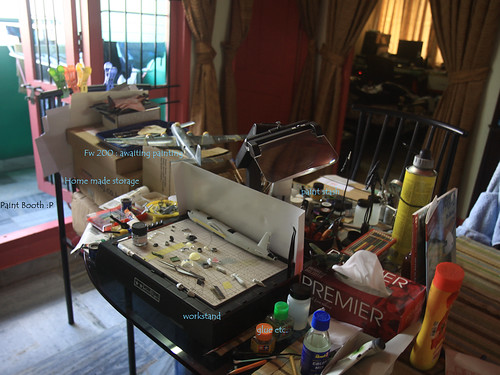
My workbench as it looks now.
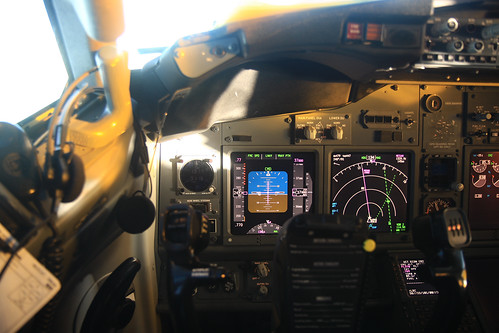
And my office cubicle which is keeping me away from the work bench these days
. Finished it finally Next on the agenda is to finish all the armaments and attach all the turrets so that the fuselage half can be closed. Since i am building it for a friend and he wants it in the "Air" mode, the gear assemblies would be skipped.
Some pics of the progress :
Dry fitting of the fuselage and wings. I see a lot of sanding in my near future
My workbench as it looks now.
And my office cubicle which is keeping me away from the work bench these days

Dirkpitt289
Joined: May 24, 2008
KitMaker: 346 posts
AeroScale: 307 posts
Posted: Thursday, January 28, 2010 - 02:15 AM UTC
Justin
Great work o0n the Cockpit. Keep the photos coming.
Andrew and Raj, also some good progress. SWEET!. Hopefully I can get make some progress soon. As it is I'm so damn tired when I get home I just can't get motivated.
Great work o0n the Cockpit. Keep the photos coming.
Andrew and Raj, also some good progress. SWEET!. Hopefully I can get make some progress soon. As it is I'm so damn tired when I get home I just can't get motivated.
Tigerbait
Joined: September 28, 2005
KitMaker: 347 posts
AeroScale: 179 posts
Posted: Thursday, January 28, 2010 - 02:32 PM UTC
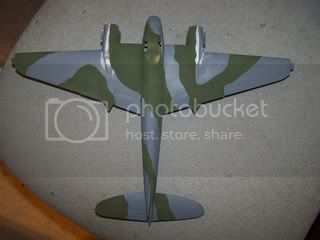
A little progress on the Mossie. Wings are ready and the canopy is on the fuselage. The wings fit so well they'll get painted seprately and put on as sub assemblies.
Now a little paint
Now a little paint

Red4
Joined: April 01, 2002
KitMaker: 4,287 posts
AeroScale: 1,164 posts
Posted: Monday, February 01, 2010 - 03:07 AM UTC
Looking good everybody. I'm trying to get things wrapped up with other commitments I have so I can get going on mine. I imagine I can get it knocked out in the remaining 11 months though.. Thanks for keeping the thread alive and adding your progress pics, much appreciated. "Q" 
Thanks for keeping the thread alive and adding your progress pics, much appreciated. "Q" iflytb20
#501
Joined: August 25, 2009
KitMaker: 292 posts
AeroScale: 194 posts
Posted: Monday, February 01, 2010 - 03:33 AM UTC
Progress Update:
*Finished the wing sub-assembly. The model will be in an AIR mode as the friend i'm building it for wants it that way. Therefore no tricky landing gear sub-assembly . yay
*All the defensive armaments finished.
*Closed the fuselage finally
My camera has gone for servicing, so will upload some more pics as soon as i get it back.
Now i need some advice regarding the clear parts. I used Testor's Clear part cement but am not happy with the results. The bonding is not strong and my not-so-delicate handling causes the parts to come off. I am planing to use Tamiya's Extra Thin Cement. Would you guys advice it or should i stick to the Testor's one???
Cheers

Emeritus

Joined: March 30, 2004
KitMaker: 2,845 posts
AeroScale: 1,564 posts
Posted: Monday, February 01, 2010 - 06:57 AM UTC
With Testor's one, do you mean a liquid cement similar to Big T's extra thin or some higher viscosity cement?
I haven't used liquid cement for attaching canopies, but I can't see why it wouldn't work. Be very careful with it though. Use a small brush to apply the cement right where the parts meet.
I usually attach clear parts with either some PVA or Gator glue, or Revell's cement (the thicker-than-liquid kind in the needle applicator bottle) when I need a stronger hold.
The biggest difficulty using liquid cement for gluing clear parts would be keeping the clear sections clear. Protecting them with masking tape doesn't work, low viscosity cements seep under the edge of the tape just as fast it flows between plastic parts, marring the surface. The same goes for holding the parts in place with tape when you're applying the glue, liquid cements like to seep under the tape.
But then, if you leave the clear parts unprotected, then there's the danger to ending up with spills on clear sections when working near the parts with a cement-laden brush.
IIRC, I heard somewhere that some liquid cements leave less (if any) marks on styrene if left to dry on their own, so if you go with the liquid cement, I'd recommend testing it out on some clear sprue beforehand to see how possible spils will behave.
Keeperofsouls2099
Joined: January 14, 2009
KitMaker: 2,798 posts
AeroScale: 2,443 posts
Posted: Wednesday, February 03, 2010 - 11:02 AM UTC
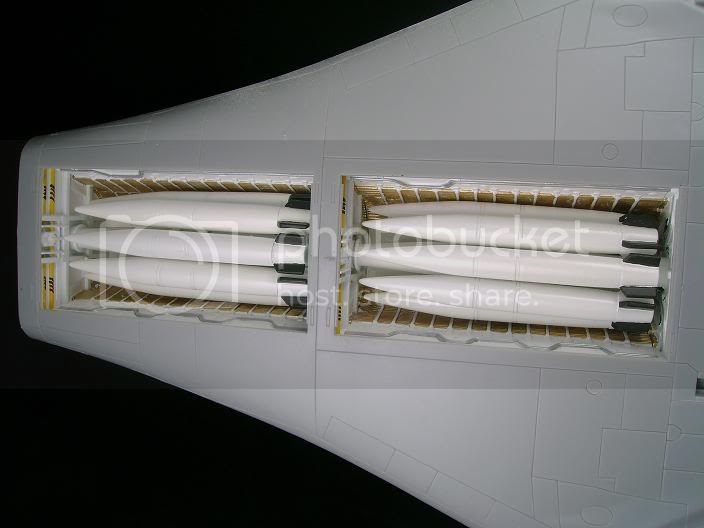
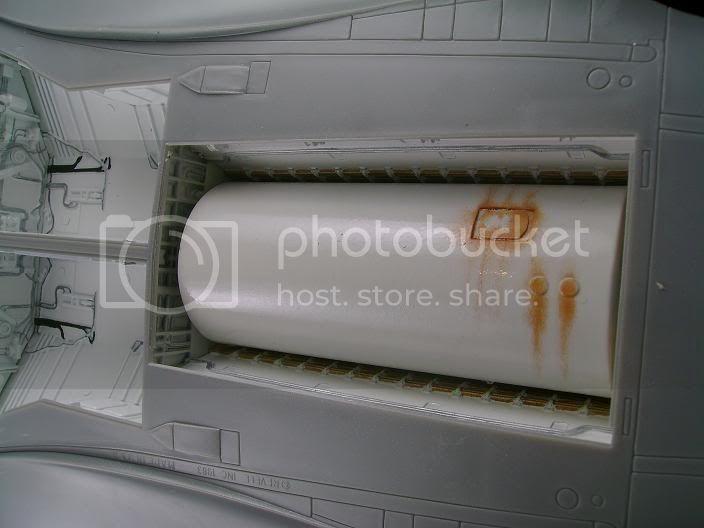
Just an update no nothing really exciting to post yet as this plane is 3 ft. long im doing alot of filling of the wings and engine intakes getting ready for alot of sanding.I have finished all the weapons bays and im currently painting all 16 MISSLES  so as soon as my white gloss dries which is a multi day challange I will post more pics.
Build On,
Justin
so as soon as my white gloss dries which is a multi day challange I will post more pics.Build On,
Justin
SGTJKJ

#041

Joined: July 20, 2006
KitMaker: 10,069 posts
AeroScale: 3,788 posts

Posted: Wednesday, February 03, 2010 - 11:57 PM UTC
Interesting choice, Andrew. A good start - it will be interesting to follow your build.
Justin, that is going to be one hell of a beast. Looking forward to see it finished.
Justin, that is going to be one hell of a beast. Looking forward to see it finished.

Tigerbait
Joined: September 28, 2005
KitMaker: 347 posts
AeroScale: 179 posts
Posted: Thursday, February 04, 2010 - 11:58 AM UTC
Ok gents... another one down 1/48 Mosquito B Mk.IV, 109 squadron, 1944

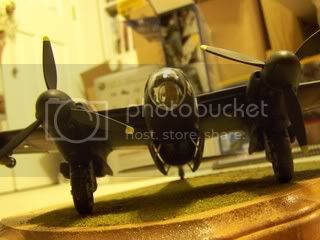


This was straight from the box. A word of warning to those about to build this kit ... BE SURE THE PILOT SEAT IS SECURE BEFORE GLUING THE CANOPY ON ... voice of experience there. The decals don't lay all that great but I am attributing that to user error. I hope that they release the FB/NF sometime soon!!!
Another great campaign guys!!! i look forward to serving with you all again!!!
Emeritus
Joined: March 30, 2004
KitMaker: 2,845 posts
AeroScale: 1,564 posts
Posted: Saturday, February 06, 2010 - 08:18 AM UTC
After finishing my very long overdue Blenheim, I thought about it and came to the conclusion that it's time to build smooth & easily built mainstream kit for a change.
Revell's re-boxing of Hasegawa's He 111 H-6 it is!

I'm planning on adding just Eduard's Zoom PE set, masks from the same manufacturer, and perhaps some brake lines, etc. But I definately won't be letting this project get out of hand!
Yesterday I washed the sprues and earlier today started with the build, clipping parts off the sprues and put some parts together: wheels, wings, stabilisers & engine nacelles. Everything has fit nicely so far, not that much yet to show pics about.
But tell me this: what's your guess as to what colour is this light grey pre-painted finish on the Eduard PE supposed to represent?

I'm out of ideas... I was thinking that the wartime cockpit interior colours were pretty much either RLM02 or RLM66, depending on the aircraft and time. Or is that just another goof? Should be RLM66, I think. That's a bummer to fix for sure.
Btw, guess what Revell suggests for the interior color in the instructions? Yep, Olive green (45)...
I just had to check the instructions of the original. Just as I thought, Hasegawa got it right, suggesting RLM66. That comparison also highlighted what I feel is THE one thing I don't like in Revell's instructions for a bit more complicated kits: assembly broken down into way too many steps!
Revell's re-boxing of Hasegawa's He 111 H-6 it is!
I'm planning on adding just Eduard's Zoom PE set, masks from the same manufacturer, and perhaps some brake lines, etc. But I definately won't be letting this project get out of hand!
Yesterday I washed the sprues and earlier today started with the build, clipping parts off the sprues and put some parts together: wheels, wings, stabilisers & engine nacelles. Everything has fit nicely so far, not that much yet to show pics about.
But tell me this: what's your guess as to what colour is this light grey pre-painted finish on the Eduard PE supposed to represent?
I'm out of ideas... I was thinking that the wartime cockpit interior colours were pretty much either RLM02 or RLM66, depending on the aircraft and time. Or is that just another goof? Should be RLM66, I think. That's a bummer to fix for sure.
Btw, guess what Revell suggests for the interior color in the instructions? Yep, Olive green (45)...
I just had to check the instructions of the original. Just as I thought, Hasegawa got it right, suggesting RLM66. That comparison also highlighted what I feel is THE one thing I don't like in Revell's instructions for a bit more complicated kits: assembly broken down into way too many steps!
Keeperofsouls2099
Joined: January 14, 2009
KitMaker: 2,798 posts
AeroScale: 2,443 posts
Posted: Saturday, February 06, 2010 - 12:33 PM UTC
Heres some progress shots finally got all the white to dry and had to create my own radar vanes in the intakes as the kit does not come with them......
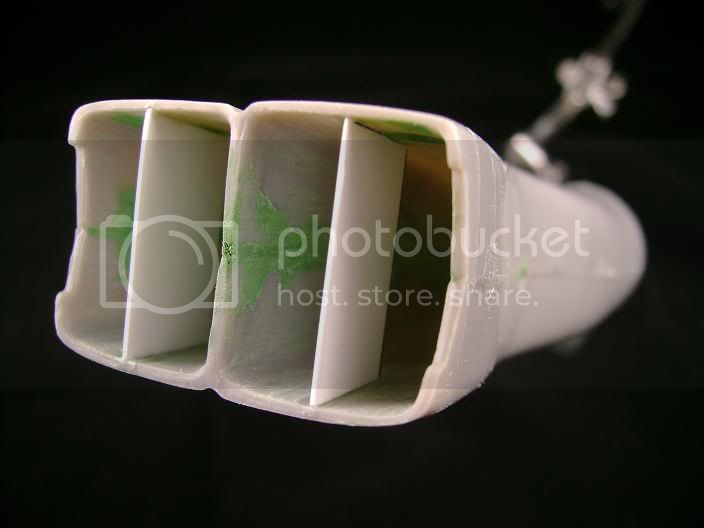
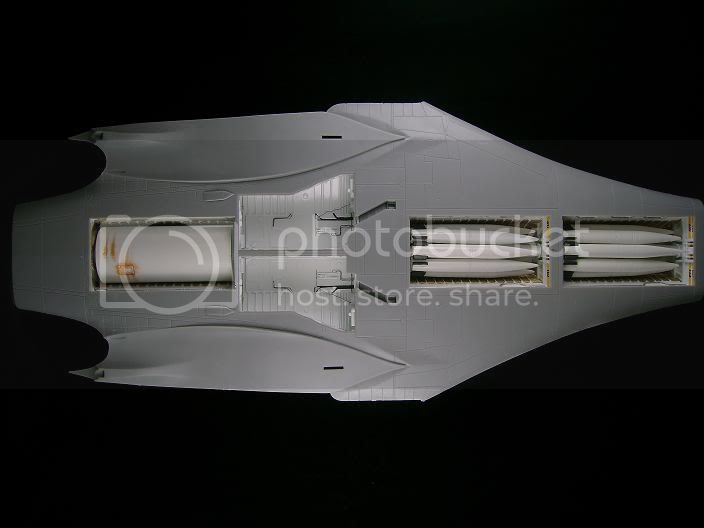
starting to assemble the fusalage have to do some filling and sanding on the wings very LARGE
gap runs right down the middle of the flaps
I also got my decals from TWOBOBS this is what I will be doing....

"Dead Reckoning" from the 37th BS
Build On,
Justin
and had to create my own radar vanes in the intakes as the kit does not come with them......starting to assemble the fusalage have to do some filling and sanding on the wings very LARGE
gap runs right down the middle of the flaps
I also got my decals from TWOBOBS this is what I will be doing....
"Dead Reckoning" from the 37th BS
Build On,
Justin
SGTJKJ
#041
Joined: July 20, 2006
KitMaker: 10,069 posts
AeroScale: 3,788 posts
Posted: Monday, February 08, 2010 - 02:09 AM UTC
Eetu. great choice. I have this kit in my stash and will look forward to see what you get from it. Have you decided on the camouflage scheme and markings?
Regarding the green interior, I seem to remember reading that the interior of some of the early bombers were a green colour. I cannot remember where I read it However, that green colour should not go for the H-6 version, but maybe that is where Revell got it from.
Regarding the green interior, I seem to remember reading that the interior of some of the early bombers were a green colour. I cannot remember where I read it
However, that green colour should not go for the H-6 version, but maybe that is where Revell got it from. Emeritus
Joined: March 30, 2004
KitMaker: 2,845 posts
AeroScale: 1,564 posts
Posted: Monday, February 08, 2010 - 04:14 AM UTC
Quoted Text
Eetu. great choice. I have this kit in my stash and will look forward to see what you get from it. Have you decided on the camouflage scheme and markings?
I've been thinking about doing the S7+FA of Stab/SG3. Used as a VIP transport by the detachment Kuhlmey, it's commander Oberstleutnant Kurt Kuhlmey arrived to Finland in the plane.
Oh, just to be sure, is this kind of entry acceptable? It wasn't used in a bomber role at that particular point of it's career, but otherwise it's a regular H-6, at least to my knowledge.
Regarding that option, I've been trying to determine the correct camo colors. To me, the patchy areas of the light color over the upper surfaces look like a worn coating of whitewash.
Fellow modelers have mentioned possibility of it being the aforementioned whitewash, remnants of the African front colours it was previously painted in, or even "squiggly pattern" type night camo.
One reputable colleague said it originally sported African front colours that were overpainted with "unidentified greens". The possibility of Italian colours used for the overpainting was also mentioned.
The kit instructions on the other hand suggest a standard splinter pattern of RLM70 and 71.
The box art plane I've been thinking of as a back-up option. Quite colourful with it's white rudder, fuselage band and engine nacelles combined with red spinners.
CMOT70
Joined: August 23, 2007
KitMaker: 629 posts
AeroScale: 539 posts
Posted: Monday, February 08, 2010 - 12:11 PM UTC
I just got the airframe together on the Pe-8. This thing is huge. Despite the complexity and various infills needed to get the airframe together, the fit isn't really all that bad on this kit. Some sanding in places will be needed to even out slight steps (mainly the fin tip insert) and a little bit of Mr Surfacer around the joins of some of the infill panels to even out the panel lines and that should be it.
But first i need to mask all those little windows to protect them from the cleanup stage. I've never been so glad to have an Eduard Mask set. Some people say that Eduard Masks are cheating and you can just do the same thing with Tamiya Tape. Those people probably like deliberately hurting themselves too.

Andrew
But first i need to mask all those little windows to protect them from the cleanup stage. I've never been so glad to have an Eduard Mask set. Some people say that Eduard Masks are cheating and you can just do the same thing with Tamiya Tape. Those people probably like deliberately hurting themselves too.
Andrew
Emeritus
Joined: March 30, 2004
KitMaker: 2,845 posts
AeroScale: 1,564 posts
Posted: Monday, February 08, 2010 - 10:46 PM UTC
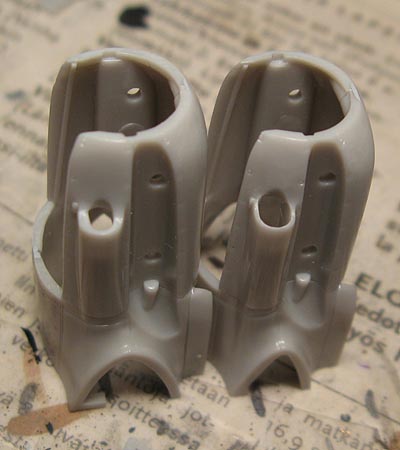
I've started working on my Heinkel.
The engine nacelles went together nicely. just a bit of mr. surfacer followed by careful sanding helped smooth the seams. Sanding had to be done carefully as there was tricky-to-replace detail next to the seams: an engraved circle on the underside and recessed vents on the upper.
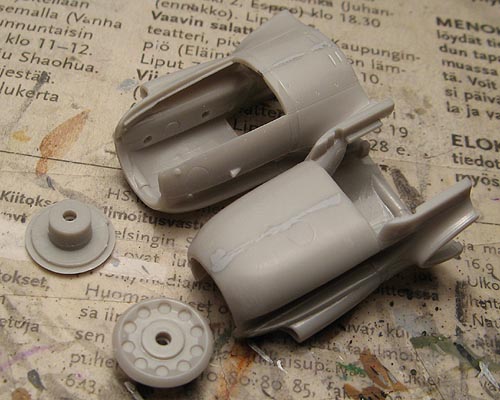
The front faces are also assembled, with the prop-mounting grommets trapped inside.
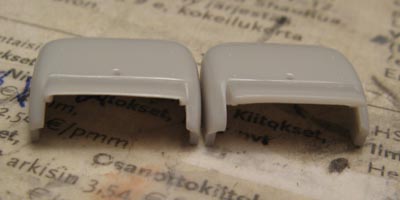
The supercharger intakes were moulded quite thick, so I carved and filed them thinner for better appearance.
(unaltered part on the left)
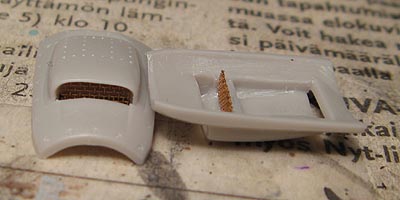
While I was at it, I also thinned the edges of the radiatior flaps.
(original on the right)
As I didn't find the recessed-lines representation of the grid on the radiator faces convincing, I glued in pieces of Eduard PE mesh.

Not that accurate I admit, but better than OOB detail.
The oil cooler intakes were blank, so I beefed them up as well, this time with copper wire mesh.
Turning over to the cockpit, I started modifying pieces according to Eduard's instructions for fitting the PE. I'll be gluing into place all the bare metal parts prior to painting, adding the coloured ones later. I'm still pondering what to do with the light grey on the pre-painted parts... The rectangular placards etc. should be easy to mask if I'm to repaint the parts with the proper RLM66, but the round instruments will be trouble, especially on the main instrument panel, as well as all that tiny printing on part #17 (a switchboard?). I think I should probably just live with the latter...?
A staple item in luftwaffe PE sets, the rudder pedals should be quite visible in the finished model.
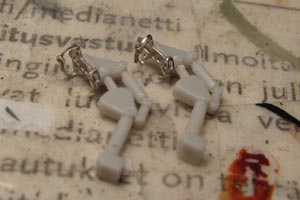
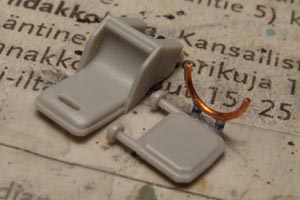
The navigator/bombardier's seat had the fabric back rest straps moulded quite thick, and the PE set naturally supplied a replacement strap. Due to combination of the somewhat brittle plastic in the kit and my clumsy fingers, I managed to break the U-shaped frame when cleaning up the remnants of the moulded-on straps.
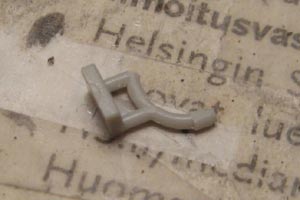
As gluing the broken piece back on and finishing the clean-up wasn't that tempting, I removed the rest as well and replaced the whole thing with copper wire.
The pilots seat had a hole cut for the seatbelts and the sides sanded down a bit.
The engine nacelles went together nicely. just a bit of mr. surfacer followed by careful sanding helped smooth the seams. Sanding had to be done carefully as there was tricky-to-replace detail next to the seams: an engraved circle on the underside and recessed vents on the upper.
The front faces are also assembled, with the prop-mounting grommets trapped inside.
The supercharger intakes were moulded quite thick, so I carved and filed them thinner for better appearance.
(unaltered part on the left)
While I was at it, I also thinned the edges of the radiatior flaps.
(original on the right)
As I didn't find the recessed-lines representation of the grid on the radiator faces convincing, I glued in pieces of Eduard PE mesh.
Not that accurate I admit, but better than OOB detail.
The oil cooler intakes were blank, so I beefed them up as well, this time with copper wire mesh.
Turning over to the cockpit, I started modifying pieces according to Eduard's instructions for fitting the PE. I'll be gluing into place all the bare metal parts prior to painting, adding the coloured ones later. I'm still pondering what to do with the light grey on the pre-painted parts... The rectangular placards etc. should be easy to mask if I'm to repaint the parts with the proper RLM66, but the round instruments will be trouble, especially on the main instrument panel, as well as all that tiny printing on part #17 (a switchboard?). I think I should probably just live with the latter...?
A staple item in luftwaffe PE sets, the rudder pedals should be quite visible in the finished model.
The navigator/bombardier's seat had the fabric back rest straps moulded quite thick, and the PE set naturally supplied a replacement strap. Due to combination of the somewhat brittle plastic in the kit and my clumsy fingers, I managed to break the U-shaped frame when cleaning up the remnants of the moulded-on straps.
As gluing the broken piece back on and finishing the clean-up wasn't that tempting, I removed the rest as well and replaced the whole thing with copper wire.
The pilots seat had a hole cut for the seatbelts and the sides sanded down a bit.
SGTJKJ
#041
Joined: July 20, 2006
KitMaker: 10,069 posts
AeroScale: 3,788 posts
Posted: Monday, February 08, 2010 - 11:11 PM UTC
Andrew, great looking bird! Eduard masking is not cheating, that is being smart in my opinion. Espercially for a project like yours. Looking forward to see it finished.
Eetu, nice choice of colour scheme. Whitewash seems like the most probable reason for the patches, but it could also be interesting to use a squiggle pattern.
Eetu, nice choice of colour scheme. Whitewash seems like the most probable reason for the patches, but it could also be interesting to use a squiggle pattern.
Keeperofsouls2099
Joined: January 14, 2009
KitMaker: 2,798 posts
AeroScale: 2,443 posts
Posted: Tuesday, February 09, 2010 - 03:55 PM UTC
Great progress guys.Just an update Ive sanded......sanded......sanded.......filled.....sanded and then sanded some more was sanding tonight when one of the wings swung forward and split my finished fusalage so then it went glue.....glue....@#$#.....$%^%$....tape....@#$@#.....got the nose attached and the tail.Plane is now 3 feet long and getting harder to work with.Pic's soon.
Build On,
Justin
Build On,
Justin
 |

WEB HOSTING BY


Copyright ©2021 AeroScale and Kitmaker Network, a subsidiary of Silver Star Enterprises
All Rights Reserved. Please read our Conditions of Use and Privacy Policy.
All Rights Reserved. Please read our Conditions of Use and Privacy Policy.