Scotland, United Kingdom
Joined: February 07, 2008
KitMaker: 1,699 posts
AeroScale: 1,384 posts
Posted: Saturday, March 20, 2010 - 11:31 AM UTC
Belated Birthdays from Scotland, Terri.
The great thing about a 109 campaign is we have the Tamiya Bf109e.
You do not need to engage the brain too much to come with something
decent and sometimes that is just the ticket. About an hour and you've got
a cockpit done and a completed airframe. This will be a Condor Legion E3.
I can't decide whether I like 6.111 or 6.109 better. Not really much to decide is there?
 http://www.risingdecals.com/Bf-109/72-015_spanish.htm
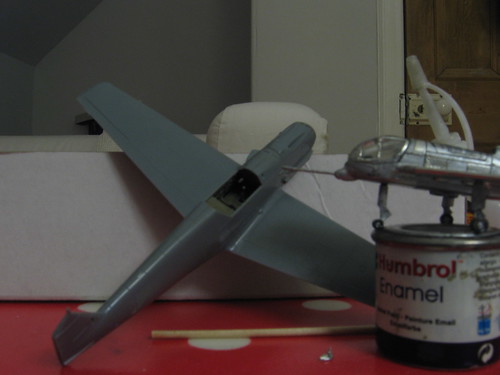
Florida, United States
Joined: March 01, 2008
KitMaker: 529 posts
AeroScale: 340 posts
Posted: Saturday, March 20, 2010 - 11:40 AM UTC
Good to see that the campaign is on it's way and some great progress is on it's way. I've started my Eduard Bf109 E-4 by removing some of the plastic details from the interior to make way for the addition of some PE and wiring details. I'll try to post some pix in the near future and will eagerly await for updates from the rest. Happy building to all!
Cheers,
Hermann.
Current projects:
Revell F-15E (1:48)
Florida, United States
Joined: March 01, 2008
KitMaker: 529 posts
AeroScale: 340 posts
Posted: Saturday, March 20, 2010 - 03:26 PM UTC

Here are some progress pix
Before:

After:

Some paint and pre-shading:

Current projects:
Revell F-15E (1:48)
Victoria, Australia
Joined: August 23, 2007
KitMaker: 629 posts
AeroScale: 539 posts
Posted: Saturday, March 20, 2010 - 05:45 PM UTC
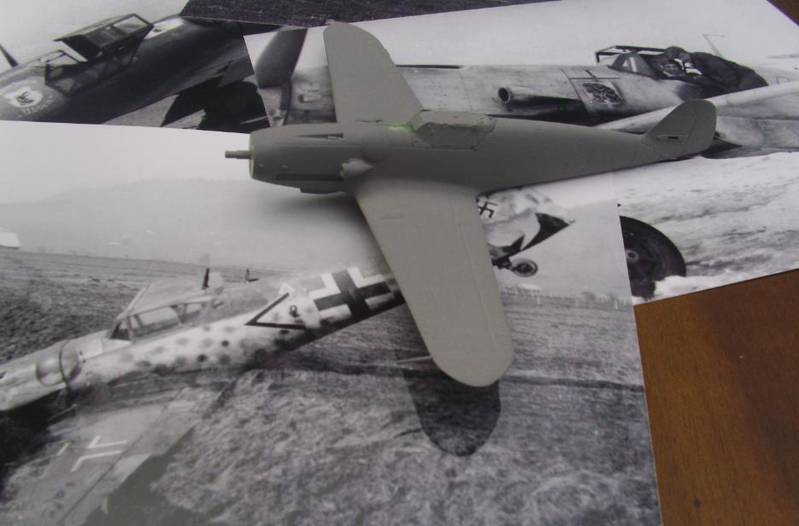
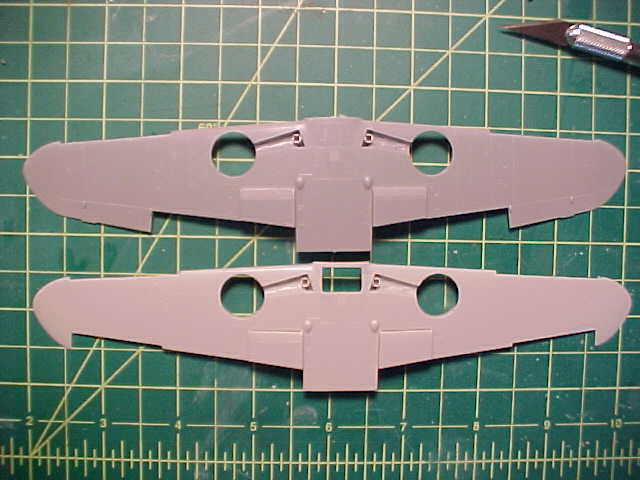
Progress is pretty quick for these Hasegawa 109's. The airframe is together already, just waiting a day for the filler to set now. The filler being used to fill some engraved access hatches that are not appropriate for this version.
No mods except a harness from my almost depleted Re-Heat Luftwaffe Harness etch set which i got way back in the old days when etch was still a novelty. Funny thing is the Re-Heat stuff still holds up well even now.


Andrew
Current Projects:
Eduard 1/48 F6F-3 Hellcat
Hasegawa 1/350 Yukikaze
1/6 JJ Models Sarah "Gothic"
England - South East, United Kingdom
Joined: March 07, 2005
KitMaker: 868 posts
AeroScale: 690 posts
Posted: Saturday, March 20, 2010 - 09:37 PM UTC
can't believe you guys have started without me !
actually I'd rather forgotten about this campaign ..but just happened to open an Academy G-6 (72nd ) yesterday ..

..however I don't think I'll do this one for campaign - it's so small I can hardly see it (my excuse for putting the rudder pedals on the wrong way!)
nope, I'll make this a practise run; I'm waiting for the new 1/48 Airfix Emil (due April 20) before starting for real..
good luck guys

Merlin
 Senior Editor
#017
United Kingdom
Joined: June 11, 2003
KitMaker: 17,582 posts
AeroScale: 12,795 posts
Posted: Sunday, March 21, 2010 - 12:00 AM UTC
Hi Terri
Belated Happy Birthday! I hope you had a great time!


I'm going to have a BIG clear out in a week or so's time to set up a new workroom - and that will mean I can also dig into my Stash to come up with a final decision on what to build for this campaign.
All the best
Rowan
BEWARE OF THE FEW...
As I grow older, I regret to say that a detestable habit of thinking seems to be getting a hold of me. - H. Rider Haggard
England - South East, United Kingdom
Joined: March 07, 2005
KitMaker: 868 posts
AeroScale: 690 posts
Posted: Sunday, March 21, 2010 - 03:36 AM UTC
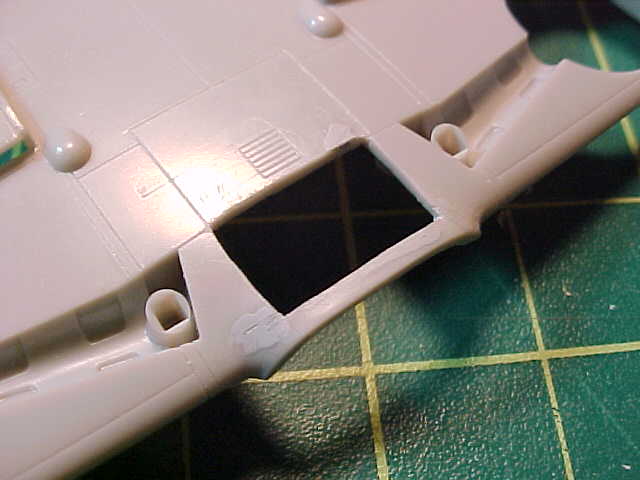
..on the other hand... less than 24 hrs in and I'm primed and ready for paint. This kit is great - all I've had to do so far is box in the wells...

Alberta, Canada
Joined: January 19, 2008
KitMaker: 6,743 posts
AeroScale: 6,151 posts
Posted: Sunday, March 21, 2010 - 03:09 PM UTC
Thanks Rowan

Neil , now that is off to a good start ! I haven't even started cutting plastic yet !
Istanbul, Turkey / Türkçe
Joined: October 19, 2005
KitMaker: 4 posts
AeroScale: 3 posts
Posted: Sunday, March 21, 2010 - 08:50 PM UTC
Hi, I've a question.
Production stages of the model under this heading you publish?
AussieReg
Associate Editor #007
Victoria, Australia
Joined: June 09, 2009
KitMaker: 8,156 posts
AeroScale: 3,756 posts
Posted: Sunday, March 21, 2010 - 09:52 PM UTC
Quoted Text
Hi, I've a question.
Production stages of the model under this heading you publish?
Hi Ozan, and welcome to Aeroscale. I hope I am understanding your question properly. You can post progress pictures of your model at any stage that you like, to show your skills, ask for advice or comments. You can post as many or as few as you wish, but we all like to see what other modellers are doing and read comments on how you build your kits.
I hope this answers your query.
Cheers, Damian
ON the bench
Revell 1/24 '53 Corvette (building as '54)
Revell 1/24 BMW 507 Coupe and Cabrio
Italeri 1/48 Me262 B-1a/U1 Nightfighter
Monogram 1/24 '57 Chevy Nomad
Dragon 1/350 USS Frank Knox DD-742
Istanbul, Turkey / Türkçe
Joined: October 19, 2005
KitMaker: 4 posts
AeroScale: 3 posts
Posted: Sunday, March 21, 2010 - 09:58 PM UTC
Thanks
Ontario, Canada
Joined: August 17, 2003
KitMaker: 753 posts
AeroScale: 174 posts
Posted: Sunday, March 21, 2010 - 11:53 PM UTC
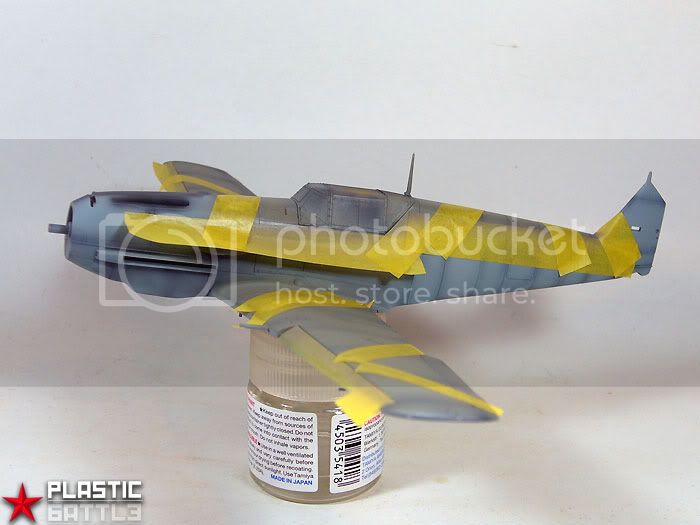
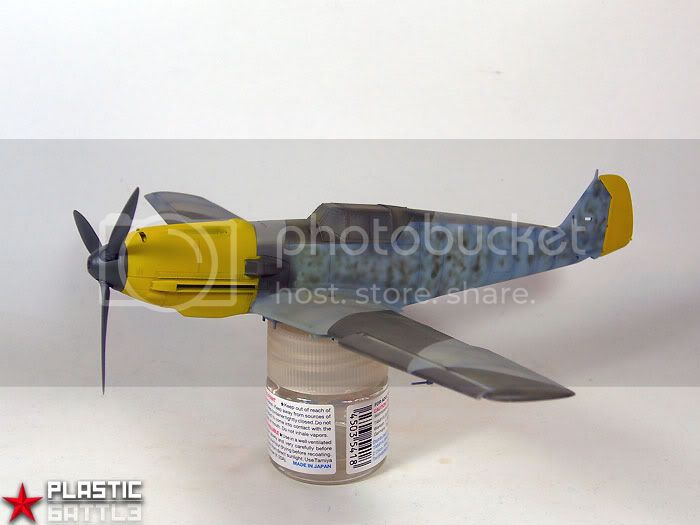
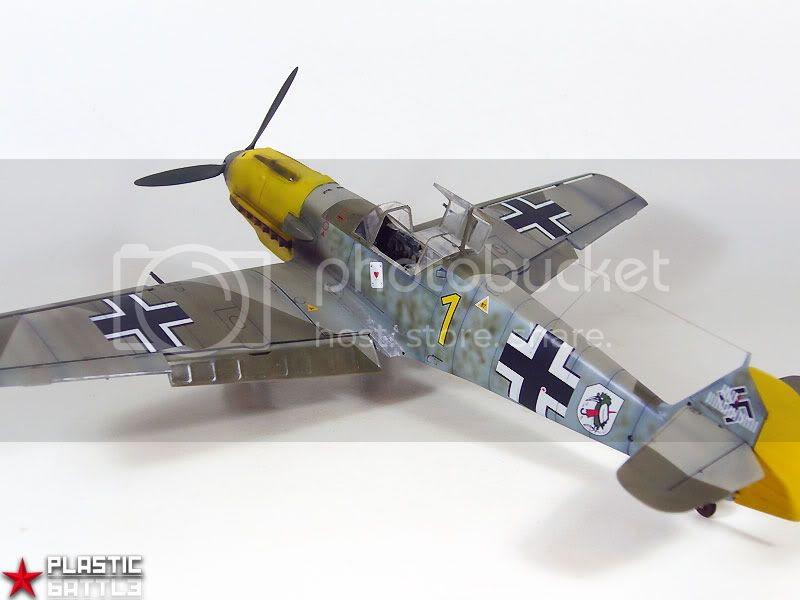
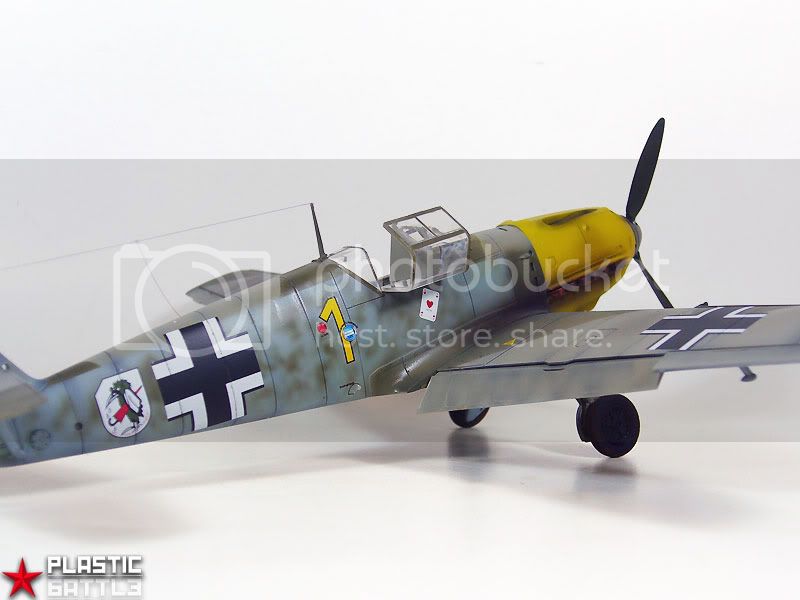
This is my campaign entry. It is 1/48 Tamiya Bf-109E3.
I painted cockpit.
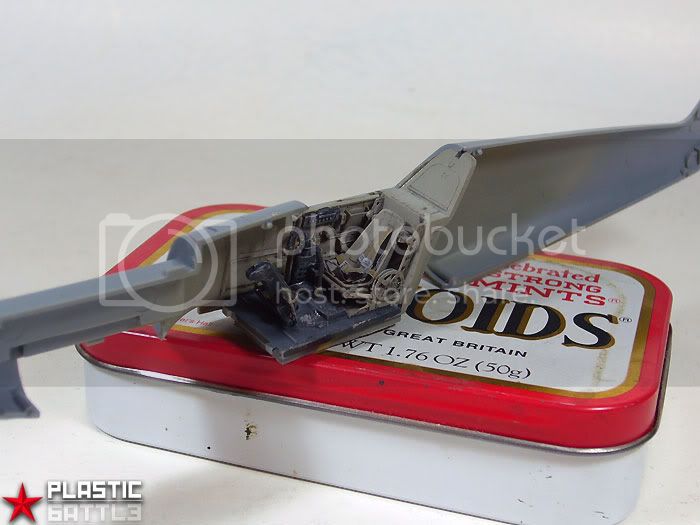

Some preshading progress pictures.

Ontario, Canada
Joined: August 17, 2003
KitMaker: 753 posts
AeroScale: 174 posts
Posted: Sunday, March 21, 2010 - 11:54 PM UTC
Ontario, Canada
Joined: August 17, 2003
KitMaker: 753 posts
AeroScale: 174 posts
Posted: Sunday, March 21, 2010 - 11:54 PM UTC
Florida, United States
Joined: March 01, 2008
KitMaker: 529 posts
AeroScale: 340 posts
Posted: Monday, March 22, 2010 - 01:38 AM UTC
The side walls are almost done:

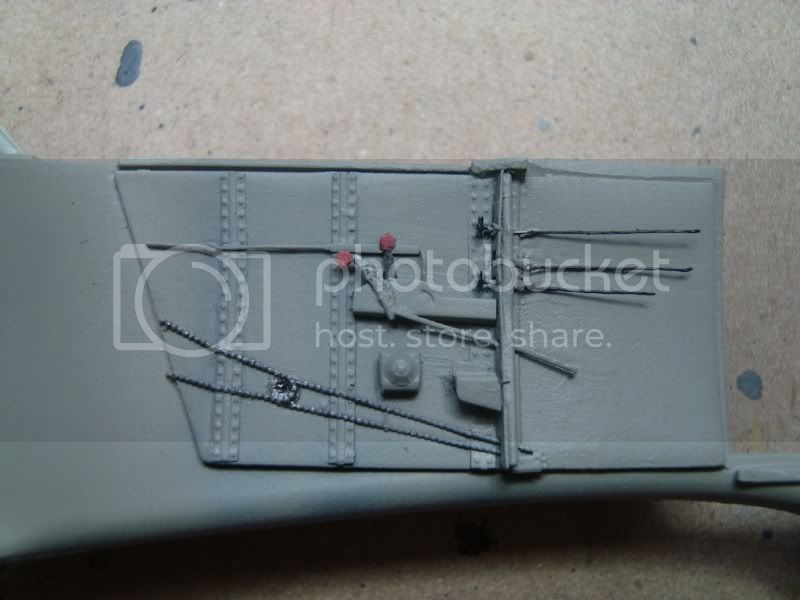
Now time to start building the instrument panel and the floor/seat assembly.
Hermann.
Current projects:
Revell F-15E (1:48)
Washington, United States
Joined: August 03, 2008
KitMaker: 436 posts
AeroScale: 69 posts
Posted: Monday, March 22, 2010 - 04:49 AM UTC
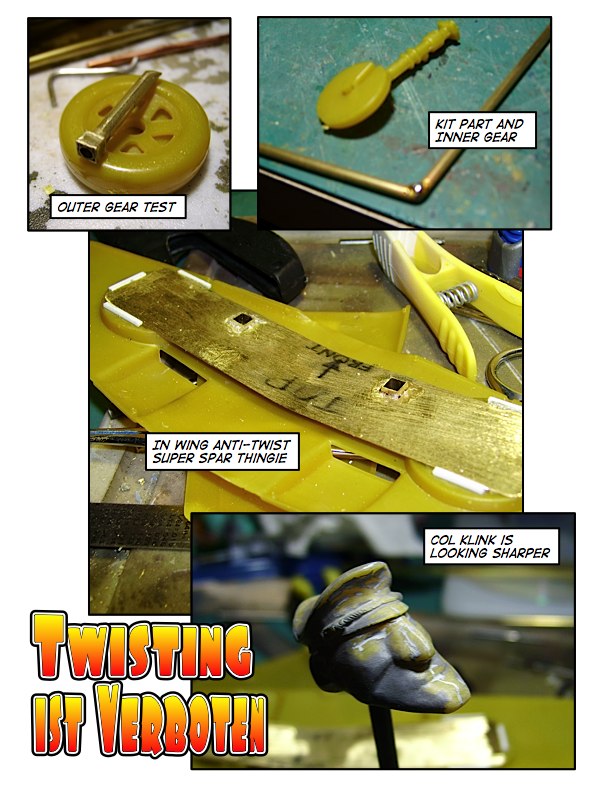
What I am hoping to do with the brass beam in the wing and all the square and round brass is to make the landing gear legs so that they will hold the aircraft in a horizontal attitude while standing on just the main gear...... that is the theory anyway. I am hoping that the large plate will keep the aircraft from twisting and I will make another one if needed for under the groundwork unless I use a solid wood plaque.
The pilot figure needed a couple hours of work to sharpen the detail.... and allow for the inclusion of a monocle....

Bob
Victoria, Australia
Joined: August 23, 2007
KitMaker: 629 posts
AeroScale: 539 posts
Posted: Monday, March 22, 2010 - 10:23 PM UTC
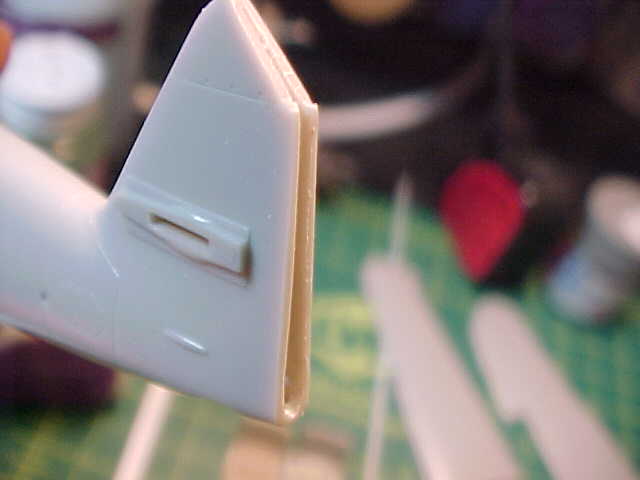
The underside just got done on the JG27 aircraft. Unusually the profile for this one shows no theatre markings at all...and with a drop tank which was very uncommon on JG27 desert aircraft. So it was probably photographed shortly after arriving in Africa with the tank fitted for the ferry flight.

Andrew
Current Projects:
Eduard 1/48 F6F-3 Hellcat
Hasegawa 1/350 Yukikaze
1/6 JJ Models Sarah "Gothic"
Alberta, Canada
Joined: January 19, 2008
KitMaker: 6,743 posts
AeroScale: 6,151 posts
Posted: Tuesday, March 23, 2010 - 01:12 AM UTC
Wow you guy's are off to an excellent start !
Ayhan , did you sleep and eat durning your build ? That was fast work on a super build ! Very well done .
I have a few things to finish off before I start my build which I'm hoping to start cutting plastic on her this weekend .
Keep the builds coming guy's ..........................
Thanks Damian for you aid

Indiana, United States
Joined: January 13, 2009
KitMaker: 419 posts
AeroScale: 378 posts
Posted: Tuesday, March 23, 2010 - 01:42 AM UTC
Wow, it looks like this thread/campaign will be one of the most active this Summer.
Started cutting up some more plastic and test fitting/evaluating the resin parts.
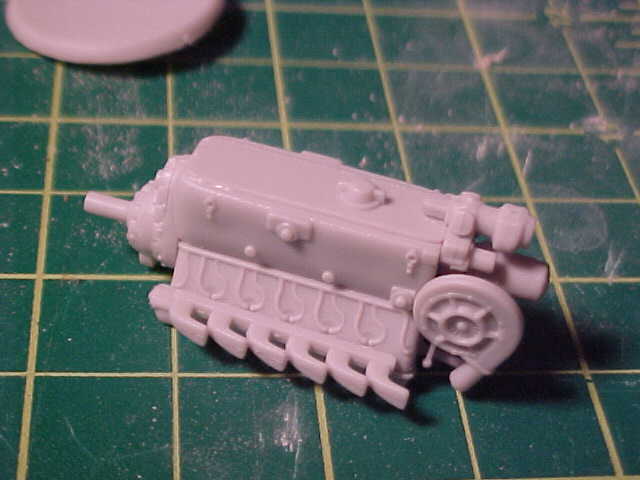
This is the built DB605 from the UM G-6 kit. (the kit is worth it for the engine alone). Something like 20 parts comprise the motor and are all crisply molded. I cannot decide yet if I want to substitute this one for the resin motor in my opened up G-2 or simply save it for the G-6.
Decisions, decisions

Cheers,
Fred
Current Builds:
Hawk 75/Saetta: Club Med Campaign
Me410: FROG Campaign
Mystery Build (insert here)
Missouri, United States
Joined: November 24, 2008
KitMaker: 564 posts
AeroScale: 510 posts
Posted: Tuesday, March 23, 2010 - 02:04 AM UTC
can I get in on this as well?
Im SO past working on my Bf-110c and JUST got a Messashnitzle.
Do I need to sign up or just start building/posting?
Nothing quite like getting lost in plastic
On the bench:Revell 1/48 P-38 Lightning built as an F-5B
Next:??
Indiana, United States
Joined: January 13, 2009
KitMaker: 419 posts
AeroScale: 378 posts
Posted: Tuesday, March 23, 2010 - 02:51 AM UTC
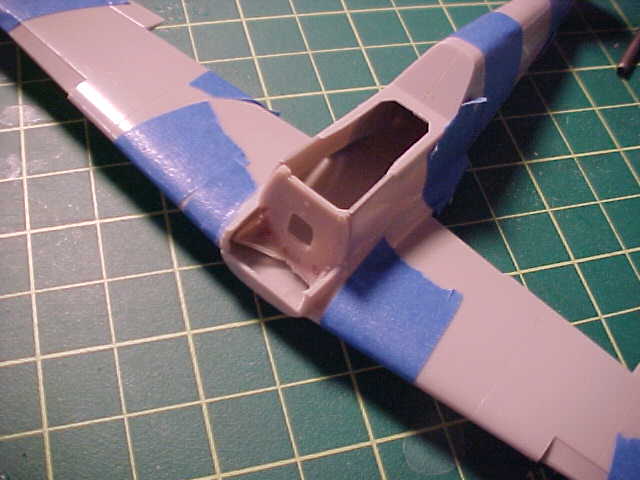
Cutting out panels and control surfaces cleanly is not easy and slow going.
... and once its done, lots of Mr Surfacer and thinning of the plastic to achieve a scale wall thickness is required (still have plenty of clean up work ahead of me.
Cheers,
Fred
Current Builds:
Hawk 75/Saetta: Club Med Campaign
Me410: FROG Campaign
Mystery Build (insert here)
Missouri, United States
Joined: November 24, 2008
KitMaker: 564 posts
AeroScale: 510 posts
Posted: Tuesday, March 23, 2010 - 02:56 AM UTC
found this while researching another project, thought I'd share:
http://www.flickr.com/photos/farinihouseoflove/sets/some great details and pics
Nothing quite like getting lost in plastic
On the bench:Revell 1/48 P-38 Lightning built as an F-5B
Next:??
Alberta, Canada
Joined: January 19, 2008
KitMaker: 6,743 posts
AeroScale: 6,151 posts
Posted: Tuesday, March 23, 2010 - 12:23 PM UTC
Quoted Text
can I get in on this as well?
Im SO past working on my Bf-110c and JUST got a Messashnitzle.
Do I need to sign up or just start building/posting?
You sure can Shawn , but you still have to sign up if you want your ribbon at the end .
Which I'm having a very hard time up loading it . It's the right size and file name , I just keep getting the red x all the time . So if some one is able to give aid here it would be very helpful .
Alberta, Canada
Joined: January 19, 2008
KitMaker: 6,743 posts
AeroScale: 6,151 posts
Posted: Tuesday, March 23, 2010 - 12:27 PM UTC
Hi Fred , save it for the G-6 . If this is going to be a closed cowl , why use it all ?
Save if for another project done the road
nice job on cutting out the control surfaces
Missouri, United States
Joined: November 24, 2008
KitMaker: 564 posts
AeroScale: 510 posts
Posted: Tuesday, March 23, 2010 - 11:22 PM UTC
Started my build last night (pics will go up tonight)
Removed exhaust
added the new panels
smoothed the cowl (forward of the firewall)
dumped the kits supercharger and went rummaging through the parts box, where I found a nice roots type blower to replace it with.
This kit is more spitsfire then messashnitzle, I'll have to fix that.
In case anyone is wondering im doing the "toon" version of the Bf-109V-14, the red one since I like red and it was Udets favorite color as well. I will be doing an "in flight" model and loading it up with character as I go.
Bib WIber, Im excited to see your build as well, love that show.
Nothing quite like getting lost in plastic
On the bench:Revell 1/48 P-38 Lightning built as an F-5B
Next:??