Washington, United States
Joined: August 03, 2008
KitMaker: 436 posts
AeroScale: 69 posts
Posted: Wednesday, March 24, 2010 - 02:21 AM UTC
Shawn, nice to have another cartoon in the campaign

........... I was beginning to feel a bit lonely. Will be interested in what you do to make it more 109.... I was thinking of building up the nose and adding the nose guns for starters....

Got one leg done but have to remake the other to be a better match...... so the build at this end is going ok.... have the "cockpit" completed. Will post later today....
Will be interested in your progress......
Did you see the one where the guy took parts from the 109 and the Spitsfire kit to make a P-51? These silly little kits have a lot of potential if approached the right way....
Later, Bob

Missouri, United States
Joined: November 24, 2008
KitMaker: 564 posts
AeroScale: 510 posts
Posted: Wednesday, March 24, 2010 - 03:19 AM UTC
I love these kits, they take me back to when modeling was pure fun and fantasy not rivets and wiring.
The P-51 conversion was super cool! Its easy to see how it was done since the main fuse halves are the same from the spit to the me-109, same gear wheels,tail wheel, prop,guns, etc
If you need any extra stuff for your let me know as I may not be using it.
This will be a fun conversion to the early prototype that turned into the Me-109e.
Nothing quite like getting lost in plastic
On the bench:Revell 1/48 P-38 Lightning built as an F-5B
Next:??
Missouri, United States
Joined: November 24, 2008
KitMaker: 564 posts
AeroScale: 510 posts
Posted: Wednesday, March 24, 2010 - 05:28 AM UTC
Bob, I just noticed that the control surfaces are fabric covered. Our kits do not show this at all, at least mine does not.
This should be fun to add!

Nothing quite like getting lost in plastic
On the bench:Revell 1/48 P-38 Lightning built as an F-5B
Next:??
England - South East, United Kingdom
Joined: March 07, 2005
KitMaker: 868 posts
AeroScale: 690 posts
Posted: Wednesday, March 24, 2010 - 05:39 AM UTC
fantastic looking Emil Ayhan !
meanwhile I am wrestling with my Academy G-6 - having trouble getting the exhaust staining looking right in this small scale - already wiped one attempt off - and the spinner spiral is a nightmare. I'm hoping this will be Heinrich Bartel's 'Red 13' 'Marga' - but so far I have been unable to find out if his a/c had white wingtips or a trop filter..

Washington, United States
Joined: August 03, 2008
KitMaker: 436 posts
AeroScale: 69 posts
Posted: Wednesday, March 24, 2010 - 06:00 AM UTC
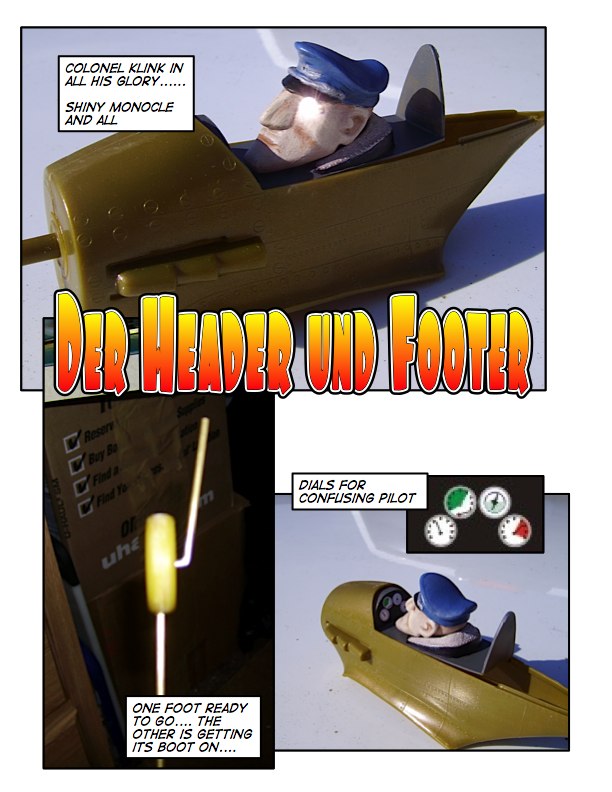
Colonel Klink is now ready for his flight....... unfortunately, his plane is not.... The one landing gear leg main structure is complete. I need to modify the other one and mount the wheel and complete detailing, etc. then the wing should be able to stand up on its wheels. Should be easy to add a airplane on top of that....
Bob

Missouri, United States
Joined: November 24, 2008
KitMaker: 564 posts
AeroScale: 510 posts
Posted: Wednesday, March 24, 2010 - 06:34 AM UTC
wow neil thats tiny! Im also used to 1/32 birds. Looks great though!
Bob, Klink turned out great! Cant wait to see the finished scene.
Nothing quite like getting lost in plastic
On the bench:Revell 1/48 P-38 Lightning built as an F-5B
Next:??
Washington, United States
Joined: August 03, 2008
KitMaker: 436 posts
AeroScale: 69 posts
Posted: Wednesday, March 24, 2010 - 06:40 AM UTC
Shawn,
Well, my cartoon like painting skills come into their own when painting a cartoon plane....

Thanks for the offer of parts, but I have an old donor kit standing by.... is my backup in case I goof this one up to bad..... Am considering building it parked with a "full" interior....... well, my version of one anyway.
Some really nice looking birds in this campaign and it hasn't even really gotten going....... be interesting to see how they come out...
Bob

Missouri, United States
Joined: November 24, 2008
KitMaker: 564 posts
AeroScale: 510 posts
Posted: Wednesday, March 24, 2010 - 07:12 AM UTC
lol
a "full interior" build up of one of these would be a riot. Squirrel in a cage for a motor?

Nothing quite like getting lost in plastic
On the bench:Revell 1/48 P-38 Lightning built as an F-5B
Next:??
Washington, United States
Joined: August 03, 2008
KitMaker: 436 posts
AeroScale: 69 posts
Posted: Wednesday, March 24, 2010 - 07:33 AM UTC
Hamsters...... I figure that the squirrel is for when the turbocharger kicks in....

Was figuring on a wine bottle for the oxygen......... that kind of thing.... Might even give it a shot for this campaign.......... depends on how the one I am doing turns out...
Of course, you had to bring up the fabric covering.... now I need to figure that one out....
Bob

Wisconsin, United States
Joined: March 17, 2009
KitMaker: 156 posts
AeroScale: 153 posts
Posted: Wednesday, March 24, 2010 - 04:33 PM UTC
Howdy all-
Some good work started already. I look forward to seeing more!
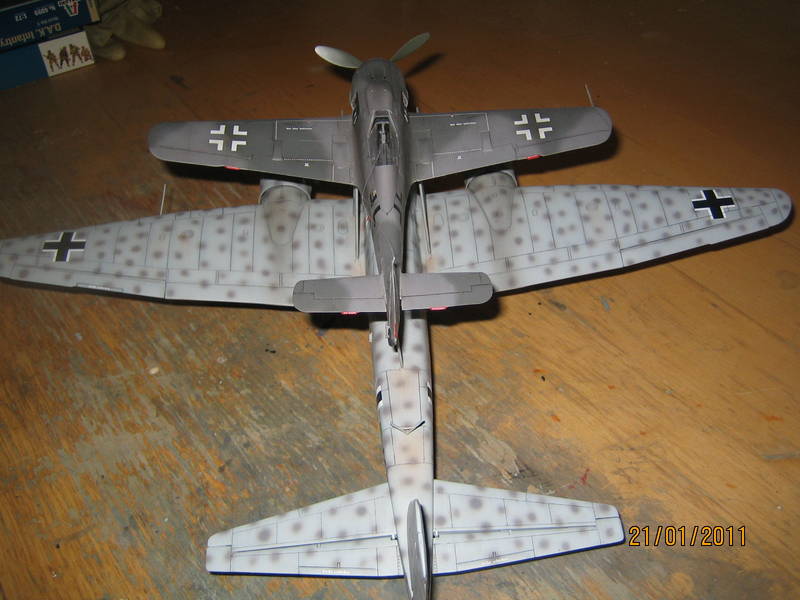
My entry for this campaign will be a Hasegawa 1/32 Bf109G-14, using Luftfahrtverlag-Start decals for "Blue 8" of 16./JG5 in 1944. I've always liked JG5 aircraft, and this seemed like a good excuse to build one.
I'll probably keep this simple with only PE belts and a few scratch cockpit additions, to ensure I meet the deadline.
On the workbench:
WNW 1/32 Fokker E.II for Canvas Falcons III
Trumpeter 1/32 MiG-21F-13 for 2nd Gen Jets Campaign
Missouri, United States
Joined: November 24, 2008
KitMaker: 564 posts
AeroScale: 510 posts
Posted: Wednesday, March 24, 2010 - 11:20 PM UTC
i figured out the fabric covering will be simulated by adding the "structure" under the fabric and dull coating the surfaces
I added the new supercharger inlet last night, glued the fuse together and started the cut out for the roots blower. I've never seen one sit on the hood before, they come through the hood! Also added the butterfly shaft into the blower scoop.
Im slacking on pics 'cause im working on the kit! Im taking them I just need to post them.
Also figured out how Im going to mod the spinner for the correct cooling ring and details. Time to get out the power drill!

This is such a fun kit.
Nothing quite like getting lost in plastic
On the bench:Revell 1/48 P-38 Lightning built as an F-5B
Next:??
Missouri, United States
Joined: November 24, 2008
KitMaker: 564 posts
AeroScale: 510 posts
Posted: Thursday, March 25, 2010 - 11:50 AM UTC
Pictures!
ahhh fresh meat

Spitfire exhausts on an ME-109?! Nein, ist verbotten!

Better!

The Bf-109-v14 has very different exhausts. This is the start.

Also has a unique supercharge intake

Nothing quite like getting lost in plastic
On the bench:Revell 1/48 P-38 Lightning built as an F-5B
Next:??
Missouri, United States
Joined: November 24, 2008
KitMaker: 564 posts
AeroScale: 510 posts
Posted: Thursday, March 25, 2010 - 11:55 AM UTC
Another shot of the v-14 intake

"If one zupercharger ist gut, zwei ist betta!"

Stock blower was crap, so I went spares bin diving and made this

Which turned into this


Currently working on the spinner mods, and fuse.
Nothing quite like getting lost in plastic
On the bench:Revell 1/48 P-38 Lightning built as an F-5B
Next:??
Missouri, United States
Joined: November 24, 2008
KitMaker: 564 posts
AeroScale: 510 posts
Posted: Thursday, March 25, 2010 - 12:11 PM UTC
Jean Lucs excellent conversion he did that I am basing my mods off of.
https://aeroscale.kitmaker.net//features/938 Nothing quite like getting lost in plastic
On the bench:Revell 1/48 P-38 Lightning built as an F-5B
Next:??
Victoria, Australia
Joined: August 23, 2007
KitMaker: 629 posts
AeroScale: 539 posts
Posted: Thursday, March 25, 2010 - 07:21 PM UTC
Current Projects:
Eduard 1/48 F6F-3 Hellcat
Hasegawa 1/350 Yukikaze
1/6 JJ Models Sarah "Gothic"
Victoria, Australia
Joined: August 23, 2007
KitMaker: 629 posts
AeroScale: 539 posts
Posted: Thursday, March 25, 2010 - 07:29 PM UTC
I just looked in the Aeroscale Campaign 2010 folder to post a completed pic...but there doesn't seem to be a folder for this campaign yet? Or is this one somewhere else?
Andrew
Current Projects:
Eduard 1/48 F6F-3 Hellcat
Hasegawa 1/350 Yukikaze
1/6 JJ Models Sarah "Gothic"
Missouri, United States
Joined: November 24, 2008
KitMaker: 564 posts
AeroScale: 510 posts
Posted: Thursday, March 25, 2010 - 11:16 PM UTC
Andrew that looks great! Your finish is beautiful.
Nothing quite like getting lost in plastic
On the bench:Revell 1/48 P-38 Lightning built as an F-5B
Next:??
Alberta, Canada
Joined: January 19, 2008
KitMaker: 6,743 posts
AeroScale: 6,151 posts
Posted: Thursday, March 25, 2010 - 11:52 PM UTC
Excellent build Andrew . I like the light weathering you did . I will get with Chuck and find out about a folder in the gallery for posting finish projects . He is the only one who can create it .
Two toon builds ! Both are turning out very well and are a nice touch to the campaign .

Looking forward to more progress from every one !
AussieReg
 Associate Editor
#007
Victoria, Australia
Joined: June 09, 2009
KitMaker: 8,156 posts
AeroScale: 3,756 posts
Posted: Friday, March 26, 2010 - 03:36 AM UTC
Well, I opened the box and started attacking the plastic tonight !!
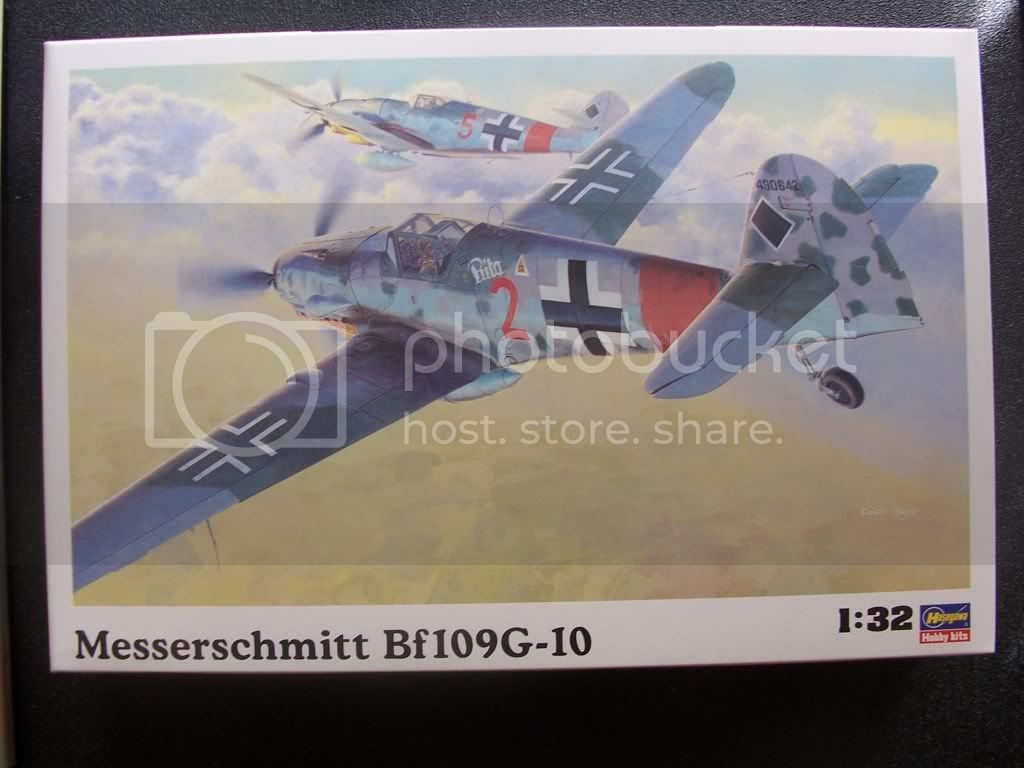
I've decided not to use the pilot, but I was thinking of doing the cockpit open, so I've had to order a set of seatbelts which will take about 10 days to get here.
This means I have to get cracking on my Gladiator (Aces High 2) and Black Widow (Pin-Ups) builds so that when the belts arrive I'm all set to focus on this, my first ever 109 !!

Cheers, D
ON the bench
Revell 1/24 '53 Corvette (building as '54)
Revell 1/24 BMW 507 Coupe and Cabrio
Italeri 1/48 Me262 B-1a/U1 Nightfighter
Monogram 1/24 '57 Chevy Nomad
Dragon 1/350 USS Frank Knox DD-742
Alberta, Canada
Joined: January 19, 2008
KitMaker: 6,743 posts
AeroScale: 6,151 posts
Posted: Saturday, March 27, 2010 - 01:45 AM UTC
Gee Damian , was wondering what happened to you , you where so gun ho on the start .

Seatbelts are a must and worth the wait . Looking forward to your progress , always enjoyed your builds and the humor

Oh yeah , your late !

Washington, United States
Joined: August 03, 2008
KitMaker: 436 posts
AeroScale: 69 posts
Posted: Saturday, March 27, 2010 - 05:13 AM UTC
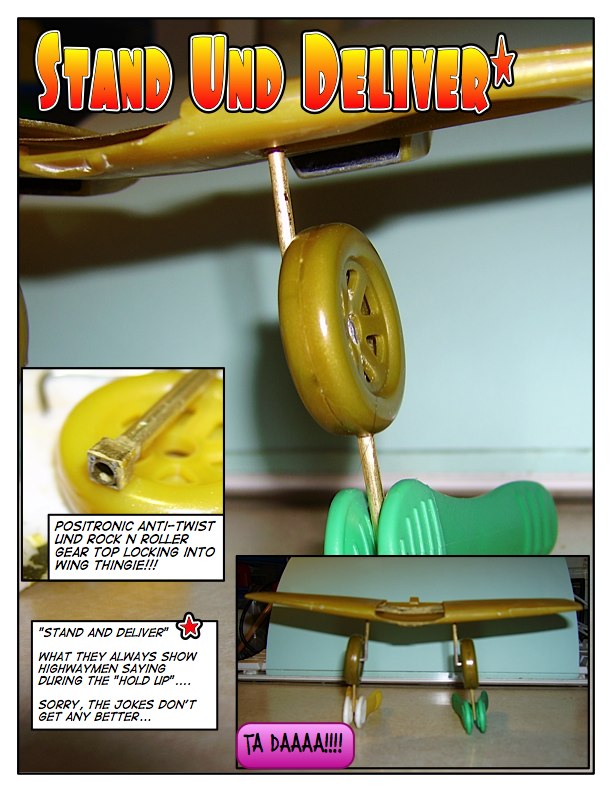
After some adventures with a soldering iron, and using the parts out of my donor kit, I finally have a set of gear that should actually hold the aircraft in a "take off" mode....

Now I get to move on to the plastic part of the kit!!!

Bob

England - South East, United Kingdom
Joined: March 07, 2005
KitMaker: 868 posts
AeroScale: 690 posts
Posted: Saturday, March 27, 2010 - 05:35 AM UTC
Quoted Text
. A bit different for a JG27 aircraft as it has no yellow regognition or white theatre markings. The decals are from AML and the profile says it was an aircraft flown by Wolfgang Lippert.
..looks very nice as usual Andrew ! thanks for the heads-up on the decals, they were new to me so I've gone and ordered a set !
New Jersey, United States
Joined: October 18, 2007
KitMaker: 1,698 posts
AeroScale: 96 posts
Posted: Saturday, March 27, 2010 - 06:18 AM UTC
wow .. two finishes already! And great paint jobs... Andrew I like the feathering (?) of the paint job (not sure if I am using the righrt nomenclature, sorry I am a newbie!). How did you achieve the effect? Cheers

AussieReg
 Associate Editor
#007
Victoria, Australia
Joined: June 09, 2009
KitMaker: 8,156 posts
AeroScale: 3,756 posts
Posted: Saturday, March 27, 2010 - 09:41 AM UTC
I'm very sorry Boss Lady, please don't take my ribbon away !!!

After moving house a few weeks back, and starting a new job for the second time in 6 months, I'm starting to get settled at home and have set up a dedicated workbench now as well. Hopefully now I can get down to business and try to keep up with you guys !! Like I said, this will be my first 109, so I will likely be asking lots of questions and copying a few ideas along the way.
Some superb work here already, I love the desert scheme on yours Andrew.
Cheers, D

ON the bench
Revell 1/24 '53 Corvette (building as '54)
Revell 1/24 BMW 507 Coupe and Cabrio
Italeri 1/48 Me262 B-1a/U1 Nightfighter
Monogram 1/24 '57 Chevy Nomad
Dragon 1/350 USS Frank Knox DD-742
Victoria, Australia
Joined: August 23, 2007
KitMaker: 629 posts
AeroScale: 539 posts
Posted: Saturday, March 27, 2010 - 12:02 PM UTC
Quoted Text
Quoted Text
. A bit different for a JG27 aircraft as it has no yellow regognition or white theatre markings. The decals are from AML and the profile says it was an aircraft flown by Wolfgang Lippert.
..looks very nice as usual Andrew ! thanks for the heads-up on the decals, they were new to me so I've gone and ordered a set !
Thanks Neil. The AML decals were a new experience for me as well, i found them on a sale stand at the LHS so i got them to try...as my Hasegawa kit has the old style Hasegawa ivory white markings.
The AML decals i have are well printed. In use however it first looked as though they were not going to react at all to the setting solutions. I had to continously hit them with Micro Sol and eventually they did soften and then settled into the engraved lines quite well. So in the end they worked well. The Swastikas are two piece versions though (which i don't like), so i just used the kit ones.
Andrew
Current Projects:
Eduard 1/48 F6F-3 Hellcat
Hasegawa 1/350 Yukikaze
1/6 JJ Models Sarah "Gothic"
 ........... I was beginning to feel a bit lonely. Will be interested in what you do to make it more 109.... I was thinking of building up the nose and adding the nose guns for starters....


