Air Campaigns
Want to start or join a group build? This is where to start.
Twin Boom 2010 Official Campaign Thread
Tomcat31
#042
_VISITCOMMUNITY
England - North East, United Kingdom
Joined: November 18, 2006
KitMaker: 2,828 posts
AeroScale: 1,720 posts
Posted: Saturday, March 27, 2010 - 11:23 PM UTC
Had a few days off work and managed to get some time in at the bench while running around for Sam. But late last night I finally finish my entry (almost). Here she is in all her glory......


Quoted Text

What is with the top turret? Can you put it in afterwards? I had to fit it into the fuselage halves just before glueing them together without glueing the turret to the halves ....

Sorry I didn't answer this sooner The turret just slips on top of the fuselage but doesn't have much in the way of locating. This works out quite well for me as I'm waiting for the Quickboost barrels for the turret to arrive so when they do i can glue the turret in place 
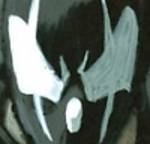
Here's a shot of the underside of the turret.


For an AOOB build I've really enjoyed this but now it finish to more projects and onto the Pin-up and P-47 Campaign.

As always comments, suggestions and critique is always welcomed

P.S. All, don't forget to upload some photos to the Campaign Gallery. it's looking a bit empty with only mine, Sam's and Justin's entries

Link to Gallery
SGTJKJ
#041
_VISITCOMMUNITY
Kobenhavn, Denmark
Joined: July 20, 2006
KitMaker: 10,069 posts
AeroScale: 3,788 posts
Posted: Sunday, March 28, 2010 - 12:03 AM UTC
Nice black widow, Allen. Love the nose art

Thanks for participating
AussieReg
Staff MemberAssociate Editor
AUTOMODELER
#007
_VISITCOMMUNITY
Victoria, Australia
Joined: June 09, 2009
KitMaker: 8,156 posts
AeroScale: 3,756 posts
Posted: Sunday, March 28, 2010 - 12:27 AM UTC
Allen, superb work mate, I love the finish and the weathering, and the nice little detail work like the lines in the front wheel well. You said "almost" finished, what's left? Just the quickboost barrels or some other finishing touches?

Either way, I like it a lot.

Cheers, D
Tomcat31
#042
_VISITCOMMUNITY
England - North East, United Kingdom
Joined: November 18, 2006
KitMaker: 2,828 posts
AeroScale: 1,720 posts
Posted: Sunday, March 28, 2010 - 02:24 AM UTC

Quoted Text

You said "almost" finished, what's left? Just the quickboost barrels or some other finishing touches?

Just the barrels left but the LHS only ordered them on Friday so I'm calling it finished until they arrive.
JMartine
_VISITCOMMUNITY
New Jersey, United States
Joined: October 18, 2007
KitMaker: 1,698 posts
AeroScale: 96 posts
Posted: Sunday, March 28, 2010 - 05:15 AM UTC
Samantha - very nice finish on your P38, hope mine come out half as good as yours!

Stefan - nice job on the Bronco, upgrading the old Testors' molds not an wasy thing!

Simon - Good WIP so far, some nice detailing.. lots of great widows in here! And now I see the finished product (hey, I am catching up with couple weeks of posts! Really nice finish.

Torsten - Beautiful work; flawless construction from what my eye can see. Just gorgeous birds. Cheers And yes, both are great but I like the Spook one the best

Allen - Really nice bird, dito on the nose art, superb!

Jesper - nice start on an old kit.. you know? I DO miss those plastic/transparent bases we used to get with the old kits (dont miss the crude details and 10 cm gaps lol). Hand brushing came out nice so far; I had to re-learn to brush paint for the winter months, when I dont have access to my spray booth, which is in an attached but unheated garage space.

SGTJKJ
#041
_VISITCOMMUNITY
Kobenhavn, Denmark
Joined: July 20, 2006
KitMaker: 10,069 posts
AeroScale: 3,788 posts
Posted: Sunday, March 28, 2010 - 06:57 AM UTC
Thanks for the comments, James.

The kit has some good details in places, but the cockpit glazing fits very bad. Not a good thing as it is impossible to sand a clear plastic part to fit without making the plastic unclear.

I have now finished it. The result is satisfying for me considering I went old school and left the airbrush out for this project.

The yellow tail band decals could have come on better and originally I wanted to paint them on, but the fuselage code is printed on to them so I decided to use the kit decals.

The cockpit glazing painting would obviously have been much better if I had masked it, but I simply did not want to. Masking is not my favourite part of the hobby and no masking set was available for this kit. Cutting out all the small individual squares and strange triangular shapes would have been a pain in the A#¤ for me, so I painted it freehand. After all it is a hobby and should be fun - most of the time

Seeing the pictures now I might give it an extra wash of MiG washes to give it a more worn and weathered look.

My next project will be Eduards excellent FW 190A-8 as I want to come back to the high quality stuff after two oldies projects with kits probably older than me. Then there will be no blaming the kit when things do not work out perfectly.

Comments welcome


Siderius
_VISITCOMMUNITY
Tennessee, United States
Joined: September 20, 2005
KitMaker: 1,747 posts
AeroScale: 1,673 posts
Posted: Sunday, March 28, 2010 - 07:52 AM UTC
Allen, awesome looking widow! If it is the DML kit I'm building the same one, don't know if it'll be half as good as yours.

Jesper, really nice and unusual design to build for this campaign! Really like it.

You both did fantastic work! Russell

P.S. Isn't 72 scale great!!!
AussieReg
Staff MemberAssociate Editor
AUTOMODELER
#007
_VISITCOMMUNITY
Victoria, Australia
Joined: June 09, 2009
KitMaker: 8,156 posts
AeroScale: 3,756 posts
Posted: Sunday, March 28, 2010 - 10:40 AM UTC
Jesper, superb mate. Isn't it great to go "old school" once in a while. Please come back with some pics down the track once you have applied the weathering as well. I know I've said it before, but the 189 is just such a fragile looking craft with those thin booms and twin props, you would be afraid that a bit of buffeting would snap something !!

Thanks so much for sharing your thoughts and your work with us, and for supporting my Campaign.

Cheers, D
SGTJKJ
#041
_VISITCOMMUNITY
Kobenhavn, Denmark
Joined: July 20, 2006
KitMaker: 10,069 posts
AeroScale: 3,788 posts
Posted: Sunday, March 28, 2010 - 08:33 PM UTC
Thanks for the comments, Damian and Russell. I appreciate it. Old school is definitely nice - the nostalgia aspect cannot be beaten.

I will share some more pictures when the weathering is all done. I have tried to find out where the exhausts are on this aircraft. I cannot find them. Anybody has an idea are where they?
KrisMax
_VISITCOMMUNITY
Queensland, Australia
Joined: January 23, 2010
KitMaker: 156 posts
AeroScale: 139 posts
Posted: Sunday, March 28, 2010 - 10:05 PM UTC
Allen, that's a great looking widow.

Jesper, Your hand brushing looks better than my air brushing. I'm impressed!
I agree with Damian, it looks a bit flimsy, like it should have elastic bands spinning the props. A great subject though.

KrisMax
_VISITCOMMUNITY
Queensland, Australia
Joined: January 23, 2010
KitMaker: 156 posts
AeroScale: 139 posts
Posted: Sunday, March 28, 2010 - 11:40 PM UTC

Quoted Text

Thanks for the comments, Damian and Russell. I appreciate it. Old school is definitely nice - the nostalgia aspect cannot be beaten.

I will share some more pictures when the weathering is all done. I have tried to find out where the exhausts are on this aircraft. I cannot find them. Anybody has an idea are where they?


Here's a picture from my reference books . I would guess the black ellipse on the lower side of the engine nacelle is the exhaust. So it must be an engine, not a rubber band


Cheers

Simon

SGTJKJ
#041
_VISITCOMMUNITY
Kobenhavn, Denmark
Joined: July 20, 2006
KitMaker: 10,069 posts
AeroScale: 3,788 posts
Posted: Sunday, March 28, 2010 - 11:44 PM UTC
Thanks for the comment, Simon.

Thanks for the picture. I see these exhaust are shown as engine bulges on my aircraft. I think I need to drill some holes to show them of properly. I guess I am not finished yet.

More to follow
AussieReg
Staff MemberAssociate Editor
AUTOMODELER
#007
_VISITCOMMUNITY
Victoria, Australia
Joined: June 09, 2009
KitMaker: 8,156 posts
AeroScale: 3,756 posts
Posted: Tuesday, March 30, 2010 - 11:23 AM UTC
Ok, everybody repeat after me . . . . . . "HAPPY BIRTHDAY OH GREAT AND GLORIOUS LEADER !!"

That's enough down time, back to your workbenches now.

Bigrip74
_VISITCOMMUNITY
Texas, United States
Joined: February 22, 2008
KitMaker: 5,026 posts
AeroScale: 2,811 posts
Posted: Tuesday, March 30, 2010 - 12:11 PM UTC
"HAPPY BIRTHDAY OH GREAT AND GLORIOUS LEADER !!"

Bob
Keeperofsouls2099
_VISITCOMMUNITY
Florida, United States
Joined: January 14, 2009
KitMaker: 2,798 posts
AeroScale: 2,443 posts
Posted: Tuesday, March 30, 2010 - 01:30 PM UTC
Happy Birthday D


Build On,
Justin
SGTJKJ
#041
_VISITCOMMUNITY
Kobenhavn, Denmark
Joined: July 20, 2006
KitMaker: 10,069 posts
AeroScale: 3,788 posts
Posted: Wednesday, March 31, 2010 - 02:34 AM UTC

Quoted Text

Ok, everybody repeat after me . . . . . . "HAPPY BIRTHDAY OH GREAT AND GLORIOUS LEADER !!"


What? Is it Kim Yong Il's birthday today?

Seriously, happy birthday, Damian. Hope there are lots of styrene birthday presents.

I have now added some weathering to my FW 189. I gave it a total wash with dark brown followed by light brown. Both washes wiped off in the direction of flight after a few minutes. It gave a lightly dirty and faded look although it can be difficult to see in the picture of the top surfaces of the FW 189.

I drilled out the two bulges on each engine that turned out to be exhausts. Going through pictures in my references not much exhaust can be seen from the small exhausts, so I kept the exhaust staining limited.

Now I am calling this one finished. Great and well run campaign, Damian.


BlackWidow
_VISITCOMMUNITY
European Union
Joined: August 09, 2009
KitMaker: 1,732 posts
AeroScale: 1,336 posts
Posted: Wednesday, March 31, 2010 - 04:59 AM UTC
A few days not looking into this thread and there are tons of new finished kits in here!

@Allen
Another great looking Black Widow! This place seems to become a happy area for P-61. How many do we have now? 4 or 5?

@Jesper
That's a nice Focke-Wulf of yours. I can't remember when I last painted a kit with brush. And the 189 is rarely build, especially when its the Airfix model. Are there any other models of this in 1:72 on the market? As far as I know there's no 1:48 kit available. Oh, ehm, Mr. Tamiya, Mr. Hasegawa, Mr. Eduard would you please be so kind ....
Btw, I alo build the Fw 190 A-8 by Eduard at the moment. Maybe we could share pictures afterwards .....?

@Damian
HAPPY BELATED BIRTHDAY, OH GREAT AND GLORIOUS CAMPAIGN LEADER !!!!!!!!!!!
Hope there's a lot of plastic in your presents! I'll have a drink on you! Now, where's my beer?

Ciao
Torsten
magnusf
_VISITCOMMUNITY
Stockholm, Sweden
Joined: May 02, 2006
KitMaker: 1,953 posts
AeroScale: 1,902 posts
Posted: Wednesday, March 31, 2010 - 08:54 PM UTC
I'm also fascinated by people's fascination for the P-61! I like it a lot too but I don't think I have ever seen one built myself!

Regarding the FW-189: MPM/Special Hobby/Condor do one. I once had the Airfix kit but it was missing a part (the front glazing) so it never got built !

I'm following this thread even if I seldom comment and build even less for the time being! Lovely work all around.


Magnus
discordian
_VISITCOMMUNITY
New Jersey, United States
Joined: May 28, 2009
KitMaker: 239 posts
AeroScale: 95 posts
Posted: Thursday, April 01, 2010 - 02:08 AM UTC
Some more progress shots...
I'm actually a bit beyond this: since these photos I've attached the wings and engine nacelles and am about ready to begin the filling and sanding that everyone enjoys so much.

This photo is about everything as of a week ago:


This is the nose gear compartment. If my photography was better you could make our more of the photo etch details.


These are the PE intakesin the wings. I have to cut out the plastic and mount these. I have since glued the wing halves togehter and straightened out the more crooked baffles.


hopefully more to show after this long Easter weekend
AussieReg
Staff MemberAssociate Editor
AUTOMODELER
#007
_VISITCOMMUNITY
Victoria, Australia
Joined: June 09, 2009
KitMaker: 8,156 posts
AeroScale: 3,756 posts
Posted: Saturday, April 03, 2010 - 04:48 AM UTC

Quoted Text

Now I am calling this one finished. Great and well run campaign, Damian.


The washes finished your 189 off brilliantly Jesper, very nice touch. And thanks again for your support, I'm pleased with the way the Campaign is going so far especially since it is my first one as leader from the start.

Magnus, I'm glad you're still kepping an eye on us, when are you going to fire up that Fokker ??

Scott, your P-61 is coming along nicely. Are you going to fit the flaps extended down ? I ask because it looks as though you haven't trimmed the locating pins for a straight fit, and because in all of my references I haven't seen a Widow parked with flaps down yet. I have trimmed mine for raised position for my Pin-Ups build.

Cheers, all, D
discordian
_VISITCOMMUNITY
New Jersey, United States
Joined: May 28, 2009
KitMaker: 239 posts
AeroScale: 95 posts
Posted: Saturday, April 03, 2010 - 08:05 AM UTC
still undecided. It would be easier to put them up.
discordian
_VISITCOMMUNITY
New Jersey, United States
Joined: May 28, 2009
KitMaker: 239 posts
AeroScale: 95 posts
Posted: Saturday, April 03, 2010 - 09:09 AM UTC
Oh - and I was at MosquitoCon today (North New Jersey's annual IPMS event) and saw a twin Mustang kit for $5.00... I was somewhat tempted to grab it but I have enough in the stash.

Oh did I really just type those last 6 words?
AussieReg
Staff MemberAssociate Editor
AUTOMODELER
#007
_VISITCOMMUNITY
Victoria, Australia
Joined: June 09, 2009
KitMaker: 8,156 posts
AeroScale: 3,756 posts
Posted: Saturday, April 03, 2010 - 12:11 PM UTC

Quoted Text

... I was somewhat tempted to grab it but I have enough in the stash.


MEDIC !!
discordian
_VISITCOMMUNITY
New Jersey, United States
Joined: May 28, 2009
KitMaker: 239 posts
AeroScale: 95 posts
Posted: Sunday, April 04, 2010 - 04:03 AM UTC
Happy Easter for those of you that celebrate it!

Here's some progress I've made over the weekend.
Damian - I put the flaps up. It's easier and I've taken long enough in assembly....and as you said, there is no evidence of a landed plane with flaps down.
Just about ready for painting. A few odds and ends - antenna and such.


hkopper
_VISITCOMMUNITY
Florida, United States
Joined: March 01, 2008
KitMaker: 529 posts
AeroScale: 340 posts
Posted: Monday, April 05, 2010 - 03:51 AM UTC
And now an update on another P-61:

i managed to get the main assembly done ..all that is left are small components that I'll add last. I masked off the canopy and primed the aircraft.


That was followed by a coat of Tamiya semi gloss black:


and a coat of alcalad dark aluminum for the landing gear and wheel hubs:


I left the engines off for now as I decide on what to use to weigh them down (due to the confined space, I'll probably use BB's or tiny ball bearings. Thanks for watching,

Hermann.