OFFICIAL: Cold War Jets Campaign
California, United States
Joined: April 01, 2002
KitMaker: 4,287 posts
AeroScale: 1,164 posts
Posted: Friday, February 25, 2011 - 02:48 AM UTC
Quoted Text
As Mr. Matt will confirm, I have kind of a jones for IAF airplanes
Saying that Mike likes IAF stuff is like calling a bear furry.

Looking forward to seeing what you come up with. "Q"

"Don't fear the night, fear what hunts at night"
California, United States
Joined: April 01, 2002
KitMaker: 4,287 posts
AeroScale: 1,164 posts
Posted: Friday, February 25, 2011 - 10:28 AM UTC
All, Something has been brought to my attention and I need to address it here. I am not pointing fingers at anybody so please don't take this personally. In past campaigns I have run, I have had people join in at the very end of the campaign by posting only a single pic of their completed build saying something like "Its done" and then in the gallery or just a pic in the gallery. Now I'd like to think that everybody plays by the rules and such, but I know better. So, I am going to have to ask that Work In Progress pics be posted in the thread. If getting a campaign ribbon is the sole reason to be doing these builds, then something is wrong.

The builds are about sharing ideas, suggestions, modeling techniques etc. It really puts a bad taste in my mouth to sit here and write this, but it really isn't fair to those that actively contribute to the threads. I hope this clears things up. Thanks, "Q"
"Don't fear the night, fear what hunts at night"
litespeed
 News Reporter
England - North West, United Kingdom
Joined: October 15, 2009
KitMaker: 1,976 posts
AeroScale: 1,789 posts
Posted: Friday, February 25, 2011 - 12:34 PM UTC
Hi all
I thought I would join the party if that's Ok with you all?
I have always liked this image on the cover of this book on the BAC or SEPECAT Jaguar by Arthur Reed. A Cold War aircraft in a cold climate.

I will be building the Airfix 1/72 Jaguar and I will be finishing it as the aircraft on the cover in white and dk green. Started it a couple of days ago, built a scratch cockpit. I may use a resin bang seat although with some minor modifications, the kits seat is not a million miles away in accuracy. I will try to be quick with this one, I even glued the wings on before gluing the two halves of the fuselage. Still working on the cockpit, although I am not going to go mad with it.
All the best.
tim


Scotland, United Kingdom
Joined: February 07, 2008
KitMaker: 1,699 posts
AeroScale: 1,384 posts
Posted: Friday, February 25, 2011 - 02:11 PM UTC
Jets are not my usual thing but I do have the hasegawa 1/72 sabre in the stash.
So I took it out tonight. VERY basic. Dreaded putting it together.
Actually a couple of hours and the airframe is together and snap tight!
Not bad for a 70s moulding. Feels really well engineered. it all fits very positively.
Has to be gear up unless you want a pile of work cutting out the gear doors.
Boxed in the seat and I'll add some switches and levers before dropping the pilot in. Also added some card round the front intake to avoid the see-through.
Blue Impulse decals look attractive but don't know how successful I'll be.
I assume Japan is OK for Cold War.
Here it is just before I glued up the fuselage.
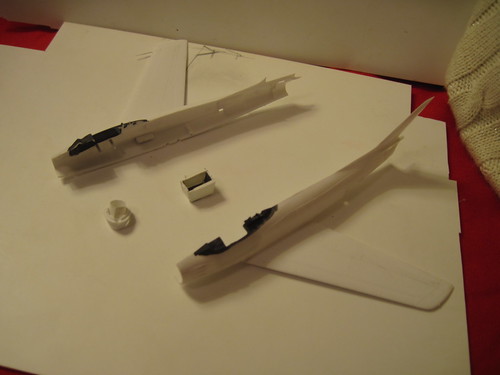
The kit is basic and looks a bit long and skinny and the panel lines might need killed off. Blue Impulse look super clean. But it was cheap and really quick to put together.
California, United States
Joined: April 01, 2002
KitMaker: 4,287 posts
AeroScale: 1,164 posts
Posted: Friday, February 25, 2011 - 05:43 PM UTC
Looking good gentlemen. Thanks for the WIP pics. "Q"

"Don't fear the night, fear what hunts at night"
MichaelSatin
 Campaigns Administrator
Colorado, United States
Joined: January 19, 2008
KitMaker: 3,909 posts
AeroScale: 2,904 posts
Posted: Saturday, February 26, 2011 - 04:49 AM UTC
The Start photo of my Mirage project:

I'm using the Eduard 1/48 Mirage IIIC Profipack kit to do an Israel IIICJ. I have the old AeroMaster Desert Mirages decal sheet (as well as kit decals) and just have to decide which specific airplane I'll be doing. Pretty sure it will be a bare metal '67 bird though.
Michael
On the bench:
Sorta depends on your definition of "on the bench"...
MichaelSatin
 Campaigns Administrator
Colorado, United States
Joined: January 19, 2008
KitMaker: 3,909 posts
AeroScale: 2,904 posts
Posted: Saturday, February 26, 2011 - 12:14 PM UTC
And some progress:

the Black Hole. Happily Eduard gives you two sets of those handles on the panel, as I lost one of each.

and the nose wheel well (they're one assembly)
I have also sanded back the insides of the leading edges of the wings. To be honest, this isn't my first Eduard Mirage and I remember the fit problems with the wings. The leading edge is all part of the top halves of the wings and the underside butts up against it. There's a big step there if you don't watch out, so this time hopefully I'm going to counteract that. We'll see!

Michael
On the bench:
Sorta depends on your definition of "on the bench"...
Scotland, United Kingdom
Joined: February 07, 2008
KitMaker: 1,699 posts
AeroScale: 1,384 posts
Posted: Saturday, February 26, 2011 - 12:39 PM UTC
Got a question for you jet guys. What to do about the jet pipe at the back of my sabre. Looks truely awful.
What can I use to scratch one? I've tried heating styrene stock around a dowel to make a tube but can't get it to stick.
Biro is too big. Plastic straws I have in the house are too small.
I guess a selection of plastic straws might have one close enough.
It is just a case finding one or is there some trick I'm missing in making one?
Thanks in advance.
BTW V little filler needed on the sabre. Tempted to do a NMF, but you don't see the Blue Impulse done in 1/72 often. I'll see how I get on with the decals.
Scotland, United Kingdom
Joined: February 07, 2008
KitMaker: 1,699 posts
AeroScale: 1,384 posts
Posted: Saturday, February 26, 2011 - 01:45 PM UTC
Got it. A 1/72 ME109 fuel tank has the right outer diameter. Chop off the ends and bevel out one end to make it look scale thickness. Perfect.
Gotta love the spares box.
Scotland, United Kingdom
Joined: February 07, 2008
KitMaker: 1,699 posts
AeroScale: 1,384 posts
Posted: Saturday, February 26, 2011 - 09:50 PM UTC
sanded off the raised lines, Coat of primer.
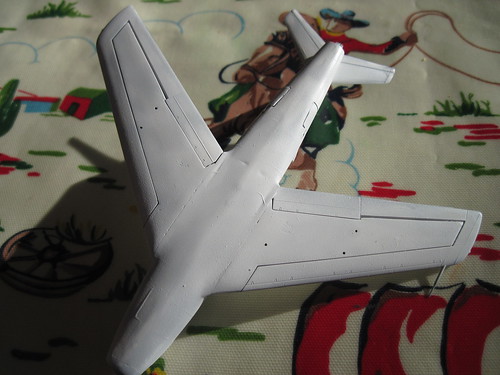
Couple of wee sink marks and slight work on wing roots todo.
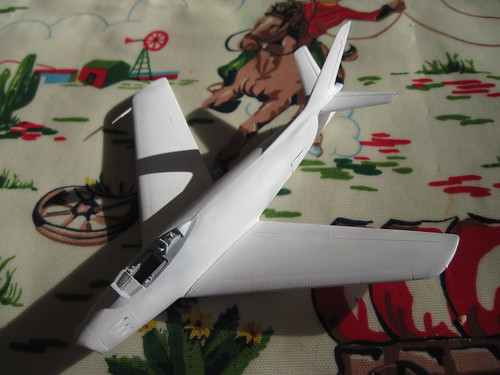
Same on the top side.
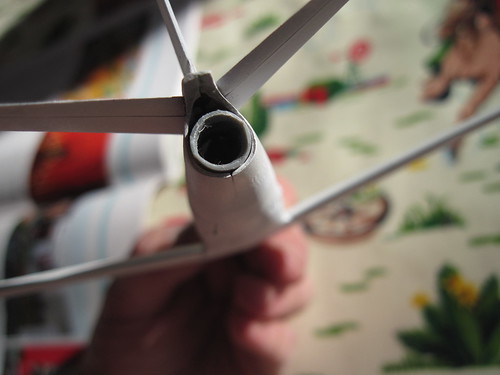
New jet pipe dry fitted. Again more clean up todo on the seams and tidy up the bevelling.
Ontario, Canada
Joined: November 14, 2009
KitMaker: 270 posts
AeroScale: 264 posts
Posted: Sunday, February 27, 2011 - 02:04 AM UTC
That Sabre's coming along nicely.
Note that you can often use drinking straws as jet pipes for many early 1/72 jets.
South Australia, Australia
Joined: August 14, 2007
KitMaker: 5,926 posts
AeroScale: 2,201 posts
Posted: Tuesday, March 01, 2011 - 06:57 PM UTC
Well, after my misfortune of losing one of the main parts of the kit I have finished the red and silver Scorpion as used by the USAAF in the 1950s and 1960's.
Decals were OK, but they did not like nestling down even with copious amounts of Solvaset system softeners. Oh well.
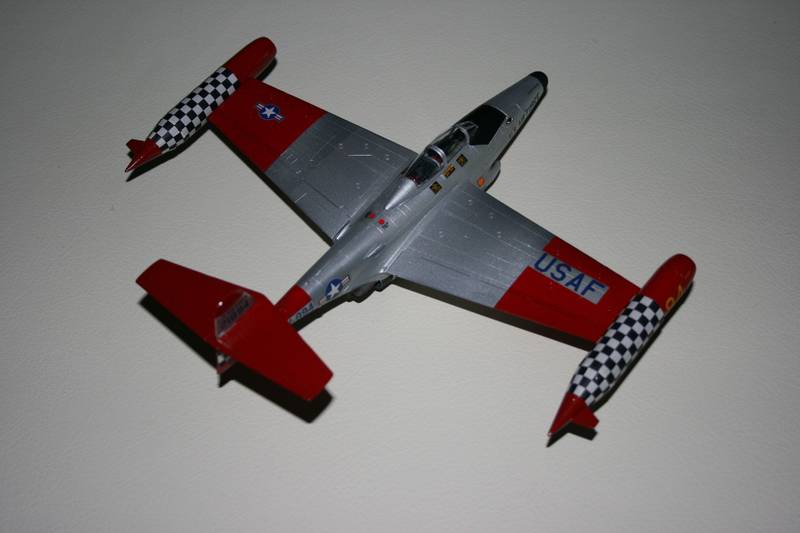
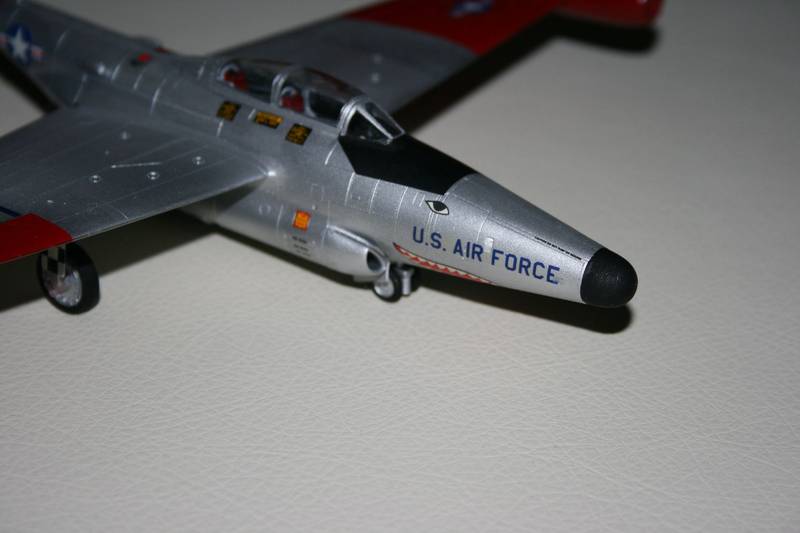
Oh, and its Revell's 1/72 scale version. The date on the decals was 1991. It has engraved lines and the ft is good to great. Very little filler was used and then it was only the Mr Surfacer 500 variety.
Leep on buildng guys and gals.

You may be right, I may be crazy.

#041
Kobenhavn, Denmark
Joined: July 20, 2006
KitMaker: 10,069 posts
AeroScale: 3,788 posts
Posted: Tuesday, March 01, 2011 - 10:16 PM UTC
Nice build, Warren. Camouflage was not really the priority back then.

Love the checkerboard and the shark teeth.
Nice progress, JP. Clever solution for the exhaust pipe.
Looking forward to see more

Campaign'oholic - 252+ campaigns completed
California, United States
Joined: April 01, 2002
KitMaker: 4,287 posts
AeroScale: 1,164 posts
Posted: Wednesday, March 02, 2011 - 12:32 AM UTC
Nice recovery JP. The Scorpion came out great Warren. Makes me want to drag a few of them off of my shelf and knock one out.

Make sure you post a couple of pics in the gallery too. Thanks, and as Warren said, keep at it guys and gals. "Q"

"Don't fear the night, fear what hunts at night"
South Australia, Australia
Joined: August 14, 2007
KitMaker: 5,926 posts
AeroScale: 2,201 posts
Posted: Wednesday, March 02, 2011 - 07:01 AM UTC
Thanks guys. If I were to build another one I would paint the checkerboards as the decals, while opaque and in register, were difficult to get to settle down, and the white is more pale cream than real white.
But unless ne comes out in 1/32 (please!!) this is my one and only F-89..

You may be right, I may be crazy.
Scotland, United Kingdom
Joined: February 07, 2008
KitMaker: 1,699 posts
AeroScale: 1,384 posts
Posted: Wednesday, March 02, 2011 - 09:42 AM UTC
1/72 Warren? You must feel like a Giant handling such tiny things.

Very neat with that unforgiving scheme.
[sarcasm]Now my abSOLute favourity part of scale model building. Wait for MicroSol to work it's magic. I never ever feel like it is going to wrong.....[/sarcasm]
Feel my trepidation.
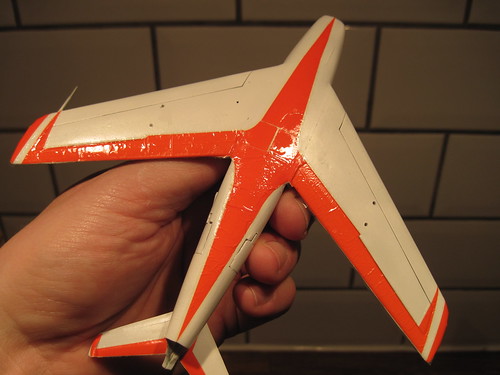
Fingers crossed. Nice colour though.
California, United States
Joined: April 01, 2002
KitMaker: 4,287 posts
AeroScale: 1,164 posts
Posted: Wednesday, March 02, 2011 - 03:44 PM UTC
Insert Obi-wan voice over here..."Patience young Jedi JP"

Looking good JP. I like the color. "Q"
"Don't fear the night, fear what hunts at night"
Tennessee, United States
Joined: September 20, 2005
KitMaker: 1,747 posts
AeroScale: 1,673 posts
Posted: Wednesday, March 02, 2011 - 04:16 PM UTC
Warren, beautiful bird there! Russell

To Thine Own Self Be True
Siderius
A.K.A., RTA
United States
Joined: February 19, 2010
KitMaker: 23 posts
AeroScale: 19 posts
Posted: Wednesday, March 02, 2011 - 06:08 PM UTC
Hi all,
Just found this campaign, and was going to jump in with an echelon Lightning that I got from Red4, but will save that for the vac campaign, so I will jump in with a 1/32 Tamiya Phantom converted into a FG.1 or FGR.2, depending on how successful I am at making my own decals... pics to follow- BTW, I have started this already, but after the start date of the campaign, hope that's ok-
Chesley

South Australia, Australia
Joined: August 14, 2007
KitMaker: 5,926 posts
AeroScale: 2,201 posts
Posted: Wednesday, March 02, 2011 - 07:55 PM UTC
Thanks Russell and JP.
JP.. I am waiting to hear how it turned out with the Micro-sol..
Cheers
You may be right, I may be crazy.
Scotland, United Kingdom
Joined: February 07, 2008
KitMaker: 1,699 posts
AeroScale: 1,384 posts
Posted: Thursday, March 03, 2011 - 12:09 AM UTC
Patience is a virtue. Don't effing touch it when it is wrinkled.
Turned out fine.
30yr old hasegawa decals stuck together with damp, went on snug and neat with a touch of Microsol.
Just found out the underwing should be silver though. Fuselage is still white though.
A few coats of future should let me mask over the decals with post-it notes
but I'll get everything else done before I respray the wings. At least I'll have a pic of a nice looking A/C if I screw it up

.
Pics later.
California, United States
Joined: April 01, 2002
KitMaker: 4,287 posts
AeroScale: 1,164 posts
Posted: Thursday, March 03, 2011 - 02:40 AM UTC
Quoted Text
Hi all,
Just found this campaign, and was going to jump in with an echelon Lightning that I got from Red4, but will save that for the vac campaign, so I will jump in with a 1/32 Tamiya Phantom converted into a FG.1 or FGR.2, depending on how successful I am at making my own decals... pics to follow- BTW, I have started this already, but after the start date of the campaign, hope that's ok- Chesley 
Welcome aboard Chesley. Your Phantom should be fine. The rest of the group will like your work. This guy does some amazing vacuform work all. He recently scratch built a 1/32 Vigilante. Awesome I tell you...

"Q"
"Don't fear the night, fear what hunts at night"
United States
Joined: February 19, 2010
KitMaker: 23 posts
AeroScale: 19 posts
Posted: Thursday, March 03, 2011 - 08:09 AM UTC

#372
United Kingdom
Joined: March 10, 2010
KitMaker: 2,568 posts
AeroScale: 1,619 posts
Posted: Thursday, March 03, 2011 - 09:45 AM UTC
Now this I'm looking forward to seeing! I've seen Tamiya's F-4J done in RAF 74sqn markings, but a complete conversion to spey power? Never have I seen that. You sir have more skill and bravery than me, I (nor my wallet) just couldn't bring myself to start cutting up one of those kits.
On the bench: 1/72 Mosquito, Lightning F.6, DH.2,
AMT Vulcan Shuttle Surak.
Cyber-Hobby 1:35 Sherman Firefly IC - still stalled.
United States
Joined: February 19, 2010
KitMaker: 23 posts
AeroScale: 19 posts
Posted: Thursday, March 03, 2011 - 09:58 AM UTC
Thanks, Stephen, I've always liked the 'brute" look of the British phantoms, so it was a natural for me to do this model. The conversion is pretty simple, as all the engineering has already been done by the original modeler- this more like a "paint by numbers" build than anything else. Also, forgot to post the pic of the back end- this was about 1/2 done when photographed, now it is a bit further along....

here is a link to the original article, done by the man who did the masters for the Wild hare kit... HTH!
http://www.largescaleplanes.com/articles/JetAge/FrankMitchell/fgr4/fgr4.php Looking forward to seeing what you come up with. "Q"


