Air Campaigns
Want to start or join a group build? This is where to start.
OFFICIAL: Hangar Queen 2 Campaign
Apistofreak
_VISITCOMMUNITY
Tasmania, Australia
Joined: February 25, 2012
KitMaker: 34 posts
AeroScale: 14 posts
Posted: Sunday, June 24, 2012 - 11:43 PM UTC
Well nice to be back at the bench again (to many computer games not enough time ). Gotta catch up on all the missed posts and realise what I've missed.

Rob, nice work on the storch, with equally interesting markings.

Frederick. Nice Bearcat mate. I Love the shiny satin finish with great panel lines. Nice and clear not overdone.

Mark nice skyraider, does seem to be missing the toilet bomb but otherwise rearing to go.

Jesse nice work on the putty monster, looking like a real plane now.

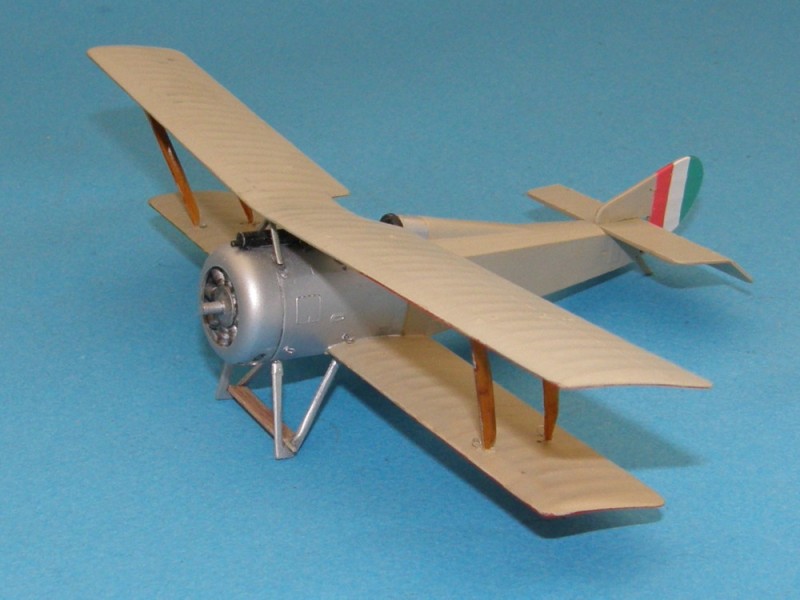
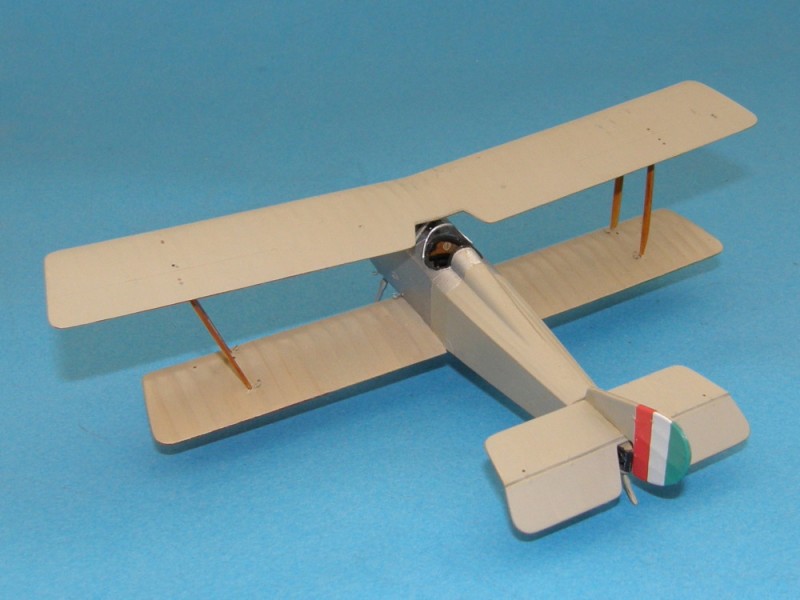
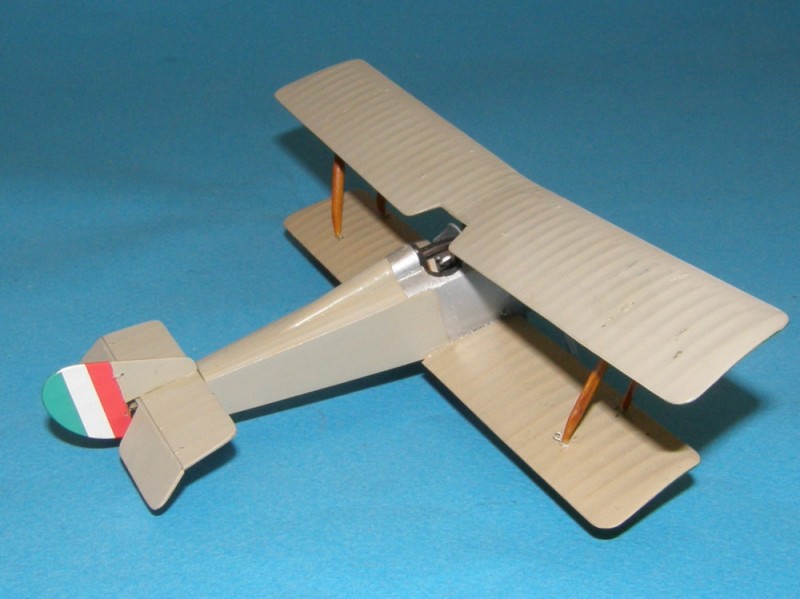
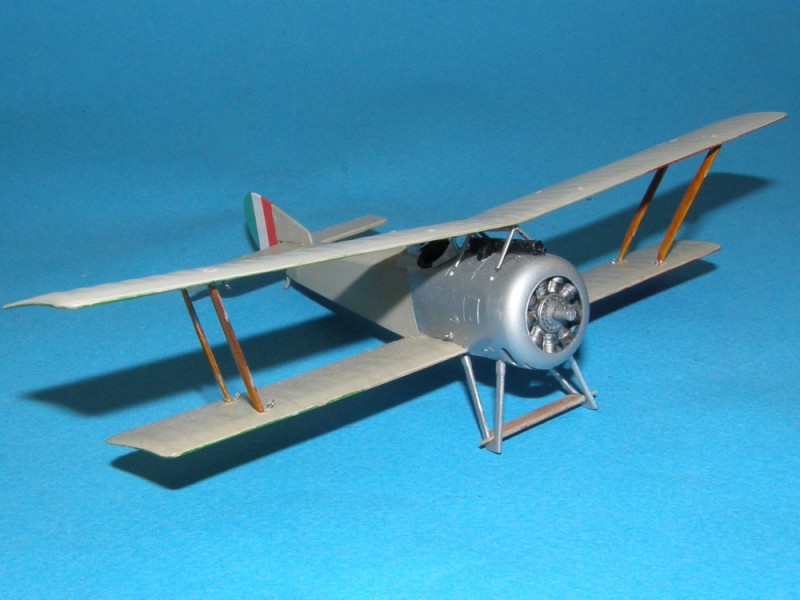
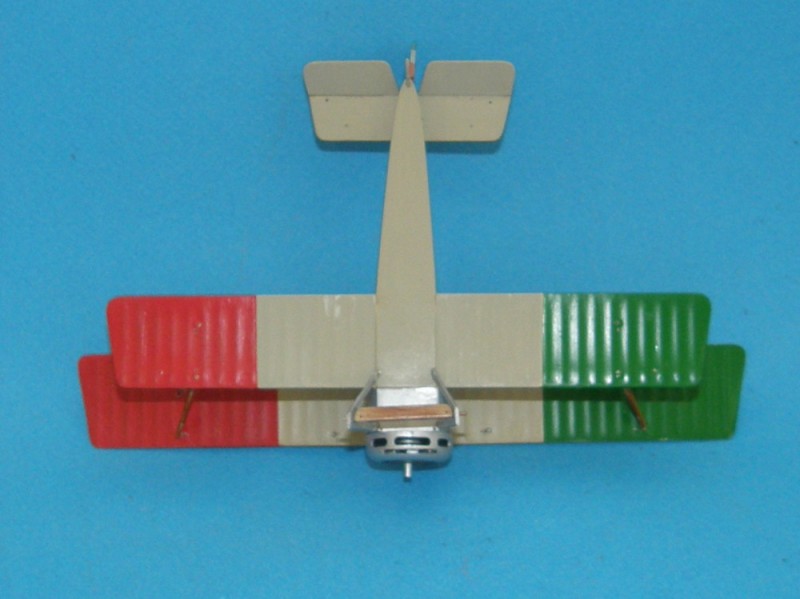
As for myself not much more to show than where I was. I've had a couple of aborted attempts at trying to tint the canopy gold but had to strip it off both times . Otherwise added the tail stuff (wings and engine), nose cone and other bits and pieces ready to prime.


Undercarriage doors etc are just blutacked into position for painting.
woltersk
_VISITCOMMUNITY
Utah, United States
Joined: May 27, 2003
KitMaker: 1,026 posts
AeroScale: 215 posts
Posted: Monday, June 25, 2012 - 04:42 AM UTC
Ash--your Viper is coming along nicely. They sure are mean looking with all the doo-dads added on.

Here is another first time technique for me--sheet styrene as gap filler. I've always used putty before and never thought about this until seeing it here on Aeroscale. It us so simple, easy, and makes so much sense.

Rough patch:


Rough sanding:


Rough fit:


Keith
md72
#439
_VISITCOMMUNITY
Washington, United States
Joined: November 05, 2005
KitMaker: 4,950 posts
AeroScale: 3,192 posts
Posted: Monday, June 25, 2012 - 06:38 AM UTC
Somewhere here in these very pages, I found a suggestion for using streched sprue as a gap filler on small seams. Worked great. Might try "Reading the Seams" over in the intro pages.
Jessie_C
_VISITCOMMUNITY
British Columbia, Canada
Joined: September 03, 2009
KitMaker: 6,965 posts
AeroScale: 6,247 posts
Posted: Tuesday, June 26, 2012 - 01:40 PM UTC
Законченный!


There are lots of nagging little touch-ups still required, but for now I can call this one done.
windysean
_VISITCOMMUNITY
Wisconsin, United States
Joined: September 11, 2009
KitMaker: 1,917 posts
AeroScale: 563 posts
Posted: Tuesday, June 26, 2012 - 02:11 PM UTC
That's a beaut! I have no idea what it all says, but it comes together awesomely.
thanks for posting it!
-Sean.
woltersk
_VISITCOMMUNITY
Utah, United States
Joined: May 27, 2003
KitMaker: 1,026 posts
AeroScale: 215 posts
Posted: Tuesday, June 26, 2012 - 03:18 PM UTC
Very nice Jesse! Paint, decals, everything. But you need a bigger phototable and poster board. Just how big is that monster?

Keith
Jessie_C
_VISITCOMMUNITY
British Columbia, Canada
Joined: September 03, 2009
KitMaker: 6,965 posts
AeroScale: 6,247 posts
Posted: Tuesday, June 26, 2012 - 03:45 PM UTC
Hi Sean, the website I used gave me the word for "Finished!", so I trusted it
Keith, you know how big a Dakota is, so here's my very dusty and beat up Dakota parked nose-to-nose:


Yes, I either need a larger photo stage, or I need to stop building monster kits
woltersk
_VISITCOMMUNITY
Utah, United States
Joined: May 27, 2003
KitMaker: 1,026 posts
AeroScale: 215 posts
Posted: Tuesday, June 26, 2012 - 04:07 PM UTC
I'm sure you stated it a few pages ago, but what scale is it? No bigger than 1/72 I'd imagine and hope!

Speaking of monster kits--primered the major sub-components of the 1/32 F-16:


So what's next on your workbench Jesse?

Keith
Jessie_C
_VISITCOMMUNITY
British Columbia, Canada
Joined: September 03, 2009
KitMaker: 6,965 posts
AeroScale: 6,247 posts
Posted: Tuesday, June 26, 2012 - 04:44 PM UTC
Actually I can't remember if I had or not. It's the 1/72 Amodel Amonster kit. Fibreglass wing and fuselage, injection detail bits.

What's next on the workbench? I have a Martin Kitten in the Knights of the Sky campaign, an Albatros and SPAD in the Osprey Duel an A-300 in the British Aerospace campaign and a T-28 in the Support Aircraft campaign.
Whew, I'm a busy girl these days.
tinbanger
_VISITCOMMUNITY
Ontario, Canada
Joined: February 04, 2008
KitMaker: 2,507 posts
AeroScale: 1,814 posts
Posted: Tuesday, June 26, 2012 - 10:27 PM UTC
Jessica
Great work!
TaiidanTomcat
_VISITCOMMUNITY
Alabama, United States
Joined: January 04, 2009
KitMaker: 45 posts
AeroScale: 31 posts
Posted: Thursday, June 28, 2012 - 10:31 AM UTC

Quoted Text

Jessica
Great work!


Indeed!! Wow Jess!!


That DH 88 is a peach as well!!

Keith nice work on your F-16, hope to post some pictures of mine here soon.

Ash, I am also curious about the scale of your model its looking good!
TaiidanTomcat
_VISITCOMMUNITY
Alabama, United States
Joined: January 04, 2009
KitMaker: 45 posts
AeroScale: 31 posts
Posted: Friday, June 29, 2012 - 03:13 AM UTC


1/48 scale panel from a Revellogram F-14. You can see I got some Epoxy everywhere! No worries It will be painted black soon. I had to fight like hell to get that part to cooperate!


Underside showing the Ventral fin. Very important that it was strong because I am constantly forgetting its there and setting the model on it :o No breaks...yet


The "Mig-16" as of right now. Primed, scheme (Finally) decided on!! I just need to think of the smartest way to make it work >:D
JClapp
#259
_VISITCOMMUNITY
Massachusetts, United States
Joined: October 23, 2011
KitMaker: 2,265 posts
AeroScale: 1,715 posts
Posted: Wednesday, July 04, 2012 - 12:26 PM UTC
So I was recently reminded of this C-121 I made a while back, but never finished.


I set it aside because the silver paint showed up alot of glitches in the seams, but Im over that now. How far along can a model be and still be considered as a Hangar Queen? this one just needs decalling, undercarriage and props to be complete,
Is that enough to qualify for this campaign?

I do have several other candidates of course..
Jessie_C
_VISITCOMMUNITY
British Columbia, Canada
Joined: September 03, 2009
KitMaker: 6,965 posts
AeroScale: 6,247 posts
Posted: Wednesday, July 04, 2012 - 12:46 PM UTC
The rule that applies is The model must be a build started, but not finished and must be site specific.

We've had entrants that just needed a couple more decals to be finished so yours is completely welcome. The idea here is to finish. Who cares how much finishing that needs to be, just get it done
JClapp
#259
_VISITCOMMUNITY
Massachusetts, United States
Joined: October 23, 2011
KitMaker: 2,265 posts
AeroScale: 1,715 posts
Posted: Wednesday, July 04, 2012 - 01:24 PM UTC
well ok then. Ive just gone and enlisted.
Minicraft kits do come with lovely decals.


windysean
_VISITCOMMUNITY
Wisconsin, United States
Joined: September 11, 2009
KitMaker: 1,917 posts
AeroScale: 563 posts
Posted: Wednesday, July 04, 2012 - 02:29 PM UTC
Benjamin, I can't see the epoxy in the instrument panel-- looks great to me! I see you have some work to do with seams on the bottom though!
Jess, perfectly said.
Jonathan, she's perfectly welcome here. Glad to have you aboard. Can't wait to see the decals you refer to.
-Sean H.
Removed by original poster on 07/05/12 - 05:30:14 (GMT).
JClapp
#259
_VISITCOMMUNITY
Massachusetts, United States
Joined: October 23, 2011
KitMaker: 2,265 posts
AeroScale: 1,715 posts
Posted: Wednesday, July 04, 2012 - 06:06 PM UTC
Got a good bit of it done. The black boots around all those tail surfaces took some time to settle in.


JClapp
#259
_VISITCOMMUNITY
Massachusetts, United States
Joined: October 23, 2011
KitMaker: 2,265 posts
AeroScale: 1,715 posts
Posted: Wednesday, July 04, 2012 - 07:09 PM UTC
not really sure of the function of these black lines (do not step?) but they sure dress up the model.
windysean
_VISITCOMMUNITY
Wisconsin, United States
Joined: September 11, 2009
KitMaker: 1,917 posts
AeroScale: 563 posts
Posted: Friday, July 06, 2012 - 06:36 AM UTC

Quoted Text

not really sure of the function of these black lines (do not step?) but they sure dress up the model.


Indeed, they do! Nice work.
-Sean.
woltersk
_VISITCOMMUNITY
Utah, United States
Joined: May 27, 2003
KitMaker: 1,026 posts
AeroScale: 215 posts
Posted: Wednesday, July 18, 2012 - 03:03 AM UTC
"Spare the Rod, Spoil the Dihedral"

I am using metal rod, (which I think came from an old, stainless steel clothes hanger) to help hold the major components together.  This is in hopes that it won't need gluing, making the large kit more manageable when transporting.  The rods add considerable support, keeping a problematic starboard wing from drooping.  So far, so good.  The speed-brakes and ventral fins will be glued on of course, but the wings, vertical stabilizer and horizontal stabs should work just sliding on.

The resultant seams may be out-of-scale and toy-like, but since the finished model will be sitting in a display case in my basement and unseen by anyone but me, I can live with that.


Keith
woltersk
_VISITCOMMUNITY
Utah, United States
Joined: May 27, 2003
KitMaker: 1,026 posts
AeroScale: 215 posts
Posted: Wednesday, July 18, 2012 - 06:11 AM UTC
I had an issue with the pics, then the post's editing option went away. So here they are:


JClapp
#259
_VISITCOMMUNITY
Massachusetts, United States
Joined: October 23, 2011
KitMaker: 2,265 posts
AeroScale: 1,715 posts
Posted: Wednesday, July 18, 2012 - 06:32 AM UTC
that's good thinking, Kieth.
Stout, straight steel rods, and precisely aligned drillings, requires more work and care than actually finishing the model solid!

I too would like to be able to 'knock-down' certain models for storage and transport, but yeah, it means leaving un-podged joints which certain observers will cluck at.

The vertical empenage and removable/insert-able landing gears seem to me topics in need of investigation. 'Flat' may be more useful than narrow, in terms of packing up.

also, agree 'edit' button goes away much too quickly, mods take note.

windysean
_VISITCOMMUNITY
Wisconsin, United States
Joined: September 11, 2009
KitMaker: 1,917 posts
AeroScale: 563 posts
Posted: Wednesday, July 18, 2012 - 07:24 AM UTC

Quoted Text

that's good thinking, Kieth.
Stout, straight steel rods, and precisely aligned drillings, requires more work and care than actually finishing the model solid!
...
also, agree 'edit' button goes away much too quickly, mods take note.


Yep, nicely done, Keith.
As for the "edit" and "delete" buttons, I think it gives you 10 minutes to rethink your post. (I do it often. )
Cheers, all!
-Sean.
Jessie_C
_VISITCOMMUNITY
British Columbia, Canada
Joined: September 03, 2009
KitMaker: 6,965 posts
AeroScale: 6,247 posts
Posted: Wednesday, July 18, 2012 - 09:39 AM UTC
The next in my seemingly endless series of hangar queens is this Eduard Hanriot. I got it to the stage of putting on the top wing fairly quickly, then suffered a strut explosion while I was trying to get everything in place. I put the model away and waited for the struts to show up again. Once they did, I left it for a while. Last night I returned to it, and in a fit of building got the struts, top wing, elevator, rudder, tail skid windscreen and landing gear struts on. Now all that remains are the outer parts of the W struts, rigging, wheels and prop. This one shouldn't take long.