OFFICIAL: Hangar Queen 2 Campaign
Indiana, United States
Joined: January 13, 2009
KitMaker: 419 posts
AeroScale: 378 posts
Posted: Saturday, March 24, 2012 - 04:46 AM UTC
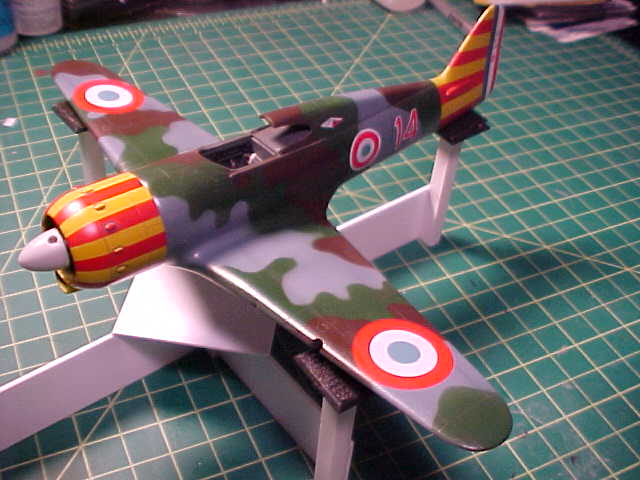
Well after a long lay off for CX season I'm back to spending a bit of time at the work bench. Sorta missed out on making any headway with my unfinished kits during the first "Hanger Queen" campaign, so I'm looking for a little redemption this time around. Two models are on my "to do list" over the next few weeks. First is a Classic Airframes MB155 that I started 2 years ago for a French Aircraft campaign. I then resubmitted it for the first hanger queen campaign. (let's hope the third time is a charm). The second one is a Academy F8F Bearcat that I started this winter to get back into the modelling groove and I never closed the deal on finishing.
I want to tackle an ambitious build this Summer but I really need to finish up some of this other stuff before I crack the box on yet another project. Anyhoo... (without further addoo ...)
Cheers,
Fred
Current Builds:
Hawk 75/Saetta: Club Med Campaign
Me410: FROG Campaign
Mystery Build (insert here)
Alabama, United States
Joined: January 04, 2009
KitMaker: 45 posts
AeroScale: 31 posts
Posted: Saturday, March 24, 2012 - 06:09 AM UTC
The third will be the charm, you look so close!!
Armor is neatly divided into two catergories: German, and then the other 10 percent.
Wisconsin, United States
Joined: September 11, 2009
KitMaker: 1,917 posts
AeroScale: 563 posts
Posted: Saturday, March 24, 2012 - 04:02 PM UTC
Welcome back, cinzano! Good entrants. Glad to see them.
thanks again,
Sean.

Current: model railroad layout
Stalled a while ago:
. 1950's Chrome, WW II Twins
Last completed: Police Car
Indiana, United States
Joined: January 13, 2009
KitMaker: 419 posts
AeroScale: 378 posts
Posted: Sunday, March 25, 2012 - 02:29 PM UTC
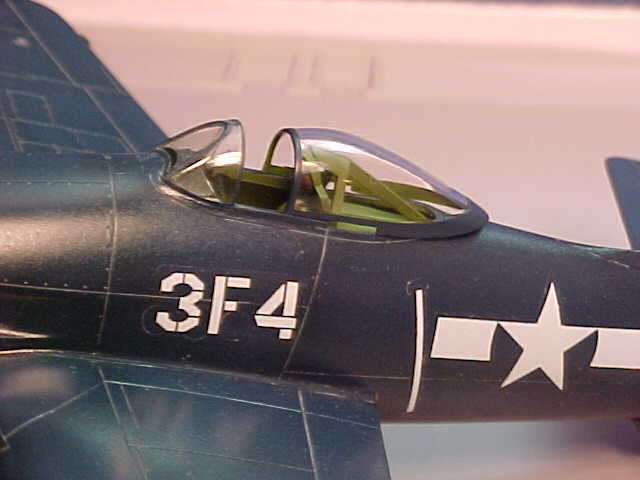
Started working with the decals on the bearcat today. Here's something for those who wonder of aftermarket decals are worth the expense. To that I say "yes". I've been struggling with the stock Academy sheet. The transfers are heavy and don't respond to setting solutions. I had to resort to a replacement decal from an AeroMaster sheet and the difference couldn't be more stark. The AeroMaster transfers responded beautifully to Solvaset with no fussiness.
Cheers,
Fred
Current Builds:
Hawk 75/Saetta: Club Med Campaign
Me410: FROG Campaign
Mystery Build (insert here)
Victoria, Australia
Joined: September 19, 2003
KitMaker: 708 posts
AeroScale: 674 posts
Posted: Monday, March 26, 2012 - 01:39 AM UTC
Nice builds and look forward to seeing both of them finished.
I built the Bearcat as a consignment and know what you are up against with the Academy decal sheet, as my consignment had the am decals supplied.
President:- Southern Model Club.
Those who never learn from history will always repeat it.
"When you go home tell them of us and say.
For your tomorrow we gave our today."
Indiana, United States
Joined: January 13, 2009
KitMaker: 419 posts
AeroScale: 378 posts
Posted: Tuesday, March 27, 2012 - 12:52 AM UTC
Thanks for the encouragement. My reward to myself if I can get some of these guys finished is a Timaya he-219 with CMK and Aires trimmings. To that end I made some progress with decals last night. Need to clear coat again tonight then I can do some final weathering and begin finishing the sub assemblies.
Cheers,
Fred

Current Builds:
Hawk 75/Saetta: Club Med Campaign
Me410: FROG Campaign
Mystery Build (insert here)
Ontario, Canada
Joined: March 25, 2010
KitMaker: 514 posts
AeroScale: 244 posts
Posted: Tuesday, March 27, 2012 - 02:07 AM UTC
I have decided upon a paint scheme for the Do 24 that is kicking about. While looking through my stash of pics I came across a red cross painted a/c. All cream with a rlm 65 hull and the red cross placed in the appropriate places. Just have to weasel out the turret canopies and blank them off.
Indiana, United States
Joined: January 13, 2009
KitMaker: 419 posts
AeroScale: 378 posts
Posted: Thursday, March 29, 2012 - 01:18 PM UTC
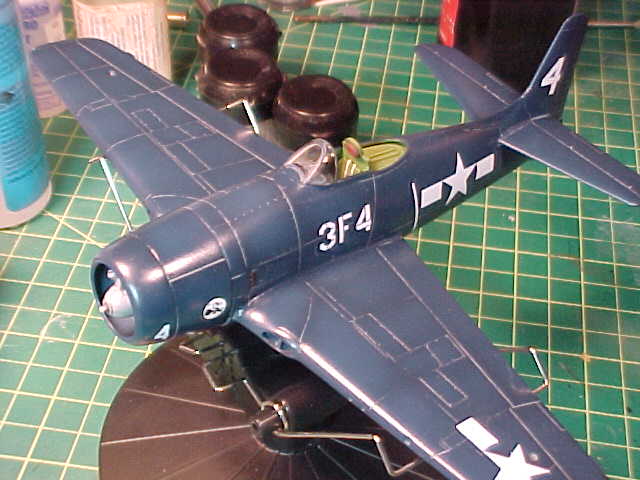
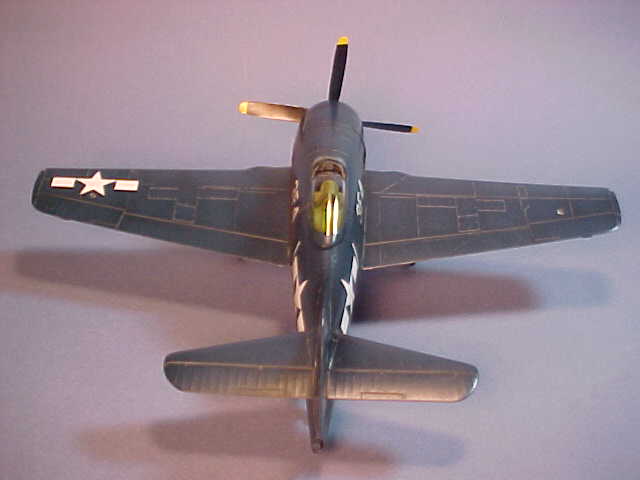
Wohoo! slowly making some progress on the bearcat. Weathering is nearly done. Now on to the fiddly bits.
For those interested in building a quarter scale bearcat, the Academy/Hobbycraft kit has its qualities: Its affordable, the engraving and plastic quality is nice, and there are enough extra bits to build either an F1 or F2 variant....
...however... if you want to make a convincing bird there are a couple of things to wrestle with. First and foremost is the need to address the terrible cowling!!!! Its amazing how far off Hobbycraft was when designing the radius for the cowling shape. There are aftermarket resin 'corrected' cowls (which I bought), however, in the end I just dug up the cowl from an old Hawk/Testors Bearcat instead. The lines of it are very good. Unfortunately the Testors Bearcat is an F2 with an enlarged oil cooler vent for the improved R2800 powerplant. As I'm building an F1, it doesn't have that feature (whic I only discovered _after_ painting it).
Meh, I'm gonna go with it anyway and hope it doesn't detract from the overall look.

Cheers,
Fred
Current Builds:
Hawk 75/Saetta: Club Med Campaign
Me410: FROG Campaign
Mystery Build (insert here)
Indiana, United States
Joined: January 13, 2009
KitMaker: 419 posts
AeroScale: 378 posts
Posted: Thursday, March 29, 2012 - 03:44 PM UTC
Current Builds:
Hawk 75/Saetta: Club Med Campaign
Me410: FROG Campaign
Mystery Build (insert here)
Indiana, United States
Joined: January 13, 2009
KitMaker: 419 posts
AeroScale: 378 posts
Posted: Sunday, April 01, 2012 - 05:31 AM UTC
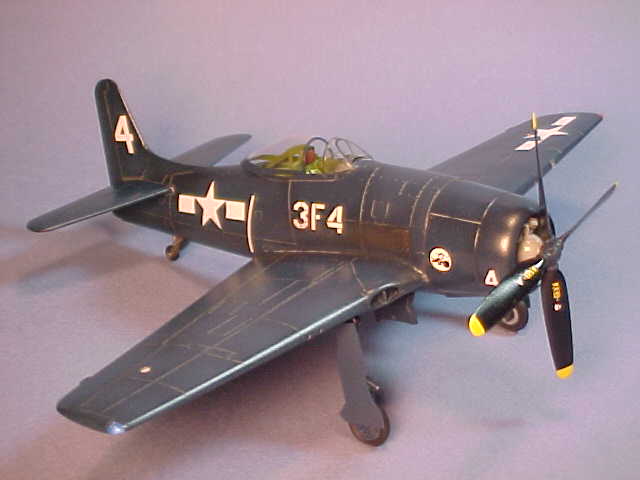
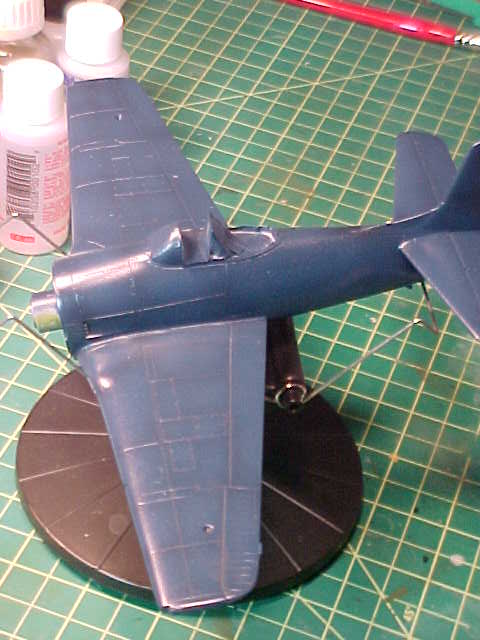
I'm a little closer. Finish prop, landing gear, final weather highlights and that is all that stands between me and getting this kite in the cabinet (and on to the next model)
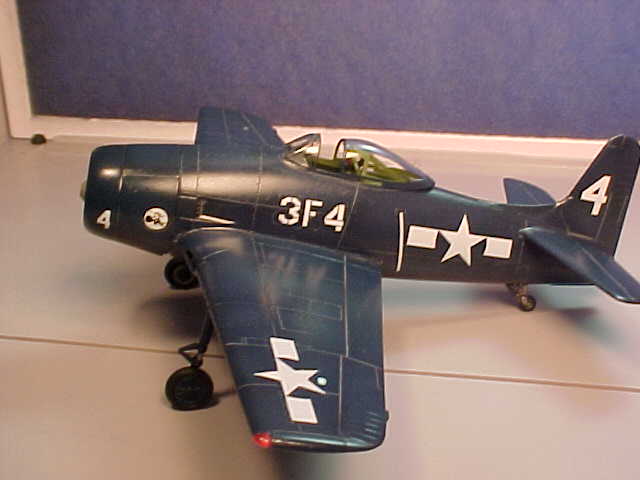
Wasn't enthused about the poor fit of the nav. lights. For future reference: next time I will mount the nav lights during the build process (that way I can sand them to conform better to the wing contour)

Cheers,
Fred
Current Builds:
Hawk 75/Saetta: Club Med Campaign
Me410: FROG Campaign
Mystery Build (insert here)
Wisconsin, United States
Joined: September 11, 2009
KitMaker: 1,917 posts
AeroScale: 563 posts
Posted: Sunday, April 01, 2012 - 11:04 AM UTC
What?!? An F1 with an enlarged oil cooler? Are you kidding me? Do you have no respect for the Hangar Queen 2 modeling community and Aeroscale overall?
Er, actually, what I mean is, Well done, Fred! Thanks for the update!

-Sean.
Current: model railroad layout
Stalled a while ago:
. 1950's Chrome, WW II Twins
Last completed: Police Car
Indiana, United States
Joined: January 13, 2009
KitMaker: 419 posts
AeroScale: 378 posts
Posted: Tuesday, April 03, 2012 - 12:36 AM UTC
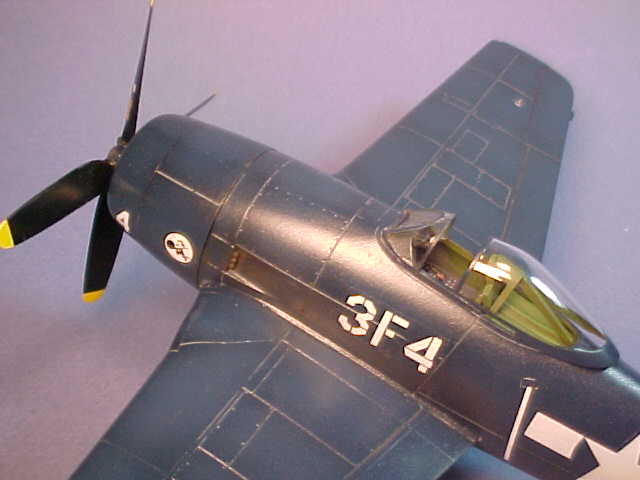
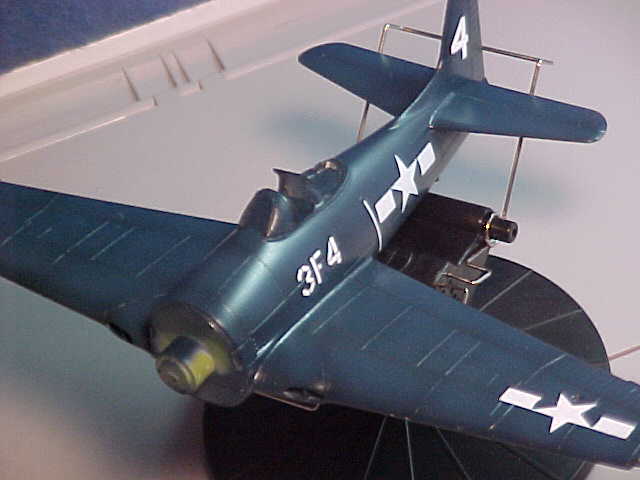
Unfinished bird number one is now complete.
(I have my nitpicks about it but I'm not displeased with the final result)
I'll try to post final pics shortly.
Cheers,
Fred
Current Builds:
Hawk 75/Saetta: Club Med Campaign
Me410: FROG Campaign
Mystery Build (insert here)
Alabama, United States
Joined: January 04, 2009
KitMaker: 45 posts
AeroScale: 31 posts
Posted: Wednesday, April 04, 2012 - 04:33 AM UTC
Quoted Text
(I have my nitpicks about it but I'm not displeased with the final result)
I know that Feeling!! Nice work though!! I think it looks top notch
Armor is neatly divided into two catergories: German, and then the other 10 percent.
Utah, United States
Joined: May 27, 2003
KitMaker: 1,026 posts
AeroScale: 215 posts
Posted: Wednesday, April 04, 2012 - 11:11 AM UTC
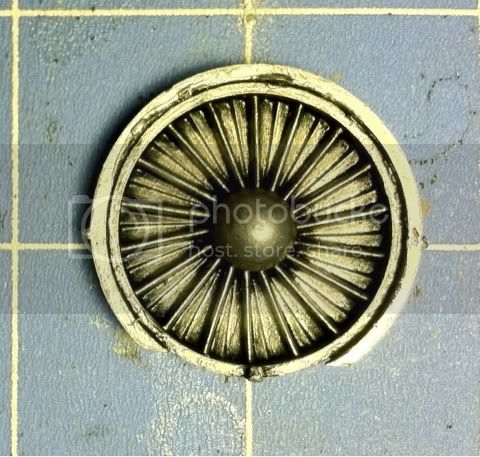
A small update, both literally and figuratively. I was not happy with the kit throttle (top of photo) so I scratch built one (bottom of photo) Not a good pic, but you can get the idea of a throttle quadrant: grip on top attached to the curved arm with half the friction wheel exposed at the bottom.

With this done it is ready for the fuselage halves to be glued together.
Keith
Build 'em better than the box art!
Indiana, United States
Joined: January 13, 2009
KitMaker: 419 posts
AeroScale: 378 posts
Posted: Thursday, April 05, 2012 - 01:03 PM UTC
Current Builds:
Hawk 75/Saetta: Club Med Campaign
Me410: FROG Campaign
Mystery Build (insert here)
Alabama, United States
Joined: January 04, 2009
KitMaker: 45 posts
AeroScale: 31 posts
Posted: Monday, April 09, 2012 - 02:08 PM UTC
Nice work! Nice finish!
I cracked my F-16 canopy so its going to be on hold until I can get a replacement

Armor is neatly divided into two catergories: German, and then the other 10 percent.
Wisconsin, United States
Joined: September 11, 2009
KitMaker: 1,917 posts
AeroScale: 563 posts
Posted: Tuesday, April 10, 2012 - 02:02 AM UTC
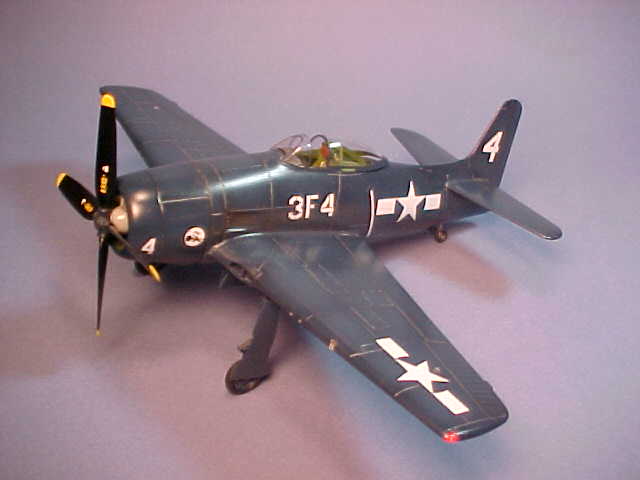
...and there she is, in the
gallery . A nice addition. Thanks for your efforts, Fred! Great looking seams on the overall blue paint.
-Sean.

Current: model railroad layout
Stalled a while ago:
. 1950's Chrome, WW II Twins
Last completed: Police Car
Utah, United States
Joined: May 27, 2003
KitMaker: 1,026 posts
AeroScale: 215 posts
Posted: Saturday, April 14, 2012 - 01:23 PM UTC
Minor update to the 1/32 F-16A--I almost forgot to repaint the motor front end and install it!
NOW it's ready for the fuselage halves to go together. It would have been hard to slide this down the backside and glue to the end of the intake once the body was together.
Beautiful work being done by everyone. Nice to see some coming out of the hangars and landing on the display shelves.
Keith
Build 'em better than the box art!
Victoria, Australia
Joined: September 19, 2003
KitMaker: 708 posts
AeroScale: 674 posts
Posted: Monday, April 16, 2012 - 10:46 AM UTC
Hi All,
Some great progress and excellent builds happening here, I finally got back into getting some of mine completed, in between all the consignment and contract builds I have going, plus the small break due to two family matters.
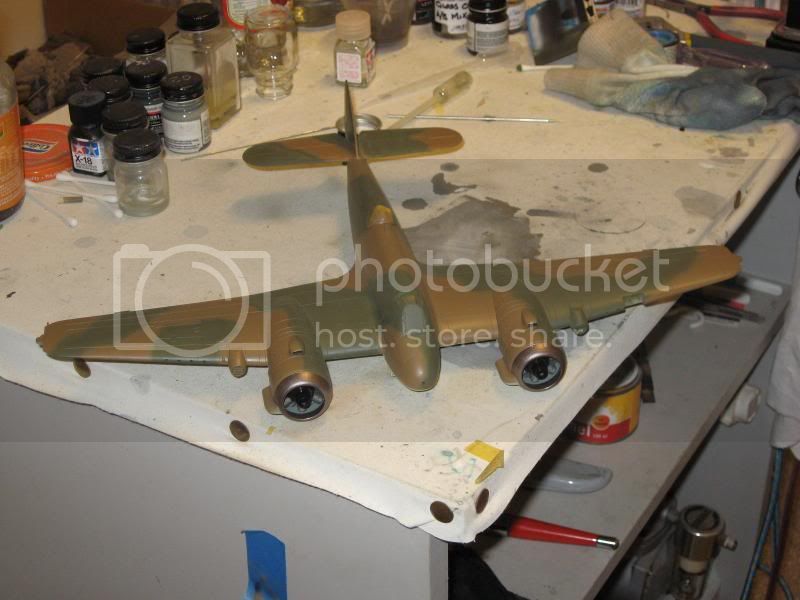
Anyway here is the progress on my Bristol Beaufighter Mk If {I listed this originally as a Mk IV}, the serial of R 2055 is yet to be added.
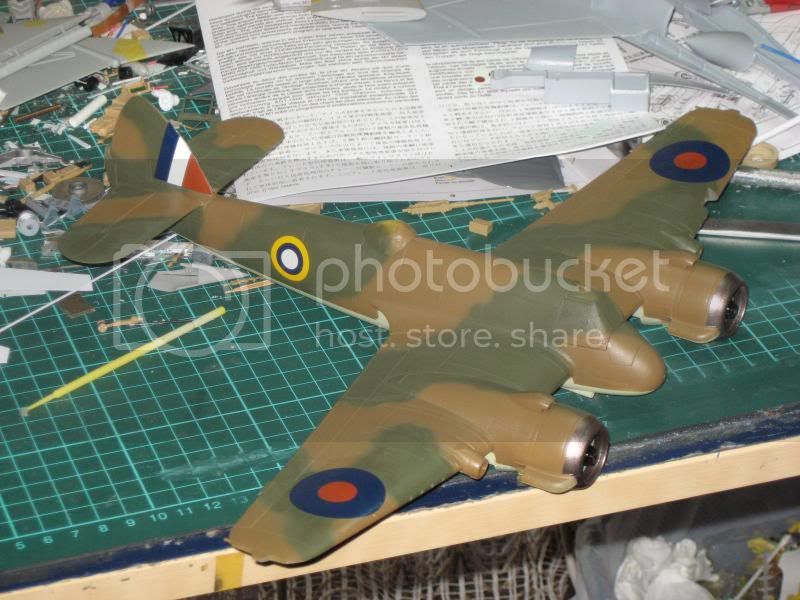 Note:
Note: This is the 40mm Heavy weapons Prototype, which tested both the Rolls Royce and Bofos 40mm guns.
The Horizontal tail planes are the kit supplied pieces which had been cut and pressed flat prior to gluing the halves together.
President:- Southern Model Club.
Those who never learn from history will always repeat it.
"When you go home tell them of us and say.
For your tomorrow we gave our today."
Utah, United States
Joined: May 27, 2003
KitMaker: 1,026 posts
AeroScale: 215 posts
Posted: Sunday, April 22, 2012 - 04:30 PM UTC
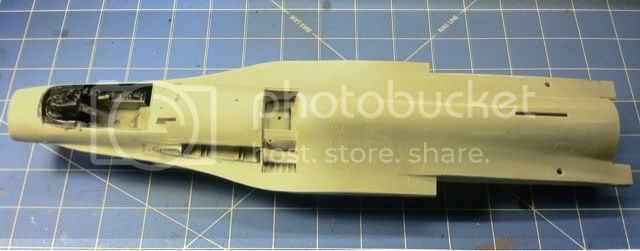
I finally broke new ground on the 1/32nd F-16. Up until now I was redoing my work from 1992--repainted the wheel wells and landing gear, touched up the cockpit, and stripped the paint from the gun and exhaust. But this weekend I glued the fuselage halves together and will soon attach the wings, strakes, and vertical tail. It's about to hit critical mass where I'm gonna have a hard time finding room for it on the workbench.
Keith
Build 'em better than the box art!
Wisconsin, United States
Joined: September 11, 2009
KitMaker: 1,917 posts
AeroScale: 563 posts
Posted: Monday, April 23, 2012 - 12:32 AM UTC
Keith good thing you remembered that jet fan in time! Nice to improve what you did 20 years before (I like to believe we've all learned a few things in that time.
). You've done the hard work of correcting the earlier stuff and now it's Easy Street! Enjoy the rest of this build.
Rob I don't even want to guess how many hangar queens are in that stash of yours! I'm predicting another beauty queen of that beaufighter. You definitely are good with an airbrush!
Cheers!
-Sean H.
Current: model railroad layout
Stalled a while ago:
. 1950's Chrome, WW II Twins
Last completed: Police Car
Ontario, Canada
Joined: March 25, 2010
KitMaker: 514 posts
AeroScale: 244 posts
Posted: Saturday, April 28, 2012 - 01:32 AM UTC
Victoria, Australia
Joined: September 19, 2003
KitMaker: 708 posts
AeroScale: 674 posts
Posted: Friday, May 04, 2012 - 12:48 AM UTC
Sean,
There are to many in the stash to mention, but this campaign gives me a chance to complete some of them, in between contract and consignment builds.
Trevor,
Keep up the good work on the Do 24. I have the F.M 48 scale kit as a consignment build, I had to make up two spars in joining the wing sections together, next job is the fuselage ribs, before the fuselage is joined together.
President:- Southern Model Club.
Those who never learn from history will always repeat it.
"When you go home tell them of us and say.
For your tomorrow we gave our today."
Wisconsin, United States
Joined: September 11, 2009
KitMaker: 1,917 posts
AeroScale: 563 posts
Posted: Friday, May 04, 2012 - 02:10 AM UTC
Trevor, nice find! When I saw the Porco Rosso thread, this is what I would have considered-- I'll be keeping an eye on the quality of this Italeri kit and how you handle it! Of course, I don't have a moment to spare for any other campaigns until March '13, but this is what I would have considered.
Rob, it's been two weeks-- you must have finished the Beaufighter and on to another by now.
thanks, guys!
-Sean.
Current: model railroad layout
Stalled a while ago:
. 1950's Chrome, WW II Twins
Last completed: Police Car