Airfix 1/24 Scale Hawker Typhoon Build.
Joel_W
 Associate Editor
New York, United States
Joined: December 04, 2010
KitMaker: 11,666 posts
AeroScale: 7,410 posts
Posted: Monday, June 23, 2014 - 08:57 AM UTC
Quoted Text
Nice work Mal ! 
As Matt has noted, Tamiya paints spray really well with cellulose (lacquer) thinners - I wouldn't use anything else with them, as it also gives a bit more "bite" and durability. I actually don't bother with their own brand thinners (although it may well have added advantages) - any cellulose thinners has worked fine for me.
All the best
Rowan 
Rowan,
What you term as Celluose Thinners, are they for different brands of hobby paints, or what I buy for clean up at a big box home improvement store?
Joel
On my Workbench:
Monogram 1/24 scale 427 Shelby Cobra
Just Completed:
Beemax 1/24 scale BMW M3 E30 1992 Evolution II
Holdfast
 President
#056
England - South West, United Kingdom
Joined: September 30, 2002
KitMaker: 8,581 posts
AeroScale: 4,913 posts
Posted: Monday, June 23, 2014 - 06:06 PM UTC
Interesting that this thread has turned into a, how to thin Tamiya paints"

I have moved on a little, on this and a couple of other builds; I hope to post the, small, progress on them later but, as I keep saying I am very busy with "work"

MAL the MASK
BULLDOG # 6 (President)
BEWARE OF THE FEW
Sappers: First in, last out. (UBIQUE)
It's not the same, better, but not the same.
Joel_W
 Associate Editor
New York, United States
Joined: December 04, 2010
KitMaker: 11,666 posts
AeroScale: 7,410 posts
Posted: Tuesday, June 24, 2014 - 12:36 AM UTC
Mal,
Sorry for the semi High Jacking of your thread. I'm back on focus now waiting for your next update.


Joel
On my Workbench:
Monogram 1/24 scale 427 Shelby Cobra
Just Completed:
Beemax 1/24 scale BMW M3 E30 1992 Evolution II
Holdfast
 President
#056
England - South West, United Kingdom
Joined: September 30, 2002
KitMaker: 8,581 posts
AeroScale: 4,913 posts
Posted: Wednesday, July 02, 2014 - 05:15 AM UTC
MAL the MASK
BULLDOG # 6 (President)
BEWARE OF THE FEW
Sappers: First in, last out. (UBIQUE)
It's not the same, better, but not the same.
Ontario, Canada
Joined: July 22, 2012
KitMaker: 771 posts
AeroScale: 763 posts
Posted: Wednesday, July 02, 2014 - 05:28 AM UTC
Looks good Mal. I'm glad to hear everything is fitting - I can deal with fiddly no problem. I'm so excited to get my copy. When are they coming out anyway? I thought the ADH book was a June release too, but no word on my pre-order being shipped

Matt Odom
I've been known to build a few things
England - South East, United Kingdom
Joined: September 15, 2004
KitMaker: 4,728 posts
AeroScale: 1,351 posts
Posted: Wednesday, July 02, 2014 - 05:29 AM UTC
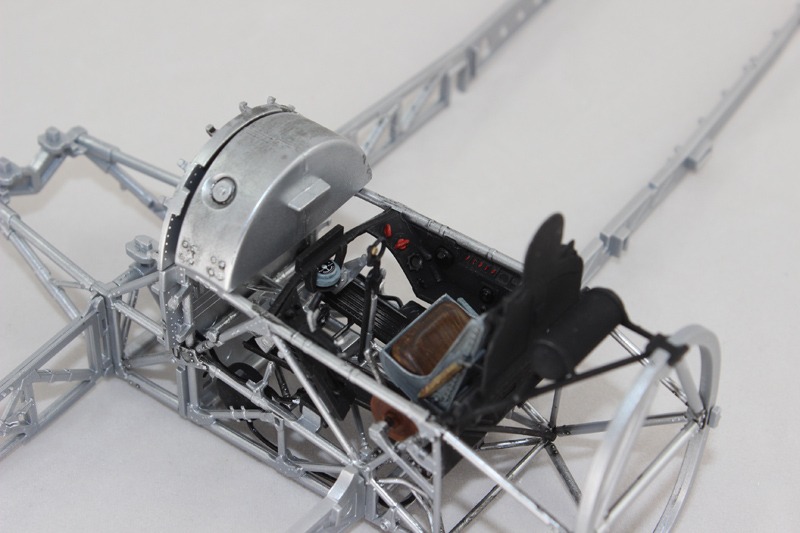
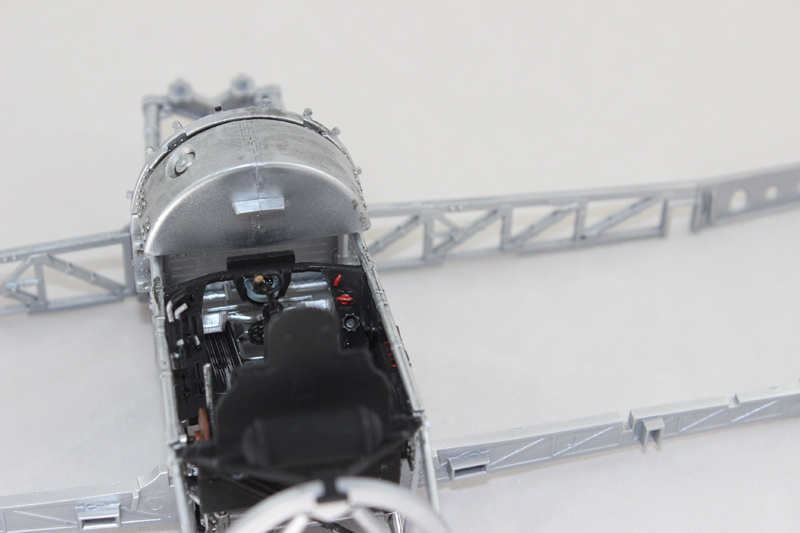
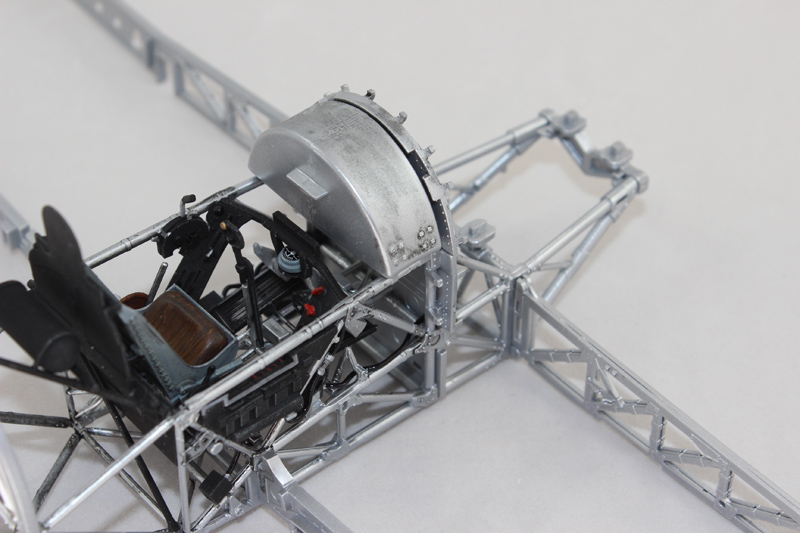
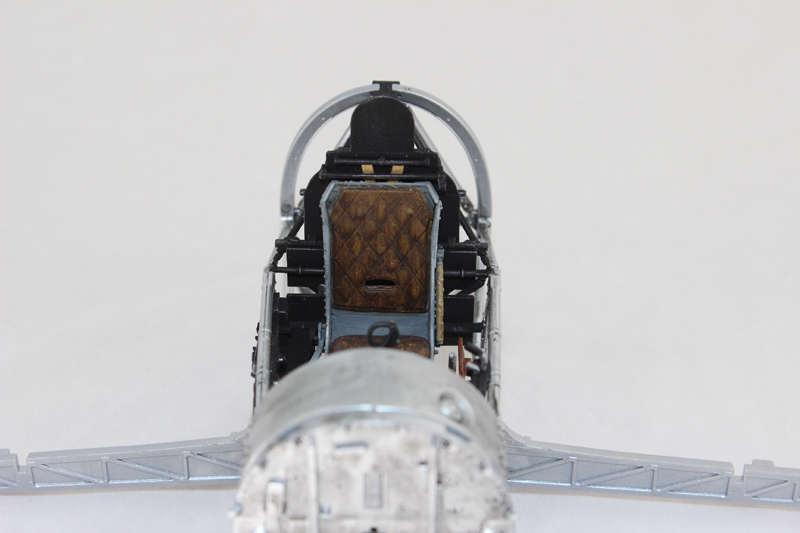
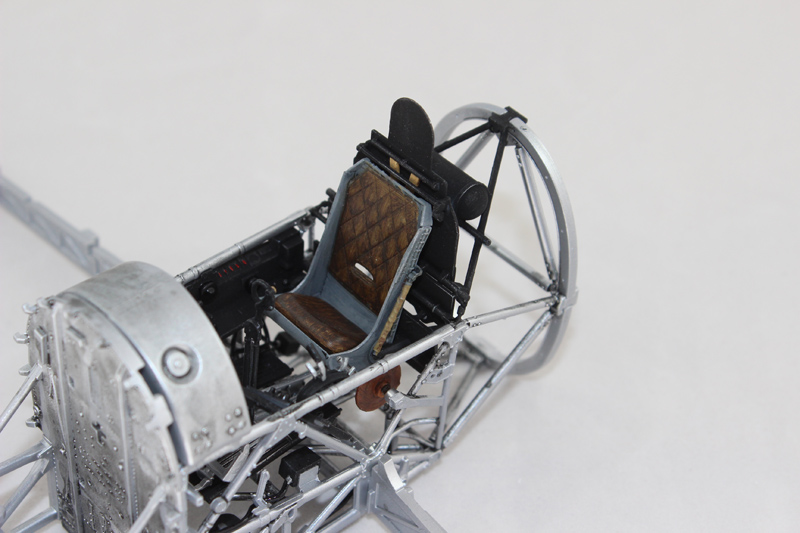
Looking good Mal, nice to see the tubular framing painted the correct colour. Hawker painted the framing silver it's not natural metal, one review build I've seen the reviewer had painted the framing black.
On the bench...
Italeri A129 Mangusta
British Bulldog Spitfire theme build
Joined: October 30, 2005
KitMaker: 3,897 posts
AeroScale: 564 posts
Posted: Wednesday, July 02, 2014 - 06:13 AM UTC
looking very good Mal, can't wait to get my hands on this model.

Haute-Vienne, France
Joined: August 15, 2011
KitMaker: 57 posts
AeroScale: 55 posts
Posted: Wednesday, July 02, 2014 - 05:41 PM UTC
Quoted Text
Looks good Mal. I'm glad to hear everything is fitting - I can deal with fiddly no problem. I'm so excited to get my copy. When are they coming out anyway? I thought the ADH book was a June release too, but no word on my pre-order being shipped 
ME TOO!!!

Holdfast
 President
#056
England - South West, United Kingdom
Joined: September 30, 2002
KitMaker: 8,581 posts
AeroScale: 4,913 posts
Posted: Wednesday, July 02, 2014 - 07:12 PM UTC
Quoted Text
Looking good Mal, nice to see the tubular framing painted the correct colour. Hawker painted the framing silver it's not natural metal, one review build I've seen the reviewer had painted the framing black.
I thought that everyone knew that Hawker painted it silver!

I must admit to being a bit lazy with the mould seams, I didn't worry about removing them all as not much of this will be seen.
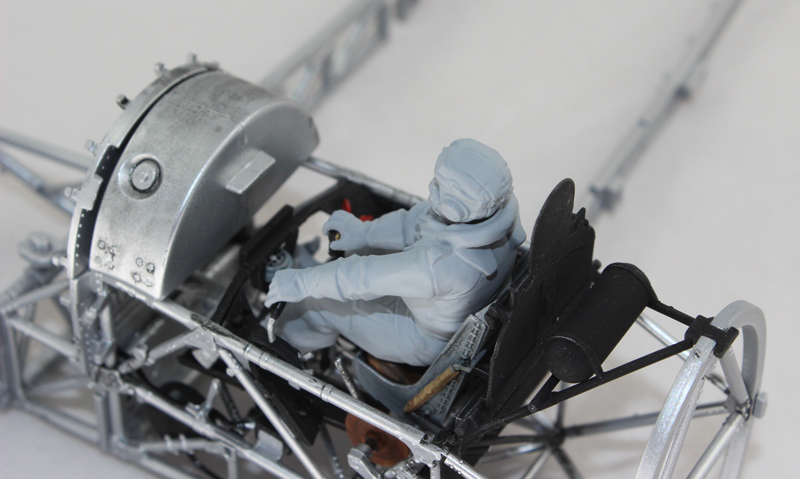
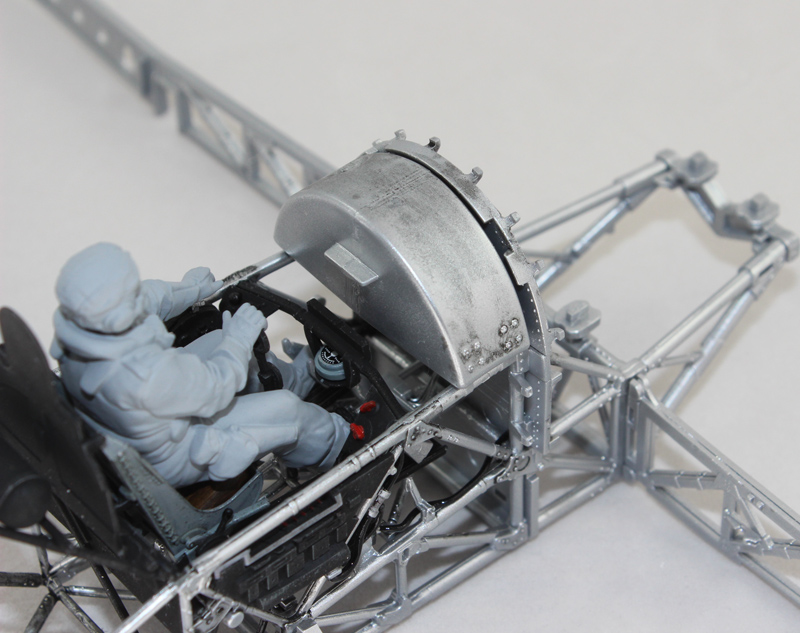
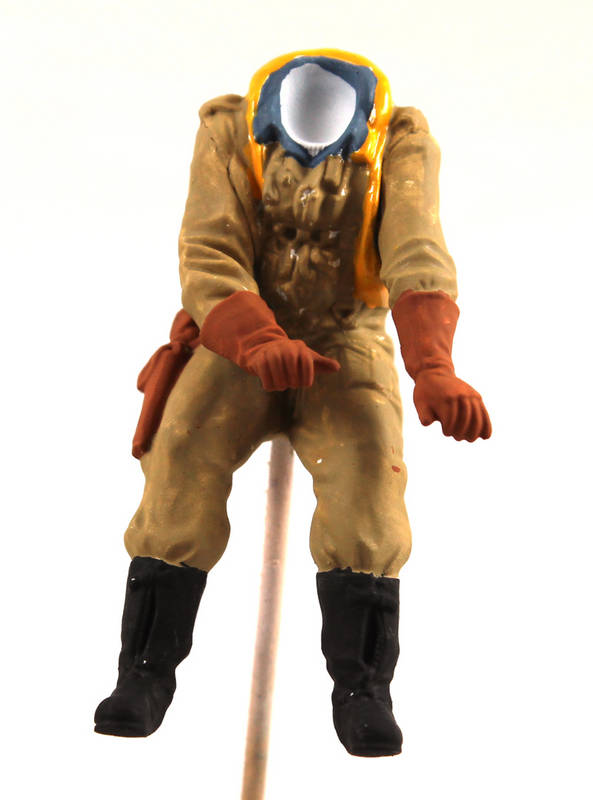
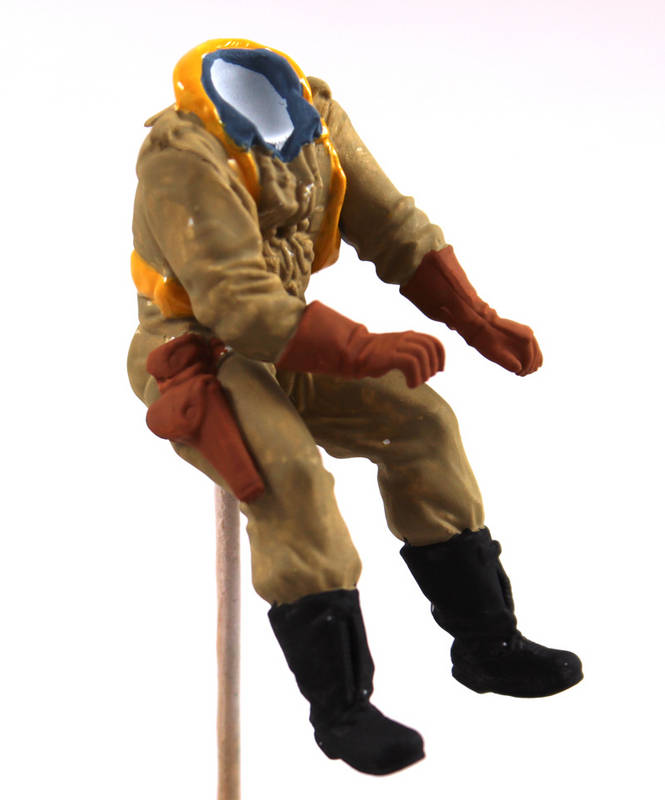
The pilot figure is the one that Steve Budd sent me as I plan on trying to get the goggles over his eyes. I had decided to use Steve's pilot as it was nicely finished and primed; however with the arms pre-attached the left one is just a smidge shy of the throttle lever. I have tried my pilot and attached the arms in situe and they fit perfectly, so I will be using mine

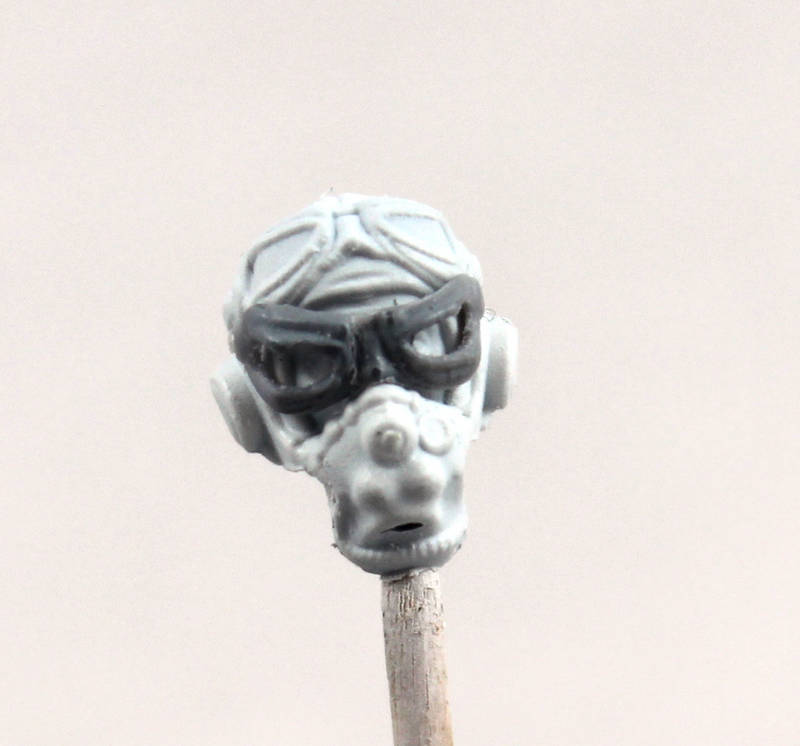
I will try and recover the goggles from Steve's pilot and, if that is successful, I will remove the goggles from my pilot and then attache the retrieved goggles over his eyes. I did this successfully with the pilot in my Jet Shinden, so I know that it is possible

I have started applying the instrument decals to the panel and I hope to finish that today, but I'm off to a local air museum which has a large collection of models

I'm also undecided whether to paint the lower internal fuselage black (dark grey) or silver? The idea of painting it silver is to reflect some light into what will be a dark pit otherwise. Remember that the canopy will be closed also.
MAL the MASK
BULLDOG # 6 (President)
BEWARE OF THE FEW
Sappers: First in, last out. (UBIQUE)
It's not the same, better, but not the same.
England - South East, United Kingdom
Joined: June 03, 2006
KitMaker: 397 posts
AeroScale: 384 posts
Posted: Wednesday, July 02, 2014 - 07:56 PM UTC
I suspect that the confusion stems from the fact that the RAF Museum's Typhoon's cockpit has black framing (there's a photo in Donald Nijboer's "Cockpit.")
With the airframe now in Canada, we have the homework for Canadian modellers right there; get a look inside, please, and don't forget the harness & seat, while you're at it.

Edgar
Joel_W
 Associate Editor
New York, United States
Joined: December 04, 2010
KitMaker: 11,666 posts
AeroScale: 7,410 posts
Posted: Thursday, July 03, 2014 - 01:38 AM UTC
Mal,
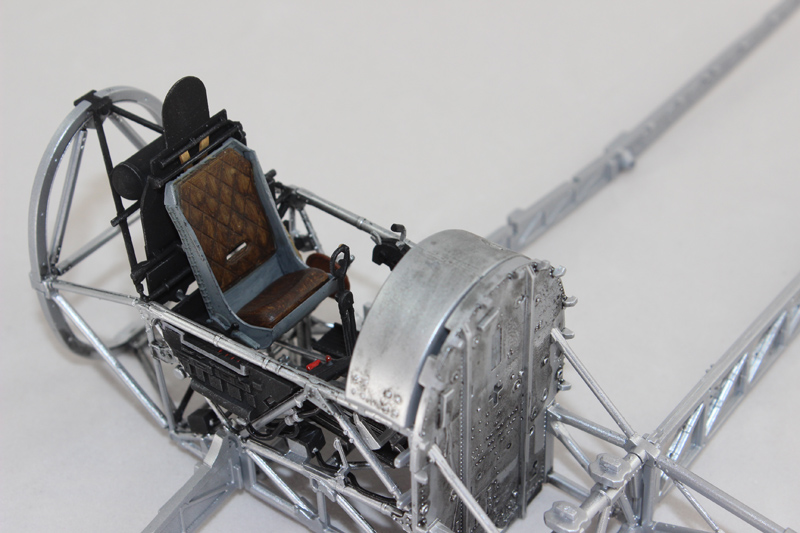
It's really coming along very nicely. The tubing looks really quite nice painted silver and then with the black wash added. Your seat padding really is quite well done.
Joel
On my Workbench:
Monogram 1/24 scale 427 Shelby Cobra
Just Completed:
Beemax 1/24 scale BMW M3 E30 1992 Evolution II
Ontario, Canada
Joined: July 22, 2012
KitMaker: 771 posts
AeroScale: 763 posts
Posted: Thursday, July 03, 2014 - 04:03 AM UTC
Quoted Text
I suspect that the confusion stems from the fact that the RAF Museum's Typhoon's cockpit has black framing (there's a photo in Donald Nijboer's "Cockpit.")
With the airframe now in Canada, we have the homework for Canadian modellers right there; get a look inside, please, and don't forget the harness & seat, while you're at it. 
Edgar
Is it already here? I wonder if it's already on display, I'll check the NAM's website.
Matt Odom
I've been known to build a few things
Holdfast
 President
#056
England - South West, United Kingdom
Joined: September 30, 2002
KitMaker: 8,581 posts
AeroScale: 4,913 posts
Posted: Thursday, July 03, 2014 - 06:00 PM UTC
Quoted Text
Mal,
It's really coming along very nicely. The tubing looks really quite nice painted silver and then with the black wash added. Your seat padding really is quite well done.
Joel
Thanks Joel, yes I used Mig Ammo black wash. The seat padding was painted with Humbrol "German overall sand" and then given a coat of thinned Raw Umber oil paint. To get the lightened areas I dragged the paint with a dry brush and for the more lightened areas I used a brush dampened with thinners

I have the goggles off the head of Steve's pilot and they have been filed down and they are almost fitting on my pilots face. A bit more work though and I must paint the figure and instal him in the cockpit before I can close the fuselage halves around him. I am working on the engine and radiator.
MAL the MASK
BULLDOG # 6 (President)
BEWARE OF THE FEW
Sappers: First in, last out. (UBIQUE)
It's not the same, better, but not the same.
England - South East, United Kingdom
Joined: September 30, 2004
KitMaker: 84 posts
AeroScale: 76 posts
Posted: Thursday, July 03, 2014 - 10:07 PM UTC
Looking lovely Mal. Once you've got the driver's bit and engine sorted it'll speed up, especially as you've not got the wheel bays or under cart to fiddle with.
Blue skies.
Steve
I am the Bad Wolf. I create myself. I take the words; I scatter them in time and space. A message to lead myself here...
Berlin, Germany
Joined: February 20, 2005
KitMaker: 204 posts
AeroScale: 99 posts
Posted: Thursday, July 03, 2014 - 10:43 PM UTC
Hi Mal,
very nice progress on the cockpit, painting and subtle weathering are very convincing. Looking forward to your build.
best regards ro
Holdfast
 President
#056
England - South West, United Kingdom
Joined: September 30, 2002
KitMaker: 8,581 posts
AeroScale: 4,913 posts
Posted: Friday, July 04, 2014 - 06:15 PM UTC
Quoted Text
Looking lovely Mal. Once you've got the driver's bit and engine sorted it'll speed up, especially as you've not got the wheel bays or under cart to fiddle with.
Blue skies.
Steve
Hi Steve,
Yes I was looking at it yesterday, while thinning down the goggles, and realised that once the engine is in it certainly won't take long to actually finish; I'll have to really start to think about how I do the rockets firing

Quoted Text
Hi Mal,
very nice progress on the cockpit, painting and subtle weathering are very convincing. Looking forward to your build.
best regards ro
Hi Ro,
Thanks, I have also been getting on with my Raiden, P-39 and Bf109E-1; the Raiden is not far behind your build

MAL the MASK
BULLDOG # 6 (President)
BEWARE OF THE FEW
Sappers: First in, last out. (UBIQUE)
It's not the same, better, but not the same.
Haute-Vienne, France
Joined: August 15, 2011
KitMaker: 57 posts
AeroScale: 55 posts
Posted: Thursday, July 17, 2014 - 06:29 PM UTC
Hi, just a thought for the rockets. My wife used to do a lot of flower arranging and used very thin but rigid wire which might work for attaching the fired rockets to the rails. You're on your own though for working out how to depict the smoke trails.
Good luck
John

Holdfast
 President
#056
England - South West, United Kingdom
Joined: September 30, 2002
KitMaker: 8,581 posts
AeroScale: 4,913 posts
Posted: Friday, July 18, 2014 - 07:20 PM UTC
Hi John,
Thanks, that sounds interesting I'll look into it

I have been given another idea, carbon fibre rods, available from R/C shops. I'm not sure that they will be rigid enough though? I'm erring on brass rod at the moment though. The smoke trails should be relatively easy I reckon, I intend to use cotton wool, we'll see

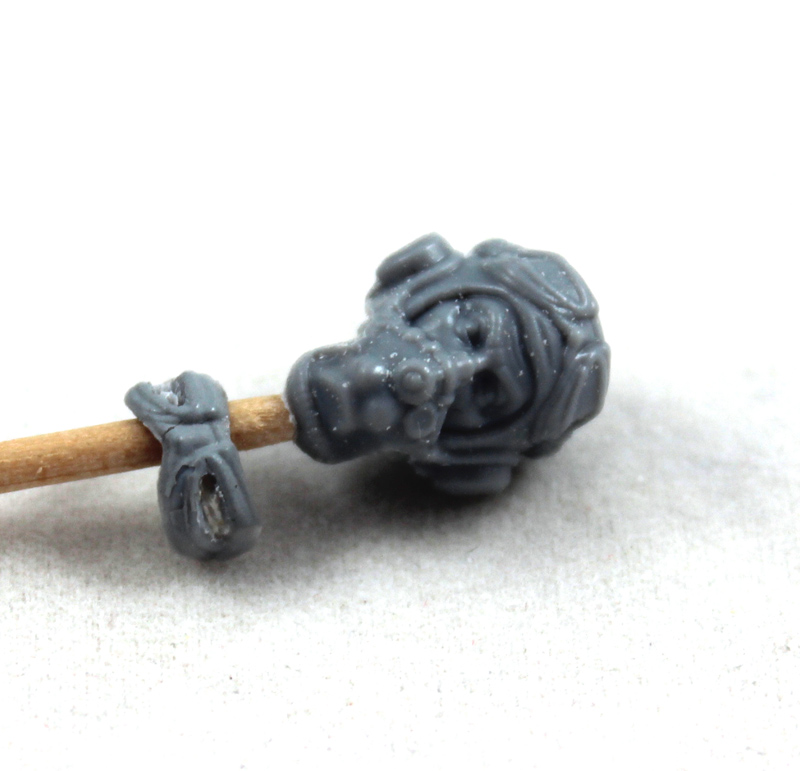
I have chopped the goggles away from the spare pilot head and I have thinned them down from the rear. I have drilled a few small holes into the lenses and I am in the process of very slowly opening them out. The goggles have become very flimsy, but I have been there before, with the pilot of my Jet Shinden. I have been putting off painting the pilot until I know if my attempt to give the pilot goggles over his face has worked. I don't need to so I should get on with painting his body!
/417855]
MAL the MASK
BULLDOG # 6 (President)
BEWARE OF THE FEW
Sappers: First in, last out. (UBIQUE)
It's not the same, better, but not the same.
Niedersachsen, Germany
Joined: March 26, 2014
KitMaker: 844 posts
AeroScale: 630 posts
Posted: Thursday, July 24, 2014 - 02:48 AM UTC
Hi Mal, i am enjoying the show, looking good !
Bernd

Holdfast
 President
#056
England - South West, United Kingdom
Joined: September 30, 2002
KitMaker: 8,581 posts
AeroScale: 4,913 posts
Posted: Monday, July 28, 2014 - 06:46 PM UTC
MAL the MASK
BULLDOG # 6 (President)
BEWARE OF THE FEW
Sappers: First in, last out. (UBIQUE)
It's not the same, better, but not the same.
Joel_W
 Associate Editor
New York, United States
Joined: December 04, 2010
KitMaker: 11,666 posts
AeroScale: 7,410 posts
Posted: Tuesday, July 29, 2014 - 01:04 AM UTC
Mal,
The initial stages of your figure painting is really coming along quite nicely.
Your goggles are getting very close to fitting the head. At some point you're going to have to remove them so that you can deal with the molded on ones. And that's when the carpet monster will surely try to attack.
Joel
On my Workbench:
Monogram 1/24 scale 427 Shelby Cobra
Just Completed:
Beemax 1/24 scale BMW M3 E30 1992 Evolution II
Joined: October 30, 2005
KitMaker: 3,897 posts
AeroScale: 564 posts
Posted: Tuesday, July 29, 2014 - 02:38 AM UTC
Beautiful work on the pilot Mal. It will look very aggressive when finished.

Florida, United States
Joined: January 07, 2014
KitMaker: 25 posts
AeroScale: 25 posts
Posted: Tuesday, July 29, 2014 - 02:47 AM UTC
I recognize this pilot, he is from a small town called "Sleepy Hollow"


Joined: October 30, 2005
KitMaker: 3,897 posts
AeroScale: 564 posts
Posted: Tuesday, July 29, 2014 - 02:53 AM UTC
Quoted Text
I recognize this pilot, he is from a small town called "Sleepy Hollow" 

the Teutonic knight? With the filed, pointy teeth?


#042
England - North East, United Kingdom
Joined: November 18, 2006
KitMaker: 2,828 posts
AeroScale: 1,720 posts
Posted: Tuesday, July 29, 2014 - 08:45 AM UTC
I feel I should reply before Camogirl gets on her high horse, but he was a Hessian Mercenary. (She's a huge Sleepy Hollow fan) anyway great work so far Mal
Modellers Creed: This is my toolbox. There are many like it, but this one is mine. My toolbox is my best friend. It is my life. I must master it as I must master my life. My toolbox, without me, is useless. Without my toolbox, I am useless.


