Mal,
Small but steady progress.
Joel
Hosted by Rowan Baylis
Airfix 1/24 Scale Hawker Typhoon Build.
Joel_W

Joined: December 04, 2010
KitMaker: 11,666 posts
AeroScale: 7,410 posts

Posted: Thursday, August 28, 2014 - 10:35 AM UTC
Posted: Thursday, August 28, 2014 - 07:18 PM UTC
Thanks Bernd,
Its proving to be a little troublesome to get the prop spinning freely, but I think that I have a good idea of what the problem is. To solve it I need to be able to switch the motor on and off at will so I decided to get the leads, switch and battery box connected, a simple task as I did it many times in my last job However I didn't take the batteries out of the holder and after stripping the wire ends and putting it back on my work bench the bare ends were touching a file. I discovered this when I noticed the tell tail smell of melting plastic! No sweat really as I had realised that the shrink wrap that I had was too small so I was going to have to phone my old work place for some of the correct size and they are sending me another battery pack, as well at no cost! Way to go Roundhouse, and I didn't even have to play the sympathy card
  They have some of the best customer service I have ever encounted, apart from me
I only intend to have a pair of rockets firing. watching clips of Typhoons firing rockets they are nearly always firing them in pairs. If I was to show them all firing in pairs then there just wouldn't be any room in my display as the first rockets to leave the rails would be quite some way from the aircraft in both the horizontal and vertical planes. That would also mean that there would be nothing to hang the first 6 rockets off. So the plan is to have the first pair having not long left their rails and even these, depending on the distance, will be below the height of the the rails that they have left; if that makes sense? I need to trial the method of producing the smoke trails which I will do soon. I will also get the rockets together so that they can be painted and decalled
I hope to have the prop spinning freely by the end of the week end, wish me luck
Its proving to be a little troublesome to get the prop spinning freely, but I think that I have a good idea of what the problem is. To solve it I need to be able to switch the motor on and off at will so I decided to get the leads, switch and battery box connected, a simple task as I did it many times in my last job
 However I didn't take the batteries out of the holder and after stripping the wire ends and putting it back on my work bench the bare ends were touching a file. I discovered this when I noticed the tell tail smell of melting plastic! No sweat really as I had realised that the shrink wrap that I had was too small so I was going to have to phone my old work place for some of the correct size and they are sending me another battery pack, as well at no cost! Way to go Roundhouse, and I didn't even have to play the sympathy card
  They have some of the best customer service I have ever encounted, apart from me
Quoted Text
that is a big operation you have underway Mal, but it should look very sexy with the prop spinning and the rockets leaving their rails.
I only intend to have a pair of rockets firing. watching clips of Typhoons firing rockets they are nearly always firing them in pairs. If I was to show them all firing in pairs then there just wouldn't be any room in my display as the first rockets to leave the rails would be quite some way from the aircraft in both the horizontal and vertical planes. That would also mean that there would be nothing to hang the first 6 rockets off. So the plan is to have the first pair having not long left their rails and even these, depending on the distance, will be below the height of the the rails that they have left; if that makes sense? I need to trial the method of producing the smoke trails which I will do soon. I will also get the rockets together so that they can be painted and decalled

I hope to have the prop spinning freely by the end of the week end, wish me luck

Gremlin56
Joined: October 30, 2005
KitMaker: 3,897 posts
AeroScale: 564 posts
KitMaker: 3,897 posts
AeroScale: 564 posts

Posted: Thursday, August 28, 2014 - 08:13 PM UTC
They do seem to angle down very quickly when fired. There are some fantastic films of Typhoons getting off 4 salvo's of two rockets. Try and post a clip of the moving prop Mal,


Posted: Saturday, August 30, 2014 - 07:29 PM UTC
Quoted Text
They do seem to angle down very quickly when fired. There are some fantastic films of Typhoons getting off 4 salvo's of two rockets. Try and post a clip of the moving prop Mal,
Its the fact that the aircraft is moving, so as the rockets are fired there is quickly separation. I did think about having all eight being fired at once but it would be too much of a mess and would detract from the whole idea which is A)to promote the kit and B)to promote paint masks (mine in particular)

I have sign up to You Tube just so that I can post a video clip of the prop spinning
 I have had another little set back, I can't find my bottle of flux, so joining the separate leads won't happen until I can get hold of some. I went out yesterday and could only find paste flux; that would be fin but it was between £8.00-£12.00! Finding it reminded me that I had some paste flux somewhere as well so the hunt is on for that today. If I don't find it I will get on with getting the rockets built as I won't to paint the fill bands on
Posted: Saturday, September 06, 2014 - 06:05 PM UTC
At last, the lower wing is on  It was very easy to fit as it aligned perfectly, I just had to make sure that contact was kept between the spars and the wing and cloths pegs worked well for this. I also fitted the centre part of the radiator. I also glued on the gearbox ensuring that it didn't interfere with the turning of the propeller shaft. The back plate was still lose and made the assembly a bit noisy due to its vibration. I knew that if I glued this in tight it could have a detrimental effect on the spinning shaft; the shaft had about 0.5mm play in it. I had the motor running while I applied a little cement, so that the shaft found its own position. It now runs freely and more quietly. I would like to include a sound chip, but I don't know where to look?
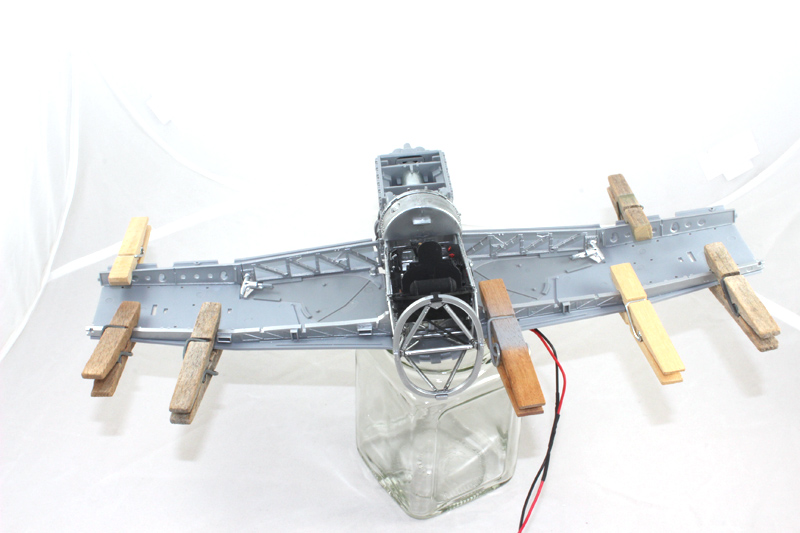
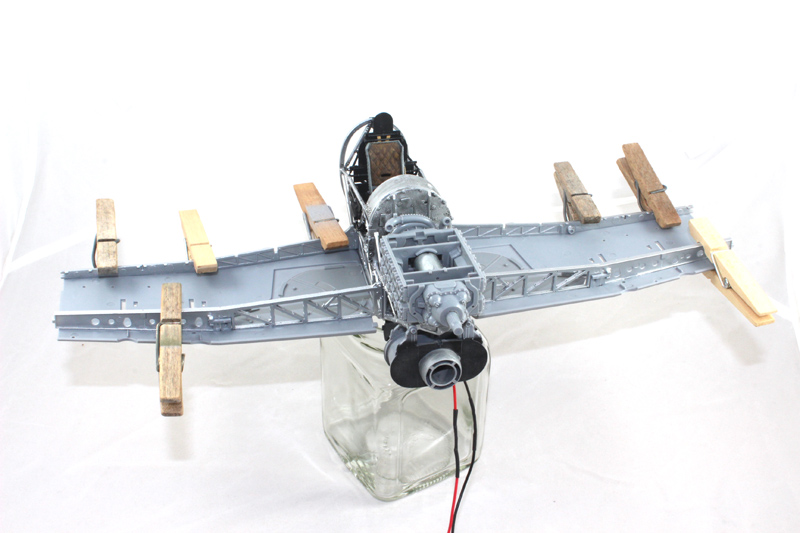
This is a major step forward I might just get the whole thing buttoned up this week. It would be nice to have it ready for paint as I have a model show that I am attending this Saturday. It will be going with me, whatever the state of play. I have also been working on the base
 It was very easy to fit as it aligned perfectly, I just had to make sure that contact was kept between the spars and the wing and cloths pegs worked well for this. I also fitted the centre part of the radiator. I also glued on the gearbox ensuring that it didn't interfere with the turning of the propeller shaft. The back plate was still lose and made the assembly a bit noisy due to its vibration. I knew that if I glued this in tight it could have a detrimental effect on the spinning shaft; the shaft had about 0.5mm play in it. I had the motor running while I applied a little cement, so that the shaft found its own position. It now runs freely and more quietly. I would like to include a sound chip, but I don't know where to look?

This is a major step forward I might just get the whole thing buttoned up this week. It would be nice to have it ready for paint as I have a model show that I am attending this Saturday. It will be going with me, whatever the state of play. I have also been working on the base

Gremlin56
Joined: October 30, 2005
KitMaker: 3,897 posts
AeroScale: 564 posts
KitMaker: 3,897 posts
AeroScale: 564 posts

Posted: Saturday, September 06, 2014 - 06:58 PM UTC
Now you are getting there Mal, looking good. The wings and fuselage should go fast if you are not going to display the "innards".


Joel_W

Joined: December 04, 2010
KitMaker: 11,666 posts
AeroScale: 7,410 posts

Posted: Sunday, September 07, 2014 - 12:17 PM UTC
Mal,
It would be a real shame not to show off any of that highly detailed frame. Can you show just some of it?
Joel
It would be a real shame not to show off any of that highly detailed frame. Can you show just some of it?
Joel
Posted: Sunday, September 07, 2014 - 06:20 PM UTC
Quoted Text
Mal,
It would be a real shame not to show off any of that highly detailed frame. Can you show just some of it?
Joel
Errrrr, No!
 It will be in flying mode so I don't want cause any problems with the aerodynamics!
  Detail will be shown in the second build, but I certainly won't be hacking bits off the airframe
  There's planty to see with the panels left off
Joel_W

Joined: December 04, 2010
KitMaker: 11,666 posts
AeroScale: 7,410 posts

Posted: Monday, September 08, 2014 - 12:22 AM UTC
Quoted Text
Quoted TextMal,
It would be a real shame not to show off any of that highly detailed frame. Can you show just some of it?
Joel
Errrrr, No!It will be in flying mode so I don't want cause any problems with the aerodynamics!
Detail will be shown in the second build, but I certainly won't be hacking bits off the airframe
There's planty to see with the panels left off

Mal,
I realize that. But it just seems like a waste to build such a highly detailed model, then cover all of it up. I guess my mentality is that most modelers like myself would only be building one of this kit at best, so it's not a question of doing the next build differently. it's more of a now or never type of deal.
Joel

Scrodes

Joined: July 22, 2012
KitMaker: 771 posts
AeroScale: 763 posts

Posted: Monday, September 08, 2014 - 07:31 AM UTC
Quoted Text
Quoted TextMal,
It would be a real shame not to show off any of that highly detailed frame. Can you show just some of it?
Joel
Errrrr, No!It will be in flying mode so I don't want cause any problems with the aerodynamics!
Detail will be shown in the second build, but I certainly won't be hacking bits off the airframe
There's planty to see with the panels left off

That's why I have two!
Posted: Monday, September 08, 2014 - 05:14 PM UTC
Now that I have the motor sorted and the main part of the lower wing on things are beginning to move quickly.
I have added the tail fin to the fuselage halves and the tail wheel well is also in place. The kit offers both short and long cord tail planes, so there is a choice of fins with the correct fairings for the tail plane of choice. I have used the short cord one for the aircraft that I am building. The fit is exemplary
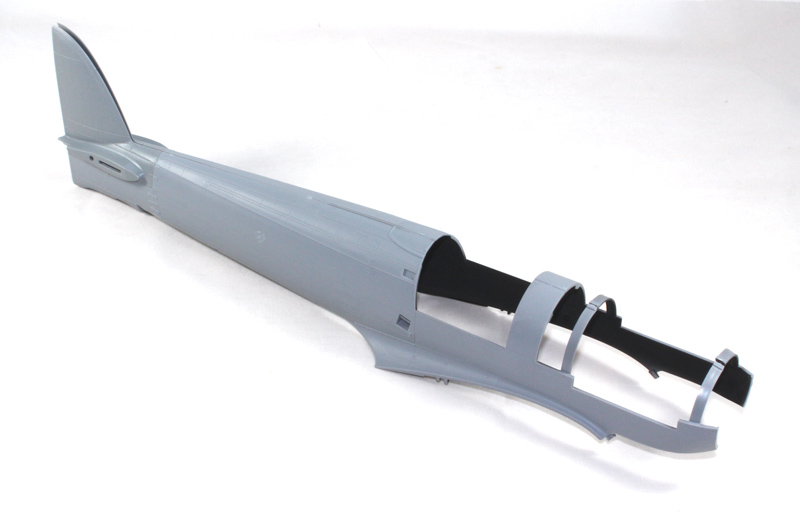
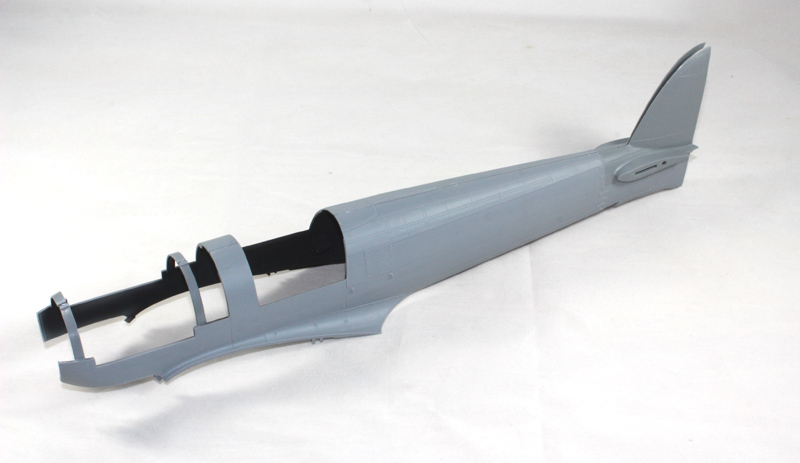
I drilled out the cannon barrels, no sweat; if there is one omission in this kit it is that the cannon barrels aren't hollow, but I can live with that
Because I am building this with wheels up I can omit most of the internal details. I fitted everything loose, to make sure that I could get the cannon barrels through the openings in the internal and main spars, then cemented everything into position, an easy task. I then fitted the outer lower wing panels and the filler pieces for the flaps and ailerons. Everything was just a great fit, all you need to do is to make sure that you have everything correctly aligned, before committing to glue, wonderful
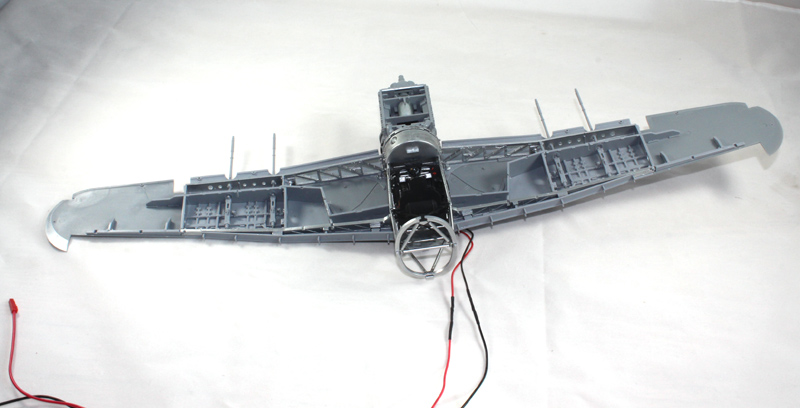
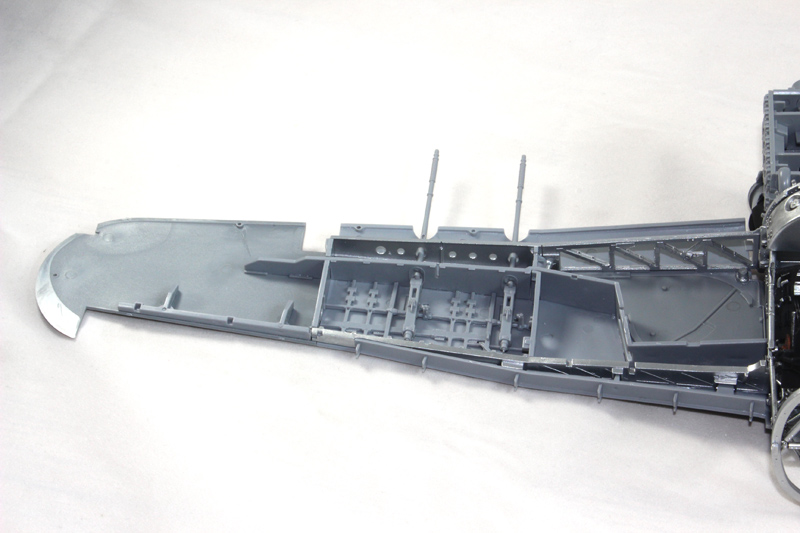
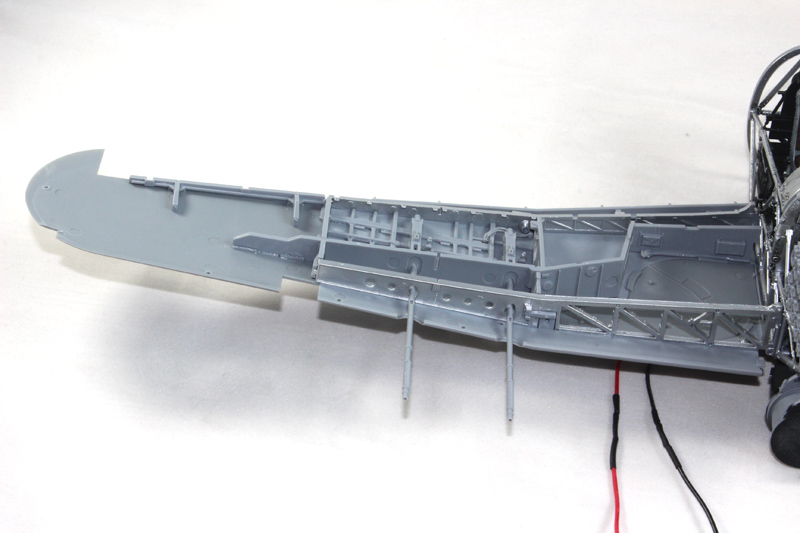
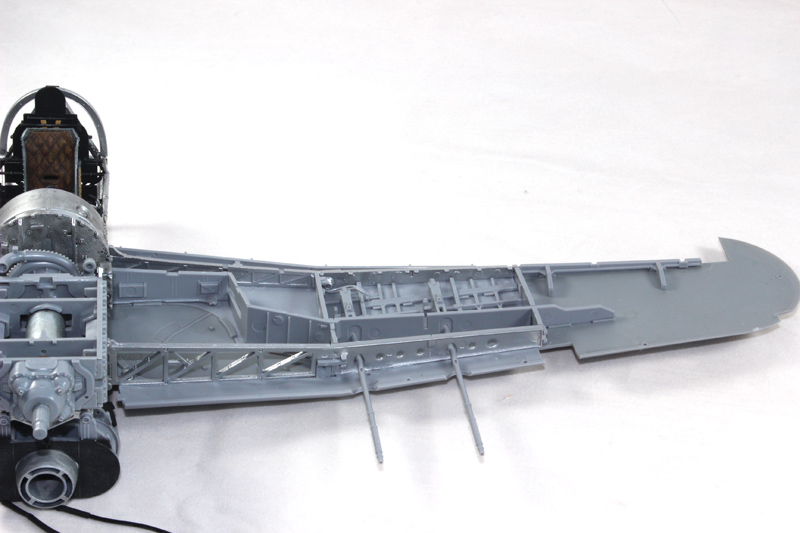
I test fitted the upper wings, a perfect fit, then I just had to try the fuselage halves, again the fit is perfect. A testament to that is that there only 3 small pieces of masking tape holding each of the upper wings in place and only 1 piece to just hold the starboard fuselage in its relative position to the wing The thing is massive! I placed a 300mm ruler alongside it to show the size! It is also pretty heavy, so my decision to use a 1/4" brass tube to support it was the correct one
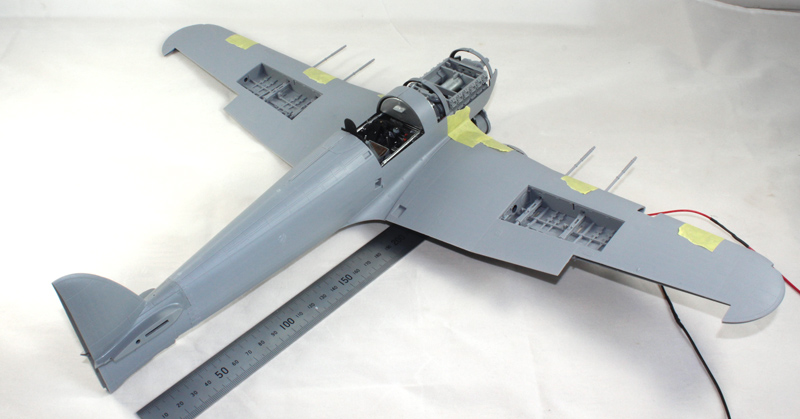
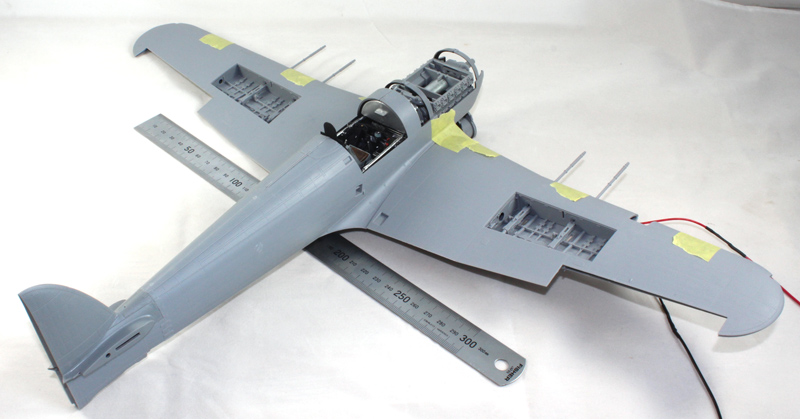
I aim to get this lot all glued up today, but the first task will be to check the fitting of the cannon barrel fairings, but I don't anticipate any problems, judging by the rest of the kit so far.
I have also made a start on the base, its quite big
I have added the tail fin to the fuselage halves and the tail wheel well is also in place. The kit offers both short and long cord tail planes, so there is a choice of fins with the correct fairings for the tail plane of choice. I have used the short cord one for the aircraft that I am building. The fit is exemplary


I drilled out the cannon barrels, no sweat; if there is one omission in this kit it is that the cannon barrels aren't hollow, but I can live with that

Because I am building this with wheels up I can omit most of the internal details. I fitted everything loose, to make sure that I could get the cannon barrels through the openings in the internal and main spars, then cemented everything into position, an easy task. I then fitted the outer lower wing panels and the filler pieces for the flaps and ailerons. Everything was just a great fit, all you need to do is to make sure that you have everything correctly aligned, before committing to glue, wonderful


I test fitted the upper wings, a perfect fit, then I just had to try the fuselage halves, again the fit is perfect. A testament to that is that there only 3 small pieces of masking tape holding each of the upper wings in place and only 1 piece to just hold the starboard fuselage in its relative position to the wing
 The thing is massive! I placed a 300mm ruler alongside it to show the size! It is also pretty heavy, so my decision to use a 1/4" brass tube to support it was the correct one


I aim to get this lot all glued up today, but the first task will be to check the fitting of the cannon barrel fairings, but I don't anticipate any problems, judging by the rest of the kit so far.
I have also made a start on the base, its quite big

Gremlin56
Joined: October 30, 2005
KitMaker: 3,897 posts
AeroScale: 564 posts
KitMaker: 3,897 posts
AeroScale: 564 posts

Posted: Tuesday, September 09, 2014 - 06:02 PM UTC
Looks like you should be in better shape for the intake scoop Mal, have you given a thought to how you are going to cart this huge piece of real estate around the UK to shows etc.?
Daniel Moscatelli, (Model Shipwrights), built a wooden transport case for this 1/72 U-boat so he could transport it around Uruguay without having to worry about damage.

Daniel Moscatelli, (Model Shipwrights), built a wooden transport case for this 1/72 U-boat so he could transport it around Uruguay without having to worry about damage.

berndm

Joined: March 26, 2014
KitMaker: 844 posts
AeroScale: 630 posts

Posted: Tuesday, September 09, 2014 - 09:10 PM UTC
Hi Mal, it is coming together, looks good !
Posted: Wednesday, September 10, 2014 - 05:36 PM UTC
Quoted Text
Looks like you should be in better shape for the intake scoop Mal, have you given a thought to how you are going to cart this huge piece of real estate around the UK to shows etc.?
Daniel Moscatelli, (Model Shipwrights), built a wooden transport case for this 1/72 U-boat so he could transport it around Uruguay without having to worry about damage.
Yep, it will be housed in a plastic box, although I have yet to check if it will fit!
 This is how I transport models to shows. I have 3 1/32 scale kits in one, but this beast will take up one by itself!
Thanks Bernd, it is much further ahead now, I will post pictures later

Posted: Saturday, October 04, 2014 - 06:50 PM UTC
OK I have moved on quite a bit from the last update. this is a test of the stand, I quite like the dive angle  Take no notice of the writing on the base, I cut this from my Shinen base, where I had a DVD player showing the painting. I have had a reply from Airfix and I am OK to paint their logo on here
  I might have a map of the D-Day landings though, it depends on time.
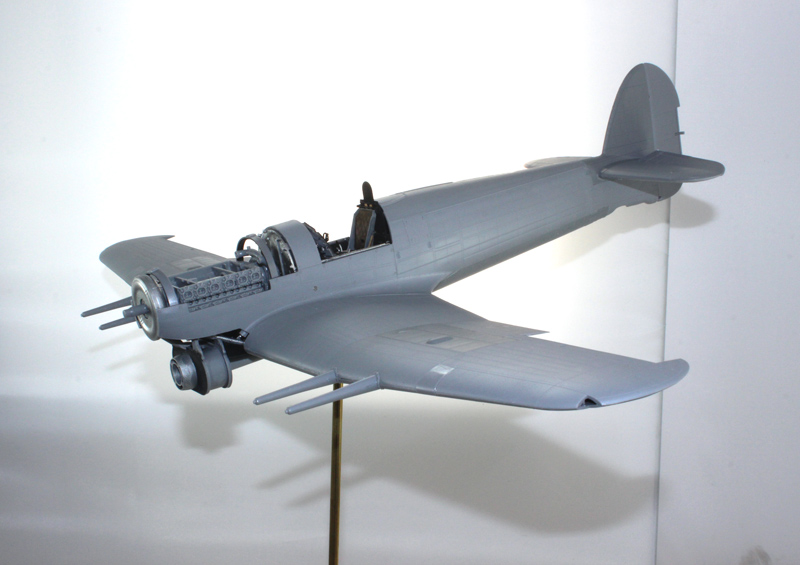
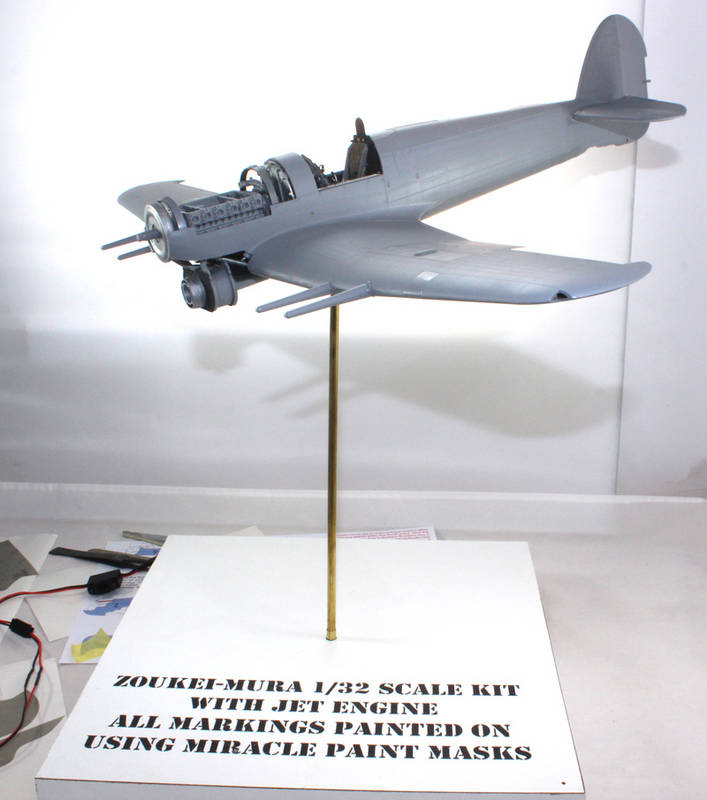
I struggled a bit with the engine cowlings, but only because a cock up on my part. It wouldn't have mattered if I didn't have the motor in there, but because of previous very, very slight misalignments, in the engine parts, and I stress very slight and of my doing, the coolant reservoir(?) (the part at the very front of the engine) was very slightly cockled. As the front of the fuselage and engine panels clip over this the port side was pulling back on it, again very slightly; I was worried that it would make the drive shaft foul slightly and effect the ease of it turning. The remedy was to scrape some of the plastic away! This isn't a problem as none of it will be seen! The problem that I have now is working out how to attach the prop? Anyway Everything is together and looking good and from having tested the motor everything seems fine.
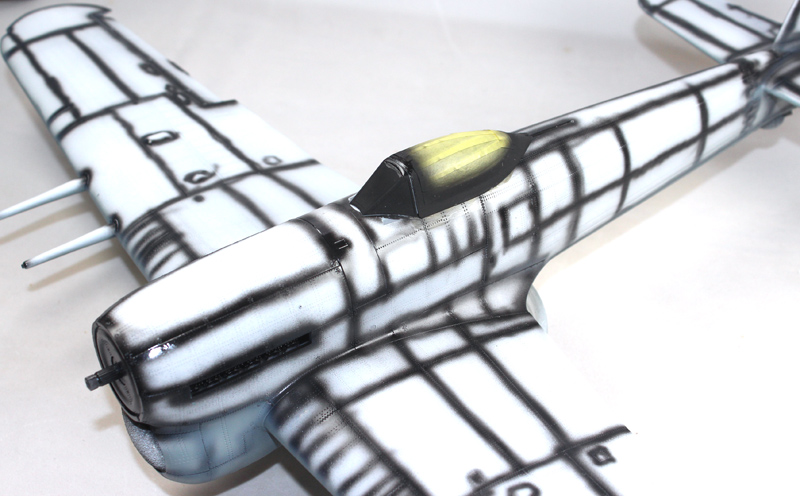
I applied a base coat of white, using Mr Paint Surface Primer, which gave a lovely coat of paint for the next stage, the pre-shading
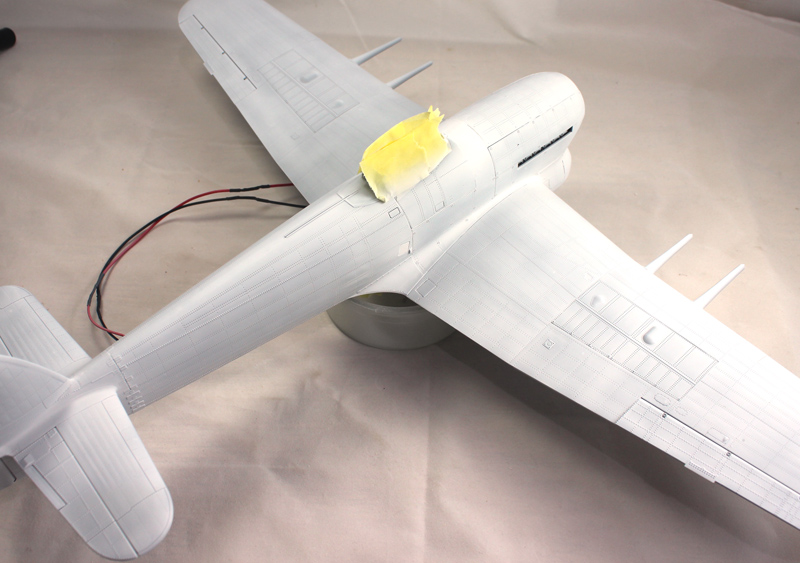
The primer is a little thin in places but that's not a problem, It took a whole bottle of paint to get a decent coverage and it didn't really need a really perfect covering as its doing the job perfectly as it is.
This picture shows a trial with a blank shape for the blue and white checkers for the 245 Sqn shark mouth machine I will be trialing the actual shark mouth soon
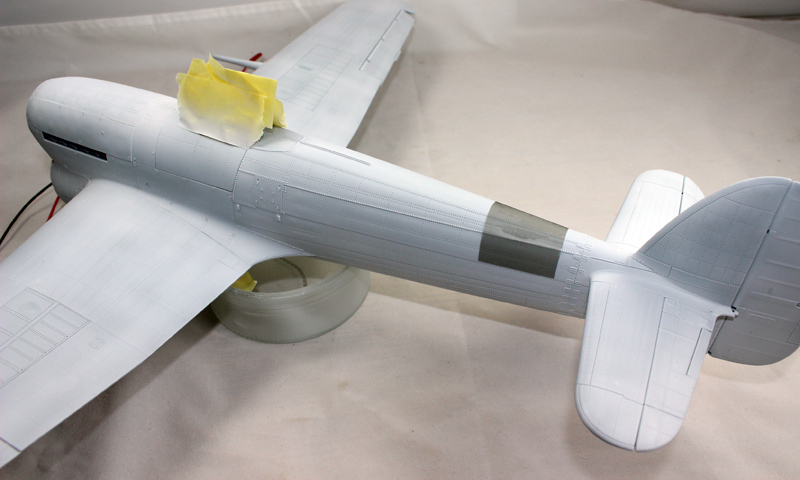
In the set of masks that I am producing for this kit are a set of canopy, clear parts and wheel masks, and here are the canopy masks in use. I don't actually like canopy masks; unless they are very very accurate they are useless! If they are accurate then the modeller most apply them very, very accurately, and more often than not they neither of these things apply! I prefer to use Parafilm M Anyway, after very many minute tweaks, I believe that these are very accurate
  I am still considering whether or not to include these in the set?
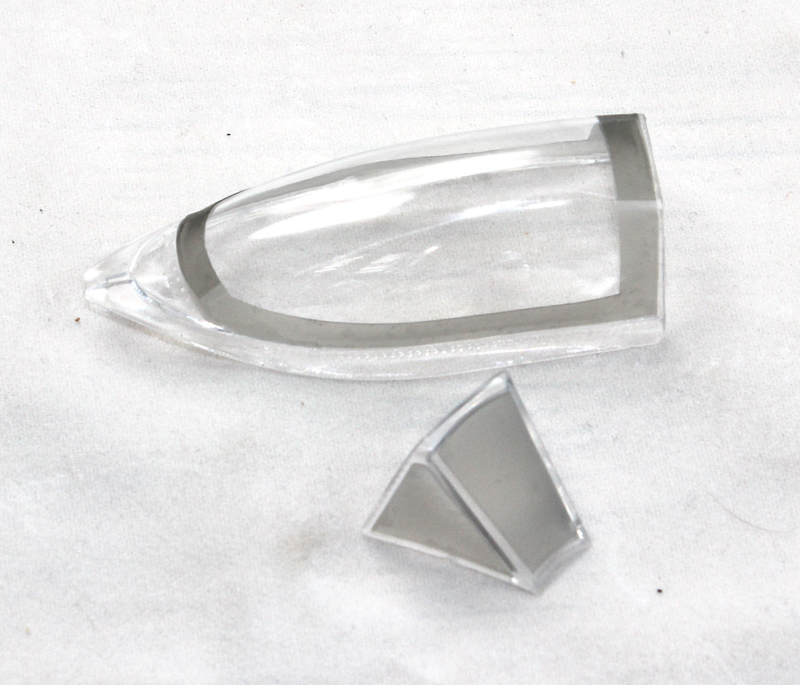
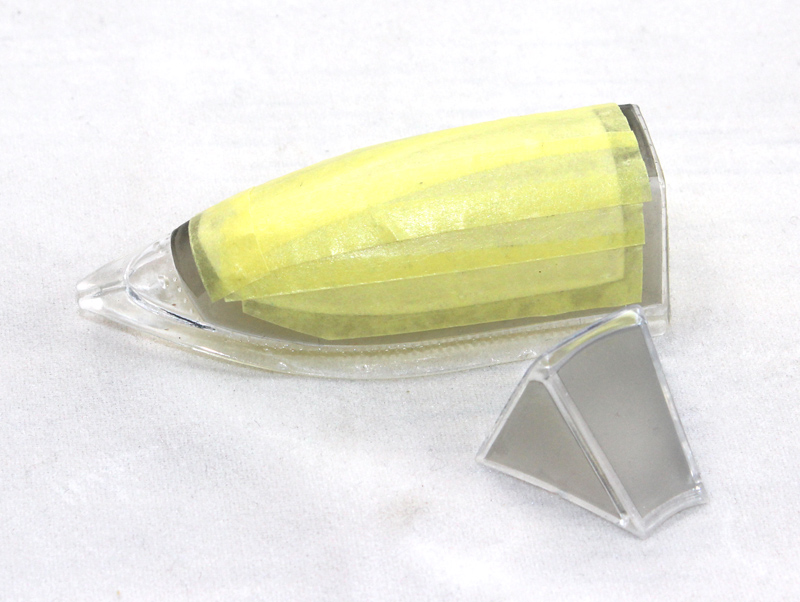
The next stage, Pre-shading has been done and the camo paints from White Ensign have arrived so this afternoon, or tomorrow, I will start the camo painting
I have started to paint the rockets, the rocket bodies are Humbrol dark green, to be a slightly different shade to the upper surface dark green. The war heads are going to be deep bronze green, but I have to decide how I will mask out the fill bands whhich are on the cone shape of the nose and need to be a scale 0.5" and 0.5" apart! Watch this space
 Take no notice of the writing on the base, I cut this from my Shinen base, where I had a DVD player showing the painting. I have had a reply from Airfix and I am OK to paint their logo on here
  I might have a map of the D-Day landings though, it depends on time.

I struggled a bit with the engine cowlings, but only because a cock up on my part. It wouldn't have mattered if I didn't have the motor in there, but because of previous very, very slight misalignments, in the engine parts, and I stress very slight and of my doing, the coolant reservoir(?) (the part at the very front of the engine) was very slightly cockled. As the front of the fuselage and engine panels clip over this the port side was pulling back on it, again very slightly; I was worried that it would make the drive shaft foul slightly and effect the ease of it turning. The remedy was to scrape some of the plastic away! This isn't a problem as none of it will be seen! The problem that I have now is working out how to attach the prop? Anyway Everything is together and looking good and from having tested the motor everything seems fine.
I applied a base coat of white, using Mr Paint Surface Primer, which gave a lovely coat of paint for the next stage, the pre-shading


The primer is a little thin in places but that's not a problem, It took a whole bottle of paint to get a decent coverage and it didn't really need a really perfect covering as its doing the job perfectly as it is.
This picture shows a trial with a blank shape for the blue and white checkers for the 245 Sqn shark mouth machine
 I will be trialing the actual shark mouth soon

In the set of masks that I am producing for this kit are a set of canopy, clear parts and wheel masks, and here are the canopy masks in use. I don't actually like canopy masks; unless they are very very accurate they are useless! If they are accurate then the modeller most apply them very, very accurately, and more often than not they neither of these things apply! I prefer to use Parafilm M
 Anyway, after very many minute tweaks, I believe that these are very accurate
  I am still considering whether or not to include these in the set?

The next stage, Pre-shading has been done and the camo paints from White Ensign have arrived so this afternoon, or tomorrow, I will start the camo painting

I have started to paint the rockets, the rocket bodies are Humbrol dark green, to be a slightly different shade to the upper surface dark green. The war heads are going to be deep bronze green, but I have to decide how I will mask out the fill bands whhich are on the cone shape of the nose and need to be a scale 0.5" and 0.5" apart! Watch this space

Gremlin56
Joined: October 30, 2005
KitMaker: 3,897 posts
AeroScale: 564 posts
KitMaker: 3,897 posts
AeroScale: 564 posts

Posted: Saturday, October 04, 2014 - 07:07 PM UTC
Looking very good Mal, can't wait to see the further build 


Scrodes

Joined: July 22, 2012
KitMaker: 771 posts
AeroScale: 763 posts

Posted: Saturday, October 04, 2014 - 08:53 PM UTC
Yes include the canopy mask in the set.
I hope the tailband works out, you know i need it
To mask the bands on the warhead, use a punch and dieset topunch someprogressively smaller holes in masking tape and stick the warhead through the holes with just thetip sticking outand paint one colour at atime, switch to asmaller hole andpaintthe next colour
Sorry about the typing, my playbookis havingafit
berndm

Joined: March 26, 2014
KitMaker: 844 posts
AeroScale: 630 posts

Posted: Sunday, October 05, 2014 - 12:33 AM UTC
Looking good Mal, it is nice to compare the same kit with two different ideas to present them.
They have one thing in coomon, they will come out great.
And yes pre cut masks are a challenge too, i use them on heavy framed kits, works for me.
Happy modelling
Bernd

They have one thing in coomon, they will come out great.
And yes pre cut masks are a challenge too, i use them on heavy framed kits, works for me.
Happy modelling
Bernd

Posted: Sunday, October 05, 2014 - 06:04 PM UTC
Julian.
I have pre-shaded and applied the first couple of coats on the underside, pics soon
Matt.
Mmmmm, still unsure about including the canopy masks! I have been looking, again, at pictures that modellers show of the use of canopy masks, and everyone has an issue! Those that are accurate have a mask or 2 that is not applied accurately!
The Checkers and shark mouth will work, I owe Steve Budd a set, as he gave me the kit
Yep that is about how I plan on doing it, but with my set up I should be able to cut the holes progressively smaller to give the scale 0.5" (0.53mm)bands and spacing and the 1.06mm for the green fill band
  [/quote]
Bernd.
Yes, there are many on going builds and its very interesting to see how modellers do there thing. In the end there is no way that I could cut up the model to show off the interior; I will however be building 2 more, one with the engine and gun bay showing and one again buttoned up but on its wheels, that one will probably be the shark mouth
Quoted Text
Looking very good Mal, can't wait to see the further build
I have pre-shaded and applied the first couple of coats on the underside, pics soon

Matt.
Quoted Text
Yes include the canopy mask in the set.
I hope the tail band works out, you know i need it
To mask the bands on the warhead, use a punch and die set to punch some progressively smaller holes in masking tape and stick the warhead through the holes with just the tip sticking out and paint one colour at a time, switch to a smaller hole and paint the next colour
Mmmmm, still unsure about including the canopy masks! I have been looking, again, at pictures that modellers show of the use of canopy masks, and everyone has an issue! Those that are accurate have a mask or 2 that is not applied accurately!
The Checkers and shark mouth will work, I owe Steve Budd a set, as he gave me the kit

Yep that is about how I plan on doing it, but with my set up I should be able to cut the holes progressively smaller to give the scale 0.5" (0.53mm)bands and spacing
 and the 1.06mm for the green fill band
  [/quote]
 Bernd.
Quoted Text
Looking good Mal, it is nice to compare the same kit with two different ideas to present them.
They have one thing in coomon, they will come out great.
And yes pre cut masks are a challenge too, i use them on heavy framed kits, works for me.
Yes, there are many on going builds and its very interesting to see how modellers do there thing. In the end there is no way that I could cut up the model to show off the interior; I will however be building 2 more, one with the engine and gun bay showing and one again buttoned up but on its wheels, that one will probably be the shark mouth

berndm

Joined: March 26, 2014
KitMaker: 844 posts
AeroScale: 630 posts

Posted: Monday, October 06, 2014 - 11:15 PM UTC
Good look with your future Typhoon projects, it is nice to see, that the Hawker production line is re-opened again.

After viewing the builds, i think it is a sound kit, that deserves to be done again. Maybe something for me
Bernd

After viewing the builds, i think it is a sound kit, that deserves to be done again. Maybe something for me
Bernd
Posted: Thursday, October 09, 2014 - 07:57 PM UTC
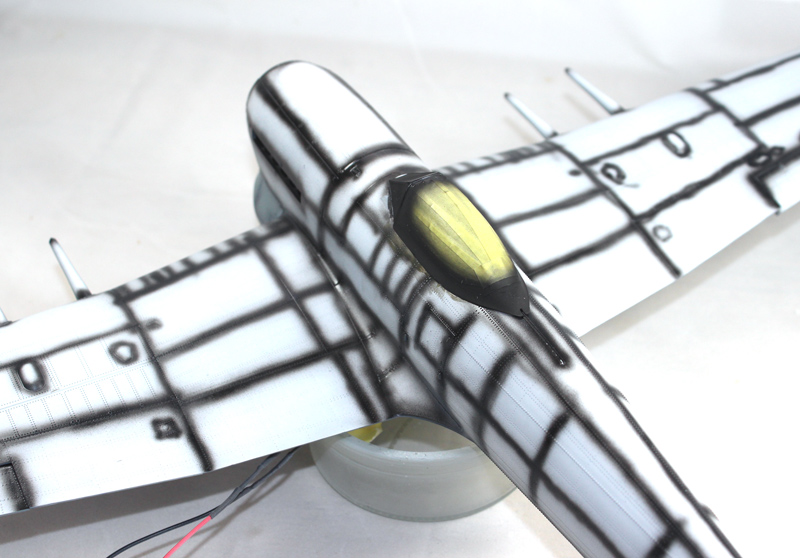
The under surface medium sea grey going on, done in stages to allow the pre-shading to show. The first thing ist use the actual colour as pre-shading along the rivet detail (the black is over the panel lines)
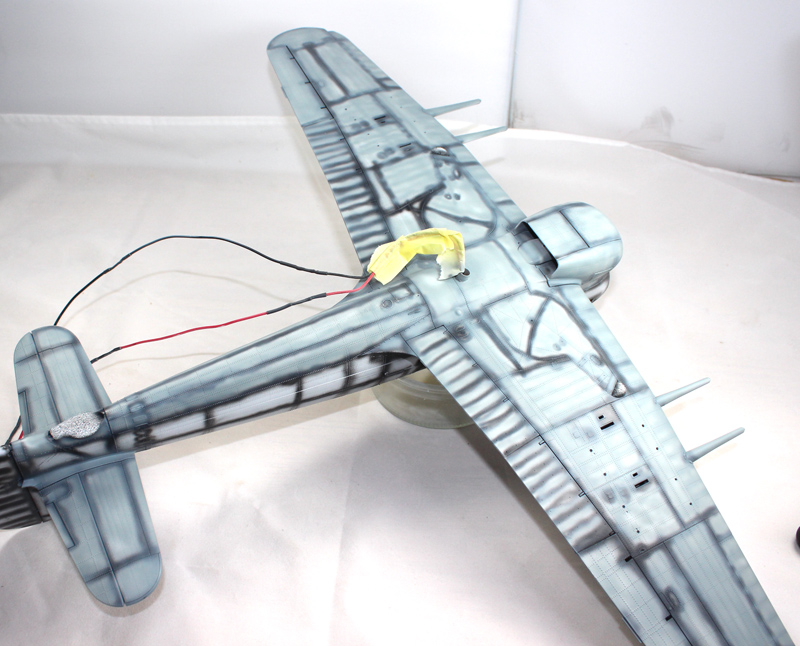
Then the various panels are filled in, starting around the edge, feathering into the pre-shaded medium sea grey areas and with less paint towards the centre, allowing the white to alter the hue slightly.
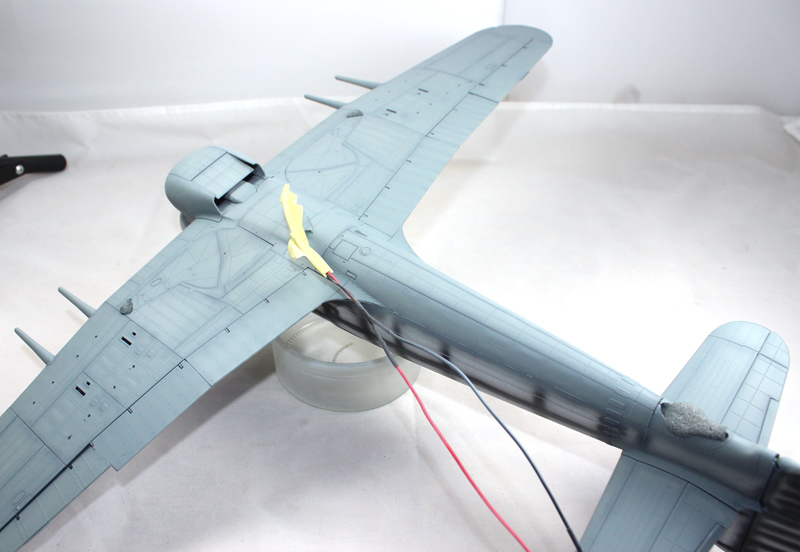
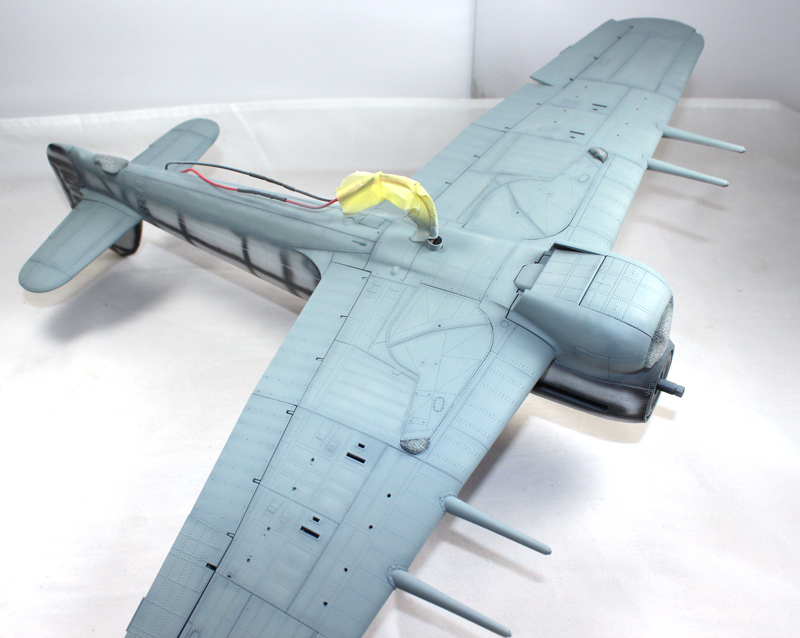
Finally the whole underside is over sprayed with a more diluted paint, blending everything together. The black shows through as a slightly darker shadow and the middle of the panels are very slightly lighter Difficult to see here, but it is subtle and is there
While the paint is drying I attached the canopy parts, and excellent fit
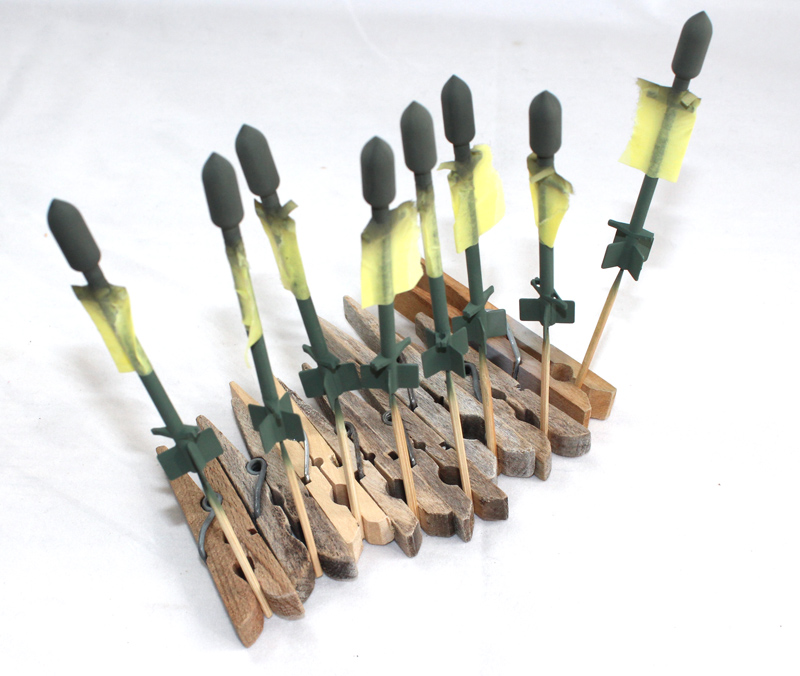
And painted the rockets, the bodies are Humbrol dark green 30, to be slightly different from the camo WEM dark green. The war heads are WEM deep bronze green.
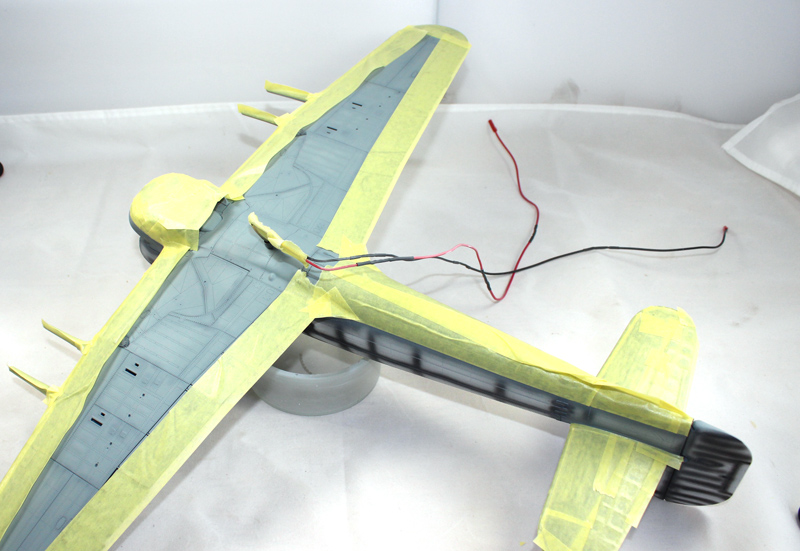
With the paint dry I masked off the under surface colour
Then it was time to paint the upper surface camo Being privilaged to be able to cut my own masks
  I decided to use the camo masks to give me the area to be painted ocean grey (I only paint the area that needs to be the colour, otherwise the pre-shading cannot work. I laid the mask on but there was a problem, can you see it?
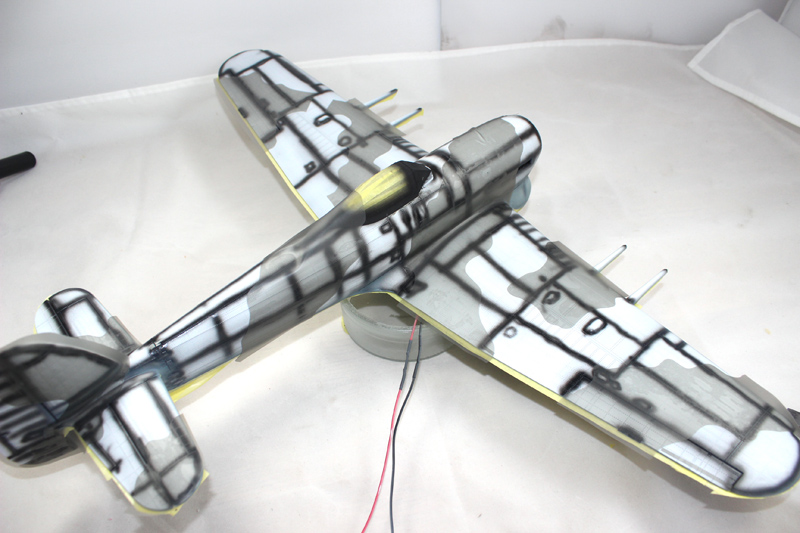
What about now?
[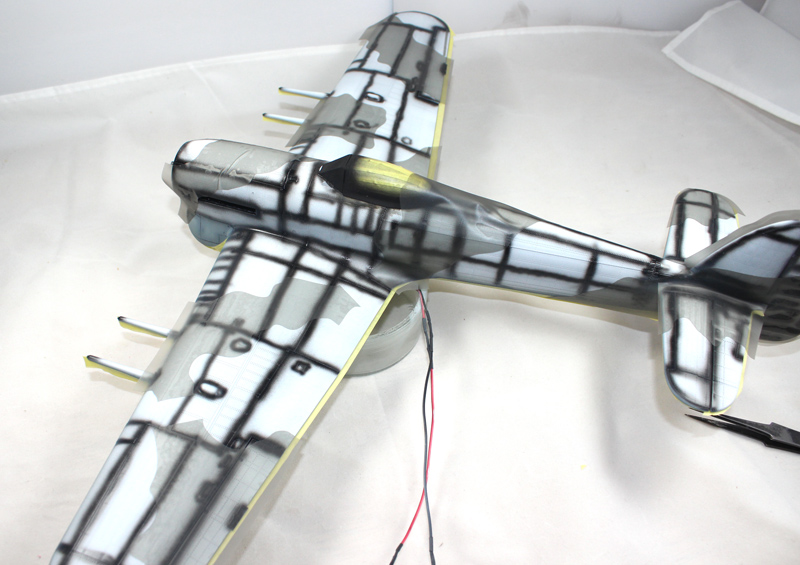
Yep, the main mask on the port wing is too small! Yes I can simply re-cut one in the correct scale but this was cut within the set!
I had spent 2 days to get all 13 elements of the camo masks fitted into only 2 sheets of material which were the larges that would fit into the zip lock bags! But that wasn't the problem, that was that I had just signed off the files for printing and the camo mask stuff obviously had the diagrams of the masks, which now had to revert back to 3 sheets! Luckily though a call to the printers stopped the production, which was shceduled for that evening, phew
  I have since re-done the layout and I think that 3 sheets might actually be better, as I can no get 4 across my plotter with no waste (instead of 3 with quite a bit of waste) not only that I now can have the 3mm trimming gap, rather than have to trim them very closely, which was a real pain. So all, in the end is very good
So a new mask is cut and applied.
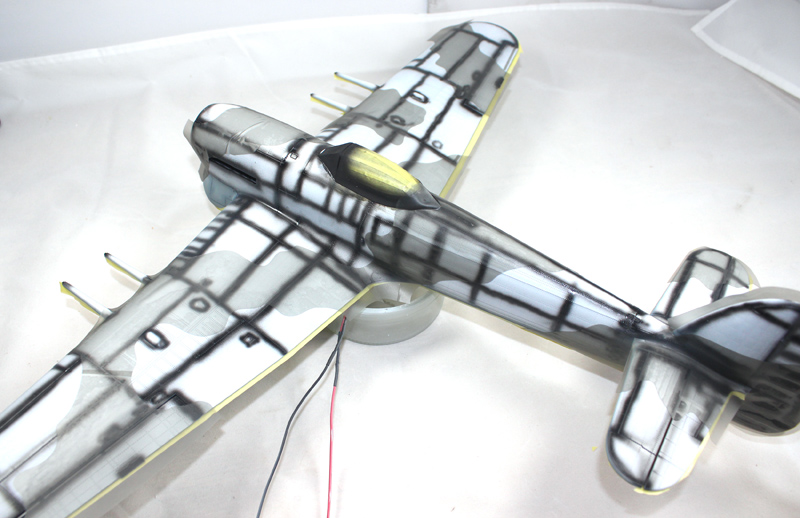
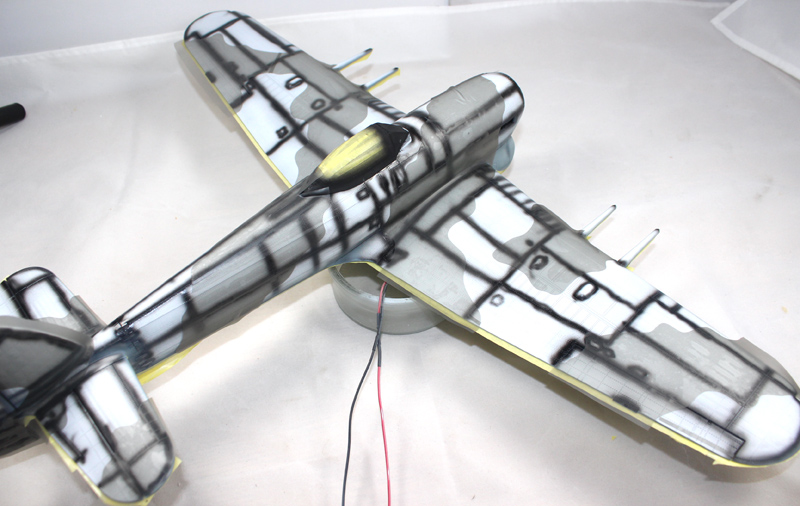
Then I sprayed around the edge and removed the masks.
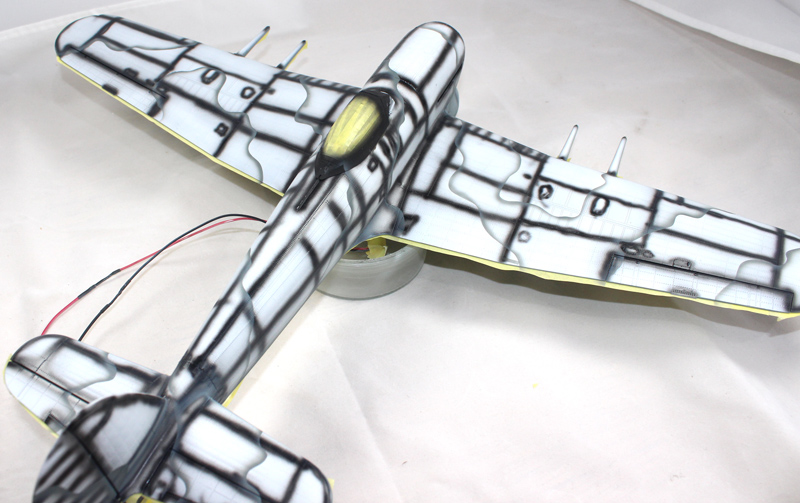
Next up the ocean grey goes on

Then the various panels are filled in, starting around the edge, feathering into the pre-shaded medium sea grey areas and with less paint towards the centre, allowing the white to alter the hue slightly.

Finally the whole underside is over sprayed with a more diluted paint, blending everything together. The black shows through as a slightly darker shadow and the middle of the panels are very slightly lighter
 Difficult to see here, but it is subtle and is there

While the paint is drying I attached the canopy parts, and excellent fit


And painted the rockets, the bodies are Humbrol dark green 30, to be slightly different from the camo WEM dark green. The war heads are WEM deep bronze green.

With the paint dry I masked off the under surface colour

Then it was time to paint the upper surface camo
 Being privilaged to be able to cut my own masks
  I decided to use the camo masks to give me the area to be painted ocean grey (I only paint the area that needs to be the colour, otherwise the pre-shading cannot work. I laid the mask on but there was a problem, can you see it?
What about now?
[

Yep, the main mask on the port wing is too small! Yes I can simply re-cut one in the correct scale but this was cut within the set!
I had spent 2 days to get all 13 elements of the camo masks fitted into only 2 sheets of material which were the larges that would fit into the zip lock bags! But that wasn't the problem, that was that I had just signed off the files for printing and the camo mask stuff obviously had the diagrams of the masks, which now had to revert back to 3 sheets!
 Luckily though a call to the printers stopped the production, which was shceduled for that evening, phew
  I have since re-done the layout and I think that 3 sheets might actually be better, as I can no get 4 across my plotter with no waste (instead of 3 with quite a bit of waste) not only that I now can have the 3mm trimming gap, rather than have to trim them very closely, which was a real pain. So all, in the end is very good
So a new mask is cut and applied.


Then I sprayed around the edge and removed the masks.

Next up the ocean grey goes on

Gremlin56
Joined: October 30, 2005
KitMaker: 3,897 posts
AeroScale: 564 posts
KitMaker: 3,897 posts
AeroScale: 564 posts

Posted: Thursday, October 09, 2014 - 08:08 PM UTC
Looking excellent Mal, nice to see the masks in action.
Keep the photos coming

Keep the photos coming


berndm

Joined: March 26, 2014
KitMaker: 844 posts
AeroScale: 630 posts

Posted: Friday, October 10, 2014 - 06:47 AM UTC
As said, good to see this in action, nice paintwork on the underside as well,looking great.
Bernd
Bernd

Scrodes

Joined: July 22, 2012
KitMaker: 771 posts
AeroScale: 763 posts

Posted: Friday, October 10, 2014 - 08:37 AM UTC
Sorry if I missed it, what paints are you using for the camouflage?
Posted: Friday, October 10, 2014 - 05:52 PM UTC
Matt, I use White Ensign Models (WEM) Colourcoats enamels 

 |


