World War II: Great Britain
Aircraft of Great Britain in WWII.
Hosted by Rowan Baylis
Airfix 1/24 Scale Hawker Typhoon Build.
Holdfast
Staff MemberPresident
IPMS-UK KITMAKER BRANCH
#056
_VISITCOMMUNITY
England - South West, United Kingdom
Joined: September 30, 2002
KitMaker: 8,581 posts
AeroScale: 4,913 posts
Posted: Wednesday, October 22, 2014 - 05:32 PM UTC
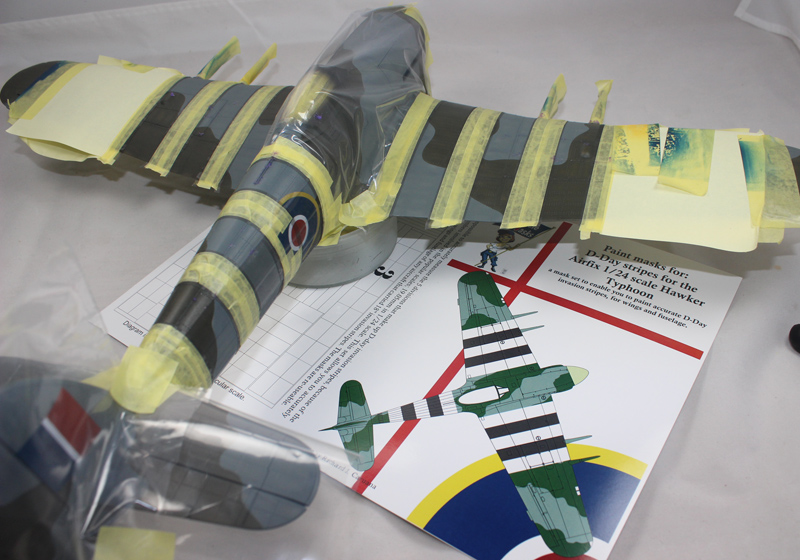
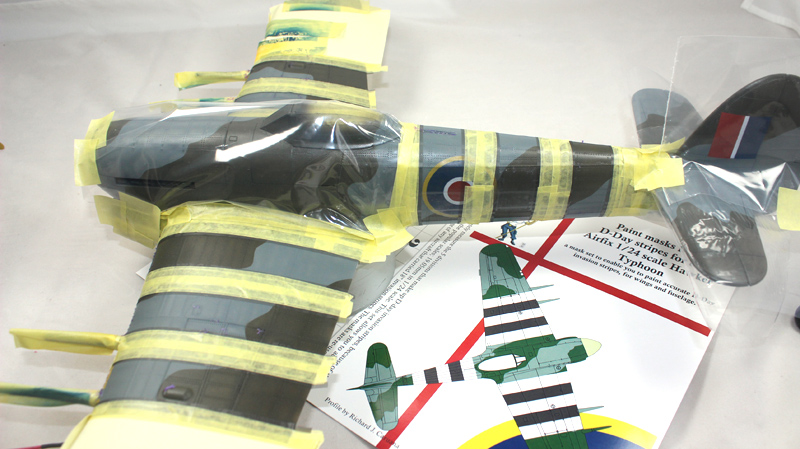
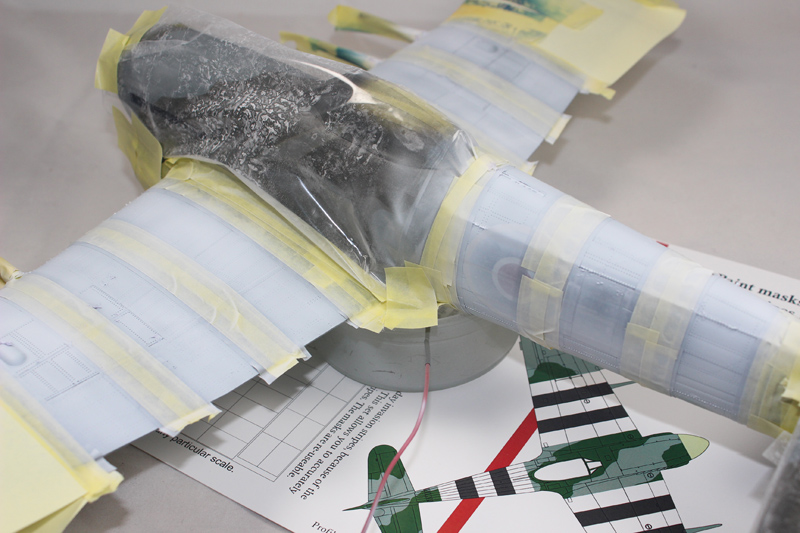
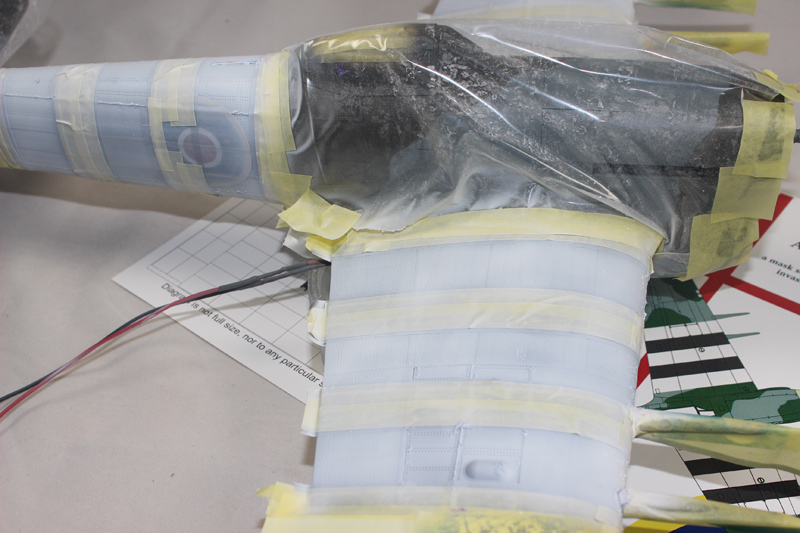
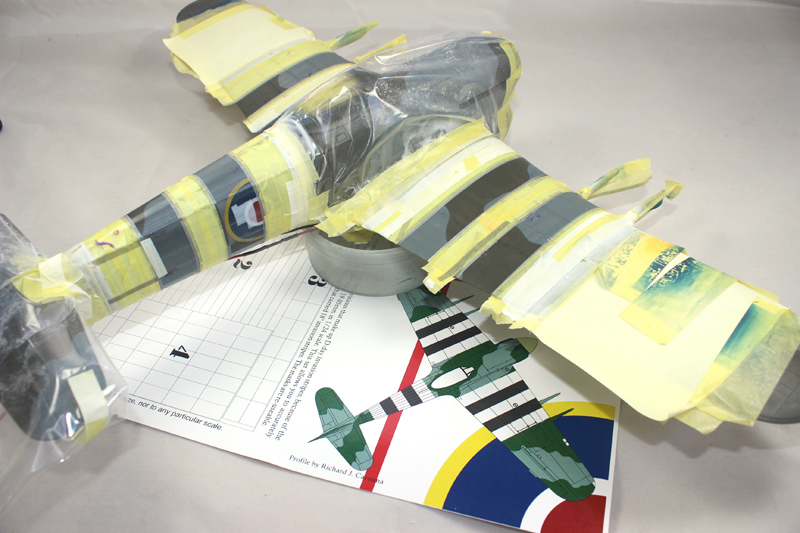
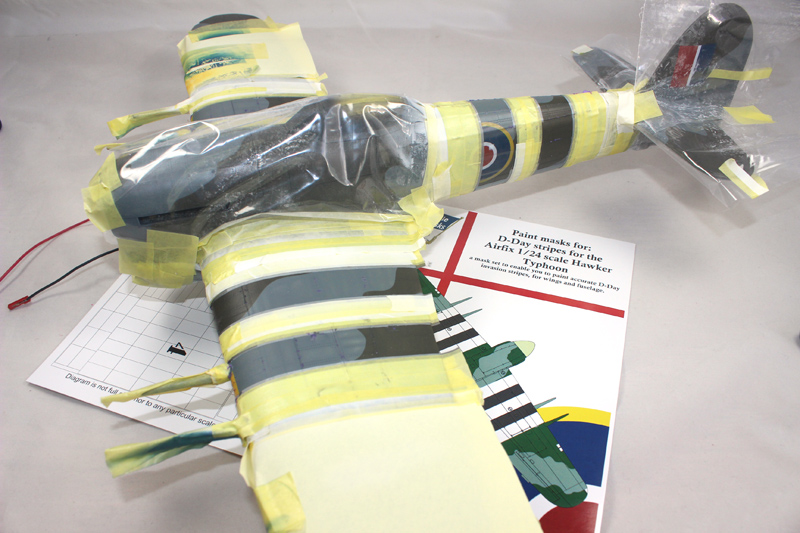
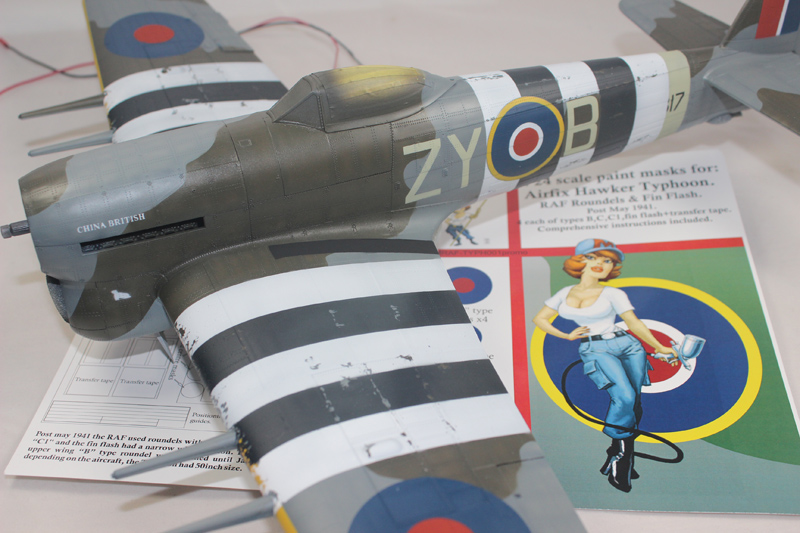
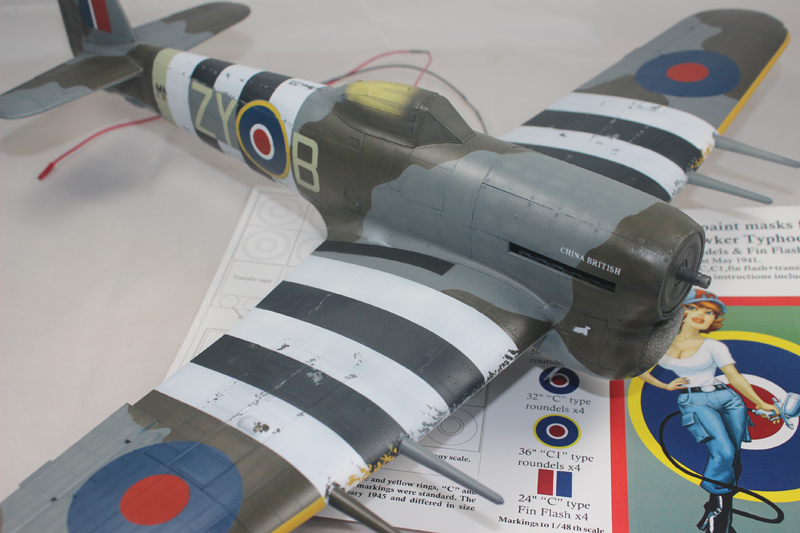
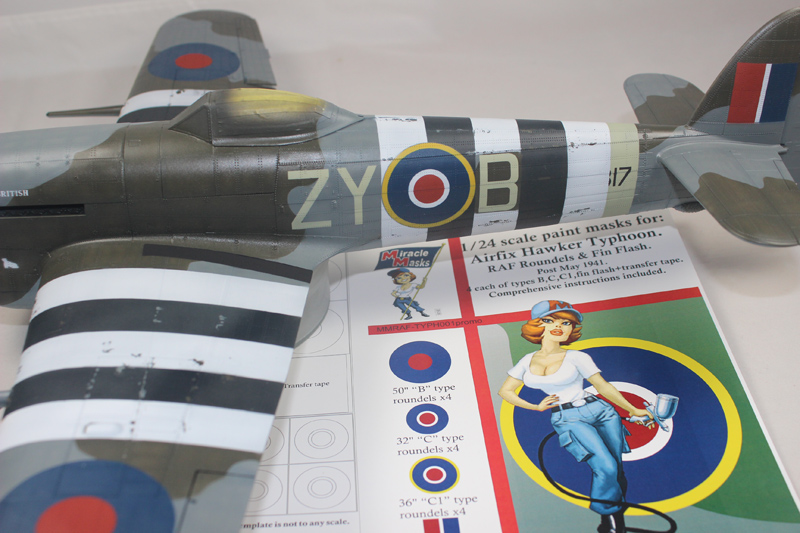
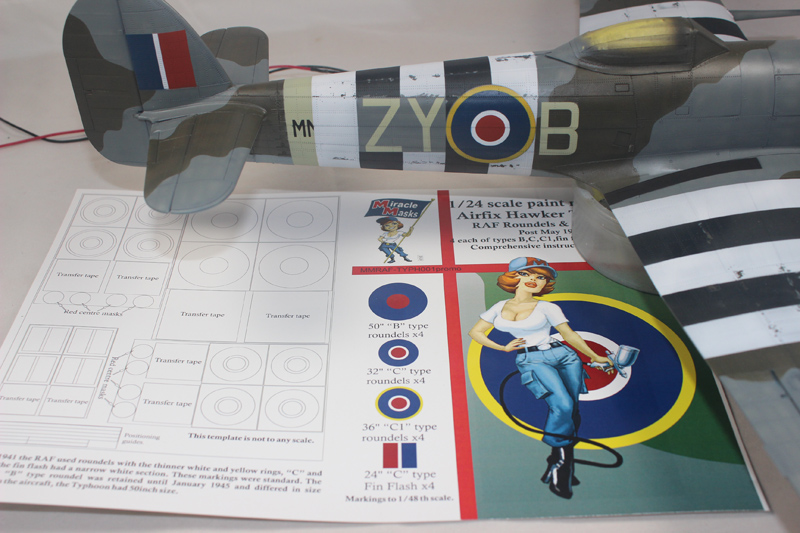
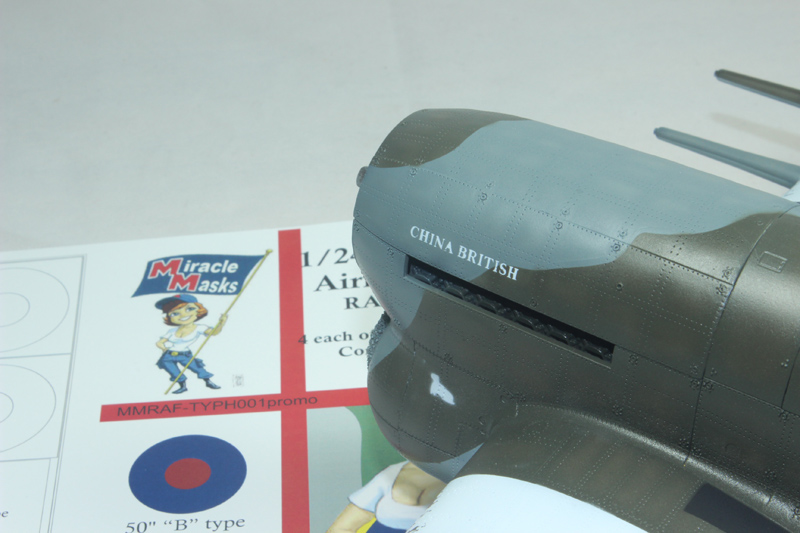
I masked off for the white stripes. The instructions for my "D-Day stripe helpers" suggest laying out the whole area of the 5 stripes then painting that white then using the set as described to mask out the white to paint the black. This is the way that most modellers will approach this, but not me I used my set to lay out the white areas, separately to the black, now this was a "ton" of work Joel, but if it worked it would be worth it (as is all masking ) In fact it took me all day Sunday, but it was quite relaxing I am building ZY-B MN317 of 247Sqn "China British", the same markings as on my 1/48 scale version. This aircraft had the "B" on the port side and the "ZY" on the starboard side masked out ( ) so that they were in areas clear of the stripes, so I cut masks for these 2 areas, and for the roundel. The roundel mask was a scale 1" bigger, giving a scale 0.5" space all around it. The reason for this is 2 fold; 1. It seems logical that a space was left and 2. If and exact sized disc isn't positioned bang on then, after painting the stripes, the roundel would look odd.


I applied liquid mask using a piece of scouring pad, in strategic places and I used Mr Paint to paint the white areas.


berndm
_VISITCOMMUNITY
Niedersachsen, Germany
Joined: March 26, 2014
KitMaker: 844 posts
AeroScale: 630 posts
Posted: Thursday, October 23, 2014 - 02:50 AM UTC
Perfect work, Mal, great presentation.
chukw1
_VISITCOMMUNITY
California, United States
Joined: November 28, 2007
KitMaker: 817 posts
AeroScale: 729 posts
Posted: Thursday, October 23, 2014 - 05:37 AM UTC
Yes, you are rockin' those stripes! Good idea on the liquid masking- I'm looking forward to seeing some wear and tear.
Joel_W
Staff MemberAssociate Editor
AUTOMODELER
_VISITCOMMUNITY
New York, United States
Joined: December 04, 2010
KitMaker: 11,666 posts
AeroScale: 7,410 posts
Posted: Thursday, October 23, 2014 - 06:34 AM UTC
Mal,
without a doubt, you're the master of Masking. It's looking real good. Now bring on the paint.
Joel
Holdfast
Staff MemberPresident
IPMS-UK KITMAKER BRANCH
#056
_VISITCOMMUNITY
England - South West, United Kingdom
Joined: September 30, 2002
KitMaker: 8,581 posts
AeroScale: 4,913 posts
Posted: Friday, October 24, 2014 - 07:28 PM UTC


Quoted Text

Perfect work, Mal, great presentation.


Thanks Bernd


Quoted Text

Yes, you are rockin' those stripes! Good idea on the liquid masking- I'm looking forward to seeing some wear and tear.


Thanks Chuck, I've not used this method before as when I have tried to use liquid mask it has never worked for me! So I am taking a risk, wish me luck


Quoted Text

Mal,
without a doubt, you're the master of Masking. It's looking real good. Now bring on the paint.
Joel


Thanks Joel, here we go:

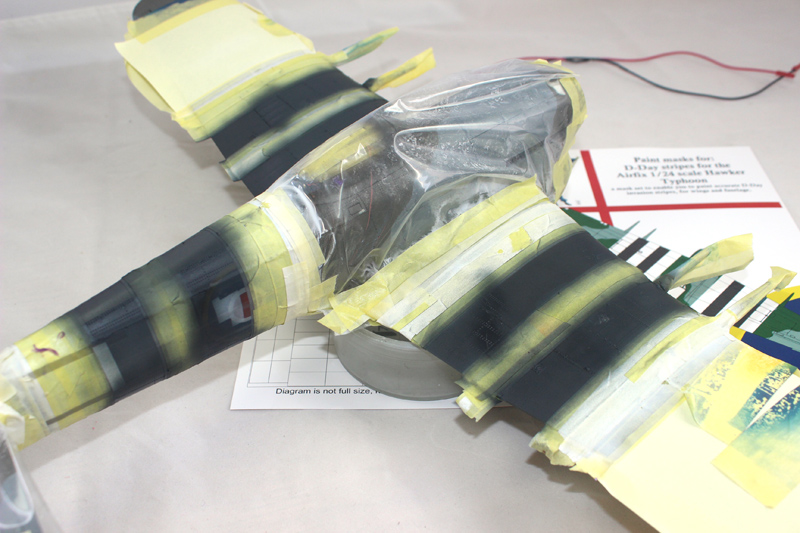
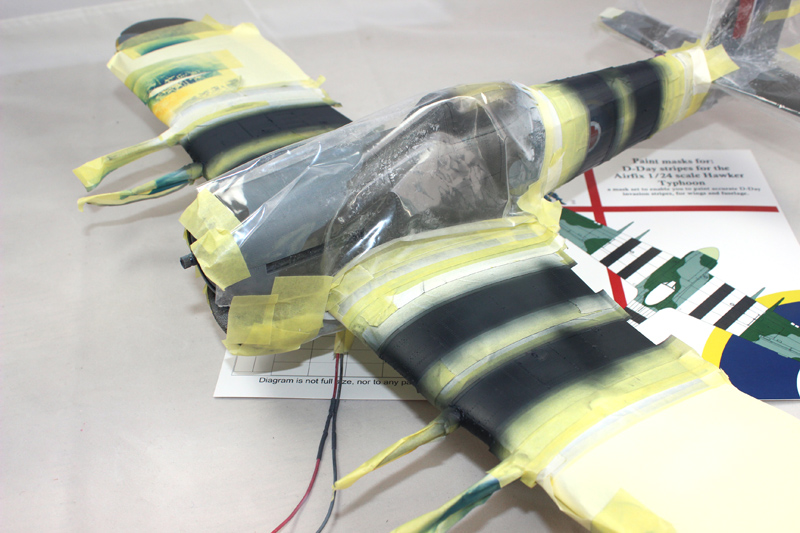
The white masked out.


I used White Ensign Models Colourcoats Japanese cowl blue black for the black stripes.


Next up the codes, and the script on the nose

berndm
_VISITCOMMUNITY
Niedersachsen, Germany
Joined: March 26, 2014
KitMaker: 844 posts
AeroScale: 630 posts
Posted: Friday, October 24, 2014 - 07:37 PM UTC
VERY nice, Mal, can t wait to see all masking off!
Holdfast
Staff MemberPresident
IPMS-UK KITMAKER BRANCH
#056
_VISITCOMMUNITY
England - South West, United Kingdom
Joined: September 30, 2002
KitMaker: 8,581 posts
AeroScale: 4,913 posts
Posted: Saturday, October 25, 2014 - 05:47 PM UTC
Well in the excitement to get the next stage of masking done I forgot to take a photo of the invasion stripes completed The excitement of the reveal can be just too much Then having masked and painted the codes and the logo on the nose would you believe it! The same thing happened and I forgot to photograph the codes before the last stage of the masking, the part serials and the walk areas on the wing roots
So here we are with all the masking and painting complete


The poly bag masking over the canopy escaped the masking tape and allowed a little white over spray, DOH! I should have spotted this but put it down to the excitement of masking and painting! Or old age It is an easy fix so no problem.

I have applied the few stencil d****s! so it just needs a coat of Klear before the final weathering stages.

I have found a nice graphic of the D-Day landings, which I will attach to the top of the base and I have painted the caption on the base

I have started painting the fill bands on the rockets, but I'm not hopeful of a great outcome for the red and white on the nose of the war heads we will see. The green bands around them won't be a problem I have lost a week somewhere as I thought that I had a week longer to finish this than I actually have! I never know what day it is since I "retired" So I may or may not manage to have a pair of rockets firing as that is not a priority now that Master have announce their turned rockets, which will be on sale at Telford and will take the place of the kit rockets, in time

I also need to start cutting the masks for the set, I'm taking 30 to Telford, so that's a lot of cutting!
FredrikA
_VISITCOMMUNITY
Uppsala, Sweden
Joined: January 09, 2008
KitMaker: 92 posts
AeroScale: 90 posts
Posted: Saturday, October 25, 2014 - 06:27 PM UTC
Hi Mal! It's looking good! Your work with the masks is very "fun" too watch, as well as inspiring. Having used your masks, I know they do what they are supposed to do and that they do it without any fuss, but your display of the results on the Typhoon is still marvelous to watch. Good luck with the finish! I hope you manage it before Telford.
/Fredrik
Joel_W
Staff MemberAssociate Editor
AUTOMODELER
_VISITCOMMUNITY
New York, United States
Joined: December 04, 2010
KitMaker: 11,666 posts
AeroScale: 7,410 posts
Posted: Sunday, October 26, 2014 - 02:41 AM UTC
Mal,
Most impressive once the masking has been removed.
Joel
Holdfast
Staff MemberPresident
IPMS-UK KITMAKER BRANCH
#056
_VISITCOMMUNITY
England - South West, United Kingdom
Joined: September 30, 2002
KitMaker: 8,581 posts
AeroScale: 4,913 posts
Posted: Sunday, October 26, 2014 - 08:26 PM UTC
Thanks Fredrik and Joel

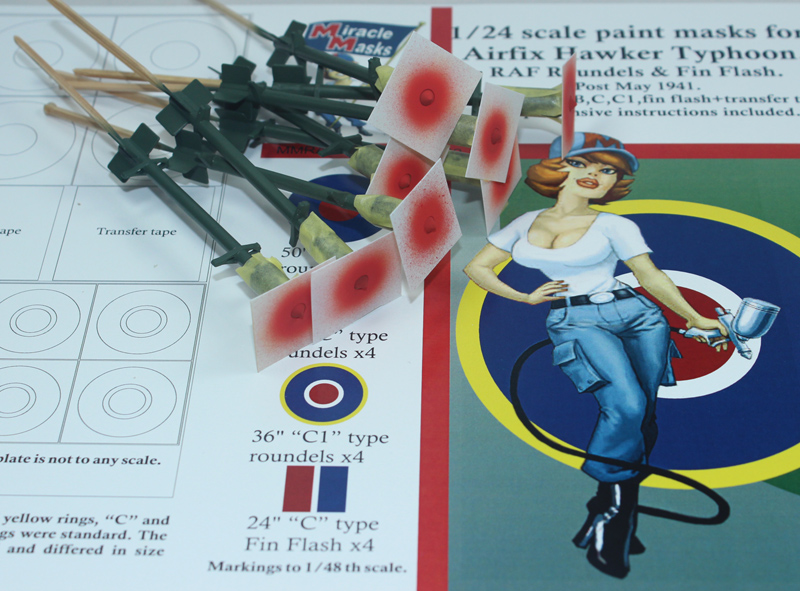
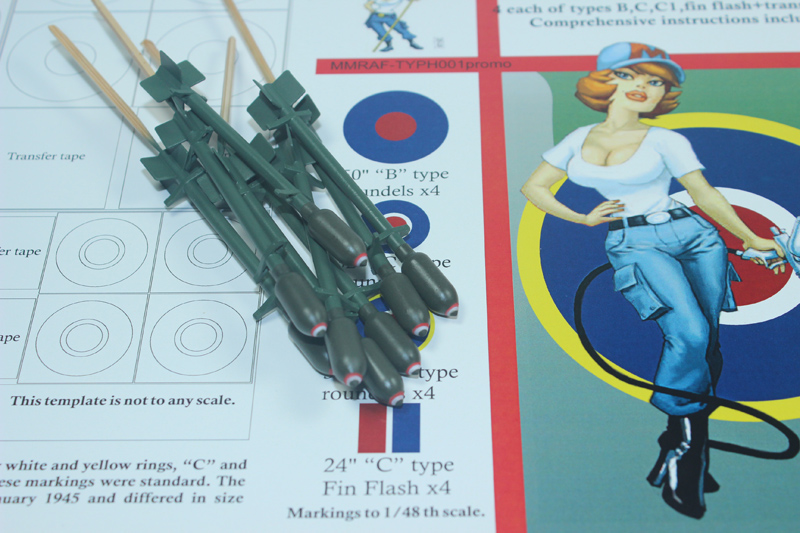
I have started painting the fill bands on the rockets. Here are the red and white bands on the nose of the warhead. They are by no means perfect and I was hoping to get them better than this but I will be replacing these with Masters turn examples, so these will do for the time being, especially as I don't have the time to re-do them. The issue is that I didn't have a reliable way of keeping each of the punched pieces of plastic card level. The method does work though and it isn't too bad?

There is a light green band to go on around the war head, which I hop to do today


stooge
_VISITCOMMUNITY
South Australia, Australia
Joined: June 20, 2013
KitMaker: 210 posts
AeroScale: 210 posts
Posted: Sunday, October 26, 2014 - 10:49 PM UTC
Nice tips.
Joel_W
Staff MemberAssociate Editor
AUTOMODELER
_VISITCOMMUNITY
New York, United States
Joined: December 04, 2010
KitMaker: 11,666 posts
AeroScale: 7,410 posts
Posted: Monday, October 27, 2014 - 04:22 AM UTC
Mal,
Nicely done. I like your method much better then the convoluted method I try to use with thin strips of masking tape.
Joel
Holdfast
Staff MemberPresident
IPMS-UK KITMAKER BRANCH
#056
_VISITCOMMUNITY
England - South West, United Kingdom
Joined: September 30, 2002
KitMaker: 8,581 posts
AeroScale: 4,913 posts
Posted: Monday, October 27, 2014 - 06:43 PM UTC

Quoted Text

Nice tips.


Quoted Text

Mal,
Nicely done. I like your method much better then the convoluted method I try to use with thin strips of masking tape.
Joel


Thanks Joel,
This bodes well for the next attempt as this shows that it will work; all I need to do is to find a way of keeping the first piece of card square to the warhead!
Joel_W
Staff MemberAssociate Editor
AUTOMODELER
_VISITCOMMUNITY
New York, United States
Joined: December 04, 2010
KitMaker: 11,666 posts
AeroScale: 7,410 posts
Posted: Tuesday, October 28, 2014 - 03:11 AM UTC


Quoted Text

Mal,
Nicely done. I like your method much better then the convoluted method I try to use with thin strips of masking tape.
Joel


Thanks Joel,
This bodes well for the next attempt as this shows that it will work; all I need to do is to find a way of keeping the first piece of card square to the warhead![/quote]

Mal,
I never thought of that. I just figured if the dia of the hole was correct, as you moved the piece of plastic down the bomb, it should be easy enough by eye to square up. That assumption doesn't seem to be quite true.
Joel
chukw1
_VISITCOMMUNITY
California, United States
Joined: November 28, 2007
KitMaker: 817 posts
AeroScale: 729 posts
Posted: Tuesday, October 28, 2014 - 03:20 AM UTC
Quite a brilliant way to paint those warheads, Mal- cheers!
If you can mount the missile vertically plums, you can level off the card mask in a couple of stacks of books flanking it. Hmm- that would work for spinners as well! Gotta try that one out now. The Hawker is lookin' mighty fine!
Holdfast
Staff MemberPresident
IPMS-UK KITMAKER BRANCH
#056
_VISITCOMMUNITY
England - South West, United Kingdom
Joined: September 30, 2002
KitMaker: 8,581 posts
AeroScale: 4,913 posts
Posted: Tuesday, October 28, 2014 - 08:06 PM UTC

Quoted Text

Mal,
I never thought of that. I just figured if the dia of the hole was correct, as you moved the piece of plastic down the bomb, it should be easy enough by eye to square up. That assumption doesn't seem to be quite true.
Joel


No, as you can see I also thought that even if the first piece wasn't bang on square then subsequent pieces would simply be equally out and it would really matter. That is not the case also. The method of holding the first piece (masking tape) was just too unpredictable.


Quoted Text

Quite a brilliant way to paint those warheads, Mal- cheers!
If you can mount the missile vertically plums, you can level off the card mask in a couple of stacks of books flanking it. Hmm- that would work for spinners as well! Gotta try that one out now. The Hawker is lookin' mighty fine!


Thanks Chuck
Yep, for the 1/48 rockets that I painted Storm bringers
I designed a jig out of slide boxes. The issue with these was that I tried hand painting them so they were not very even. So yes, this is the key

Green bands are painted, decals go on today
SGTJKJ
#041
_VISITCOMMUNITY
Kobenhavn, Denmark
Joined: July 20, 2006
KitMaker: 10,069 posts
AeroScale: 3,788 posts
Posted: Tuesday, October 28, 2014 - 10:28 PM UTC
Great paintwork! Loooks absolutely outstanding!

Nice tip on painting the missile tips.

Looking forward to see more
Holdfast
Staff MemberPresident
IPMS-UK KITMAKER BRANCH
#056
_VISITCOMMUNITY
England - South West, United Kingdom
Joined: September 30, 2002
KitMaker: 8,581 posts
AeroScale: 4,913 posts
Posted: Wednesday, October 29, 2014 - 07:15 PM UTC

Quoted Text

Great paintwork! Loooks absolutely outstanding!

Nice tip on painting the missile tips.

Looking forward to see more


Thanks Jesper, here ya go
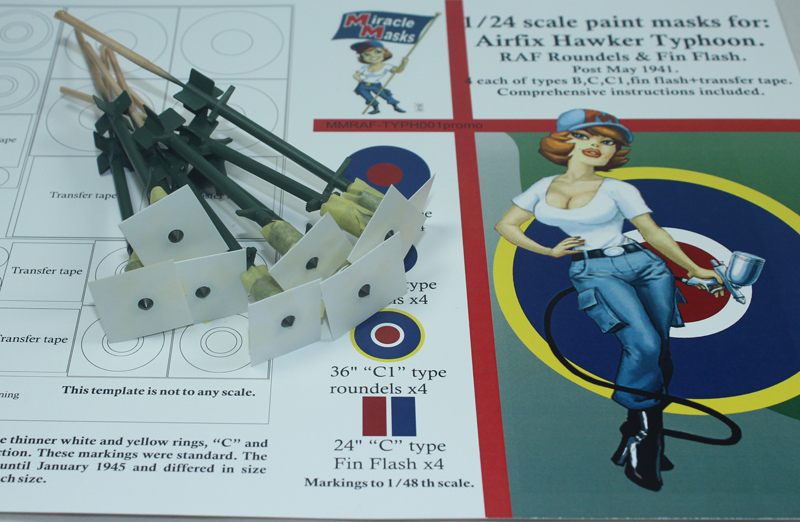
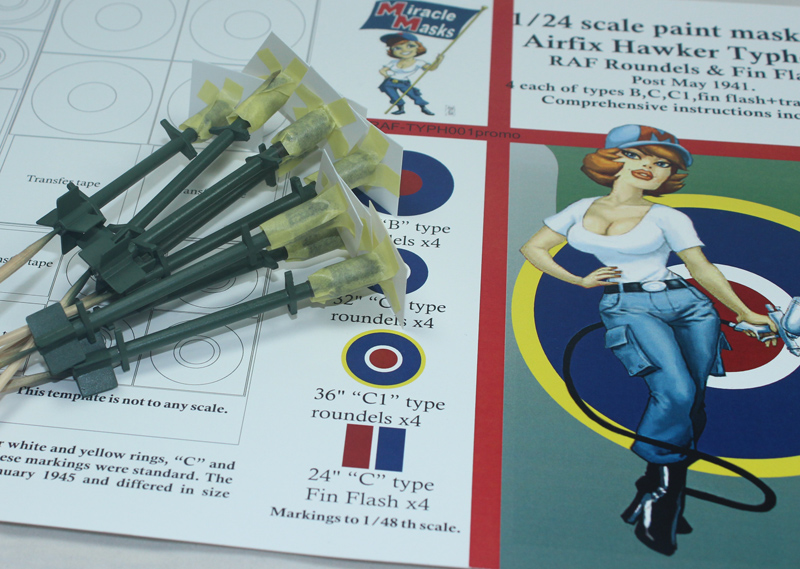
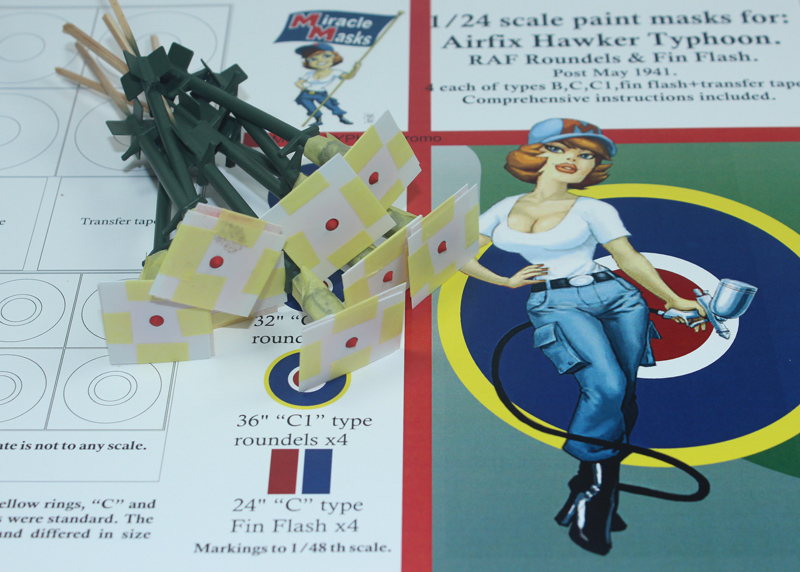
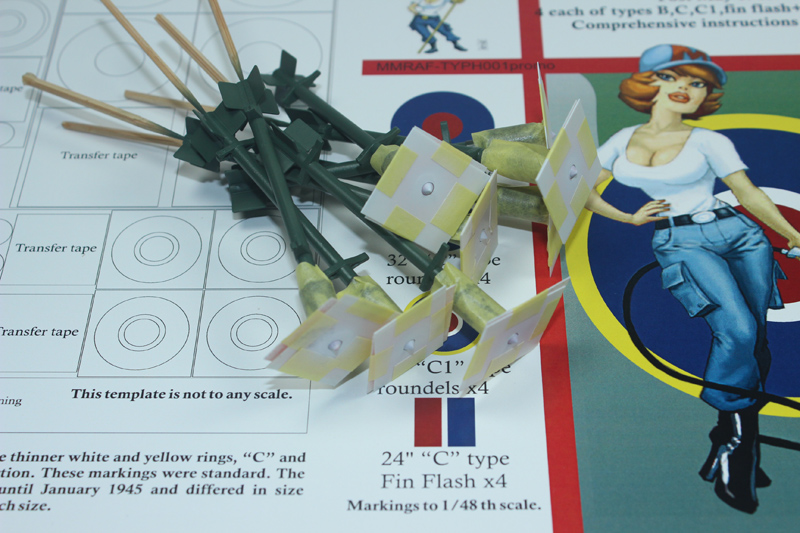
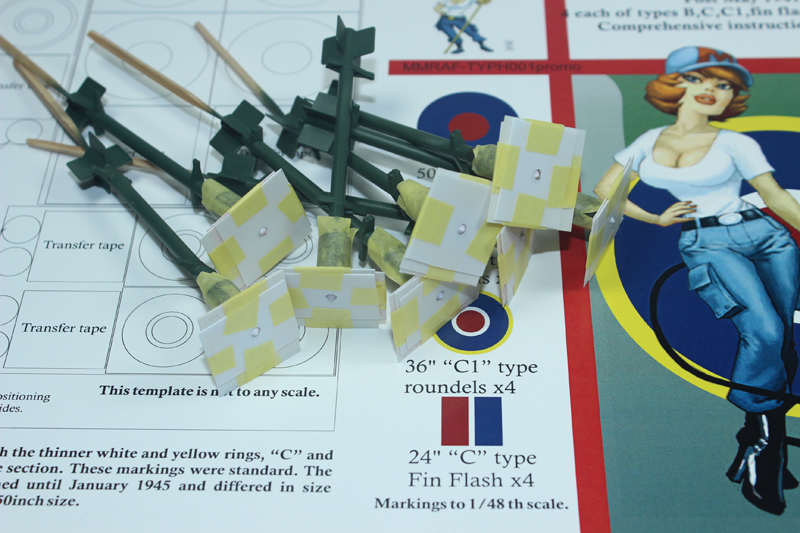
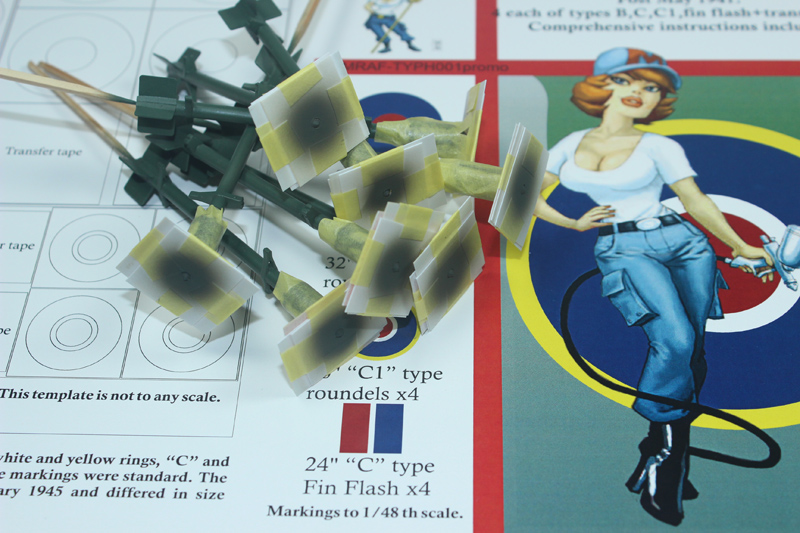
Rather than yellow british ordnance has a green fill band around the main body. On the the rockets this is 1" (1.06mm in 1/24 scale). The bands need to be positioned in the same place on each rocket so I used a simple jig, 2 pieces of thick plastic card glued at right angles with a strip of masking material cut at 1.06mm width placed on the base at the the correct point. I simply laid another cut strip, adhesive side up, on top of it then butted the nose of the rocket against the vertical piece of card and lowered it onto the strip. It was then a simple case of wrapping the strip around the warhead, keeping it square.
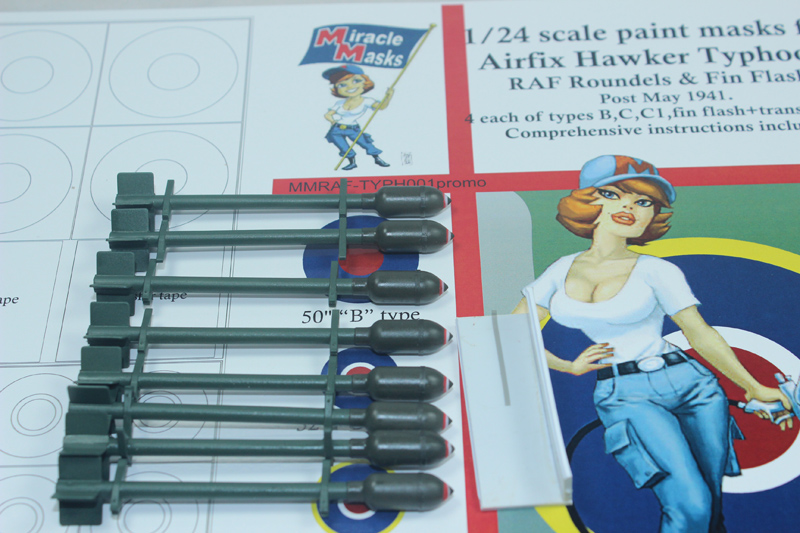

I then added strips of material either side of the first, and butted up to it.
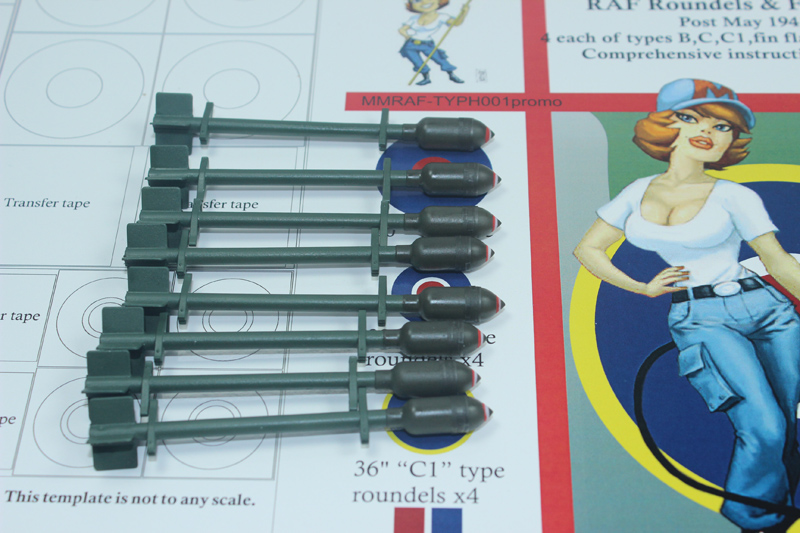

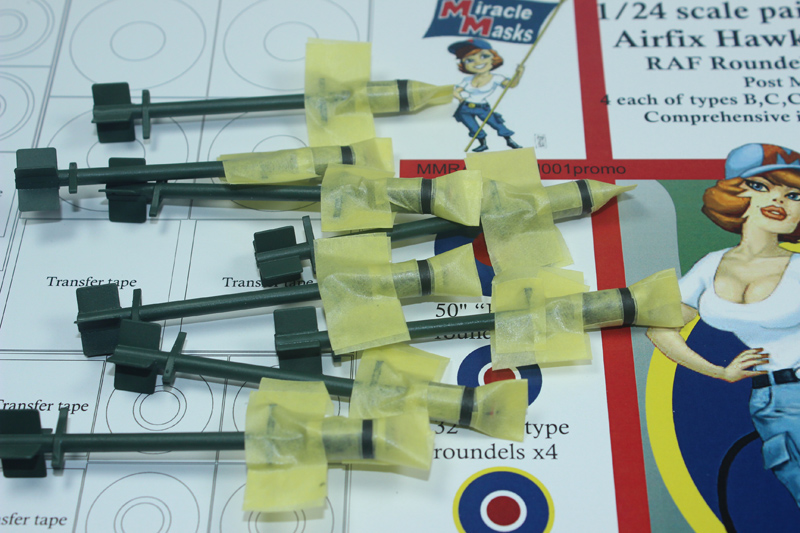
Then mask away from the second strips, to prevent over spray. Remove the first positioning strips.

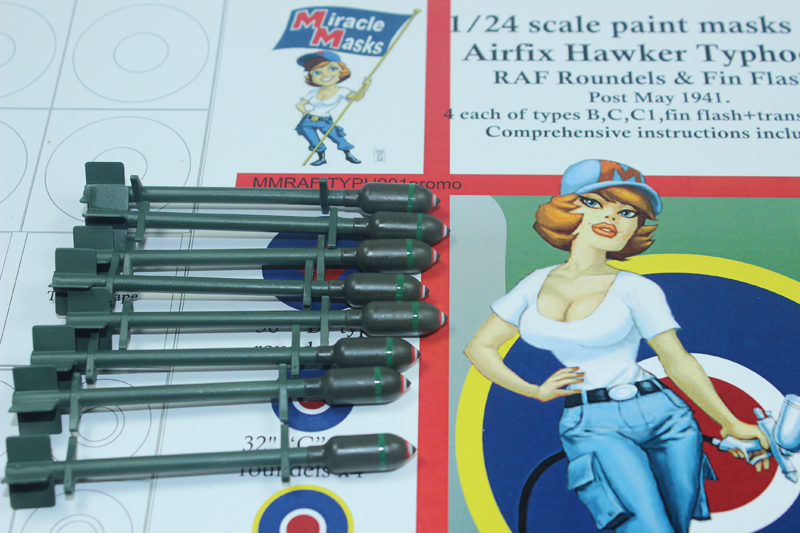
I mixed the green using Humbrol green No3 with white to match the green of the fill bands for the bombs on the Airfix decal sheet. The decal sheets that I have are pre-production, well the kit is, and there are indications that there should be fill band decals for the rockets on the "generic markings sheet", but there are none on the sheets that I have, but no sweat I sprayed the colour onto the exposed areas and when dry, well I couldn't wait that long so I removed the masking and we have the green fill bands

I am currently adding the stencil decals, which I should complete today. These are comprehensive and cover both SAP and HE war heads mine are all SAP as I'm after targets

I feel that I am course to get this finished in time for Telford. I just have to finish the rockets, apply the weathering to the Typhoon and add a matt coat, finish the base, and build a box in which to carry it I was considering not having a pair of rockets firing, as was the original plan, as they will be replaced by the "Master" rockets after Telford. However I have cracked the problem of making them removable, so it may be back on
FredrikA
_VISITCOMMUNITY
Uppsala, Sweden
Joined: January 09, 2008
KitMaker: 92 posts
AeroScale: 90 posts
Posted: Wednesday, October 29, 2014 - 08:12 PM UTC
Thank you for another update! They are very frequent, so I guess you are on a roll as well as on a deadline.
A friend of mine, normally a shipbuilder, has been building transport boxes for a long time. As he travels a lot with his models, the boxes are quite sturdy. Here is an example

Box built by Ulf Lundberg
http://www.ipmsstockholm.se/phpBB3/viewtopic.php?f=3&t=5471&start=100


Keep up the good work!
/Fredrik
Joel_W
Staff MemberAssociate Editor
AUTOMODELER
_VISITCOMMUNITY
New York, United States
Joined: December 04, 2010
KitMaker: 11,666 posts
AeroScale: 7,410 posts
Posted: Thursday, October 30, 2014 - 01:33 AM UTC
Fredrik,
That transport box your friend built is amazing.

Mal,
That's certainly a excellent way of mass producing those bomb stripes accurately, and neatly. Well done.

Joel
Holdfast
Staff MemberPresident
IPMS-UK KITMAKER BRANCH
#056
_VISITCOMMUNITY
England - South West, United Kingdom
Joined: September 30, 2002
KitMaker: 8,581 posts
AeroScale: 4,913 posts
Posted: Thursday, October 30, 2014 - 07:00 PM UTC
Nice box Fredrik, I have it covered, my box will be similar, but much bigger as it will look a little like an wooden ammunition box I am trying to think what I could stencil on it?


Quoted Text

Mal,
That's certainly a excellent way of mass producing those bomb stripes accurately, and neatly. Well done.

Joel


Yes it worked so its a way to go The decals have been applied and the rockets look quite good for it 4 decals for each of the eight rockets!
berndm
_VISITCOMMUNITY
Niedersachsen, Germany
Joined: March 26, 2014
KitMaker: 844 posts
AeroScale: 630 posts
Posted: Sunday, November 02, 2014 - 06:28 AM UTC
Your paint work is really impressive Mal,these rockets look very good, great idea !
Holdfast
Staff MemberPresident
IPMS-UK KITMAKER BRANCH
#056
_VISITCOMMUNITY
England - South West, United Kingdom
Joined: September 30, 2002
KitMaker: 8,581 posts
AeroScale: 4,913 posts
Posted: Sunday, November 02, 2014 - 07:14 PM UTC
Thanks Bernd,
The rockets are finished and look pretty cool I have almost finished the Typhoon but with only 3 days until I leave for Telford, and still lots to do in getting stuff for my trade stand ready (the paint masks for this ) I will probably not find the time to post until I return from the show! If I do find time though, if I'm ready by midday on Wednesday, then I will try and remember Oh! and I still have the box to make, which I hope to do this afternoon
berndm
_VISITCOMMUNITY
Niedersachsen, Germany
Joined: March 26, 2014
KitMaker: 844 posts
AeroScale: 630 posts
Posted: Sunday, November 02, 2014 - 07:43 PM UTC
Good luck for your project, Mal. I hope that everything is ready
on time.
Ready or not, your Typhoon is a show stopper and will get a lot of positive feedack.
Well done so far !

Bernd
Biggles87
_VISITCOMMUNITY
Haute-Vienne, France
Joined: August 15, 2011
KitMaker: 57 posts
AeroScale: 55 posts
Posted: Sunday, November 02, 2014 - 08:56 PM UTC
Hi Mal, don't know why but I've not looked at your thread foe a while and you've come a long way. I particularly like the way you've masked the rockets, must try that on mine, and spinners also.
All the best for Telford, pity I won't be their to see your Typhoon but I've had my UK ' aviation' outing for this year, I went to Duxford in September.

Cheers

John