Hosted by Rowan Baylis
Airfix 1/24 Scale Hawker Typhoon Build.

Scrodes

Joined: July 22, 2012
KitMaker: 771 posts
AeroScale: 763 posts

Posted: Saturday, October 11, 2014 - 03:42 AM UTC
Do they still come in the stupid Humbrol-like paintcans?
Posted: Saturday, October 11, 2014 - 06:46 PM UTC
Quoted Text
Do they still come in the stupid Humbrol-like paintcans?
You mean those lovely little tinlets? Yes
 I'm not sure what the inference is but I get on with them quite well
Gremlin56
Joined: October 30, 2005
KitMaker: 3,897 posts
AeroScale: 564 posts
KitMaker: 3,897 posts
AeroScale: 564 posts

Posted: Saturday, October 11, 2014 - 07:16 PM UTC
The tinlets aren't too bad, it's Revell's "cubes" that they sell their acrylic paint in that I detest. Most stupid paint package ever IMHO and thats a shame because the paint is quite good.
Posted: Saturday, October 11, 2014 - 08:11 PM UTC
I agree Julian the Revell cubes are not good!
After removing the camo masks I proceeded to "pre-shade the rivet lines using the same ocean grey paint that I will use for the camo. This is laid on as an opaque coat.
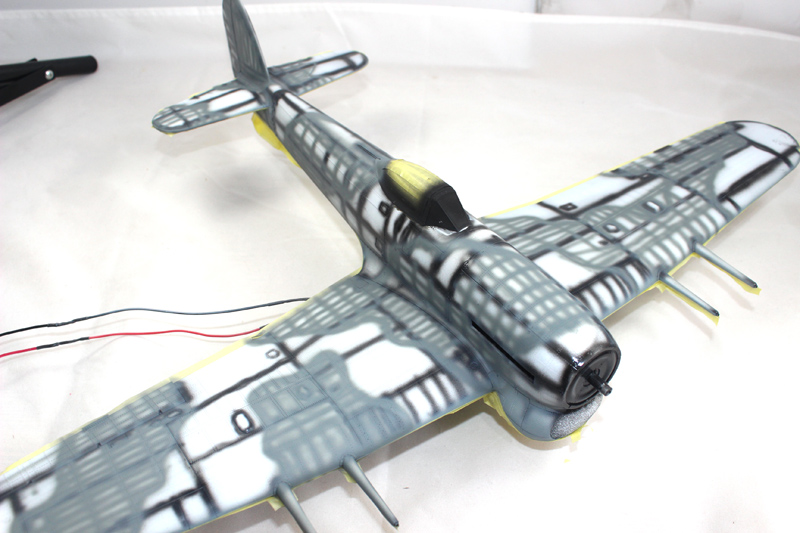
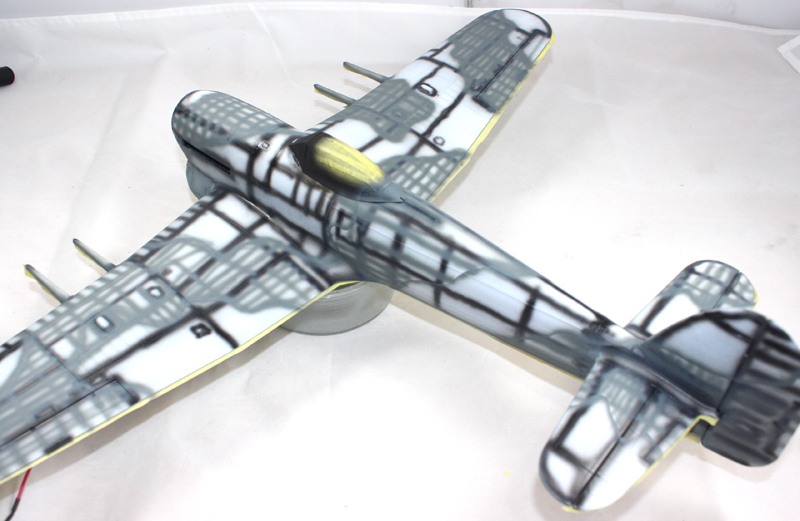
I then over sprayed the areas to start blending in the the different elements of the pre-shading. I stopped and left it alone over night after the first bout of blending as I know from past experience that when you thing it is just right it is too much and then it is too late to go back!
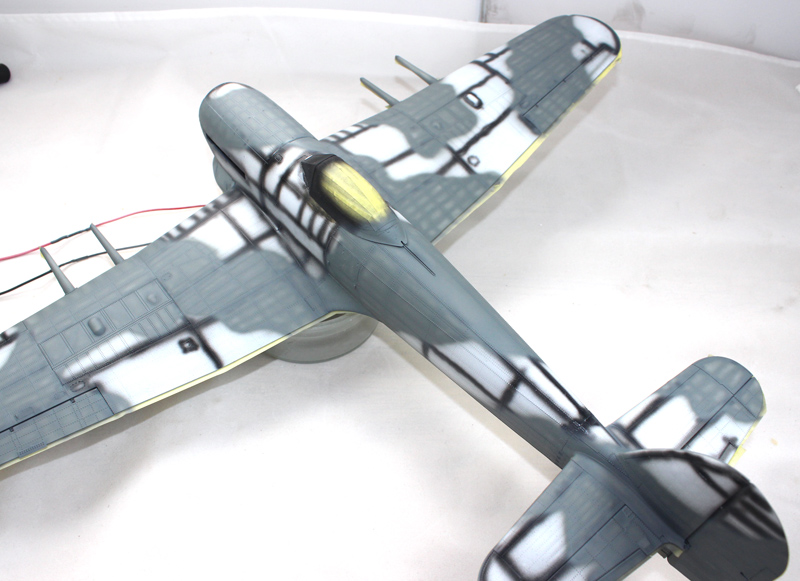
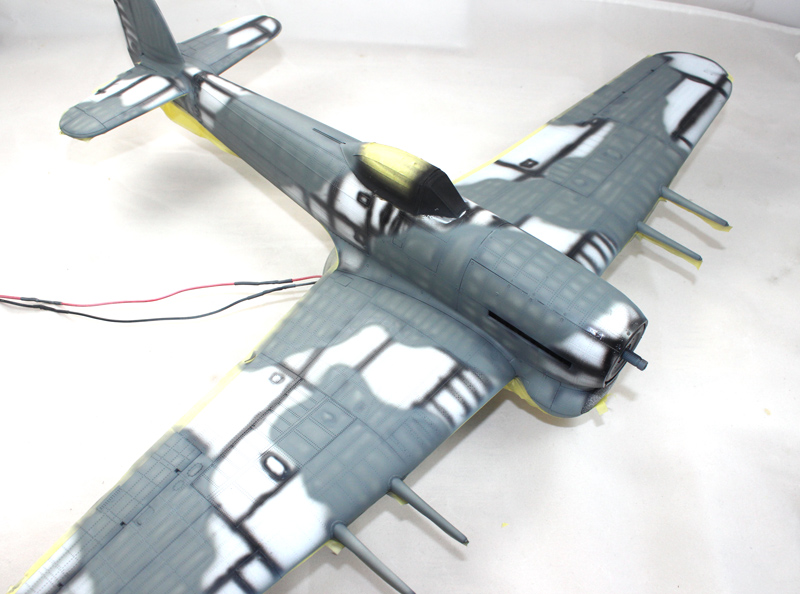
The following day I mixed the paint at 50/50 and over sprayed the areas again. The thinned paint allows you to go carefully and not apply too much paint, which would simply end up with a neat single hue of the colour, which is not what I am looking for.
After doing this I left it for another day and when I took a look there were still areas that needed going over, so I mixed some more paint, this time at around 70/30 and over sprayed the camo areas again, concentrating on the areas that obviously needed it.
This is the result, a subtly faded/light going darker, to the rivet lines, and a smidge darker at the panel lines and hinge points. It can't always be seen, the light has to catch it, but it is there and I'm quite pleased with it. I much prefer this approach to using various different shades of the same colour
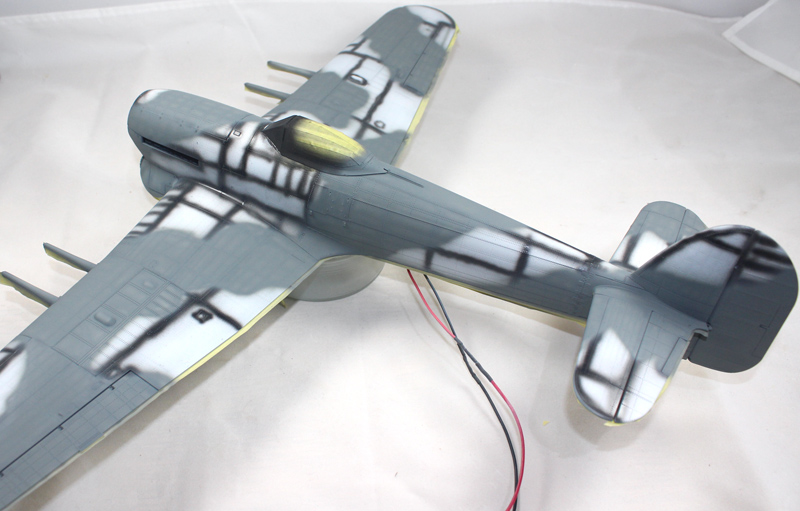
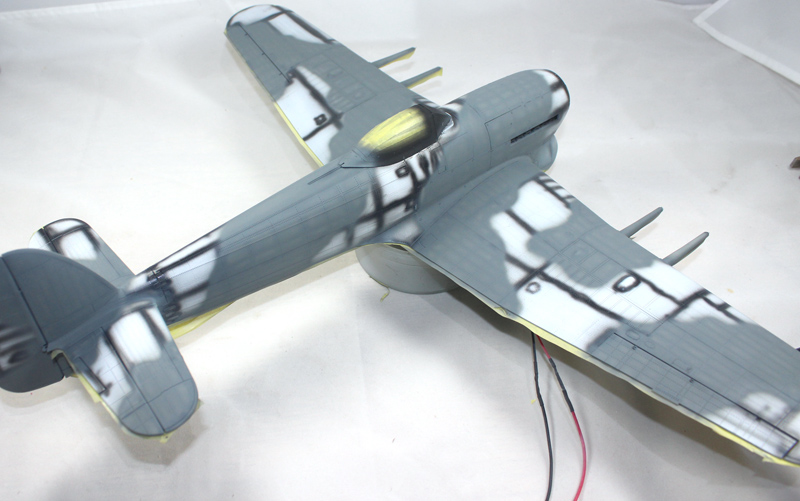
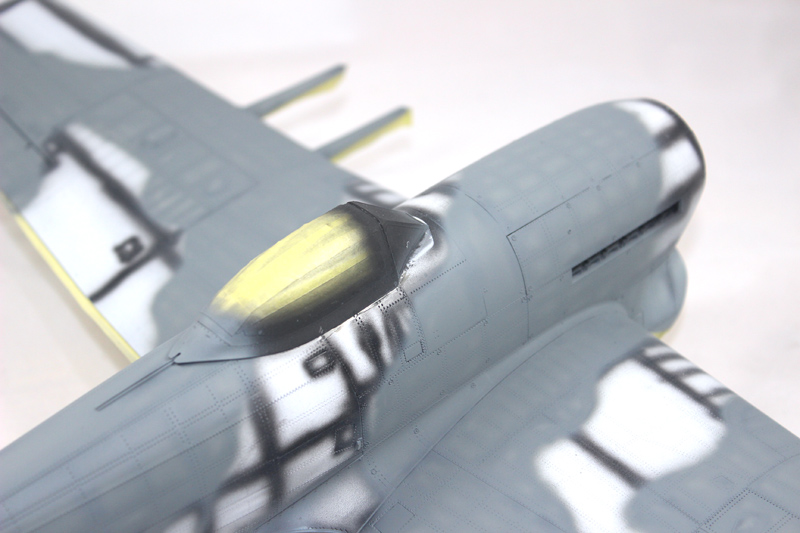
Later today I will mask off the ocean grey, using my paint masks, of course, and begin painting the dark green
After removing the camo masks I proceeded to "pre-shade the rivet lines using the same ocean grey paint that I will use for the camo. This is laid on as an opaque coat.


I then over sprayed the areas to start blending in the the different elements of the pre-shading. I stopped and left it alone over night after the first bout of blending as I know from past experience that when you thing it is just right it is too much and then it is too late to go back!


The following day I mixed the paint at 50/50 and over sprayed the areas again. The thinned paint allows you to go carefully and not apply too much paint, which would simply end up with a neat single hue of the colour, which is not what I am looking for.
After doing this I left it for another day and when I took a look there were still areas that needed going over, so I mixed some more paint, this time at around 70/30 and over sprayed the camo areas again, concentrating on the areas that obviously needed it.
This is the result, a subtly faded/light going darker, to the rivet lines, and a smidge darker at the panel lines and hinge points. It can't always be seen, the light has to catch it, but it is there and I'm quite pleased with it. I much prefer this approach to using various different shades of the same colour


Later today I will mask off the ocean grey, using my paint masks, of course, and begin painting the dark green

Joel_W

Joined: December 04, 2010
KitMaker: 11,666 posts
AeroScale: 7,410 posts

Posted: Sunday, October 12, 2014 - 02:04 AM UTC
Mal,
Been following along daily in the background. I'm quite impressed with your pre-shading technique which solves all my issues with using just one dark color and ending up with that dreaded checkerboard effect. On my next camo paint scheme, I'm going to try using it.
Joel
Been following along daily in the background. I'm quite impressed with your pre-shading technique which solves all my issues with using just one dark color and ending up with that dreaded checkerboard effect. On my next camo paint scheme, I'm going to try using it.
Joel

Scrodes

Joined: July 22, 2012
KitMaker: 771 posts
AeroScale: 763 posts

Posted: Sunday, October 12, 2014 - 10:54 AM UTC
Quoted Text
You mean those lovely little tinlets? YesI'm not sure what the inference is but I get on with them quite well

HATE them, I can never get the paint to mix properly (I use a flathead screwdriver to stir after I shake the paint by hand, this works perfectly for every other type of container) and I typically pour my paint into a mixing vessel to thin - those things are impossible to pour neatly out of.
Quoted Text
The tinlets aren't too bad, it's Revell's "cubes" that they sell their acrylic paint in that I detest. Most stupid paint package ever IMHO and thats a shame because the paint is quite good.
You don't mean these do you?
http://cdn.dickblick.com/items/010/37/01037-group3ww-l.jpg
In Canada our testors enamels come like that, but the Model Master paints come in round jars. No one really uses Testor's for anything other than brush painting - they're small and they're square so they fit compactly on shelves.
I think I might have seen some other packaging that you might be talking about - but we don't get those here.
Posted: Sunday, October 12, 2014 - 05:47 PM UTC
Quoted Text
Mal,
Been following along daily in the background. I'm quite impressed with your pre-shading technique which solves all my issues with using just one dark color and ending up with that dreaded checkerboard effect. On my next camo paint scheme, I'm going to try using it.
Joel
Hi Joel,
The trick is to stop adding paint at the right time so you do need to stop when you think that it needs a little more and come back later to assess it. It is quite nerve wracking as if you do then go too far there is no going back! However the results are pretty good when you actually achieve the aim
 You could use different colours or shades but the idea, for me, is to get tonal effects while using the the one colour. The weathering process will add another couple of layers and I am contemplating whether I will add a little dry brushing of the raised rivets and overlapping panels?
Posted: Sunday, October 12, 2014 - 10:27 PM UTC
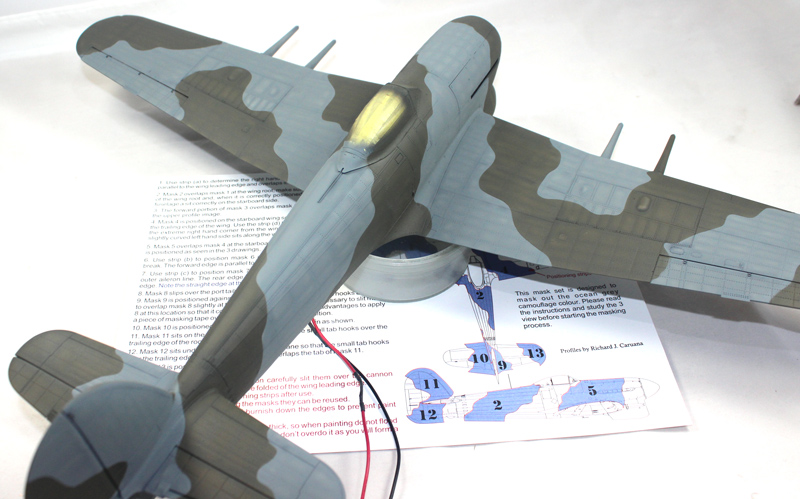
With the ocean grey painted I turned to masking it, using my Camo masks  The masks are designed to go over the fuselage where they meet the canopy so, if like me, you have the canopy in place it is a simple matter to slit the mask down the canopy centre line to allow it to conform around the canopy and simply add a couple of strips of masking tape over the exposed ocean grey area. Because the masks at the leading edge don't have a large area to wrap around the wing, and therefore lack adhesive over sufficient area to keep them in contact over the curve; because there is a need to keep them as small as possible, a piece of masking tape is used to ensure that they stay in place there. I also realised that I had missed a piece, which only came to light when I actually did this masking. That is under the spinner, between the spinner and the chin radiator. I simply cut a piece of masking tape that goes around the centre line. I might add a piece in to the masks set, but it is too late to include its use in the instructions! Anyway it is fairly obvious that this needs to be done and this was confirmed by the first person to actually use the masks on a kit that is being built for the Airfix stand at Scale Modelworld
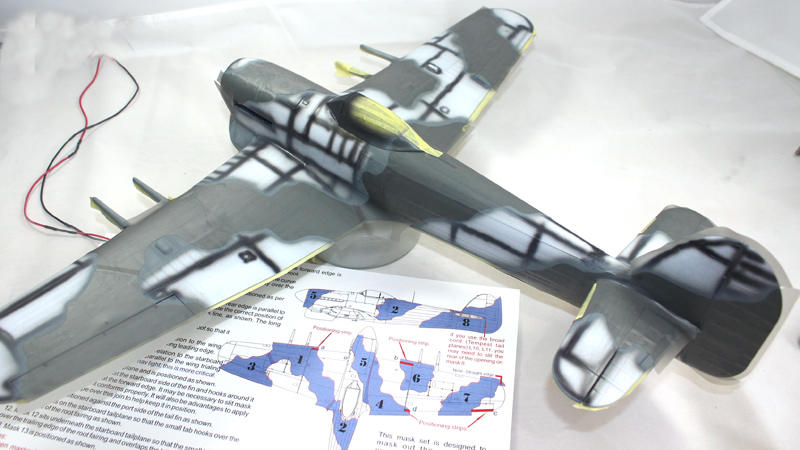
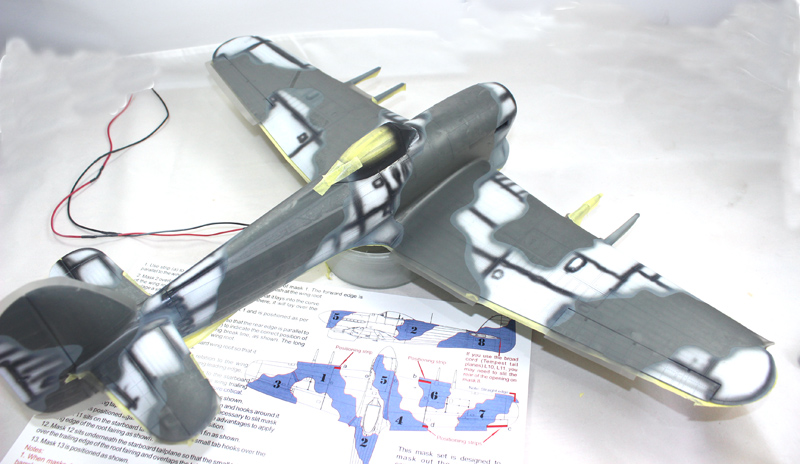
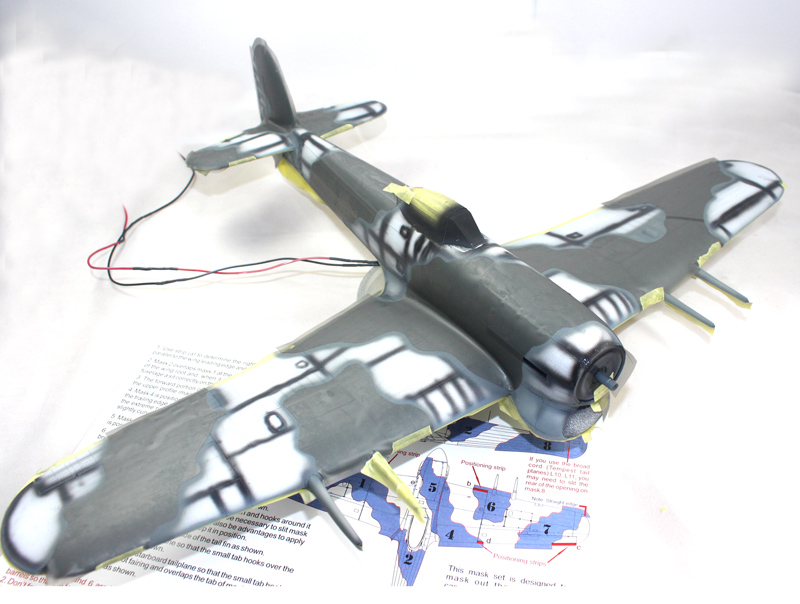
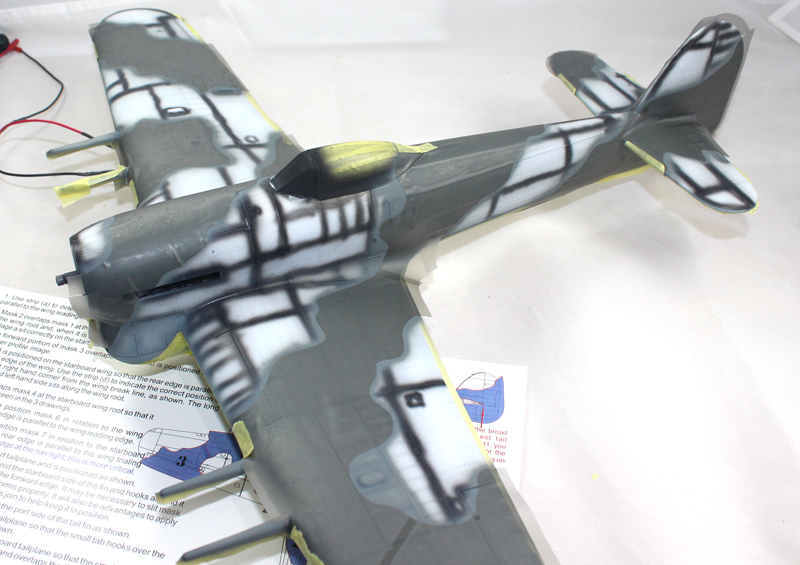
With the masks in position I started the painting of the dark green. This is the first application with just a light over spray of the pre-shading. I will be applying a second coat after lunch today
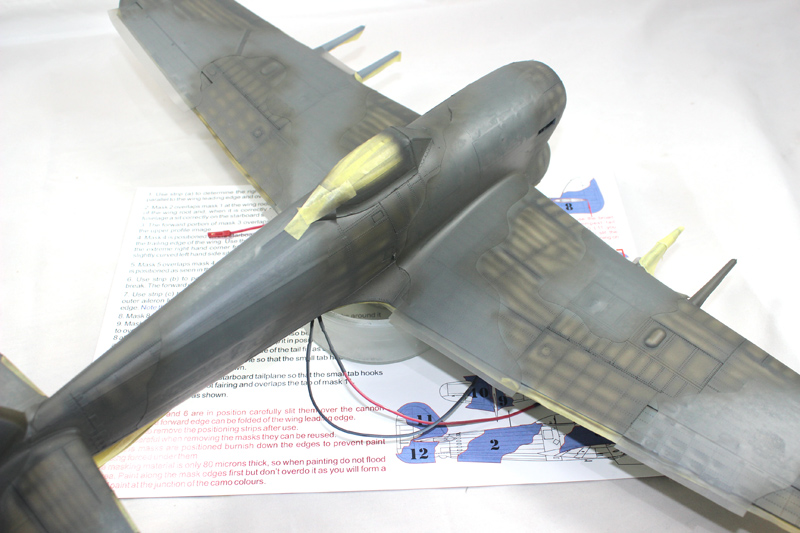
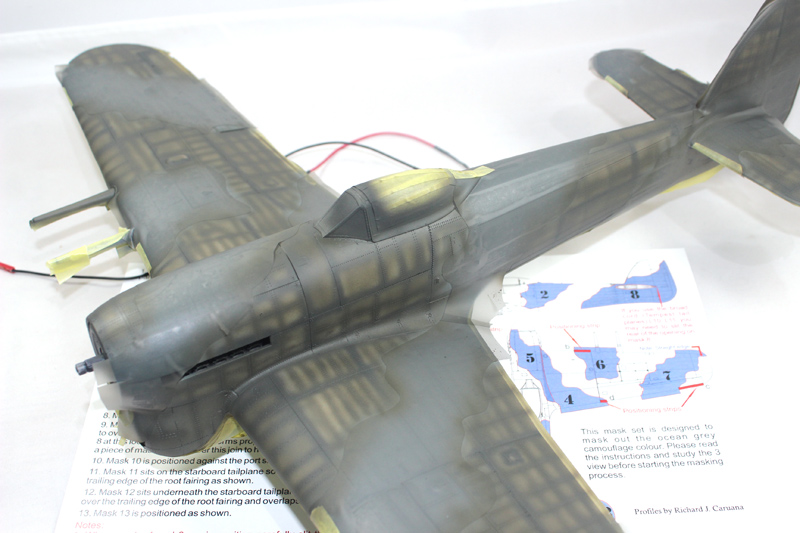
 The masks are designed to go over the fuselage where they meet the canopy so, if like me, you have the canopy in place it is a simple matter to slit the mask down the canopy centre line to allow it to conform around the canopy and simply add a couple of strips of masking tape over the exposed ocean grey area. Because the masks at the leading edge don't have a large area to wrap around the wing, and therefore lack adhesive over sufficient area to keep them in contact over the curve; because there is a need to keep them as small as possible, a piece of masking tape is used to ensure that they stay in place there. I also realised that I had missed a piece, which only came to light when I actually did this masking. That is under the spinner, between the spinner and the chin radiator. I simply cut a piece of masking tape that goes around the centre line. I might add a piece in to the masks set, but it is too late to include its use in the instructions! Anyway it is fairly obvious that this needs to be done and this was confirmed by the first person to actually use the masks on a kit that is being built for the Airfix stand at Scale Modelworld


With the masks in position I started the painting of the dark green. This is the first application with just a light over spray of the pre-shading. I will be applying a second coat after lunch today


SiStorey

Joined: March 14, 2014
KitMaker: 242 posts
AeroScale: 65 posts

Posted: Sunday, October 12, 2014 - 10:52 PM UTC
Brilliant technique there, top job well done! 


chukw1

Joined: November 28, 2007
KitMaker: 817 posts
AeroScale: 729 posts

Posted: Monday, October 13, 2014 - 02:58 AM UTC
Looks fantastic, Mal- cheers!
Posted: Monday, October 13, 2014 - 05:32 PM UTC
Thanks Si and Chuck  The camo is finished, photos later today
 The camo is finished, photos later today
Posted: Tuesday, October 14, 2014 - 07:14 PM UTC
A second session of dark green and its complete 
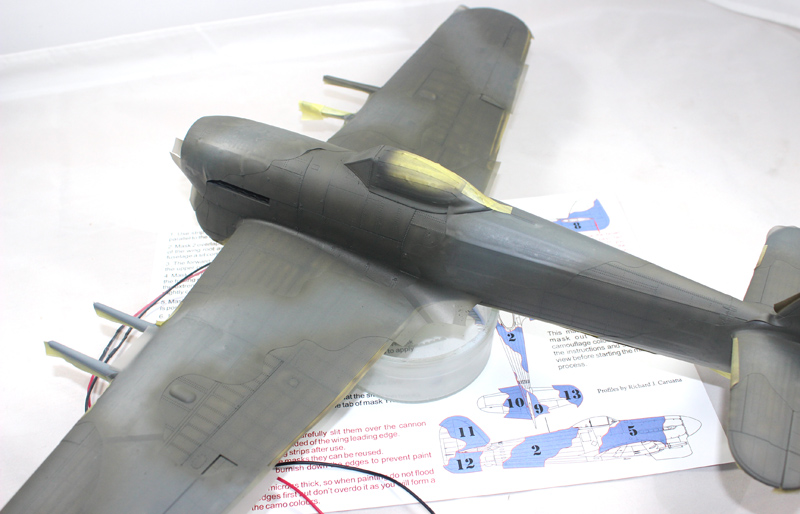
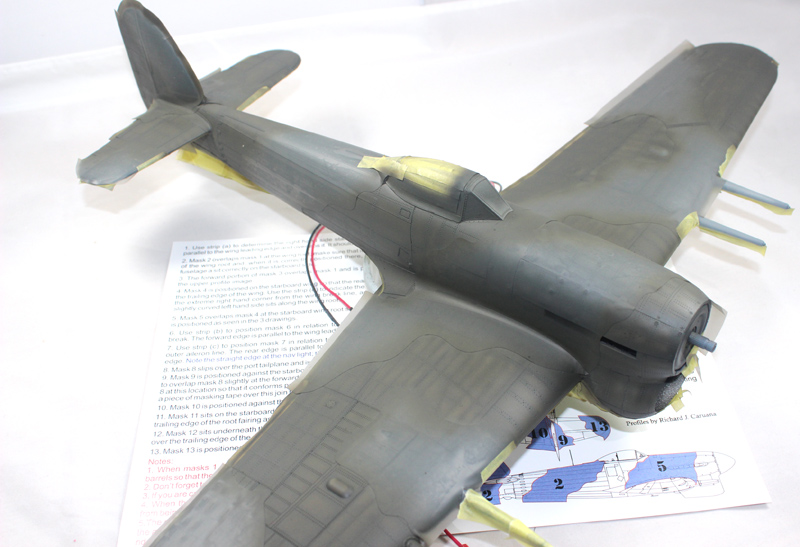
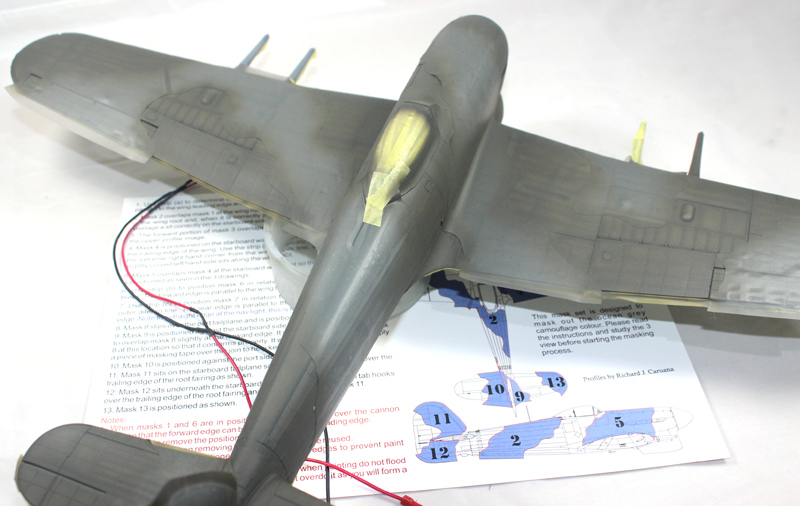
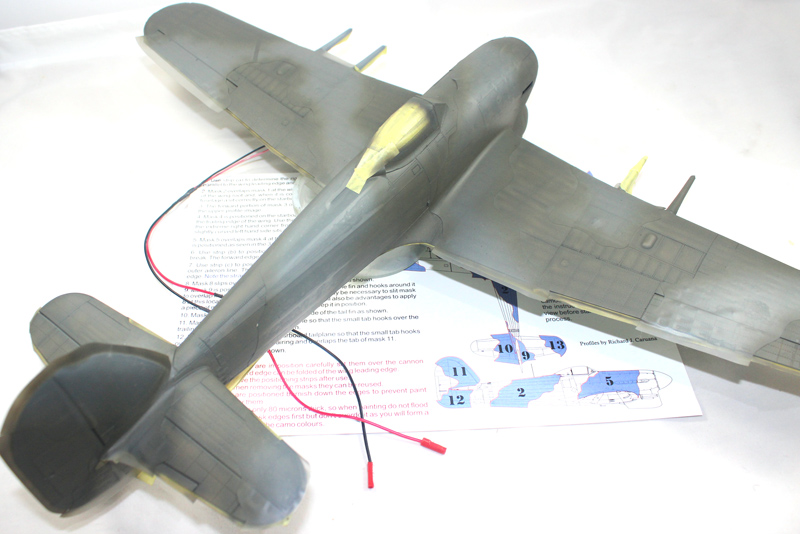
Then, when the paint is dry the masks are removed, as is the under side masking. Yes the sense of self satisfaction is overwhelming
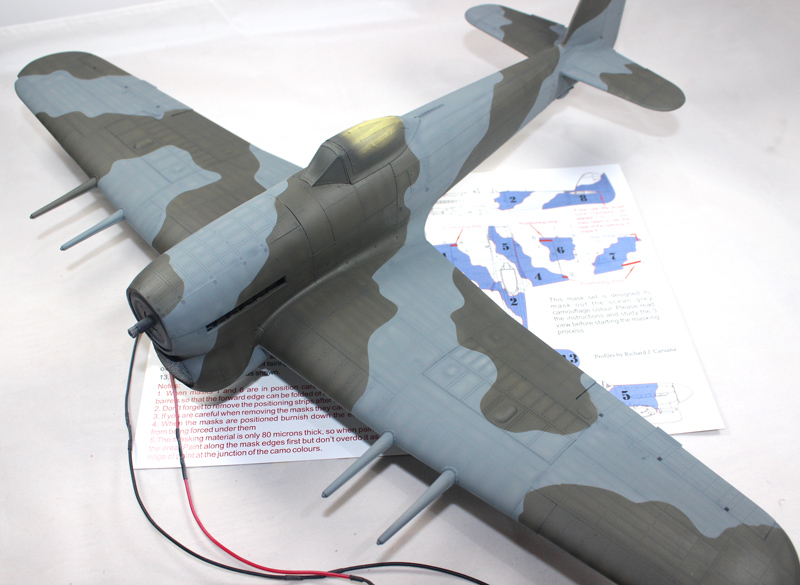
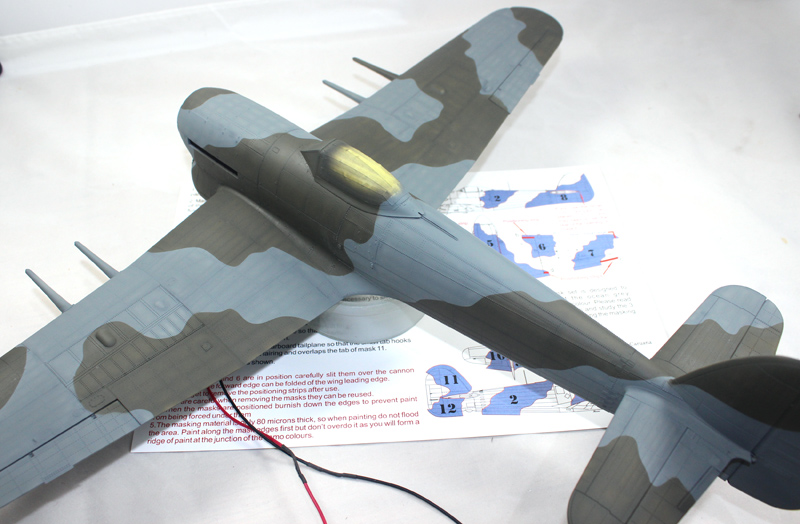

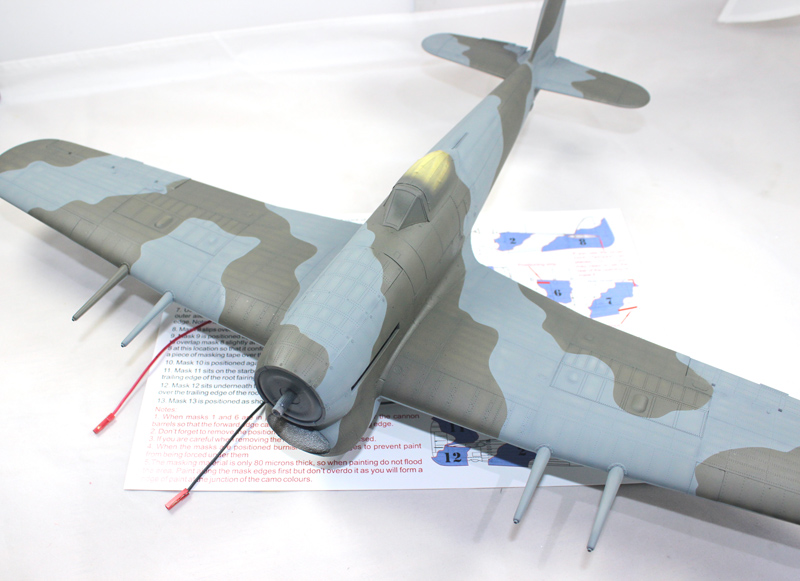
I applied a couple of coats of Klear yesterday and I have begun to apply the masks for the roundels, fin flash and yellow leading edge These will take 4 days to paint, then the codes will go on and then the D-Day stripes


Then, when the paint is dry the masks are removed, as is the under side masking. Yes the sense of self satisfaction is overwhelming


I applied a couple of coats of Klear yesterday and I have begun to apply the masks for the roundels, fin flash and yellow leading edge
 These will take 4 days to paint, then the codes will go on and then the D-Day stripes
FredrikA

Joined: January 09, 2008
KitMaker: 92 posts
AeroScale: 90 posts

Posted: Wednesday, October 15, 2014 - 01:11 AM UTC
Fantastic work! Really, really inspiring! It might be this that actually gets med back to the work desk...
/Fredrik
/Fredrik
Joel_W

Joined: December 04, 2010
KitMaker: 11,666 posts
AeroScale: 7,410 posts

Posted: Wednesday, October 15, 2014 - 01:30 AM UTC
Mal,
The camo scheme really is turning out nicely. Your method of pre-shading solves many of the issues I've had with the overall look of pre-shading through the various colors.
Joel
The camo scheme really is turning out nicely. Your method of pre-shading solves many of the issues I've had with the overall look of pre-shading through the various colors.
Joel
Gremlin56
Joined: October 30, 2005
KitMaker: 3,897 posts
AeroScale: 564 posts
KitMaker: 3,897 posts
AeroScale: 564 posts

Posted: Wednesday, October 15, 2014 - 02:27 AM UTC
Nice crispy sharp masking Mal,


Posted: Wednesday, October 15, 2014 - 05:52 PM UTC
Quoted Text
Fantastic work! Really, really inspiring! It might be this that actually gets med back to the work desk...
/Fredrik
Well Fredrik, if that is the case my work here is done

Quoted Text
Mal,
The camo scheme really is turning out nicely. Your method of pre-shading solves many of the issues I've had with the overall look of pre-shading through the various colors.
Joel
Thanks Joel, There are those that don't think that pre-shading is appropriate but that, I believe, stems from the fact that they are, like many that do use the technique, are using it for the wrong reasons
 Those that advocate post shading are, generally the ones that voice the opinion that post shading is wrong! I use pre-shading to achieve similar aims as the post shading brigade but in a, I believe, much easier manner
  Anyway it works for me, which is the only thing that really matters in the end
Quoted Text
Nice crispy sharp masking Mal,
Thanks Julian, you make it sound like a potato based snack!

Yesterday I applied the roundel and fin flash masks and the yellow leading edge masks. The yellow leading edge and the white areas of the markings have been painted

Posted: Friday, October 17, 2014 - 11:37 PM UTC
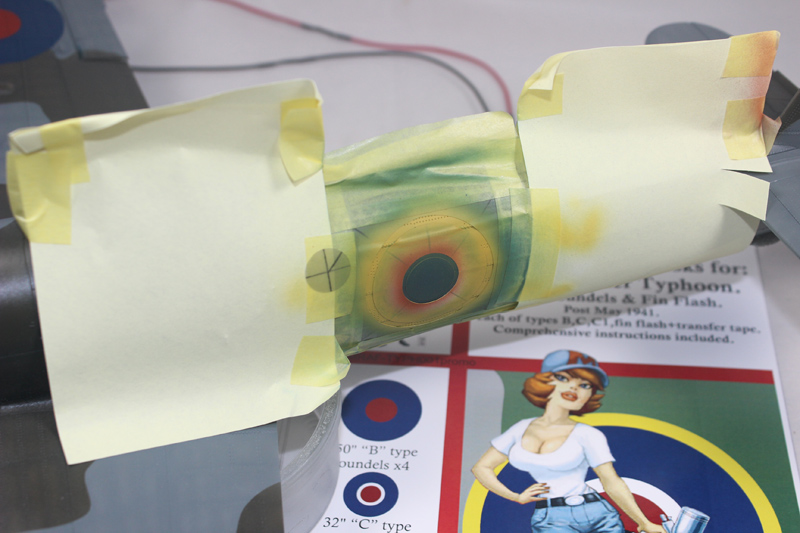
The first step in the masking process, when dealing with roundels is to add reference lines. These really help when replacing the various elements. For roundels a cross through the centre works well; the other line, out from the centre, is to orientate the cross, as it won't be exactly through the centre. For the fin flash use horizontal lines.
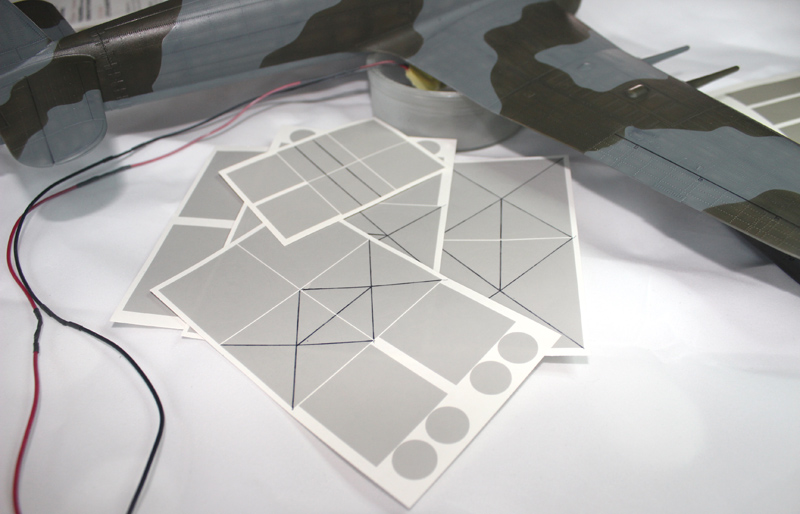
I am including positioning strips within the set. These are the correct scale inches from the points given in the diagram, which is included in the instructions. The upper and lower wing markings have the same centre point, 84" from the wing tip, and central on the wing cord, excluding the aileron and landing light. The fuselage roundels are central on the fuselage and 34" from the trailing edge of the radio compartment door.
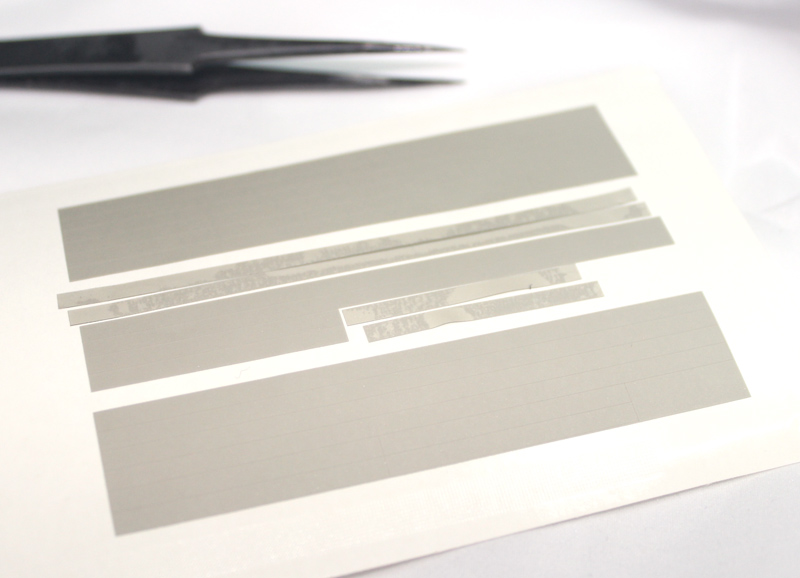
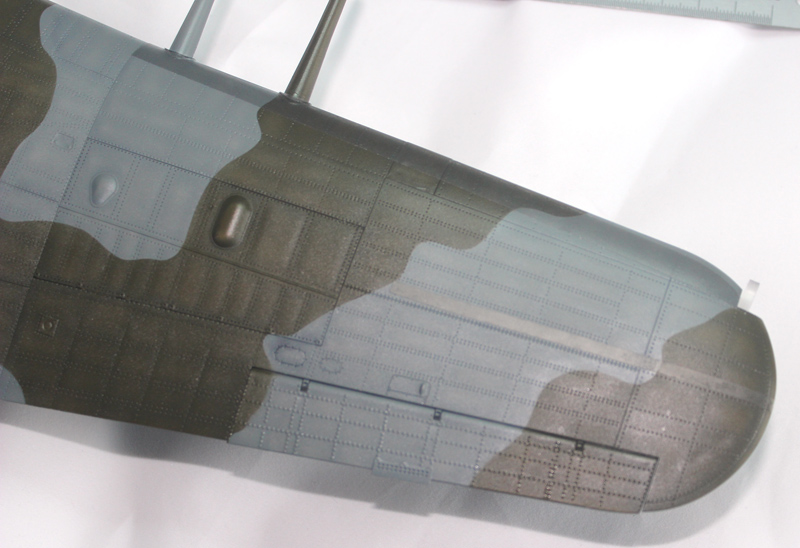
It is difficult to see the positioning strips through the masking material with the transfer tape on the mask as well so I added a small piece of Tamiya tape on its end to help make it stand out.
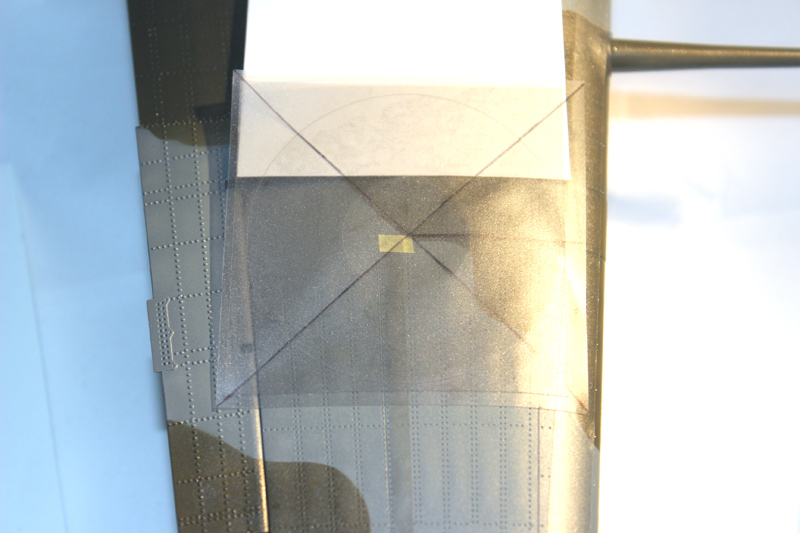
For the fuselage roundels I layed a strip of Tamiya tape over the fuselage to connect the 2 positioning strips (there is no radio door on the starboard side but there is an obvious similarity in the surface detail that gives you the correct position). Again to make the positions stand out I overlaid the strips with Tamiya tape. The junction is the point at which the centre of the roundel sits.
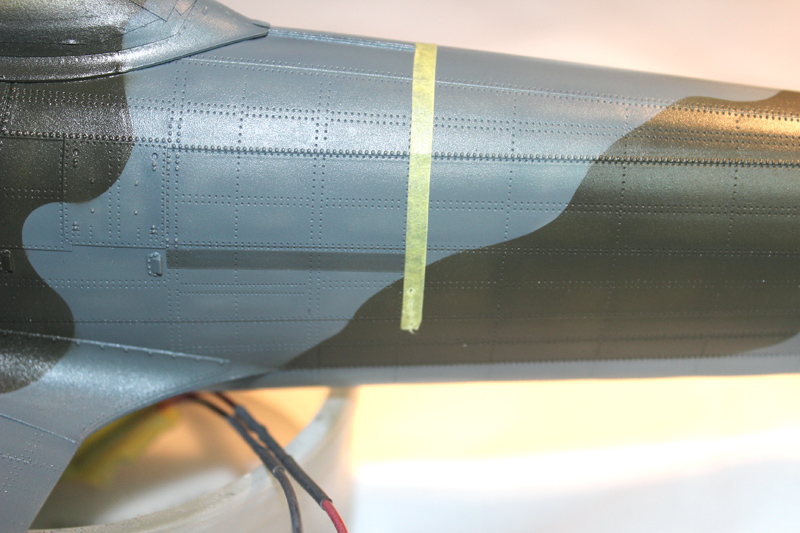
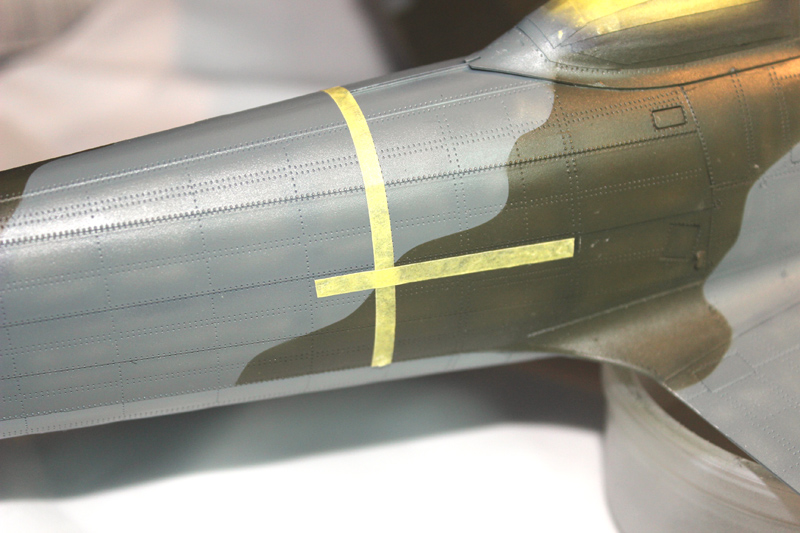
When the roundels are in position hold the corner down and carefully remove the stripes by pulling them low over themselves.
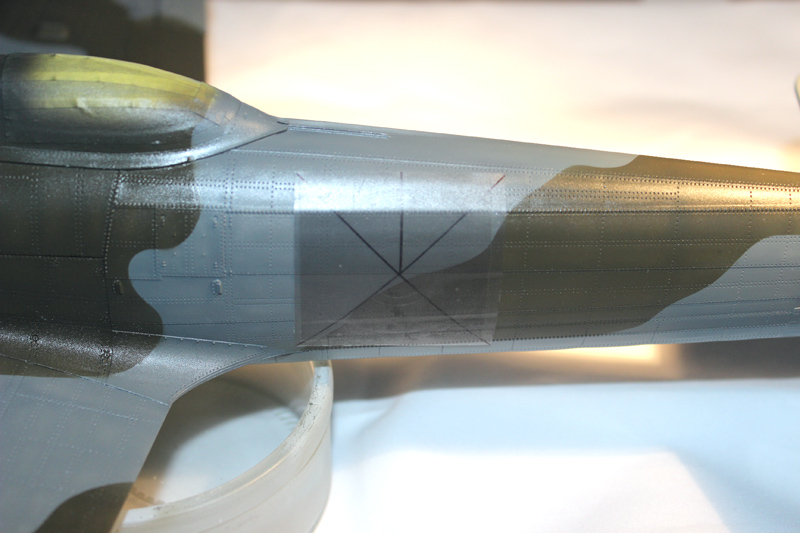
The fin flash are positioned sitting on the lower panel line. The Tape is positioned first to help show where the rudder post is.
The flash does only have a pair of horizontal lines drawn on it, the vertical ones are actually on the tack side of the transfer tape, which lifted some ink off the port side one.
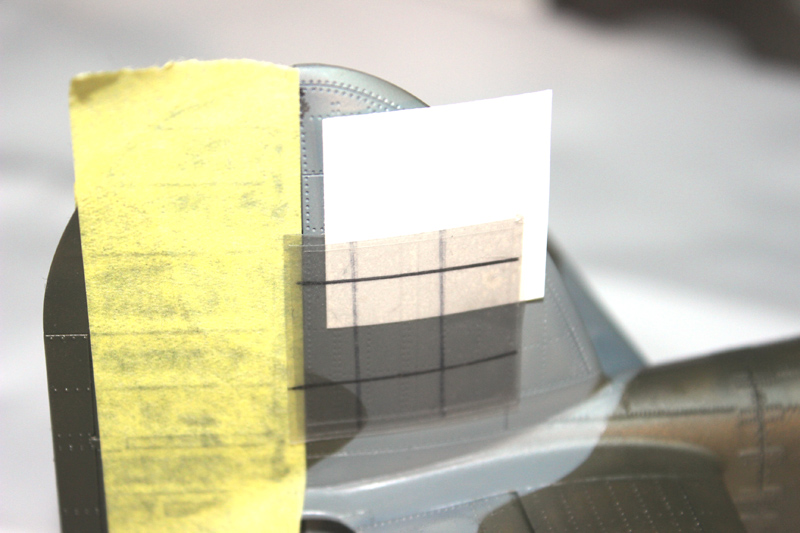
The white mask of the fin flash and the red and white masks of the "C" and "C1" roundels are weeded out. The whites are retained, the red can be discarded. White is then sprayed on the exposed areas.
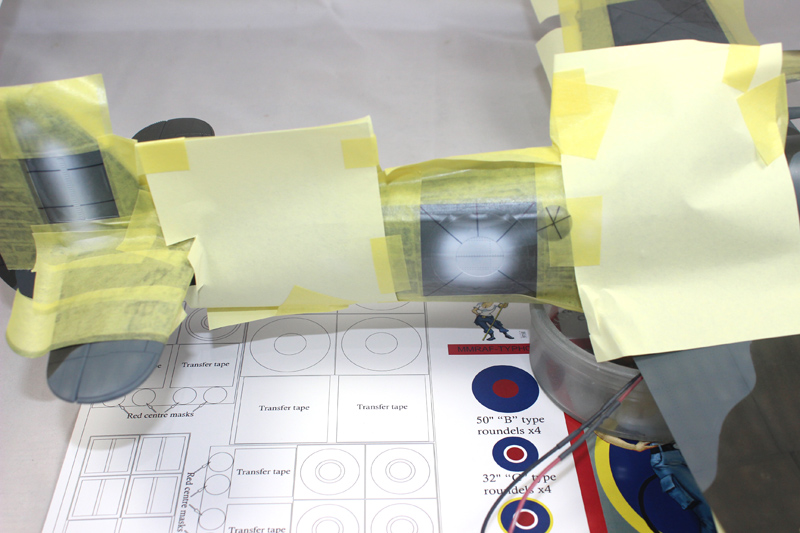
When the white is dry the white masks are carefully and accurately replaced.
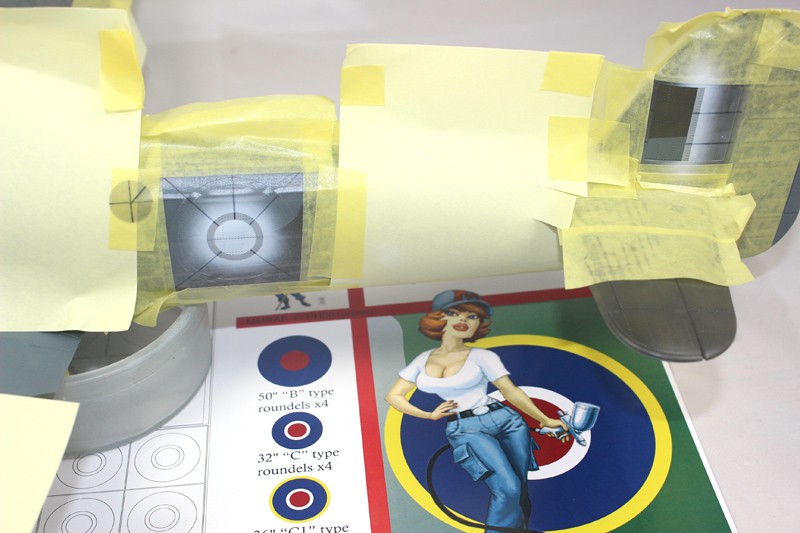
The red is weeded from the fin flash, this can be discarded, the red is weeded from the "B" type roundels, and red is then sprayed on the exposed areas.
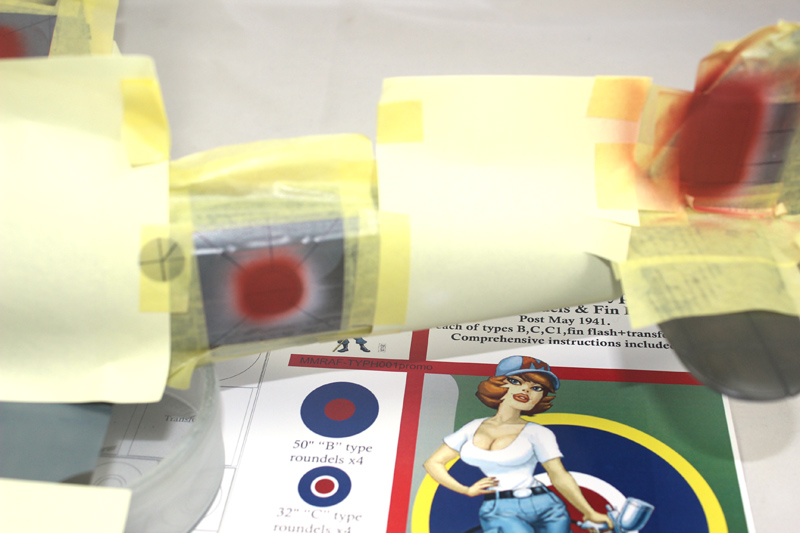
When the red is dry use the red masks to mask out the red on the roundels. This is slightly oversized so that you don't have to worry about getting it exactly positined, just don't overlap the white mask. The red of the "B" type roundel needs to be accurately re-positioned. Use the transfer tape as oversize masks to mask the red of the fin flash.
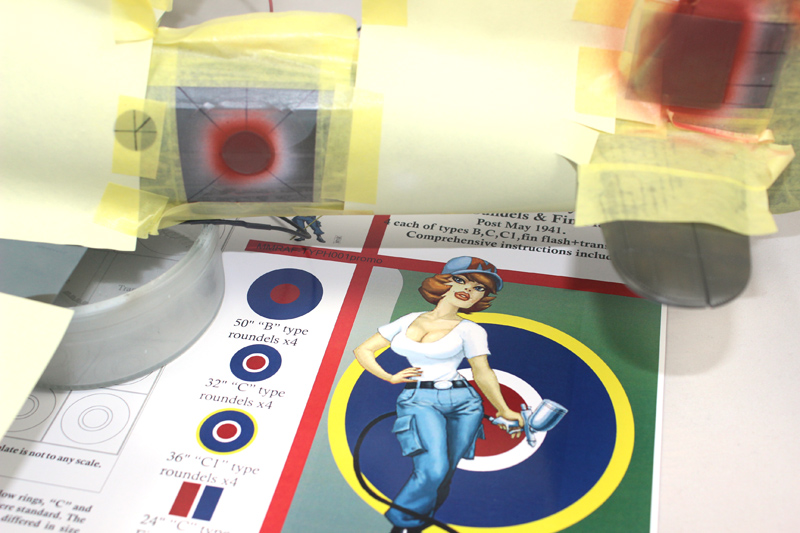
Weed out the blue masks, the one from the "C1" fuselage roundel is retained, the others can be discarded.
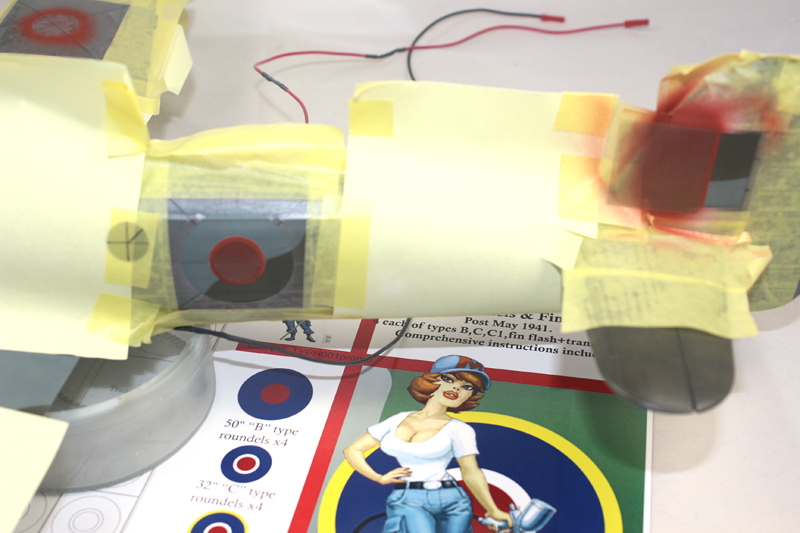

I am including positioning strips within the set. These are the correct scale inches from the points given in the diagram, which is included in the instructions. The upper and lower wing markings have the same centre point, 84" from the wing tip, and central on the wing cord, excluding the aileron and landing light. The fuselage roundels are central on the fuselage and 34" from the trailing edge of the radio compartment door.


It is difficult to see the positioning strips through the masking material with the transfer tape on the mask as well so I added a small piece of Tamiya tape on its end to help make it stand out.

For the fuselage roundels I layed a strip of Tamiya tape over the fuselage to connect the 2 positioning strips (there is no radio door on the starboard side but there is an obvious similarity in the surface detail that gives you the correct position). Again to make the positions stand out I overlaid the strips with Tamiya tape. The junction is the point at which the centre of the roundel sits.


When the roundels are in position hold the corner down and carefully remove the stripes by pulling them low over themselves.

The fin flash are positioned sitting on the lower panel line. The Tape is positioned first to help show where the rudder post is.
The flash does only have a pair of horizontal lines drawn on it, the vertical ones are actually on the tack side of the transfer tape, which lifted some ink off the port side one.

The white mask of the fin flash and the red and white masks of the "C" and "C1" roundels are weeded out. The whites are retained, the red can be discarded. White is then sprayed on the exposed areas.

When the white is dry the white masks are carefully and accurately replaced.

The red is weeded from the fin flash, this can be discarded, the red is weeded from the "B" type roundels, and red is then sprayed on the exposed areas.

When the red is dry use the red masks to mask out the red on the roundels. This is slightly oversized so that you don't have to worry about getting it exactly positined, just don't overlap the white mask. The red of the "B" type roundel needs to be accurately re-positioned. Use the transfer tape as oversize masks to mask the red of the fin flash.

Weed out the blue masks, the one from the "C1" fuselage roundel is retained, the others can be discarded.

Joel_W

Joined: December 04, 2010
KitMaker: 11,666 posts
AeroScale: 7,410 posts

Posted: Saturday, October 18, 2014 - 12:48 AM UTC
Mal,
Thank you for your detailed explanation and accompanying pictures to your masking process. BTW, you have one really "nice looking" painting assistant. Margo surely would approve
Joel
Thank you for your detailed explanation and accompanying pictures to your masking process. BTW, you have one really "nice looking" painting assistant. Margo surely would approve

Joel
Posted: Saturday, October 18, 2014 - 06:42 PM UTC
Thanks Joel, Yes Millie helps a lot  The markings are complete and the D-Day stripes are next, which I will start later today
 The markings are complete and the D-Day stripes are next, which I will start later today
berndm

Joined: March 26, 2014
KitMaker: 844 posts
AeroScale: 630 posts

Posted: Sunday, October 19, 2014 - 06:49 PM UTC
Looking great Mal, nice to see this masks "in action"
Posted: Tuesday, October 21, 2014 - 02:45 AM UTC
Thanks Bernd 
Paint the exposed areas blue, when the paint is dry that's the markings finished apart from the fuselage roundel. Replace the blue mask on the fuselage roundels, take your time and make sure that it is bang on. I forgot to take any photos of the blue painted on as I unmasked everything except the fuselage roundel. The yellow mask is weeded out and this can be discarded. I also masked the prop tips and painted these when I painted the yellow of the roundel.
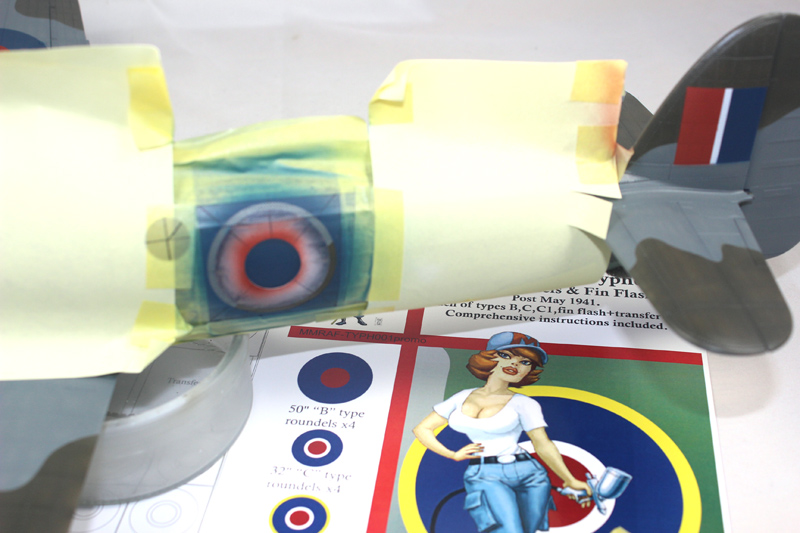
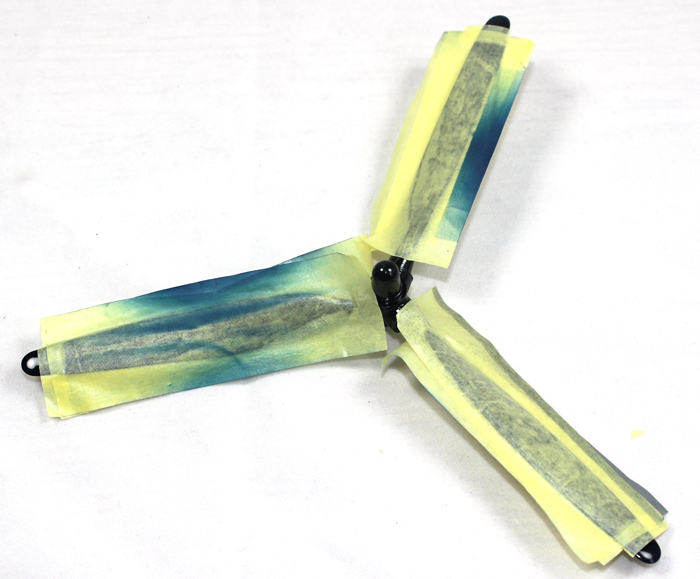
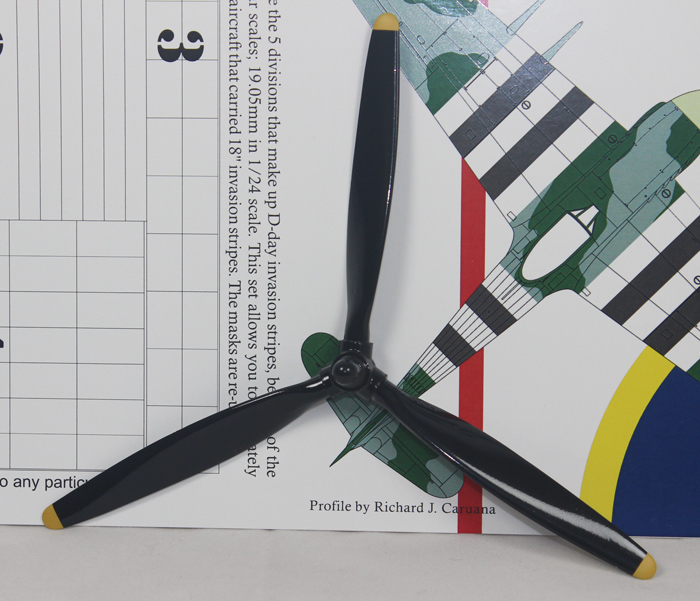
When the yellow is dry remove all masking, a beautifully painted set of markings is the result
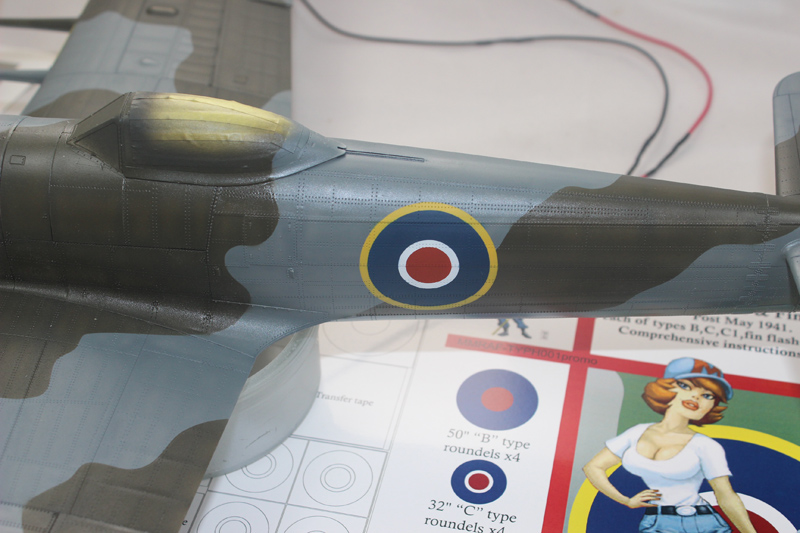
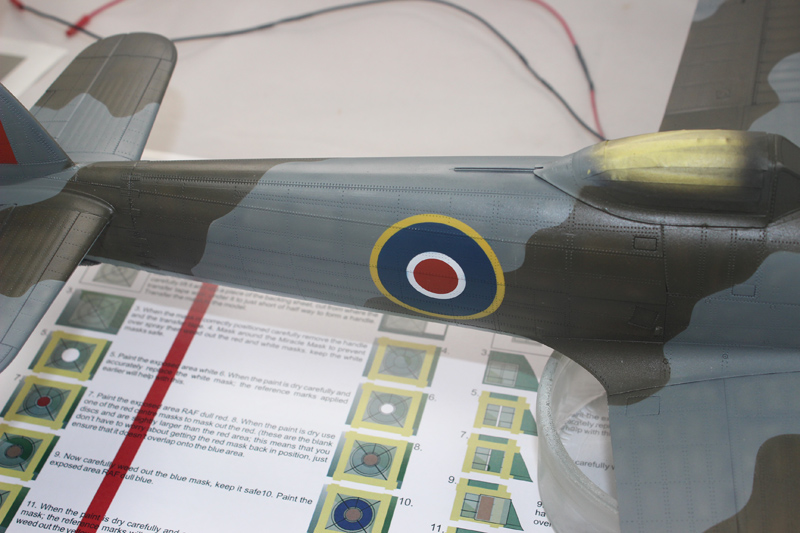
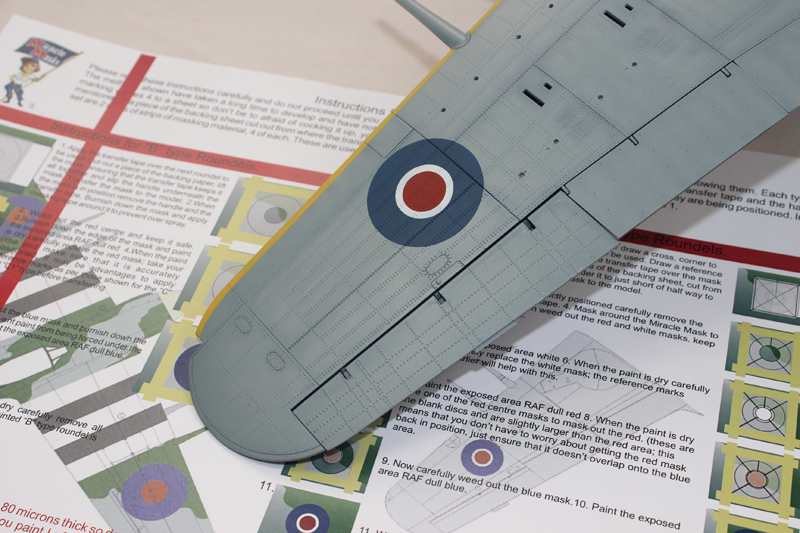
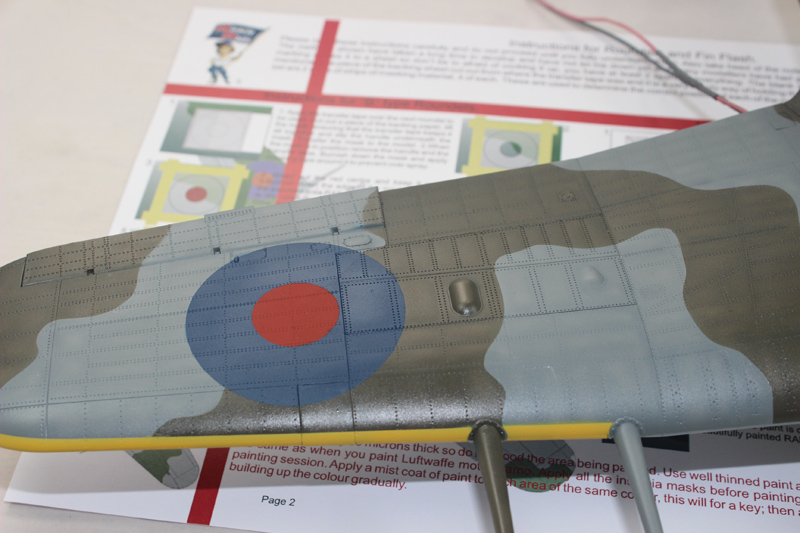
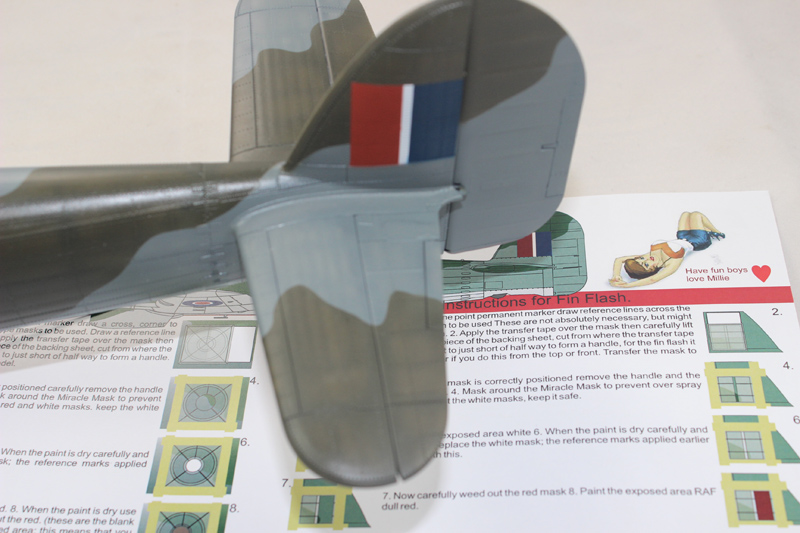
Next up the D-Day invasion stripes

Paint the exposed areas blue, when the paint is dry that's the markings finished apart from the fuselage roundel. Replace the blue mask on the fuselage roundels, take your time and make sure that it is bang on. I forgot to take any photos of the blue painted on as I unmasked everything except the fuselage roundel. The yellow mask is weeded out and this can be discarded. I also masked the prop tips and painted these when I painted the yellow of the roundel.


When the yellow is dry remove all masking, a beautifully painted set of markings is the result


Next up the D-Day invasion stripes

Gremlin56
Joined: October 30, 2005
KitMaker: 3,897 posts
AeroScale: 564 posts
KitMaker: 3,897 posts
AeroScale: 564 posts

Posted: Tuesday, October 21, 2014 - 03:02 AM UTC
Looks fantastic Mal, getting me all hot and bothered that I missed out on your masks 

Joel_W

Joined: December 04, 2010
KitMaker: 11,666 posts
AeroScale: 7,410 posts

Posted: Wednesday, October 22, 2014 - 02:29 AM UTC
Mal,
Honestly, it seems like a "ton" of work to use masks rather then thin decals, but the results are fantastic when done properly.
Joel
Honestly, it seems like a "ton" of work to use masks rather then thin decals, but the results are fantastic when done properly.
Joel

Scrodes

Joined: July 22, 2012
KitMaker: 771 posts
AeroScale: 763 posts

Posted: Wednesday, October 22, 2014 - 11:37 AM UTC
Nothing beats painted markings.
Posted: Wednesday, October 22, 2014 - 05:12 PM UTC
Quoted Text
Looks fantastic Mal, getting me all hot and bothered that I missed out on your masks
Well Julian, then you will need to build another

Quoted Text
Mal,
Honestly, it seems like a "ton" of work to use masks rather then thin decals, but the results are fantastic when done properly.
Joel
But when you have used paint masks and seen the very much better results the difference is so marked that you cannot go back to using decals! The "ton" of work (and it isn't really work because of the excitement of the reveal
 ), is no more than a bit of detailing. If you are going to detail, using brass, resin and scratch building why would you want to skimp on the finish? Think about all the problems that you get with decals, these are all eliminated by using paint masks. Using paint masks is just an extension of the normal process of using an airbrush. To be able to use an air brush successfully you need to be able to use it free hand and use masking! In other words, if you use an air brush then there is no reason why you can't use paint masks and the "ton" of work is far, far outweighed by the results!
Quoted Text
Nothing beats painted markings.
Nuff said

 |


