Grems 1/24th Typhoon build
Joined: October 30, 2005
KitMaker: 3,897 posts
AeroScale: 564 posts
Posted: Thursday, August 28, 2014 - 02:19 AM UTC
Quoted Text
Hi Julian, great progress on your Typhoon, it is looking great
and the presentation with your b/w photography as well.
Bernd
Thank you Bernd,
glad you like it. It can be fun putting the photos of a build in b/w or old fashion sepia, also can show up bloopers too


Montevideo, Uruguay
Joined: August 22, 2011
KitMaker: 998 posts
AeroScale: 20 posts
Posted: Thursday, August 28, 2014 - 03:32 PM UTC
" My bigger dread is to look at the history of my life and to ask me what I did with her "
Joined: October 30, 2005
KitMaker: 3,897 posts
AeroScale: 564 posts
Posted: Thursday, August 28, 2014 - 04:17 PM UTC
Joined: October 30, 2005
KitMaker: 3,897 posts
AeroScale: 564 posts
Posted: Saturday, August 30, 2014 - 02:57 AM UTC
August 30th update:
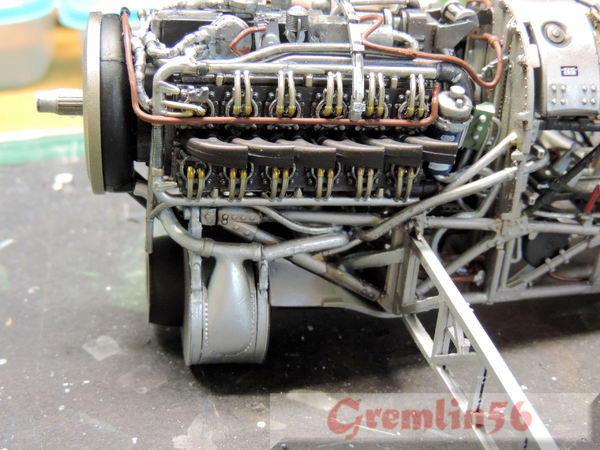
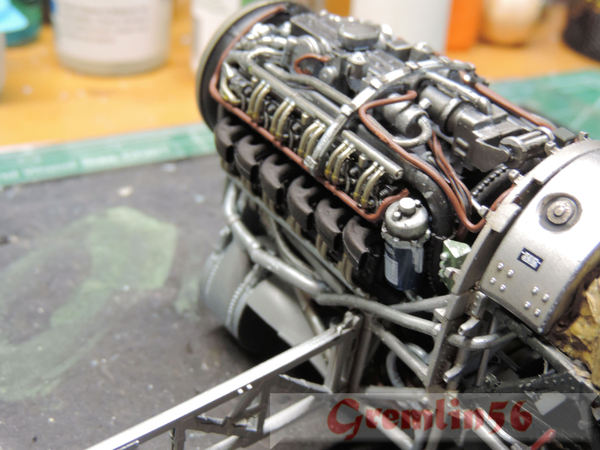
Real life got in the way last week. Here's what is happening at the moment:
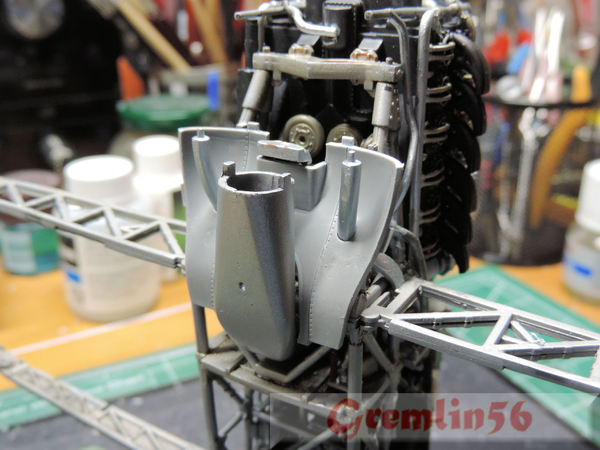
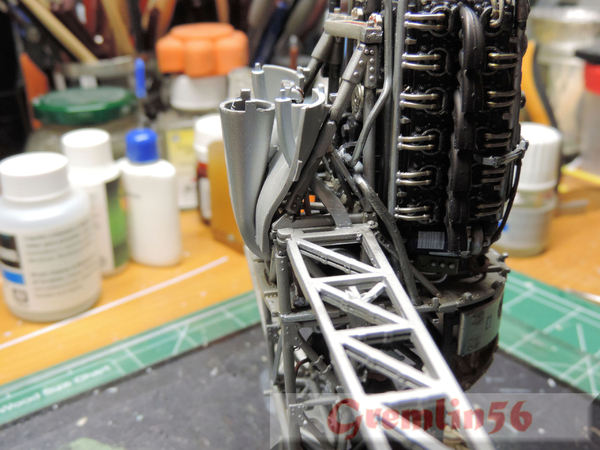
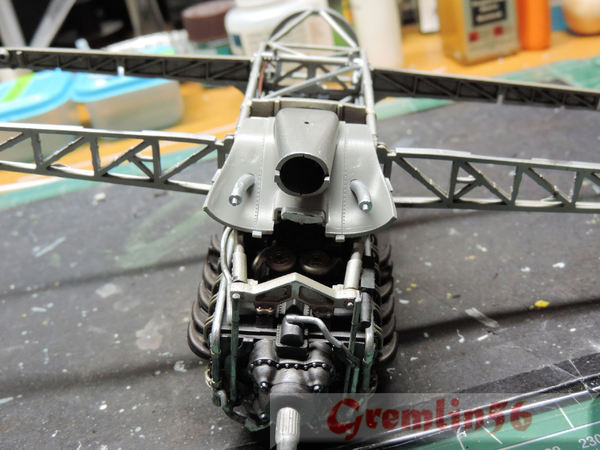
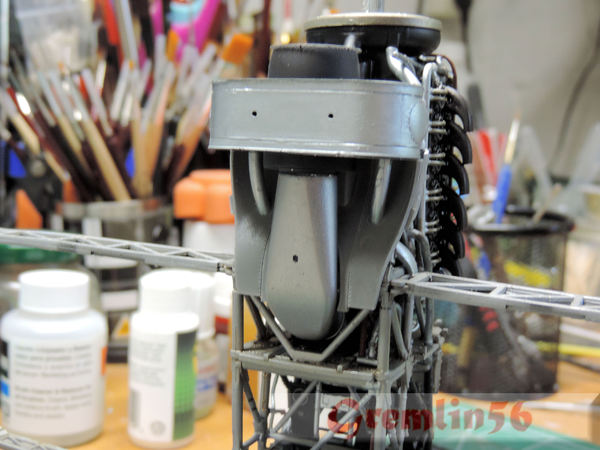
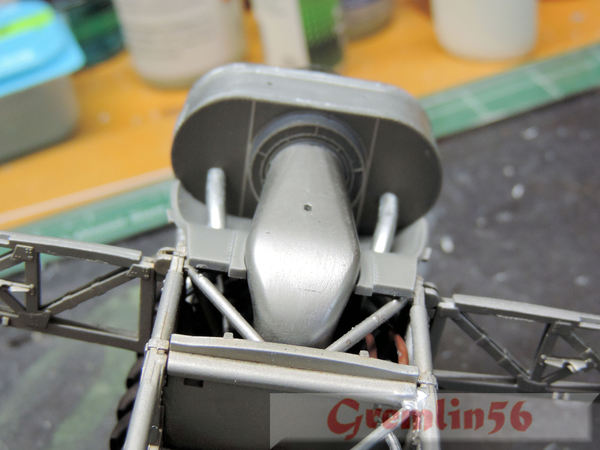
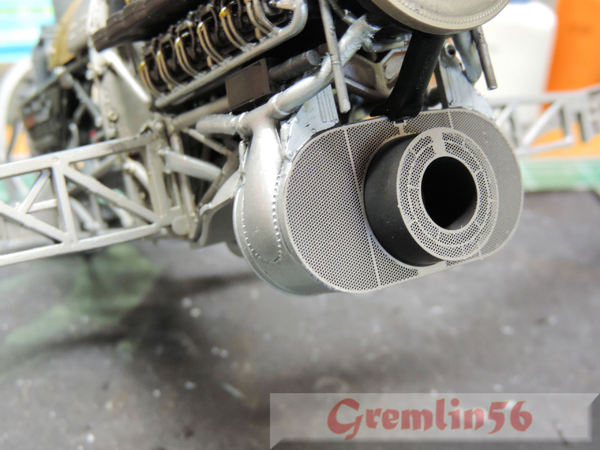
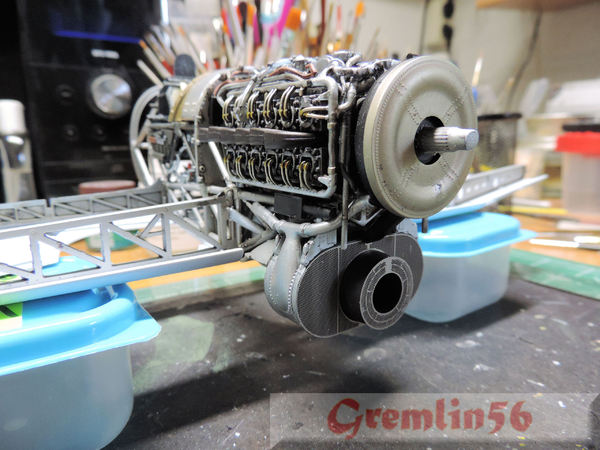
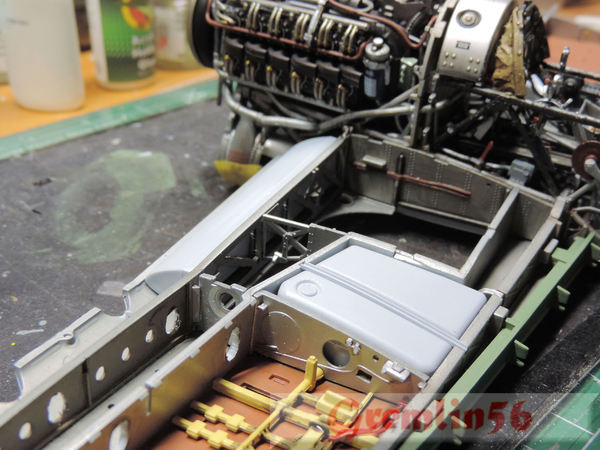
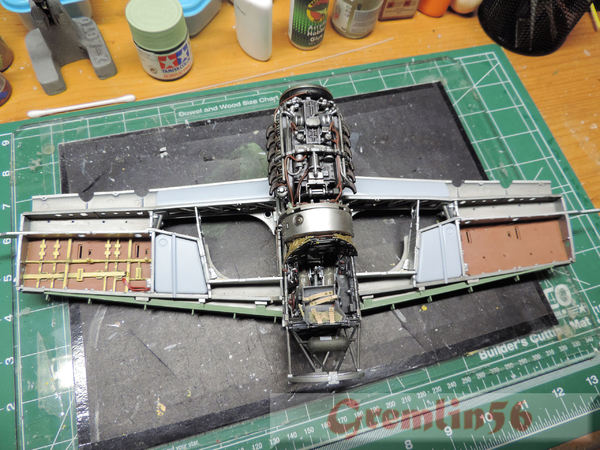
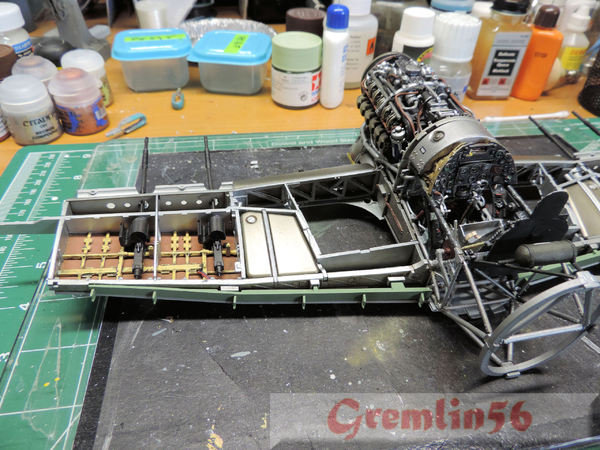
Internal piping and wiring all fitted now, the big intake underneath the beast's nose in progress.

Joined: October 30, 2005
KitMaker: 3,897 posts
AeroScale: 564 posts
Posted: Sunday, August 31, 2014 - 02:55 AM UTC
Haute-Vienne, France
Joined: August 15, 2011
KitMaker: 57 posts
AeroScale: 55 posts
Posted: Sunday, August 31, 2014 - 04:36 AM UTC
Hi Julian
As you say it looks really good with the etched radiator parts, I presume you will leave the chin cowlings off to enhance the effect.
Keep up the good work
John
PS a very belated Happy Birthday from me, mine in a couple of weeks, going to Duxford.


Joined: October 30, 2005
KitMaker: 3,897 posts
AeroScale: 564 posts
Posted: Sunday, August 31, 2014 - 06:20 AM UTC
England - South West, United Kingdom
Joined: July 04, 2013
KitMaker: 430 posts
AeroScale: 18 posts
Posted: Sunday, August 31, 2014 - 09:39 AM UTC
Hi Julian,
Belated Happy Birthday


That engine is really coming together - great job.
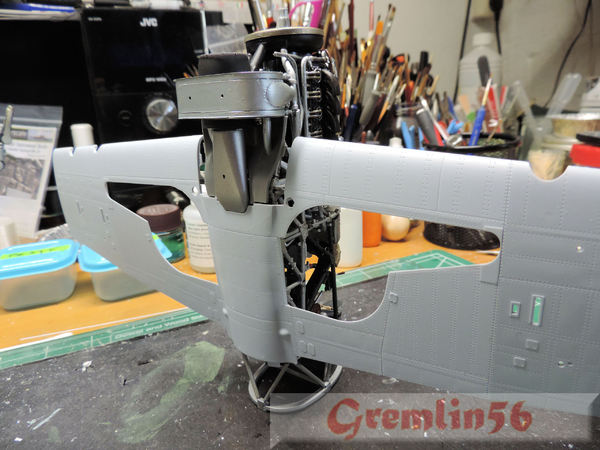
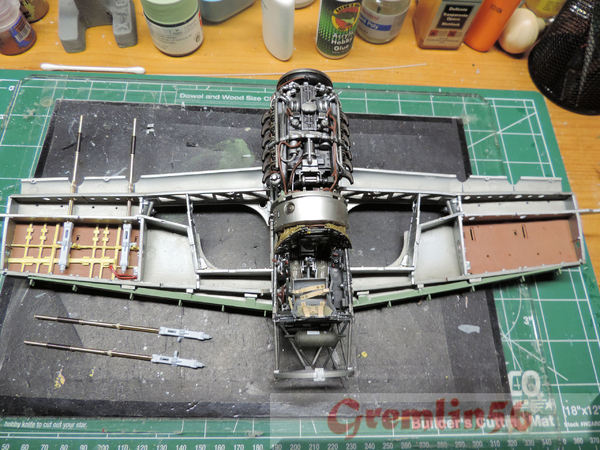
Looking forward to watching your plan come together re the two sides of the aircraft
Cheers Kev
Joined: October 30, 2005
KitMaker: 3,897 posts
AeroScale: 564 posts
Posted: Sunday, August 31, 2014 - 05:00 PM UTC
Hi Kev,
thanks mate

Remember discussing this plan back when you were building your MAS and Channel Adversaries was running.
This was what I had in mind, now just need to do it


cheers,
Julian
Holdfast
 President
#056
England - South West, United Kingdom
Joined: September 30, 2002
KitMaker: 8,581 posts
AeroScale: 4,913 posts
Posted: Sunday, August 31, 2014 - 07:24 PM UTC
Those etched radiator grills do look the dogs

I won't be using them on my build but I will on my second one

Your Tiffie is looking really good

MAL the MASK
BULLDOG # 6 (President)
BEWARE OF THE FEW
Sappers: First in, last out. (UBIQUE)
It's not the same, better, but not the same.
Joined: October 30, 2005
KitMaker: 3,897 posts
AeroScale: 564 posts
Posted: Sunday, August 31, 2014 - 07:38 PM UTC
Thank you Mal,
The radiators are great, just a light spray of matt varnish to finish them off.

Niedersachsen, Germany
Joined: March 26, 2014
KitMaker: 844 posts
AeroScale: 630 posts
Posted: Sunday, August 31, 2014 - 07:44 PM UTC
Hi Julian, nice progress on your Typhoon ! The radiator looks
very much like the real one !
Bernd
Joined: October 30, 2005
KitMaker: 3,897 posts
AeroScale: 564 posts
Posted: Monday, September 01, 2014 - 01:17 AM UTC
Thanks Bernd,

Joined: October 30, 2005
KitMaker: 3,897 posts
AeroScale: 564 posts
Posted: Monday, September 01, 2014 - 06:25 AM UTC

#306
Victoria, Australia
Joined: June 27, 2010
KitMaker: 3,959 posts
AeroScale: 598 posts
Posted: Monday, September 01, 2014 - 10:00 AM UTC
Love it, love it, love it!

hang on, gotta clean the drool off my keyboard


Stay home and build models!
In 1/72
Gloster Gladiator MkII for the Bi-planes Campaign
In 1/350
Airfix 1:350 Type 45 Destroyer
Joined: October 30, 2005
KitMaker: 3,897 posts
AeroScale: 564 posts
Posted: Monday, September 01, 2014 - 04:43 PM UTC
You certainly will love it when you get started Russell,

England - South West, United Kingdom
Joined: July 04, 2013
KitMaker: 430 posts
AeroScale: 18 posts
Posted: Monday, September 01, 2014 - 06:33 PM UTC
Hi Julian,
This is awesome! Is all the detail in the kit or are you scratch building any of it.
Cheers Kev

Joined: October 30, 2005
KitMaker: 3,897 posts
AeroScale: 564 posts
Posted: Monday, September 01, 2014 - 06:49 PM UTC
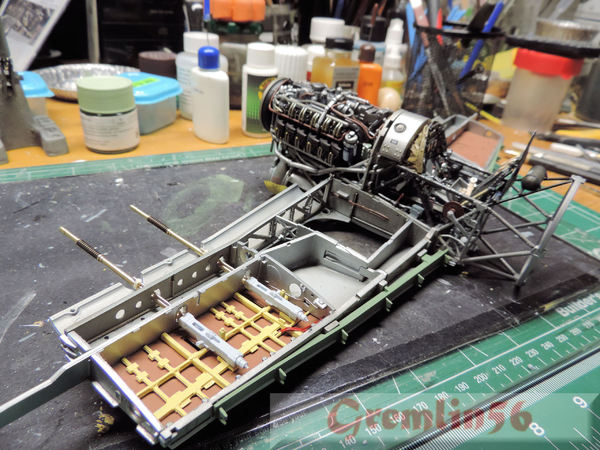
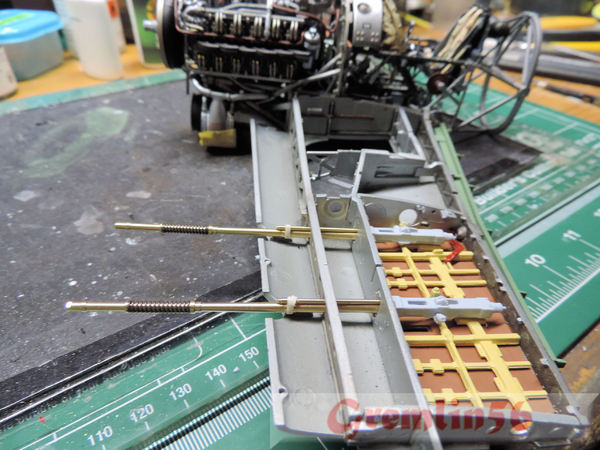
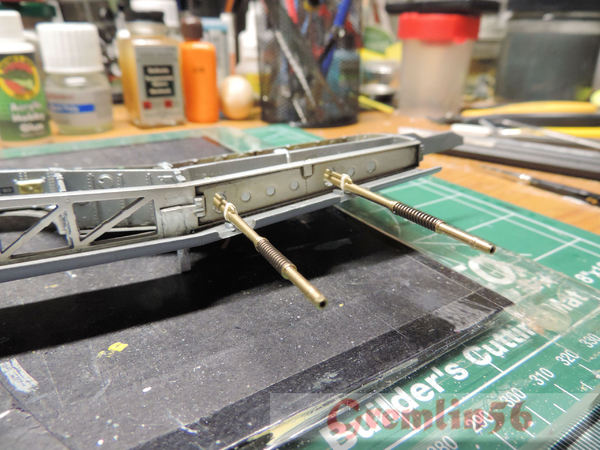
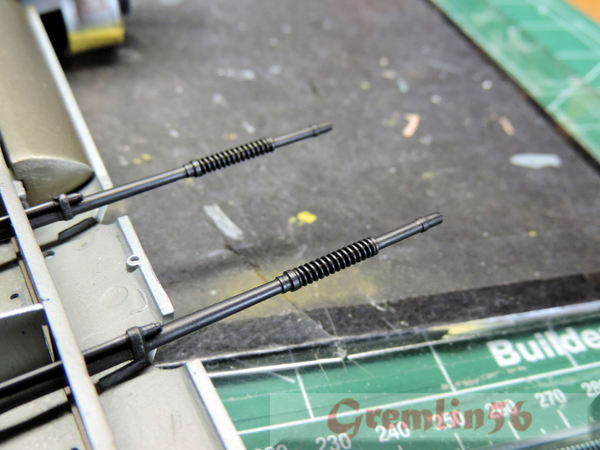
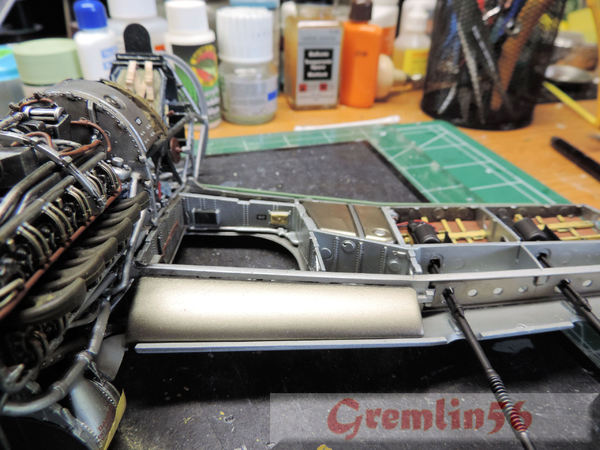
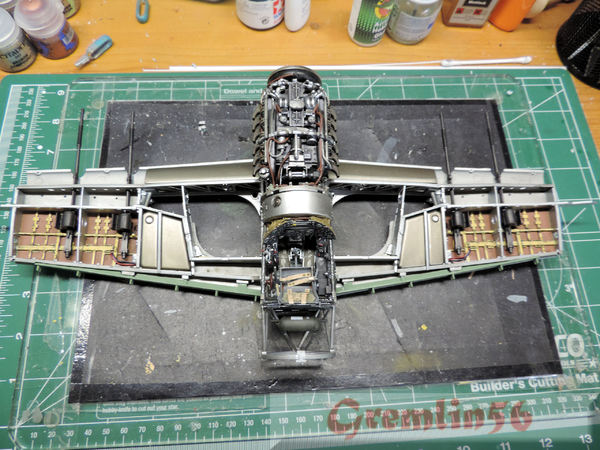
Hi Kev, it's mainly OOB. Some things I am replacing with after market goodies: Sutton harness, Hispano barrels and the radiator/intake mesh. The canvas instrument panel shroud probably isn't accurate but it solves the necessity to scratch build the instruments and wiring.
It's an amazing model in spite of a rather non-2014 amount of flash on some parts. Fit is very good although the measurements in the instruction sheet are a bit wonky at times


Joined: October 30, 2005
KitMaker: 3,897 posts
AeroScale: 564 posts
Posted: Tuesday, September 02, 2014 - 01:22 AM UTC
New Hampshire, United States
Joined: November 09, 2008
KitMaker: 615 posts
AeroScale: 459 posts
Posted: Tuesday, September 02, 2014 - 01:30 AM UTC
Good grief Julian

All I can say is...WOW!


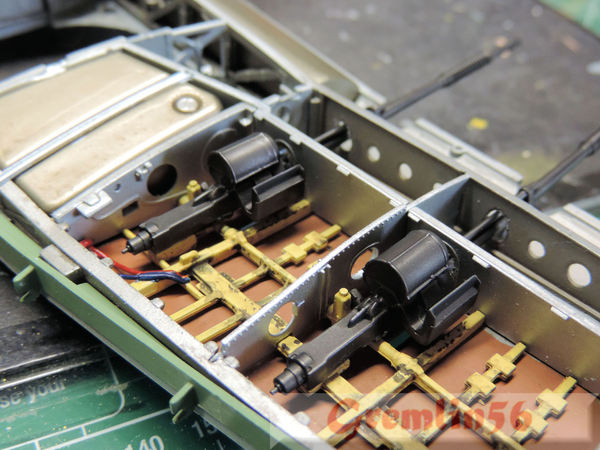
Great cockpit, great engine and now great guns and wing tanks.
Later

P-61 Black Widows, the Group Build
Veni, Vidi, Velcro; I came, I saw, I stuck around
Ontario, Canada
Joined: July 22, 2012
KitMaker: 771 posts
AeroScale: 763 posts
Posted: Tuesday, September 02, 2014 - 01:51 AM UTC
Looks good Julian
Aren't the barrels going to be shrouded though?
How did you pick that salmon/wood colour for the gunbay floors?
Matt Odom
I've been known to build a few things
Joined: October 30, 2005
KitMaker: 3,897 posts
AeroScale: 564 posts
Posted: Tuesday, September 02, 2014 - 02:34 AM UTC
Hi Matt,
thanks, it's a very enjoyable build. The Hispano's are only going to be shrouded on one side, (not sure which yet).
The brown gun bay was shamelessly stolen from Steve Budd's build. In his research before the build he found that the gun bays were often lined with a brown fiber material. This was too good to let pass, gives a nice contrast to the rest of the wings innards, so I used a Lifecolour brown and did a couple of oil washes over the top.

Joined: October 30, 2005
KitMaker: 3,897 posts
AeroScale: 564 posts
Posted: Tuesday, September 02, 2014 - 02:35 AM UTC
Hi there Bruce,
Thank you,

Ontario, Canada
Joined: July 22, 2012
KitMaker: 771 posts
AeroScale: 763 posts
Posted: Wednesday, September 03, 2014 - 03:03 AM UTC
Quoted Text
Hi Matt,
thanks, it's a very enjoyable build. The Hispano's are only going to be shrouded on one side, (not sure which yet).
The brown gun bay was shamelessly stolen from Steve Budd's build. In his research before the build he found that the gun bays were often lined with a brown fiber material. This was too good to let pass, gives a nice contrast to the rest of the wings innards, so I used a Lifecolour brown and did a couple of oil washes over the top.

Do you have a link to his build? I found the feature on Hyperscale, but I assume he had a build thread somewhere.
Matt Odom
I've been known to build a few things
Joined: October 30, 2005
KitMaker: 3,897 posts
AeroScale: 564 posts
Posted: Wednesday, September 03, 2014 - 03:08 AM UTC
Quoted Text
Quoted Text
Hi Matt,
thanks, it's a very enjoyable build. The Hispano's are only going to be shrouded on one side, (not sure which yet).
The brown gun bay was shamelessly stolen from Steve Budd's build. In his research before the build he found that the gun bays were often lined with a brown fiber material. This was too good to let pass, gives a nice contrast to the rest of the wings innards, so I used a Lifecolour brown and did a couple of oil washes over the top.

Do you have a link to his build? I found the feature on Hyperscale, but I assume he had a build thread somewhere.
His build was in a supplement to the Airfix magazine in March or June I think. I think it can be read or downloaded at the Airfix website.
Hang on, this should be it:
http://www.airfix.com/news/airfix-hawker-typhoon-mkib/


