OFFICIAL: Sea Plane Campaign 2014
Ontario, Canada
Joined: February 04, 2008
KitMaker: 2,507 posts
AeroScale: 1,814 posts
Posted: Friday, December 26, 2014 - 02:30 AM UTC
Andy! Nice GIN turrets LOL!
Andy I know Jonathan has been at the bottle!wink,wink! but you have done a great job on those turrets!
I have finished the filler and sanding for now and the resin cockpit glaze is on:-

Up next some more work on the engines.

" The Die Hards"
43rd MIDDLESEX REGIMENT
MACHINE GUN CORPS
XXX CORP
The most effective way to do it, is to do it.
- Amelia Earhart

#259
Massachusetts, United States
Joined: October 23, 2011
KitMaker: 2,265 posts
AeroScale: 1,715 posts
Posted: Friday, December 26, 2014 - 03:44 AM UTC

I was waiting for someone to spot that. Anyway, If I had to man a gun like that in combat, Id have a bottle in there with me..

Ontario, Canada
Joined: February 04, 2008
KitMaker: 2,507 posts
AeroScale: 1,814 posts
Posted: Friday, December 26, 2014 - 03:48 AM UTC
Quoted Text
:| I was waiting for someone to spot that. Anyway, If I had to man a gun like that in combat, Id have a bottle in there with me.. 
Your not the only one Jonathan!
Happy new year to you!

" The Die Hards"
43rd MIDDLESEX REGIMENT
MACHINE GUN CORPS
XXX CORP
The most effective way to do it, is to do it.
- Amelia Earhart
New Hampshire, United States
Joined: November 09, 2008
KitMaker: 615 posts
AeroScale: 459 posts
Posted: Friday, December 26, 2014 - 10:24 PM UTC
I finally got all the fiddly bits on the Dornier 24T, so I guess we will call it finished. I used Fine EZ Line y Berkshire Junction for the first time for the aerials and rigging and I really like it.


Beauty shots for the photo gallery to come, but, at least it is done. And looking good.
Nice kit to build. The worst problems I had were operator error. I'll do another one someday, probably in the Spanish markings.
Later

P-61 Black Widows, the Group Build
Veni, Vidi, Velcro; I came, I saw, I stuck around
Ontario, Canada
Joined: July 22, 2012
KitMaker: 771 posts
AeroScale: 763 posts
Posted: Friday, December 26, 2014 - 11:12 PM UTC
Wow, some beautiful builds here fellas. One of the best looking campaigns I've seen yet.
Remember to set your camera to macro for those close up shots of fiddly bits - typically a flower icon on the setting wheel - and if you don't have enough light, try resting the camera on a book or something to steady it instead of using the flash if you can. I'm sad we're missing some of the finer details on some quality work!
Or if you have a DSLR like me, you'll need to get a macro lens....which I'm too cheap to do yet.
Matt Odom
I've been known to build a few things

#305
Christchurch, New Zealand
Joined: February 01, 2006
KitMaker: 1,673 posts
AeroScale: 1,517 posts
Posted: Saturday, December 27, 2014 - 01:30 AM UTC
Hi Matt at least you have a DSLR! LOL I'm still working with SLR's and 35mm film. I do have a Fuji DSLR look alike that I use for my digital photography as it has macro and super macro settings, it doesn't however have a hot shoe so I can use a ring flash and remove all those annoying shadows.... but I'm looking for one that does!!
Ontario, Canada
Joined: February 04, 2008
KitMaker: 2,507 posts
AeroScale: 1,814 posts
Posted: Saturday, December 27, 2014 - 01:46 AM UTC
Nice build Bruce!

" The Die Hards"
43rd MIDDLESEX REGIMENT
MACHINE GUN CORPS
XXX CORP
The most effective way to do it, is to do it.
- Amelia Earhart
JPTRR
 Managing Editor
#051
Tennessee, United States
Joined: December 21, 2002
KitMaker: 7,772 posts
AeroScale: 3,175 posts
Posted: Saturday, December 27, 2014 - 02:00 AM UTC
If they demand your loyalty, give them integrity; if they demand integrity, give them your loyalty.--Col John Boyd, USAF
“Any plan where you lose your hat is a bad plan.”
New Hampshire, United States
Joined: November 09, 2008
KitMaker: 615 posts
AeroScale: 459 posts
Posted: Sunday, December 28, 2014 - 01:05 AM UTC
@ Richard, thank you, as I said, it was a nice kit to put together.
@ Matt, I don't even have a camera. You guys, with your DSLR's have it easy when it comes to taking photos. I'm just glad my new cell phone has a flash option.
Later

P-61 Black Widows, the Group Build
Veni, Vidi, Velcro; I came, I saw, I stuck around

#041
Kobenhavn, Denmark
Joined: July 20, 2006
KitMaker: 10,069 posts
AeroScale: 3,788 posts
Posted: Monday, December 29, 2014 - 02:46 PM UTC
Beautiful build, Bruce. Glad to see you finished with a great result despite the problems with the wing along the way.
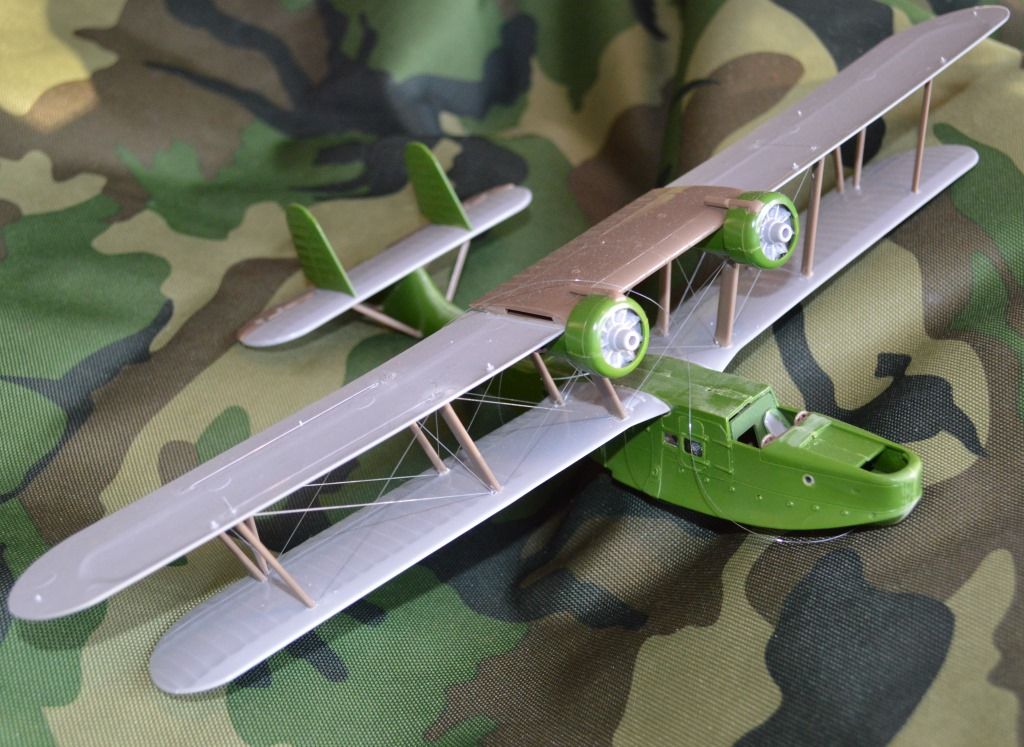
I have almost finished the rigging, but it takes a long time. I fit a couple of lines and let the glue set until the next day with a weight to it to keep it taut. It works perfectly, but takes a long time.
Is there any chance for an extension for another month? The rigging is almost done, so after that it should be a breeze.
Campaign'oholic - 252+ campaigns completed

#259
Massachusetts, United States
Joined: October 23, 2011
KitMaker: 2,265 posts
AeroScale: 1,715 posts
Posted: Monday, December 29, 2014 - 05:35 PM UTC
Quoted Text
Beautiful build, Bruce. Glad to see you finished with a great result despite the problems with the wing along the way.
I have almost finished the rigging, but it takes a long time. I fit a couple of lines and let the glue set until the next day with a weight to it to keep it taut. It works perfectly, but takes a long time.
Is there any chance for an extension for another month? The rigging is almost done, so after that it should be a breeze.

that rigging looks great!
This campaign runs to January
31st so still 33 days !

Ontario, Canada
Joined: February 04, 2008
KitMaker: 2,507 posts
AeroScale: 1,814 posts
Posted: Monday, December 29, 2014 - 05:55 PM UTC
Nice work Jesper,
You have plenty of time left to finish.

" The Die Hards"
43rd MIDDLESEX REGIMENT
MACHINE GUN CORPS
XXX CORP
The most effective way to do it, is to do it.
- Amelia Earhart

#041
Kobenhavn, Denmark
Joined: July 20, 2006
KitMaker: 10,069 posts
AeroScale: 3,788 posts
Posted: Monday, December 29, 2014 - 06:45 PM UTC
Thanks for the comments, guys. For some reason I thought the campaign ended 31st December. I will finish for sure before end of January.
More to follow soon.

Campaign'oholic - 252+ campaigns completed
England - West Midlands, United Kingdom
Joined: August 01, 2012
KitMaker: 960 posts
AeroScale: 391 posts
Posted: Wednesday, December 31, 2014 - 07:51 AM UTC
Happy New Year all. I'm the someone who posted the Ryan PT20 start. Well it has been ages but here is an update for the new year. I have a few things to add and it will be complete.

This is a great little kit!

#041
Kobenhavn, Denmark
Joined: July 20, 2006
KitMaker: 10,069 posts
AeroScale: 3,788 posts
Posted: Saturday, January 03, 2015 - 01:45 PM UTC
Nice little diorama. North, I assume that the kit included some pilots and that is one of the details missing? Strange if they would include a diorama base, but no figures.
Looks great!
Campaign'oholic - 252+ campaigns completed

#259
Massachusetts, United States
Joined: October 23, 2011
KitMaker: 2,265 posts
AeroScale: 1,715 posts
Posted: Saturday, January 03, 2015 - 02:39 PM UTC
Ive finished decorating the TALOA PBYs

next to mount the wings and landing gear.

#372
United Kingdom
Joined: March 10, 2010
KitMaker: 2,568 posts
AeroScale: 1,619 posts
Posted: Sunday, January 04, 2015 - 01:04 AM UTC
I seem to be lagging a little behind everyone so I think it's time I made an update.
I finally managed to sort out the problems with assembling the engine nacelle and struts. Needed quite a bit of filler to blend it all together and it was very tricky to sand back without damaging any of the struts! Wings are also glued together and cleaned up.
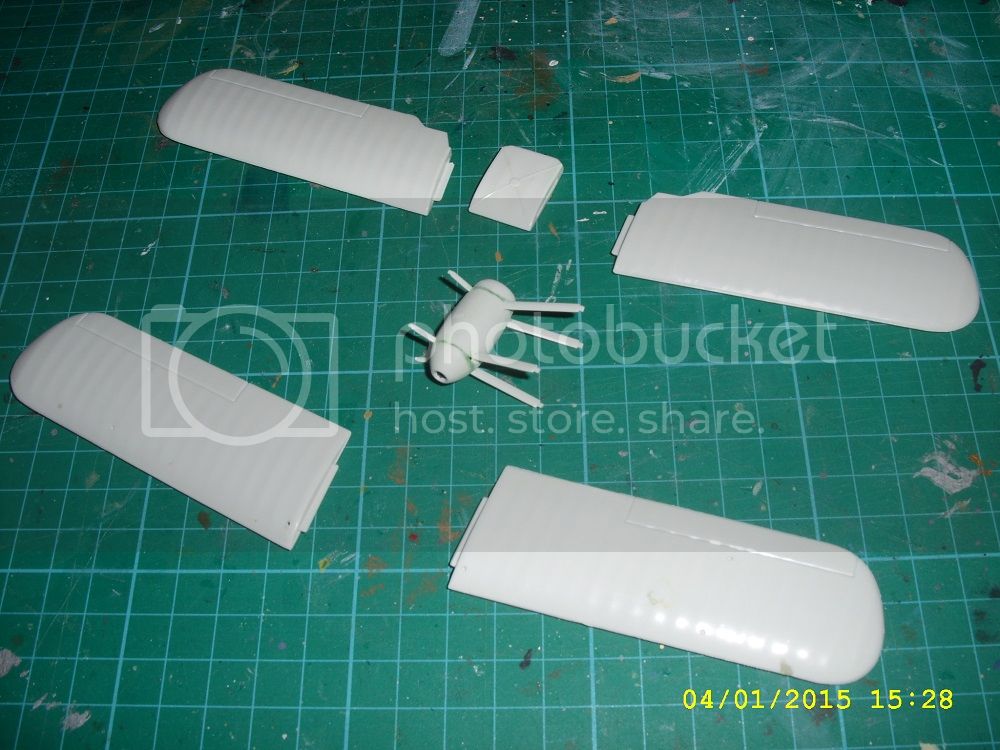
And that's about it for the main components. Still a few small bits to sort out but the bulk of the airframe is done and ready to be put together. With luck I should be ready for paint by the weekend.
On the bench: 1/72 Mosquito, Lightning F.6, DH.2,
AMT Vulcan Shuttle Surak.
Cyber-Hobby 1:35 Sherman Firefly IC - still stalled.

#259
Massachusetts, United States
Joined: October 23, 2011
KitMaker: 2,265 posts
AeroScale: 1,715 posts
Posted: Monday, January 05, 2015 - 11:59 AM UTC
construction complete on the PBY-5s.
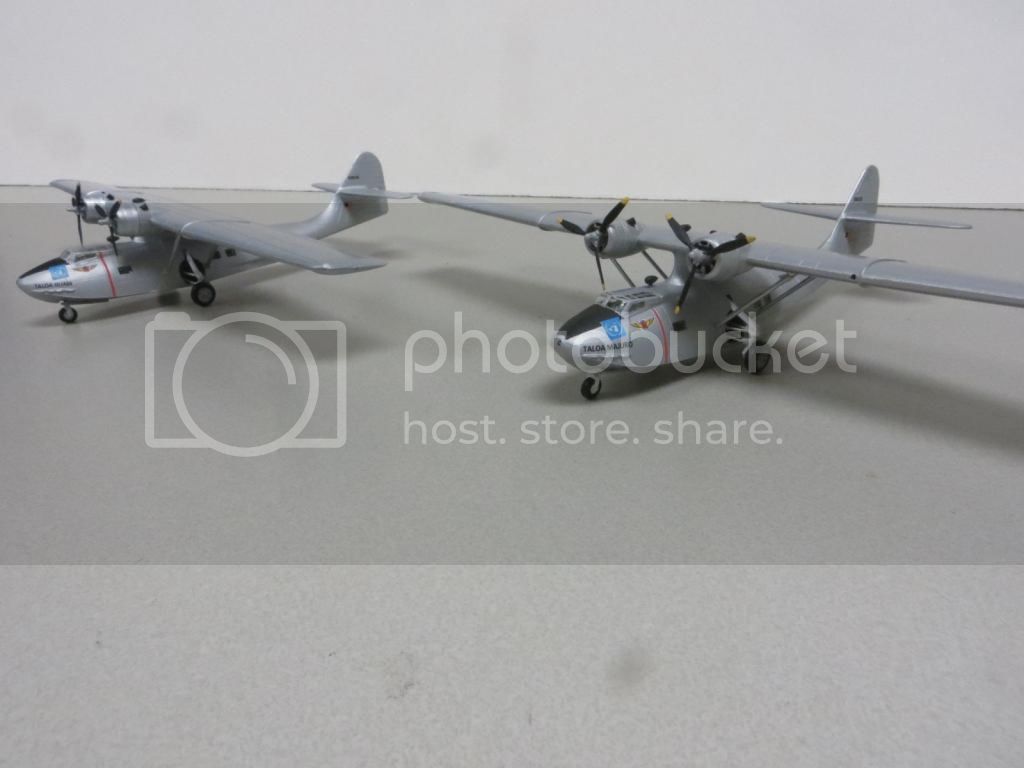
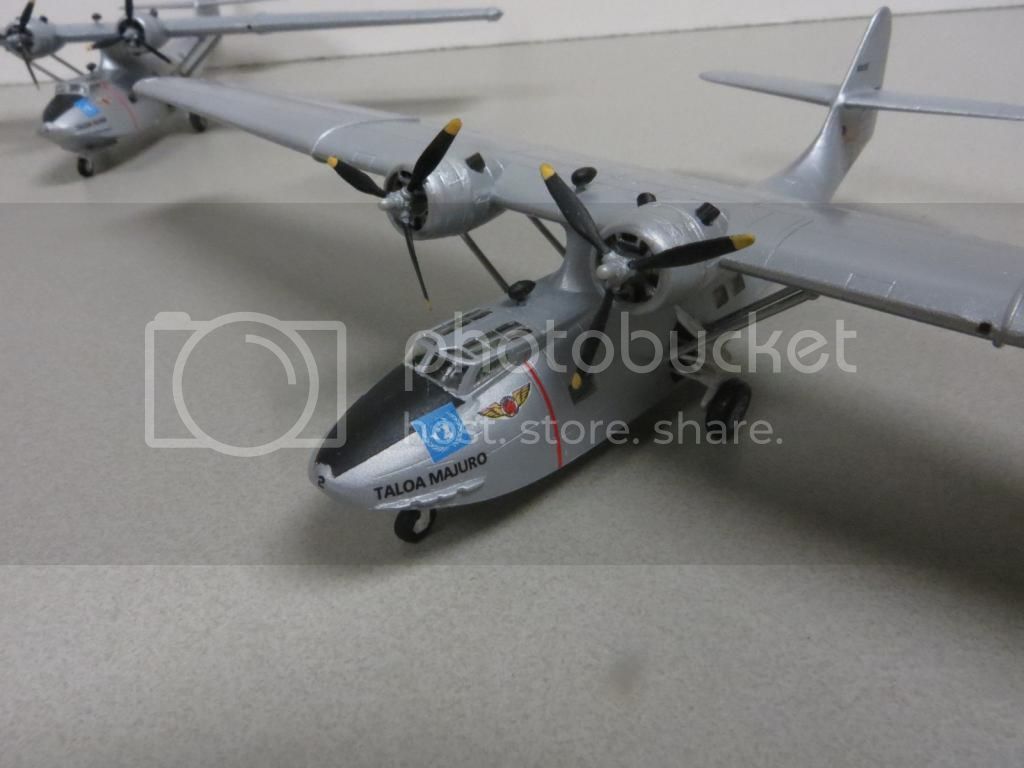
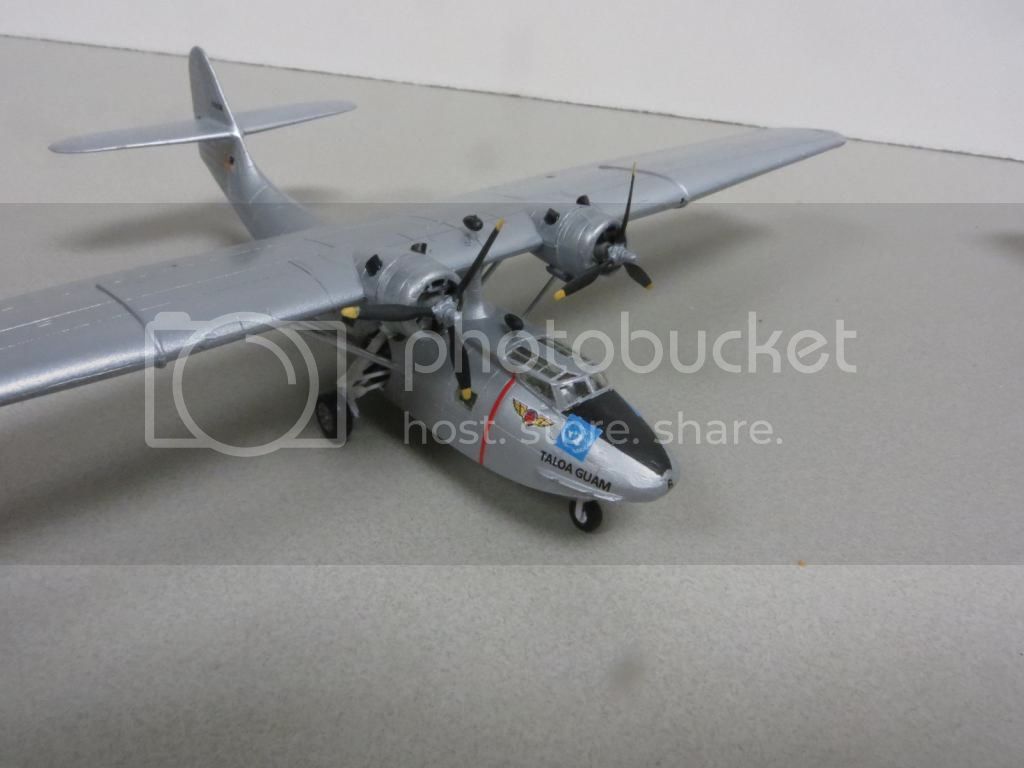
I still need to make some exhaust streaks on the top of the wings.
Ontario, Canada
Joined: February 04, 2008
KitMaker: 2,507 posts
AeroScale: 1,814 posts
Posted: Monday, January 05, 2015 - 04:47 PM UTC
Great looking models Jonathan!
Well done!

" The Die Hards"
43rd MIDDLESEX REGIMENT
MACHINE GUN CORPS
XXX CORP
The most effective way to do it, is to do it.
- Amelia Earhart

#041
Kobenhavn, Denmark
Joined: July 20, 2006
KitMaker: 10,069 posts
AeroScale: 3,788 posts
Posted: Monday, January 05, 2015 - 05:27 PM UTC
Campaign'oholic - 252+ campaigns completed

#041
Kobenhavn, Denmark
Joined: July 20, 2006
KitMaker: 10,069 posts
AeroScale: 3,788 posts
Posted: Wednesday, January 07, 2015 - 12:22 PM UTC
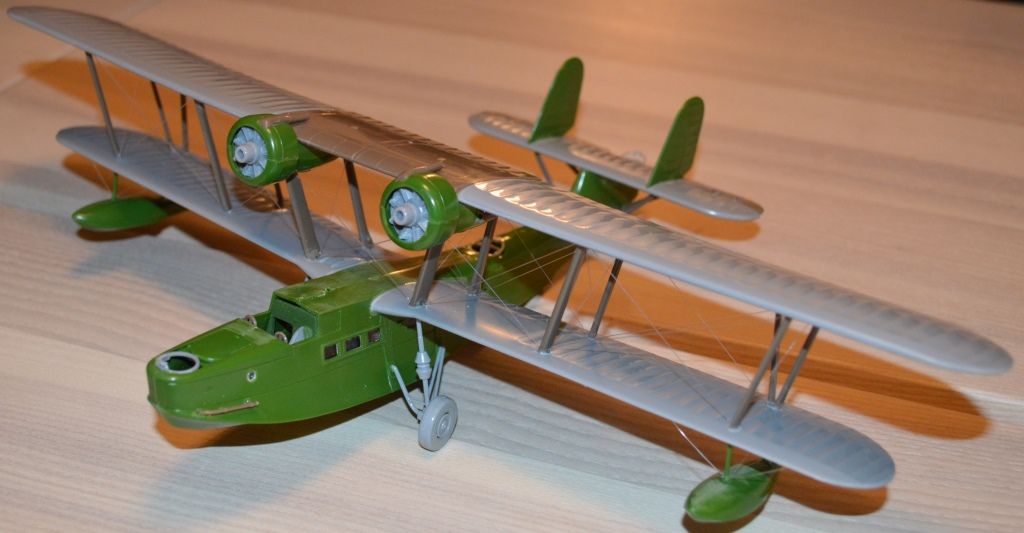
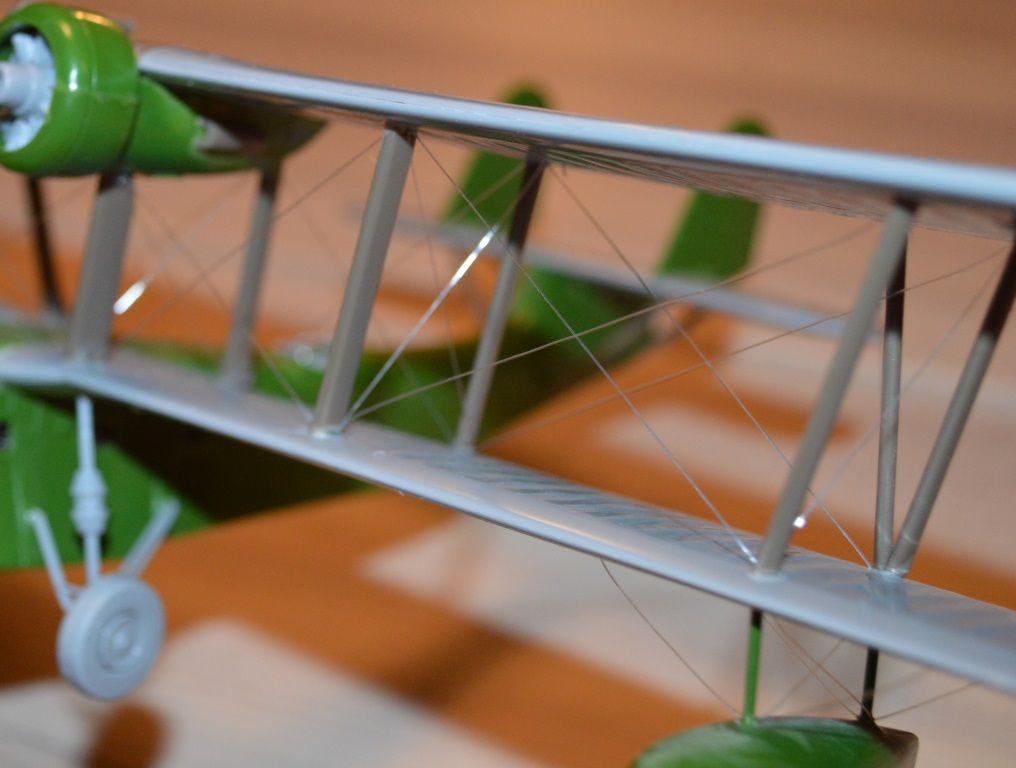
Rigging is finally complete. I am very satisfied with the result.
Only thing I wanted to turn out better are the floats on the wings. The fragile struts made it difficult to get perfect tension on the wires.
Next is some masking of the windows and then painting of the camouflage. I am spraying on the aluminium undersides and brush painting the rest. Masking the camouflage in between the rigging makes me terrified, so the brushes will come out

More to follow soon.
Campaign'oholic - 252+ campaigns completed

#305
Christchurch, New Zealand
Joined: February 01, 2006
KitMaker: 1,673 posts
AeroScale: 1,517 posts
Posted: Wednesday, January 07, 2015 - 02:05 PM UTC
Looking good Jesper! I have one of these in my my stash that needs building and I find I'm getting itchy fingers watching you build yours!
I tend to leave the rigging (what little I've done) till the very end after all the fiddly masking etc. There are some products out there that are slightly stretchy that allow you to anchor one end and then apply tension to the lines and then anchor the other end. I think that rigging the way you did it certainly has its advantages, simplicity being one. I usually avoid bi-planes for the simple reason I don't like rigging and don't do it that well.
However I've found that rigging is still in abundance in WW2 mostly with seaplanes and some biplanes that were operational in the time period, Fairey Swordfish, Henschel Hs123, Gloucester Gladiator and Fiat Cr42 Falco just off the top of my head. So I'm learning it as best I can. I know Jessica has some really great tips for WW1 subjects which still relate very well to most of the WW2 subjects.
I usually drill right the way through the wing and hang pegs off the thread after anchoring one end. I personally use a thread that gives the impression of wire after hanging several pegs off it it becomes gratifyingly taught (stretches only minimally), then it's a simple matter of using super glue and kicker to fix it in place and then snip off the excess, then it's usually just a little clean up and a touch up with a paint brush or airbrush if it requires no masking. Sill not perfect at the process but I'm persevering to become more adept.

#041
Kobenhavn, Denmark
Joined: July 20, 2006
KitMaker: 10,069 posts
AeroScale: 3,788 posts
Posted: Wednesday, January 07, 2015 - 03:16 PM UTC
Thanks for the tips, Chris. I will use that process with the Albatros I am building for the Canvas Falcons campaign.
Campaign'oholic - 252+ campaigns completed
Ontario, Canada
Joined: February 04, 2008
KitMaker: 2,507 posts
AeroScale: 1,814 posts
Posted: Thursday, January 08, 2015 - 03:03 AM UTC
Great rigging job Jesper!
Managed to get the engines painted and installed and canopy on and some filler applied:-


" The Die Hards"
43rd MIDDLESEX REGIMENT
MACHINE GUN CORPS
XXX CORP
The most effective way to do it, is to do it.
- Amelia Earhart

#305
Christchurch, New Zealand
Joined: February 01, 2006
KitMaker: 1,673 posts
AeroScale: 1,517 posts
Posted: Thursday, January 08, 2015 - 10:24 AM UTC


 I was waiting for someone to spot that. Anyway, If I had to man a gun like that in combat, Id have a bottle in there with me..


