I keep on looking at the pics I posted of the camo scheme, and the Dark Green is too brown. So I took the Spitfire out of the drying bin I have, and it's dark green, not anywhere the shade that is posted. All I can think of is that the Nikon D90 sensor shifted the WB, and since these were just grab shots, I didn't retake them.
Next set I'll make sure I get the colors to translate correctly.
Joel
World War II
Discuss WWII and the era directly before and after the war from 1935-1949.
Discuss WWII and the era directly before and after the war from 1935-1949.
Hosted by Rowan Baylis
Eduard 1/48 Limited Edition Spitfire Mk.IX
Joel_W

Joined: December 04, 2010
KitMaker: 11,666 posts
AeroScale: 7,410 posts

Posted: Wednesday, April 22, 2015 - 02:07 AM UTC
litespeed


Joined: October 15, 2009
KitMaker: 1,976 posts
AeroScale: 1,789 posts

Posted: Wednesday, April 22, 2015 - 02:25 AM UTC
Quoted Text
While waiting for Mal's Masks to arrive, I started to work on the landing gear. I added what I think is a oil line to the strut made from stretched sprue. The hydraulic brake line was made from copper wire that was bent to shape. I painted the lower curved section with thick flat Nato Black paint to represent rubber tubing, and the top portion painted with flat Aluminum paint to represent aluminum tubing. The strut was painted with the same Tamiya Flat Aluminum acrylic paint. the oleo was primed with Tamiya Gray primer, then buffed, followed by a coat of Alcad 11 Chrome. When dry I brushed on a coat of Alcad Gloss Clear to add a oily shine to it.
The Wheel and tires are separate pieces which made painting them so much easier.
Finally, the assembled strut/wheel assembly got an overall wash of Raw Sienna enamel paint except for the oleos.
Joel
The landing gear looks superb Joel. The additions make a real difference.
tim

Joel_W

Joined: December 04, 2010
KitMaker: 11,666 posts
AeroScale: 7,410 posts

Posted: Wednesday, April 22, 2015 - 02:59 AM UTC
Quoted Text
Quoted Text
While waiting for Mal's Masks to arrive, I started to work on the landing gear. I added what I think is a oil line to the strut made from stretched sprue. The hydraulic brake line was made from copper wire that was bent to shape. I painted the lower curved section with thick flat Nato Black paint to represent rubber tubing, and the top portion painted with flat Aluminum paint to represent aluminum tubing. The strut was painted with the same Tamiya Flat Aluminum acrylic paint. the oleo was primed with Tamiya Gray primer, then buffed, followed by a coat of Alcad 11 Chrome. When dry I brushed on a coat of Alcad Gloss Clear to add a oily shine to it.
The Wheel and tires are separate pieces which made painting them so much easier.
Finally, the assembled strut/wheel assembly got an overall wash of Raw Sienna enamel paint except for the oleos.
Joel
The landing gear looks superb Joel. The additions make a real difference.
tim
Tim,
Thanks so much for stopping by. Glad you like those additions to the landing gear.
Joel
Joel_W

Joined: December 04, 2010
KitMaker: 11,666 posts
AeroScale: 7,410 posts

Posted: Saturday, April 25, 2015 - 11:22 PM UTC
Progress continues at my slow but steady pace.
I masked the rear fuselage to air brush the band, only to find that I didn't have the proper color Sky in any brand of paint. I just couldn't justify driving 45 min one way for a bottle of paint, nor ordering it from Sprue Brothers, so I spent almost a hr. mixing colors till I got what I thought was pretty close.
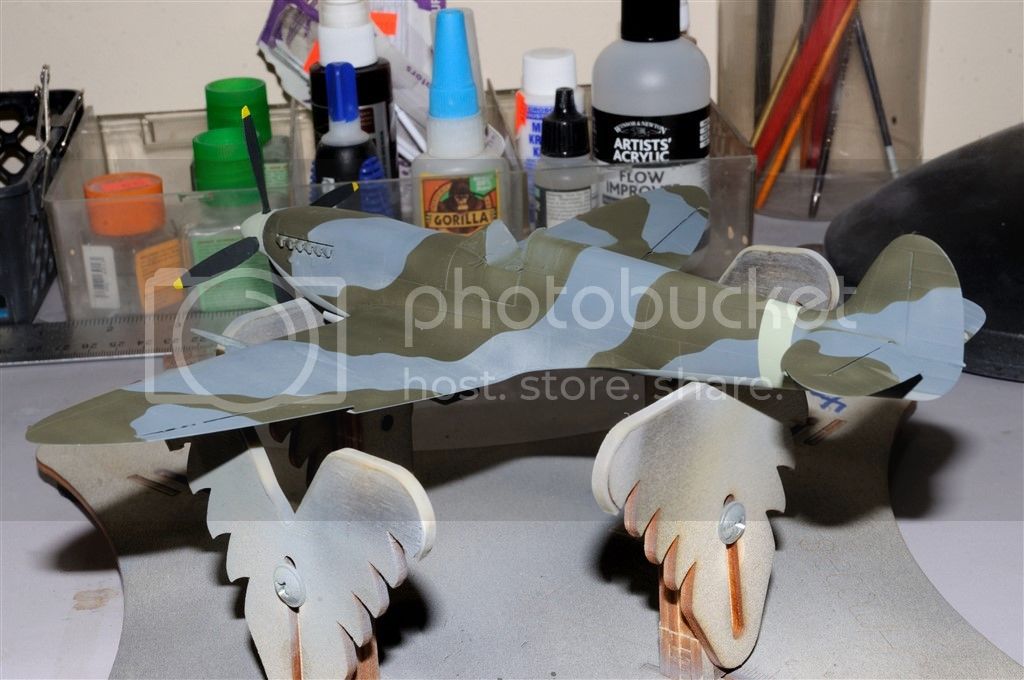
Then I masked the leading edges of both wings and air brushed on Tamiya XF-3 Flat Yellow. Next was the red tape that covers the MG ports. In sanding the leading edges, I had sanded off the molded raised plastic that represented tape, as I wanted to try making them myself. Using 1/8 inch masking tape I cut 1/4 inch sections, then painted them with a Red marker pen. The final effect really does look the part.
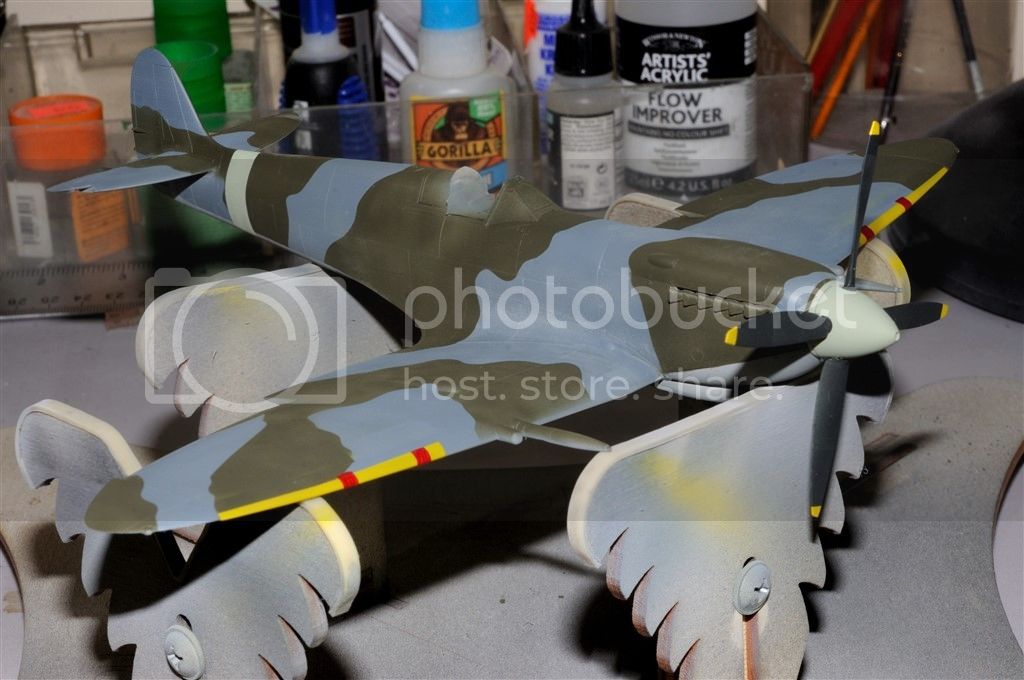
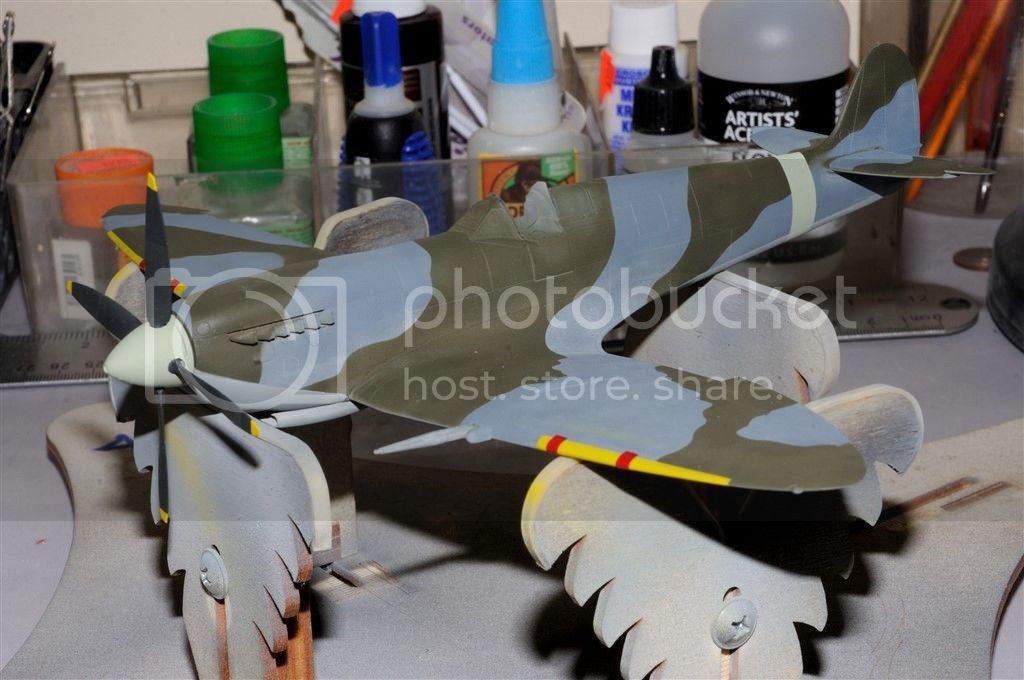
Next up is a little more detail work, then Glosscoat and decaling.
Joel
I masked the rear fuselage to air brush the band, only to find that I didn't have the proper color Sky in any brand of paint. I just couldn't justify driving 45 min one way for a bottle of paint, nor ordering it from Sprue Brothers, so I spent almost a hr. mixing colors till I got what I thought was pretty close.
Then I masked the leading edges of both wings and air brushed on Tamiya XF-3 Flat Yellow. Next was the red tape that covers the MG ports. In sanding the leading edges, I had sanded off the molded raised plastic that represented tape, as I wanted to try making them myself. Using 1/8 inch masking tape I cut 1/4 inch sections, then painted them with a Red marker pen. The final effect really does look the part.
Next up is a little more detail work, then Glosscoat and decaling.
Joel

SaxonTheShiba

Joined: February 01, 2009
KitMaker: 1,233 posts
AeroScale: 663 posts

Posted: Saturday, April 25, 2015 - 11:53 PM UTC
Ha-ha.....this one's back from the dead! Right on Joel....looks awesome.
Best wishes,
Ian
Best wishes,
Ian
Joel_W

Joined: December 04, 2010
KitMaker: 11,666 posts
AeroScale: 7,410 posts

Posted: Sunday, April 26, 2015 - 12:08 AM UTC
Quoted Text
Ha-ha.....this one's back from the dead! Right on Joel....looks awesome.
Best wishes,
Ian
Ian,
Yep. But it's doing its best to kill me.
Joel

SaxonTheShiba

Joined: February 01, 2009
KitMaker: 1,233 posts
AeroScale: 663 posts

Posted: Sunday, April 26, 2015 - 01:33 AM UTC
True, but after you have vanquished the model you can do some Ragnar Lothbrok chest beating and drink some ale from a horn! Looking forward to the rest of the build.
Ian
Ian
Quoted Text
Quoted TextHa-ha.....this one's back from the dead! Right on Joel....looks awesome.
Best wishes,
Ian
Ian,
Yep. But it's doing its best to kill me.
Joel
Joel_W

Joined: December 04, 2010
KitMaker: 11,666 posts
AeroScale: 7,410 posts

Posted: Sunday, April 26, 2015 - 02:08 AM UTC
Quoted Text
True, but after you have vanquished the model you can do some Ragnar Lothbrok chest beating and drink some ale from a horn! Looking forward to the rest of the build.
IanQuoted TextQuoted TextHa-ha.....this one's back from the dead! Right on Joel....looks awesome.
Best wishes,
Ian
Ian,
Yep. But it's doing its best to kill me.
Joel
Ian,
Now there's a great idea.
Joel
Posted: Sunday, April 26, 2015 - 11:08 AM UTC
Nice one Joel, I told you that it was easy  Now imagine what you could do with masks for the national insignia and tteh codes and serials, they are just as easy, if not easier
 Now imagine what you could do with masks for the national insignia and tteh codes and serials, they are just as easy, if not easier
Joel_W

Joined: December 04, 2010
KitMaker: 11,666 posts
AeroScale: 7,410 posts

Posted: Sunday, April 26, 2015 - 05:27 PM UTC
Quoted Text
Nice one Joel, I told you that it was easyNow imagine what you could do with masks for the national insignia and tteh codes and serials, they are just as easy, if not easier
Mal,
Thanks for stopping by and seeing how your masks actually worked for me. I'm still raving about them. As for the National insignias and codes, I'll be going the full route on my next British aircraft.
Joel
Joel_W

Joined: December 04, 2010
KitMaker: 11,666 posts
AeroScale: 7,410 posts

Posted: Wednesday, April 29, 2015 - 03:12 AM UTC
Well, I'm on my 1st of 3 weeks vacation, and this one is dedicated to catching up on home repairs, and painting. Today I finally finished the hallway trim and all the doors. So by noon it was back to the workbench for the rest of the day as I had the house to myself.
With the majority of the painting done, I glossed the Spit Mk.IXc with Glosscoat as I still prefer it over Pledge. The Eduard kit comes with decals by Cartograf, so you know that they're perfect, and a 2nd sheet of stencils done in house. I must say that the stencils were also thin, and behaved just as if they were made by Cartograph. I did limit the stencils on the topside to those that I could actually read.
The Cartograf decals have very little clear film around them but the "FY" is one decal, and I prefer to lay the letters one at a time, so I did have to do some trimming. My decal method is still Microscale Set (Blue)under and over as a wetting agent, then Microscale Sol (Red)as a setting agent, then Solvaset as the final setting agent. I've found that this method really makes the decals lay down into all the nooks and crannies like they were painted on. At this point there is no gloss overcoat on any of the decals to help blend them into the paint.
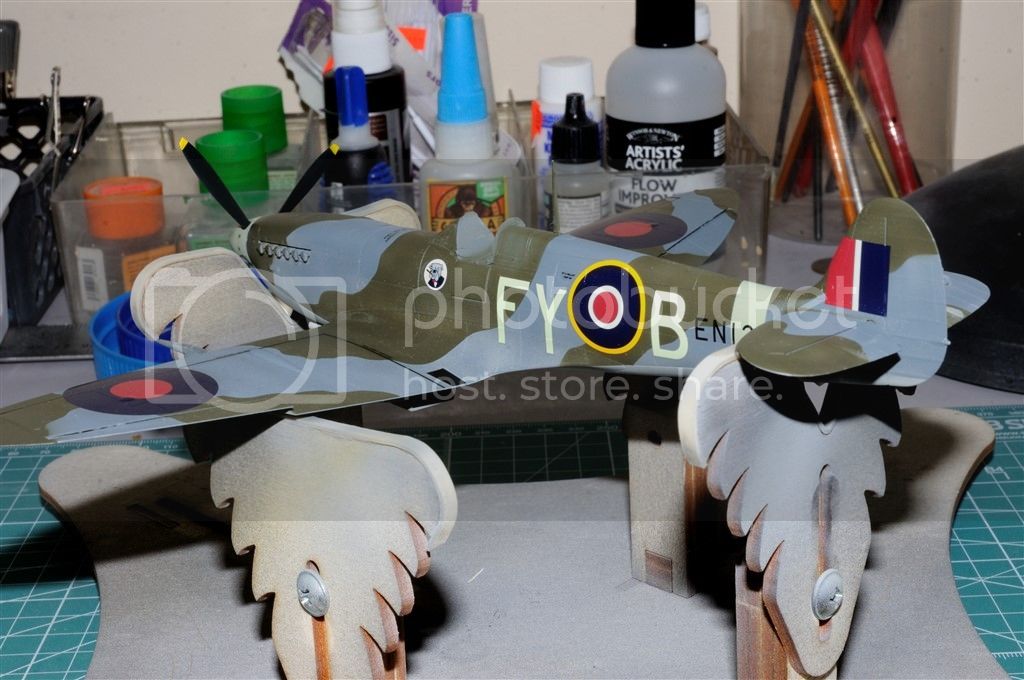
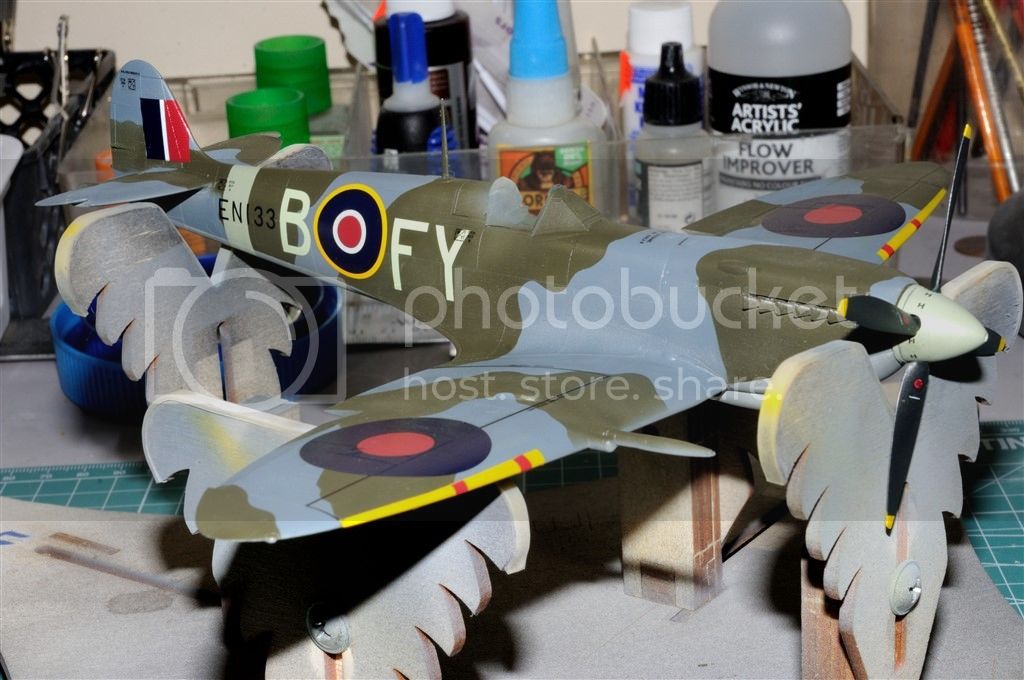
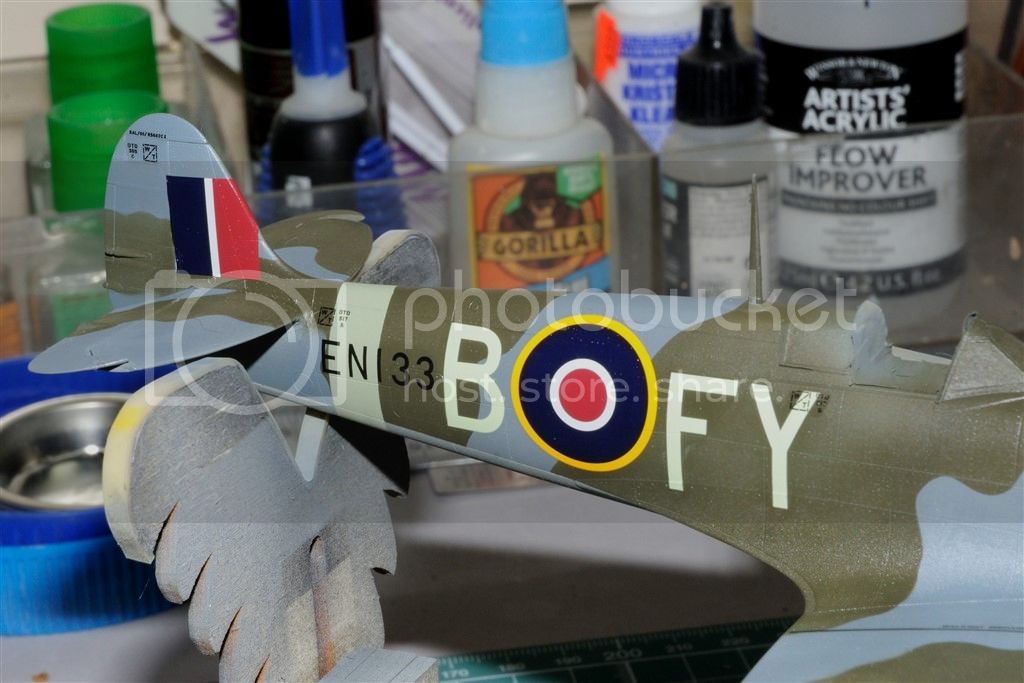
Here's a close up of the side of the fuselage, and you really can't see any flash or silvering.
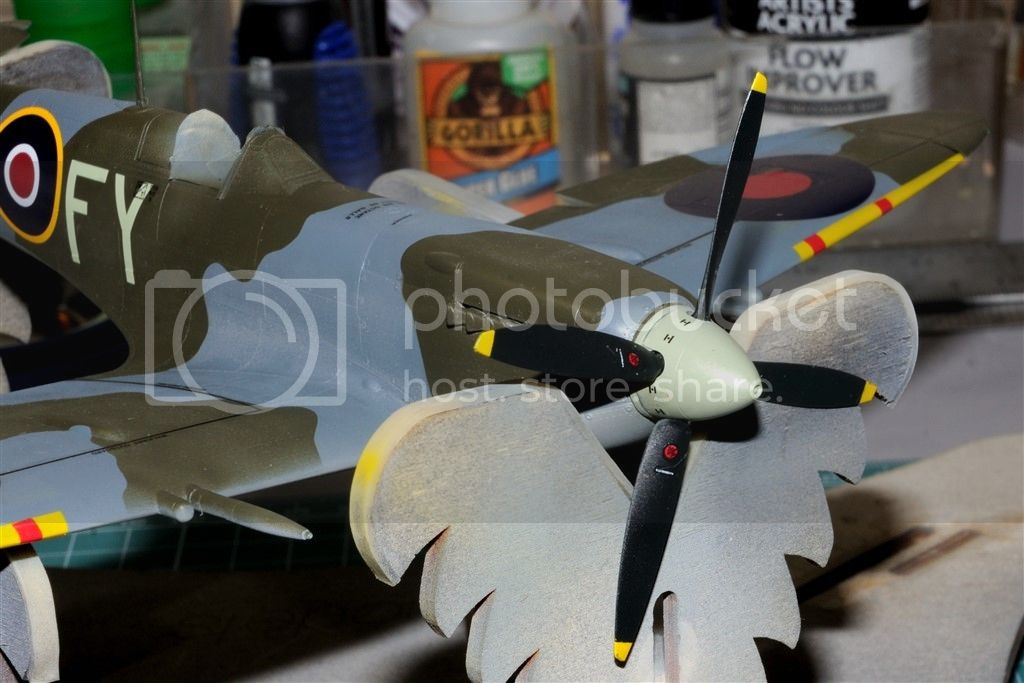
Eduard stencils included individual decals and logos for each prop blade. There small size made it a real challenge to keep them all straight. They also included two sets of marking between each blade.
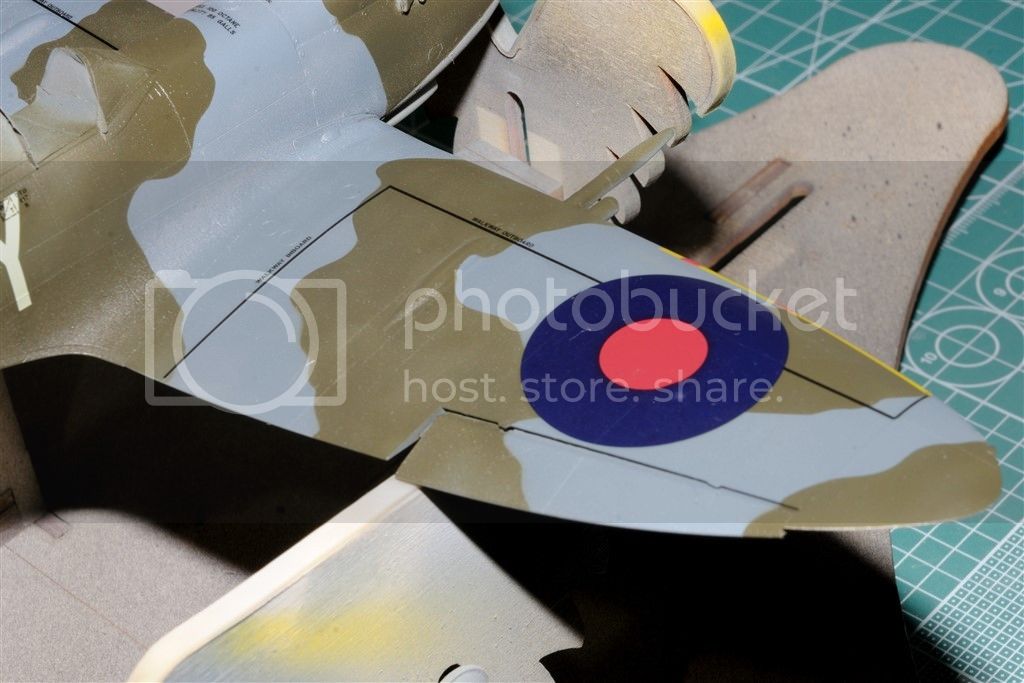
the main wings have the wings walks as 3 separate pieces plus both Walkway stencils. They laid down perfectly.
Next up is the decaling on the bottom side.
Joel
With the majority of the painting done, I glossed the Spit Mk.IXc with Glosscoat as I still prefer it over Pledge. The Eduard kit comes with decals by Cartograf, so you know that they're perfect, and a 2nd sheet of stencils done in house. I must say that the stencils were also thin, and behaved just as if they were made by Cartograph. I did limit the stencils on the topside to those that I could actually read.
The Cartograf decals have very little clear film around them but the "FY" is one decal, and I prefer to lay the letters one at a time, so I did have to do some trimming. My decal method is still Microscale Set (Blue)under and over as a wetting agent, then Microscale Sol (Red)as a setting agent, then Solvaset as the final setting agent. I've found that this method really makes the decals lay down into all the nooks and crannies like they were painted on. At this point there is no gloss overcoat on any of the decals to help blend them into the paint.
Here's a close up of the side of the fuselage, and you really can't see any flash or silvering.
Eduard stencils included individual decals and logos for each prop blade. There small size made it a real challenge to keep them all straight. They also included two sets of marking between each blade.
the main wings have the wings walks as 3 separate pieces plus both Walkway stencils. They laid down perfectly.
Next up is the decaling on the bottom side.
Joel
thegirl

Joined: January 19, 2008
KitMaker: 6,743 posts
AeroScale: 6,151 posts

Posted: Wednesday, April 29, 2015 - 07:13 AM UTC
I'm really glad that you pressed on Joel ! 
Terri

Terri

magnusf

Joined: May 02, 2006
KitMaker: 1,953 posts
AeroScale: 1,902 posts

Posted: Wednesday, April 29, 2015 - 11:03 AM UTC
Joel! I get the feeling that this one will turn out great! I like the look of the colours - spot on I think!

Magnus

Magnus
Joel_W

Joined: December 04, 2010
KitMaker: 11,666 posts
AeroScale: 7,410 posts

Posted: Wednesday, April 29, 2015 - 06:38 PM UTC
Terri,
Thanks, and me too. As Mal would say, you can never have enough Spitfires. I've even started to do some research on the whole family of Spitfires, and how the British just loved to make a new mark for even small changes. I'm use to how the USAAF and USN did it, with just changing dash numbers unless it's a major change.
I've just read up on the differences in the C and E wings. Talk about getting confused Thank Goodness we have Edgar to keep us on the right track.
Joel
Thanks, and me too. As Mal would say, you can never have enough Spitfires. I've even started to do some research on the whole family of Spitfires, and how the British just loved to make a new mark for even small changes. I'm use to how the USAAF and USN did it, with just changing dash numbers unless it's a major change.
I've just read up on the differences in the C and E wings. Talk about getting confused
 Thank Goodness we have Edgar to keep us on the right track.
Joel
Joel_W

Joined: December 04, 2010
KitMaker: 11,666 posts
AeroScale: 7,410 posts

Posted: Wednesday, April 29, 2015 - 06:42 PM UTC
Quoted Text
Joel! I get the feeling that this one will turn out great! I like the look of the colours - spot on I think!

Magnus
Magnus,
I sure hope so. I've really put my time into this build. As a matter of fact, when I email my brother about it, I always refer to it as "The Resurrection", because it truly came back from the dead.
The colors should be spot on as they're by Tamiya who had them made expressly for their 1/32 scale Spitfire.
The issue I was having was poor and incorrect lighting when taking my pictures. Now I've gone to a 3 light setup using two white lights, and the camera built in flash as fill, which seams to have a pronounced effect on the White Balance. I can assure you it was dumb luck on my part.

Joel
Posted: Wednesday, April 29, 2015 - 06:49 PM UTC
That Prop and spinner. Wow, the decals really bring THAT to life. It's great looking, and will be an eye-magnet when this is done. Very impressive.
Any photographic evidence for a metallic interior to the spinner tip with the nut & bolt, or paint chipping around it? Might be a nice added touch.
Any photographic evidence for a metallic interior to the spinner tip with the nut & bolt, or paint chipping around it? Might be a nice added touch.
Joel_W

Joined: December 04, 2010
KitMaker: 11,666 posts
AeroScale: 7,410 posts

Posted: Wednesday, April 29, 2015 - 06:51 PM UTC
Quoted Text
That Prop and spinner. Wow, the decals really bring THAT to life. It's great looking, and will be an eye-magnet when this is done. Very impressive.
Brian,
Coming from you, that means a lot.
Joel

BlackWidow

Joined: August 09, 2009
KitMaker: 1,732 posts
AeroScale: 1,336 posts

Posted: Wednesday, April 29, 2015 - 11:48 PM UTC
Very, very nice, Joel. I can see, this will become a pretty baby. And as I mentioned before, I believe, this won't be your only Spitfire .... 
What's that emblem on the left fuselage side just under the canopy?
Torsten

What's that emblem on the left fuselage side just under the canopy?
Torsten

Antoni

Joined: June 03, 2006
KitMaker: 574 posts
AeroScale: 573 posts

Posted: Thursday, April 30, 2015 - 01:37 AM UTC
A bulldog with a cigar.
Joel_W

Joined: December 04, 2010
KitMaker: 11,666 posts
AeroScale: 7,410 posts

Posted: Thursday, April 30, 2015 - 02:32 AM UTC
Quoted Text
Very, very nice, Joel. I can see, this will become a pretty baby. And as I mentioned before, I believe, this won't be your only Spitfire ....
What's that emblem on the left fuselage side just under the canopy?
Torsten
Torsten,
Thanks for those more then kind words. And yes, this won't be my last Spitfire as I intend to build a min of one or two per year.
Antoni got what the patch is. It's on the Eduard sheet
Joel
Posted: Thursday, April 30, 2015 - 02:57 AM UTC
Quoted Text
What's that emblem on the left fuselage side just under the canopy?
* * * *
Antoni got what the patch is. It's on the Eduard sheet
Joel
Just so I'm clear Joel, this is one of the A/C for which the decals are provided in the kit, except that you are making it earlier, before application of D-Day stripes, right?
Brian
Antoni

Joined: June 03, 2006
KitMaker: 574 posts
AeroScale: 573 posts

Posted: Thursday, April 30, 2015 - 03:39 AM UTC
I think there is some confusion here. EN133 is not one of the options on the 'Longest Day' special edition. It never made it to D-Day.
http://search.aol.co.uk/aol/imageDetails?s_it=imageDetails&q=spitfire+en133&s_chn=hp_t1&v_t=aoluk-homePage51-engmodusaolp00000011&b=image%3Fs_chn%3Dhp_t1%26enabled_terms%3D%26s_it%3Daoluk-homePage51-engmodusaolp00000011%26q%3Dspitfire%2Ben133%26oreq%3D5f14eee6ea4e4373880be57c99c57370&img=http%3A%2F%2F1000aircraftphotos.com%2FContributions%2FPippinBill%2F7816.jpg&host=http%3A%2F%2F1000aircraftphotos.com%2FContributions%2FPippinBill%2F7816.htm&width=153&height=85&thumbUrl=https%3A%2F%2Fencrypted-tbn0.gstatic.com%2Fimages%3Fq%3Dtbn%3AANd9GcQjwwMRMDUt615awASI3pGwwDp5DvBM8Mjxoo19sE6sEpW-tk2OlhIc5FwV&imgWidth=450&imgHeight=249&imgSize=32508&imgTitle=spitfire+en133
IIRC Slater was a Wing Commander, not Squadron Leader
Joel_W

Joined: December 04, 2010
KitMaker: 11,666 posts
AeroScale: 7,410 posts

Posted: Thursday, April 30, 2015 - 04:09 AM UTC
Quoted Text
Quoted Text
What's that emblem on the left fuselage side just under the canopy?
* * * *
Antoni got what the patch is. It's on the Eduard sheet
Joel
Just so I'm clear Joel, this is one of the A/C for which the decals are provided in the kit, except that you are making it earlier, before application of D-Day stripes, right?
Brian
Brian,
That was the original intention, but the kit decals didn't have all the decals needed, so I used the decals from their original Mk.IX release. If there's an error with the markings, there isn't anything I can do about it now. The markings used are for a pre-D-Day Spit MK.IX.
Joel
Posted: Thursday, April 30, 2015 - 12:42 PM UTC
Looking very good Joel, well done on the resurrection 

Posted: Thursday, April 30, 2015 - 02:25 PM UTC
Quoted Text
Just so I'm clear Joel, this is one of the A/C for which the decals are provided in the kit, except that you are making it earlier, before application of D-Day stripes, right?
Quoted Text
That was the original intention, but the kit decals didn't have all the decals needed, so I used the decals from their original Mk.IX release. * * * The markings used are for a pre-D-Day Spit MK.IX.
Got it.
 |


