Hosted by Rowan Baylis
1/48 Hasegawa Ki 43 Hayabusa build
Posted: Wednesday, November 23, 2016 - 07:51 AM UTC
Man you certainly inherited your family's attention to detail genes, and the skill to pull off complex corrections!

rdt1953

Joined: February 06, 2015
KitMaker: 1,098 posts
AeroScale: 900 posts

Posted: Wednesday, November 23, 2016 - 08:01 AM UTC
Quoted Text
Man you certainly inherited your family's attention to detail genes, and the skill to pull off complex corrections!
Brian - Thanks for the compliments and we've yet to see about pulling of the corrections - fingers crossed !
Happy Thanksgiving Day to you and yours - Richard
Posted: Wednesday, November 23, 2016 - 08:30 AM UTC
Quoted Text
Happy Thanksgiving Day to you and yours - Richard
Same here Richard!
Joel_W

Joined: December 04, 2010
KitMaker: 11,666 posts
AeroScale: 7,410 posts

Posted: Thursday, November 24, 2016 - 06:17 AM UTC
Richard,
After shamefully stuffing myself with too much Turkey, homemade stuffing, and the rest of an exceptional home cooked meal, my job as always is clean up. With that task done and the start of the Steelers/Colts game not starting till 8:30, I got caught up with your build.
I can only echo Brian's words as you've certainly inherited your families craftsman's skills.
The extent of your planned corrections for the cowl, including turning one from I'm guessing is plexi stock, is something I'm really looking forward to. If I can't do it by hand, or substitute parts from another kit, then I usually live with it.
Joel

rdt1953

Joined: February 06, 2015
KitMaker: 1,098 posts
AeroScale: 900 posts

Posted: Monday, November 28, 2016 - 11:29 PM UTC
Brian & Joel - Thanks for the kind words and all the interest you guys have shown all along - thanks also to all others who may be watching. The cowl fix is well along but now the gremlins are working their mischief in both the I Mac and Mac Book . Loading any thing is hit or miss so posting pics is an exorcise in frustration. Time for both machines to go to the computer Doctor. All of this seems to be the result of trying to fix something that wasn't broke. Updates/ schmupdates - HUMBUG ! Any how , lots of pics of the process lay in wait while this gets sorted out . Thanks to all for your continuing patience.
Wringing hands in agony - Richard
Wringing hands in agony - Richard

rdt1953

Joined: February 06, 2015
KitMaker: 1,098 posts
AeroScale: 900 posts

Posted: Tuesday, November 29, 2016 - 04:54 AM UTC
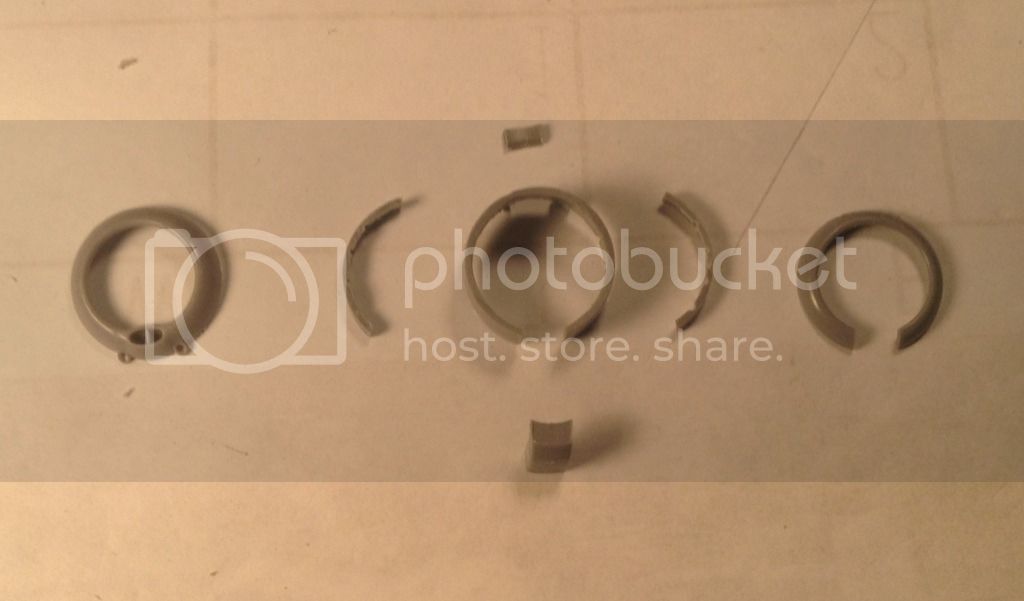
I've begun the cowl improvements by sawing off the gun blisters, cowl flaps,
chin scoop and front cowl ring - the cowl ring to the left is the FineMolds Ki II ring inverted .
The cowl was then placed on a wood block and cleats glued to the block to maintain the shape at the rear of the cowl-

Next slits were sawn in the cowl partway down along panel lines and under the gun blisters to allow the cowl to expand . Plastic shims were wedged in the slits.
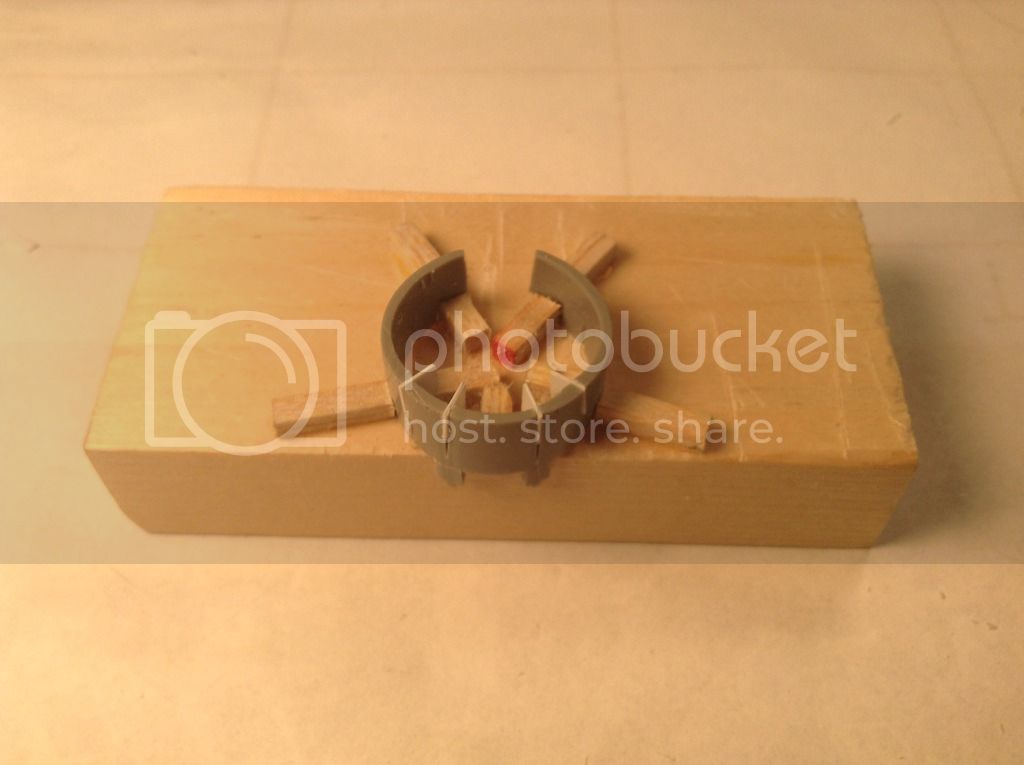
The shims were driven down to expand the cowl until it matched the greater diameter of the FineMolds cowl ring.
Next up will be the preparations for turning a ring from scratch should the FineMolds ring not work out.
Thanks for looking ! Richard
chin scoop and front cowl ring - the cowl ring to the left is the FineMolds Ki II ring inverted .

The cowl was then placed on a wood block and cleats glued to the block to maintain the shape at the rear of the cowl-

Next slits were sawn in the cowl partway down along panel lines and under the gun blisters to allow the cowl to expand . Plastic shims were wedged in the slits.

The shims were driven down to expand the cowl until it matched the greater diameter of the FineMolds cowl ring.
Next up will be the preparations for turning a ring from scratch should the FineMolds ring not work out.
Thanks for looking ! Richard

rdt1953

Joined: February 06, 2015
KitMaker: 1,098 posts
AeroScale: 900 posts

Posted: Tuesday, November 29, 2016 - 06:31 AM UTC
I am likely going to use the FineMolds ring as it looks like it will adequately lessen the pitch along the top of the cowl but I'm going to turn one up to a slightly greater diameter to see which might be the best option.
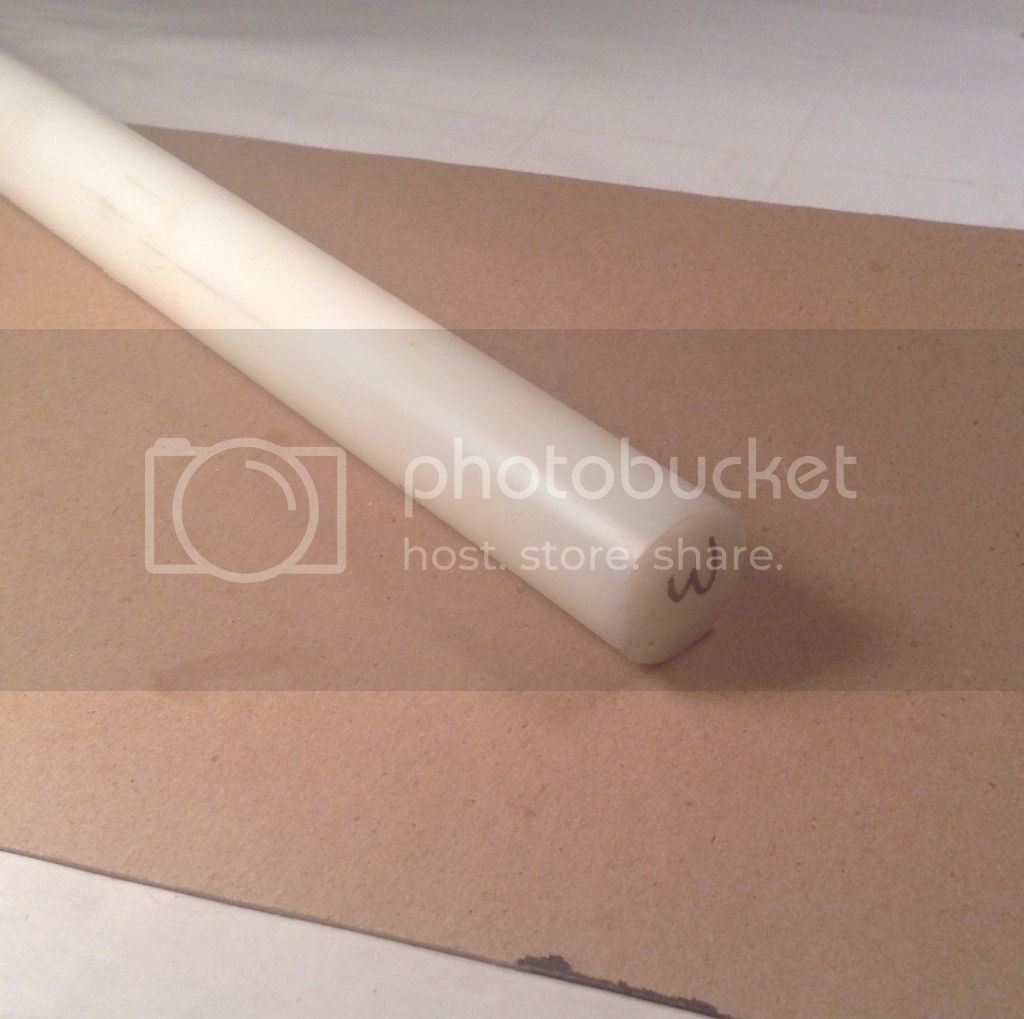
I purchased a piece of 1" dia polystyrene rod from McMaster-Carr . They are an amazing organization- probably hundreds of thousands of items in inventory- tools, supplies, raw materials-pretty much everything in industrial supply. Easy to use website, excellent service- I usually receive my order the following day- and they have never been out of stock on anything I have ever ordered.
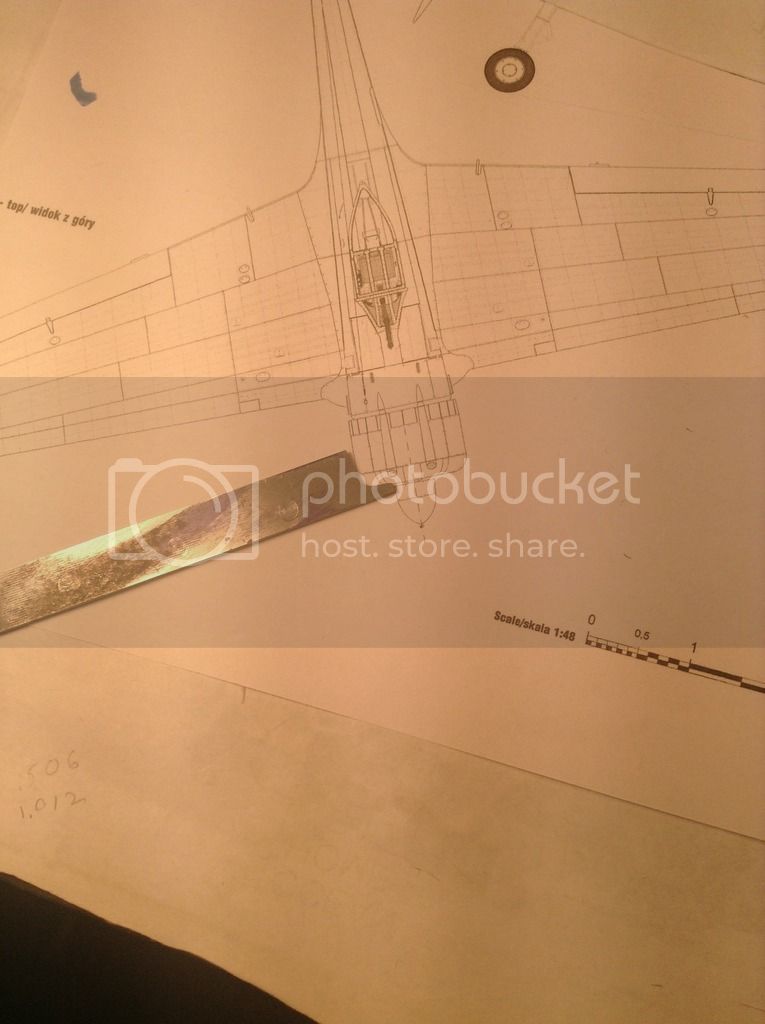
I next filed up two profile cutters out of a piece of mild steel bar stock- one for the radius on the outside and another for the profile on the inside-

The rod was then chucked up in the three jaw chuck- once machining has begun it cannot be disturbed or subsequent operations may not be concentric so you must be certain that you have enough working room for the tooling yet have the minimum mount of stock protruding as it will not be supported by the tail stock in this type of work.
I hoped to place an image of the rod chucked in the lathe here but the gremlins have returned . Here then are the order of operations and hopefully the pics will follow.
1. Facing- cutting across perpendicular to the axis of rotation
2. Light turning- truing up the diameter
3. Center drilling - starting a hole in the end of the stock
4. Boring- enlarging the hole in the stock to the diameter of the opening in
the cowl ring - essentially turning from the inside
5. Turning- reducing the outside to the required diameter
6. Profiling - creating the radius on the outside
7. Profiling- creating the profile on the inside
8. Parting- cutting off the workpiece from the stock
I guess I'm lucky the gremlins let me get this far- I'll try again later with some more pics.
Thanks for looking - Richard
I purchased a piece of 1" dia polystyrene rod from McMaster-Carr . They are an amazing organization- probably hundreds of thousands of items in inventory- tools, supplies, raw materials-pretty much everything in industrial supply. Easy to use website, excellent service- I usually receive my order the following day- and they have never been out of stock on anything I have ever ordered.

I next filed up two profile cutters out of a piece of mild steel bar stock- one for the radius on the outside and another for the profile on the inside-


The rod was then chucked up in the three jaw chuck- once machining has begun it cannot be disturbed or subsequent operations may not be concentric so you must be certain that you have enough working room for the tooling yet have the minimum mount of stock protruding as it will not be supported by the tail stock in this type of work.
I hoped to place an image of the rod chucked in the lathe here but the gremlins have returned . Here then are the order of operations and hopefully the pics will follow.
1. Facing- cutting across perpendicular to the axis of rotation
2. Light turning- truing up the diameter
3. Center drilling - starting a hole in the end of the stock
4. Boring- enlarging the hole in the stock to the diameter of the opening in
the cowl ring - essentially turning from the inside
5. Turning- reducing the outside to the required diameter
6. Profiling - creating the radius on the outside
7. Profiling- creating the profile on the inside
8. Parting- cutting off the workpiece from the stock
I guess I'm lucky the gremlins let me get this far- I'll try again later with some more pics.
Thanks for looking - Richard

rdt1953

Joined: February 06, 2015
KitMaker: 1,098 posts
AeroScale: 900 posts

Posted: Tuesday, November 29, 2016 - 08:49 AM UTC
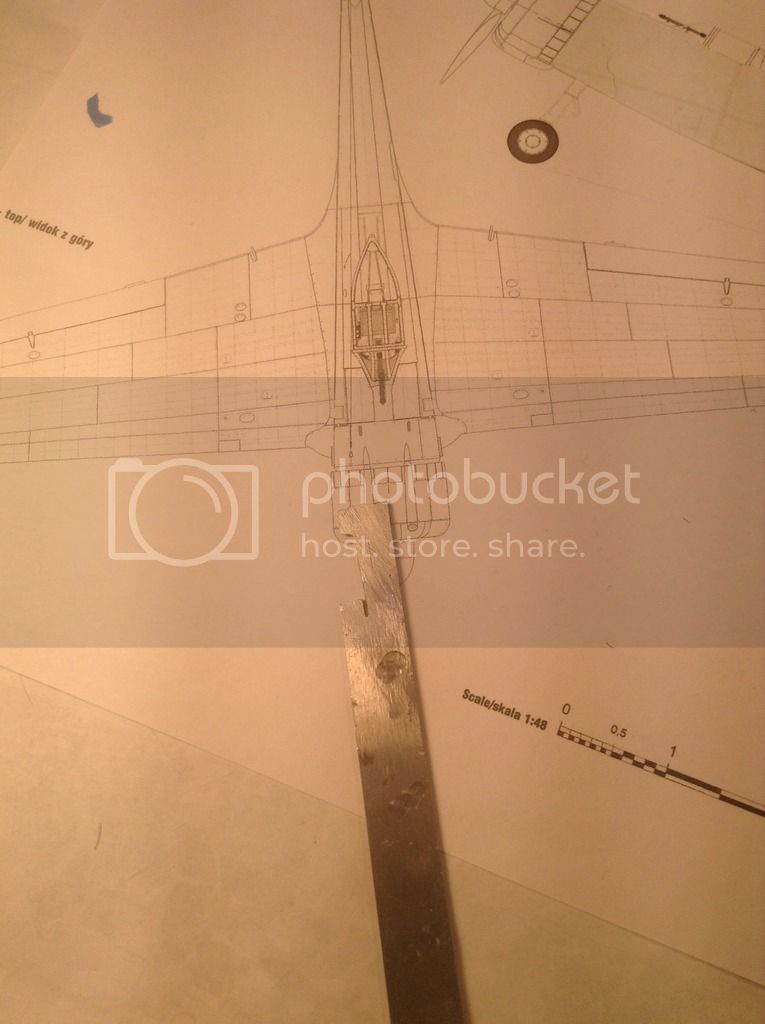
it looks like I posted the outside profile cutter pic twice- here is the inside profile cutter-
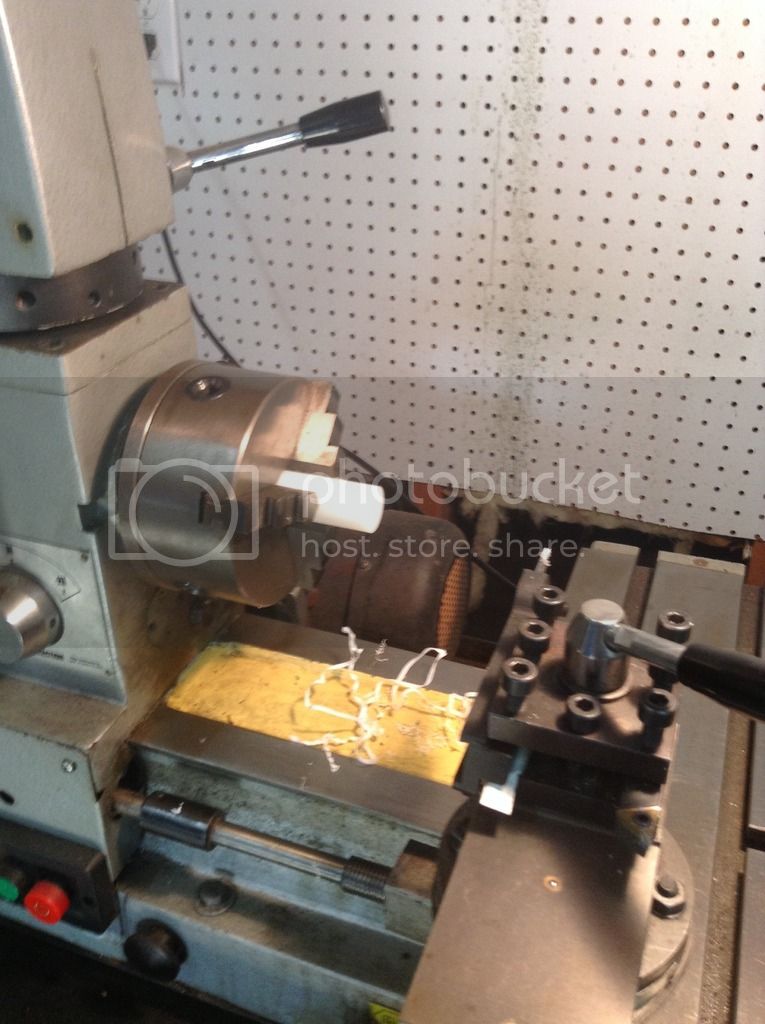
Here is the rod stock in the chuck -
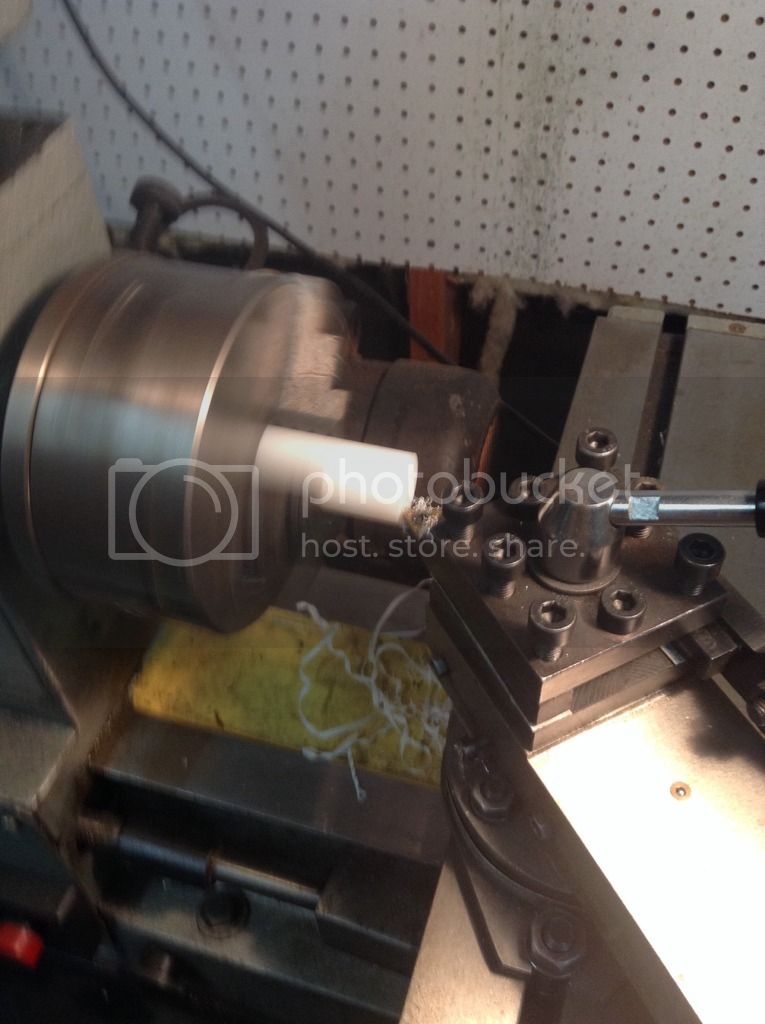
Facing-
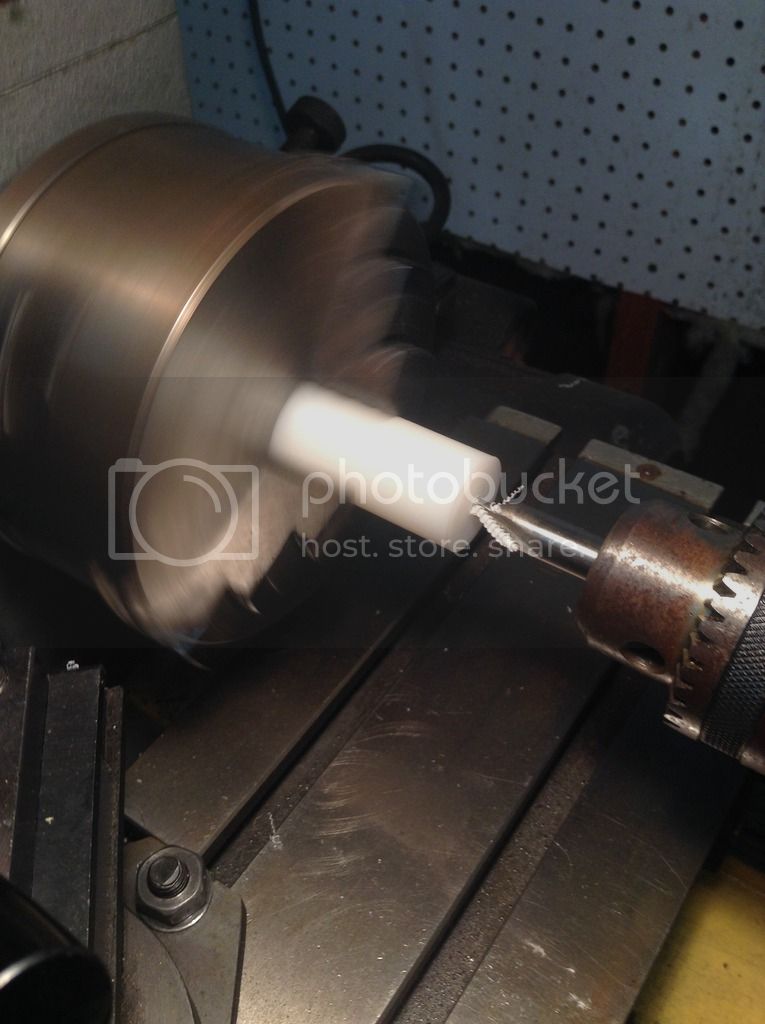
Center drilling-
Centering the boring bar-

Boring-
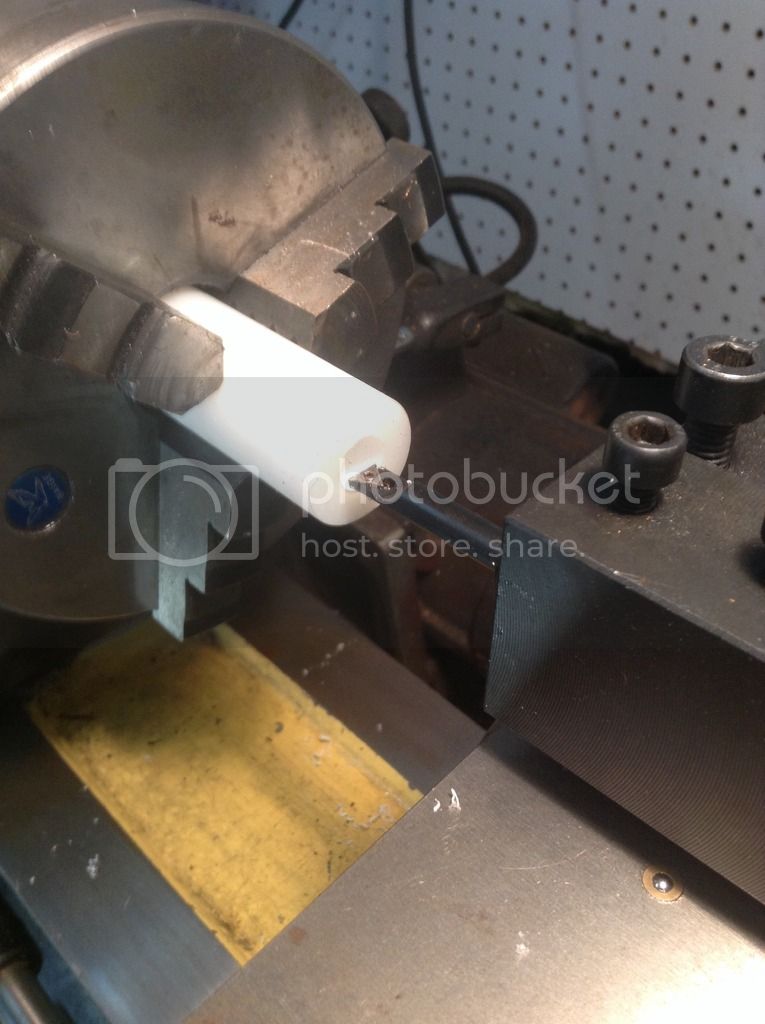
Turning-
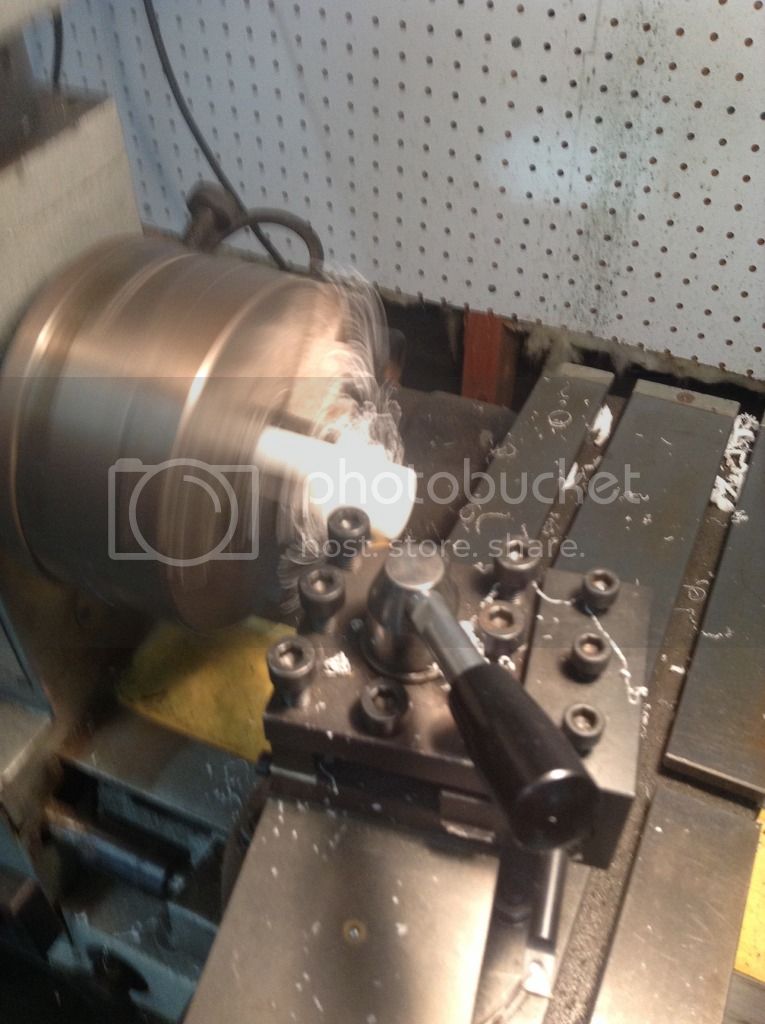
Boring and turning complete-
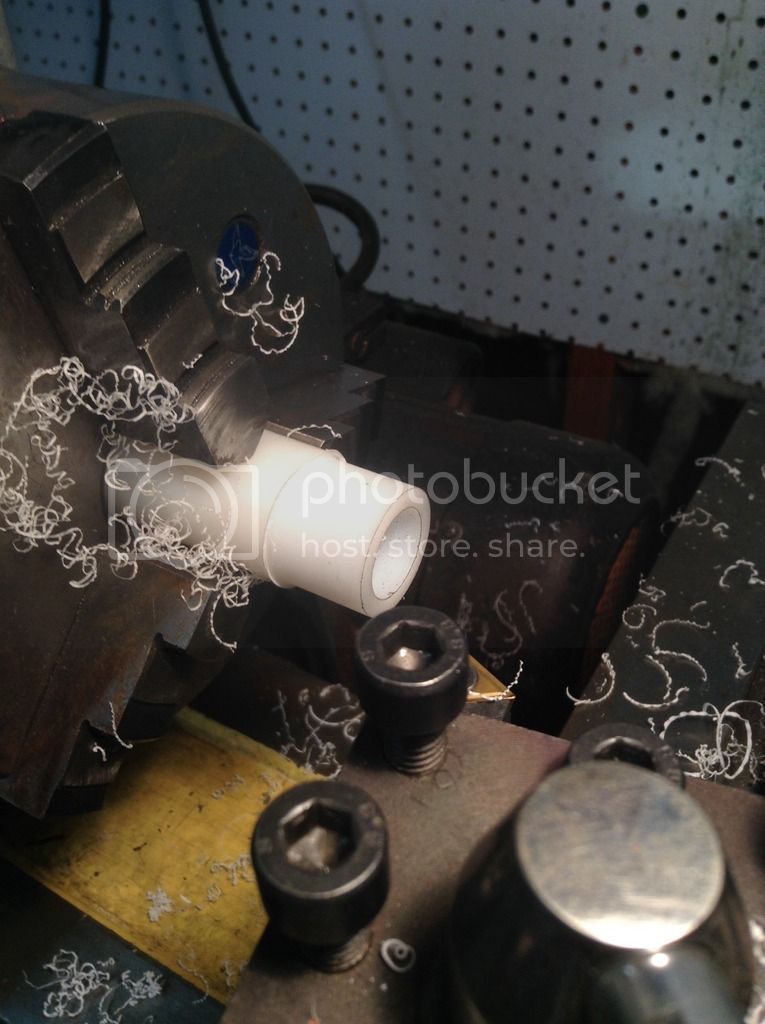
Profiling outside-
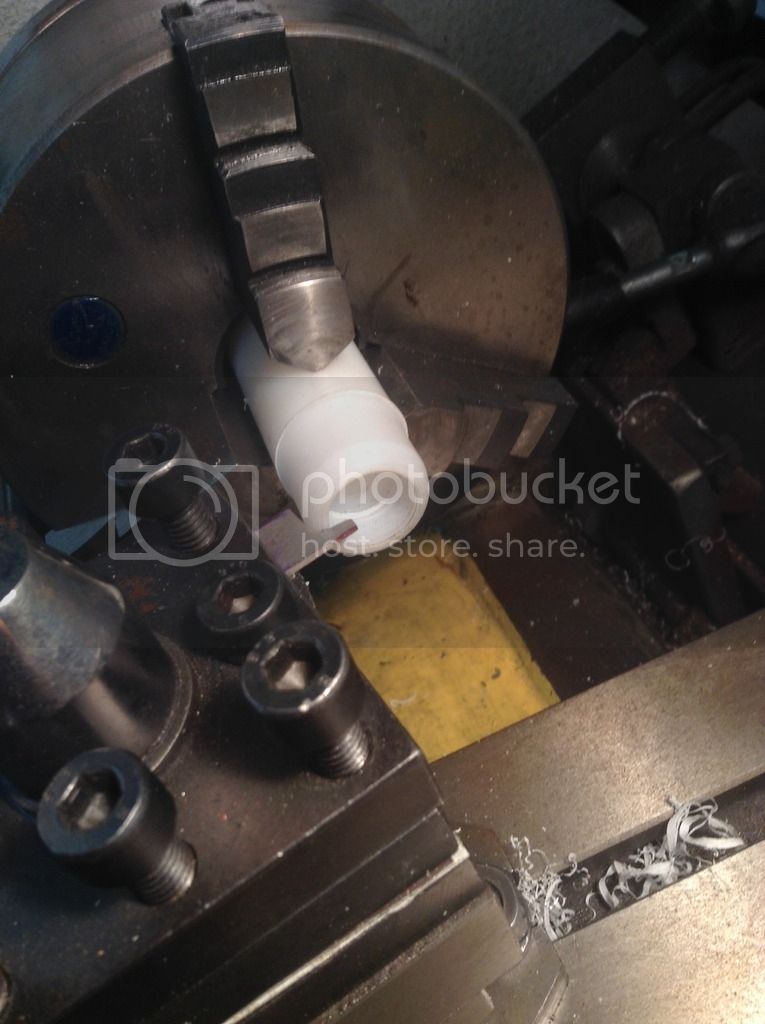
Profiling inside-
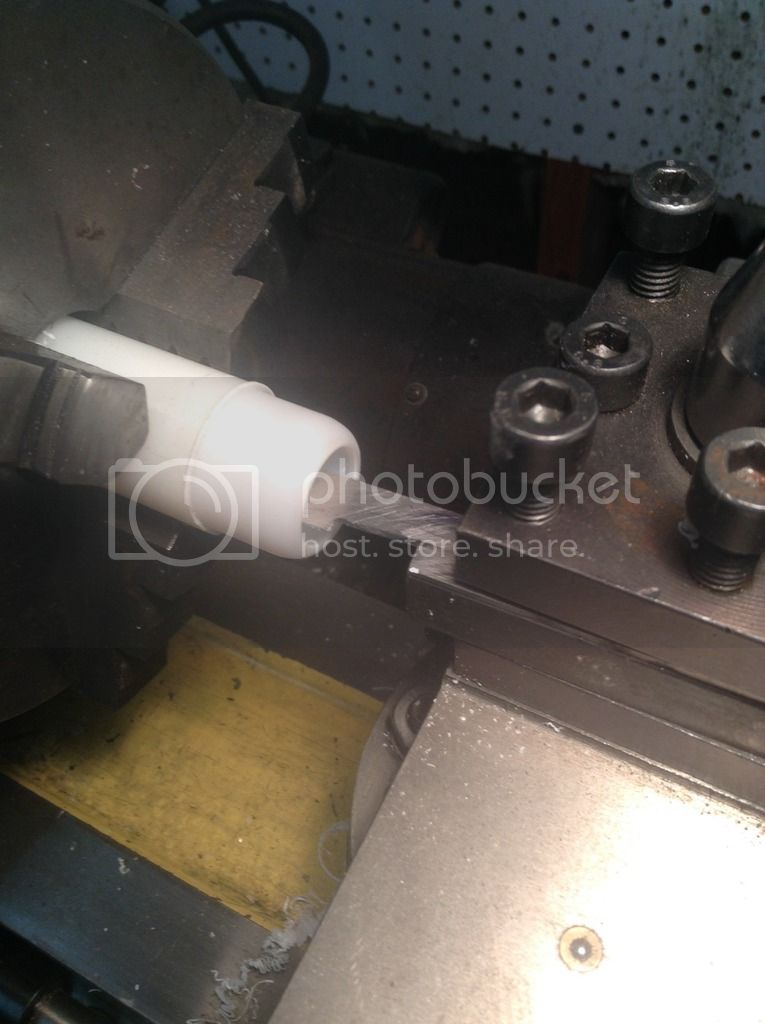
Parting-

Voila !
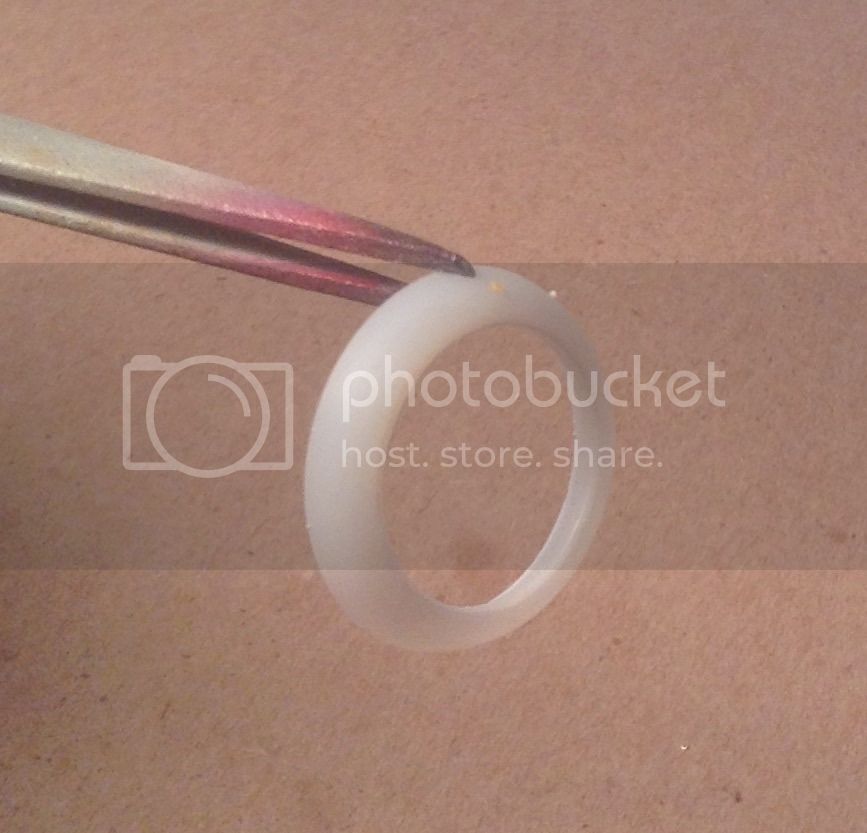
so there we have it - a scratch cowl ring . Next up will be choosing which and cementing to the widened cowl-
My apologies for the disjointed presentation- the loading of the photos seems to have a mind of its own - ??????
Thanks for looking in - Richard

Here is the rod stock in the chuck -

Facing-

Center drilling-

Centering the boring bar-

Boring-

Turning-

Boring and turning complete-

Profiling outside-

Profiling inside-

Parting-

Voila !

so there we have it - a scratch cowl ring . Next up will be choosing which and cementing to the widened cowl-
My apologies for the disjointed presentation- the loading of the photos seems to have a mind of its own - ??????
Thanks for looking in - Richard

rdt1953

Joined: February 06, 2015
KitMaker: 1,098 posts
AeroScale: 900 posts

Posted: Tuesday, November 29, 2016 - 08:57 AM UTC
The centering of the boring bar and parting images are incorrect-
these are the correct ones-
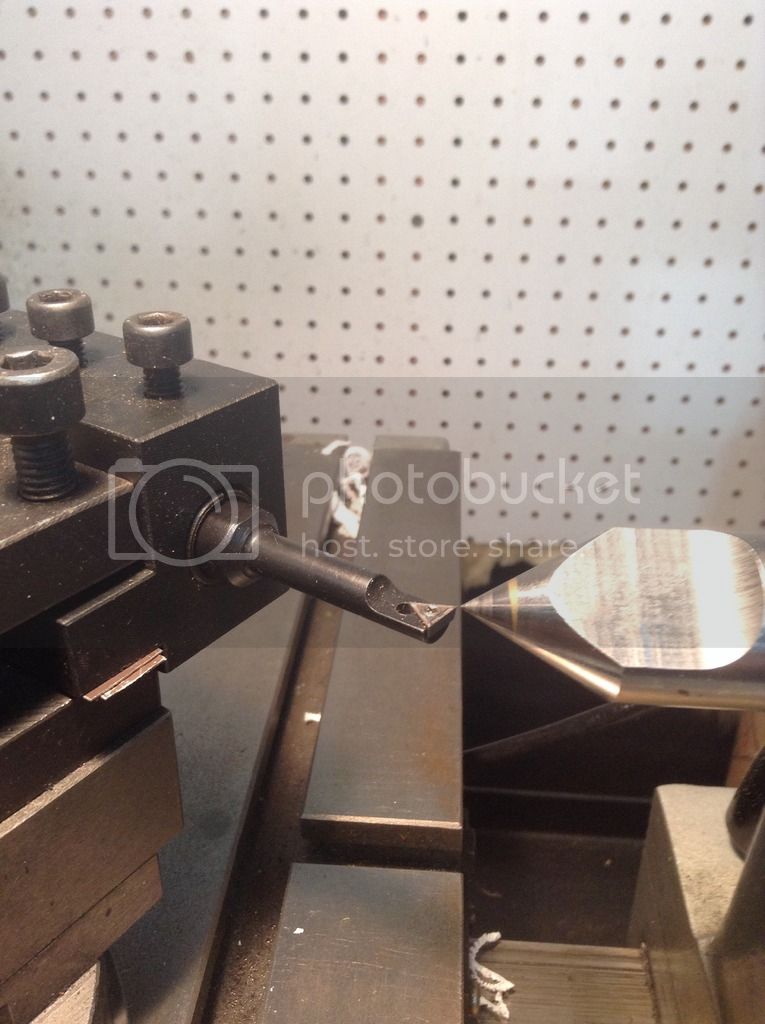
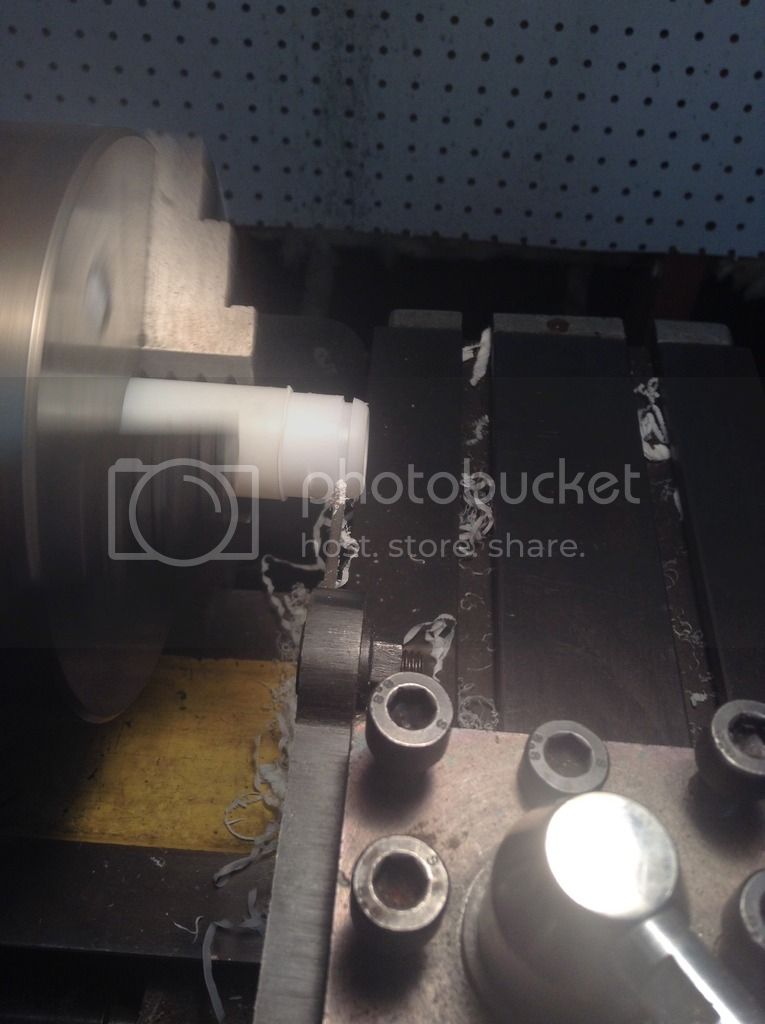
these are the correct ones-


Kendzior

Joined: January 29, 2016
KitMaker: 96 posts
AeroScale: 91 posts

Posted: Tuesday, November 29, 2016 - 03:31 PM UTC
Don't know what to say... just amazing workmanship.
Watching with great interest, as I'm preparing to launch two Ki-43 projects soon, 1:48th and 1:32nd scale. Yours is very inspiring, thanks for sharing.
Best regards
Hubert
Watching with great interest, as I'm preparing to launch two Ki-43 projects soon, 1:48th and 1:32nd scale. Yours is very inspiring, thanks for sharing.
Best regards
Hubert

rdt1953

Joined: February 06, 2015
KitMaker: 1,098 posts
AeroScale: 900 posts

Posted: Wednesday, November 30, 2016 - 01:21 AM UTC
Quoted Text
Don't know what to say... just amazing workmanship.
Watching with great interest, as I'm preparing to launch two Ki-43 projects soon, 1:48th and 1:32nd scale. Yours is very inspiring, thanks for sharing.
Best regards
Hubert
Hubert - Dziekuje ! Thanks for the kind words - I've been admiring your Ki 61 as well. I hope you will be posting your Ki 43 project.
Cheers - Ish
Posted: Wednesday, November 30, 2016 - 01:36 AM UTC
Yours is the work of an artisan, not a mere plastic kit builder.
Joel_W

Joined: December 04, 2010
KitMaker: 11,666 posts
AeroScale: 7,410 posts

Posted: Wednesday, November 30, 2016 - 04:42 AM UTC
Richard,
I've never seen anyone turn anything other then wood spindles on a lathe up until your presentation. I never would have thought it possible to turn a cowl ring like you just did.
What you've just shown us is a set of master skills of a machinist, and what one can accomplish. I'm more then truly impressed.
Joel

rdt1953

Joined: February 06, 2015
KitMaker: 1,098 posts
AeroScale: 900 posts

Posted: Thursday, December 01, 2016 - 04:14 AM UTC
Brian & Joel - Thanks gents for the compliments. No false modesty here - this is truly very basic machining. I realize that it all seems very mysterious because up until a few years ago it held the same mystery for me as well . Until I bought the lathe/mill combo you see in the photos I had never even touched such machinery- most of my life has been spent with woodworking . Machining is one of those things that once you get involved with it the more you realize what you don't know -
As the risqué saying goes : " What I know about machining wouldn't make a bump on a real machinists a_s ! Whatever manual skills I may possess doesn't help much with the computer problems I seem to be having- perhaps it doesn't excite me enough to learn how to fix it but my current attitude is to cry for help from the younger generation!
Happy modeling to you both - Richard

rdt1953

Joined: February 06, 2015
KitMaker: 1,098 posts
AeroScale: 900 posts

Posted: Sunday, December 04, 2016 - 12:15 AM UTC
The cowling improvements are largely done. I wound up using the FineMolds cowl ring because its slightly greater diameter was enough to negate the pitch along the spine. I inverted it and cemented it to the expanded cowl in its jig and when cured I cut out the air intake which is now at the bottom:
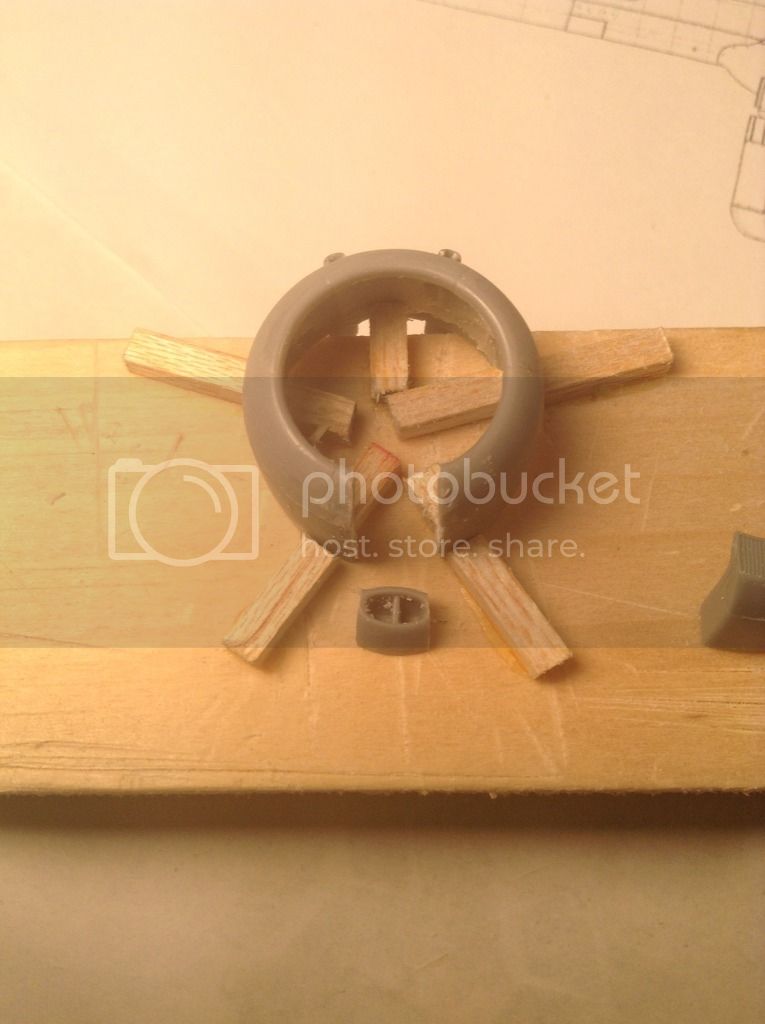
Here is the cowl all back together with the original Ki 43- I air inlet at the bottom- a little sanding, thinning etc and I'll call it done:

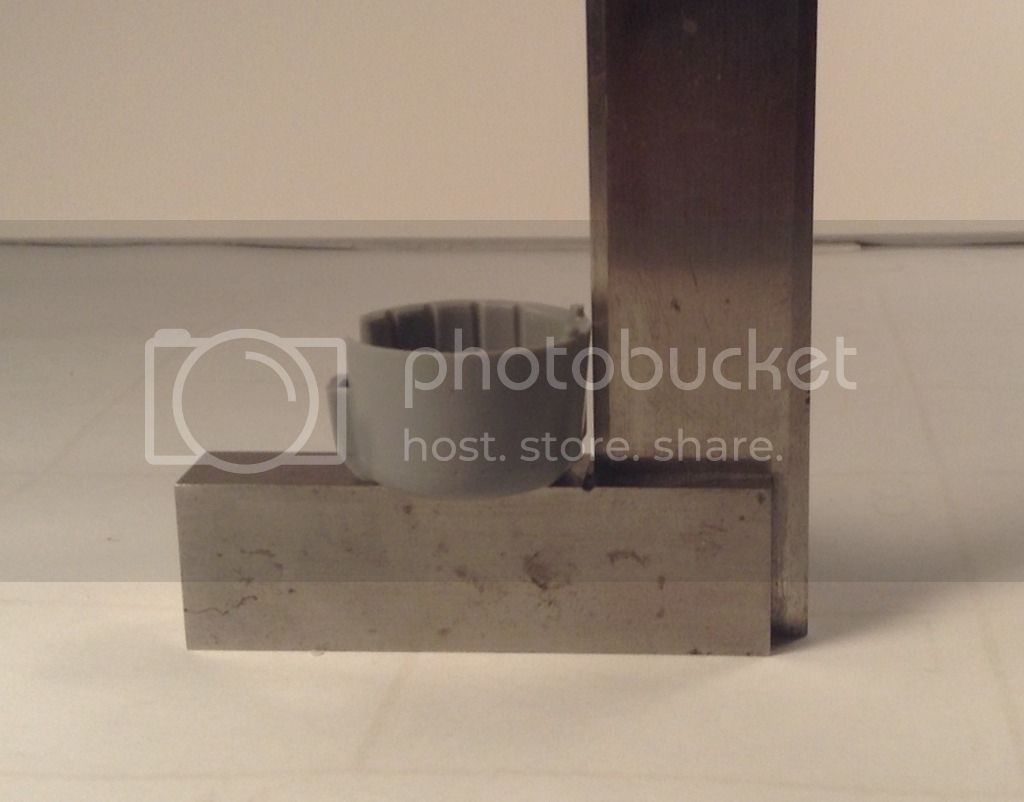
Here we can see the difference along the spine - first the original Hasegawa cowl in unmodified form:
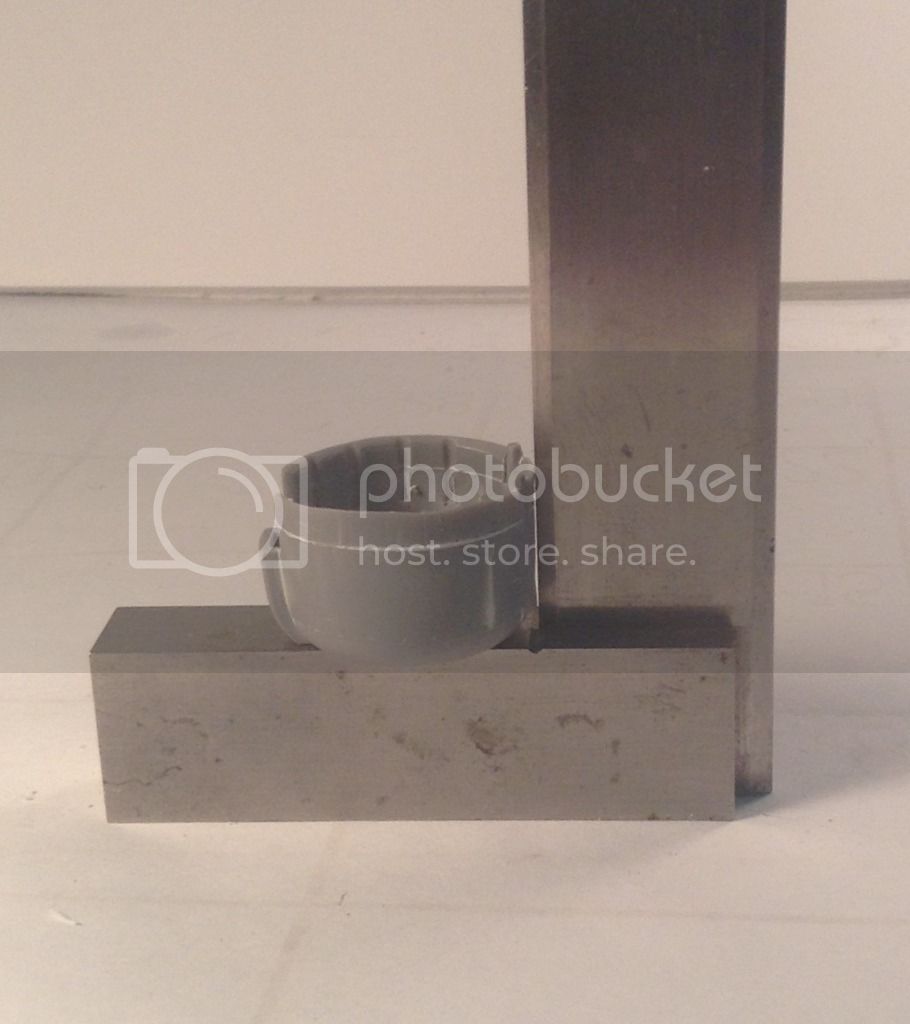
and the modified version:
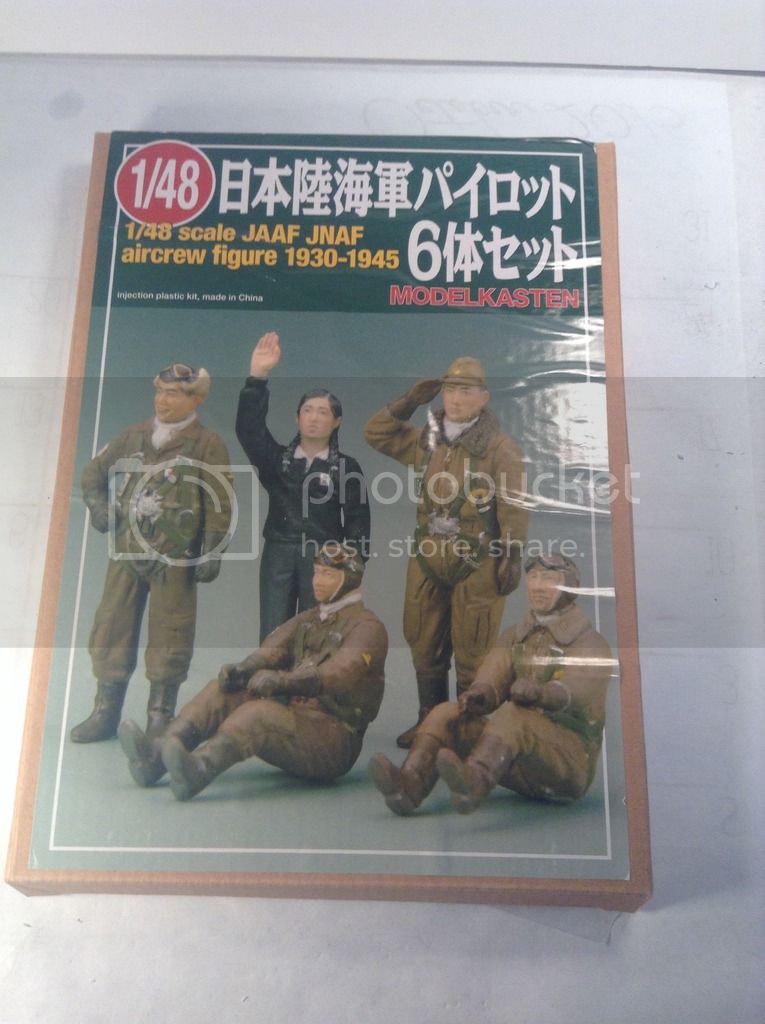
I have decided to try to pose a pilot figure from this set by Modelkasten in the cockpit:
I had to do pelvic and knee surgery and also thin cockpit side walls to get it all to fit:

Next task will be the engine- I would like to try to make an oil cooler out of fine copper wire - this is a very prominent feature in the cowl and the kit one is very heavy looking.
Thanks for looking and as always, all comments/input welcome.
Cheers ! Richard

Here is the cowl all back together with the original Ki 43- I air inlet at the bottom- a little sanding, thinning etc and I'll call it done:

Here we can see the difference along the spine - first the original Hasegawa cowl in unmodified form:

and the modified version:

I have decided to try to pose a pilot figure from this set by Modelkasten in the cockpit:

I had to do pelvic and knee surgery and also thin cockpit side walls to get it all to fit:

Next task will be the engine- I would like to try to make an oil cooler out of fine copper wire - this is a very prominent feature in the cowl and the kit one is very heavy looking.
Thanks for looking and as always, all comments/input welcome.
Cheers ! Richard
Joel_W

Joined: December 04, 2010
KitMaker: 11,666 posts
AeroScale: 7,410 posts

Posted: Sunday, December 04, 2016 - 11:03 PM UTC
Richard,
the modified cowl is outstanding to say the least. I was hoping to see the cowl you turned, but the choice you made does indeed fit perfectly.
the Comparison pics really shows your adjustments.
Joel
the modified cowl is outstanding to say the least. I was hoping to see the cowl you turned, but the choice you made does indeed fit perfectly.
the Comparison pics really shows your adjustments.
Joel
Posted: Monday, December 05, 2016 - 11:28 AM UTC
Quoted Text
Richard,
the modified cowl is outstanding to say the least. I was hoping to see the cowl you turned, but the choice you made does indeed fit perfectly.
the Comparison pics really shows your adjustments.
Joel
What Joel said.

rdt1953

Joined: February 06, 2015
KitMaker: 1,098 posts
AeroScale: 900 posts

Posted: Wednesday, December 07, 2016 - 01:23 AM UTC
Quoted Text
Richard,
the modified cowl is outstanding to say the least. I was hoping to see the cowl you turned, but the choice you made does indeed fit perfectly.
the Comparison pics really shows your adjustments.
Joel
Joel And Brian - thanks again guys - There may be yet another cowl turning in the future as I may be building the FineMolds Ki 43 next and I may need to replace the donor cowl that went to the Hasegawa project. While on our holiday a short time ago I visited a LHS - small place literally stacked floor to ceiling with kits with many being rare OOP stuff - the owner likely bought out collections . Among my purchases was another Hasegawa early Oscar which I bought in case I needed to combine parts for the modifications I planned. When going through the contents yesterday I discovered to my delight it contained Eduards' now discontinued photo etch for the early Oscar . The photo etch for the cockpit is amazing including longerons and frames complete with lightening holes. Since I am planning a pilot for the Hasegawa build it would be a waste to use the photo etch as most of it would be hidden by the figure. The wheels are now turning in my head about trying to use it in the FineMolds Kit - we'll see.
Cheers ! Richard

rdt1953

Joined: February 06, 2015
KitMaker: 1,098 posts
AeroScale: 900 posts

Posted: Wednesday, December 07, 2016 - 06:47 PM UTC
I've been working on fitting/posing the pilot figure a bit - he'll be kicking in a little right rudder and back on the stick to keep the tailwheel planted during the start -
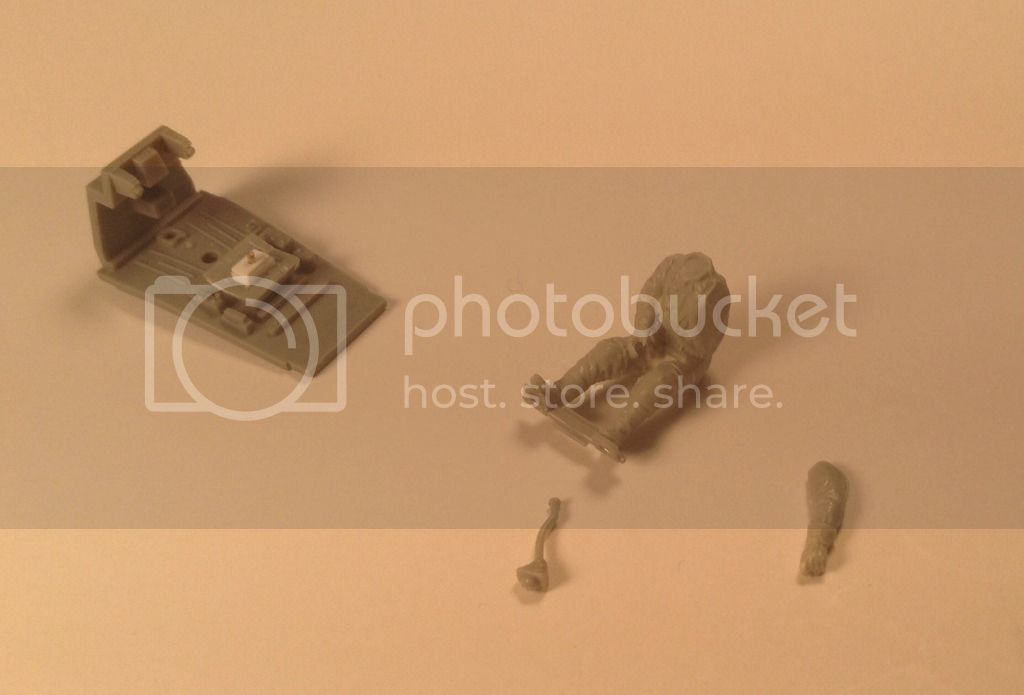
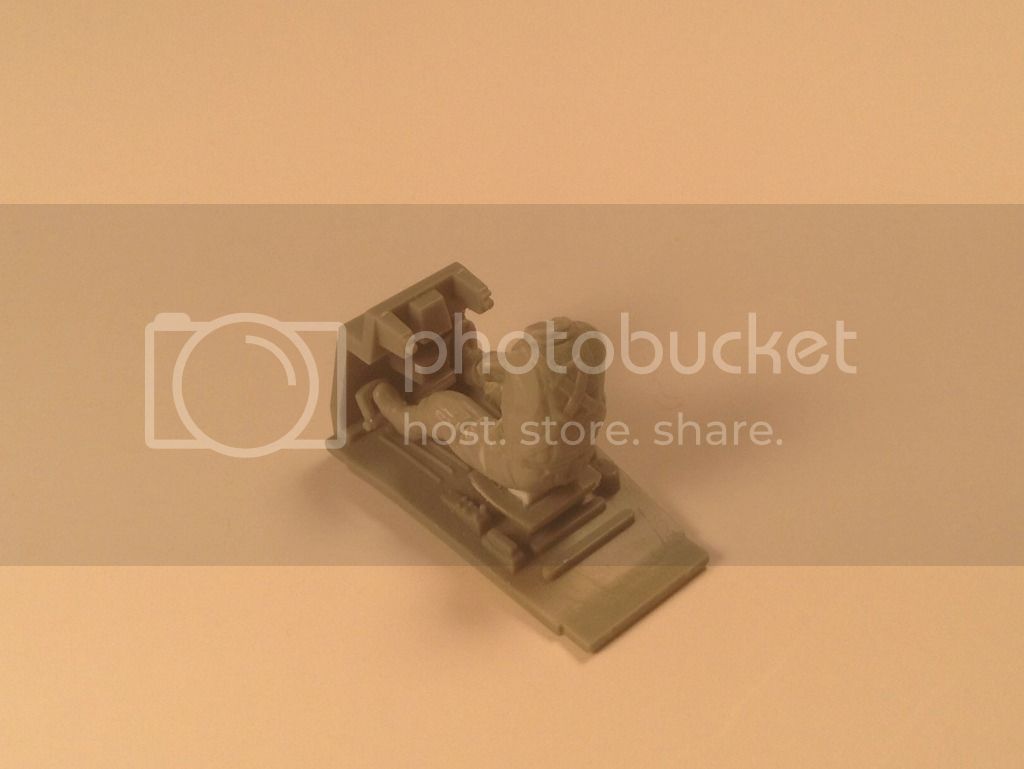
I originally planned to have his left arm raised in a signal fashion but the narrow cockpit opening made that difficult so he will have his arm resting on the fuselage -

This raises some painting issues- I think I am going to have to finish the
interior and legs/right arm/torso and then cement/ putty left arm to fuselage and go back to painting left arm and head after aircraft paint is complete- I'm open to suggestions.
Thanks for looking - Richard


I originally planned to have his left arm raised in a signal fashion but the narrow cockpit opening made that difficult so he will have his arm resting on the fuselage -

This raises some painting issues- I think I am going to have to finish the
interior and legs/right arm/torso and then cement/ putty left arm to fuselage and go back to painting left arm and head after aircraft paint is complete- I'm open to suggestions.
Thanks for looking - Richard
Joel_W

Joined: December 04, 2010
KitMaker: 11,666 posts
AeroScale: 7,410 posts

Posted: Wednesday, December 07, 2016 - 09:38 PM UTC
Richard,
It's hard to believe, but for once I don't even have a suggestion as I've never added nor painted a figure. Your plan does sound like the most logical way to go about it, but I can see some difficulties in the painting of the arm without getting any paint on the fuselage.
Joel
It's hard to believe, but for once I don't even have a suggestion as I've never added nor painted a figure. Your plan does sound like the most logical way to go about it, but I can see some difficulties in the painting of the arm without getting any paint on the fuselage.
Joel
Posted: Wednesday, December 07, 2016 - 10:16 PM UTC
A pilot! Oh my, how deliciously retro!

rdt1953

Joined: February 06, 2015
KitMaker: 1,098 posts
AeroScale: 900 posts

Posted: Wednesday, December 07, 2016 - 11:12 PM UTC
[quote]Richard,
It's hard to believe, but for once I don't even have a suggestion as I've never added nor painted a figure. Your plan does sound like the most logical way to go about it, but I can see some difficulties in the painting of the arm without getting any paint on the fuselage.
Joel[/quote
Joel - I better limit my caffeine intake come the day I have to paint the left arm , eh ?
Richard

rdt1953

Joined: February 06, 2015
KitMaker: 1,098 posts
AeroScale: 900 posts

Posted: Wednesday, December 07, 2016 - 11:15 PM UTC
Quoted Text
A pilot! Oh my, how deliciously retro!
Brian - Old school , yes ? If only the kit had raised lines for decal placement!

Richard
Joel_W

Joined: December 04, 2010
KitMaker: 11,666 posts
AeroScale: 7,410 posts

Posted: Thursday, December 08, 2016 - 02:24 AM UTC
Quoted Text
Quoted TextA pilot! Oh my, how deliciously retro!
Brian - Old school , yes ? If only the kit had raised lines for decal placement!
Richard
Richard,
Way back in the early 60s every model I built seemed to have them. Built it, and was flying it the same day.
Joel

rdt1953

Joined: February 06, 2015
KitMaker: 1,098 posts
AeroScale: 900 posts

Posted: Thursday, December 15, 2016 - 07:23 AM UTC
Just a brief update - more of a test as my daughter seems to have cured the computer - Ah ! Youth !
I have added the top of the frame at the back of the cockpit - .010 " styrene with lightening holes drilled. Some of this will be seen behind the pilot's shoulders-
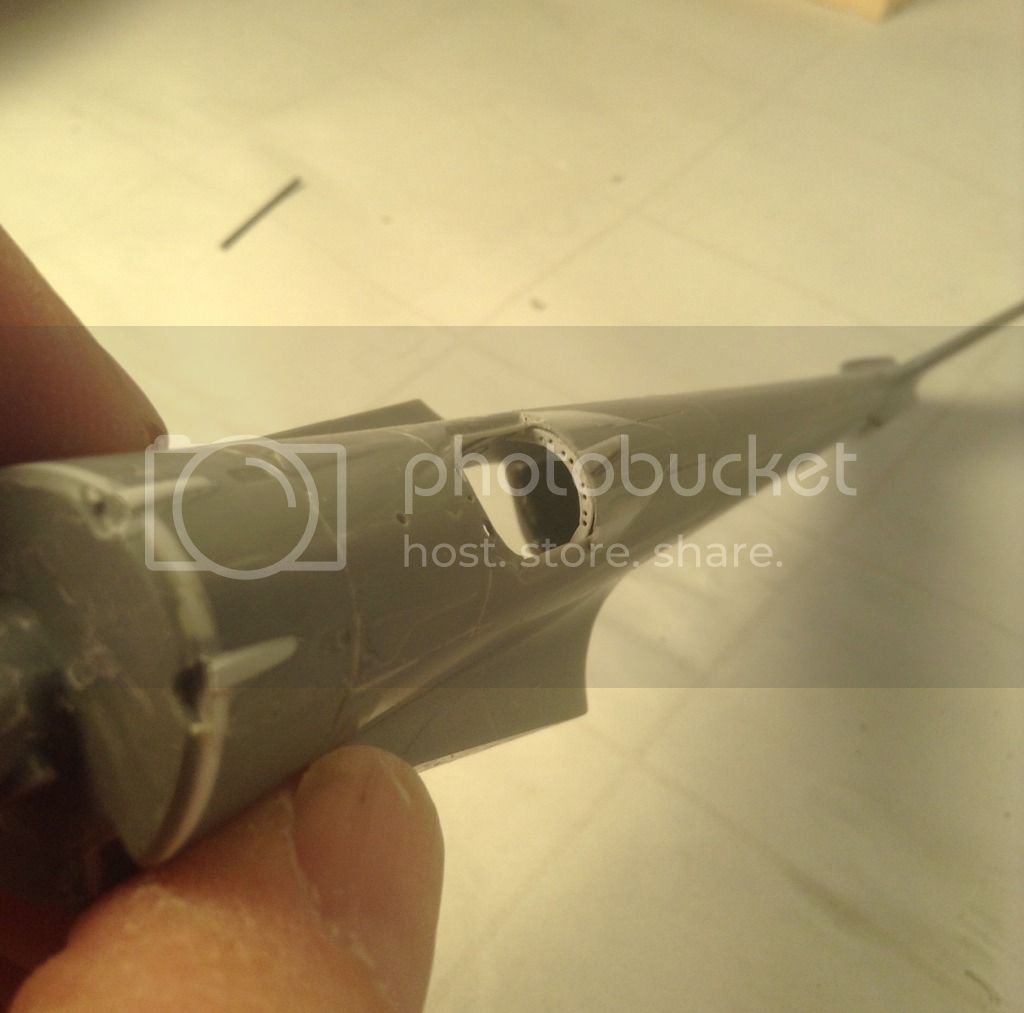
I have also thinned the fuselage deck around the cockpit and added the two hand holds behind the windscreen and faired in the recesses flanking the headrest-
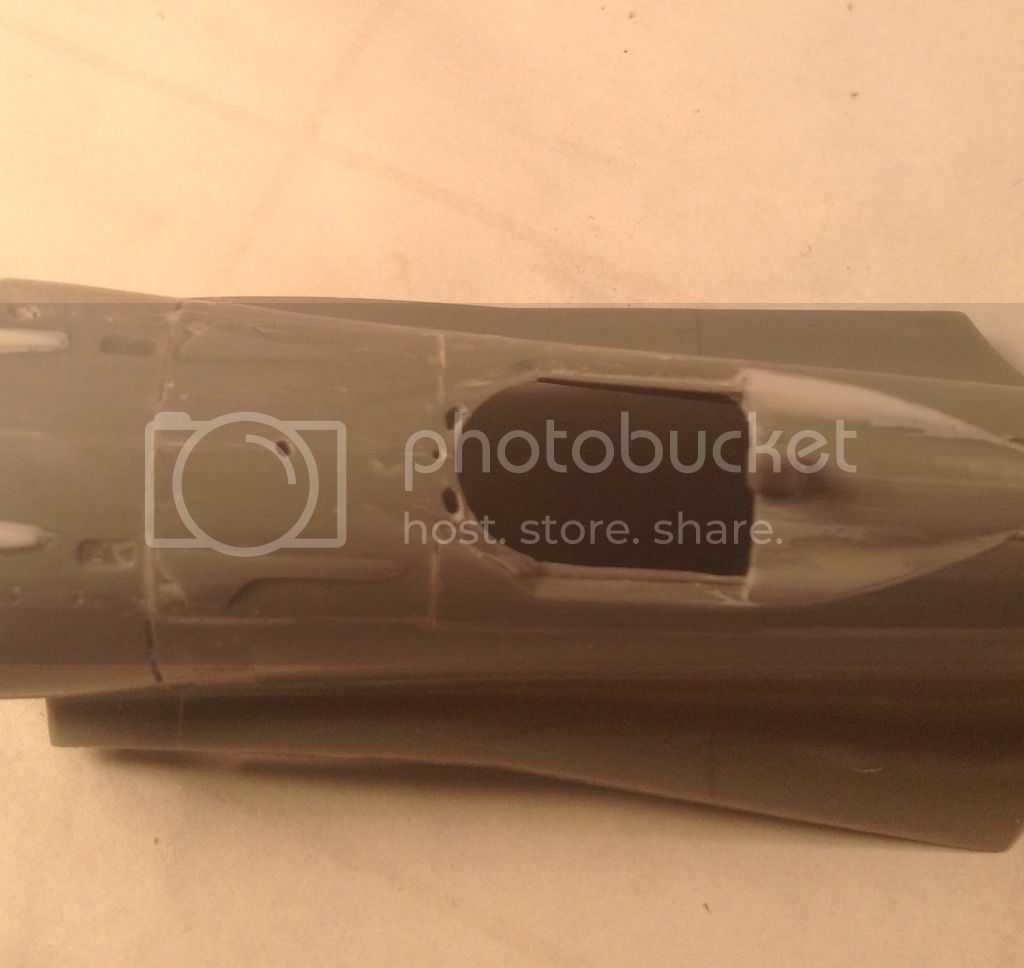
I tweaked the gun blisters a bit with strips of styrene, filler and surfacer-
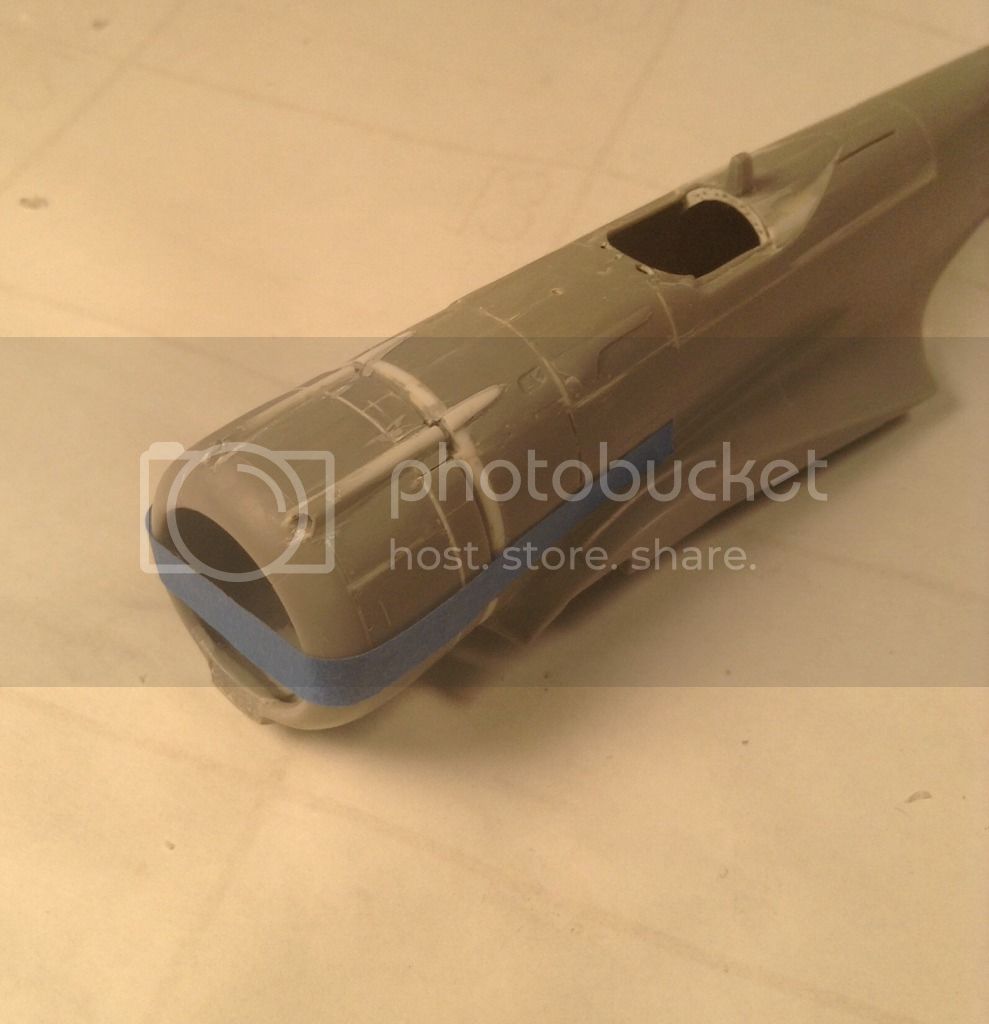
I am also working towards getting some paint on the interior components.
Thanks for looking ! Richard
I have added the top of the frame at the back of the cockpit - .010 " styrene with lightening holes drilled. Some of this will be seen behind the pilot's shoulders-

I have also thinned the fuselage deck around the cockpit and added the two hand holds behind the windscreen and faired in the recesses flanking the headrest-

I tweaked the gun blisters a bit with strips of styrene, filler and surfacer-

I am also working towards getting some paint on the interior components.
Thanks for looking ! Richard
 |


