"The Guardian Angel" Helicopter Campaign '07
Luzon, Philippines
Joined: December 05, 2003
KitMaker: 35 posts
AeroScale: 12 posts
Posted: Friday, October 26, 2007 - 03:18 AM UTC
Just to show my progress. I just started this kit last few days ago.
Iteleri OH-6A:

An old decal. grrrrrrrrgghhhhh


and some of my progress


Victoria, Australia
Joined: September 07, 2007
KitMaker: 404 posts
AeroScale: 339 posts
Posted: Sunday, October 28, 2007 - 11:13 AM UTC
Hi Guys,
I'm making steady progress. A weekend always helps too!

The lid is on and clamped and braced etc. The top of the door frames is moulded with the fuselage halves and I needed to add the toothpick bracing to press it up against the roof. Apart from that the fit was pretty good.

Rotors sprayed, doors sprayed and fuselage almost ready for paint. One more cleanup sand and a wash and I'll hose it with primer. The nacelle is just sitting there at the moment, I'll spray it separately and glue it on later. The kit join lines all match up with actual panel lines and the fit is good so it should work well.


Here's some scratchbuilt detail from the underside and tail. The tail shows the structure under the removed tail-cone and the other is a box under the nose. I don't know what this was for, but I know that the NSCA was leading the field in using IR sensors and other electronic gear for rescue work, long before the police here, so I imagine it was sensors of some sort.
Does anyone else get the jitters at this stage, when it comes time to commit to paint? It always feels like this is make-or-break time.
Next post should show the fuse primed. If not, I'll show you the crash and burn video!
Graeme.
Florida, United States
Joined: May 16, 2002
KitMaker: 17,694 posts
AeroScale: 1,728 posts
Posted: Sunday, October 28, 2007 - 11:46 AM UTC
Graeme, your UH-1N SAR is looking great. Do you plan on adding the various grab handles and antennas around the top and bottom of the fuselage, and front windscreen? Can't wait to see it painted up and finished. Keep up the good work.
Field Artillery --- The KING of BATTLE!!!
"People sleep peaceably in their beds at night only because rough men stand ready to do violence on their behalf." -- George Orwell
Showcase
Victoria, Australia
Joined: September 07, 2007
KitMaker: 404 posts
AeroScale: 339 posts
Posted: Sunday, October 28, 2007 - 12:16 PM UTC
Hi Gino, thanks for your comments.
Yep, handles and antennae and cutters and braces are going on. I'm in two minds over whether to add them before or after top coats. I'm leaning toward fitting them before painting as they are mostly body colour anyway. How would you tackle it? I'll need to add antenna wire and supports to the port side of the tail boom too.
There are some box shapes under the boom to add yet, too. I don't know what they are, but they appear on my ref shots.

I'm running up some decals for it now too:

Graeme.
Florida, United States
Joined: May 16, 2002
KitMaker: 17,694 posts
AeroScale: 1,728 posts
Posted: Sunday, October 28, 2007 - 12:24 PM UTC
Graeme,
I usually add all the handles, antenni, wire cutters, etc. before painting. I find it easier to paint them all at once than to try and add them after painting. Decals look good too.
Field Artillery --- The KING of BATTLE!!!
"People sleep peaceably in their beds at night only because rough men stand ready to do violence on their behalf." -- George Orwell
Showcase
Victoria, Australia
Joined: September 07, 2007
KitMaker: 404 posts
AeroScale: 339 posts
Posted: Monday, October 29, 2007 - 09:55 PM UTC
Look, Mum, It's a helicopter!

Things are taking shape. I love what that first coat of primer does to tie everything together.
Here you see brass grab handles, antennae and braces.
The yellow goes on tomorrow!
Graeme.
Victoria, Australia
Joined: September 07, 2007
KitMaker: 404 posts
AeroScale: 339 posts
Posted: Tuesday, October 30, 2007 - 07:07 PM UTC
Hi Guys,
Here's a cautionary tale: Mr Hobby Colour spray cans may not precisely match the cap colour. This lovelly orange-yellow capped can gives this decidedly lemon-yellow result.


I persisted with the paint job thinking it may darken with thickness and curing time...No good...Now what?
I'm going to have to go over it with an orange-red. At least the detail is heavy and it won't fill in.
I'll look at it again tomorrow in daylight (sigh).
Graeme.
Victoria, Australia
Joined: September 07, 2007
KitMaker: 404 posts
AeroScale: 339 posts
Posted: Thursday, November 01, 2007 - 01:35 PM UTC
That's better!

Victoria, Australia
Joined: September 07, 2007
KitMaker: 404 posts
AeroScale: 339 posts
Posted: Friday, November 02, 2007 - 06:39 PM UTC

Yes! The masking of the interior worked. I have no overspray inside and only one small piece of masking tape was stubborn. I just trimmed that off with a blade and you can't see it. It will be behind a closed door anyway.
You can see here I have masked and sprayed the nose, tailboom and walkway on the roof.
Note that the kit has the tail rotor on the port side. On all 212s and UH-1Ns I've seen it is on the starboard.
I think I'm nearly done. I won't need much weathering as NSCA kept their birds pritstine. I'll get the decals made up this week and get the rest of the bits on. The doors are ready to go, as are the rotors.
The aerial on the side of the boom will be fun, I haven't done one like that before. Any tips on materials and methods?
AAARGH!! I've just realised the box under the chin is on the wrong side!! It should be on the port. Bugger. Oh well, it's staying there now.
Graeme.
Florida, United States
Joined: May 16, 2002
KitMaker: 17,694 posts
AeroScale: 1,728 posts
Posted: Saturday, November 03, 2007 - 07:56 PM UTC
Looking good. I have started a new project as well. You have inspired me to do a colorful bird too. Mine is a US Army SAR bird out of White Sands Missile Range, NM. Here are a couple pics of the real thing.
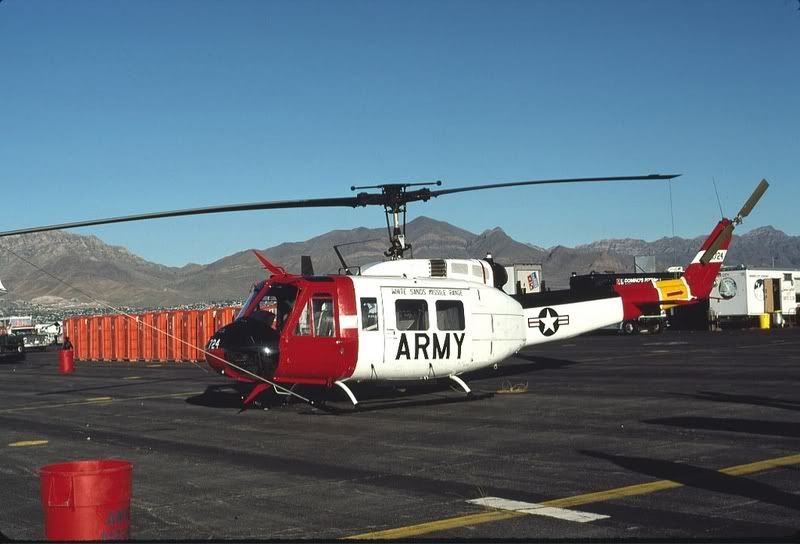
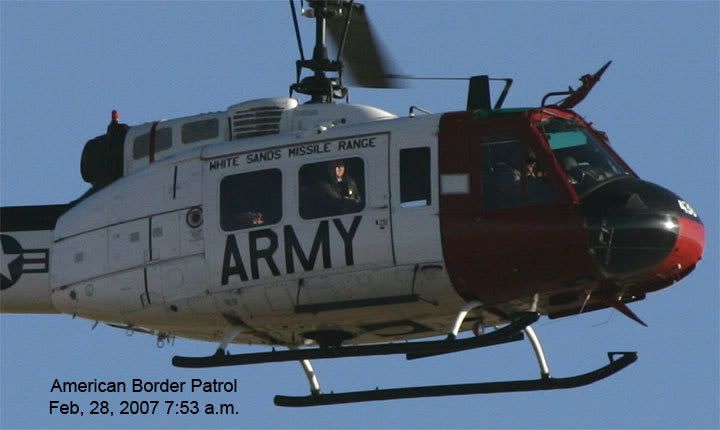
I'll get some pics of my model up soon. I almost have the interior done on it. More to come later.
Field Artillery --- The KING of BATTLE!!!
"People sleep peaceably in their beds at night only because rough men stand ready to do violence on their behalf." -- George Orwell
Showcase
New York, United States
Joined: January 29, 2004
KitMaker: 3,836 posts
AeroScale: 1,036 posts
Posted: Sunday, November 04, 2007 - 11:47 AM UTC
I still stand by my initial post…very impressive. Glad to see that the masking worked out, will have to remember that one. Yes the color looks better, great job with all the painting.
As for the aerial on the side of the boom, what you can do (I did this myself) is to stretch some sprue…just heat a section under a flame and then give it a quick pull. The more it stretches the thinner. If you haven’t done this it may take a few try’s. then glue it to one end let it dry and move onto the next post and let that dry. Once dry give it a slight bend and glue to post and so on and so on.
Looking forward to seeing the decals and rotors on. Keep us posted.
Joe
It feels like bible camp…Only I’m not crying pretending I’m somewhere else.
Happy Modeling
Joe
New York, United States
Joined: January 29, 2004
KitMaker: 3,836 posts
AeroScale: 1,036 posts
Posted: Sunday, November 04, 2007 - 11:50 AM UTC
Gino,
Thats going to look super, can't wait to see the pics. What color red will you use.
Joe
It feels like bible camp…Only I’m not crying pretending I’m somewhere else.
Happy Modeling
Joe
New York, United States
Joined: January 29, 2004
KitMaker: 3,836 posts
AeroScale: 1,036 posts
Posted: Sunday, November 04, 2007 - 11:56 AM UTC
Joe,
How's the OH-6A coming along, did you manage using the old decals or did you get a new set.
Joe
It feels like bible camp…Only I’m not crying pretending I’m somewhere else.
Happy Modeling
Joe
Victoria, Australia
Joined: September 07, 2007
KitMaker: 404 posts
AeroScale: 339 posts
Posted: Sunday, November 04, 2007 - 12:04 PM UTC
Thanks, Gino.
I do like the bold colour schemes. I seem to have a theme of my own going: Yellow Choppers. This is my third consecutive yellow helo and I have another two on the list: The Revell 1:32 B0105 as another NSCA bird and a 1:35 Bell 47G as an Antarctic flyer. Not intentional, it has just worked out that way.
Joe, Thanks for the tip. I'll try stretched sprue.
Graeme
Florida, United States
Joined: May 16, 2002
KitMaker: 17,694 posts
AeroScale: 1,728 posts
Posted: Sunday, November 04, 2007 - 04:41 PM UTC
Joe, the color plate for the Arctic/Hi-Vis scheme calls for regular Insignia Red, FS11136. I guess it will be good old Testors Model Master paints as usual. Should have some pics up tomorrow.
Graeme, keep building those colorful helos. If they come out like this one, they will all look great. Show us some pics when done too.
Field Artillery --- The KING of BATTLE!!!
"People sleep peaceably in their beds at night only because rough men stand ready to do violence on their behalf." -- George Orwell
Showcase
Florida, United States
Joined: May 16, 2002
KitMaker: 17,694 posts
AeroScale: 1,728 posts
Posted: Tuesday, November 06, 2007 - 03:36 PM UTC
My UH-1H WSMR SAR build log is posted in the Rotary Wing Forum. Enjoy.
Field Artillery --- The KING of BATTLE!!!
"People sleep peaceably in their beds at night only because rough men stand ready to do violence on their behalf." -- George Orwell
Showcase
Victoria, Australia
Joined: September 07, 2007
KitMaker: 404 posts
AeroScale: 339 posts
Posted: Tuesday, November 06, 2007 - 04:30 PM UTC
Sorry, Guys, I posted this to the wrong thread. Ginoo, what are you trying to do to me? I am so confused!
Hi Gino,
Looking good, Mate, nice and busy.
You flew on this bird? Outstanding! That sort of info lends a real credibility and interest to the model. We don't get many of these flying around here. The RAAF has just retired their last ones with the NH90 coming on stream. I did see a 412 fly over yesterday, but that's my first Huey in 6 months, since Avalon.
How many hours to get it to this stage? I don't normally count the hours spent on a model, but I have this time. I have put 56 hours in so far! Much more than I would have expected.
Here is where I am at. I am waiting now for decals so I can finish it off. Your level of detail puts me to shame!
Graeme.


Florida, United States
Joined: May 16, 2002
KitMaker: 17,694 posts
AeroScale: 1,728 posts
Posted: Sunday, November 11, 2007 - 04:15 PM UTC
She is done.

Check out more of her and a build synopsis in the Rotary Wing Forum.
Field Artillery --- The KING of BATTLE!!!
"People sleep peaceably in their beds at night only because rough men stand ready to do violence on their behalf." -- George Orwell
Showcase
European Union
Joined: September 28, 2004
KitMaker: 2,186 posts
AeroScale: 1,587 posts
Posted: Sunday, November 11, 2007 - 09:46 PM UTC
Quoted Text
She is done.

Check out more of her and a build synopsis in the Rotary Wing Forum.
and she is beautiful
The mission: Beat the stash.
Almost conquered: MIG-29, Blackhawk, Skyray, Skyraider, fouga
Main battle:Demon, Skyhawk, F-14, CH-53
Stash reserve:Blackhawk, CH-46, 47 en 53; SU-7, Eurofighter, mohawk, hellcat, F-16D, 6x Fouga Magister, Voodoo
European Union
Joined: September 28, 2004
KitMaker: 2,186 posts
AeroScale: 1,587 posts
Posted: Tuesday, November 13, 2007 - 09:48 AM UTC
The mission: Beat the stash.
Almost conquered: MIG-29, Blackhawk, Skyray, Skyraider, fouga
Main battle:Demon, Skyhawk, F-14, CH-53
Stash reserve:Blackhawk, CH-46, 47 en 53; SU-7, Eurofighter, mohawk, hellcat, F-16D, 6x Fouga Magister, Voodoo
Victoria, Australia
Joined: September 07, 2007
KitMaker: 404 posts
AeroScale: 339 posts
Posted: Tuesday, November 13, 2007 - 10:12 AM UTC
Decals worked. This is good news.


All that's left now are some aerials and a little weathering and touching up.
I took it as-is to the modelling club last night and got a very favorable response. There was general surprise that the Panda kit could come up so clean.
Next post should be the finale!
Graeme.
Victoria, Australia
Joined: September 07, 2007
KitMaker: 404 posts
AeroScale: 339 posts
Posted: Tuesday, November 13, 2007 - 10:49 AM UTC
Hi Drabslab,
Your Sea King is looking super-crisp! Well done.
Is this the Hasegawa kit? How is it going together?
Graeme
Florida, United States
Joined: May 16, 2002
KitMaker: 17,694 posts
AeroScale: 1,728 posts
Posted: Tuesday, November 13, 2007 - 01:43 PM UTC
Graeme and Drabslab, those are both great looking helos. Good job. Can't wait to see them done.
Yup, with a little TLC, the Panda Hueys can come out great. I am really starting to like them. I have built 2 and have 2 more in the stash.
Field Artillery --- The KING of BATTLE!!!
"People sleep peaceably in their beds at night only because rough men stand ready to do violence on their behalf." -- George Orwell
Showcase
European Union
Joined: September 28, 2004
KitMaker: 2,186 posts
AeroScale: 1,587 posts
Posted: Tuesday, November 13, 2007 - 09:01 PM UTC
Hai Graeme and HeavyArty,
The Sea King is looking good so far but I have seen the work of both of you and must admit that I will be very very happy when mine would turn out to be on the same level.
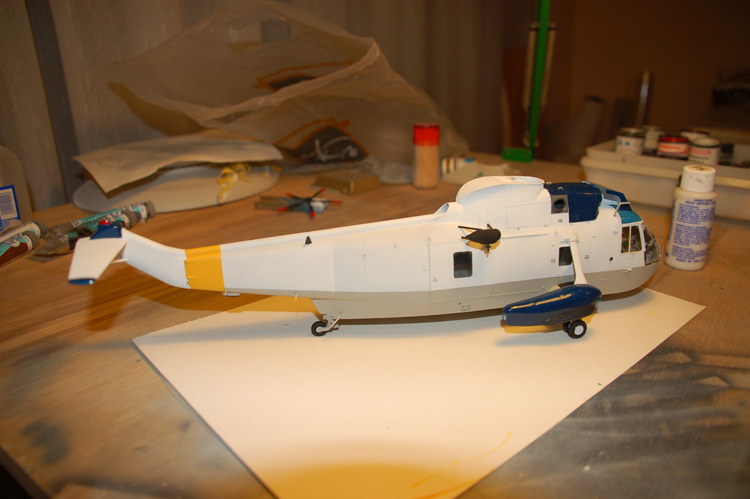
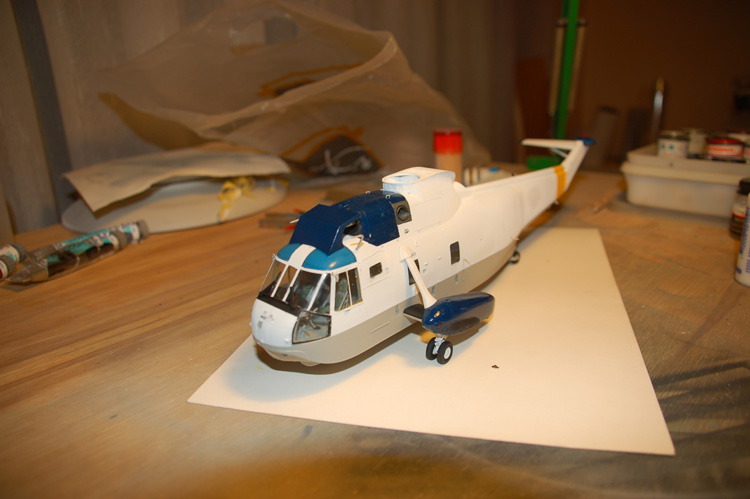
It is the Hasegawa 1/48 kit. Like many of the Hasegawa kits it has appeared in all kinds of colors and types over the years. Mother built another version for the "guardian angel" campaign.
In my opinion it goes together very well though the large transparent section (in different parts) can be a problem.
Also, do not underestimate the amount of work this thing needs. It looks like a straight forward build in grey and white but there are numerous details to be taken care of.
But that is all behind me. Now I will "future" my King and start on the decals.
The mission: Beat the stash.
Almost conquered: MIG-29, Blackhawk, Skyray, Skyraider, fouga
Main battle:Demon, Skyhawk, F-14, CH-53
Stash reserve:Blackhawk, CH-46, 47 en 53; SU-7, Eurofighter, mohawk, hellcat, F-16D, 6x Fouga Magister, Voodoo
Victoria, Australia
Joined: September 07, 2007
KitMaker: 404 posts
AeroScale: 339 posts
Posted: Thursday, November 15, 2007 - 01:35 AM UTC
Hi Guys,
All done!
I'll post the rest of the pics at the finished forum.


Thanks everyone for the comments and encouragement. I look forward to the next theme build!
All the best,
Graeme.

