Air Campaigns
Want to start or join a group build? This is where to start.
Official tread: Rumble in the East Asian Sky
SGTJKJ
#041
_VISITCOMMUNITY
Kobenhavn, Denmark
Joined: July 20, 2006
KitMaker: 10,069 posts
AeroScale: 3,788 posts
Posted: Tuesday, September 11, 2007 - 06:36 PM UTC

Quoted Text

Jesper,

Is your P 40 the old AMT tooled Italeri boxed kit with the RAAF decal option and if so which option are you doing ?
Geoff Atherton's P40N "Cleopatra III' has a red/white spinner and the standard USAAC specifications of the time of the Medium Green splotching on the horizontal surfaces, was discontinued by the time aircraft in the RAAF's middle 600 series entered service.
This aircraft shows signs of having the American national markings overpainted before the Australian markings were applied, however their is no evidence as to which colour was actually used to over paint the markings. Either Foliage Green, Medium Green 42, Dark Green or even Light Olive Drab could have been used.
In the instance of the wing leading edges did not progress inboard of the undercarriage fairing, from the photograph it is not apparent if the serial is applied in black or very Dark Grey, the wing roundals are set far forward and although they appear to be far outboard on the wings, they are in fact fairly well in from the wing tips.
As this is the CO's aircraft and had the extra care lavished upon it, the red / white spinner and white wing leading edges was a means for other pilots to identify their CO.


I also have a plan view of this particular bird and when I scan it I'll post it here.

Hope this helps.


Yes, my kit is the old AMT kit in a new Italeri pack with quite a lot of decal options. There are some quite serious fit issues in the kit. Especially around the wings and fuselage, but I think I sorted it out. I have finished the painting and given the aircraft a coat of varnish in preparation for adding the decals.

I am making exactly the same as in your photo. The painting instructions show the overpainted markings on the fuselage sides, but not what colour to paint them, so I went for a dark green colour. It seems like this aircraft still has the brankets for the drop tank fitted. Or maybe it is someting else? The instrutions show only to fit the bombs and not the drop tank or the brankets, so I have not fitted them. However, I think I could without destroying the painwork, although the painting is finished.

Thanks for the photo. I had not seen that one before. Looking forward to see plan view.

Thanks for all the information, Rob. It is a great help
csch
_VISITCOMMUNITY
Buenos Aires, Argentina
Joined: December 27, 2002
KitMaker: 1,941 posts
AeroScale: 1,040 posts
Posted: Thursday, September 13, 2007 - 12:36 AM UTC

Quoted Text

Hi guys

Sorry I have been away from the campaign a couple of days. Just got promoted to head of marketing, so had to get some things sorted out at work.

Carlos, great looking Mossie. It will look great with the markings in place. I really like this version of the Mossie as it looks very aggressive with the guns sticking out the nose.
;)


Hi Jesper:
It´s good to hear from you again. Thank you and congratulations for your promotion !!!

I´m near finishing the Mossie I think it will be next week.
SGTJKJ
#041
_VISITCOMMUNITY
Kobenhavn, Denmark
Joined: July 20, 2006
KitMaker: 10,069 posts
AeroScale: 3,788 posts
Posted: Thursday, September 13, 2007 - 01:45 AM UTC

Quoted Text


Hi Jesper:
It´s good to hear from you again. Thank you and congratulations for your promotion !!!

I´m near finishing the Mossie I think it will be next week.


Thanks

Looking forward to see your Mossie in markings
betheyn
Staff MemberSenior Editor
AEROSCALE
#019
_VISITCOMMUNITY
England - South East, United Kingdom
Joined: October 14, 2004
KitMaker: 4,560 posts
AeroScale: 2,225 posts
Posted: Friday, September 14, 2007 - 05:58 AM UTC
Finished
Eduard Profi- pack,1/48th P-39 Airacobra.
Markings for 41st FS, 35th GF, 5th AF, Milne Bay, Nova Guinea, Autumn 1942.
A very nice kit, with no major problems, and a enjoyable build.


P.S For those that are counting (Nige ), from start to finish - 9 days .
CMOT70
_VISITCOMMUNITY
Victoria, Australia
Joined: August 23, 2007
KitMaker: 629 posts
AeroScale: 539 posts
Posted: Friday, September 14, 2007 - 08:01 PM UTC
Great work by everyone so far!

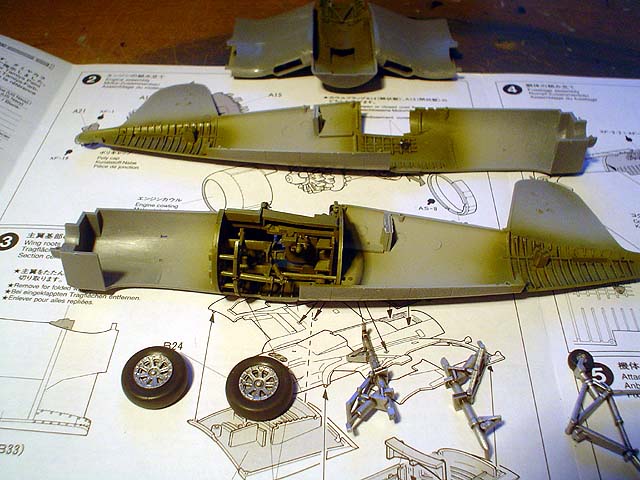
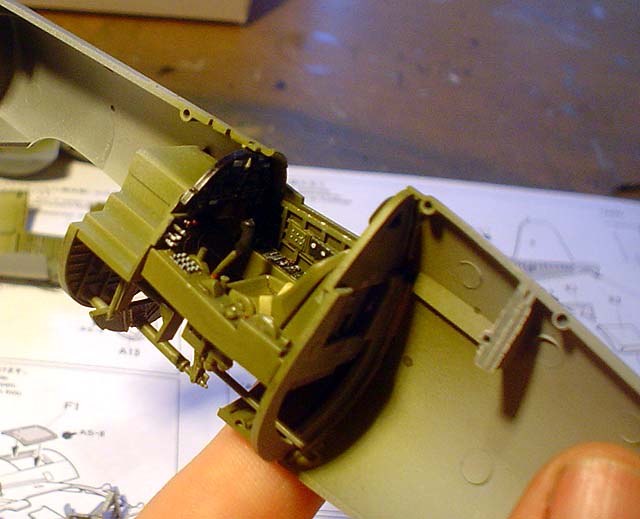
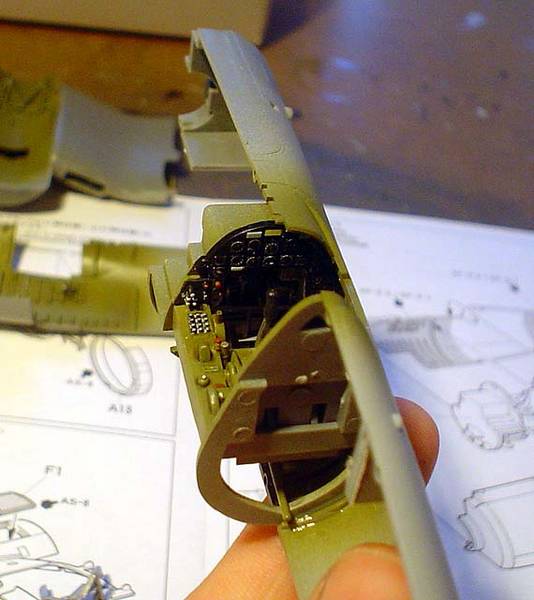
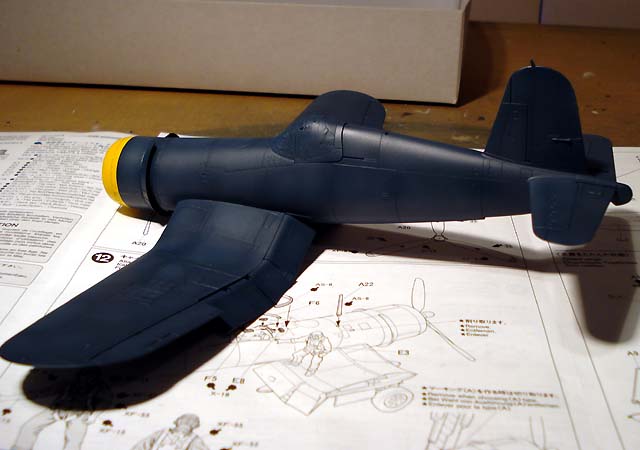
I've progressed my Tamiya F4U-1D to the closing up the fuselage stage. All the detail parts are mostly done too. And wings together, just waiting for the fuselage.
OOB except for some belts in the cockpit- canopy will be closed anyway. This kit is the easiest i've ever built so far- even easy by Tamiya standards .

Andrew


SGTJKJ
#041
_VISITCOMMUNITY
Kobenhavn, Denmark
Joined: July 20, 2006
KitMaker: 10,069 posts
AeroScale: 3,788 posts
Posted: Saturday, September 15, 2007 - 08:36 AM UTC
@Andy: Great aircobra! It is really good looking with a very nice paint job.

@Andrew: very nice cockpit on the corsair. Looking forward to see more.

I have finished my Kittyhawk. I am just waiting for better weather without rain so I can go outside and take some pictures.
29Foxtrot
_VISITCOMMUNITY
Victoria, Australia
Joined: September 19, 2003
KitMaker: 708 posts
AeroScale: 674 posts
Posted: Saturday, September 15, 2007 - 08:40 AM UTC
Carlos,

Excellent progress on your Mossie, I look forward to seeing it decaled.

Andy,

Excellent P 39, but it looks more you used the P 400 exhausts.

Andrew,

Excellent progress on the 'Bentwing Bird', I have the same kit in the stash.

Jesper,

I built the old AMT P 40M Kittyhawk and to eliminate the huge gaps created between fuselage and wing root, I used a small evergreen strip in each end of the cockpit floor, as a wedge to open the middle lower fuselage and dry fitted the two assemblies, before applying [Tamiya Extra Fine] glue, which solved the gap problem at the wing root.

In regard to your RAAF P40N here are the side and plan views, of Geoff Atherton's "Cleopatra II" one thing I should point out is the "B" actually started out as a "P" hence the odd shape of the "B" code.


Hope these plan and side views are of help.

Here is a pic of my old AMT P 40M:

This is made to replicate the personal mount of W.Cdr W.Arthurs, who was the RAAF's 76Sqn CO and was badly injured in a take off accident with this bird.

On another note I've been assisting in 4 other local projects for future production on the RAAF's P 40 aircraft, 3 of which are SWPA [one of these is the P40E as flow by Geoff Atherton as 'Cleopatra I' at Milne Bay, 2 x P40K's] and the other is a P 40F of 3 Sqn RAAF's Nth Africa.
camogirl
_VISITCOMMUNITY
England - North East, United Kingdom
Joined: October 20, 2005
KitMaker: 1,045 posts
AeroScale: 622 posts
Posted: Sunday, September 16, 2007 - 09:47 AM UTC
Im signed up for this campaign. Im doing Tamiya's 1/48 Brewster Buffalo in the boxart scheme. Made a start on it today and managed to get the cockpit done, fuselage halves together and the wings attached.


Bigskip
_VISITCOMMUNITY
England - South East, United Kingdom
Joined: June 27, 2006
KitMaker: 2,487 posts
AeroScale: 575 posts
Posted: Sunday, September 16, 2007 - 10:29 AM UTC
[quote]Im signed up for this campaign. Im doing Tamiya's 1/48 Brewster Buffalo in the boxart scheme. /quote]

Hi Sam

Wish you hadn't chosen this colour scheme - we now will have a direct comparison between our model making, as it's the one i'm doing. Will you be done by Newark?

Glad to see you're back at the bench.

Andy
CMOT70
_VISITCOMMUNITY
Victoria, Australia
Joined: August 23, 2007
KitMaker: 629 posts
AeroScale: 539 posts
Posted: Monday, September 17, 2007 - 08:22 PM UTC
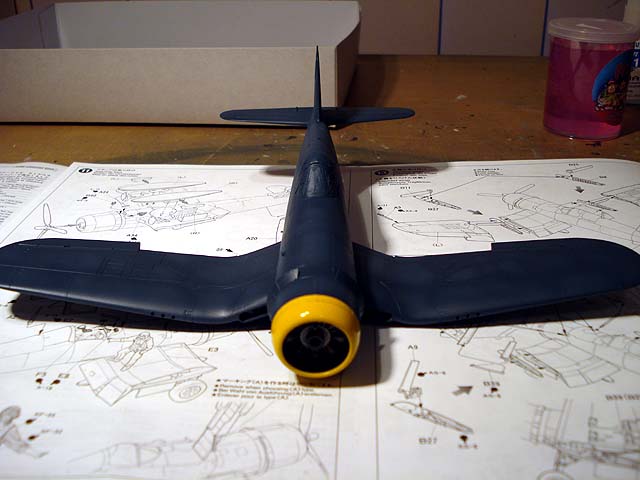
Made a bit of progress on the F4U-1D this week, despite it being the worst part of my work shift cycle. It looks a bit darker through the camera lens than to the eye for some reason.

Anyway, my plan for this one is to do it very clean, an aircraft in the first few weeks of service... especially since it's a late war aircraft flown off a Carrier and not the coral islands that earlier Corsairs used. So only light fading and not much metal showing on this one when done.

Andrew


PolarBear
_VISITCOMMUNITY
Västra Götaland, Sweden
Joined: February 23, 2005
KitMaker: 820 posts
AeroScale: 629 posts
Posted: Tuesday, September 18, 2007 - 04:18 AM UTC
Hi Guys,

I've started on my third entry in this campaign!


This is the Minicraft Hi-61 Hien "Tony" in 1/144. Not the same quality as the Sweet kits, I'm afraid, so a lot of filling and sanding necessary and a lot of work remaining to get it decent...

Cheers!
SGTJKJ
#041
_VISITCOMMUNITY
Kobenhavn, Denmark
Joined: July 20, 2006
KitMaker: 10,069 posts
AeroScale: 3,788 posts
Posted: Tuesday, September 18, 2007 - 05:43 PM UTC
Samantha and Andy: Welcome onboard. Good to have you participating in the campaign.

Andrew: Good start on the Corsair. I agree with you that weathering should probably be kept at a minimum. Although I have seen some birds heavily weathered probably due to corrosion this seems to be the exception for carrier based aircraft. Not much dust around

Bjoern: looks great with the new addition to the campaign. You will end up with a small airforce if you keep going like this
SGTJKJ
#041
_VISITCOMMUNITY
Kobenhavn, Denmark
Joined: July 20, 2006
KitMaker: 10,069 posts
AeroScale: 3,788 posts
Posted: Friday, September 21, 2007 - 07:48 PM UTC
Here is my finished entry for the campaign. I am quite satisfied with it, so I might transport it to my apartment in Denmark. Therefore I have not fitted the aerial wire yet. Otherwise it is a quite nice basic kit. The only big problem is the fit betwwen the fuselage and the wings.

Now n to te next project - where did I leave that KI-115.....


CMOT70
_VISITCOMMUNITY
Victoria, Australia
Joined: August 23, 2007
KitMaker: 629 posts
AeroScale: 539 posts
Posted: Friday, September 21, 2007 - 08:09 PM UTC
I also finished my Corsair today . Overall it was an easy build, except for the usual Tamiya/Hasegawa achilles heal- the decals. The more recent trend for Tamiya to use Cartograph decals is a very welcome one, i just wish they would use them for all their kits.

Anyway this one is done in Tamiya AS8 ,US Navy Semi Gloss Blue, which i decanted and used with the airbrush. The yellow is actually Camel Yellow, meant for F1 cars! Water Clours for the panel lines. I didn't go too far i hope with paint wear, as i believe the later war semi gloss blue was much harder wearing than the earlier versions. Plus it's a carrier aircraft (Bunker Hill).

Andrew


TedMamere
_VISITCOMMUNITY
Moselle, France
Joined: May 15, 2005
KitMaker: 5,653 posts
AeroScale: 4,347 posts
Posted: Friday, September 21, 2007 - 09:14 PM UTC
Hi Jesper and Andrew!

Jesper, that's a very nice P-40! I like the paintsheme and you made a clean job (too clean? ) on the model.

Andrew, wow that's a great Corsair! The blue color seems to be dead on. I like the subtle fading you did (same AS8 color?).
Maybe a dark wash would add more depth to the air intakes on the leading edges of the wings though.

Congratulations to both of you!

Jean-Luc
CMOT70
_VISITCOMMUNITY
Victoria, Australia
Joined: August 23, 2007
KitMaker: 629 posts
AeroScale: 539 posts
Posted: Friday, September 21, 2007 - 09:30 PM UTC

Quoted Text

Andrew, wow that's a great Corsair! The blue color seems to be dead on. I like the subtle fading you did (same AS8 color?).
Maybe a dark wash would add more depth to the air intakes on the leading edges of the wings though.


Jean-Luc

Thanks for pointing out the air intakes! I hadn't even noticed until you drew my attention to them. Just an oversight. I'll fix them up soon.

As for the fading, yes it's simply some TS26 White mixed with the AS8. Those Tamiya Laquers are the finest airbrushing paints around...don't be fooled by the fact that they come in spray cans- that's just a convenient air tight container to store them in! Too bad the colour range is not very extensive.

Andrew
SGTJKJ
#041
_VISITCOMMUNITY
Kobenhavn, Denmark
Joined: July 20, 2006
KitMaker: 10,069 posts
AeroScale: 3,788 posts
Posted: Saturday, September 22, 2007 - 08:03 AM UTC
Andrew, really cool Corsair. It looks like it is ready to kick some a** - and that it has already kicked some a**!

Jean-Luc, Thanks. I tend to agree with you that it looks a little too clean. I am still experimenting a little about the weathering of my WWII aircraft builds. On this one I used some pastels but had to wash them of again as it got weathered like a well worn tank!

Well, when I get started on my KI-115 I can try once again........
CMOT70
_VISITCOMMUNITY
Victoria, Australia
Joined: August 23, 2007
KitMaker: 629 posts
AeroScale: 539 posts
Posted: Saturday, September 22, 2007 - 01:32 PM UTC

Quoted Text

Andrew, really cool Corsair. It looks like it is ready to kick some a** - and that it has already kicked some a**!


Thanks Jesper. Nice P-40 too! And good to see them in RAAF markings. Funnily enough, i have no interest in building RAAF subjects- despite being Australian and actually having been in the RAAF for 12 years. I have a policy of never taking work home in any form!

Andrew
SGTJKJ
#041
_VISITCOMMUNITY
Kobenhavn, Denmark
Joined: July 20, 2006
KitMaker: 10,069 posts
AeroScale: 3,788 posts
Posted: Saturday, September 22, 2007 - 08:17 PM UTC

Quoted Text


Thanks Jesper. Nice P-40 too! And good to see them in RAAF markings. Funnily enough, i have no interest in building RAAF subjects- despite being Australian and actually having been in the RAAF for 12 years. I have a policy of never taking work home in any form!

Andrew


Thanks Andrew
It is funny that I never really feel inclined to build any Danish subjects as well. I served two years in the Army - one year as a sergeant in the Danish armoured Infantry. Despite there are quite a few kits that include Danish camouflage schemes and markings OOB - both for aircraft and tanks.
Recently Hobbyboss even released a special Danish version Leopard 2A5DK tank in 1/35, but I do not even feel tempted.
PolarBear
_VISITCOMMUNITY
Västra Götaland, Sweden
Joined: February 23, 2005
KitMaker: 820 posts
AeroScale: 629 posts
Posted: Wednesday, September 26, 2007 - 08:57 AM UTC
Wow, Andrew, that is one heck of a plane! Very nice weathering!

Personally, I'm still working on my small scale project. Got my 1/144 pilots in the mail the other day (all the way from Australia, no less!) and started painting. Here's some of the USAAF crew resting on a tothpick and admiring a mighty big bottle of Tamiya acrylic paint.


Here's one of them test-sitting the Wildcat. This is one of the aircraft with the least good view. I bet the pilots are going to show a lot better in the upcomíng Mustang and P-38J Lightning.


Speaking of the Lightning... A lot of filling and sanding in order to get the Minicraft kit in shape. I carved out an office tub and did some freehand scribing just to get some detail... Hmmm, I'm not sure that I'm going to pull this one off...


Cheers!

Polarbear - who just loves building Swedish aircraft!
SGTJKJ
#041
_VISITCOMMUNITY
Kobenhavn, Denmark
Joined: July 20, 2006
KitMaker: 10,069 posts
AeroScale: 3,788 posts
Posted: Wednesday, September 26, 2007 - 05:53 PM UTC
Looks good Bjoern. How many planes are you going to include in your display? Your airforce is growing by the day - now you even have pilots

Seriously, very good work in this very small scale.

Looking forward to see more.
SGTJKJ
#041
_VISITCOMMUNITY
Kobenhavn, Denmark
Joined: July 20, 2006
KitMaker: 10,069 posts
AeroScale: 3,788 posts
Posted: Wednesday, September 26, 2007 - 06:01 PM UTC
Here is a small update on my second build for this campaign: the KI-115.


The KI-115 was a dedicated suicide plane developed to be used in huge waves against a JApanese mainland US invasion fleet. Production was well underway and training on the type had begun by the time of VJ day. However, fortunently this aircraft was never used operationally.

I am building Eduards 1/48 profipack of this aircraft including some PE and masks.


I have started on the cockpit and the radial engine. Both are quite nice - too bad they will almost be completely hidden when the aircraft is finished. Painting is underway but not finished. The cockpit looks very shiny in the pictures below, but this is because I had just applied a wash prior to the picture.

More to follow.....


Phantom2
_VISITCOMMUNITY
Östergötland, Sweden
Joined: April 18, 2006
KitMaker: 708 posts
AeroScale: 678 posts
Posted: Friday, September 28, 2007 - 08:45 AM UTC
Hi all!

Wow, some really nice models already finished!

Now I have made a slow but steady start on my "Speedy-Dee"!


I will build the kit almost OOB, but I will use Eduard´s etched seatbelts and Painting masks.


As usual assembly starts with the cockpit;


The build will be continued....

Cheers!

Stefan E
camogirl
_VISITCOMMUNITY
England - North East, United Kingdom
Joined: October 20, 2005
KitMaker: 1,045 posts
AeroScale: 622 posts
Posted: Saturday, September 29, 2007 - 05:35 AM UTC
Just a quick update got the major building done, all the masking done ( felt like it took an eternity) and managed to get it primed. Hope to get the camo on it tomorrow.

camogirl
_VISITCOMMUNITY
England - North East, United Kingdom
Joined: October 20, 2005
KitMaker: 1,045 posts
AeroScale: 622 posts
Posted: Sunday, September 30, 2007 - 06:50 AM UTC
Got quite a bit done today all the camoflage done, two coats of future and managed to get the decals on aswell.


Bigskip: I hope to take it to Newark it may not be totally finished though.