Ok, I have made a start on the F6F-3 Hellcat Catmouth.
I am going to push through as fast as I can on this build as I want to take it to the Illawarra Plastic Models Society show in early May so I have a bit less than 4 weeks. This will be completely OOB.
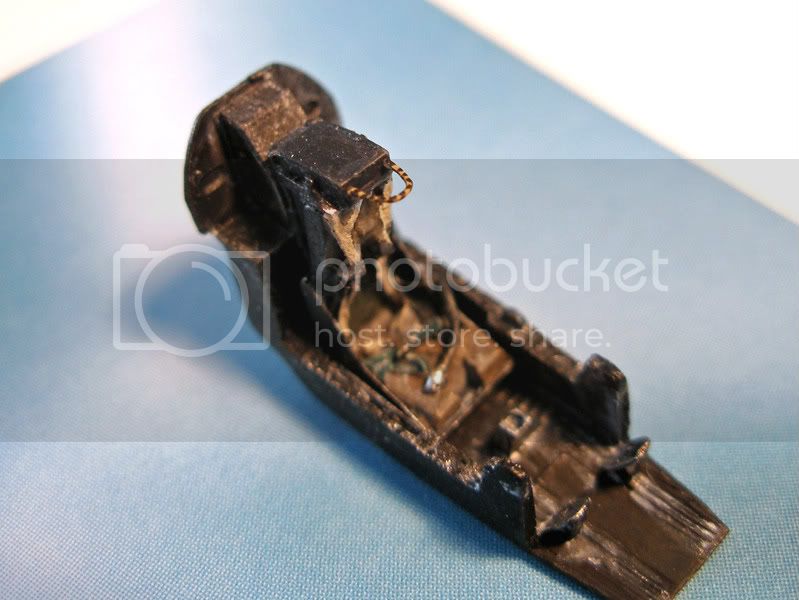
I Used the pre-painted PE in the kit I put the cockpit together, it went together quite quickly.
I also worked on the engine, this was nice but I wasn't too fussed with the PE wiring. Its a skill I need to learn still. The finished product will be ok once in the cowling.
I also started some work on the wings
thats it for now. More to come.
Air Campaigns
Want to start or join a group build? This is where to start.
Hosted by Frederick Boucher, Michael Satin
Official "Aces High" Campaign Thread
drizzt73
New South Wales, Australia
Joined: April 15, 2006
KitMaker: 158 posts
AeroScale: 70 posts
Joined: April 15, 2006
KitMaker: 158 posts
AeroScale: 70 posts
Posted: Friday, April 04, 2008 - 10:08 PM UTC
Posted: Friday, April 04, 2008 - 10:18 PM UTC
Looks great, Yalym and Anthony.
The decals look fine to me, Yalym. Academy decals are terrible in general. Simply useless.
Posted: Friday, April 04, 2008 - 10:30 PM UTC
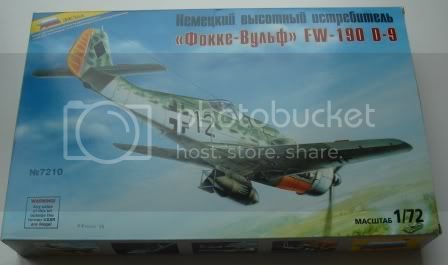
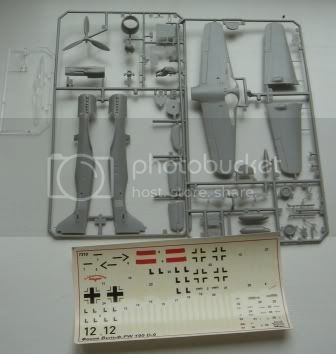
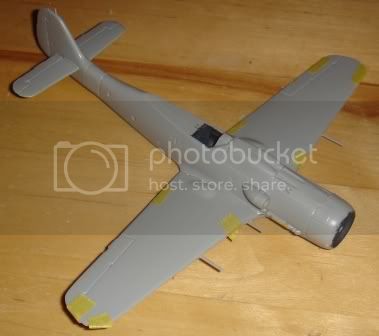
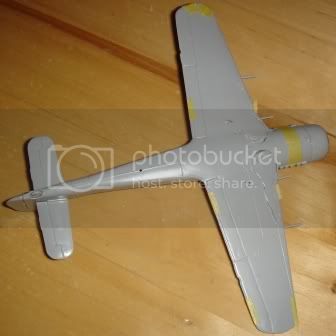
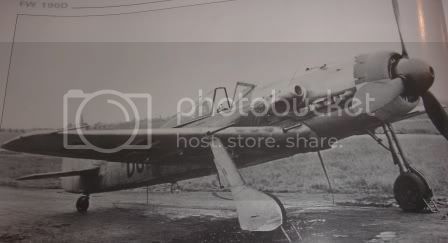
Now I have finished my Chinook project for the twin spinners campaign. Now I want to start on the pile of kits I have for this campaign. First I will start with a simple 1/72 build of the FW 190 D. It is the Zvezda kit which is probably a Hasegawa or Academy kit reboxed. It looks okay so far.
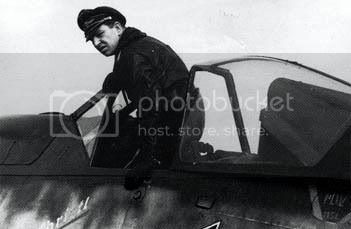
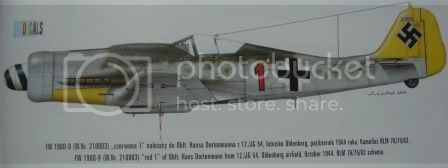
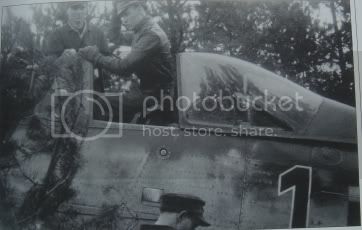
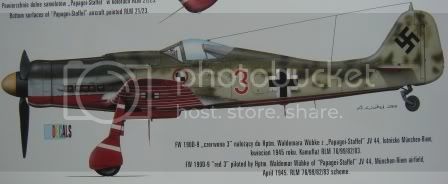
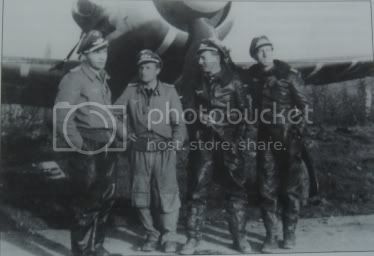
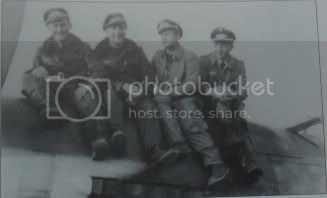
I have not decided on the camouflage and markings yet. I have three different schemes I want to build, but cannot decide which one. I do not have any real pictures of the entire aircraft only partial pictures of the machines with the ace pilot. None of the aircraft has kill markings, but were definently flown by an ace. Nige, Is this good enough to qualify as an entry in the campaign based on the profiles and pictures below?
First scheme: Barkhorn - 301 victories
Second scheme: Dortenmann - 38 victories including 18 in the FW 190 D
Third scheme: Wubke - 15 victories
Wubke on the right.
Wubke second from the left
Posted: Saturday, April 05, 2008 - 03:11 AM UTC
The famous ( or infamous) Academy decals strike again! Looking good though Yalym.
Will it be a Spit or a 109 first across the finishing line?
Anthony,,great choice!,,Im looking forward to watching your Hellcat come together. How is the kit? Ive heard nothing but good words about it so far.
Jesper,,no problem with any of those 190s,and the photos are fine. Just watch your six for those Thunderbolts and Mustangs
Nige
Posted: Saturday, April 05, 2008 - 05:15 AM UTC
Quoted Text
Jesper,,no problem with any of those 190s,and the photos are fine. Just watch your six for those Thunderbolts and Mustangs
Nige
Great, then I will get underway with the kit over the weekend, although I have not decided on which of the schemes I am going for.
Phantom2
Östergötland, Sweden
Joined: April 18, 2006
KitMaker: 708 posts
AeroScale: 678 posts
Joined: April 18, 2006
KitMaker: 708 posts
AeroScale: 678 posts
Posted: Saturday, April 05, 2008 - 09:40 AM UTC
Hi all!
I´ll join the fray with my Tamiya Mustang in 1/48;
The contents of the box;
The decal sheet is quite large;
I´ll build John D. Landers´ "Big Beautiful Doll", and I´ll add some etched seatbelts, otherwise It will be OOB.
Some facts abot BBD and Colonel Landers;
http://www.granburydepot.org/z/biog/LandersJohnDave.htm
Cheers!
Stefan E
ejclide
Ohio, United States
Joined: January 03, 2008
KitMaker: 150 posts
AeroScale: 119 posts
Joined: January 03, 2008
KitMaker: 150 posts
AeroScale: 119 posts
Posted: Saturday, April 05, 2008 - 07:40 PM UTC
A little update on Ken Walsh's F4U-4, here's the cockpit done up and about ready to be sealed in. I was very close to putting this thing together when I realized I had to have the engine done first! Glad I didn't forget that. I do think it's odd however that Hasegawa's 72nd scale offerings have both banks of the engine and this 48th offering only has one! Crazy..... Well, anyway, I know the cockpit is FAR from accurate, but I don't care because this plane is all about the outside and the markings. And the cockpit still looks nice anyway.
I'll see about getting the engine plumbed up and shoved in there so I can close this puppy up! Hope to update soon!
Edit: Yeah, i forgot the control stick!
I'll see about getting the engine plumbed up and shoved in there so I can close this puppy up! Hope to update soon!
Edit: Yeah, i forgot the control stick!
drizzt73
New South Wales, Australia
Joined: April 15, 2006
KitMaker: 158 posts
AeroScale: 70 posts
Joined: April 15, 2006
KitMaker: 158 posts
AeroScale: 70 posts
Posted: Saturday, April 05, 2008 - 10:23 PM UTC
Quoted Text
The famous ( or infamous) Academy decals strike again! Looking good though Yalym.
Will it be a Spit or a 109 first across the finishing line?
Anthony,,great choice!,,Im looking forward to watching your Hellcat come together. How is the kit? Ive heard nothing but good words about it so far.
Jesper,,no problem with any of those 190s,and the photos are fine. Just watch your six for those Thunderbolts and Mustangs
Nige
Thanks Nige,
the kit is great, Tamiya like with build and fit. Very quick to put together and I have only used a little surfacer 500 on the join at the front between the wings and fuselage.
I did some more work on it today and will post some pics sonn
cheers
Posted: Sunday, April 06, 2008 - 08:02 PM UTC
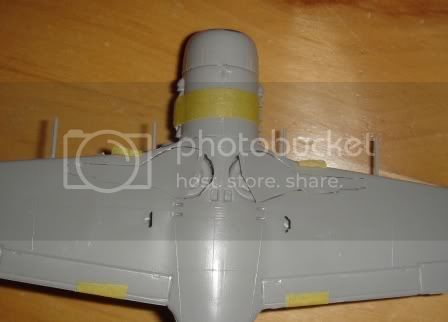
Here is a little update on my Zvezda FW 190 D. The kit is okay although the fit is not optimal.
I have decided to make this an "inflight" project because a pilot is included - rather I should write there is a plastic blob resembling a pilot included, but that will hardly be noticeable under a 1.5 - 2 mm clear plastic canopy.
JollyRoger
Istanbul, Turkey / Türkçe
Joined: December 22, 2004
KitMaker: 1,241 posts
AeroScale: 616 posts
Joined: December 22, 2004
KitMaker: 1,241 posts
AeroScale: 616 posts
Posted: Monday, April 07, 2008 - 12:53 AM UTC
Thanks guys for the kind compliments. I'll just sum up. The paint in the wheelbays and gears is Humbrol Matt 31 Slate Grey. Although it is not as green as it looks on the photo it is rather green for RLM02 I must admit but I couldn't open the lid of my Gunze 02 and I get angry in such times, so I used the 31 anyways. The tulip decals are in wrong amount as far as I could count on the Photoes and ilustrations. And the main problem is that I PLACED'EM WRONG .There is no tulip over the exhoust. One is placed just above, and one just under it and I was dumb enpugh not to check it whlie decaling. Oh by the way the one we are talking about is not a decal. It is handpainted. By the way the decals probably work perfect on glass-smooth surfaces but It is a terribly matt painted aircraft and by personal choice I tend to paint my birds with as little varnish as possible.
Jesper; DO THE BARKHORN DO THE BARKHORN!!!!! Barkhorn rules:} Or Rudel may be a nice choice if you can find the decals, which are not that hard.
Eetu; preciesly correct. No I didn't do anything else, other than losing the pilot's neck shield in the canopy . It looks ok by itself for me. Just the lack of the gun sight is disturbing me but that is ok for now, I am not taht good at modeling anyways:} I am using Humbrol Decal Fix for decals. I don't know if it works but I use it anyways. By the way how is the AML kit?
PS: No no I'll wait for Vance's Spitfire.:]
Jesper; DO THE BARKHORN DO THE BARKHORN!!!!! Barkhorn rules:} Or Rudel may be a nice choice if you can find the decals, which are not that hard.
Eetu; preciesly correct. No I didn't do anything else, other than losing the pilot's neck shield in the canopy . It looks ok by itself for me. Just the lack of the gun sight is disturbing me but that is ok for now, I am not taht good at modeling anyways:} I am using Humbrol Decal Fix for decals. I don't know if it works but I use it anyways. By the way how is the AML kit?
PS: No no I'll wait for Vance's Spitfire.:]
PolarBear
Västra Götaland, Sweden
Joined: February 23, 2005
KitMaker: 820 posts
AeroScale: 629 posts
Joined: February 23, 2005
KitMaker: 820 posts
AeroScale: 629 posts
Posted: Monday, April 07, 2008 - 10:38 AM UTC
Hi all!
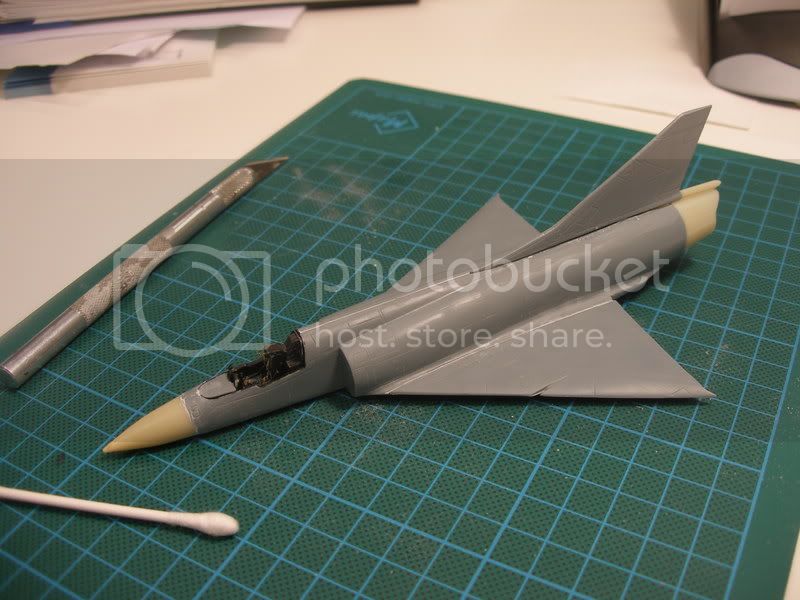
Only one week into this campign and guess what!? - I'm off to a flying start! I usually don't start my entries until the last couple of weeks! I'm building the ALM 1/72 Mirage IIICJ. Here's the tiny resin cockpit after some painting and drybrushing. The detail of the cockpit and seat is great for such a small scale. The only thing I've added is the ejection loop handle from metal wire.
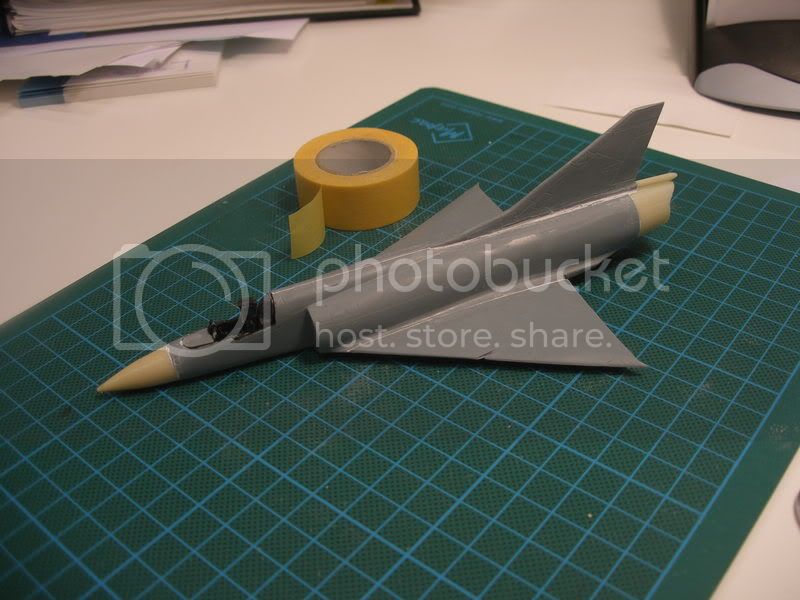
Now I understand all the growling comments regaring short run kits. The detail of the resin is excellent, but absolutely nothing fits! I've sanded and dry-fitted and sanded and dry-fitted and dremeled and sanded and dry-fitted some more. And now I'm going to have to fill and putty and sand most of the kit! How about this giant gap under the vertical stabilizer!?!
This is not a place where you want to be forced to do some heavy sanding! I've tried some "filling without sanding" technique (as previously shown by Nige on this forum - see also at the tools n' tips section at ARC). This gap is so big that I will have to go over it a couple of times!
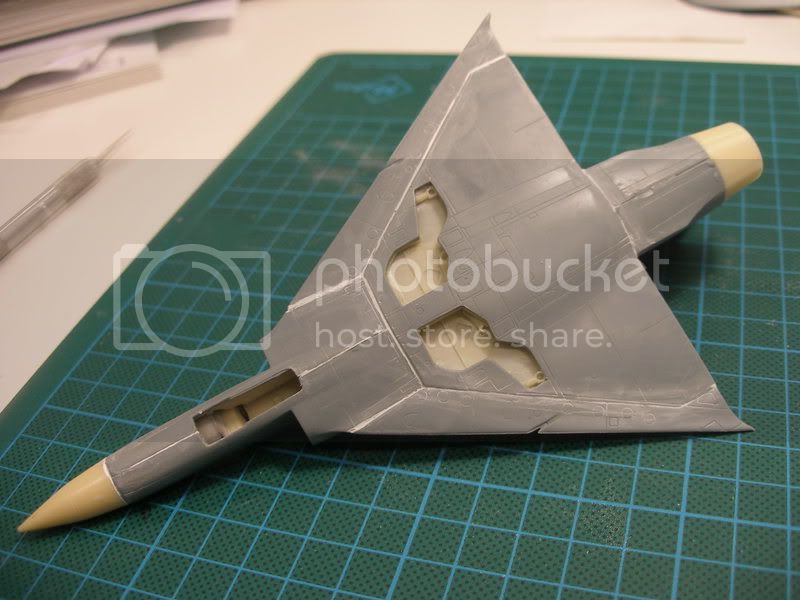
Same thing with the belly. The detail is crisp but the plastic is thick! Filling and sanding and then filling some more.
The worst part of all this filling and sanding? I'm planning to do an extra shiny, super polished NMF Shahak!!!
Good thing I started this build in time, because this will be tough job to finish. All tips on how to pull this one of are indeed welcome!
Cheers! // Polarbear
JollyRoger
Istanbul, Turkey / Türkçe
Joined: December 22, 2004
KitMaker: 1,241 posts
AeroScale: 616 posts
Joined: December 22, 2004
KitMaker: 1,241 posts
AeroScale: 616 posts
Posted: Monday, April 07, 2008 - 08:30 PM UTC
For Blind Io's sake, what a nightmare looking kit! I wish you truck loads of patience Björn.
Emeritus
Uusimaa, Finland
Joined: March 30, 2004
KitMaker: 2,845 posts
AeroScale: 1,564 posts
Joined: March 30, 2004
KitMaker: 2,845 posts
AeroScale: 1,564 posts
Posted: Monday, April 07, 2008 - 08:51 PM UTC
Quoted Text
Eetu; preciesly correct. No I didn't do anything else, other than losing the pilot's neck shield in the canopy . It looks ok by itself for me. Just the lack of the gun sight is disturbing me but that is ok for now, I am not taht good at modeling anyways:} I am using Humbrol Decal Fix for decals. I don't know if it works but I use it anyways. By the way how is the AML kit?
I remember having an extra pilot neck armor piece left over from an Academy 109. If you're not in a hurry, hold off attaching the canopy, I could send you that part if it's suitable for that kit.
If you think you could still cram in a gunsight, I think I could spare one from a quickboost set I have.
On the AML kit, it's limited run, so no locator pins, there's some minor flash to clean up, but details are mostly crisp.
The "expert edition" version I have packs some nice detail parts. The cockpit interior comprises resin and PE parts (with the choice of either a resin or PE+acetate film instrument panel). Canopies are vac-formed (two are inlcuded). Resin parts feature the aforementioned cockpit parts plus wheels, hollow exhausts and machine gun barrels. The PE fret has parts to replace the thick plasti landing gear doors, exhaust shrouds, etc.
Decals look to be of the usual high AML quality. The only slight gripes here would be the two-part swastikas and the tulips marking in the nose of one marking option being a little strangely done. It red with white borders. The white are printed in the decals, forcing the modeler to paint the red parts. This will make it tricky, as masking over the decals is a no-no (they will lift off and tear). So some careful measuring with masking the red portions will be needed (or choosing another marking option of course)
It'll surely take some more work than the finemolds offering due to it's limited-run nature, and it lacks the option of displaying the engine found in FM kits, but the detail parts will probably make it a more complete OOB build.
Accuracy I cannot comment (yet).
If you're interested, I can take a few photos of the kit and post them here.
SGTJKJ:
That 190's coming along nicely. Just one thing caught my eye. What are those outer wing cannons? To my knowledge, D9s had two fuselage-mounted MG131s plus two MG151 cannons in the wing roots. I think the manufacturer goofed here. I'd slice them off.

Posted: Tuesday, April 08, 2008 - 12:17 AM UTC
Quoted Text
SGTJKJ:
That 190's coming along nicely. Just one thing caught my eye. What are those outer wing cannons? To my knowledge, D9s had two fuselage-mounted MG131s plus two MG151 cannons in the wing roots. I think the manufacturer goofed here. I'd slice them off.

I know, but thanks for the warning. I almost left wing guns on a Bf 109F a year ago, so not entirely unlikely I could make such a mistake again, although I am beginning to research my models much better now.
I will definently slice them of as they are not on any of the FW 190 D9 I have seen - either in pictures or scale plans. Yesterday I went though my references on the Dora and did not find any versions that had an extra set of guns in the wings. There were experiments on a 20mm or 30mm firing through the spinner, but these were only implemented on the TA 152s as far as I know.
I have a suspecion that the wing in the kit is made so it can be used for some of the early prototype TA 152s with the short wings. I belive some of those had four wing mounted guns, but I am not sure as these are not included in detail in my references. Otherwise there might be the possibility that Zvezda or whoever made the forms simply made a mistake.
Edit: I just checked out Wikipedia and it seems like the D-11 version had four wing guns with the outer most pair being 30mm. I did not read about this in my references, but could have missed it. Anyway, the kit cannot be build as a D-11 as the D-11 did not have guns in the cowling. Wikipedia list 17 D-11 being produced
Posted: Tuesday, April 08, 2008 - 12:36 AM UTC
Quoted Text
Jesper; DO THE BARKHORN DO THE BARKHORN!!!!! Barkhorn rules:} Or Rudel may be a nice choice if you can find the decals, which are not that hard.
I think I even have Rudels markings at home, but I need a picture of his FW 190D "< - + - ". This I have not been able to find. Otherwise it will not qualify for the campaign.
JollyRoger
Istanbul, Turkey / Türkçe
Joined: December 22, 2004
KitMaker: 1,241 posts
AeroScale: 616 posts
Joined: December 22, 2004
KitMaker: 1,241 posts
AeroScale: 616 posts
Posted: Tuesday, April 08, 2008 - 12:55 AM UTC
Thanks Eetu, both for the kind offer and the info. I think there is no need for the parts. I'll "doodle" with the other, older canopy armor from the kit and turn it into the Erla one. And for the sight...Dunno, I'll think of something. I'll keep the AML kit in mind, sounds intresting.
Jesper, I just saw the photo of the plane a few days ago but seems like didn't save it in my referance folder, sorry. But if you Google it you probably can find. It has a multicolour, painted over and over again look that way late war D-9s have.
JollyRoger
Istanbul, Turkey / Türkçe
Joined: December 22, 2004
KitMaker: 1,241 posts
AeroScale: 616 posts
Joined: December 22, 2004
KitMaker: 1,241 posts
AeroScale: 616 posts
Posted: Tuesday, April 08, 2008 - 12:59 AM UTC
Just another question poped up in my mind...well they generally do, and I'll ask it even though I probably know the answer. Would Hartmann's(Or Barkhorn's, he flew them either as far as I remember) F-86 count? He didn't score with it but he flew with them after he was an ace. Not that I will build it but it may be a nice nouance.
Emeritus
Uusimaa, Finland
Joined: March 30, 2004
KitMaker: 2,845 posts
AeroScale: 1,564 posts
Joined: March 30, 2004
KitMaker: 2,845 posts
AeroScale: 1,564 posts
Posted: Tuesday, April 08, 2008 - 04:00 AM UTC
As promised, here's a peek of the kit. (don't know if this should rather be submitted as a preview...)
The plastic:
Clean panel lines, but a few ejector marks to clean up (fortunately they're raised)
Wing trailing edges are pretty sharp due to clever construction. The edge is molded completely on the upper wing half. It could still use a little sanding, but it's thinner than on most kits where the two wing halves form the edge.
The worst case of flash in the kit. Not that hard to deal with.
The resin and the PE:
..And the decals:
The first of my two gripes about the markings (in addition to the PC swastikas). These fuselage numbers in one of the marking options seems to be sprayed hastily with soft edges, but the decals are pixelated.
And my second and final gripe. The tulip nose will require careful measuring and masking to pull off.
In my previous post, I forgot to mention the price difference between AML and Finemolds kits. I remember paying about 17€ for this one, and in the same store, FM's 109s are around 27€.
The plastic:
Clean panel lines, but a few ejector marks to clean up (fortunately they're raised)
Wing trailing edges are pretty sharp due to clever construction. The edge is molded completely on the upper wing half. It could still use a little sanding, but it's thinner than on most kits where the two wing halves form the edge.
The worst case of flash in the kit. Not that hard to deal with.
The resin and the PE:
..And the decals:
The first of my two gripes about the markings (in addition to the PC swastikas). These fuselage numbers in one of the marking options seems to be sprayed hastily with soft edges, but the decals are pixelated.
And my second and final gripe. The tulip nose will require careful measuring and masking to pull off.
In my previous post, I forgot to mention the price difference between AML and Finemolds kits. I remember paying about 17€ for this one, and in the same store, FM's 109s are around 27€.
Posted: Tuesday, April 08, 2008 - 07:13 AM UTC
I've signed up for this and I will be building a P-47 Thanderbolt, the mount of Col T. Eagleston in 1/32 scale.
Mal
Mal
Posted: Tuesday, April 08, 2008 - 08:30 AM UTC
Quoted Text
Jesper, I just saw the photo of the plane a few days ago but seems like didn't save it in my referance folder, sorry. But if you Google it you probably can find. It has a multicolour, painted over and over again look that way late war D-9s have.
I have the colour profile and markings needed for Rudel's Dora. However, I have not seen any photo of the aircraft and cannot find any on the internet. Anyway, I am getting more and more attracted by the JV 44 Dora with red and white undersides.
Eetu, looks like a very interesting kit. The masking will be a fiddely job to add that masking. Especially in the engine area.
vanize
Texas, United States
Joined: January 30, 2006
KitMaker: 1,954 posts
AeroScale: 1,163 posts
Joined: January 30, 2006
KitMaker: 1,954 posts
AeroScale: 1,163 posts
Posted: Tuesday, April 08, 2008 - 05:37 PM UTC
Despite work hitting me hard, I am still making progress:
ready to paint:
duck egg green and dark earth colors applied:
ready to paint:
duck egg green and dark earth colors applied:
Posted: Tuesday, April 08, 2008 - 07:35 PM UTC
Vance, looking good. Hope you make the deadline!
Just to finish of the extra wing guns mystery on my FW 190 D kit. I think the extra set of guns are meant to be the D-11 variant although they are way too long to be the short barrel 30mm guns. Alternatively the kit could be based on one of the prototypes shown in a picture below.
PROTOTYPE
D-11 PROFILES - NOTICE THE EXTRA SET OF GUNS
drizzt73
New South Wales, Australia
Joined: April 15, 2006
KitMaker: 158 posts
AeroScale: 70 posts
Joined: April 15, 2006
KitMaker: 158 posts
AeroScale: 70 posts
Posted: Tuesday, April 08, 2008 - 11:03 PM UTC
hi all,
I've done some more work over the weekend
I sprayed the interior of the cowling with Lifecolours Zinc Chrome Yellow.
I joined the fuselage halves and added the wings, I am very happy with the fit and only needed some minor gap filling at the leading edge of the join between the wing and the fuselage on the left hand side.
I then sprayed a white undercoat using mr hobby 1000. I normally use Tamiya grey but since the underwing colours are white I thought a white basecoat would be better
tonight I am going to do the pre-shading of the panel lines.
cheers
redalb2253
South Carolina, United States
Joined: June 02, 2006
KitMaker: 235 posts
AeroScale: 60 posts
Joined: June 02, 2006
KitMaker: 235 posts
AeroScale: 60 posts
Posted: Wednesday, April 09, 2008 - 07:20 AM UTC
Looks like I'll do Hasagawa's 1/32 bf109e don't know who yet kit has some excess flash raised panel lines and no wheel well detail mine will be oob with some minor scratch might go for Gallands mount as I have Wick's in 48th don't know yet though.
vanize
Texas, United States
Joined: January 30, 2006
KitMaker: 1,954 posts
AeroScale: 1,163 posts
Joined: January 30, 2006
KitMaker: 1,954 posts
AeroScale: 1,163 posts
Posted: Wednesday, April 09, 2008 - 05:30 PM UTC
with only a few days left before my friends birthday, the race to the finish is on!
here is where it stands - camo done and Gloss coat on, waiting for it to cure so I can put on decals: