Air Campaigns
Want to start or join a group build? This is where to start.
Official "Aces High" Campaign Thread
vanize
_VISITCOMMUNITY
Texas, United States
Joined: January 30, 2006
KitMaker: 1,954 posts
AeroScale: 1,163 posts
Posted: Monday, April 28, 2008 - 05:33 AM UTC

Quoted Text


Vance: Love your Spit. I also got a stupid idea. Take a Imperial TIE-fighter (star wars, that is), paint it like a Spit Mk 1 and Voila -we've got Darth Bader roaming the space


Ouch!
lampie
#029
_VISITCOMMUNITY
England - East Midlands, United Kingdom
Joined: December 23, 2005
KitMaker: 6,249 posts
AeroScale: 3,270 posts
Posted: Monday, April 28, 2008 - 06:21 AM UTC

Actually the connection between Star Wars and the RAF is closer than you'd imagine.
According to George Lucas, he based the attack formations in the sequence at the end of Star Wars Episode IV,,the classic Star Wars film, on the Dambusters Raid of 1943.
er,,,,,
ok,,,
Im off now..........................................
Nige
CMOT70
_VISITCOMMUNITY
Victoria, Australia
Joined: August 23, 2007
KitMaker: 629 posts
AeroScale: 539 posts
Posted: Monday, April 28, 2008 - 10:03 PM UTC
Finally some progress to report on the Fokkers. Things have slowed down due to being at the part i don't like much, lozenge decals and more specifically doing the rib tapes, which in this case means slicing up spare kit decals as both originals had lozenge tapes.

It's getting there slowly.


Andrew
propwash
_VISITCOMMUNITY
Charente, France
Joined: July 06, 2007
KitMaker: 289 posts
AeroScale: 231 posts
Posted: Tuesday, April 29, 2008 - 01:29 AM UTC
Great to see everyones' models taking shape and even some fab complete ones too

Here's the progress on my second model, a 1/72 P-39..........


CaptainA
_VISITCOMMUNITY
Indiana, United States
Joined: May 14, 2007
KitMaker: 3,117 posts
AeroScale: 2,270 posts
Posted: Wednesday, April 30, 2008 - 11:56 AM UTC
There is a whole lotta good building going on here. Andrew, I love those kits, and understand what you are talking about. I plan mine to take about 2-3 hours a day for 3-4 days. But they look great when done right. Yours looks great.

lampie
#029
_VISITCOMMUNITY
England - East Midlands, United Kingdom
Joined: December 23, 2005
KitMaker: 6,249 posts
AeroScale: 3,270 posts
Posted: Wednesday, April 30, 2008 - 12:07 PM UTC
Great progress everyone!
Almost a month into the build now! How time flies when your having fun.
So far 45 potential aces have enlisted, however 46 people have shown interest.
Jean-Luc, please enlist
15 people have stated that they have started their builds and most of these have posted WIP photos. Thanks everyone!
Last, but by no means least, congratulations to Captain A and Vanize, the first Aces of the campaign.
Your prize gentlemen...
You get to wait longer than everyone else for your ribbons
Keep posting everyone!
Nige
PolarBear
_VISITCOMMUNITY
Västra Götaland, Sweden
Joined: February 23, 2005
KitMaker: 820 posts
AeroScale: 629 posts
Posted: Wednesday, April 30, 2008 - 09:25 PM UTC
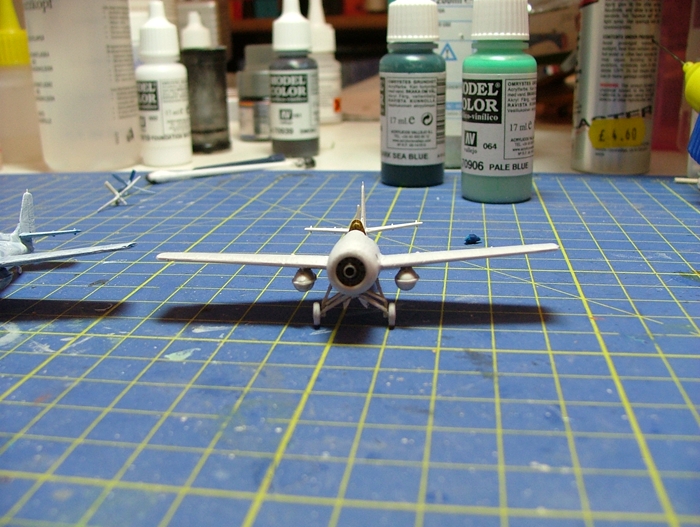
So much great progress in this campaign! I love you Spitfire, Vanize! Great work on the finish! And them Fokkers are comming on nicely, Andrew!

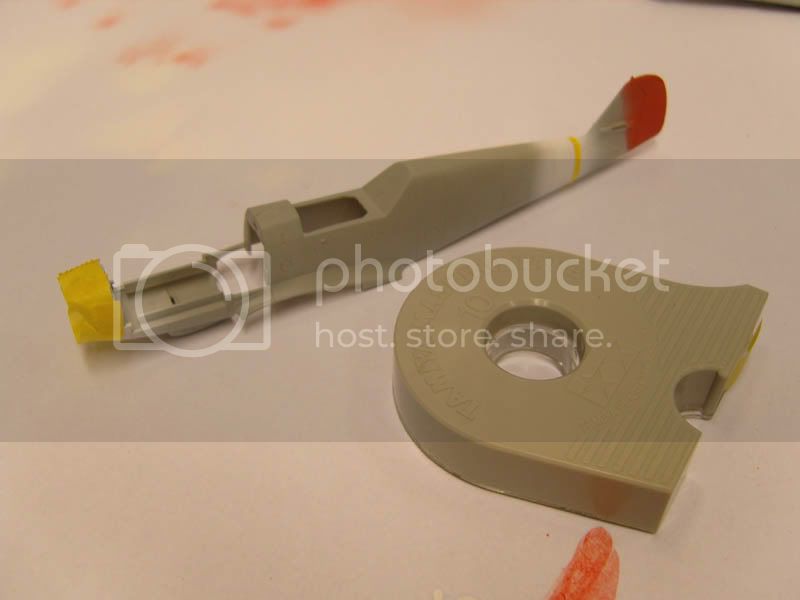
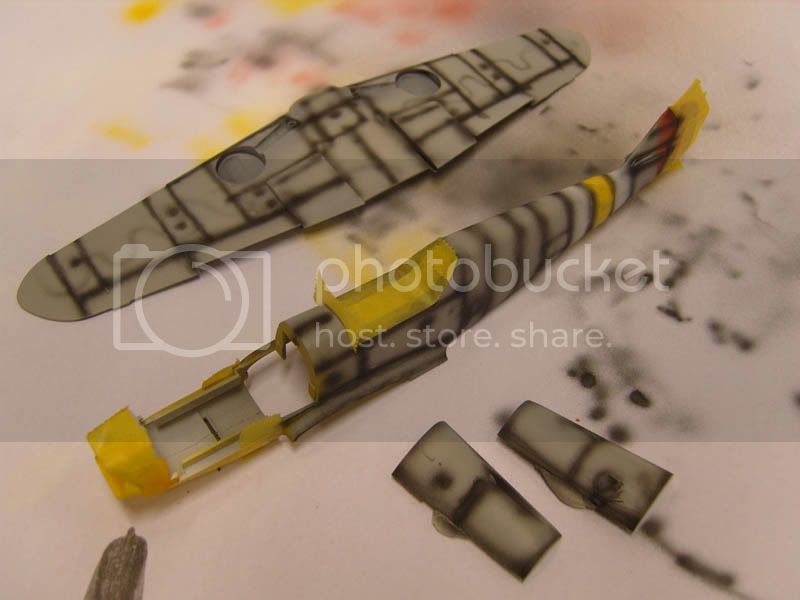
My plight with the AML Mirage IIICJ continues... I've been forces to make my own special sanding sticks in order to reach all areas that need sanding, i.e. every single seam!


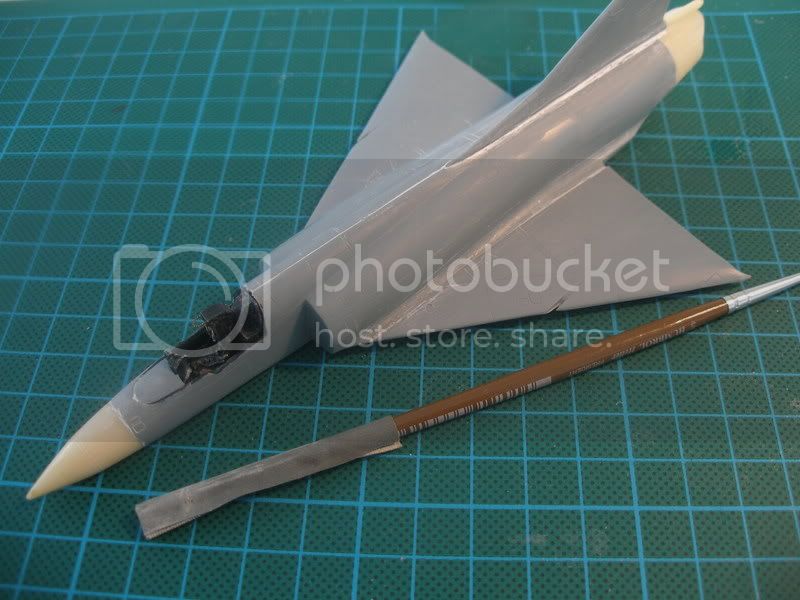
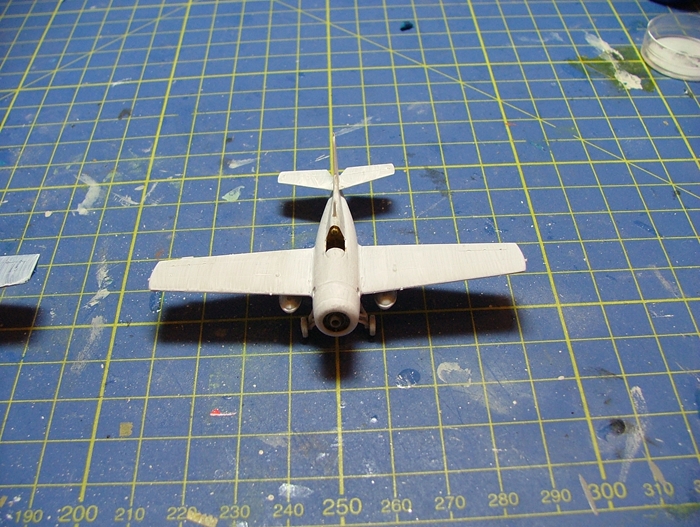
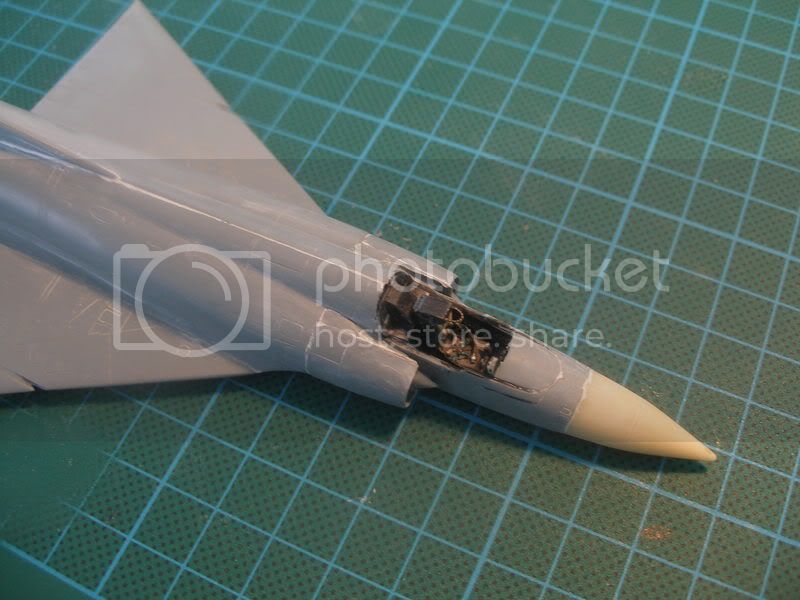
Unfortunately, the fit of the short run kit is not up to par! The plastic seems way to thick! Here are a couple of progress pics that illustrate the problem.

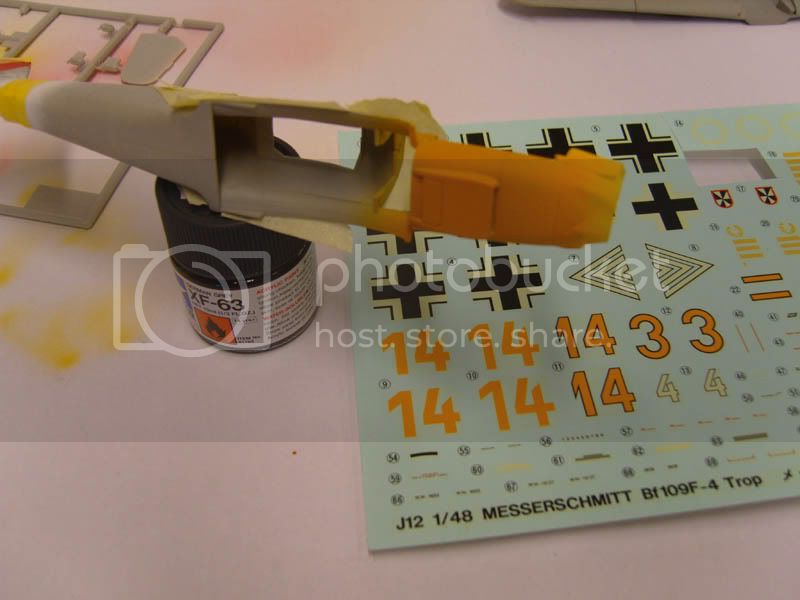
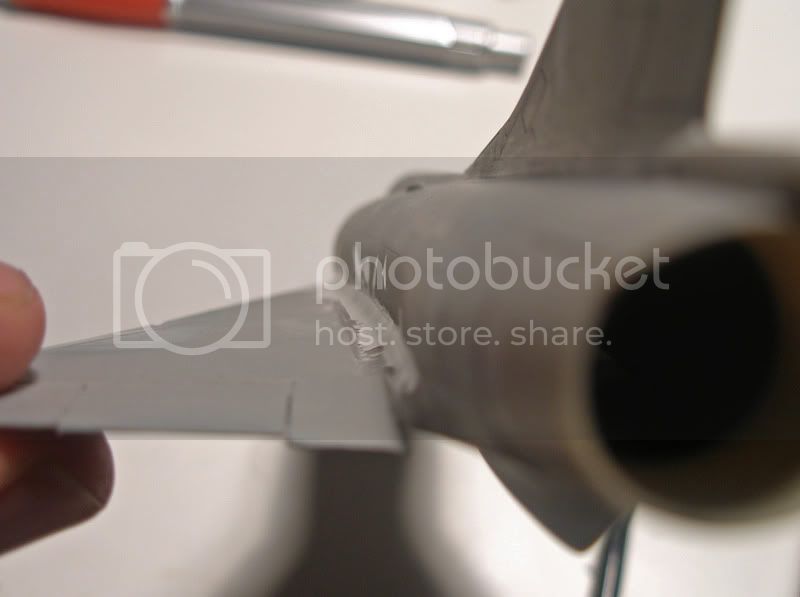
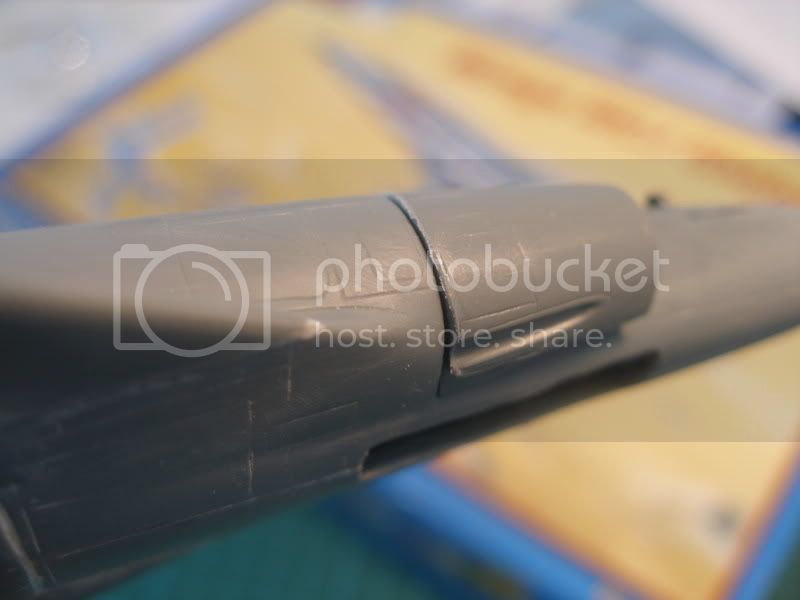
A) Dryfitting the intakes. The intake (2 parts) sticks out at almost 2 mm (not good in 1/72)!


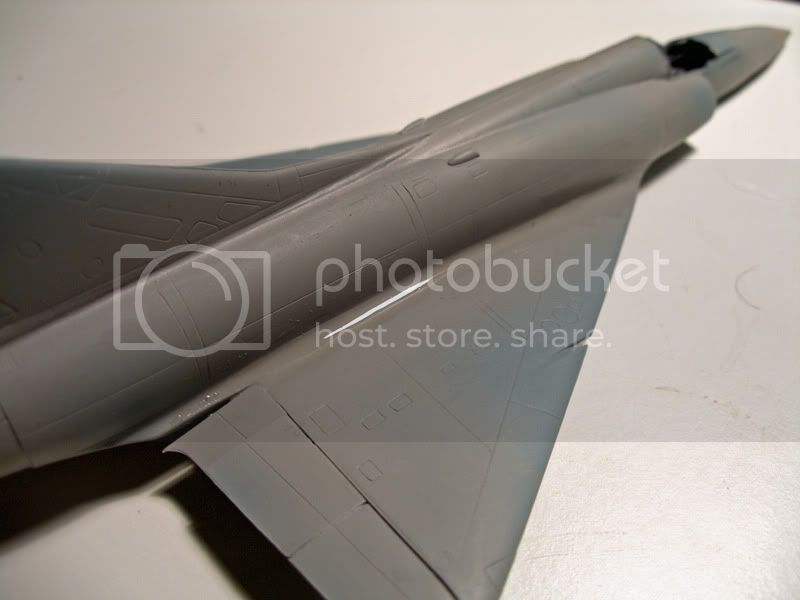
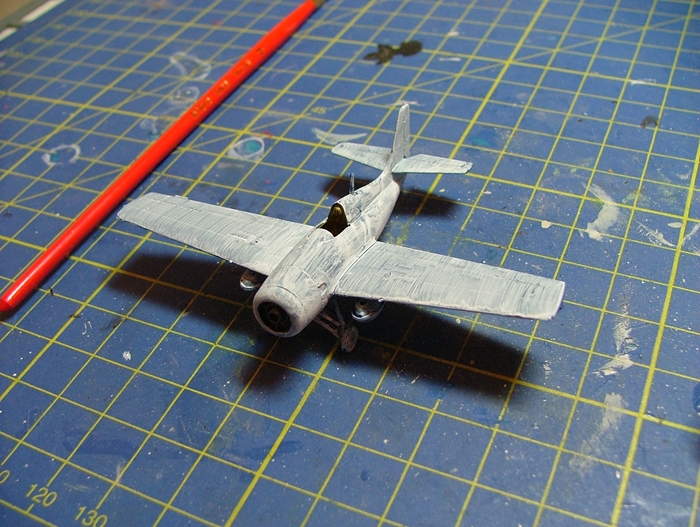
B) In order to avoid having to destroy the surface detail, I had to do some heavy sanding and trimming on all other areas. - This is not a pretty sight!


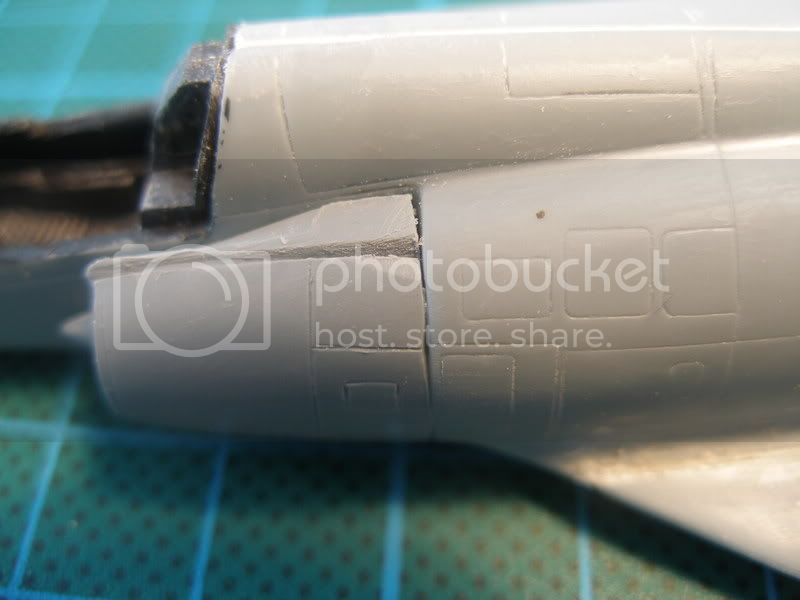
C) I've tried to fill the gaps (read canyons) with superglue, but I find that method very hard to work with. I'm not sure I'm doing it right. (Can't see the glue = Can't see the result). Instead, I'm doing some "filling without sanding" (masking of all other areas except the gaps, filling them with putty and using Q-tips with acetone nail polish remover to smoothen the area). It looks good so far, but how will it come out under a highliy polished aluminum finish!?!


Anyhow - Who said that modelling should be easy / fun / painless...?

Cheers // PolarBear
vanize
_VISITCOMMUNITY
Texas, United States
Joined: January 30, 2006
KitMaker: 1,954 posts
AeroScale: 1,163 posts
Posted: Thursday, May 01, 2008 - 01:50 AM UTC
Looks like you've taken on a real challenge, Björn! It's goingt o be a lot of work getting those seems flat enough for a NMF.

Good luck with it, but i am sure it'll turn out great.

vanize
_VISITCOMMUNITY
Texas, United States
Joined: January 30, 2006
KitMaker: 1,954 posts
AeroScale: 1,163 posts
Posted: Thursday, May 01, 2008 - 05:54 PM UTC
Update on my Spitfire:

I was finally was able to give it to my friend as a belated birthday present.

He was extremely pleased. =)

Then I found out why he knew so much about the pilot of the aircraft I depicted - Douglas Bader was his neighbor when he was little!!!

It was pretty funny seeing an Englishman in his mid forties suddenly acting like an 7 year old boy.

I was very pleased with the result of the gift.
TedMamere
_VISITCOMMUNITY
Moselle, France
Joined: May 15, 2005
KitMaker: 5,653 posts
AeroScale: 4,347 posts
Posted: Friday, May 02, 2008 - 01:53 AM UTC

Quoted Text

Jean-Luc, please enlist


Hi Nigel!

Oups! Sorry, I thought I alreay did...

Great work so far guys! It seems this Group Build will be very successful! Congratulations to Carl and Vance for their fines entries!

Here is my progress on Kozedub's La-7...


The model is build from the box. I'm not even sure to add seatbelts, I'll see... The kit is not bad at all, but if you want more detail you should buy the professional accessories boxing with the extra PE parts. In the standard kit I'm building, the cockpit interior is desperately empty.
Next step will be to add the decals. I won't use Masks this time (sorry Mal the Mask) since I want to try out Promodeller's new wash. I'm curious to see how the product will work over the paint and the decals. I think Gavia's La-7 kit is the perfect "Guinea Pig" because there are not many panel lines on it. I will also build some vehicles to go with the plane: Tamiya's Gaz-67B field car and Tarmac's resin Zis-5 Fuel Truck. They will be displayed on a Mark58 base representing the typical hexagonal pattern of some soviet airfields (I know it does look like a soccer ball). I will also use Tamiya's range of weathering products this time.


Voila, that's all...

Jean-Luc
LongKnife
_VISITCOMMUNITY
Jönköping, Sweden
Joined: April 25, 2006
KitMaker: 831 posts
AeroScale: 688 posts
Posted: Saturday, May 03, 2008 - 12:51 AM UTC
I've got a bit further, but so has everybody else, I can see.

Andrew: I understand your feelings about the lozenge decals. They gotta be huge. It looks good though, so keep it up.

Björn: Keep a contious smile and do like in the subway - Mind the gap! I'm sure you'll beat it.

Ted: Beautiful as allways. Will be nice to see if off the shelf products can beat old fashioned handicraft.

Anyway. We got a lousy may 1:st here, so I ran over to my paint shop. I took Eetus advice, so lightest comes first. I also decided to wait with the stabilizer until I had masked the rudder. Got a lot easier that way.


The oil pan seems to be white, blue or yellow depending on source, but yellow is soo colourful. I took a little reddish and a little brownish and a little what-the-h*llish, and it seems to match the "14" fair enough.


I'm also getting a better hang of the airbrush now, so I got the preshading a little narrower and also some differences in shade.


I'm hoping for [auto-censored]ty wheather tomorrow too so that I might get the tan and blue on.
propwash
_VISITCOMMUNITY
Charente, France
Joined: July 06, 2007
KitMaker: 289 posts
AeroScale: 231 posts
Posted: Wednesday, May 07, 2008 - 02:13 AM UTC
Here's my progress as it stands this afternoon. My pre-shading's been lost but I'll give her some detailing after the Klear's been applied.

Note: the prop's just been placed on loosely for the photo thus its slanted angle. I can see a few areas that need touching up but I'm generally quite happy. I used a different shade of olive drab than on my P-38 kit and think I like this shade better


PolarBear
_VISITCOMMUNITY
Västra Götaland, Sweden
Joined: February 23, 2005
KitMaker: 820 posts
AeroScale: 629 posts
Posted: Wednesday, May 07, 2008 - 10:59 AM UTC
Thanks for the nice words, Tony! Your 109 is comming along nicely, btw! Too bad about the auto-censoring! Now go wash your mouth with soap!

I will not give up just yet! I needed to attack the canyons at the wing roots. I did not want to sand down the upper surface of the wings and loose all the panellines and surfce detail. Instead, I decided to try and raise the plastic at the very wing roots (there are no panellines there etc).

First a layer of carefully placed putty and some sanding. The canyons became more shallow, but the surface became rough and ugly (= a "no go" for the NMF). Since it is more or less impossible to do any delicate and/or effective sanding at this area, I needed to try something that would come out smooth from the start. The method that I opted for is to apply multiple layers of future (approx. 10 by now). After each layer, I've raised and dipped the model every now and then for short period in order for the future to cure as smoothly as possible . Then a long wait until the next layer...


Remember that this is an experiment! It starts to look pretty ok, albeit that some sanding will be necessary. The question is, though - Will it be good enough for NMF!?!


Keep in mind that I can always cop out!! In the summer of 1970, just two weeks after adding the tenth kill mark on the NMF Shahak 59, IAF painted the whole aircraft in standard Israeli camouflage (and added the eleventh kill mark).

Shahak 59 in late June 1970

I have the decals for that scheme too, just in case...

Cheers! // PolarBear
LongKnife
_VISITCOMMUNITY
Jönköping, Sweden
Joined: April 25, 2006
KitMaker: 831 posts
AeroScale: 688 posts
Posted: Wednesday, May 07, 2008 - 10:27 PM UTC
Björn: I guess I got a bit carried away there. I have a friend who is married to a dental nurse, so I will ask her to see if she can cure my language by dental means . Anyway, you seem to fix that Mirage up good, so it would allmost be a shame to go camo, wouldn't it?

Unfortunately the summer seem to have arrived here, so nobody knows when inspiration shows up the next time. (There are only so many days of summer in Sweden, so we have to catch them when they show up, all seven of them)

This weekend I'm visiting the swedish armour museum, since it will close two years for moving. Anybody's in need of reference pics of anything? I'll be glad to help out.

You can see a swedish list of the inventory at http://www.pansarmuseet.se/samling.htm and if you put a hint here I'll see what I can do.
amegan
#243
_VISITCOMMUNITY
England - North East, United Kingdom
Joined: March 21, 2008
KitMaker: 996 posts
AeroScale: 915 posts
Posted: Thursday, May 08, 2008 - 11:55 AM UTC
Finally found a photo of Maxime Lenoir's Nieuport 16 in the Osprey reference, so on with the build. As the fuselage has already been joined the photos start from there. This is the first time I have used an airbrush on a whole model and I suspect I need a better airbush (and improved skills)
I think I should have thinned the brown paint more and suspect the silver underside should have been painted first, not last. I have sprayed the whole with a coat of Klear and fitted decals where I won't be able to reach later. Next rigging and top wing
Edouard Kit is v good so far, unlike Bjorn's Mirage build which I am following avidly. Andrew I am hanging on for more Fokker details, I have never built a lozenged camoflaged aircraft altho I do have a part built D.VII in my stash.
Pics follow if I have got the IT right


FalkeEins
_VISITCOMMUNITY
England - South East, United Kingdom
Joined: March 07, 2005
KitMaker: 868 posts
AeroScale: 690 posts
Posted: Saturday, May 10, 2008 - 03:44 AM UTC
..looking very nice Andrew ..is that 72nd ?

..some progress on my (first) build (for this campaign- I'm planning some 352nd FG P-51s after another ZG 26 Bf 110 )......this is the 72nd Italeri 110 C/D which I'm building as Wolfgang Falck's E, one of the first 110s to be finished in the overall black scheme.....

don't like the cockpit...or the fit of the engine nacelles much ...


24C here today & warm...since my Badger has given up the ghost - and I'm still deliberating over a replacement - this one is being finished in Halfords Satin Black followed by a misted layer of Volvo Dark Grey to give a nice 'scale' black finish.....


..in my haste to get painting forgot the yellow fuselage band..also added the nose air inlet from card, which was the only external/outline addition to the E variant


..undercarriage & gear wells are well detailed ..but the legs plug straight in whereas the main strut should be raked forward, as here..however that throws all the other struts and the gear doors out of alignment.... I've used clear coloured plastic from a craft set glued and filed to shape to replicate the wingtip nav lights. Still need to find out whether this machine had an a second port leading edge 'searchlight' fitted...

CMOT70
_VISITCOMMUNITY
Victoria, Australia
Joined: August 23, 2007
KitMaker: 629 posts
AeroScale: 539 posts
Posted: Saturday, May 10, 2008 - 05:49 PM UTC
Rapid progress on the DVII's now that the lozenge tapes are finished. I've just completed all the masking, sprayed and (the best part) pulled the masking off. I'm happy with all the striping. For some reason the camera lens plays havoc with the stripes, distorts them a bit. But in real life they have turned out nice and sharp and even. Maybe too perfect as i doubt that they were applied that well in the field.

So far i prefer the Bolle aircraft because of it's colours, the zebra striped Loerzer aircraft is quite commonly seen in model form.

I've lightly faded the lozenge, which probably isn't noticeable in the pics, but is easily seen up close. The shiny gloss will dissapear after final varnishing of course.

Needs some time to set before i put the remaining decals on. The fit of the main flying surfaces is good enough on these Eduard kits to allow full assembly after painting/decaling which makes things easier.


Andrew
betheyn
Staff MemberSenior Editor
AEROSCALE
#019
_VISITCOMMUNITY
England - South East, United Kingdom
Joined: October 14, 2004
KitMaker: 4,560 posts
AeroScale: 2,225 posts
Posted: Monday, May 12, 2008 - 08:22 AM UTC
Well, I have finally started the first of hopefully 2 builds for this campaign. The second one is a secret .
The first kit out of the blocks is Eduards F6F-3 Hellcat, which is a cracking little kit.

The kit near enough falls together, and I got to this stage in about 3 days. I have use the P.E set for the cockpit (I shall take some close up pics later).

The Hellcat will be in the markings of, BuNo. 40467, Lt. Alexander Vraciu VF-6, USS Intrepid, February 1944. For the main markings I shall use Miracle Masks.
Andy
RedwingNev
_VISITCOMMUNITY
England - East Midlands, United Kingdom
Joined: February 07, 2004
KitMaker: 911 posts
AeroScale: 415 posts
Posted: Monday, May 12, 2008 - 09:20 AM UTC
Just wanted to throw my hat into the ring for this one - I'll be building Trumpeters 1/24 Spitfire Vb in the markings of Wing Commander Bob Stanford Tuck, who had 27 confirmed kills when he was shot down in this aircraft in early 1942.
amegan
#243
_VISITCOMMUNITY
England - North East, United Kingdom
Joined: March 21, 2008
KitMaker: 996 posts
AeroScale: 915 posts
Posted: Monday, May 12, 2008 - 01:00 PM UTC
Neil - the Nieuport is 1:48, the eyes aren't up to a 1:72 bipe btw I like the 110, and the idea of the car paints.
Andrew - the Fokkers are looking good, I bought a D.VII about the same time as the Nieuport but a SMER kit - I should have guessed from the price. Your entry has at least urged me to build it as Udets machine with the red and white stripes for practice using the airbrush. For a first go , not too bad, wish I have done a better job on the cockpit now

Have added the top wing ro the Nieuport, next job add the aileron controls then rigging,


LongKnife
_VISITCOMMUNITY
Jönköping, Sweden
Joined: April 25, 2006
KitMaker: 831 posts
AeroScale: 688 posts
Posted: Monday, May 12, 2008 - 10:27 PM UTC
NOW it's getting confusing. Andrew is building a Fokker and a Nieuport, and the latter is really making me feel I have to build a doppeldekker. Andrew is building a Fokker and a Fokker and those are making me feel I have to start playing chess. Andy is building a Hellcat and that makes me guilty, because I had one going in a campaign last year. It's still in primer...

Anyway, I like them all, and I'm really keen on seing the checkerboard fuselages together with lozenge wings.

As for myself I have a camera software breakdown so I can't post any pics at the moment, but my 109 F is now in tan and blue, and I'm quite proud of the finish so far. So proud in fact that I'm scared to continue. I haven't really tried coating before but this time I thought I would glosscoat before decalling, flatcoating before washing and finally flatcoat to seal everything.

I've painted with Tamiya acrylics and have ModelMasters gloss and flat coats in house. Would those work together and, in that case, what should I use to thin the coats with?
gcn123
Joined: September 13, 2007
KitMaker: 69 posts
AeroScale: 60 posts
Posted: Tuesday, May 13, 2008 - 03:32 AM UTC
I'm doing a Hurricane using the below decals (LE-A) and i'm at the camo stage


Unfortunately the instruction sheets only show me a left to right profile so I don't know how it looks on the other side.

Does anyone have plans or a piccy I could follow, assuming their interpretation is correct as they cocked up on it being a sky blue spinner and tail band
vanize
_VISITCOMMUNITY
Texas, United States
Joined: January 30, 2006
KitMaker: 1,954 posts
AeroScale: 1,163 posts
Posted: Tuesday, May 13, 2008 - 03:35 PM UTC

Quoted Text

I'm doing a Hurricane using the below decals (LE-A) and i'm at the camo stage


Unfortunately the instruction sheets only show me a left to right profile so I don't know how it looks on the other side.

Does anyone have plans or a piccy I could follow, assuming their interpretation is correct as they cocked up on it being a sky blue spinner and tail band


the camo pattern was standard in type "A" and the mirror image version "B", so you should have no problem using the kit instructions or plenty of other sources for the camo lines.

the squadron letters will be in the same position on the other side, as will be the aircraft letter (so it will read from left to right A o LE, where o is the roundel), serial number, and fin flash

no idea if the skeleton exists on the starboard side, but i am pretty sure the boot to hitler's bum is not.
Bigskip
_VISITCOMMUNITY
England - South East, United Kingdom
Joined: June 27, 2006
KitMaker: 2,487 posts
AeroScale: 575 posts
Posted: Tuesday, May 13, 2008 - 08:20 PM UTC
Over a month in, but i've made a start, There's some great models already being worked on/finished, i need to catch up.

Butch O'Hares Wildcat - i intend making 3 (in 144, 72 and 48 scales) if time and commitment to other campaigns allows, but i'm starting small.

This is Sweet Models offering in 144 scale


I don't know what markings the second one will be in yet, it's not an ace so is not for this campaign.

Regards

Andy
jaypee
_VISITCOMMUNITY
Scotland, United Kingdom
Joined: February 07, 2008
KitMaker: 1,699 posts
AeroScale: 1,384 posts
Posted: Tuesday, May 13, 2008 - 09:54 PM UTC
Andy, you are a one man group build! Prolific I think the word is.