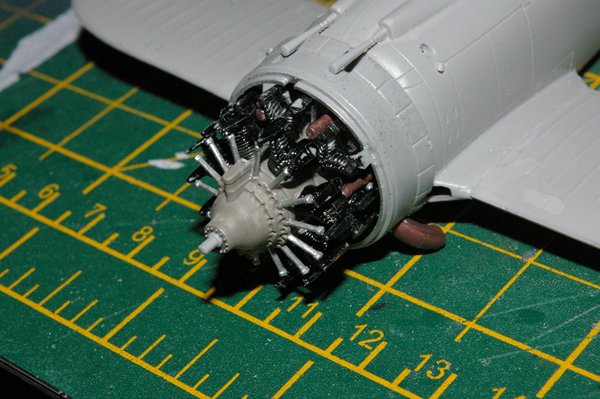
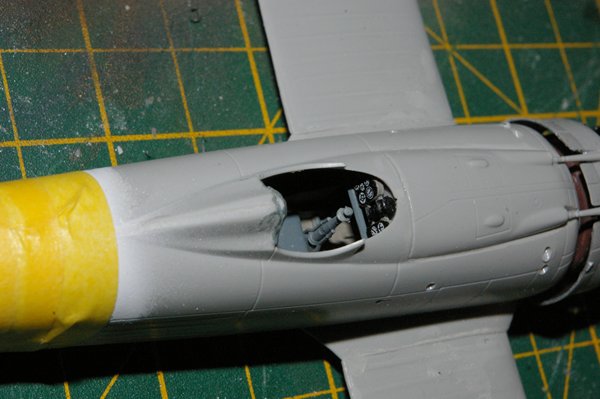
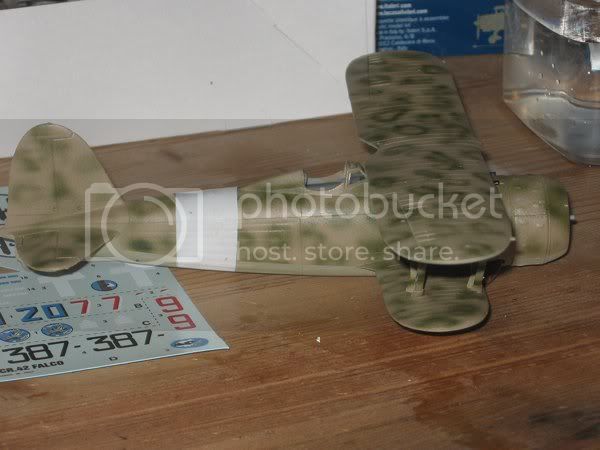
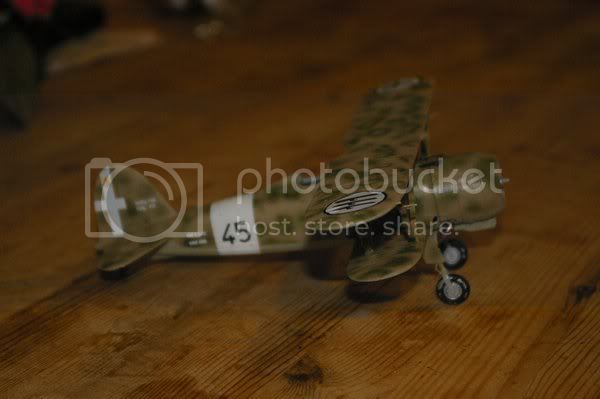
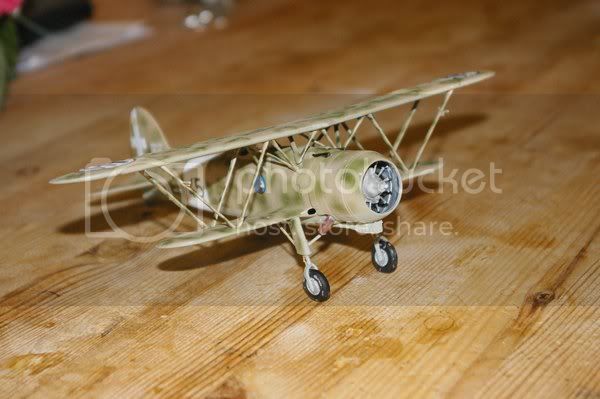
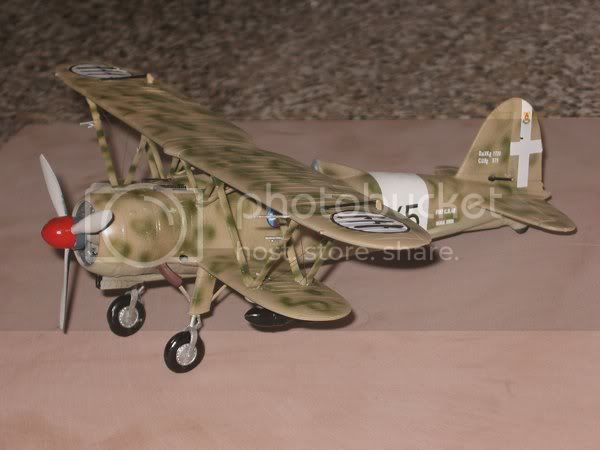
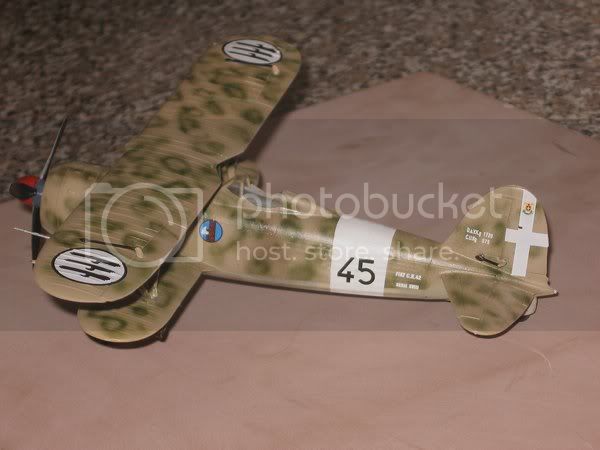
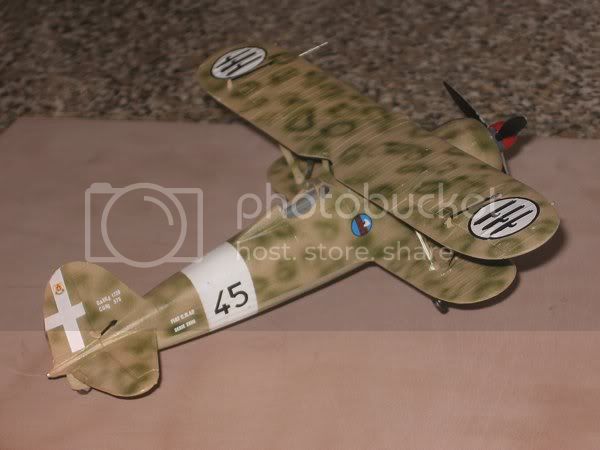
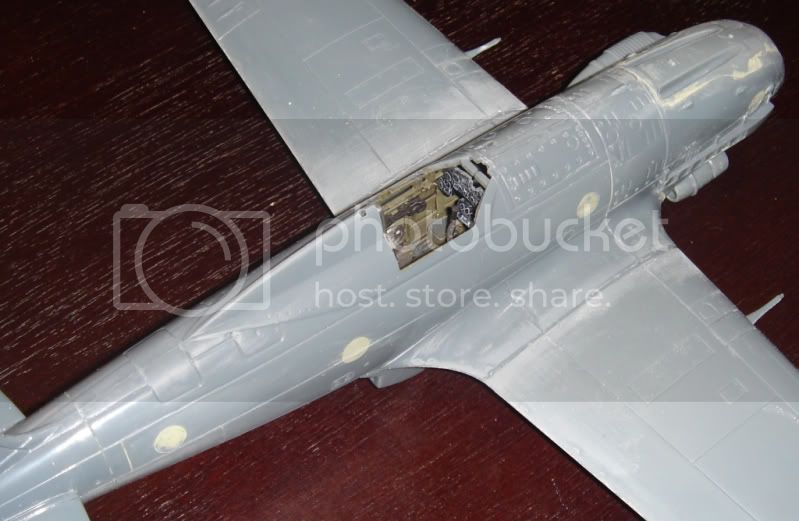
Finally got started last week on the Falco. Very nice kit (if a bit pricy) but fit is excellent so far. I am building OOB and decided to use the cockpit decals and flat instrument panels included in the kit but optional contoured ones are included. I like this aircraft and as a painting exercise will attempt the aircraft depicted on the box lid although I prefer them with spats
Air Campaigns
Want to start or join a group build? This is where to start.
Hosted by Frederick Boucher, Michael Satin
Made in Italy
Posted: Tuesday, January 26, 2010 - 12:35 AM UTC
Posted: Tuesday, January 26, 2010 - 10:51 AM UTC
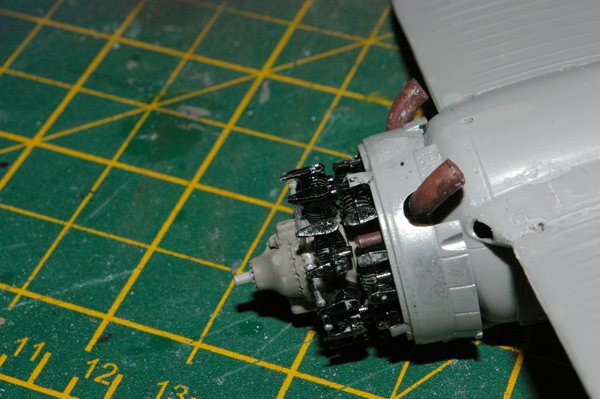
and on, engine clearly illusrates why PE is a good idea, valve pushrods look over-scale. White stripe painted first and masked. The engine cowling fitted very well.
Painting tonight.
Painting tonight.
Posted: Saturday, January 30, 2010 - 05:47 AM UTC
Feeling like the only one still building here, Hello, anybody there?
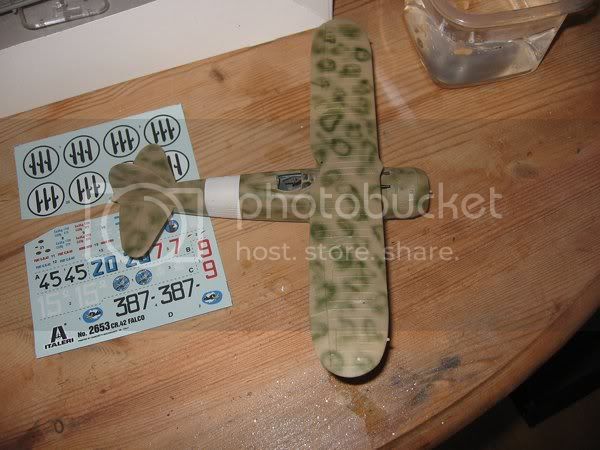
Blew some paint onto the Falco and found that I don't have the airbrush skills to do this scheme correctly. I think the green paint was too thick. Anyway I decided the effect was right even if the detail was wrong and bashed on. Top wing assembly was slightly fiddly but not difficult.
Next post will include decals and undercarriage
Posted: Saturday, January 30, 2010 - 06:59 AM UTC
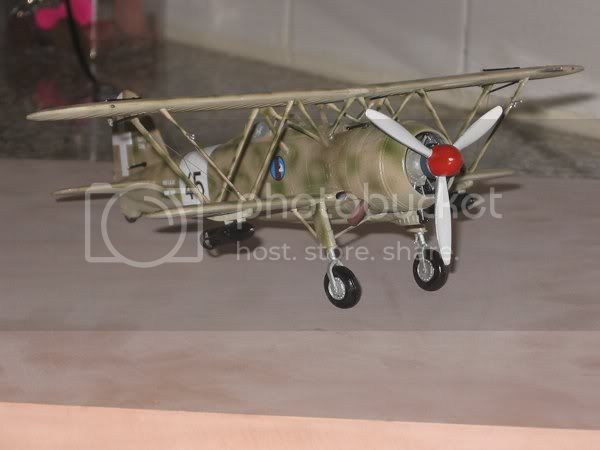
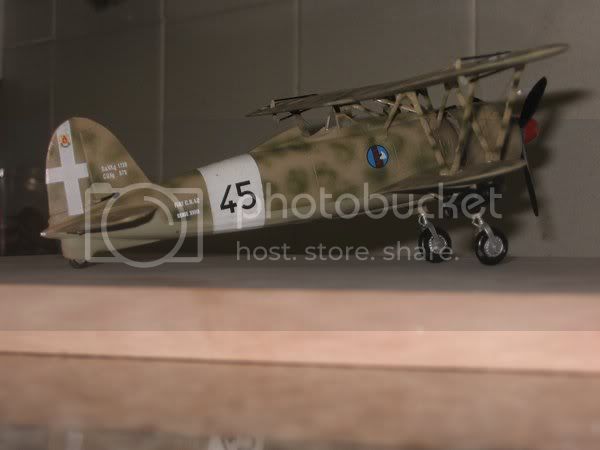
Undercarrige, first coat of clear and decals, good decals if a bit thick. Undercarriage design is difficult to guarantee wheels correctly aligned, more work required.
Prop, rigging, details and bombs left
guitarlute101
West Virginia, United States
Joined: December 18, 2006
KitMaker: 1,121 posts
AeroScale: 1,063 posts
Joined: December 18, 2006
KitMaker: 1,121 posts
AeroScale: 1,063 posts
Posted: Saturday, January 30, 2010 - 07:15 AM UTC
Andrew,
Looking good. That's a very difficult camo scheme.
Mark
Looking good. That's a very difficult camo scheme.
Mark
Posted: Saturday, January 30, 2010 - 07:37 AM UTC
A bit beyond me really, but fun trying
Matty_K
Nordrhein-Westfalen, Germany
Joined: January 31, 2010
KitMaker: 103 posts
AeroScale: 71 posts
Joined: January 31, 2010
KitMaker: 103 posts
AeroScale: 71 posts
Posted: Sunday, January 31, 2010 - 02:49 AM UTC
Hi Fred,
I'm new on Aeroscale and your "Made in Italy" campaign sounds very interesting.
It would be just the right topic for me to start a quick OOTB build of an Aermacchi MB.326.
As the campaign already started last year, is it still possible to participate?
Cheers
*Matty
I'm new on Aeroscale and your "Made in Italy" campaign sounds very interesting.
It would be just the right topic for me to start a quick OOTB build of an Aermacchi MB.326.
As the campaign already started last year, is it still possible to participate?
Cheers
*Matty
PolarBear
Västra Götaland, Sweden
Joined: February 23, 2005
KitMaker: 820 posts
AeroScale: 629 posts
Joined: February 23, 2005
KitMaker: 820 posts
AeroScale: 629 posts
Posted: Sunday, January 31, 2010 - 03:12 AM UTC
Quoted Text
Hi Fred,
I'm new on Aeroscale and your "Made in Italy" campaign sounds very interesting.
It would be just the right topic for me to start a quick OOTB build of an Aermacchi MB.326.
As the campaign already started last year, is it still possible to participate?
Cheers
*Matty
Yup! But you better get going, because it ends a March 1st (unless there is an extention). Welcome!
Cheers // PolarBear
Matty_K
Nordrhein-Westfalen, Germany
Joined: January 31, 2010
KitMaker: 103 posts
AeroScale: 71 posts
Joined: January 31, 2010
KitMaker: 103 posts
AeroScale: 71 posts
Posted: Sunday, January 31, 2010 - 03:34 AM UTC
Yep, I'm a little late to the party. So I feel a kind of "comfortable pressure" now!
In the box the kit looks quite straightforward. Fingers crossed.
Anyway, I really have to get going!
Cheers
*Matty
In the box the kit looks quite straightforward. Fingers crossed.
Anyway, I really have to get going!
Cheers
*Matty
Posted: Sunday, January 31, 2010 - 05:32 AM UTC
Hi Matty,
Welcome to Aeroscale and good luck for your Made in Italy build...
Jean-Luc
Welcome to Aeroscale and good luck for your Made in Italy build...
Jean-Luc
Matty_K
Nordrhein-Westfalen, Germany
Joined: January 31, 2010
KitMaker: 103 posts
AeroScale: 71 posts
Joined: January 31, 2010
KitMaker: 103 posts
AeroScale: 71 posts
Posted: Sunday, January 31, 2010 - 06:32 AM UTC
Hi Jean-Luc,
thank you and Björn for welcoming me on Aeroscale.
Because of the nearing end date I just rushed to my workbench and started immediately with the build.
Up to now I've cleaned an amount of parts and started the basic painting of the cockpit (as always)...
Good luck is always welcome!
By the way, do I have to announce any info regarding the kit or version for the campaign officially?
Cheers
*Mathias
PolarBear
Västra Götaland, Sweden
Joined: February 23, 2005
KitMaker: 820 posts
AeroScale: 629 posts
Joined: February 23, 2005
KitMaker: 820 posts
AeroScale: 629 posts
Posted: Sunday, January 31, 2010 - 12:42 PM UTC
Quoted Text
By the way, do I have to announce any info regarding the kit or version for the campaign officially?
You don't have to... but it would be nice!
We love to keep each other updated on our builds. You'll notice that you almost certainly will get comments and input along the way.
Pictures are nice.
Cheers! // PolarBear
Posted: Monday, February 01, 2010 - 10:20 AM UTC
Hi MattyK
Welcome to the addictive world of campaigns. Love to see some pics of the Aermacchi, if you can fathom out how to work the Aeroscale gallery, if not, Photobucket is easier.
Posted: Tuesday, February 02, 2010 - 11:52 AM UTC
Falco finihed! Well almost, in the middle of blowing the last coat of Finish when the airbrush crankshaft snapped!
I can recommend the Italieri kit, and enjoyed building it, on the the Aluminium campaign (if I can get the airbrush going again)
I am also planning an SM79 for the bomber campaign - maybe, Italian aircraft are really attractive.
I can recommend the Italieri kit, and enjoyed building it, on the the Aluminium campaign (if I can get the airbrush going again)
I am also planning an SM79 for the bomber campaign - maybe, Italian aircraft are really attractive.
thegirl
Alberta, Canada
Joined: January 19, 2008
KitMaker: 6,743 posts
AeroScale: 6,151 posts
Joined: January 19, 2008
KitMaker: 6,743 posts
AeroScale: 6,151 posts
Posted: Tuesday, February 02, 2010 - 02:14 PM UTC
Wow you guy's have some great builds and subjects ! It's be a joy watching this campaign
cinzano
Indiana, United States
Joined: January 13, 2009
KitMaker: 419 posts
AeroScale: 378 posts
Joined: January 13, 2009
KitMaker: 419 posts
AeroScale: 378 posts
Posted: Tuesday, February 02, 2010 - 02:22 PM UTC
Hi Matty,
Welcome to the campaign. I'm pretty easy about the deadline. If you can get it finished by March 1st that would be great. (I have about another 10 hours to go with mine).
If there are several people that, approaching the deadline, are still not done I may entertain an extension. (however, a little pressure can be just the motivation to see it through)
On a different note:I sent a private message to Airledge last week and haven't heard back yet. This is my first campaign as leader and I need some instruction on how to take his ribbon suggestion and get it formatted in such a way that I can hand them out to all those who successfully completed the mission come the end of the month.
Can anyone help (or point me in the correct direction?)
Cheers.
Fred
Posted: Tuesday, February 02, 2010 - 06:52 PM UTC
Hey Fred, there is a great thread by GaryKato called "Advice for Campaign leaders" or something similar, which goes into detail on ribbons and awards and such.
If I can find it I will link the thread, but it should cover all you need.
Cheers, D
Edit : Tutorial for Campaign Leaders
Found it !!
If I can find it I will link the thread, but it should cover all you need.
Cheers, D
Edit : Tutorial for Campaign Leaders
Found it !!
Phantom2
Östergötland, Sweden
Joined: April 18, 2006
KitMaker: 708 posts
AeroScale: 678 posts
Joined: April 18, 2006
KitMaker: 708 posts
AeroScale: 678 posts
Posted: Wednesday, February 03, 2010 - 04:14 AM UTC
FIAT C.R.42 ”Falco”
Hi all!
Andrew that was a really fast build!
Your Falco is very nice, good job!
I’ll build exactly the same kit as Andrew’s, just another boxing!
Italeris excellent little “Falcon”, but I will build it as a Swedish J.11 fighter!
This is the content of the roomy box;
Not many parts, but what’s there’s of good quality!
I will use an etched set from Eduard as the cockpit is really the only part of the kit lacking in detail!
All the Swedish decals will be from Flying Colors.
With this the construction can start;
The engine was painted with Alclad steel!
More to come….
Cheers!
Stefan E
Hi all!
Andrew that was a really fast build!
Your Falco is very nice, good job!
I’ll build exactly the same kit as Andrew’s, just another boxing!
Italeris excellent little “Falcon”, but I will build it as a Swedish J.11 fighter!
This is the content of the roomy box;
Not many parts, but what’s there’s of good quality!
I will use an etched set from Eduard as the cockpit is really the only part of the kit lacking in detail!
All the Swedish decals will be from Flying Colors.
With this the construction can start;
The engine was painted with Alclad steel!
More to come….
Cheers!
Stefan E
magnusf
Stockholm, Sweden
Joined: May 02, 2006
KitMaker: 1,953 posts
AeroScale: 1,902 posts
Joined: May 02, 2006
KitMaker: 1,953 posts
AeroScale: 1,902 posts
Posted: Wednesday, February 03, 2010 - 08:18 AM UTC
Posted: Wednesday, February 03, 2010 - 09:18 AM UTC
It was only fast because I built OOB. I agree the cockpit is not the best OOB but I needed something straight forward as a change as my Camel seemed to take forever
Phantom2
Östergötland, Sweden
Joined: April 18, 2006
KitMaker: 708 posts
AeroScale: 678 posts
Joined: April 18, 2006
KitMaker: 708 posts
AeroScale: 678 posts
Posted: Wednesday, February 03, 2010 - 11:13 PM UTC
Yes, It will be pefect for me during the build!
Tusen Tack!
Cheers!
Stefan E
Removed by original poster on 02/04/10 - 11:15:49 (GMT).
Posted: Wednesday, February 03, 2010 - 11:53 PM UTC
Mark, very interesting kit. It will be interesting to follow your Cant Z.501 build.
Very nice entry, Andrew. Nice job on the camouflage. I will soon face the challenge of doing the same camouflage on my Macchi 205.
Construction is now almost finished. Some details of the kit is a little too basic, but I hope it will still look good when finished. Strange feeling putting screws in a plastic kit, but it works ok with the use of a little filler and sanding.
More to follow
Matty_K
Nordrhein-Westfalen, Germany
Joined: January 31, 2010
KitMaker: 103 posts
AeroScale: 71 posts
Joined: January 31, 2010
KitMaker: 103 posts
AeroScale: 71 posts
Posted: Thursday, February 04, 2010 - 01:43 AM UTC
Hi all,
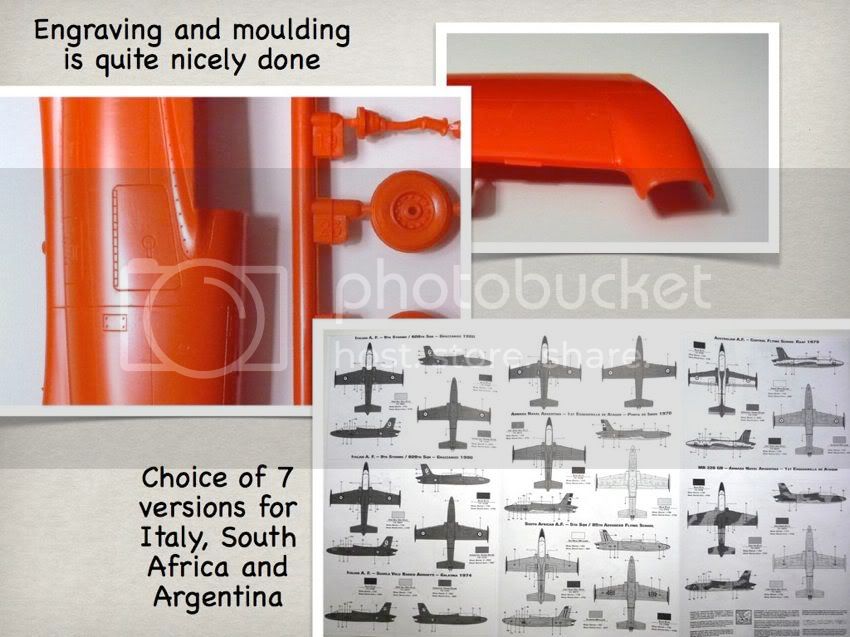
after making myself familiar with the photo posting function I just start with an overview of the Italeri kit: Aermacchi MB.326 in 1/48 scale.
Before opening the box, you first have to put your sunglasses on as the entire kit is moulded in screaming orange plastic!
Despite its age (former ESCI kit supposed to be around early 80s of last century) and a simple parts breakdown, the parts themselves have nice engravings surprisingly. The kit comes with well printed decals for seven attractive versions: 3 Italian training birds in overall orange, 1 South African version in overall NMF, 2 Argentine ARMADA versions in grey over white or dark green/tan over grey, 1 Australian trainer in the famous “FANTA can scheme” in orange/white over silver-grey.
I could hardly choose one version to build. Finally I’ve picked the Argentine grey over white scheme for this campaign and decided to buy more kits to realize at least three other schemes…
In the next post I’m going to show first picts of the build.
Cheers
*Matty
cinzano
Indiana, United States
Joined: January 13, 2009
KitMaker: 419 posts
AeroScale: 378 posts
Joined: January 13, 2009
KitMaker: 419 posts
AeroScale: 378 posts
Posted: Thursday, February 04, 2010 - 02:56 AM UTC
That definitely is bright. (reminds me of the kits I built as a kid: "molded in color". "no painting required").
...simpler times...
Did some seam checking with Mr. Surfacer this morning. Looks like priming and wheel wells will commence tonight.
Cheers,
Fred
...simpler times...
Did some seam checking with Mr. Surfacer this morning. Looks like priming and wheel wells will commence tonight.
Cheers,
Fred