Official Origami Campaign Thread
England - South East, United Kingdom
Joined: February 05, 2008
KitMaker: 1,381 posts
AeroScale: 1,110 posts
Posted: Wednesday, March 31, 2010 - 04:54 AM UTC
ok everyone, here it is.....................
The Official Origami Campaign Thread !
START DATE: April 1st, 2010
ENDS: April 1st, 2011
29Foxtrot
AussieReg
Blueheeler
Cannon99
eMan
jaypee
JMartine
litespeed
Littorio
ludwig113
navychief
Phantom2
PolarBear
SGTJKJ
ShawnM
The3rdPlacer
thegirl
vanize
VonCuda
Wolfsangel
wrenchy
i wish everyone involved an easy trouble free build.........eer yeah its not gonna happen is it...................
oh well, just have fun then

and remember to post lots of pictures.
paul
England - South East, United Kingdom
Joined: February 05, 2008
KitMaker: 1,381 posts
AeroScale: 1,110 posts
Posted: Wednesday, March 31, 2010 - 04:57 AM UTC
ok i'll start things off with...
" TARGET="_blank">
i'm away all weekend so i wont get anything done, but i hope to see some action when i get back.
all the best everyone.
paul
litespeed
 News Reporter
England - North West, United Kingdom
Joined: October 15, 2009
KitMaker: 1,976 posts
AeroScale: 1,789 posts
Posted: Thursday, April 01, 2010 - 10:46 PM UTC
Hi all
Just started my build of the Hobbyboss Avenger.
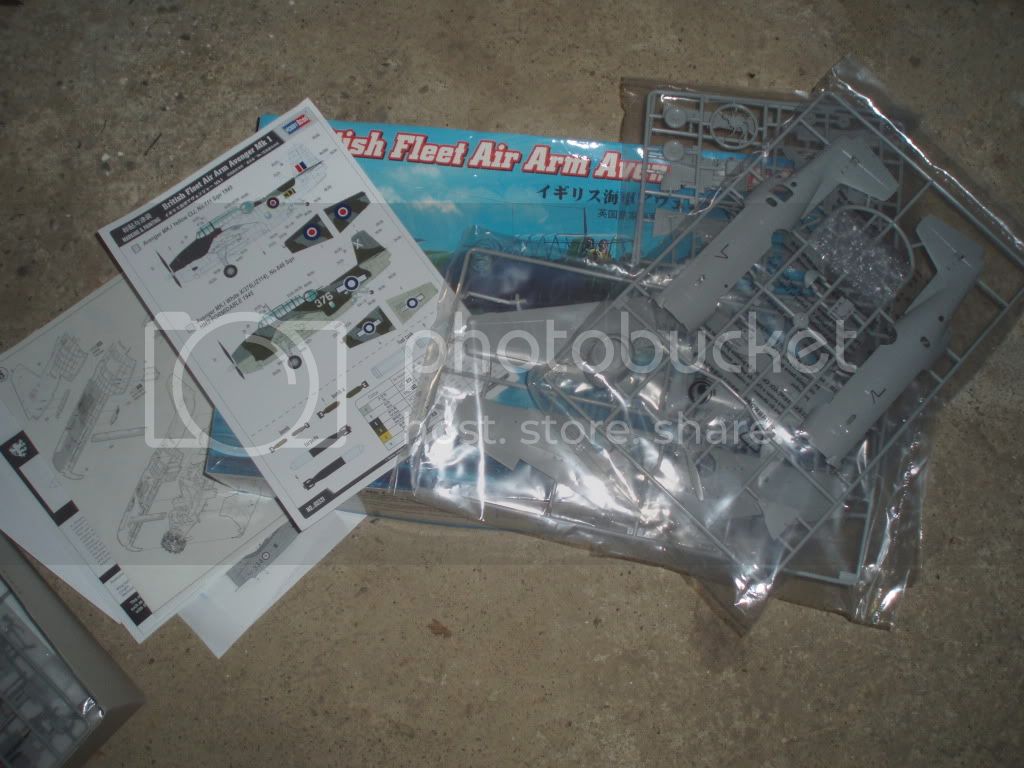
Looks great and I forgot there were resin bits included. I intend to do the FAA version that is mainly white except for the upper surface.
Started with the cockpit and bomb bay and discovered these annoying marks in the roof of the bomb bay.
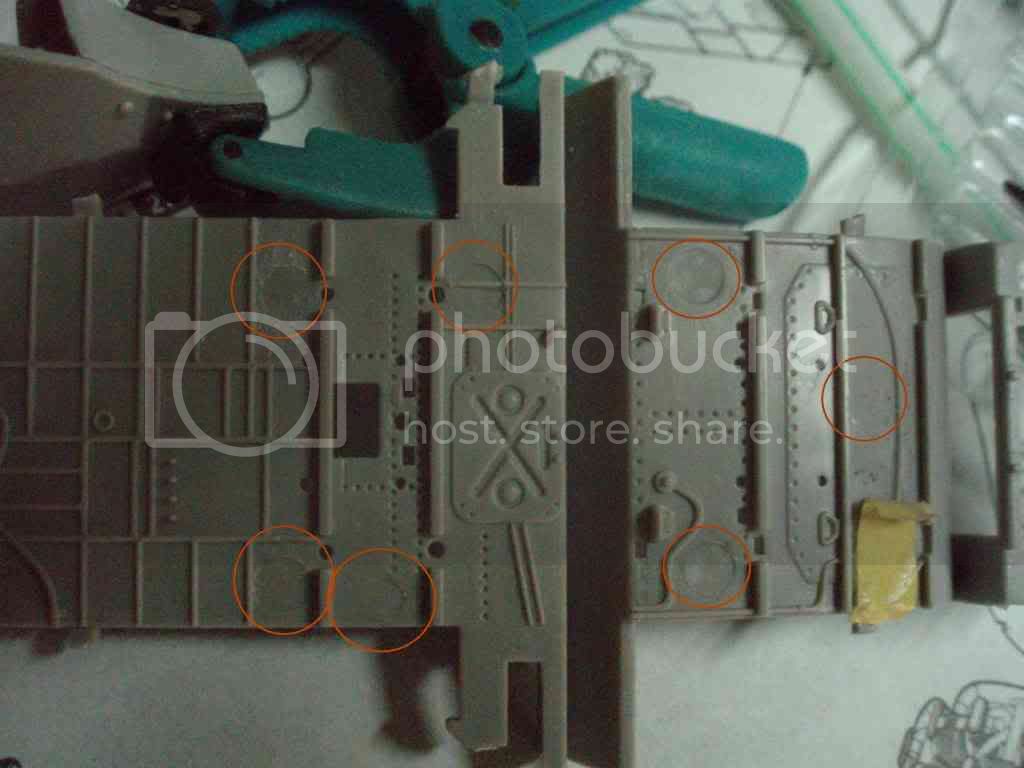
Easy enough to get rid off with a little care.
tim
litespeed
News Reporter England - North West, United Kingdom
Joined: October 15, 2009
KitMaker: 1,976 posts
AeroScale: 1,789 posts
Posted: Friday, April 02, 2010 - 02:36 AM UTC
Hi all
A few more bits to clean up in the Avengers office.
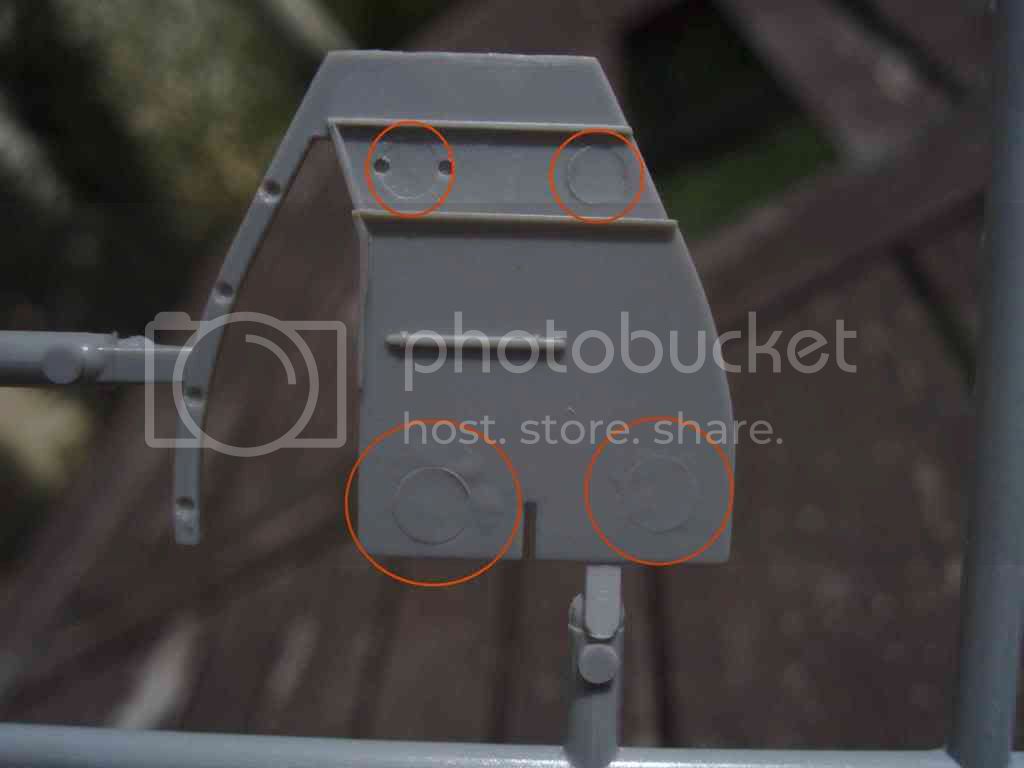
bulkhead between navigator and rear gunner
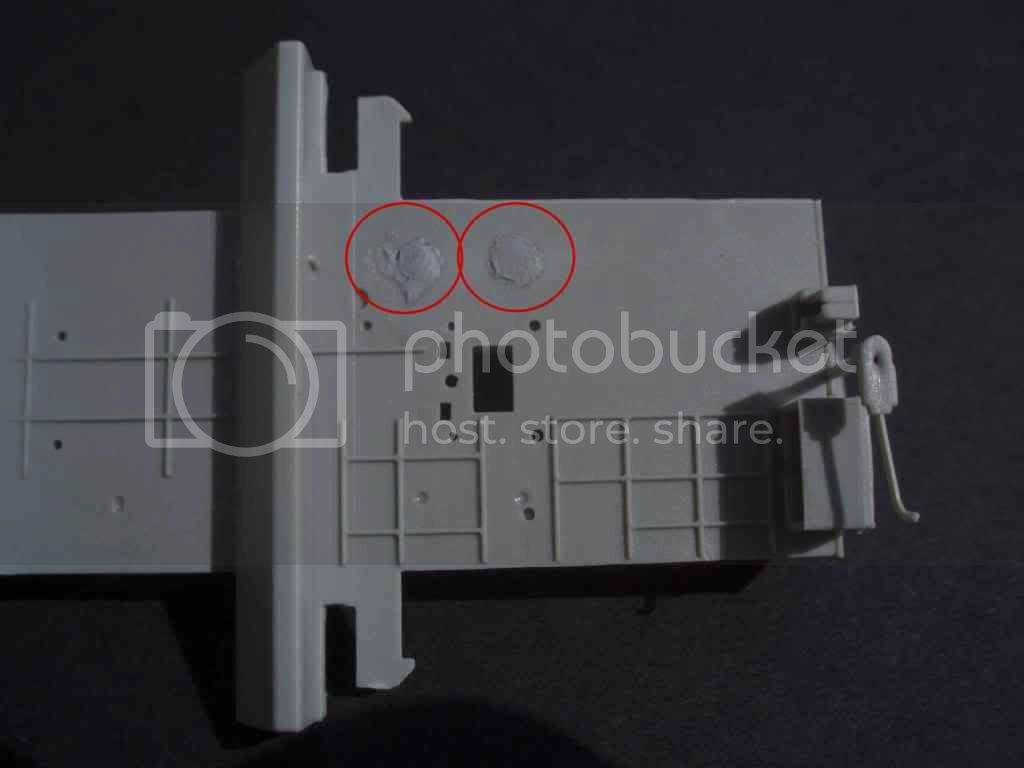
navigators floor
tim
Victoria, Australia
Joined: September 19, 2003
KitMaker: 708 posts
AeroScale: 674 posts
Posted: Friday, April 02, 2010 - 12:29 PM UTC
Hi all,
Choosing the Trumpeter 32 scale Swordfish Mk II with the Eduard exterior PE set, but while waiting for the PE to arrive, I started on the radial engine, which has a couple of added items:
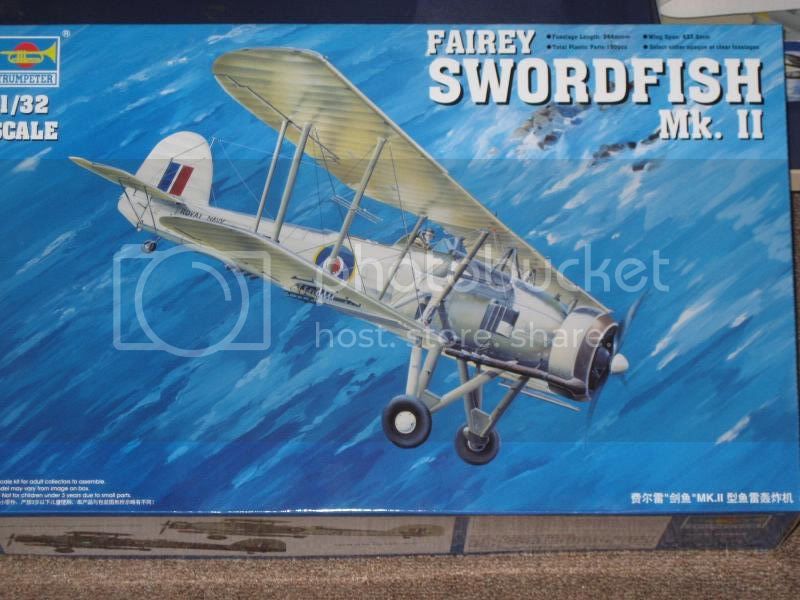 Boxart:
 I will not be following this or any of the cammo options of the kit.
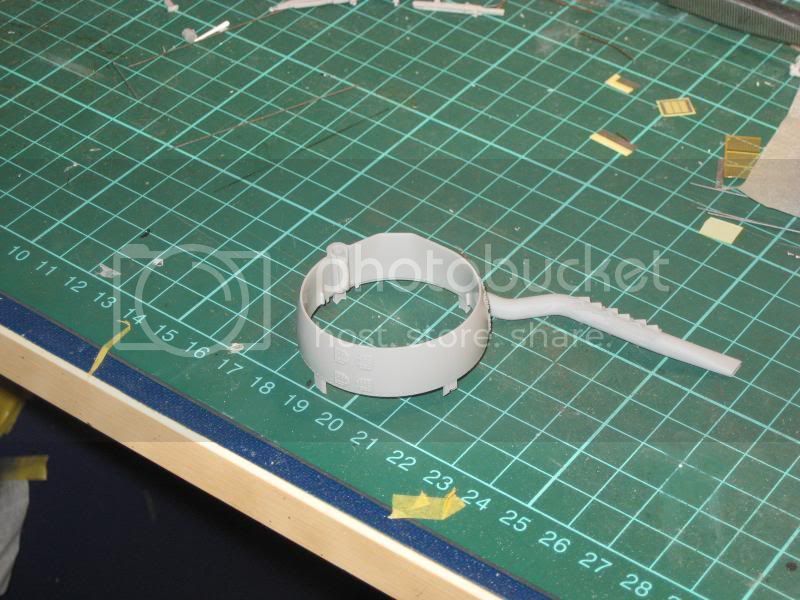 Note:
Note: Excess sprue used to fill the hollow channel inside the cowling.
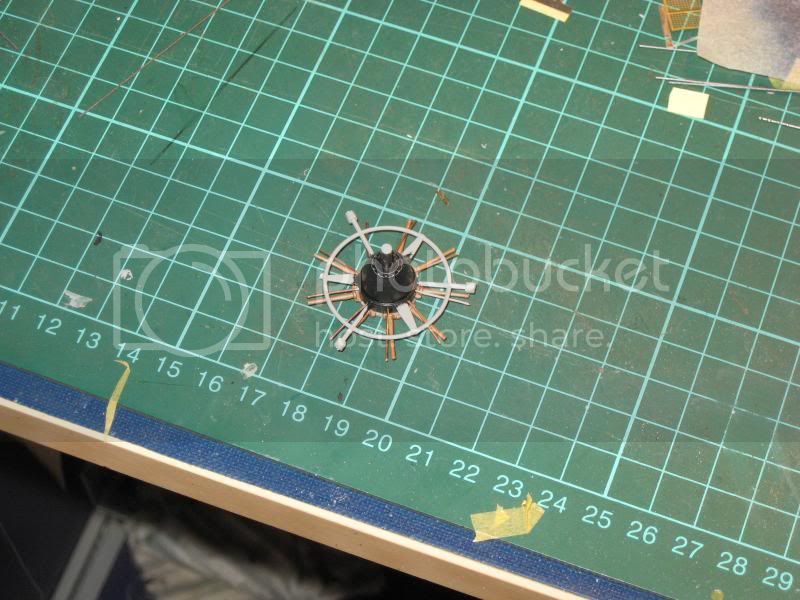
 Note:
Note: .20 thou copper wire, having drilled into the cranckcase to fix these individual pieces of wire, yet to be bent to shape to fit the spark plug fitting.
 Note:
Note: The inlet screen is a piece of mesh from the spares box cut to fit.
President:- Southern Model Club.
Those who never learn from history will always repeat it.
"When you go home tell them of us and say.
For your tomorrow we gave our today."
North Carolina, United States
Joined: November 28, 2005
KitMaker: 2,216 posts
AeroScale: 1,080 posts
Posted: Tuesday, April 06, 2010 - 12:25 PM UTC
Hi Paul
Started my A-7 last night. I'll try and get some cockpit photos up later in the week.
Hermon

"Those who would give up Essential Liberty
to purchase a little Temporary Safety,
deserve neither Liberty nor Safety."
Benjamin Franklin
England - South East, United Kingdom
Joined: February 05, 2008
KitMaker: 1,381 posts
AeroScale: 1,110 posts
Posted: Tuesday, April 06, 2010 - 07:37 PM UTC
excellent,glad to see people have started

i have the day off today so i should get something done,will post pix later.
paul
England - South East, United Kingdom
Joined: February 05, 2008
KitMaker: 1,381 posts
AeroScale: 1,110 posts
Posted: Wednesday, April 07, 2010 - 04:11 AM UTC
here we go!...................
i had the hacksaw out this morning,the cuts are pretty clean so minimal cleanup to be done :-)
" TARGET="_blank">
the only real problem that i have to sort is the casting problems on the forward part of the kit.
paul
North Carolina, United States
Joined: November 28, 2005
KitMaker: 2,216 posts
AeroScale: 1,080 posts
Posted: Wednesday, April 07, 2010 - 01:55 PM UTC
Looking good guys!
Here is a quick pic of my A-7 cockpit. I'll try and get this installed by the weekend and get the fuselage halves together.

Hermon
"Those who would give up Essential Liberty
to purchase a little Temporary Safety,
deserve neither Liberty nor Safety."
Benjamin Franklin
AussieReg
Associate Editor 
#007
Victoria, Australia
Joined: June 09, 2009
KitMaker: 8,156 posts
AeroScale: 3,756 posts
Posted: Wednesday, April 07, 2010 - 10:21 PM UTC
That office is looking great Hermon, super work !!
I put the fuselage and wings together on my bird for this build over the weekend, next step is to take to the wings with a razorsaw

so it remains to be seen whether we

or whether we

Before and after pics will be posted either way.
Cheers, D
ON the bench
Revell 1/24 '53 Corvette (building as '54)
Revell 1/24 BMW 507 Coupe and Cabrio
Italeri 1/48 Me262 B-1a/U1 Nightfighter
Monogram 1/24 '57 Chevy Nomad
Dragon 1/350 USS Frank Knox DD-742
England - South East, United Kingdom
Joined: February 05, 2008
KitMaker: 1,381 posts
AeroScale: 1,110 posts
Posted: Thursday, April 08, 2010 - 02:12 AM UTC
looking good voncuda,keep up the good work.
paul
Missouri, United States
Joined: November 24, 2008
KitMaker: 564 posts
AeroScale: 510 posts
Posted: Monday, April 12, 2010 - 02:47 AM UTC
now that my Messa-shnitzel is finished for the 109 campaign, I can start my 1/32 revell corsair for here.
It will be in Ira Keptfords colors, wings folded, canopy and engine will be tarped. I will detail out the wing fold area and gear bays with scratch built goodness. NO am will be used.
Nothing quite like getting lost in plastic
On the bench:Revell 1/48 P-38 Lightning built as an F-5B
Next:??
New Brunswick, Canada
Joined: December 25, 2009
KitMaker: 44 posts
AeroScale: 11 posts
Posted: Tuesday, April 13, 2010 - 09:42 PM UTC
I'm going to do a 1/48 Hawker Sea Fury FB. 11 (Trumpeter 02844) with the Eduard Big Ed set and Mike Grant Decals for RCN Sea Furies. I was originally going to do this kit for the True North Strong and Free Campaign but found this campaign before I started (so now I'm doing a Canadian Sherman for them).


Thanks,
Karl
England - South East, United Kingdom
Joined: February 05, 2008
KitMaker: 1,381 posts
AeroScale: 1,110 posts
Posted: Wednesday, April 14, 2010 - 01:19 AM UTC
excellent karl.
i've wanted one of those for a while now so i'll be interested on how you find the kit.
paul
North Carolina, United States
Joined: November 28, 2005
KitMaker: 2,216 posts
AeroScale: 1,080 posts
Posted: Wednesday, April 14, 2010 - 12:33 PM UTC
Karl, nice choice! I have that one in my stash and almost decided to build it for this campaign.

OK, as you can see in the first pic the wing to fuselage joints needed a couple of different coats of putty and mucho sanding. It's almost good enough but I"m gonna shoot some primer on her tonight and see if anything stands out. Second pic is the dreaded A-7 intake seams. I've done about all the filling and sanding I can do in this area. Again, I'll shoot some primer on her and see if there are any areas that still need attention.


This must be one of Hasegawas older kits. Lots of flash and a few fit problems......nothing too serious, just makes the build go a bit slower. Either way I'll take my time and do my best.
Hermon
"Those who would give up Essential Liberty
to purchase a little Temporary Safety,
deserve neither Liberty nor Safety."
Benjamin Franklin
North Carolina, United States
Joined: November 28, 2005
KitMaker: 2,216 posts
AeroScale: 1,080 posts
Posted: Wednesday, April 14, 2010 - 12:46 PM UTC
Almost forgot, I'll be using this decal sheet on my A-7. Will probably go with the blue lion "Valions".

Hermon
"Those who would give up Essential Liberty
to purchase a little Temporary Safety,
deserve neither Liberty nor Safety."
Benjamin Franklin
North Carolina, United States
Joined: November 28, 2005
KitMaker: 2,216 posts
AeroScale: 1,080 posts
Posted: Sunday, April 18, 2010 - 01:38 PM UTC
I managed to throw some paint on the Corsair this weekend. White on the bottom and Light Ghost Gray on the top.........because that's what I had handy.

The demarkation line was done with some blue-tak. I'm going to give it all a couple of days to dry and then shoot a coat of Future on it. While that's going on I'll assemble the fuel tanks, undercarriage, etc.
Hermon
"Those who would give up Essential Liberty
to purchase a little Temporary Safety,
deserve neither Liberty nor Safety."
Benjamin Franklin
AussieReg
Associate Editor #007
Victoria, Australia
Joined: June 09, 2009
KitMaker: 8,156 posts
AeroScale: 3,756 posts
Posted: Sunday, April 18, 2010 - 02:03 PM UTC
Lookin' good 'Cuda, nice clean paintwork.
Cheers, D
ON the bench
Revell 1/24 '53 Corvette (building as '54)
Revell 1/24 BMW 507 Coupe and Cabrio
Italeri 1/48 Me262 B-1a/U1 Nightfighter
Monogram 1/24 '57 Chevy Nomad
Dragon 1/350 USS Frank Knox DD-742
Missouri, United States
Joined: November 24, 2008
KitMaker: 564 posts
AeroScale: 510 posts
Posted: Sunday, April 18, 2010 - 02:40 PM UTC
quick and nice work thus far!
My launch date has been pushed back a month since we're moving into a new house.....more room (LOADS more) but the move will mean no build time.

I will start ASAP in the new place....until then I continue to collect research material.
Nothing quite like getting lost in plastic
On the bench:Revell 1/48 P-38 Lightning built as an F-5B
Next:??
New Jersey, United States
Joined: October 18, 2007
KitMaker: 1,698 posts
AeroScale: 96 posts
Posted: Monday, April 19, 2010 - 04:09 AM UTC
Tim I just got that one for my stash (sale at LuckyModel!) look forward to your build. Already thanking you for pointing out all those plugs
doing a good clean up job so far.
Rob really nice detailing of the engine.
Hermon Really nice job on the pit as well as the fuselage. Corsair looks good
always liked that bird.
England - South East, United Kingdom
Joined: February 05, 2008
KitMaker: 1,381 posts
AeroScale: 1,110 posts
Posted: Monday, April 19, 2010 - 05:32 AM UTC
looking good voncuda :-)
i've had to pack most of my modelling up for a couple of months as i'm have house work done inc new windows...this is going to be a real pain as i have about 4 builds needing paint etc but hopefully i can grab a few bits to work on every now and again...
North Carolina, United States
Joined: November 28, 2005
KitMaker: 2,216 posts
AeroScale: 1,080 posts
Posted: Wednesday, April 21, 2010 - 01:48 PM UTC
A bit more progress. I decided to try something a little different this time. I went ahead and washed the panel lines before applying the decals. Once all the excess wash is gone, I'll apply another coat of Future to seal it.

I'll let it set overnight and clean it up tomorrow.
Hermon
"Those who would give up Essential Liberty
to purchase a little Temporary Safety,
deserve neither Liberty nor Safety."
Benjamin Franklin
Florida, United States
Joined: January 14, 2009
KitMaker: 2,798 posts
AeroScale: 2,443 posts
Posted: Wednesday, April 21, 2010 - 02:40 PM UTC
Hermon stunning work my friend .how are you going to dirty up the decals

Build On,
Justin
"From time to time, the tree of liberty must be watered with the blood of
tyrants and patriots."
- Thomas Jefferson
IPMS#47611
England - South East, United Kingdom
Joined: February 05, 2008
KitMaker: 1,381 posts
AeroScale: 1,110 posts
Posted: Thursday, April 22, 2010 - 01:56 AM UTC
Quoted Text
A bit more progress. I decided to try something a little different this time. I went ahead and washed the panel lines before applying the decals. Once all the excess wash is gone, I'll apply another coat of Future to seal it.
I'll let it set overnight and clean it up tomorrow.
Hermon
hey,that looks really really nice,what did you use for your wash?
paul
Moselle, France
Joined: May 15, 2005
KitMaker: 5,653 posts
AeroScale: 4,347 posts
Posted: Thursday, April 22, 2010 - 03:17 AM UTC
Hi all,
Here is my latest finished build and I think it will fit perfectly the Origami Campaign: it is Tamiya's 1:48 scale F4U-1D kit built with the wings, of course, in the folded position...
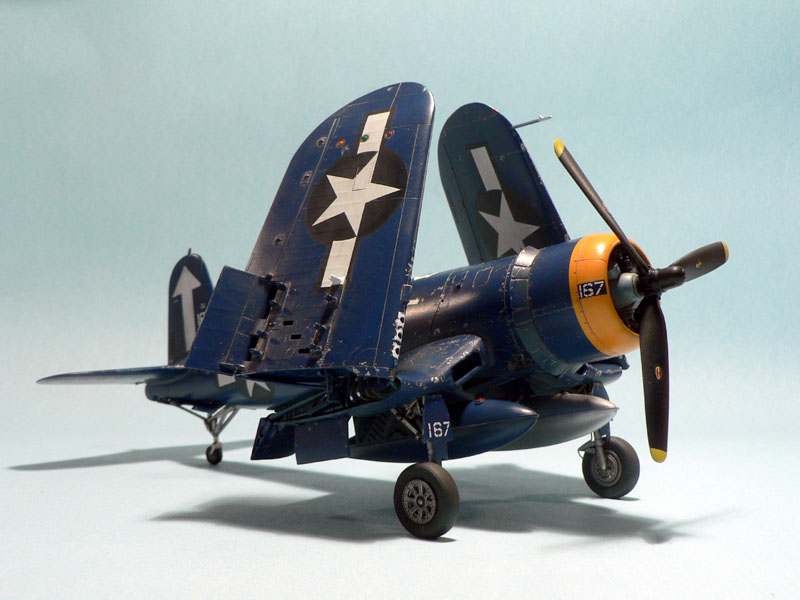

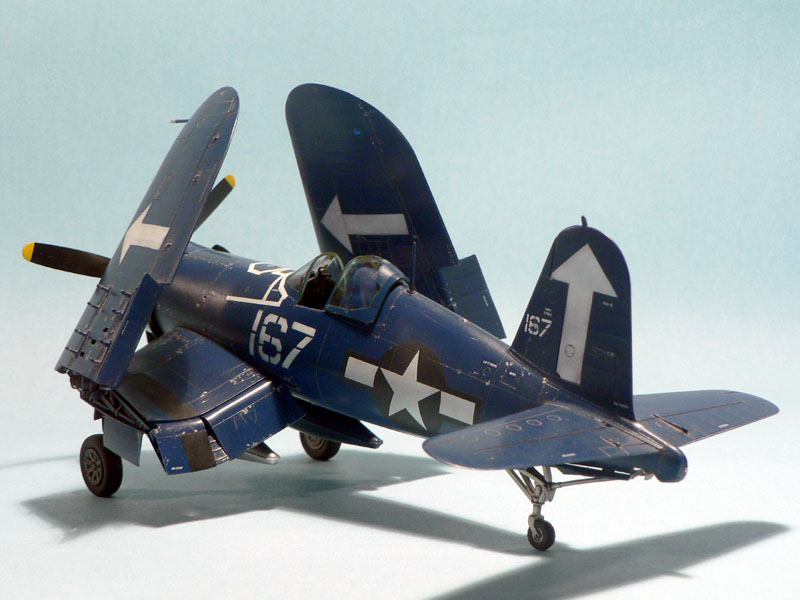
Apart from some wires and cables, the model is from the box. It will be placed in a diorama setting along with the new Tamiya Navy figures on an Eduard US Carrier Deck.
I'm looking forward to see all the entries for this interesting campaign!
Jean-Luc
Better think one hour and build five minutes...
Than think five minutes and build an hour!