
Air Campaigns
Want to start or join a group build? This is where to start.
Want to start or join a group build? This is where to start.
Hosted by Frederick Boucher, Michael Satin
OFFICIAL: Spitfire/Seafire Campaign
bdanie6

Joined: November 09, 2008
KitMaker: 615 posts
AeroScale: 459 posts

Posted: Wednesday, April 27, 2011 - 01:17 AM UTC
Thanks Tim, Jesper. Nearing the finish line now 

bdanie6

Joined: November 09, 2008
KitMaker: 615 posts
AeroScale: 459 posts

Posted: Wednesday, April 27, 2011 - 05:18 AM UTC
Alright kids, as promised  The Spitfire Mk I that Richard Hillary was shot down in and inspired him to write his book "The Last Enemy"
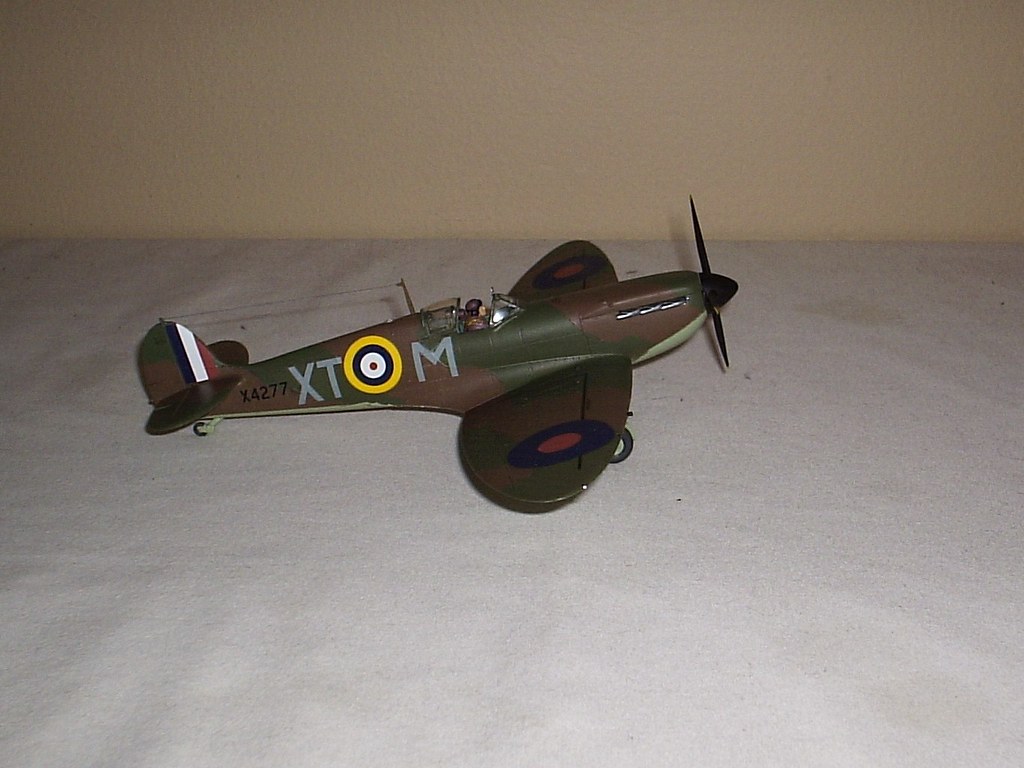
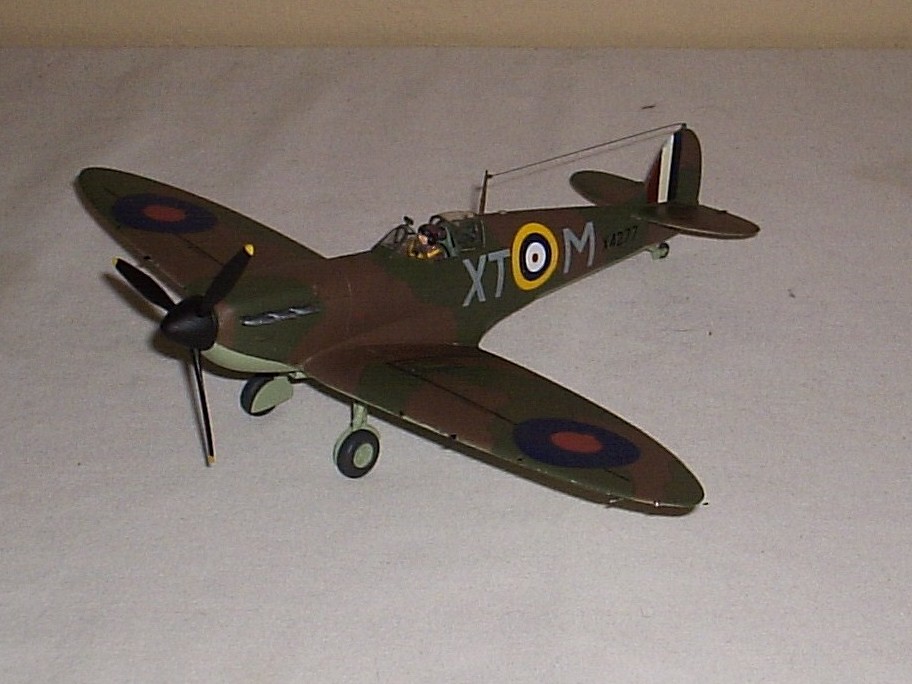
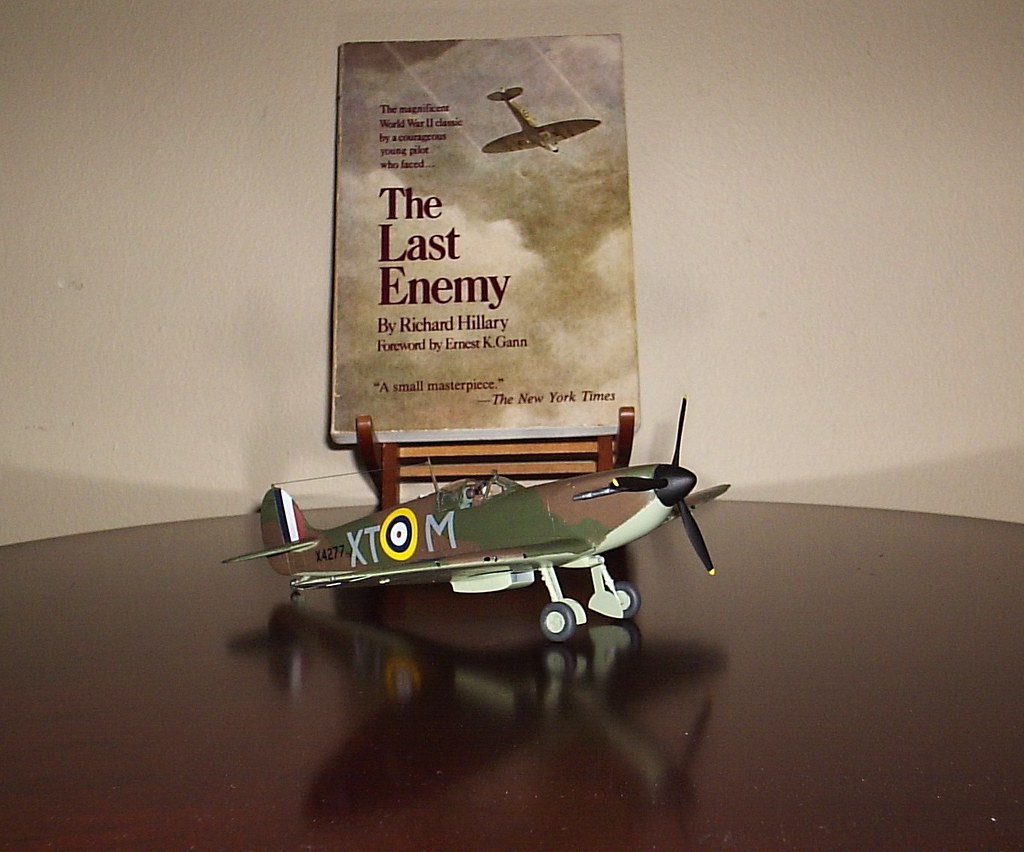
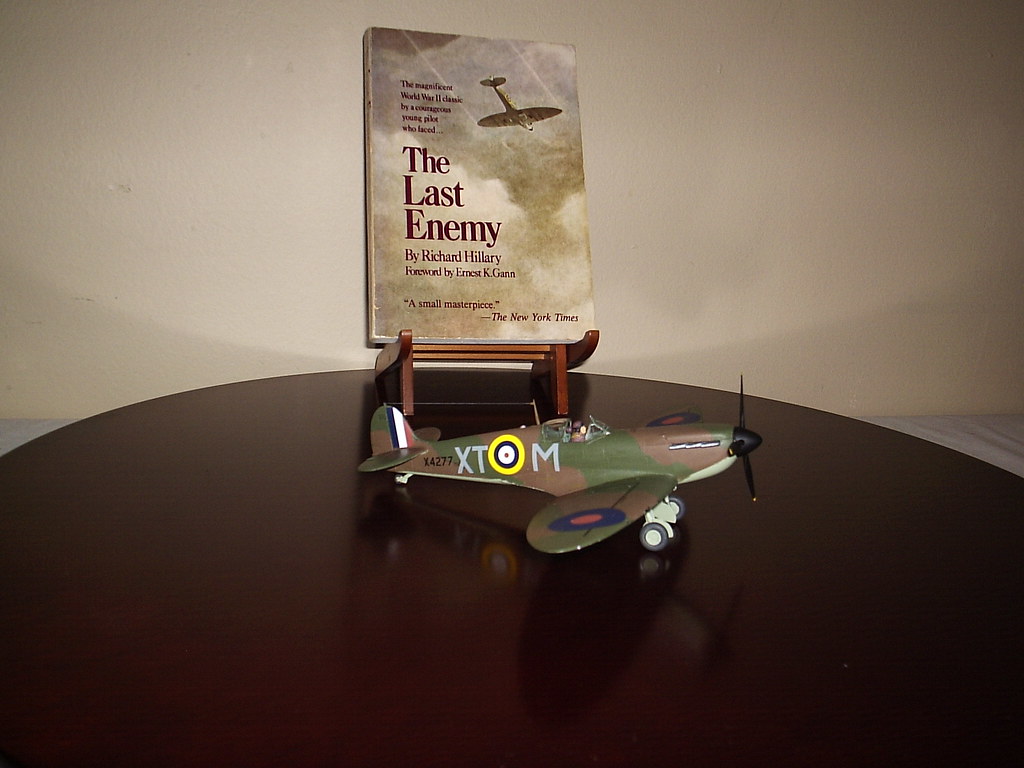
Ta-Da!
So...where is the gallery?


Thanks guys, this one has been fun
Later
 The Spitfire Mk I that Richard Hillary was shot down in and inspired him to write his book "The Last Enemy"


Ta-Da!

So...where is the gallery?


Thanks guys, this one has been fun
Later


KrisMax

Joined: January 23, 2010
KitMaker: 156 posts
AeroScale: 139 posts

Posted: Saturday, April 30, 2011 - 12:09 AM UTC
Bruce,
That's a good looking Spit you have there. It always makes a more satisfying build to have some historical relevance. I'm making a mental note to keep an eye out for that book. Thanks for posting.
I'm going to join in now with this offering:
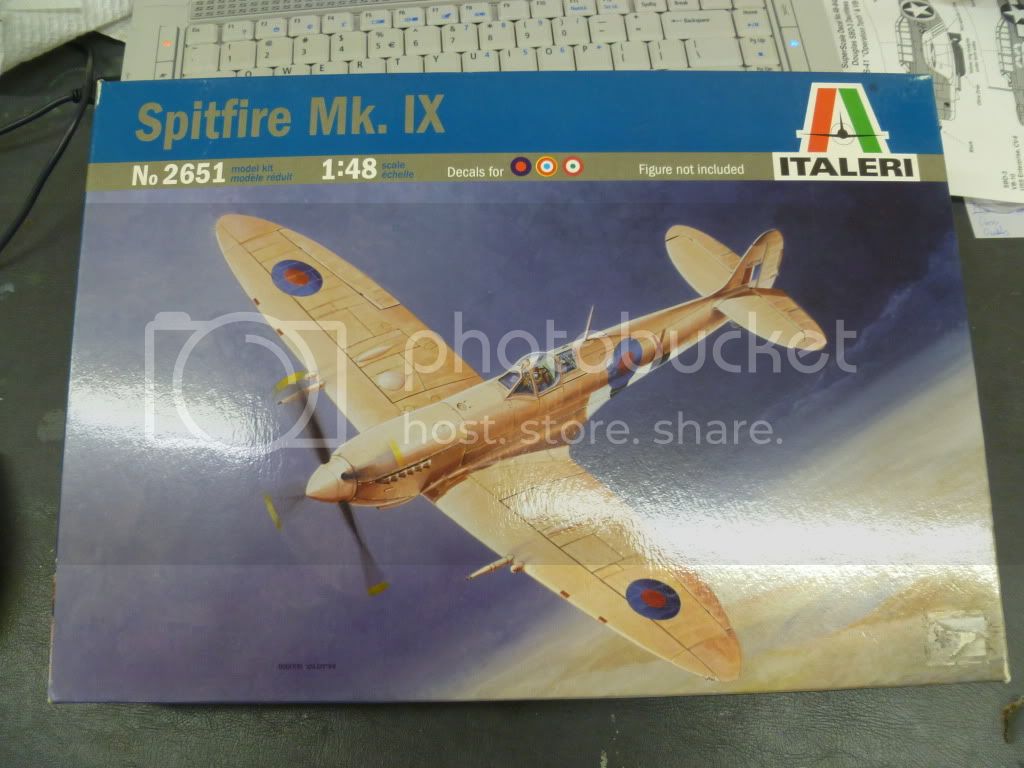
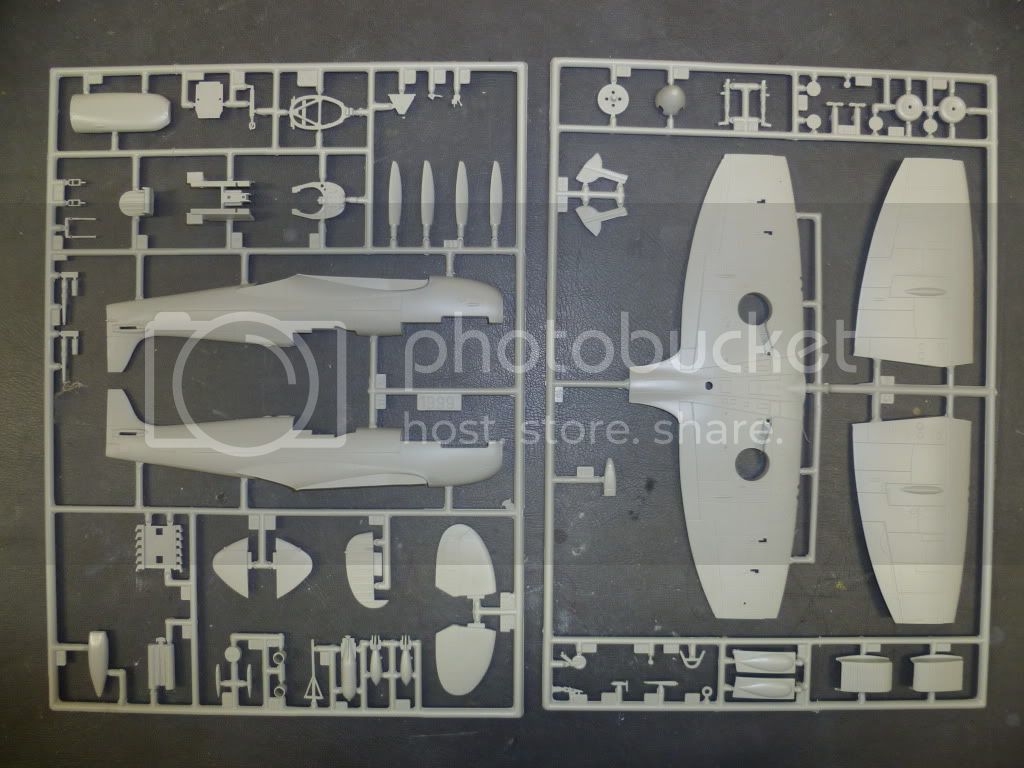
Apparently this 1:48 Spitfire Mk IX is an Occidental kit reboxed by Italeri. A quick look at the sprues and it has some very nice detail, not up to the standard of present day releases but still very good. The cockpit is basic but that's ok for me, I normally build with the canopy closed.
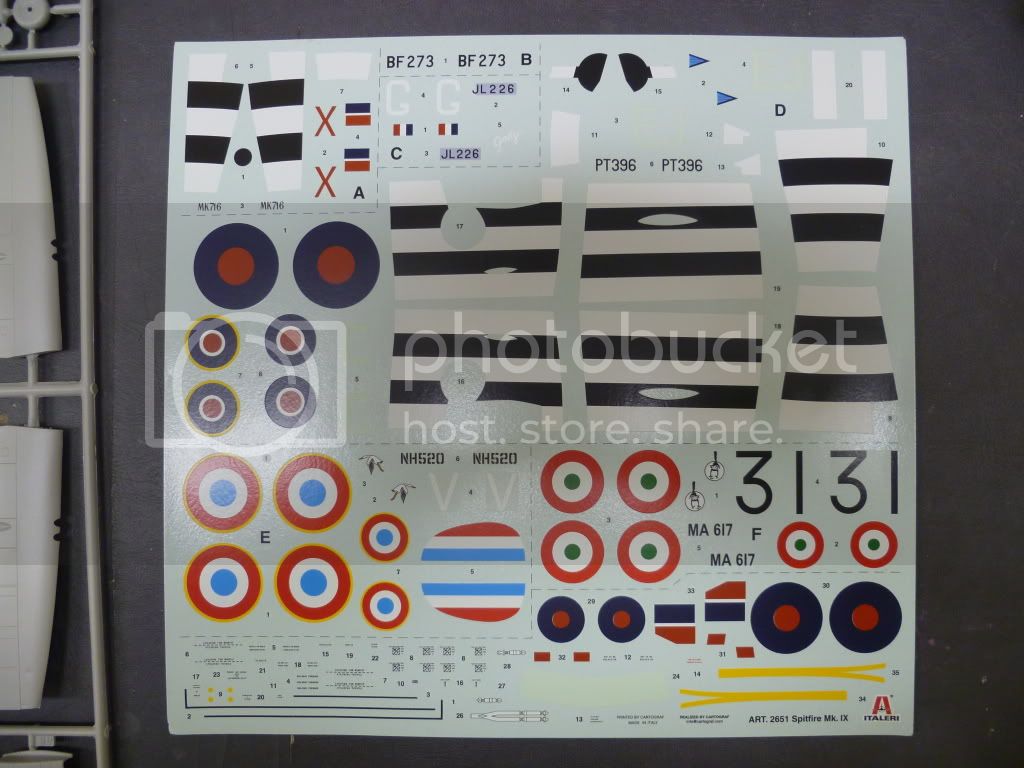
There are six marking options - plenty of variety on a Cartograf sheet.
OK, now to get out the sprue cutters.........
That's a good looking Spit you have there. It always makes a more satisfying build to have some historical relevance. I'm making a mental note to keep an eye out for that book. Thanks for posting.
I'm going to join in now with this offering:

Apparently this 1:48 Spitfire Mk IX is an Occidental kit reboxed by Italeri. A quick look at the sprues and it has some very nice detail, not up to the standard of present day releases but still very good. The cockpit is basic but that's ok for me, I normally build with the canopy closed.

There are six marking options - plenty of variety on a Cartograf sheet.

OK, now to get out the sprue cutters.........

mtnflyer

Joined: March 08, 2009
KitMaker: 394 posts
AeroScale: 360 posts

Posted: Saturday, April 30, 2011 - 03:01 AM UTC
Welcome to the campaign, Simon. Nice kit your bringing in.
Excellent end to your build, Bruce, and quickly done too. When you sit done at the desk, I quess you sit down to finish. I'm impressed.
I was wondering if you could share the camo masking technique you used? Or did you freehand? I'm always looking for a better way.
Guy
Excellent end to your build, Bruce, and quickly done too. When you sit done at the desk, I quess you sit down to finish. I'm impressed.
I was wondering if you could share the camo masking technique you used? Or did you freehand? I'm always looking for a better way.
Guy
MikeMx

Joined: May 22, 2008
KitMaker: 649 posts
AeroScale: 434 posts

Posted: Saturday, April 30, 2011 - 04:39 AM UTC
If it's of any interest to any Spitfire builders we have the new Italeri Spitfire VI and the new Admiral Seafire F45 in stock at discounted prices.
http://www.mjwmodels.co.uk/home
thanks
Mike
http://www.mjwmodels.co.uk/home
thanks
Mike
litespeed


Joined: October 15, 2009
KitMaker: 1,976 posts
AeroScale: 1,789 posts

Posted: Saturday, April 30, 2011 - 07:25 AM UTC
Hi Simon
The Italeri 1/48 MkIX is a very good kit, enjoy.
Bruce nice finish on your Spit, I like the inclusion of the pilot.
All the best.
tim
The Italeri 1/48 MkIX is a very good kit, enjoy.
Bruce nice finish on your Spit, I like the inclusion of the pilot.
All the best.
tim
bdanie6

Joined: November 09, 2008
KitMaker: 615 posts
AeroScale: 459 posts

Posted: Monday, May 02, 2011 - 12:17 PM UTC
Guy, I cheat like hell  Tamyia supplies a 1/48 scale drawing of the "B" scheme in he box of their Mk I Spit, and an "A" scheme drawing with their Spit MkV. All I do is make 4 or 5 copies of the scheme, paint the underside and the lighter top side colour onto the model. Then I cut out the parts to stay light coloured from the copies, use them to make masking tape masks....put them on the plane and then spray the RAF Dark green on. Remember, Supermarine used large rubber mats to cover the plane when painting it. That gave a crisp hard demarcation line between colours, not the fuzzy soft edges as seen on US planes
Later
 Tamyia supplies a 1/48 scale drawing of the "B" scheme in he box of their Mk I Spit, and an "A" scheme drawing with their Spit MkV. All I do is make 4 or 5 copies of the scheme, paint the underside and the lighter top side colour onto the model. Then I cut out the parts to stay light coloured from the copies, use them to make masking tape masks....put them on the plane and then spray the RAF Dark green on. Remember, Supermarine used large rubber mats to cover the plane when painting it. That gave a crisp hard demarcation line between colours, not the fuzzy soft edges as seen on US planes
Later

Posted: Sunday, May 08, 2011 - 09:44 AM UTC
well it looks like as i predicted, i'm going to have to concentrate on only one of the spitfires i'm building to make sure i do get finished.
although all four are now at the painting stage i doubt i could finish them all in time.
it'll be the new tool airfix MkIa i'll be carrying on with.

my workbench looking like castle bromwich circa 1940!

the interior of the new airfix kit, i like this a lot, adequate for an oob build but also some scope for extra details

the bad part.
where the flaps join is just all over the place,if you want to get the front of the wing and the gun ports to look right.

what i noticed is that there are little hinges that slightly stick out in front of the ailerons, when i cut these away on the left hand wing i got a lot better fit.
on the right hand wing in this pic you can just see the little hinges pushing the wing slightly out of alignment.

i had to fill and make good the flaps. at the time of posting i've just given the underside a coat of sky and it looks pretty smooth.
although all four are now at the painting stage i doubt i could finish them all in time.
it'll be the new tool airfix MkIa i'll be carrying on with.

my workbench looking like castle bromwich circa 1940!

the interior of the new airfix kit, i like this a lot, adequate for an oob build but also some scope for extra details

the bad part.
where the flaps join is just all over the place,if you want to get the front of the wing and the gun ports to look right.

what i noticed is that there are little hinges that slightly stick out in front of the ailerons, when i cut these away on the left hand wing i got a lot better fit.
on the right hand wing in this pic you can just see the little hinges pushing the wing slightly out of alignment.

i had to fill and make good the flaps. at the time of posting i've just given the underside a coat of sky and it looks pretty smooth.
Posted: Sunday, May 08, 2011 - 10:06 PM UTC
Nice build, Bruce. Always great to tie a model up with real life events. I should pick up that book on Ebay. Sounds like an interesting book.
Great choice of kit, Simon. I will follow your build and see how it comes out. Great with all the decal options.
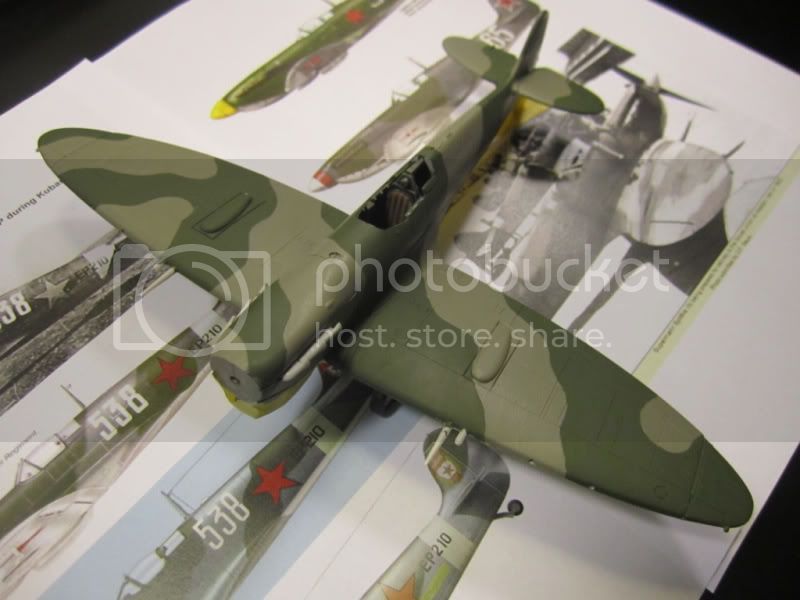
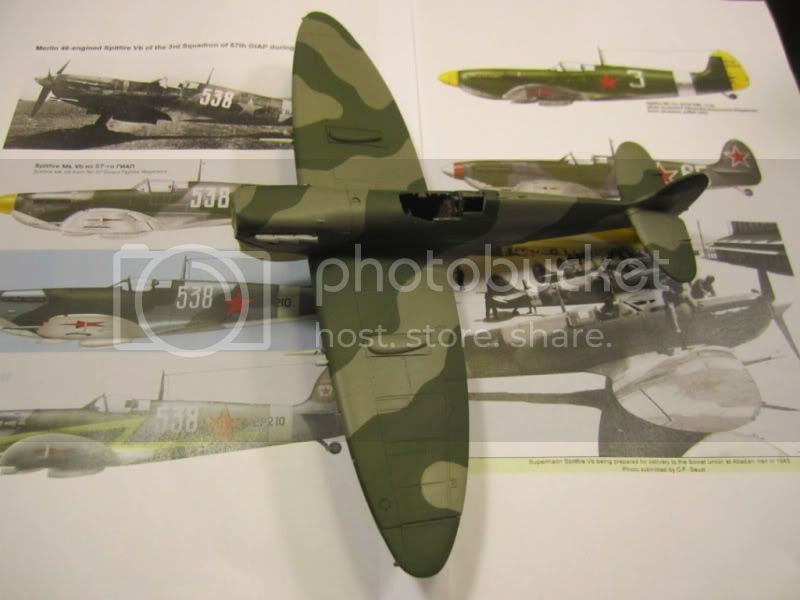
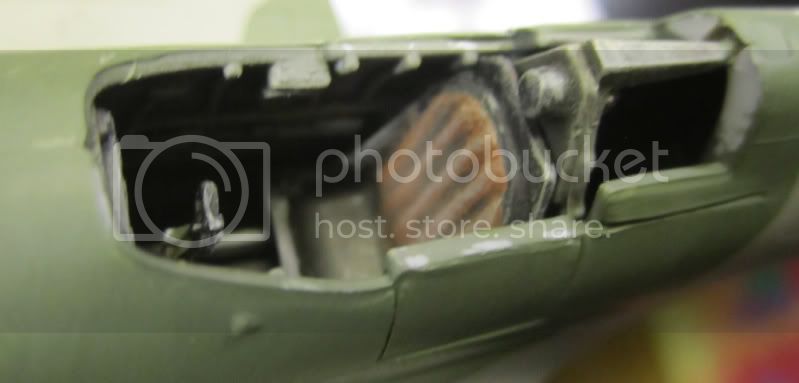
I have made a little more progress on my Soviet Spitfire. The cockpit is basic, but the glazing will be closed so that is fine. It is slow going, but I am getting there.
Great choice of kit, Simon. I will follow your build and see how it comes out. Great with all the decal options.
I have made a little more progress on my Soviet Spitfire. The cockpit is basic, but the glazing will be closed so that is fine. It is slow going, but I am getting there.


litespeed


Joined: October 15, 2009
KitMaker: 1,976 posts
AeroScale: 1,789 posts

Posted: Monday, May 09, 2011 - 10:51 AM UTC
Hi Tony, the Castle Bromich production line looks great, a pity you wont be able to finish all four. I like the pilots sitting patiently twiddling their thumbs, nice one.
Looking excellent Jesper the camouflage and the slightly worn looking pilots seat look the part.
Keep up the excellent work so far folks.
tim
Looking excellent Jesper the camouflage and the slightly worn looking pilots seat look the part.
Keep up the excellent work so far folks.
tim
Posted: Tuesday, May 10, 2011 - 10:33 AM UTC
Quoted Text
Hi Tony, the Castle Bromich production line looks great, a pity you wont be able to finish all four. I like the pilots sitting patiently twiddling their thumbs, nice one.
Looking excellent Jesper the camouflage and the slightly worn looking pilots seat look the part.
Keep up the excellent work so far folks.
tim
its Phil not Tony BTW.

Posted: Thursday, May 12, 2011 - 08:01 PM UTC
Thanks for the comment, Tim.
My project went ahead perfectly until I added the final varnish before the weathering could begin. Then .... a major set back.
Although I left my Spitfire for more than 24 hours after applying the decals something in the decal solvent reacted with the varnish. Big white blemishes was the result.

 A horror show for a modeller like me!
Now I will have to go back and repaint some of it. The colour will never be exactly the same before and after a coat of varnish, but I hope it will not be to visible when finished.
More to follow
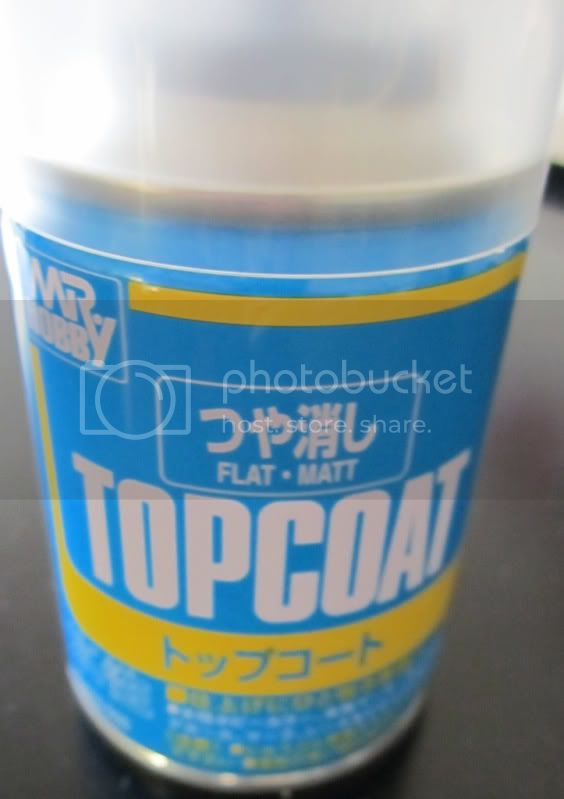
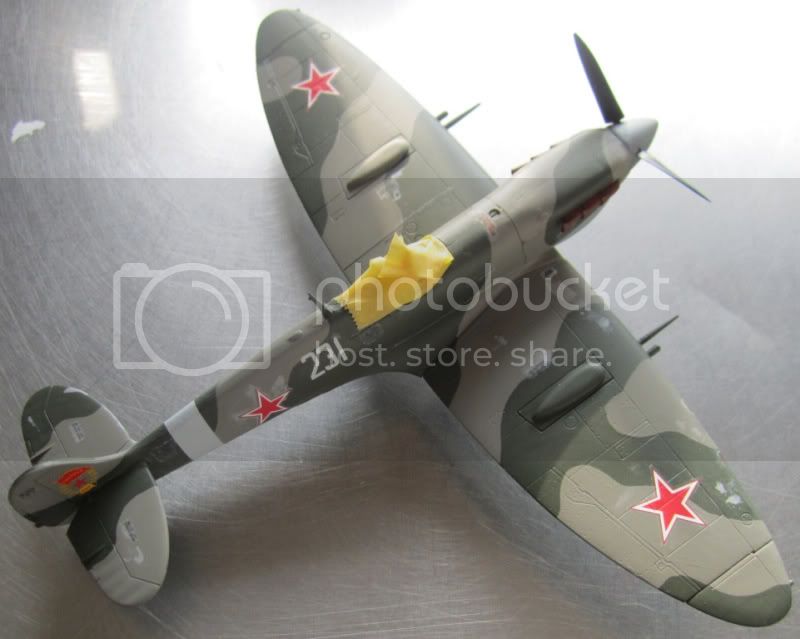
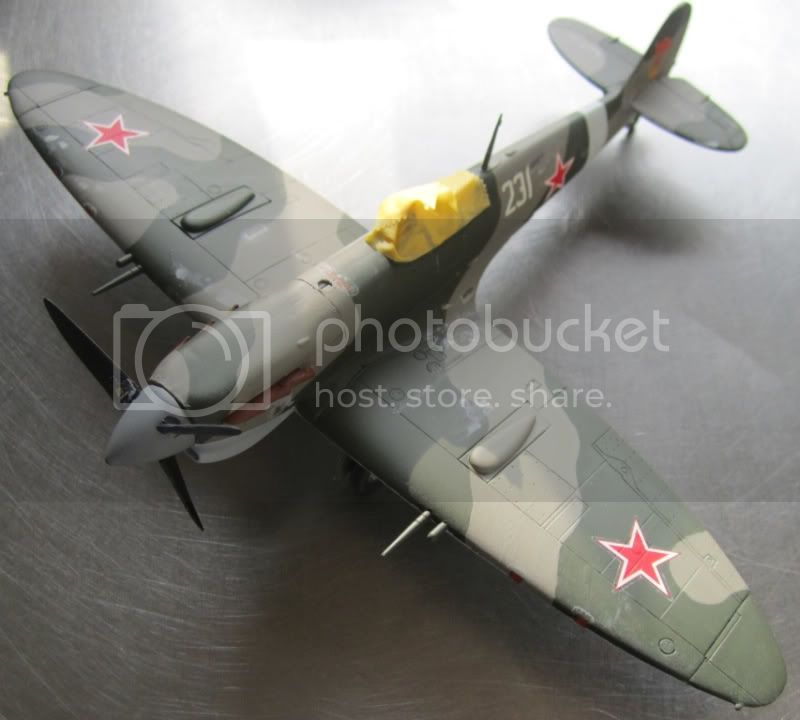
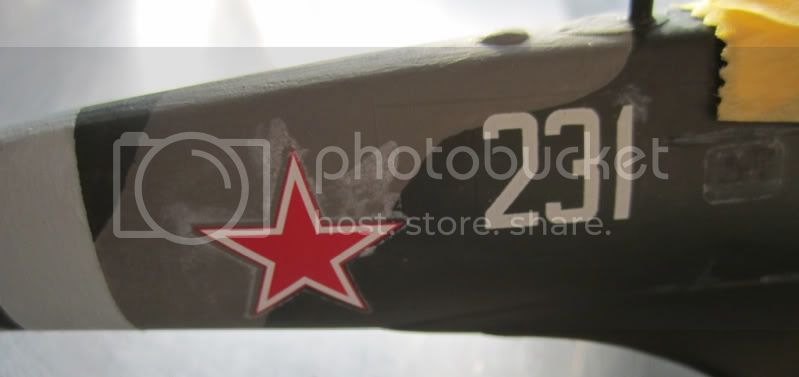
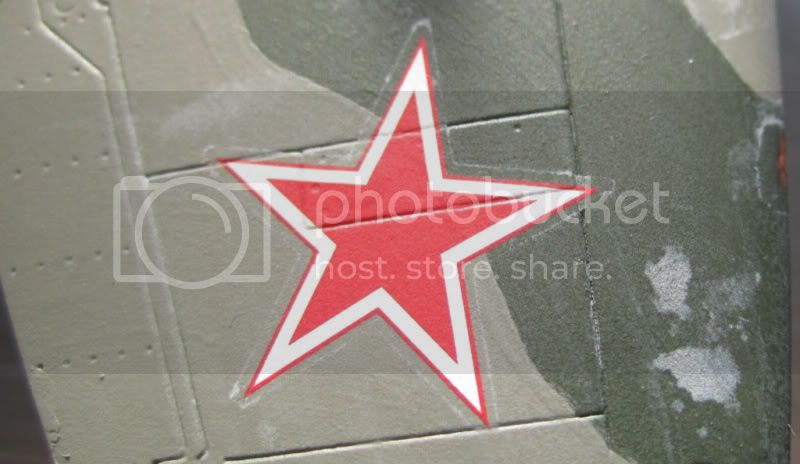
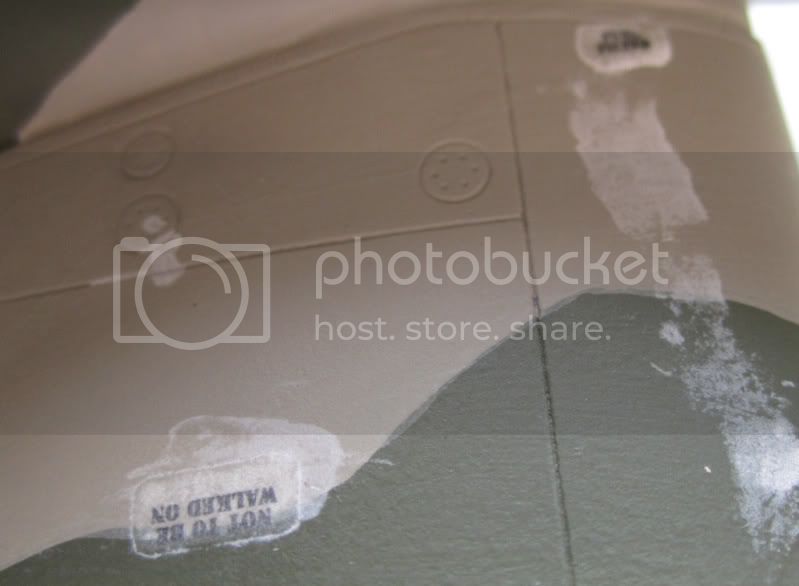
My project went ahead perfectly until I added the final varnish before the weathering could begin. Then .... a major set back.
Although I left my Spitfire for more than 24 hours after applying the decals something in the decal solvent reacted with the varnish. Big white blemishes was the result.


 A horror show for a modeller like me!
Now I will have to go back and repaint some of it. The colour will never be exactly the same before and after a coat of varnish, but I hope it will not be to visible when finished.
More to follow


KrisMax

Joined: January 23, 2010
KitMaker: 156 posts
AeroScale: 139 posts

Posted: Friday, May 13, 2011 - 01:46 AM UTC
Jesper,
Sometimes you try something new and it just doesn't work out. I tried that exact same matt coat for the first time a few months ago. It fogged across the whole model so couldn't be painted out. Most likely down to humid conditions, but I'd never had that problem before with other products. So the can goes in the bin: lesson learnt.
Good luck with fixing your spitfire.
Simon

Posted: Friday, May 13, 2011 - 02:36 AM UTC
Thanks for the comment, Simon. I believe I will be able to save this one. But like you I will not buy that varnish again.
More to follow later.
More to follow later.

mtnflyer

Joined: March 08, 2009
KitMaker: 394 posts
AeroScale: 360 posts

Posted: Friday, May 13, 2011 - 02:52 AM UTC
Wow Jesper! That same thing happened to me one time. The way I fixed it was to apply a coat of 'Future'. Like magic, the whitish blotches disappeared. I can't explain the science behind it, so I'll stick with the magic notion.
Its worth an experiment, to save you having to repaint. But, then again, I'd hate for you to ruin your model based on a 'magic notion'. Perhaps you should try the experiment on another piece first.
Guy
Its worth an experiment, to save you having to repaint. But, then again, I'd hate for you to ruin your model based on a 'magic notion'. Perhaps you should try the experiment on another piece first.
Guy
litespeed


Joined: October 15, 2009
KitMaker: 1,976 posts
AeroScale: 1,789 posts

Posted: Friday, May 13, 2011 - 11:52 AM UTC
Quoted Text
Quoted TextHi Tony, the Castle Bromich production line looks great, a pity you wont be able to finish all four. I like the pilots sitting patiently twiddling their thumbs, nice one.
Looking excellent Jesper the camouflage and the slightly worn looking pilots seat look the part.
Keep up the excellent work so far folks.
tim
its Phil not Tony BTW.
Sorry Tony

Jesper, what a pity about your Spit, still looks very good despite the unwanted marks. Hope you can sort it out. If you can't still submit images to the gallery for your award.
All the best.
tim
Posted: Sunday, May 15, 2011 - 11:19 PM UTC
Thanks for the tips, Tim and Guy. I was not brave enough to go for the future. I went over the Spitfire again with a repaint and although not perfect it actually looks quite good. The first thin wash blended everything together quite well.
Now there is just some more weathering and then it will be finished.
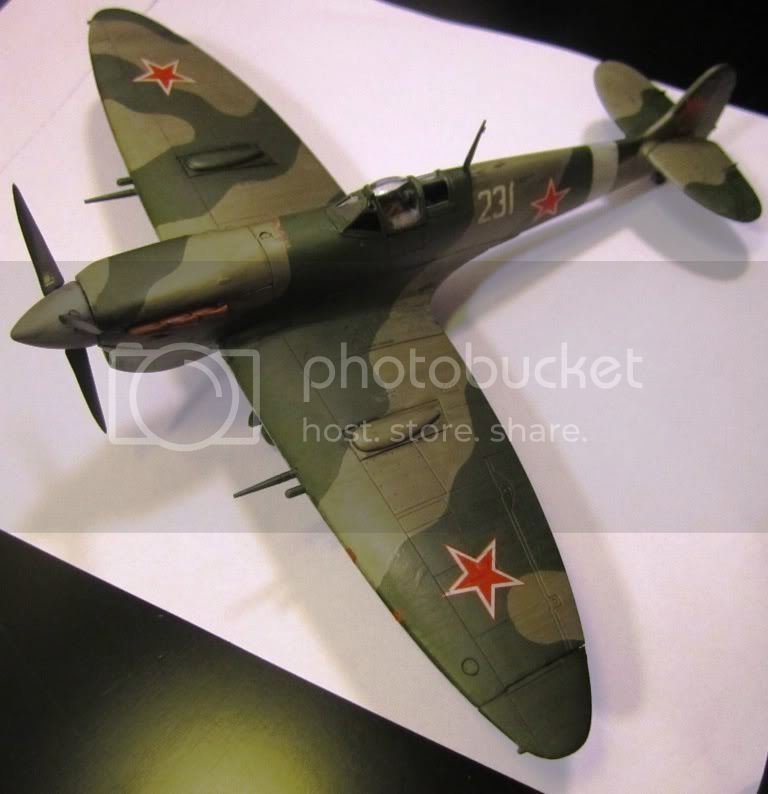
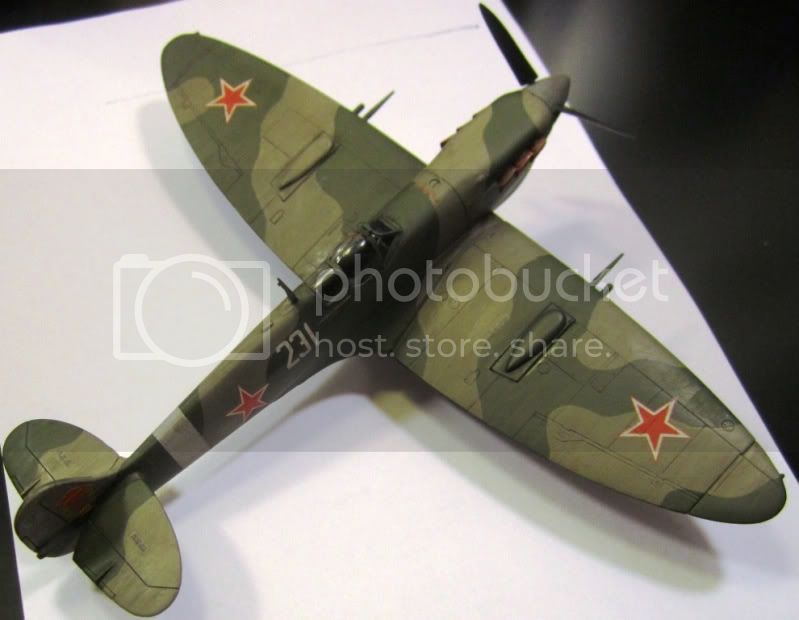
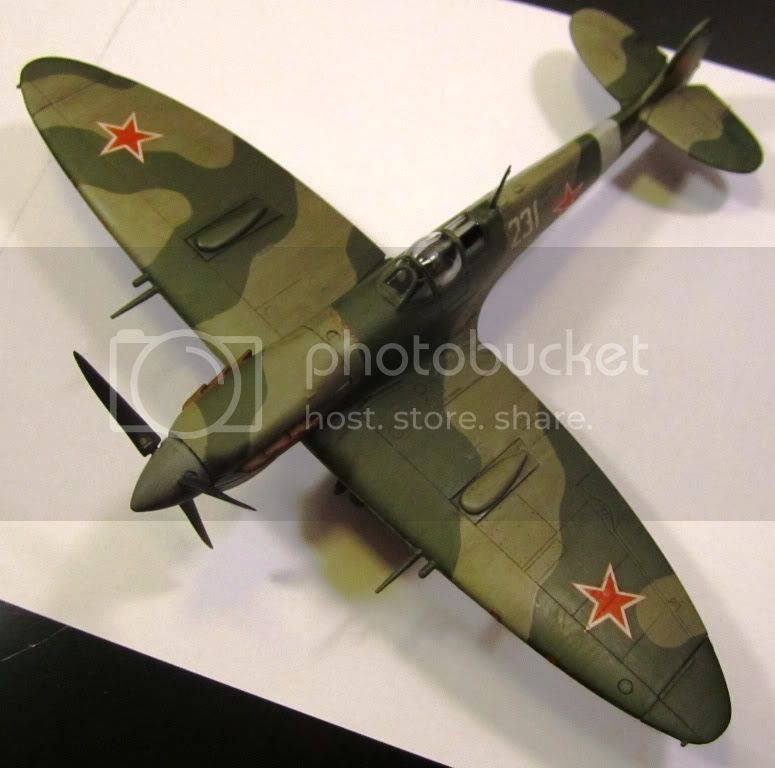
Now there is just some more weathering and then it will be finished.


ludwig113

Joined: February 05, 2008
KitMaker: 1,381 posts
AeroScale: 1,110 posts

Posted: Monday, May 16, 2011 - 03:17 AM UTC
Quoted Text
Thanks for the comment, Tim.
My project went ahead perfectly until I added the final varnish before the weathering could begin. Then .... a major set back.
Although I left my Spitfire for more than 24 hours after applying the decals something in the decal solvent reacted with the varnish. Big white blemishes was the result.

A horror show for a modeller like me!
Now I will have to go back and repaint some of it. The colour will never be exactly the same before and after a coat of varnish, but I hope it will not be to visible when finished.
i've had this reaction as well,what i now do is paint/future/decals/future/topcoat.
the future seals the decal layer and you dont get the white marks which seems to be a reation to the decal glue or sol and set.
hope this helps in the future.
btw, nice spit.
paul
litespeed


Joined: October 15, 2009
KitMaker: 1,976 posts
AeroScale: 1,789 posts

Posted: Monday, May 16, 2011 - 10:57 AM UTC
Well done Jesper, your Soviet Spit looks superb from the images you have posted. Nice work
All the best.
tim
All the best.
tim
Posted: Wednesday, May 18, 2011 - 04:28 AM UTC
Thanks for the comments, Tim and Paul.
I am now calling this one done after a little more subtle weathering. Not that visible in the pictures. I actually ended up liking the end result despite the problems with the varnish vs. decal chemical reaction.
Great campaign and a pleasure to participate!
Comments welcome
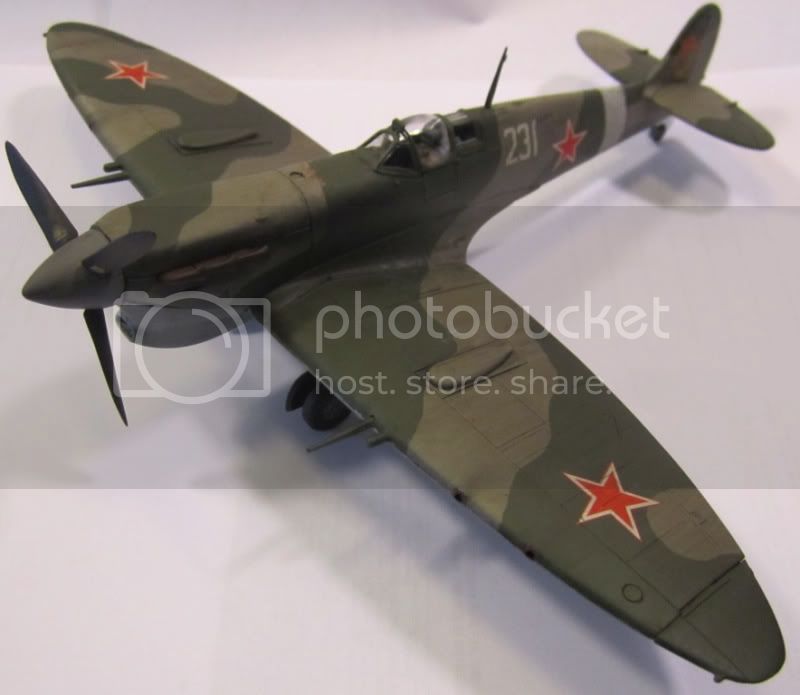
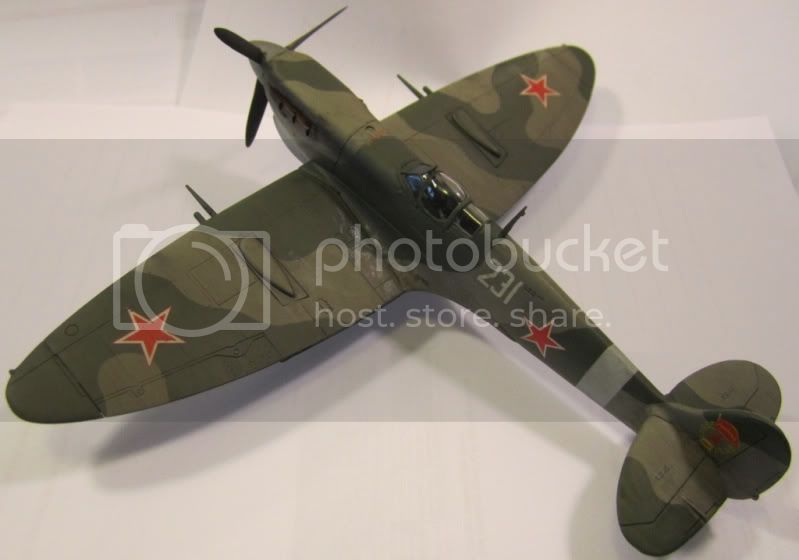
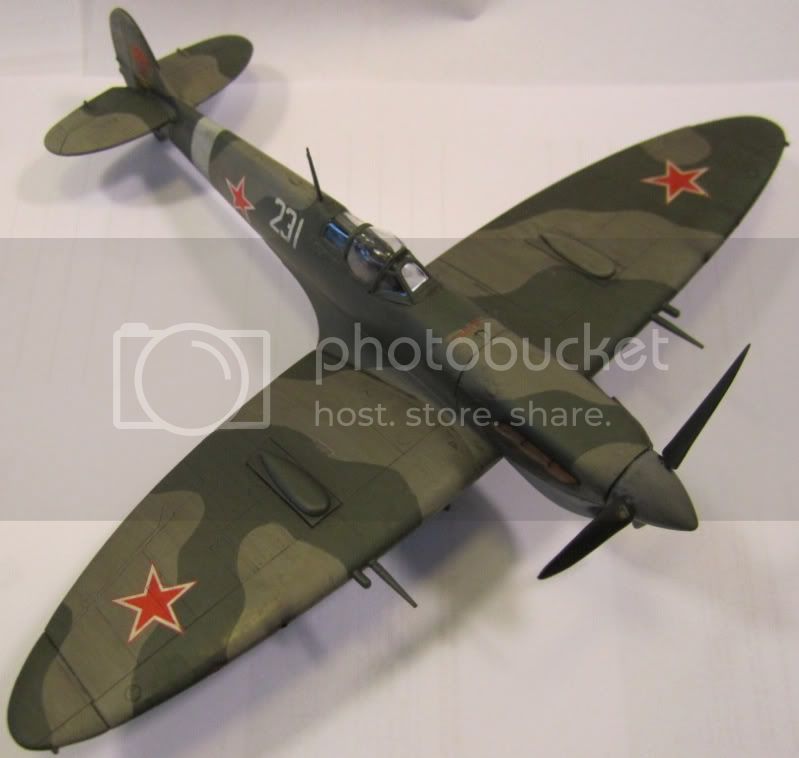
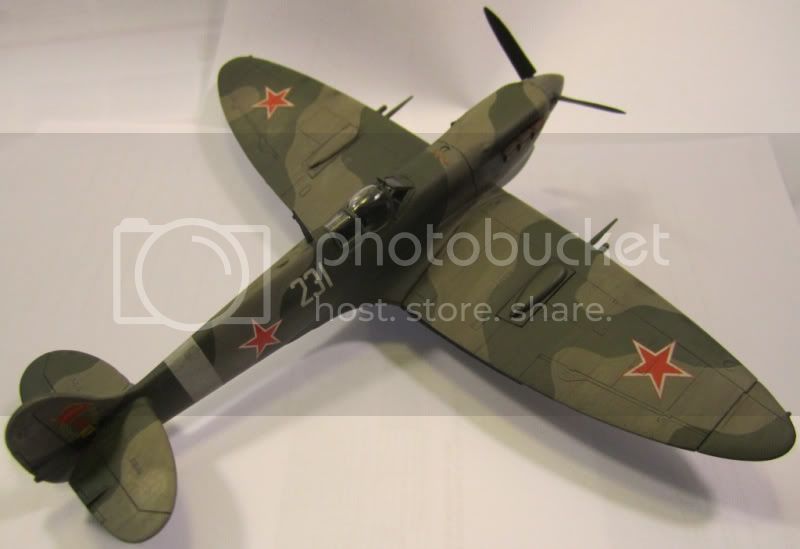
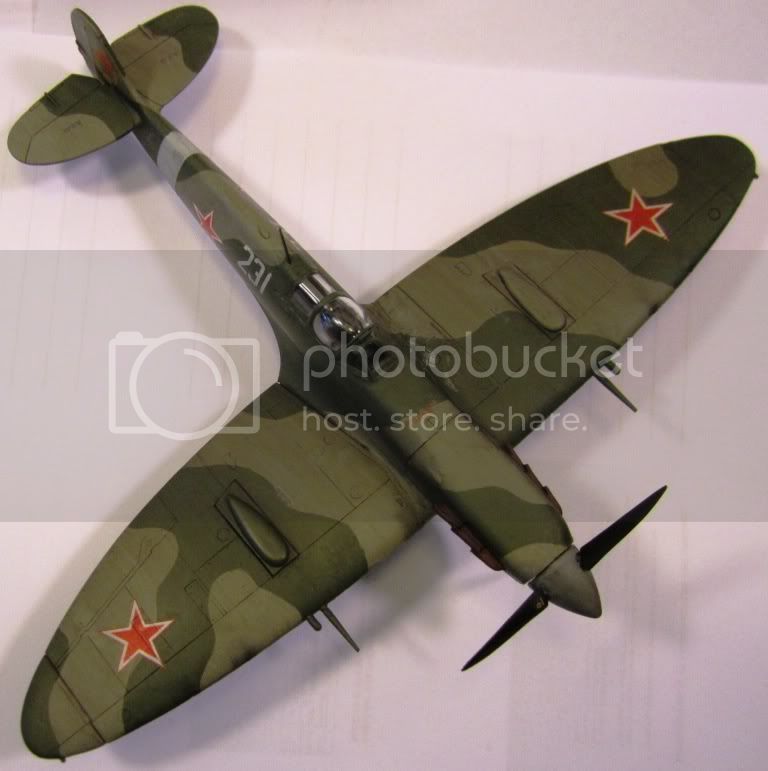
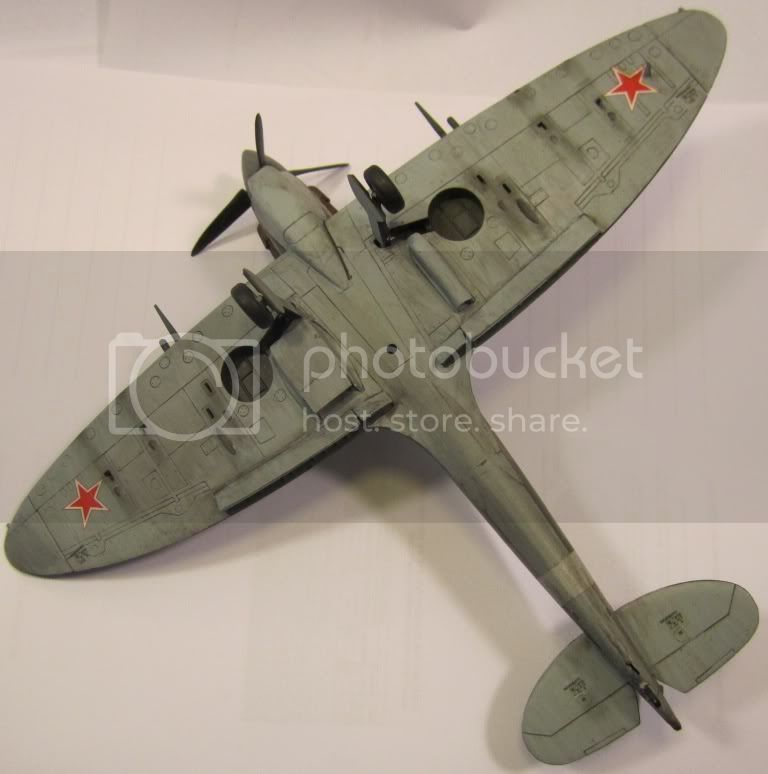
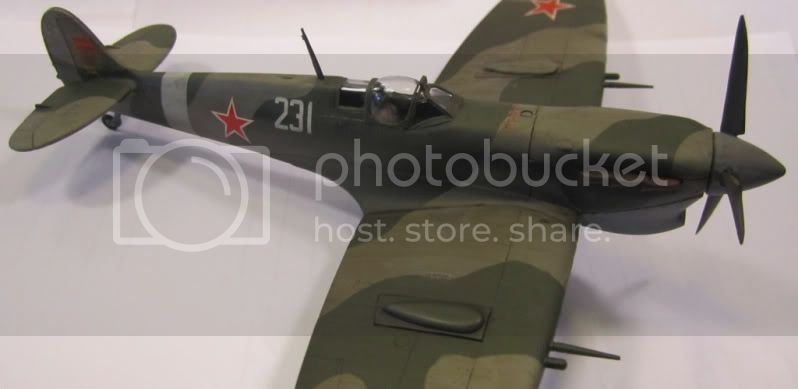
I am now calling this one done after a little more subtle weathering. Not that visible in the pictures. I actually ended up liking the end result despite the problems with the varnish vs. decal chemical reaction.
Great campaign and a pleasure to participate!
Comments welcome


mtnflyer

Joined: March 08, 2009
KitMaker: 394 posts
AeroScale: 360 posts

Posted: Wednesday, May 18, 2011 - 04:54 AM UTC
Great comeback, Jesper. Your Spitfire project looks super. The only improvement I might suggest is that you punch out a fuel filler cap and install it to rid the model of that seam line. A very small thing.
Good Work!
Good Work!
litespeed


Joined: October 15, 2009
KitMaker: 1,976 posts
AeroScale: 1,789 posts

Posted: Thursday, May 19, 2011 - 10:03 AM UTC
Hi all.
Just checked out the the campaign gallery and there are twelve superb looking Spits posted so far. Excellent work chaps. For the ones with work in progress [including me!!] there are about six weeks left until this campaign finishes.
All the best.
tim
Just checked out the the campaign gallery and there are twelve superb looking Spits posted so far. Excellent work chaps. For the ones with work in progress [including me!!] there are about six weeks left until this campaign finishes.
All the best.
tim
Posted: Saturday, May 21, 2011 - 11:46 PM UTC
Quoted Text
Hi all.
Just checked out the the campaign gallery and there are twelve superb looking Spits posted so far. Excellent work chaps. For the ones with work in progress [including me!!] there are about six weeks left until this campaign finishes.
All the best.
tim
glad you posted that Tim, i was working to the end of this month as the finish date.
now there is a chance i will get the other spits done.
up to now though, I've concentrated on the new tool spit, but still got the others up to the painting stage-


first coat of sky and a little bit of a fettle.
the paint i used is white ensign models sky s-type, which only needed a little thinning before i airbrushed it on.

top colours on.
i sprayed the green all over first, using humbrol 163 then used the rolled blutac method to spray the brown which was humbrol 29.

finally a pic of it in front of its less colourful sisters.
all i need to do to finish is to decal, a little weathering and to put on the little aerials then i should be finished. (then just three more to go!)
Posted: Sunday, May 22, 2011 - 06:17 AM UTC
Thanks for the comments, Guy. Great tip on the fuel cap. I do not know how I missed that.
Nice little family of Spitfires, Phil. Looking forward to see more.
Nice little family of Spitfires, Phil. Looking forward to see more.

MichaelSatin


Joined: January 19, 2008
KitMaker: 3,909 posts
AeroScale: 2,904 posts

Posted: Monday, May 30, 2011 - 05:07 PM UTC
Hey, I've actually applied that thing called "paint" to my IAF Spit! Who knew? I had a nice telephone conversation with Alex Yofe, Israeli Spitfire expert, on the best guesses as to the colors used on the first one they built from junk. Hopefully, pics showing results tomorrow!
Michael
Michael
 |


