OFFICIAL: P-40, Work Horse of WWII Campaign
Istanbul, Turkey / Türkçe
Joined: December 16, 2004
KitMaker: 1,163 posts
AeroScale: 255 posts
Posted: Thursday, April 14, 2011 - 11:01 AM UTC
Proud Supporter of Armorama Campaigns
AussieReg
 Associate Editor
#007
Victoria, Australia
Joined: June 09, 2009
KitMaker: 8,156 posts
AeroScale: 3,756 posts
Posted: Thursday, April 14, 2011 - 11:30 AM UTC
Emre your build is looking superb, I love that paint job !!
I managed to throw some paint at the interior of my build in the last couple of days, today I will do some weathering then it's assembly time at last !!
Cheers, D
ON the bench
Revell 1/24 '53 Corvette (building as '54)
Revell 1/24 BMW 507 Coupe and Cabrio
Italeri 1/48 Me262 B-1a/U1 Nightfighter
Monogram 1/24 '57 Chevy Nomad
Dragon 1/350 USS Frank Knox DD-742
Texas, United States
Joined: February 22, 2008
KitMaker: 5,026 posts
AeroScale: 2,811 posts
Posted: Thursday, April 14, 2011 - 11:48 AM UTC
Emre, I agree with D. I just wish that I could have been there to watch your paint technique.
Bob
If it aint broke dont fix it.
Maryland, United States
Joined: February 19, 2006
KitMaker: 144 posts
AeroScale: 141 posts
Posted: Thursday, April 14, 2011 - 01:10 PM UTC
Texas, United States
Joined: February 22, 2008
KitMaker: 5,026 posts
AeroScale: 2,811 posts
Posted: Thursday, April 14, 2011 - 02:17 PM UTC
Floyd, nice job be sure to post a photo in the gallery.
Emre has been tutoring me in the fine art of print screen and I want ot see if I did it correctly by posting an updated spreadsheet.

AHHHH!!!!!!success.
Bob
If it aint broke dont fix it.
Removed by original poster on 04/15/11 - 01:32:03 (GMT).
Maryland, United States
Joined: February 19, 2006
KitMaker: 144 posts
AeroScale: 141 posts
Posted: Thursday, April 14, 2011 - 02:32 PM UTC
Done. Woohoo! 1st posted.
Texas, United States
Joined: February 22, 2008
KitMaker: 5,026 posts
AeroScale: 2,811 posts
Posted: Thursday, April 14, 2011 - 04:08 PM UTC
Floyd, well done now you have time to do:
1. P36
2. P-40B
3. E
4. F
5. K
6. L
7. M
and last but not least Q since you have so much time on your hands.

Bob
If it aint broke dont fix it.
Istanbul, Turkey / Türkçe
Joined: December 16, 2004
KitMaker: 1,163 posts
AeroScale: 255 posts
Posted: Thursday, April 14, 2011 - 10:52 PM UTC
Thanks Damian!
Thank you Bob, although I do nothing special, I previously wrote how I painted. The rest is experience. This is my fifth airplane painted like this and I think I'm getting better at each attempt. The first one doesn't look half as good as this one.
Good to see you got the hang of the print screen thing

Beats your old trick, doesn't it?
Proud Supporter of Armorama Campaigns
Texas, United States
Joined: February 22, 2008
KitMaker: 5,026 posts
AeroScale: 2,811 posts
Posted: Friday, April 15, 2011 - 03:11 AM UTC
@ Emre: YEP it does and whole lot less labor intensive thanks for the pointers.
Bob
If it aint broke dont fix it.
California, United States
Joined: April 01, 2002
KitMaker: 4,287 posts
AeroScale: 1,164 posts
Posted: Friday, April 15, 2011 - 03:31 AM UTC
Nothing like working to a deadline....

I told my customer his P-40 would be done around mid-month and here we are. Almost there... Just need to flat coat it, a little weathering around the exhausts and guns then add the antennas. More to follow shortly. "Q"


"Don't fear the night, fear what hunts at night"
Texas, United States
Joined: February 22, 2008
KitMaker: 5,026 posts
AeroScale: 2,811 posts
Posted: Friday, April 15, 2011 - 07:57 AM UTC
Matt: your 40 looks really good. I did not go back over the threads, did you mention that you use a stand off mask for the color? I am having a little trouble seeing how I will use one and keep my under color on the fuselage from beeing sharp. I want go for a soft edge.
Bob
If it aint broke dont fix it.
California, United States
Joined: April 01, 2002
KitMaker: 4,287 posts
AeroScale: 1,164 posts
Posted: Friday, April 15, 2011 - 09:27 AM UTC
Thanks. I think I read that they were painted with rubber masks so a hard edge would be ok. I did use a stand off mask for mine. I blew the instructions up to kit size, then cut the patterns out and used poster tack to keep it off the surface. This provides for a hard/soft edge. Just be sure to paint 90 degrees to the mask so that paint doesn't creep under the poster tack where you don't want it. "Q"

"Don't fear the night, fear what hunts at night"
Istanbul, Turkey / Türkçe
Joined: December 16, 2004
KitMaker: 1,163 posts
AeroScale: 255 posts
Posted: Saturday, April 16, 2011 - 03:16 AM UTC
Proud Supporter of Armorama Campaigns
Victoria, Australia
Joined: September 19, 2003
KitMaker: 708 posts
AeroScale: 674 posts
Posted: Saturday, April 16, 2011 - 04:55 AM UTC
Emre,
Excellent workmanship on your P40E build.
I'll get back to my P40K within the next week or so.
President:- Southern Model Club.
Those who never learn from history will always repeat it.
"When you go home tell them of us and say.
For your tomorrow we gave our today."
Texas, United States
Joined: February 22, 2008
KitMaker: 5,026 posts
AeroScale: 2,811 posts
Posted: Saturday, April 16, 2011 - 06:31 AM UTC
Emre you and Floyd are out there by your selves for now. Nice job, I still need to practice on that technique.
Bob
If it aint broke dont fix it.

#057
Bayern, Germany
Joined: May 11, 2010
KitMaker: 248 posts
AeroScale: 123 posts
Posted: Saturday, April 16, 2011 - 10:59 AM UTC
Jeeez, you guys all really rock!
Just got the new 1:32 Hasegawa Kittyhawk Mk1/3 as a present from my Dad while we were visiting our old home Berlin.
Well, what better excuse to start another kit than a campaign, huh?
I'll be using the kit markings for Goffrey Fiskens machine of the No.14 sqn RNZAF. It's Olive Drab over Neutral Grey, a bit boring but I really love to hit it off on monotone schemes with my airbrushes (will be adding to your thread soon, Matthew, promise).
As i do not know about regulations for quoting other peoples pics here's the link to my documentaion pic:
http://www.warbirdinformationexchange.org/phpBB3/viewtopic.php?f=3&t=13667Hope that's ok, Bob?
Will be starting that lovely kit tomorrow and i'll take it with me on vacation (yes, I got a mobile man cave, yeeehaahhh!!). So pics will be kind of sketchy, I think.
Happy to join you!!
If thou art pained by any external thing, it is not this that disturbs thee, but thy own judgment about it.
Marcus Aurelius
Texas, United States
Joined: February 22, 2008
KitMaker: 5,026 posts
AeroScale: 2,811 posts
Posted: Saturday, April 16, 2011 - 11:42 AM UTC
Leo, you will give Matt, and Damian company in 1/32.
Bob
If it aint broke dont fix it.

#439
Washington, United States
Joined: November 05, 2005
KitMaker: 4,950 posts
AeroScale: 3,192 posts
Posted: Saturday, April 16, 2011 - 06:02 PM UTC
I guess this qualifies as finally started. Opened it up and started cleaning up the resin.

Hanger Queens in Waiting:
Monogram 1/72 F8F-1
Corsair the Sky Pirate - 1/72 Ace A-7D
Century Series - Airfix 1/72 F-105G
Anti Shipping - Academy 1/72 PBJ-1D
Academy 1/72 F-84E
Istanbul, Turkey / Türkçe
Joined: December 16, 2004
KitMaker: 1,163 posts
AeroScale: 255 posts
Posted: Saturday, April 16, 2011 - 11:21 PM UTC
Thanks Rob and Bob. I'm very glad this campaign motivated me to take that P-40 off my shelves and complete it with a shark mouth. Now, moving off to another campaign!

Proud Supporter of Armorama Campaigns
AussieReg
 Associate Editor
#007
Victoria, Australia
Joined: June 09, 2009
KitMaker: 8,156 posts
AeroScale: 3,756 posts
Posted: Sunday, April 17, 2011 - 03:43 AM UTC
A little bit of progress from me today, detailing and assembly on the office . .
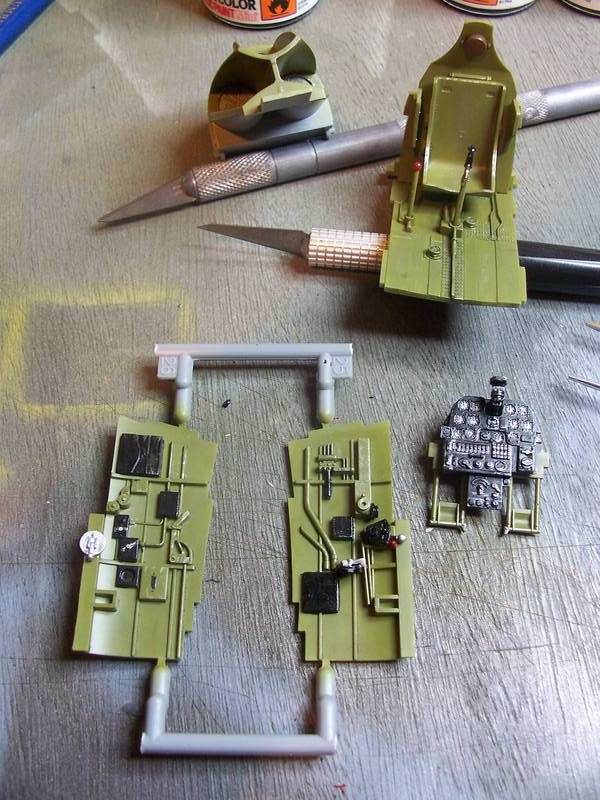
Cheers, D
ON the bench
Revell 1/24 '53 Corvette (building as '54)
Revell 1/24 BMW 507 Coupe and Cabrio
Italeri 1/48 Me262 B-1a/U1 Nightfighter
Monogram 1/24 '57 Chevy Nomad
Dragon 1/350 USS Frank Knox DD-742
Texas, United States
Joined: February 22, 2008
KitMaker: 5,026 posts
AeroScale: 2,811 posts
Posted: Sunday, April 17, 2011 - 04:22 AM UTC
Nice to see the campagin king finally do some work on his (Damian) P-40

Bob
If it aint broke dont fix it.
California, United States
Joined: April 01, 2002
KitMaker: 4,287 posts
AeroScale: 1,164 posts
Posted: Sunday, April 17, 2011 - 06:15 AM UTC
"Don't fear the night, fear what hunts at night"
Texas, United States
Joined: February 22, 2008
KitMaker: 5,026 posts
AeroScale: 2,811 posts
Posted: Sunday, April 17, 2011 - 10:26 AM UTC
Matt, you have been marked as finished nice 40 BTW.
Bob
If it aint broke dont fix it.

#057
Bayern, Germany
Joined: May 11, 2010
KitMaker: 248 posts
AeroScale: 123 posts
Posted: Tuesday, April 19, 2011 - 06:25 AM UTC
Fabulous work, everybody!
Really cool camouflage, too. Mine will be a little dull in comparison I think. But I just love the RNZAF roundel with the pinpoint red speck in the middle!
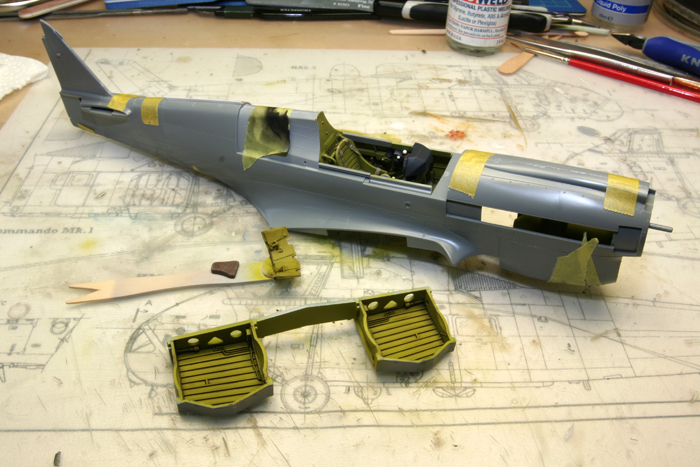
Here's my work of sunday, got into a bit of a frenzy to have the kit travel ready. As I said, I'm going on vacation so next pics will be further down the road.
The kit as is:
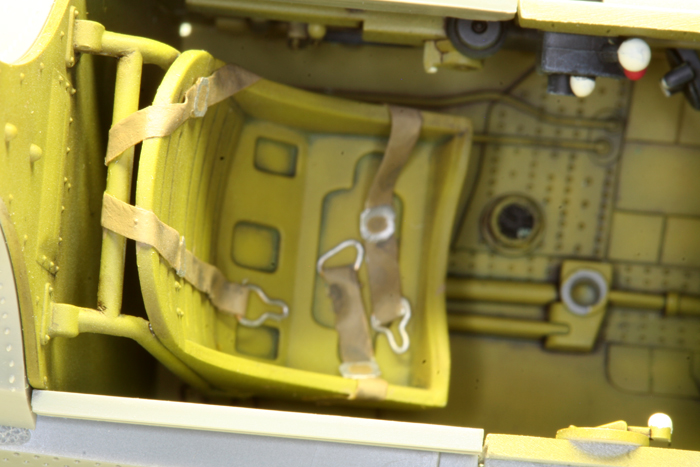
The seat complete with tape harness. My first attempt at selfmade buckles. Please be kind

The dash:
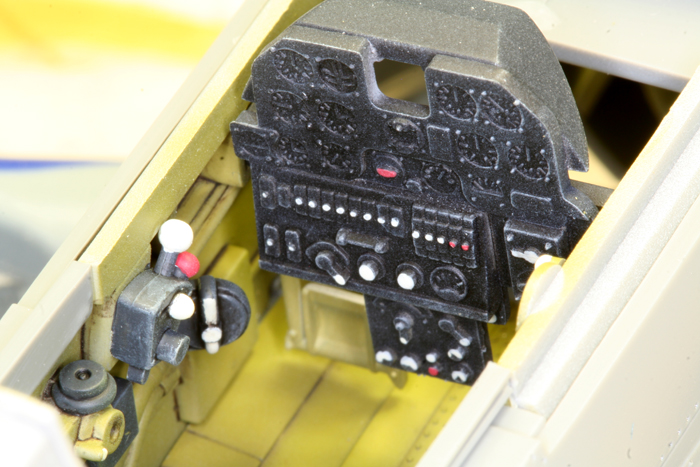
And a nice view down the maw of the beast:
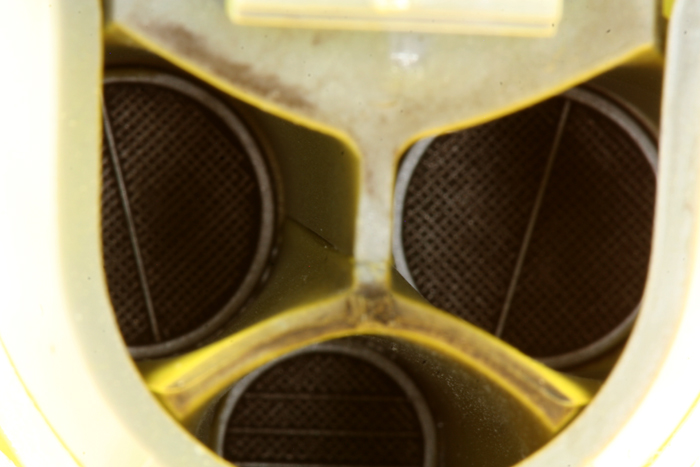
Comments welcome!
If thou art pained by any external thing, it is not this that disturbs thee, but thy own judgment about it.
Marcus Aurelius


