OFFICIAL: P-40, Work Horse of WWII Campaign
AussieReg
 Associate Editor
#007
Victoria, Australia
Joined: June 09, 2009
KitMaker: 8,156 posts
AeroScale: 3,756 posts
Posted: Saturday, September 10, 2011 - 11:43 PM UTC
Hi guys. I am about to throw some paint at my build and I am in need of some assistance. I am going to do the "Daddy Please/Milk Wagon Express" scheme from this decal set . . .

and I am in a quandary regarding the colour of the topside of the horizontal stabilizers. The colour sheet with the decals seems to show it white, but I have seen a few similar builds with it OD, and read some reports that in this FG it was originally painted white but then painted over in OD to reduce visibility for strafing Japanese aircraft.
Can anybody help with any definitive references?
Cheers, D
ON the bench
Revell 1/24 '53 Corvette (building as '54)
Revell 1/24 BMW 507 Coupe and Cabrio
Italeri 1/48 Me262 B-1a/U1 Nightfighter
Monogram 1/24 '57 Chevy Nomad
Dragon 1/350 USS Frank Knox DD-742
Victoria, Australia
Joined: September 19, 2003
KitMaker: 708 posts
AeroScale: 674 posts
Posted: Monday, September 12, 2011 - 07:14 AM UTC
Damian,
In my opinion I'd paint the tail in the OD, as some RAAF Sqn's also removed the white tailplane from their aircraft, around the same time.
Hope this helps a little.
President:- Southern Model Club.
Those who never learn from history will always repeat it.
"When you go home tell them of us and say.
For your tomorrow we gave our today."
New York, United States
Joined: May 22, 2005
KitMaker: 41 posts
AeroScale: 13 posts
Posted: Thursday, September 15, 2011 - 01:56 AM UTC
"Being miserable and treating everyone else like dirt is every New Yorkers God given right " - Da Mayor, Ghost Busters II
Nordrhein-Westfalen, Germany
Joined: January 31, 2010
KitMaker: 103 posts
AeroScale: 71 posts
Posted: Saturday, September 17, 2011 - 08:39 AM UTC
Hi all,
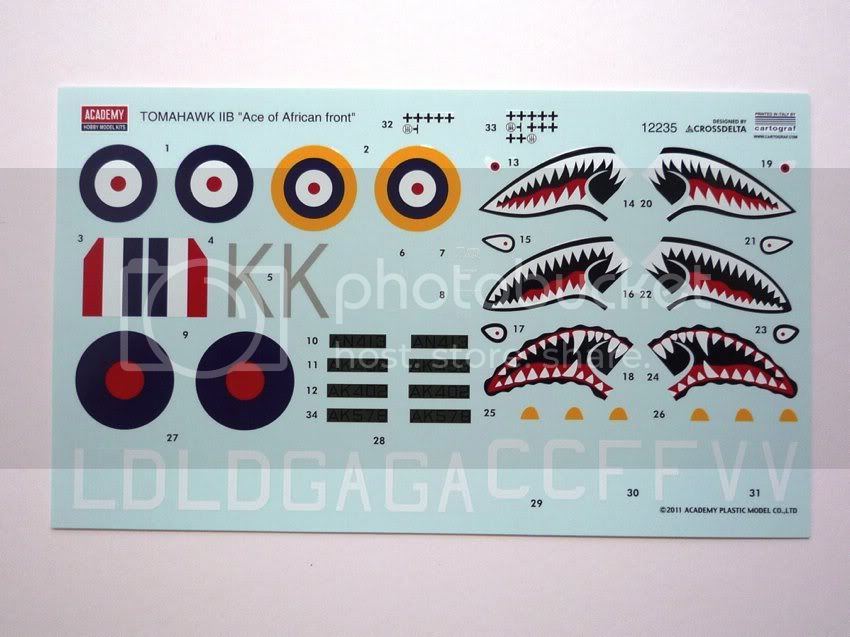
After looking at the many great P-40 builds here, I started a 1/48 Tomahawk IIB, the quite new "North Africa Edition" from Academy. The improved decals are state of the art now.
I finished the paintwork of the cockpit today. More to follow shortly.


Cheers
Matt
England - North East, United Kingdom
Joined: October 20, 2005
KitMaker: 1,045 posts
AeroScale: 622 posts
Posted: Saturday, September 17, 2011 - 10:04 AM UTC
Angel by day, Devil by night
Ontario, Canada
Joined: November 14, 2009
KitMaker: 270 posts
AeroScale: 264 posts
Posted: Saturday, September 17, 2011 - 01:20 PM UTC
That's a real looker there, nicely done.
Tennessee, United States
Joined: September 20, 2005
KitMaker: 1,747 posts
AeroScale: 1,673 posts
Posted: Saturday, September 17, 2011 - 01:40 PM UTC
Great work there Camogirl! Good looking bird. Nice job. Russell

To Thine Own Self Be True
Siderius
A.K.A., RTA
Idaho, United States
Joined: May 16, 2003
KitMaker: 895 posts
AeroScale: 457 posts
Posted: Saturday, September 17, 2011 - 02:59 PM UTC
Greetings Samantha,
Nice work on the P-40 but I do have one question, "Why is the landing gear backwards?"
All the best,
Brian

There is only two kinds of fires. Those that use less than 500 gallons of water too extinguish and those that use WAY MORE!
AussieReg
Associate Editor #007
Victoria, Australia
Joined: June 09, 2009
KitMaker: 8,156 posts
AeroScale: 3,756 posts
Posted: Saturday, September 17, 2011 - 08:26 PM UTC
Quoted Text
Nice work on the P-40 but I do have one question, "Why is the landing gear backwards?"
Coriolis effect Brian, it's a New Zealand bird, in the Southern Hemisphere we land from the opposite direction !

Nice work Camo, gotta love the speed builds !
I'm pretty well done puttying and sanding, and the glass is on now. I have some masking to do, and I'm still in two minds about the white upper stabilizer paint. I won't be doing much in the way of weathering on this bird, so being relatively fresh off the paint line I'm thinking the white upper might be appropriate. I'll ponder some more while I mask stuff up.
Bud, great progress on your build, thanks for sharing your progress pics with us. It's always great to see how others get things done.
Matty K, thanks for joining us. Another speed build to follow.
Cheers, D
ON the bench
Revell 1/24 '53 Corvette (building as '54)
Revell 1/24 BMW 507 Coupe and Cabrio
Italeri 1/48 Me262 B-1a/U1 Nightfighter
Monogram 1/24 '57 Chevy Nomad
Dragon 1/350 USS Frank Knox DD-742
Tennessee, United States
Joined: September 20, 2005
KitMaker: 1,747 posts
AeroScale: 1,673 posts
Posted: Sunday, September 18, 2011 - 07:43 AM UTC
Well guys and gals, better late then never. I just ordered a Hasegawa P-40N from Squadron. It was at a good price and I thought I might try to rapidly build one myself. I'll let you know. Take care, I've enjoyed looking at this thread a lot. I think I have a new found appreciation of the P-40!! Russell
To Thine Own Self Be True
Siderius
A.K.A., RTA
AussieReg
Associate Editor #007
Victoria, Australia
Joined: June 09, 2009
KitMaker: 8,156 posts
AeroScale: 3,756 posts
Posted: Sunday, September 18, 2011 - 07:52 PM UTC
Quoted Text
Well guys and gals, better late then never.
And yet another speed demon builder joins the party. Welcome aboard Russell, and good luck with your build mate.
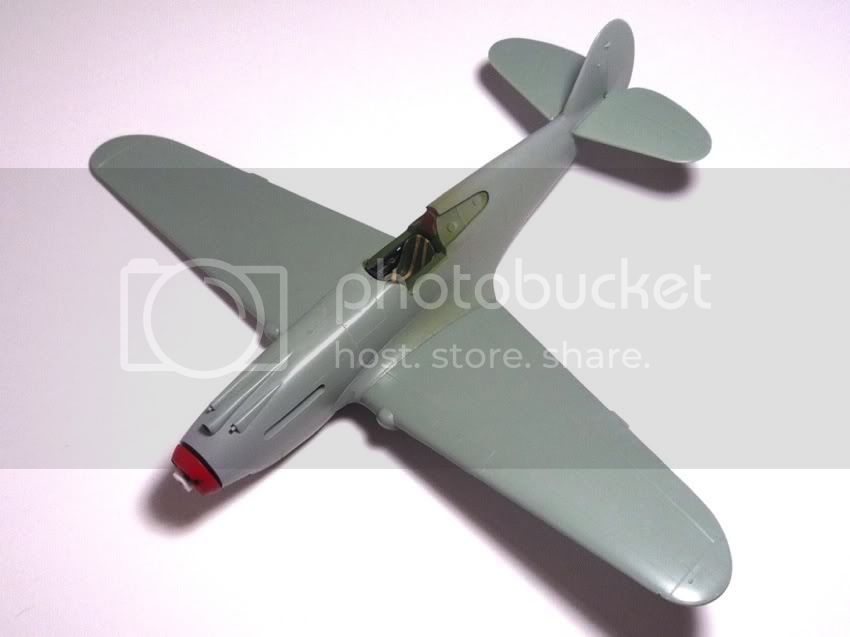
A little progress report from Chateau Reggie, glass is on and masked, and white paint done.


Cheers, D
ON the bench
Revell 1/24 '53 Corvette (building as '54)
Revell 1/24 BMW 507 Coupe and Cabrio
Italeri 1/48 Me262 B-1a/U1 Nightfighter
Monogram 1/24 '57 Chevy Nomad
Dragon 1/350 USS Frank Knox DD-742
England - North East, United Kingdom
Joined: October 20, 2005
KitMaker: 1,045 posts
AeroScale: 622 posts
Posted: Sunday, September 18, 2011 - 08:16 PM UTC
Thats coming on nicely D
The legs are now on the right way round
Angel by day, Devil by night
Nordrhein-Westfalen, Germany
Joined: January 31, 2010
KitMaker: 103 posts
AeroScale: 71 posts
Posted: Monday, September 19, 2011 - 10:36 AM UTC
@Damian: Thanks for your welcome. And nice progress by the way. The white tail scheme looks pretty cool!
@Russell: And I thought, I was starting late.
Have a smooth build.
Meanwhile Curtiss Works completed another airframe...
Cheers
Matt
Tennessee, United States
Joined: September 20, 2005
KitMaker: 1,747 posts
AeroScale: 1,673 posts
Posted: Monday, September 19, 2011 - 02:31 PM UTC
Hope I can make it all! My P-40N is due to arrive at the house on the 21st. I'll have to crack it open and get right too it I guess!

Russell
To Thine Own Self Be True
Siderius
A.K.A., RTA
Idaho, United States
Joined: May 16, 2003
KitMaker: 895 posts
AeroScale: 457 posts
Posted: Tuesday, September 20, 2011 - 04:54 PM UTC
Greetings everyone,
I've made some progress on the P-40K. The seams should be good and hide nicely when the primer is applied (I hope).
My desire to mount a bomb on the center line meant doing some scratch building for center rack and modifying the sway shackles by extending them slightly. It wasn't complicated just a little tedious (sometimes I see better without my glasses too
).
I found a 500lb. bomb from my parts box that was far better to use than the kit supplied bombs which were meant to mount under the wings. More to follow.
All the best,
Brian

There is only two kinds of fires. Those that use less than 500 gallons of water too extinguish and those that use WAY MORE!
Tennessee, United States
Joined: September 20, 2005
KitMaker: 1,747 posts
AeroScale: 1,673 posts
Posted: Friday, September 23, 2011 - 03:16 PM UTC
Well folks, here is my first post for the P-40 Campaign! I am well on my way to finishing this 49th fighter group, "white tail" machine! Hope you enjoy looking. Russell


To Thine Own Self Be True
Siderius
A.K.A., RTA
Tennessee, United States
Joined: September 20, 2005
KitMaker: 1,747 posts
AeroScale: 1,673 posts
Posted: Saturday, September 24, 2011 - 08:30 AM UTC
To Thine Own Self Be True
Siderius
A.K.A., RTA
AussieReg
Associate Editor #007
Victoria, Australia
Joined: June 09, 2009
KitMaker: 8,156 posts
AeroScale: 3,756 posts
Posted: Saturday, September 24, 2011 - 11:40 AM UTC
Nicely done Russell, well done on the quick finish and thanks for joining in.
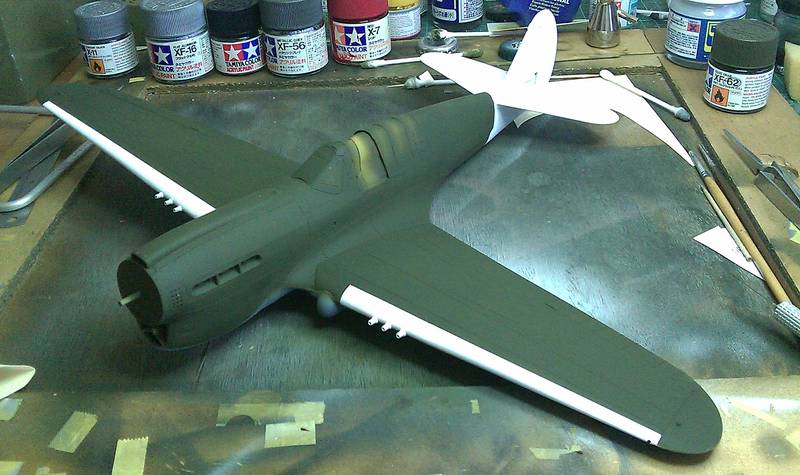
I managed to get the NG sprayed last night and will do the OD today. It will be a scramble to get it finished but I'm fairly sure I will get there, maybe.
Cheers, D
ON the bench
Revell 1/24 '53 Corvette (building as '54)
Revell 1/24 BMW 507 Coupe and Cabrio
Italeri 1/48 Me262 B-1a/U1 Nightfighter
Monogram 1/24 '57 Chevy Nomad
Dragon 1/350 USS Frank Knox DD-742
Tennessee, United States
Joined: September 20, 2005
KitMaker: 1,747 posts
AeroScale: 1,673 posts
Posted: Saturday, September 24, 2011 - 11:48 AM UTC
Thanks a lot AusseiReg! It is always fun when a model seems to just fly together on it's own!

That's quite a fish you've got in the picture on your profile! Of course you've got some really big fish in that Southern Ocean! Thanks again. Russell
To Thine Own Self Be True
Siderius
A.K.A., RTA
AussieReg
Associate Editor #007
Victoria, Australia
Joined: June 09, 2009
KitMaker: 8,156 posts
AeroScale: 3,756 posts
Posted: Saturday, September 24, 2011 - 01:51 PM UTC
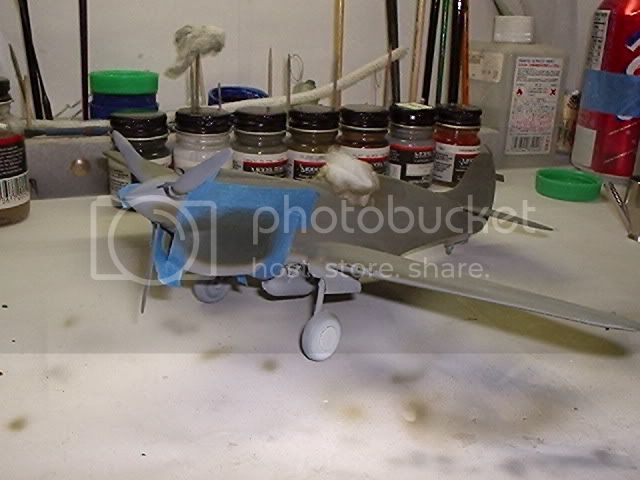
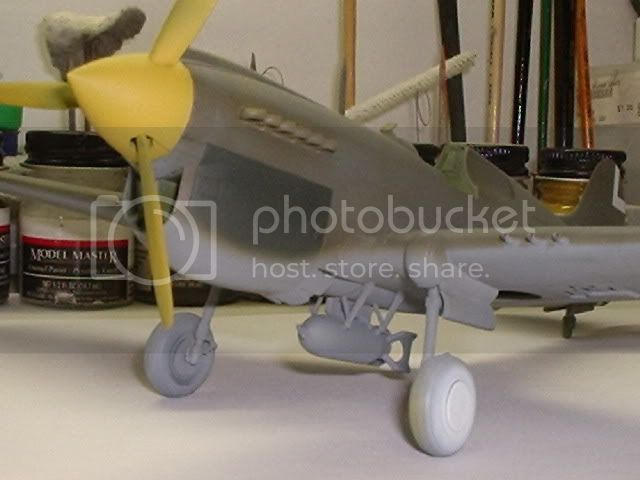
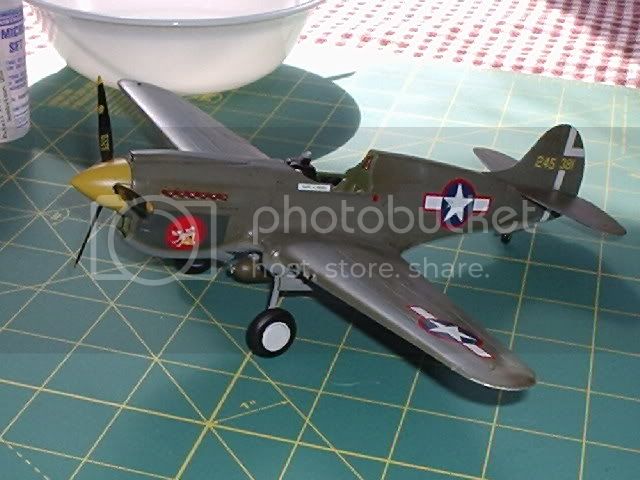
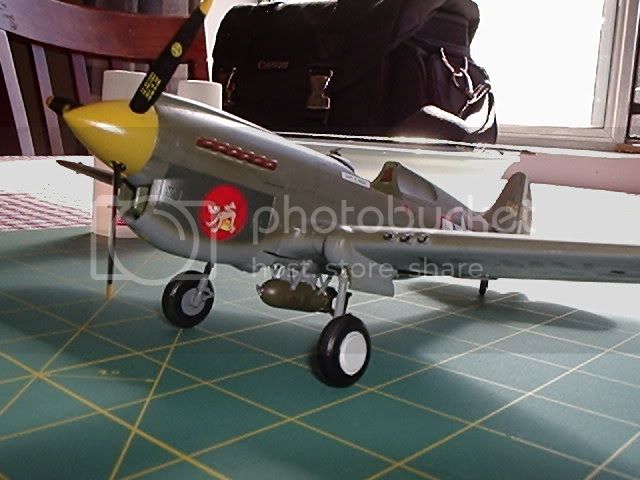
Colour !
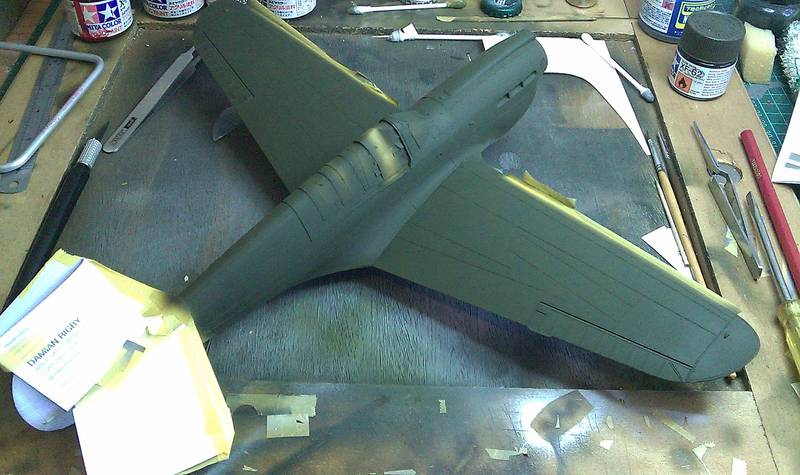
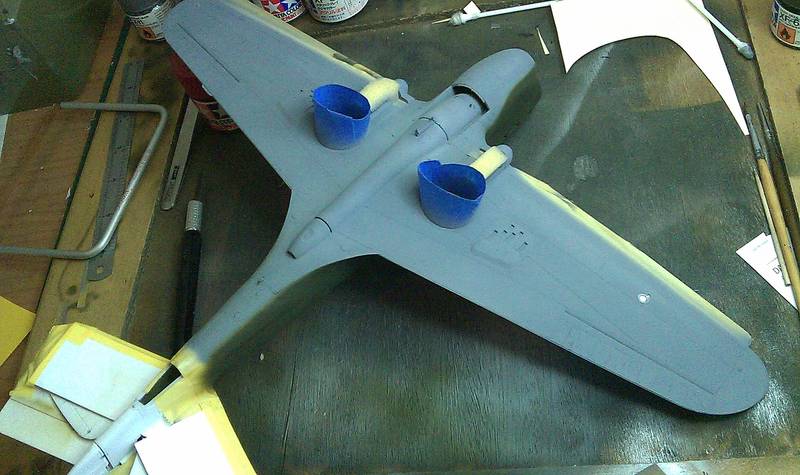
Apologies for the crappy pics, the digicam appears to have left the building so I've used the phone.
I will remove the masking soon and let it dry overnight, then Future tomorrow night after work.
Cheers, D
ON the bench
Revell 1/24 '53 Corvette (building as '54)
Revell 1/24 BMW 507 Coupe and Cabrio
Italeri 1/48 Me262 B-1a/U1 Nightfighter
Monogram 1/24 '57 Chevy Nomad
Dragon 1/350 USS Frank Knox DD-742
AussieReg
Associate Editor #007
Victoria, Australia
Joined: June 09, 2009
KitMaker: 8,156 posts
AeroScale: 3,756 posts
Posted: Saturday, September 24, 2011 - 02:17 PM UTC
ON the bench
Revell 1/24 '53 Corvette (building as '54)
Revell 1/24 BMW 507 Coupe and Cabrio
Italeri 1/48 Me262 B-1a/U1 Nightfighter
Monogram 1/24 '57 Chevy Nomad
Dragon 1/350 USS Frank Knox DD-742
#041
Kobenhavn, Denmark
Joined: July 20, 2006
KitMaker: 10,069 posts
AeroScale: 3,788 posts
Posted: Wednesday, September 28, 2011 - 04:17 PM UTC
Nice build, Russell. Although Hasegawa's cockpit glazing is really badly cast. You did a nice job on it none the less.
Nice progress, Damian. Looking forward to see more.
Campaign'oholic - 252+ campaigns completed
AussieReg
Associate Editor #007
Victoria, Australia
Joined: June 09, 2009
KitMaker: 8,156 posts
AeroScale: 3,756 posts
Posted: Thursday, September 29, 2011 - 11:15 AM UTC
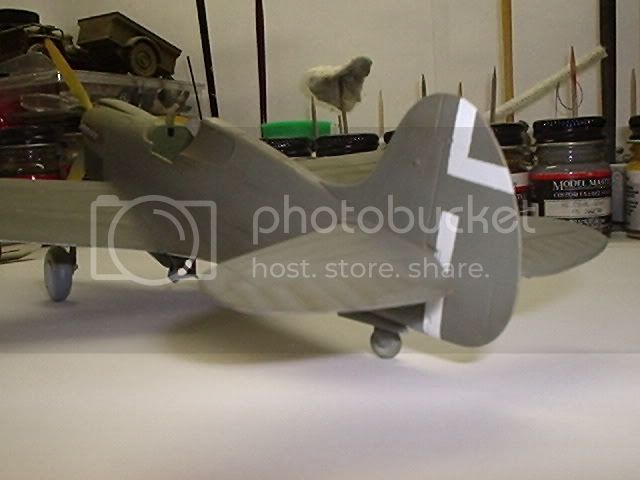
Well folks it's right down to the wire now, who's still building?
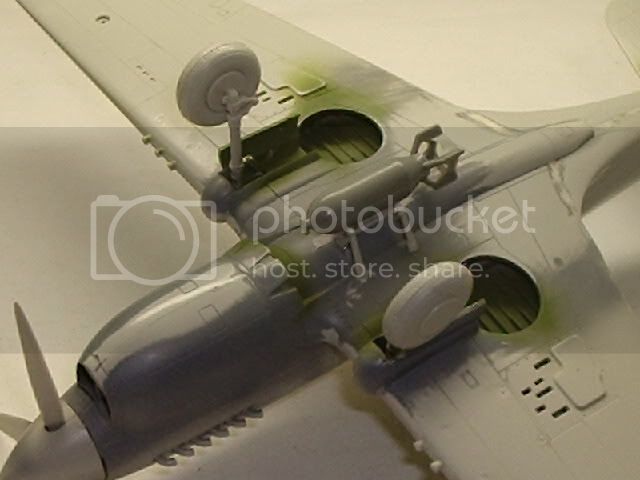
I have finished decalling and sprayed a couple of coats of Future last night, tonight I will fit the wheels and wheel bay doors an other assorted parts, then a couple of good coats of flat clear. The last item on the agenda is the prop/spinner assembly which has been painted and just needs some touch-ups and decalling.
Cheers, D
ON the bench
Revell 1/24 '53 Corvette (building as '54)
Revell 1/24 BMW 507 Coupe and Cabrio
Italeri 1/48 Me262 B-1a/U1 Nightfighter
Monogram 1/24 '57 Chevy Nomad
Dragon 1/350 USS Frank Knox DD-742
Idaho, United States
Joined: May 16, 2003
KitMaker: 895 posts
AeroScale: 457 posts
Posted: Thursday, September 29, 2011 - 06:49 PM UTC
There is only two kinds of fires. Those that use less than 500 gallons of water too extinguish and those that use WAY MORE!
AussieReg
Associate Editor #007
Victoria, Australia
Joined: June 09, 2009
KitMaker: 8,156 posts
AeroScale: 3,756 posts
Posted: Thursday, September 29, 2011 - 11:22 PM UTC
Quoted Text
With luck I will have finished pictures (Minus any weathering) of it on Saturday morning.
Good work Brian, I'll be doing the same thing with the no-weathering final pics. I will give it some weathering down the line sometime. Your build is looking good mate, nice choice of scheme.
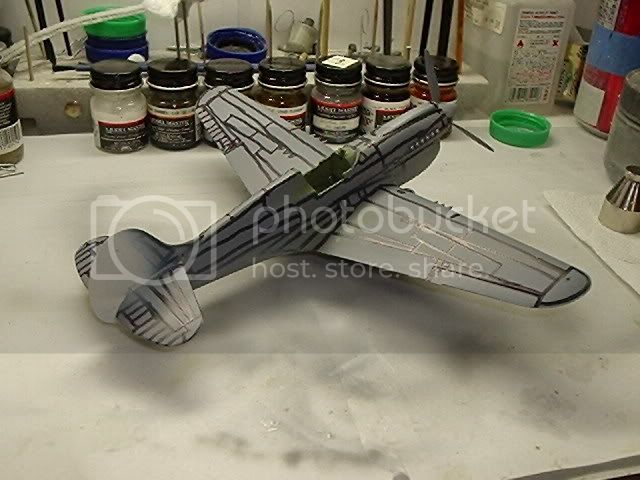
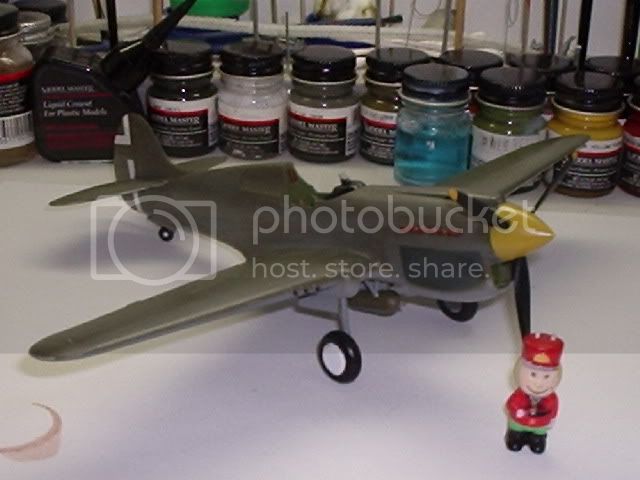
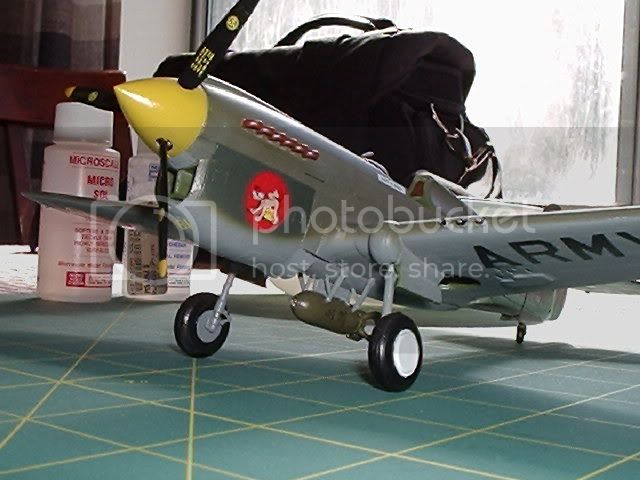
Here's where I'm at . . . .


A few little touch-ups on the paint, decals on the spinner/prop assembly, and a goodly coat of flat clear and I'm there !
Cheers, D
ON the bench
Revell 1/24 '53 Corvette (building as '54)
Revell 1/24 BMW 507 Coupe and Cabrio
Italeri 1/48 Me262 B-1a/U1 Nightfighter
Monogram 1/24 '57 Chevy Nomad
Dragon 1/350 USS Frank Knox DD-742