Air Campaigns
Want to start or join a group build? This is where to start.
OFFICIAL: P-40, Work Horse of WWII Campaign
Emeritus
_VISITCOMMUNITY
Uusimaa, Finland
Joined: March 30, 2004
KitMaker: 2,845 posts
AeroScale: 1,564 posts
Posted: Tuesday, March 01, 2011 - 05:31 AM UTC

Quoted Text

Ah Eetu, is that the correct marking for a Finnish A/C or is 'something' missing??


Yep, the roundel's are missing the blue swastika. No swastikas on box art seems to be company policy, regardless of nationality.
Fortunately the decal sheet has both those funny white circles and complete one-piece insignias as well, the latter positioned on the edge of the sheet ease cutting off for countries banning the symbol.

Edit: Harm pretty much covered it while I was doodling away with my reply.
I had the impression too that showing Nazi symbols in Germany is legal for "educational and historical purposes". Scale models seem to be generally considered to fall into the category of toys though, as photos from model shows often show models having these banned symbols covered with masking tape, post-it notes, etc.

Manufacturers' approaches seem to vary quite wildly. Hasegawa doesn't show swastikas on box art but includes one-piece decals (well, unless you happen to buy it in certain countries). Eduard has the same box art policy, but they usually have both complete and multipart swastikas.

The original Finnish air force insignia seems to be a tricky case for kit manufacturers. While it was adopted way back in 1918 and had nothing to do with the Nazi swastika, it of course looks very similar to the uninformed and understandably (if annoyingly) some manufacturers make the multi-part.
One can find various combinations of box art and decals, from realistic box art with cut-up decals to censored box art with one-piece markings.
I think the most peculiar case I've seen so far is AML's Hawk 75. The box art shows a Finnish roundel with a blue cross, and the decal sheet has two-part German swastikas and intact Finnish markings
Bigrip74
_VISITCOMMUNITY
Texas, United States
Joined: February 22, 2008
KitMaker: 5,026 posts
AeroScale: 2,811 posts
Posted: Tuesday, March 01, 2011 - 06:00 AM UTC
@ Floyd: nice choice of markings, my first wife was a strawberry blonde and boy was she a pistol I hope your Strawberry Blonde build has a better dispasition . Don not forget to enlist into the campaign page listed in the link below.

http://aeroscale.kitmaker.net/modules.php?op=modload&name=Campaigns&file=index&req=showcontent&id=418

@ Harm: welcome to the campaign be sure to enlist on the link above.

Bob
md72
#439
_VISITCOMMUNITY
Washington, United States
Joined: November 05, 2005
KitMaker: 4,950 posts
AeroScale: 3,192 posts
Posted: Tuesday, March 01, 2011 - 06:43 AM UTC
Eetu & Harm,

I was assuming that was the case, Hasegawa being overly cautious. I thought the swastikas used by the Finns, the LaFayette Escadrille, Hindu and Buddist sects and American Indians were reversed from the Nazi symbols. I guess that could cause lots of problems.

Several years ago I visited Seoul, South Korea. The map provided by my hotel incuded a swastika on a building across the street. Much to my relief, it turned out to be a large Buddist temple.

NickZour
_VISITCOMMUNITY
Attica, Greece / Ελλάδα
Joined: May 01, 2008
KitMaker: 1,437 posts
AeroScale: 1,241 posts
Posted: Tuesday, March 01, 2011 - 07:21 AM UTC
Here is the kit I build for this campaign and the start I made


Cheers Nick
Bigrip74
_VISITCOMMUNITY
Texas, United States
Joined: February 22, 2008
KitMaker: 5,026 posts
AeroScale: 2,811 posts
Posted: Tuesday, March 01, 2011 - 07:24 AM UTC
I started my squadron:
The book that I am using for my color scheme guide.
Photobucket

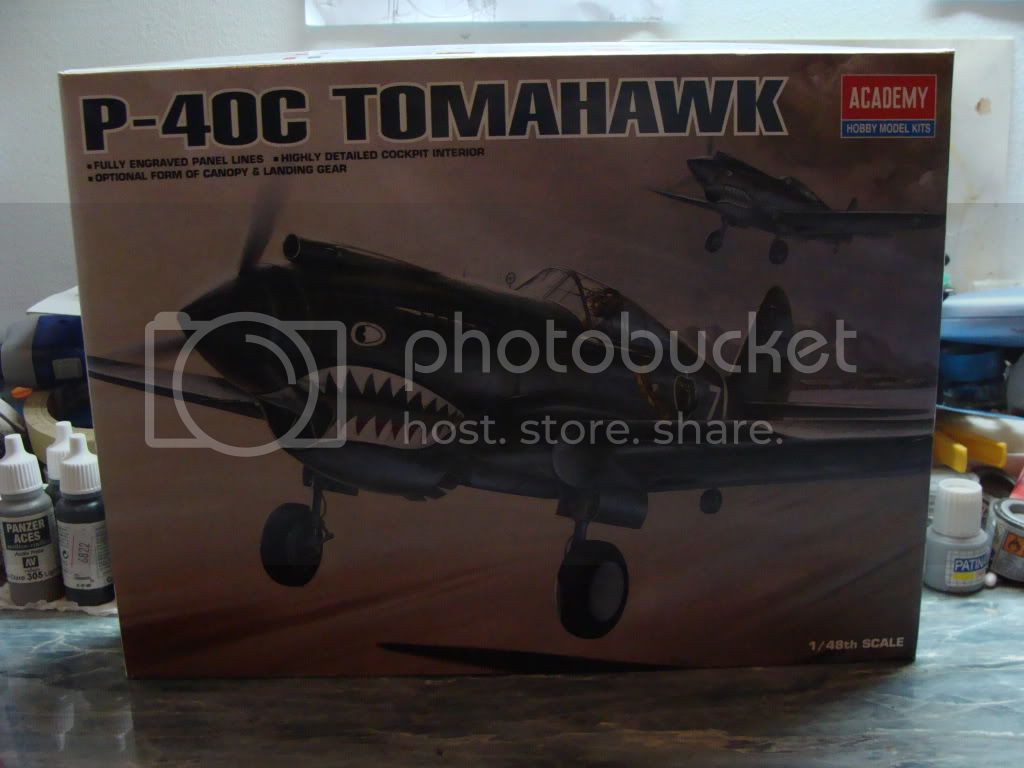
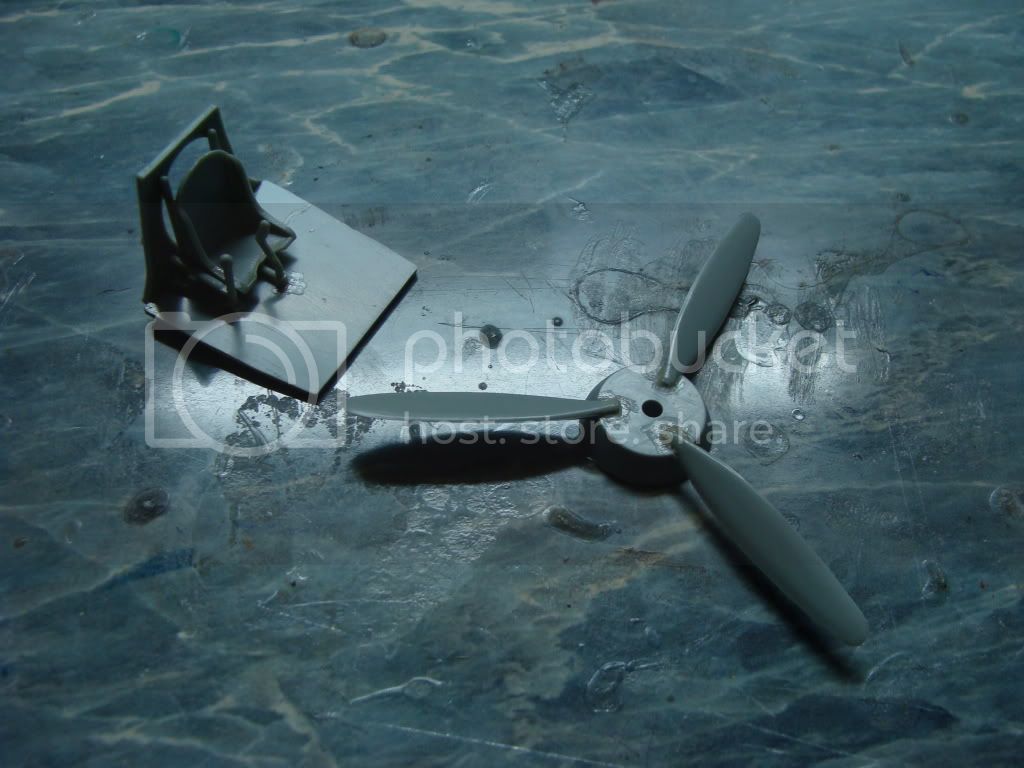
Academy P40C 1/48
Photobucket
Photobucket

Otaki P40E 1/48 this kit does not count since it had been started already, but I could not resist the chance to build another P40
Photobucket
Photobucket

Navair (AMT ?) P-40F 1/48. Love the Med. schemes wih Azure Blue for this a/c.
Photobucket
Photobucket

Academy P-36A/C 1/48
Photobucket

Ok! there is no room on my bench to put my books for class so I am in the floor doing my study. The P-40's need a proper place to rest while I do surgery on them

Bob
Bigrip74
_VISITCOMMUNITY
Texas, United States
Joined: February 22, 2008
KitMaker: 5,026 posts
AeroScale: 2,811 posts
Posted: Tuesday, March 01, 2011 - 08:35 AM UTC
Tim, I just read your review on Special Hobby's 1/72 P-40F/L and wish that it was in 1/48. My favorite scale.

http://aeroscale.kitmaker.net/review/6051

Bob
SGTJKJ
#041
_VISITCOMMUNITY
Kobenhavn, Denmark
Joined: July 20, 2006
KitMaker: 10,069 posts
AeroScale: 3,788 posts
Posted: Tuesday, March 01, 2011 - 10:10 PM UTC
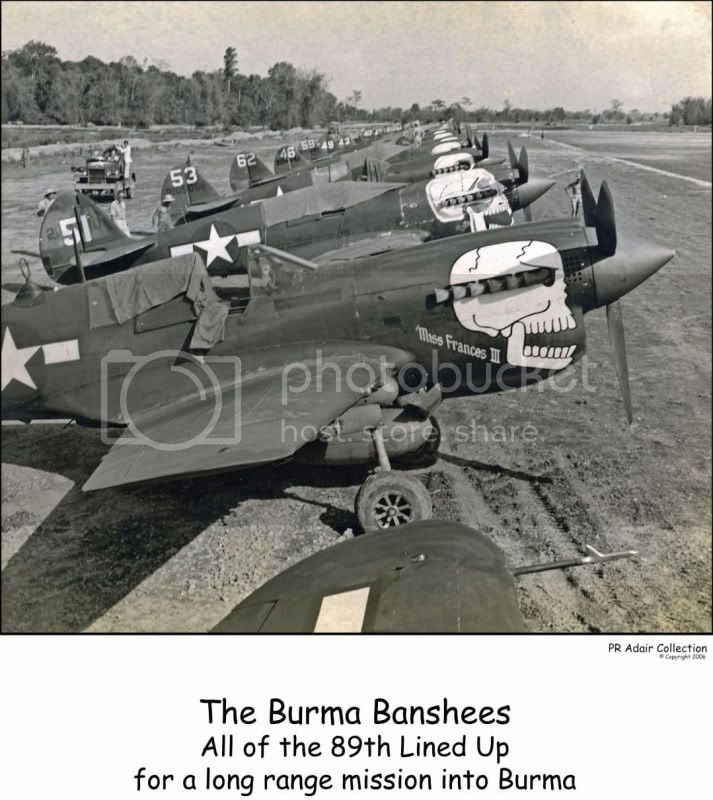
Nice start, Bob. I will be building a 1/72 Hasegawa or Matchbox kit for this campaign.
I am expecting to go for the big Skull version. That big engine and engine intake screams for massive nose art!

More to follow in a month or two.

Bigrip74
_VISITCOMMUNITY
Texas, United States
Joined: February 22, 2008
KitMaker: 5,026 posts
AeroScale: 2,811 posts
Posted: Tuesday, March 01, 2011 - 10:22 PM UTC
Jesper, that is a nice photo you have there. I wonder what any enemy thought when and if they were able to see the skulls?

Bob
litespeed
Staff MemberNews Reporter
AEROSCALE
_VISITCOMMUNITY
England - North West, United Kingdom
Joined: October 15, 2009
KitMaker: 1,976 posts
AeroScale: 1,789 posts
Posted: Tuesday, March 01, 2011 - 10:35 PM UTC

Quoted Text

Tim, I just read your review on Special Hobby's 1/72 P-40F/L and wish that it was in 1/48. My favorite scale.

http://aeroscale.kitmaker.net/review/6051

Bob


Me too Bob, me too! An excellent one though for those that do work in 1/72. I have just started building up the cockpit. Makes a nice change swapping scales every now and then.
All the best.
tim
Red4
_VISITCOMMUNITY
California, United States
Joined: April 01, 2002
KitMaker: 4,287 posts
AeroScale: 1,164 posts
Posted: Wednesday, March 02, 2011 - 12:47 AM UTC
I'll be starting mine this evening. Trumpeters offering in 1/32 of Second Sqdn Leader John Newkirk's mount #34 out of Toungoo Burma, 1941. My customers Aunt knew the pilot so this build is for her. I have the markings in hand so it should be a quick and easy build.
What is interesting about Jesper's picture is the placement of the tail numbers. They all vary in some form which is pretty cool. Thanks for posting it Jesper.
Progress pics to follow soon. "Q"
atoplu
_VISITCOMMUNITY
Ontario, Canada
Joined: August 17, 2003
KitMaker: 753 posts
AeroScale: 174 posts
Posted: Wednesday, March 02, 2011 - 02:11 AM UTC
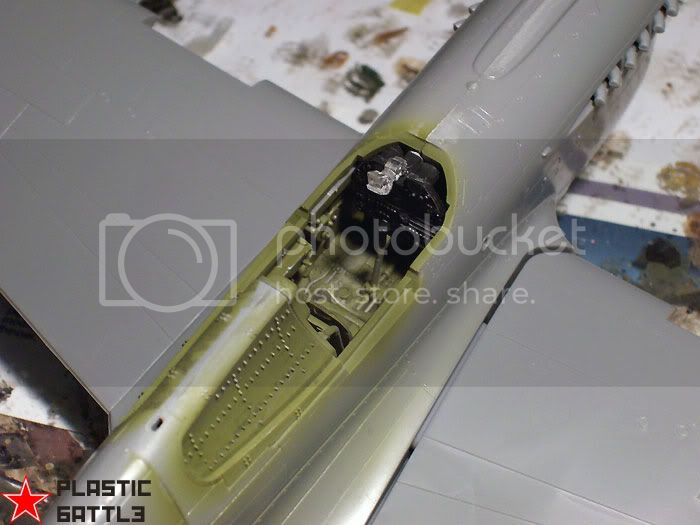
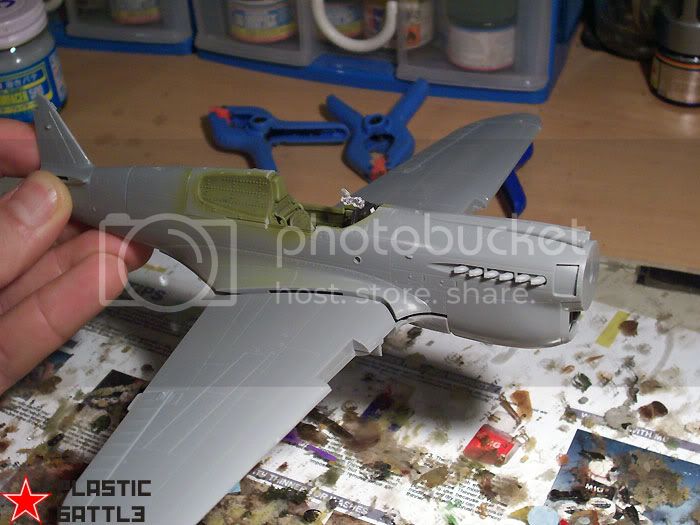
Today I got the model in general, in the cockpit and its weathering over. Hasegawa's the same mold in a few places because of love for a few models P-40 extraction is the problem.


Red4
_VISITCOMMUNITY
California, United States
Joined: April 01, 2002
KitMaker: 4,287 posts
AeroScale: 1,164 posts
Posted: Wednesday, March 02, 2011 - 04:04 AM UTC
Looks good Ayhan. Something you might want to change is the area behind the cockpit. Note that the area under the rear perspex panels behind the cockpit are painted the external camouflage color, not the cockpit color. Those panels are easily removable, so even repainted aircraft usually had these areas in the new colors as well. Hope this helps. "Q"
Bigrip74
_VISITCOMMUNITY
Texas, United States
Joined: February 22, 2008
KitMaker: 5,026 posts
AeroScale: 2,811 posts
Posted: Wednesday, March 02, 2011 - 08:29 AM UTC
@ Ayhan: welcome aboard and thanks for enlisting. You have made a quick start, the cockpit is a touchy part of the assembly in my case. Matt does bring up a point regarding the area under the rear glass.

@ Matt: your commision build brings this kit closer to home by having a personal interest in it. I can remember having a paper route (Dallas, Tx) in Jr. High and one of my customers was in the AVG. He let me look at his photo albums and paraphenalia. He had one of the gold peices that they were paid by the Chinese govt. when they were credited with downing a Japanese a/c. I do not remember his name, probably since my accident . In 1993 I met Charlie Bond at my fathers house in Emory Tx (he made custom knives for he DEA, special forces) and Charlie Bond was a customer. I recieved A Flying Tigers Dairy and a print of Chalie's no. 5 a/c. He gave me the story of how the 1st. squadron got their Adam and Eve art work and related the story how they had seen in some magazines while onboard the ship over to India the RAF/RAAF P-40's with sharks teeth and everyone had a contest on who came up with the best looking mouth. At one point I had planned on builing his no. 5 for him, but he passed away before I was able to do so. It seems there are many here who are touched in some way by the AVG whether it is by a father, brother, uncle, or by coincidence. And many of them owe much to the P-40's ability to do what was needed and to the leadership that knew what and how to use this tool of war.

NEW MATRIX
Photobucket

I borke open Academy's P-36A and started with the cockpit I had to install the bulkhead to one half of the fuselage in order to make sure when the floor was installed it was at the correct angle (good ole Academy) The wings went together ok, and they have the canvas in the wheelwell a nice touch for an inexpensive kit.

The ammo chute needs to be cut open along with leading edge gun protrution holes.

Photobucket
Photobucket
Photobucket
Photobucket

I like the French Scheme best and the Brazilian second.
Photobucket
Photobucket

This is the cockpit step and the angle they give you to complete in order to install in the fuselage correctly with no help. So I installed the bulkhead on one half of the fuselage then glued the floor onto the bulkhead. Makes it easier to install but harder to paint
Photobucket

Bob
Red4
_VISITCOMMUNITY
California, United States
Joined: April 01, 2002
KitMaker: 4,287 posts
AeroScale: 1,164 posts
Posted: Wednesday, March 02, 2011 - 08:49 AM UTC
Interesting story Bob, thanks I've ran into similar problems with other kits and the floor/bulkhead issue. Here is how I handled it so you can remove the cockpit for easier painting. Glue the floor and the rear bulkhead together and then while the parts are still soft, place it in the fuselage at the correct angle and let it dry fully. Once dried fully, you can then pull it out, add the additional pieces and paint as normal. I never really follow the kit supplied degree measurements....how many of us have something on hand to accurately measure angles on our workbench anyway?
I'll typically use some poster tac/blu-tac to hold things in place, glue them, and then let them set. It works well. At least you've made a start. It'll be a little while before I can get going on mine. "Q"
md72
#439
_VISITCOMMUNITY
Washington, United States
Joined: November 05, 2005
KitMaker: 4,950 posts
AeroScale: 3,192 posts
Posted: Wednesday, March 02, 2011 - 09:04 AM UTC
@ Matt, great tip. I borrowed it for my F2H.

@Bob, was the floor of the cockpit in the P-36 the top of the mid wing fuel tank like it was in the P-40?

Oh, and BTW, I'm still going to build the 1/72 P-40E
29Foxtrot
_VISITCOMMUNITY
Victoria, Australia
Joined: September 19, 2003
KitMaker: 708 posts
AeroScale: 674 posts
Posted: Thursday, March 03, 2011 - 01:13 AM UTC
Hi All,

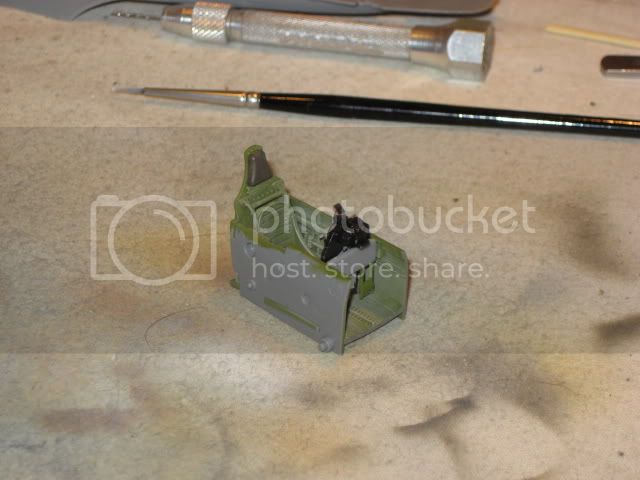
Started on the interior of the 'K' version of the Kittyhawk. Some progress was made to complete the tub in between other builds and projects.


More to follow as the build progresses.
litespeed
Staff MemberNews Reporter
AEROSCALE
_VISITCOMMUNITY
England - North West, United Kingdom
Joined: October 15, 2009
KitMaker: 1,976 posts
AeroScale: 1,789 posts
Posted: Thursday, March 03, 2011 - 08:40 AM UTC


Hi all
If you are looking for something different to finish your P-40N have a look at this excellent publication from Dutch Profile.

All the best.
tim
Bigrip74
_VISITCOMMUNITY
Texas, United States
Joined: February 22, 2008
KitMaker: 5,026 posts
AeroScale: 2,811 posts
Posted: Thursday, March 03, 2011 - 09:27 AM UTC
@ Mark: I would say the floor is probably the top of the wing as you say, but with out having seen one or read any thing to know for sure

@ Rob: nice instrument panel, whats your secret?

@ Tim: does the book give a pretty good account on the operational activities of the Dutch in their areas of occupation. How many P-40's did they have at any one time?

Bob
litespeed
Staff MemberNews Reporter
AEROSCALE
_VISITCOMMUNITY
England - North West, United Kingdom
Joined: October 15, 2009
KitMaker: 1,976 posts
AeroScale: 1,789 posts
Posted: Thursday, March 03, 2011 - 09:39 AM UTC
Hi Bob
The book does give brief accounts of the activities of 102 Squadronm mainly bombing missions on rebel positions, strafing enemy airfields and recon. 102 Squadron had around 40 P-40N's at their disposal between 1945 -1949. It does not look like there were many left of the 40 by the end of 1949 as the attrition rate was very high.
All the best.
tim
29Foxtrot
_VISITCOMMUNITY
Victoria, Australia
Joined: September 19, 2003
KitMaker: 708 posts
AeroScale: 674 posts
Posted: Thursday, March 03, 2011 - 02:05 PM UTC
Bob,

The instrument panel is from the kit decal sheet, I elected to use the decal on this build as it showed a little more detail than that of a painted panel.

The Dutch Squadrons were based around Australia from '42 - '45, one of the Kittyhawk Sqn was based in Canberra, I'll hunt threw some info and post it here later.

Hope this helps a little.
Red4
_VISITCOMMUNITY
California, United States
Joined: April 01, 2002
KitMaker: 4,287 posts
AeroScale: 1,164 posts
Posted: Thursday, March 03, 2011 - 03:25 PM UTC
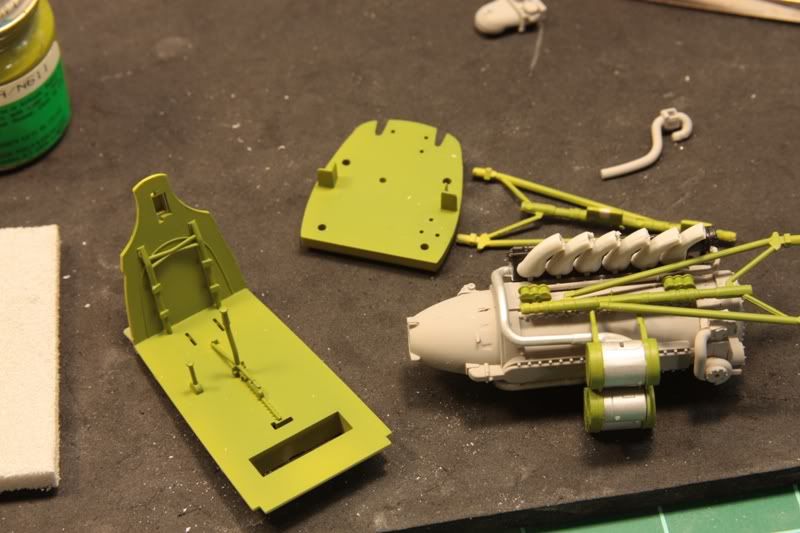
I've made a start on mine. Trumpeter's engine is pretty detailed. I am less than pleased with the way they handled the exhaust stacks. 2 Individual pieces to make up one exhaust stack...or 24 individual pieces for the exhaust assembly.. The pieces don't exactly click together either. I had to trim each piece to get them together. I still ended up with some misfits, but I can dress them up once they dry completely. I've gotten the engine painted and most of the parts installed. Will paint and add the exhaust stacks here shortly. They are just dry fitted to see how well the are going to fit. The one side I've dealt with thus far looks like they will fit fine. Hope the other side cooperates when the time comes. Everything is just base painted for now. Weathering will follow. More to follow soon. Thanks, "Q"

Cockpit floor and other goodies painted....

Engine.....
29Foxtrot
_VISITCOMMUNITY
Victoria, Australia
Joined: September 19, 2003
KitMaker: 708 posts
AeroScale: 674 posts
Posted: Thursday, March 03, 2011 - 03:26 PM UTC
Matthew,

Nice progress on your Trumpeter P40, I looked into that particular kit with the idea of doing an RAF North Africa scheme.

To add to my previous post:

The Dutch P-40 Kittyhawk Squadron based in Australia was number 120 their aircraft code was RR their markings was the tri coloured Dutch flag and based outside Canberra until their transfer.

Other RAAF Sqn's to operate the P40 Kittyhawk in the Pacific Region were:

75 - GA
76 - SV
77 - AM
78 - HU
80 - BU
82 - FA
86 - MP

Hope this helps a little.
Bigrip74
_VISITCOMMUNITY
Texas, United States
Joined: February 22, 2008
KitMaker: 5,026 posts
AeroScale: 2,811 posts
Posted: Thursday, March 03, 2011 - 05:02 PM UTC
@ Matt: that is a lot of plumbing, will it be seen by any removeable panels? I now see what looks like the oil cooler (3 can looking items) on the bottom of the engine. Is that correct?

@ Rob: do you know if the Dutch took part in any air operations during WWII with their P-40's?

Bob
md72
#439
_VISITCOMMUNITY
Washington, United States
Joined: November 05, 2005
KitMaker: 4,950 posts
AeroScale: 3,192 posts
Posted: Thursday, March 03, 2011 - 06:43 PM UTC
Bob,

I've got 120 squadron spending most of the war doing home defense duties in Australia. Spent some time in mid 1945 flying over the East Indies with Aussie units flying strafing and bombing missions.

Curtis Kittyhawk Mk.I-IV Arco-Aircam Aviation Series No.6
Red4
_VISITCOMMUNITY
California, United States
Joined: April 01, 2002
KitMaker: 4,287 posts
AeroScale: 1,164 posts
Posted: Friday, March 04, 2011 - 03:44 AM UTC
I guess the three cans on the bottom are the oil coolers as they route into the cylinder heads. I haven't looked at any panels, but will check into that today. Hopefully the panels fit well.. Thanks, "Q"