Hi everyone,
Although with very little free time for myself (or the hobby), I continue to tackle the cockpit of my 2nd Bf 110 for this campaign.
The pics show unfinished sections for the most, but the end result can be imagined. My goal is to end these 2 zerstorers around next month.
Sem título por rochaped38
Also included goes a pic of the 2 Wfr.Gr.21 rockets used on the G-2 version Pulk Zerstorer. (Little of them will be seen in the finished model, unless...)
Sem título por rochaped38
Cheers
Pedro
Air Campaigns
Want to start or join a group build? This is where to start.
Hosted by Frederick Boucher, Michael Satin
OFFICIAL: "Zerstorer!" Campaign Thread
rochaped
Lisboa, Portugal
Joined: August 27, 2010
KitMaker: 679 posts
AeroScale: 669 posts
Joined: August 27, 2010
KitMaker: 679 posts
AeroScale: 669 posts
Posted: Sunday, June 26, 2011 - 06:34 AM UTC
SUNDON
England - South East, United Kingdom
Joined: January 19, 2009
KitMaker: 158 posts
AeroScale: 155 posts
Joined: January 19, 2009
KitMaker: 158 posts
AeroScale: 155 posts
Posted: Tuesday, June 28, 2011 - 09:17 AM UTC
Made some more progress over the last couple of days.
I closed the fuselage halfs and added the nose.
This went ok with only some small amount of trimming and a little filler.
Next the engine nacelles to the wings, first the starboard.
Not to bad a little filler is required but not to bad.
Next the Port wing and engine nacelle.
This didn't go to well some styrene strips and a large clamp was required while the glue set.
I have since moved on and have attached the wings and tail to the fuselage and applied some under coat. As the weather has taken a turn for the worst and the light has got to bad to take any pictures I will add some more as I start to add some colour.
Thanks.
Martin
Posted: Wednesday, June 29, 2011 - 08:37 PM UTC
Now I have my anti-shipping campaign build finished I will get my butt into gear on my build for this campaign
SUNDON
England - South East, United Kingdom
Joined: January 19, 2009
KitMaker: 158 posts
AeroScale: 155 posts
Joined: January 19, 2009
KitMaker: 158 posts
AeroScale: 155 posts
Posted: Friday, July 01, 2011 - 04:21 AM UTC
I've been busy since Tuesday and compleated most of the painting.
Started off with a bit of pre shading.
I moved onto some RLM 76 on the underside and on the sides of the fuselage.
The RLM 75 was then added and masked off ready for theRLM 74.
This is where I'm at today , the mottling has been applied and a coat of Klear has been added.
I'll leave it to dry overnight and start applying the decals hopefully tomorrow.
Thanks
Martin
wespe66
Frederiksborg, Denmark
Joined: June 27, 2011
KitMaker: 122 posts
AeroScale: 121 posts
Joined: June 27, 2011
KitMaker: 122 posts
AeroScale: 121 posts
Posted: Friday, July 01, 2011 - 07:11 AM UTC
Hello fellow modellers,
This is my first campaign, and my first post on this cool site
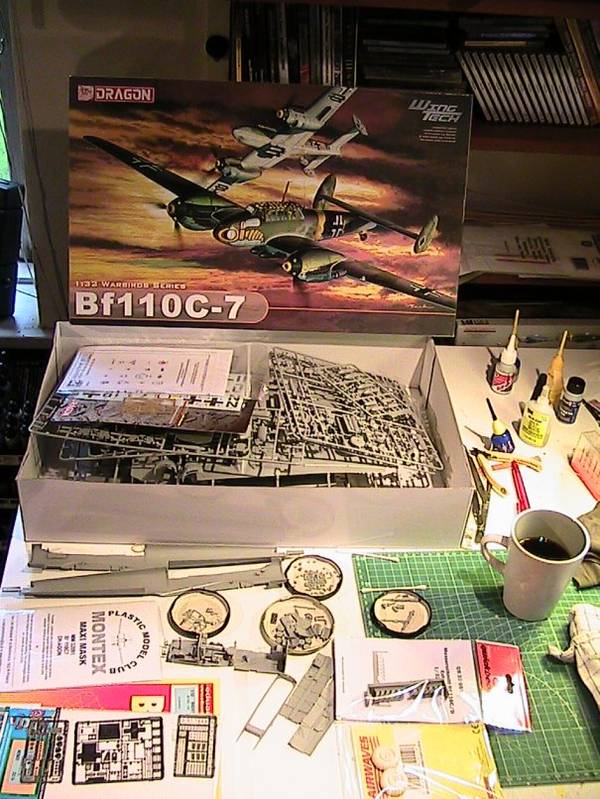
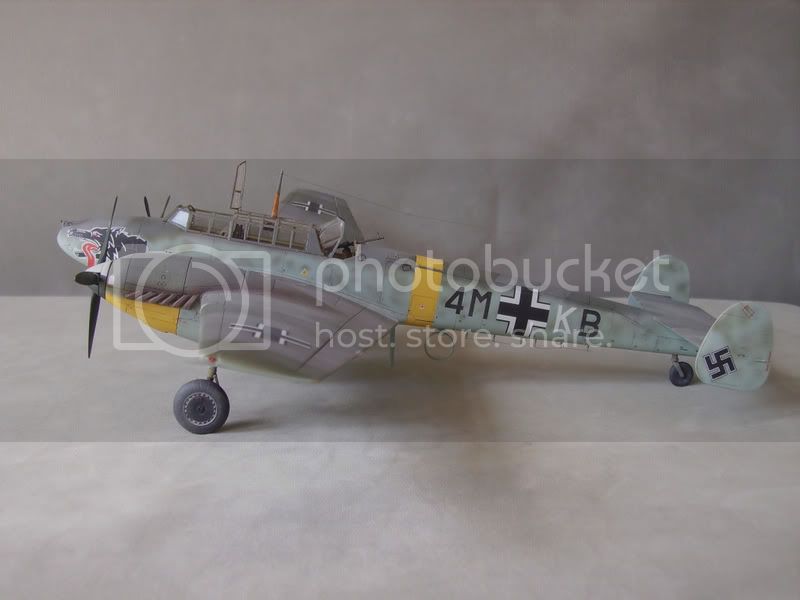
I am planning to build the Dragon Messerschmitt Bf110C-7 in 1/32 scale - as several others are doing I will be using a Big-Ed photo-etch set and resin wheels and exhausts. Crosses and markings will be painted on using a Montex paint mask.
As (I hope) you can see in the images I have started on the cockpit.
I am sure that this build will stretch my limited modelling skills to the limit and beyond! I just hope that I will be able to finish it it time for this campaign - wish me luck.
I will start a build log in the Pre-flight Check forum.
Kenneth
And now I found out how to post pictures in a forum! Yeah! What a great day!
Posted: Friday, July 01, 2011 - 11:22 AM UTC
G'day Kenneth, and welcome to Aeroscale! Great to have you on board here and thanks for joining the Campaign. I'm looking forward to seeing your build progress, so don't be shy about posting plenty of pictures and comments as you go. Also, the guys here are a wealth of knowledge and will give you (and me) all of the advice you might require, so please don't hesitate to ask any questions.
Martin, superb job on the paint scheme mate, it looks great !
I have updated the Roll Call/Build Status post on page 1 of the thread, so please take a peek to see where everybody is at. We are up to 47 enlisted now with some amazing progress on your builds, thanks guys !!
Cheers, D
Martin, superb job on the paint scheme mate, it looks great !
I have updated the Roll Call/Build Status post on page 1 of the thread, so please take a peek to see where everybody is at. We are up to 47 enlisted now with some amazing progress on your builds, thanks guys !!
Cheers, D
wespe66
Frederiksborg, Denmark
Joined: June 27, 2011
KitMaker: 122 posts
AeroScale: 121 posts
Joined: June 27, 2011
KitMaker: 122 posts
AeroScale: 121 posts
Posted: Saturday, July 02, 2011 - 05:54 AM UTC
Hi,
I'm building the cockpit of the Dragon Messerschmitt Bf110C-7 1/32 using an Eduard PE-set, and I have some questions about some PE parts in the rear end of the cockpit.
Eduard suggests that there should be a frame (part #52) containing a radio (or something) below the spare ammo drums, and also a plate or deck (#53) with a box (#72) on top of the side walls (ie above the ammo drums). Please see attached images.
I have not been able to verify anywhere, that these parts were actually fitted on bf110C, either on other kits or original photos (I have checked the instructions for Eduard bf110 1/48 - they are not there). Does anyone have a picture that shows these parts mounted on a real bf110 or a plastic kit?
Also, I am sure that the position of the plate #53 is wrong, because it will be completely hidden by plastic part A4 (part of the fuselage). And also because plastic part E15 (a big frame) would not fit at all. Maybe the correct position would be right above #52, ie. below the spare ammo-drums.
Eduard mentions that they used the following 2 books for references: "Walk Around #24 Messerschmitt Bf 110" and "Aero Detail Messerschmitt bf 110". I have checked both of those books, and I cannot find any picture of the items in question
Some expert suggestions are badly needed!
Kenneth
I'm building the cockpit of the Dragon Messerschmitt Bf110C-7 1/32 using an Eduard PE-set, and I have some questions about some PE parts in the rear end of the cockpit.
Eduard suggests that there should be a frame (part #52) containing a radio (or something) below the spare ammo drums, and also a plate or deck (#53) with a box (#72) on top of the side walls (ie above the ammo drums). Please see attached images.
I have not been able to verify anywhere, that these parts were actually fitted on bf110C, either on other kits or original photos (I have checked the instructions for Eduard bf110 1/48 - they are not there). Does anyone have a picture that shows these parts mounted on a real bf110 or a plastic kit?
Also, I am sure that the position of the plate #53 is wrong, because it will be completely hidden by plastic part A4 (part of the fuselage). And also because plastic part E15 (a big frame) would not fit at all. Maybe the correct position would be right above #52, ie. below the spare ammo-drums.
Eduard mentions that they used the following 2 books for references: "Walk Around #24 Messerschmitt Bf 110" and "Aero Detail Messerschmitt bf 110". I have checked both of those books, and I cannot find any picture of the items in question
Some expert suggestions are badly needed!
Kenneth
Posted: Saturday, July 02, 2011 - 10:14 PM UTC
Well I said I would get my butt into gear now my anti shipping model is done. I snuck onto the bench this morning while Allen was still asleep. (Im still banned form using sharp instruments ) In the space of three hours this is what I have acheived (the interior painting etc had already been done I was just putting together)
(the control column is now in place as well )
Posted: Sunday, July 03, 2011 - 12:15 AM UTC
Quoted Text
And there's me thinking you got up to make me breakfast in bed and you're not banned just don't cut yourself Well I said I would get my butt into gear now my anti shipping model is done. I snuck onto the bench this morning while Allen was still asleep. (I'm still banned form using sharp instruments )
Anyway I've had a bit of progress as well the wings are attached and the whole plane and sub assemblies were primed to check for flaws
Once I was happy the whole thing got a coat of Alclad Aluminium
Next will be a daring technique that I haven't tried before... Salt weathering/chipping
Watch this space...
Posted: Sunday, July 03, 2011 - 02:47 AM UTC
Well it's great to see the dynamic duo getting stuck in to their builds here ! Great work Camo and Tomcat, coming along just fine so far. I'm loving Cap'n Jack overseeing your work as well. I have a rock guitar Smurf and "Beaker" from the Muppets that both sit on my bench, perhaps they should sneak into a few pics occasionally. It would be very interesting to see what quirky characters watch over everybody's workspaces.
Cheers, D
Cheers, D
Posted: Sunday, July 03, 2011 - 10:30 AM UTC
I vote for Beaker
SUNDON
England - South East, United Kingdom
Joined: January 19, 2009
KitMaker: 158 posts
AeroScale: 155 posts
Joined: January 19, 2009
KitMaker: 158 posts
AeroScale: 155 posts
Posted: Tuesday, July 05, 2011 - 12:01 AM UTC
Finished last night but had to wait till this morning for some light for the Photos.
Eduards BF110 E Weekend with some added seatbelts from the spares box.
Painted mainly with Revell Aqua and some Tamiya Acrylic paints .
The only real problem I had with the build was with the engine nacelles which were a pain but came out alright at the end.
A light oil whash was applied and some exhaust stains after the dull coat to finish.
The only other addition was the antenas which was made from some fishing line .
I've really enjoyed this build and would definitely build another in the future.
Looking forward to seeing some more great builds in this copaign.
Martin
Posted: Tuesday, July 05, 2011 - 01:17 AM UTC
Great build, Martin. Excellent painting finish.
Thanks for participating.
rochaped
Lisboa, Portugal
Joined: August 27, 2010
KitMaker: 679 posts
AeroScale: 669 posts
Joined: August 27, 2010
KitMaker: 679 posts
AeroScale: 669 posts
Posted: Tuesday, July 05, 2011 - 03:37 AM UTC
Martin,
Been following your post with great enthusiasm (the same goes for Emre, due to sharing the same kit build up), and all i can say is Awesome 110, beautifully painted and assembled. Congratulations
Pedro
Been following your post with great enthusiasm (the same goes for Emre, due to sharing the same kit build up), and all i can say is Awesome 110, beautifully painted and assembled. Congratulations
Pedro
Posted: Tuesday, July 05, 2011 - 09:41 PM UTC
Superb job Martin, your 110 looks great ! It is a nice clean build and the weathering is subtle but clearly visible. Very well done all round.
Thanks for sharing your work with us.
Cheers, D
Thanks for sharing your work with us.
Cheers, D
dbmdyxl
California, United States
Joined: May 20, 2011
KitMaker: 30 posts
AeroScale: 28 posts
Joined: May 20, 2011
KitMaker: 30 posts
AeroScale: 28 posts
Posted: Wednesday, July 06, 2011 - 07:37 PM UTC
I've been enjoying all your excellent works silently, for I have made little progress since my last post. I have just finished the two engines for my P-61B:
--And first post of pg 9!!
Posted: Wednesday, July 06, 2011 - 11:18 PM UTC
Hi Jiang, and thanks for leading us on to a new page sir !
Very nice work on the powerplants, what paint colours have you used, and do I see an oil wash as well ?
Cheers, D
Very nice work on the powerplants, what paint colours have you used, and do I see an oil wash as well ?
Cheers, D
emroglan
Istanbul, Turkey / Türkçe
Joined: December 16, 2004
KitMaker: 1,163 posts
AeroScale: 255 posts
Joined: December 16, 2004
KitMaker: 1,163 posts
AeroScale: 255 posts
Posted: Thursday, July 07, 2011 - 08:38 AM UTC
Hello everyone,
Sorry for the lack of progres... but I'm getting married in two weeks, so life is "tense", to say the least. Too many things to do in too little time.
Yet I managed to make some progress in my Zerstörer... though very little.
The pilot's daily office to go bombing Britain or strafing shipping in the Mediterranean. I had to repaint the pre-colored photo-etch as they were the wrong color.
The "back office".
And everything crammed together. The fit of the fuselage is good, I was afraid the fully filled cockpit might be too wide.
These were last week. These two days I managed to get the nose section done. You can show the gun bay open or closed... I'll go for open after assembling all four guns and having a party losing and finding all those small parts!
Time permitting, I'll move on to assemble the wings and taking care of fit issues in the fuselage. Don't know if it's my fault, but the nose does not fit perfectly.
dbmdyxl
California, United States
Joined: May 20, 2011
KitMaker: 30 posts
AeroScale: 28 posts
Joined: May 20, 2011
KitMaker: 30 posts
AeroScale: 28 posts
Posted: Thursday, July 07, 2011 - 08:24 PM UTC
@Damian: I used tamiya XF 54 dark sea grey and washed them with oil paint dissolved by zippo oil
Posted: Friday, July 08, 2011 - 12:02 AM UTC
Emre, best wishes to both of you in the next chapter of your life, I hope it all goes well on the big day ! Excellent progress on your build as well, thanks for posting lots of pics.
Cheers, D
Cheers, D
Blueheeler
New South Wales, Australia
Joined: March 18, 2008
KitMaker: 347 posts
AeroScale: 223 posts
Joined: March 18, 2008
KitMaker: 347 posts
AeroScale: 223 posts
Posted: Friday, July 15, 2011 - 02:25 AM UTC
All the best for upcoming wedding Emre.
Well, its not much yet, but here is my entry, Tamiya 1/48 Mosquito.
Cheers,
Nick
Well, its not much yet, but here is my entry, Tamiya 1/48 Mosquito.
Cheers,
Nick
Posted: Saturday, July 16, 2011 - 09:41 PM UTC
Hey Nick, welcome aboard mate ! Making good progress on the Mossie already as well.
Cheers, D
Cheers, D
rochaped
Lisboa, Portugal
Joined: August 27, 2010
KitMaker: 679 posts
AeroScale: 669 posts
Joined: August 27, 2010
KitMaker: 679 posts
AeroScale: 669 posts
Posted: Sunday, July 17, 2011 - 07:16 AM UTC
Hi there,
It's been a while since my last post but here goes some more pics on the progress of both 110's
The finished pilot´s office of the C version
Also the almost complete gunners/RO office...
[url=http://www.flickr.com/photos/rochinhas4/5946732621/]
and how it is right now
Sem título por rochaped38
As seen in the pics a lot of putty and surface primer to get all parts evenly fit, which should not be accounted solely to the Kit but mostly to my errors
The G-2 is coming up nicely, albeit with the same amount of filling&sanding
[url=http://www.flickr.com/photos/rochinhas4/5946734929/]
[url=http://www.flickr.com/photos/rochinhas4/5946734929/]
That white plastic bit in the lower nose is a styrene sheet replacement for the PE part of the kit, way to hard to mould itself at the contours of the nose (that's the fairing for the MGF 20mm canons, not used in the R1 version, already overloaded with the BK 37mm canon).
I'm quite confident that both birds should progress without major obstacles from now on.
Cheers
Pedro
emroglan
Istanbul, Turkey / Türkçe
Joined: December 16, 2004
KitMaker: 1,163 posts
AeroScale: 255 posts
Joined: December 16, 2004
KitMaker: 1,163 posts
AeroScale: 255 posts
Posted: Sunday, July 17, 2011 - 09:41 AM UTC
Pedro, I see from your post that I'm not alone with problems mating the engines to the wings and the wings to the fuselage. I'm at the point of quitting this project altogether. The fit is... well there's no fit. And there's that darned step where the engine meets the wing.
Thanks for the wedding congrats guys... Less than a week to go, I'm full of stress and this Eduard kit is only making me worse!
rochaped
Lisboa, Portugal
Joined: August 27, 2010
KitMaker: 679 posts
AeroScale: 669 posts
Joined: August 27, 2010
KitMaker: 679 posts
AeroScale: 669 posts
Posted: Sunday, July 17, 2011 - 09:47 AM UTC
Cool down Emre! After all this is only a kit... it last for some months while a wedding last for many years
But you're quite right, it gets frustrating with those engines & nose
Cheers and many years of fortune in your new life
P.S.- I know better, my count goes in 2
But you're quite right, it gets frustrating with those engines & nose
Cheers and many years of fortune in your new life
P.S.- I know better, my count goes in 2