OFFICIAL: "Zerstorer!" Campaign Thread
Queensland, Australia
Joined: August 13, 2010
KitMaker: 188 posts
AeroScale: 62 posts
Posted: Monday, March 07, 2011 - 10:13 PM UTC
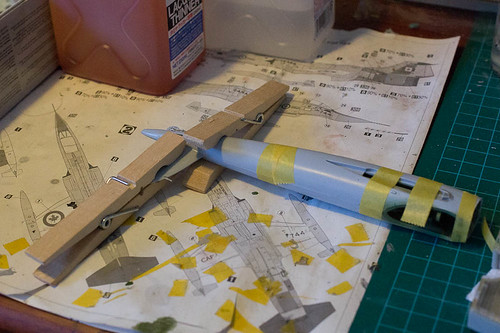
well its under way slowly, pit partly done and IP , still lots of detail painting to do.
the pe set is very nice but oh so small lol ya need a microscope to see some bits, trumpy's instructions are as usual rubbish miss numbered or no numbers at all, lucky most of us know a bit about aircraft, seat belts are wrong too i modified them to what real pics i have of the jet.


bit of luck pit be finished in couple of days.
cheers,
Graham
if at first you don't succeed try it again
my model page http://s756.photobucket.com/home/Kiwi_Modeller/index
Istanbul, Turkey / Türkçe
Joined: December 16, 2004
KitMaker: 1,163 posts
AeroScale: 255 posts
Posted: Wednesday, March 09, 2011 - 01:00 AM UTC
Okay, so it seems I'm somehow destined to join and complete this campaign... My december MOM prize arrived today, after chasing the postmen around (they have been carrying my package in their van for a week and neglecting to stop by saying they were "too busy"). What did Dragon send me? A Cyberhobby Bf 110D Nachtjager in 1/48 scale

Depending on the response of Eduard for my missing parts request, I might switch kits and build my prize instead. The only problem remaining is finding space in my shelves to park two Zerstörers now.

Proud Supporter of Armorama Campaigns

#501
Kerala, India / भारत
Joined: August 25, 2009
KitMaker: 292 posts
AeroScale: 194 posts
Posted: Wednesday, March 09, 2011 - 05:24 AM UTC
Started my entry today. Its a Revell 1/48 Bf110 G-2. And of all the Revell kits i have built till now, this one has one of the worst case of flash and badly places sprue connectors [if that is the correct term for it]. Not to mention a bad fit. But on the brighter side, it would be good learning experience.
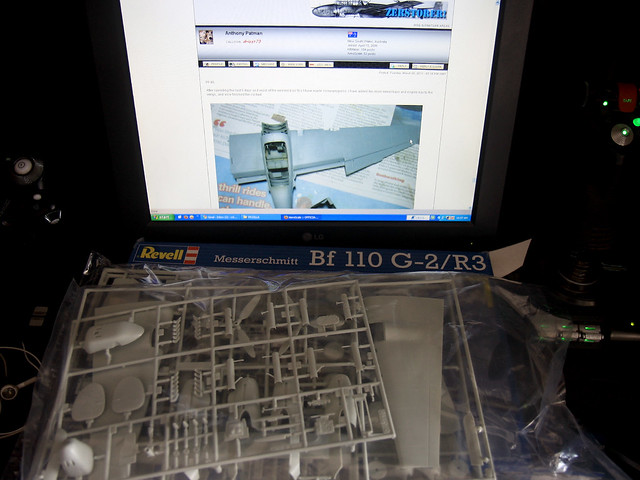
The Kit.
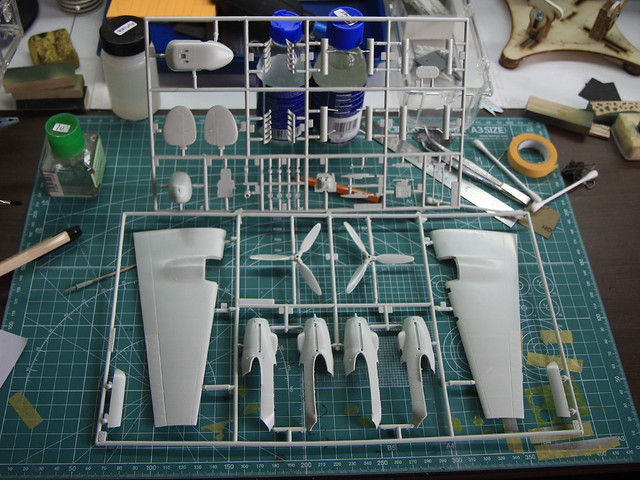
The Sprue - part I
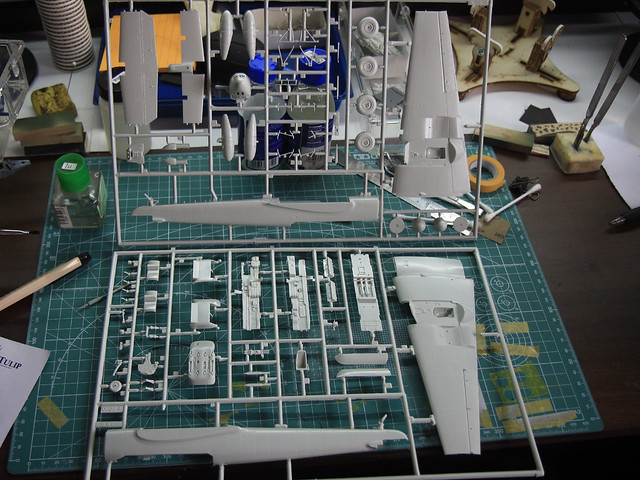
The Sprue - part II

I started with the cockpit [as usual]
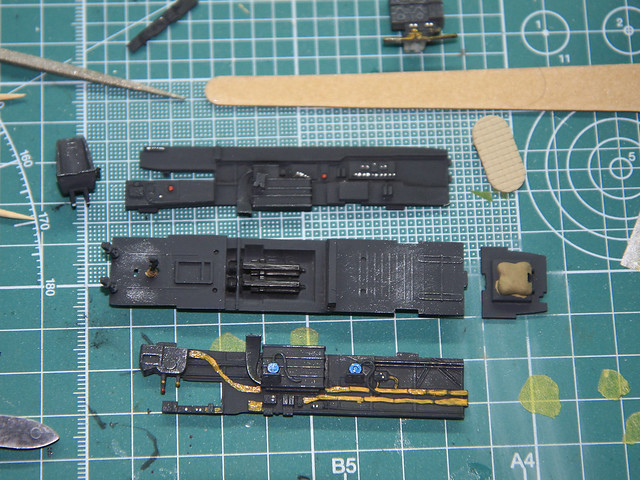
Cockpit is all finished
Future trouble spot

Texas, United States
Joined: February 22, 2008
KitMaker: 5,026 posts
AeroScale: 2,811 posts
Posted: Wednesday, March 09, 2011 - 07:17 AM UTC
Raj: I agree with your statement regarding the Revell Bf110. My kit is also warped, how is yours and what do you think of the engine nacelle attachment?
Bob
If it aint broke dont fix it.
#501
Kerala, India / भारत
Joined: August 25, 2009
KitMaker: 292 posts
AeroScale: 194 posts
Posted: Wednesday, March 09, 2011 - 07:43 AM UTC
Quoted Text
Raj: I agree with your statement regarding the Revell Bf110. My kit is also warped, how is yours and what do you think of the engine nacelle attachment?
Bob
The fuselage is warped. The lower wing looks like a relative of flash gordon. The Nacelles have a strange way of being attached. I guess the only saving grace is the interiors. As this would be my 6th model ever, i guess i can use this as a learning experience

Ontario, Canada
Joined: January 24, 2011
KitMaker: 470 posts
AeroScale: 99 posts
Posted: Wednesday, March 09, 2011 - 07:48 AM UTC
Sounds like your describing the Airfix 1/72 Ju-88 I just built. A nightmare in a cardboard box. Fun times, fun times.
Ontario, Canada
Joined: November 14, 2009
KitMaker: 270 posts
AeroScale: 264 posts
Posted: Wednesday, March 09, 2011 - 10:36 AM UTC
With Hell Week done (midterms, tons of housework and a new PC build), I can finally get a real start on this.
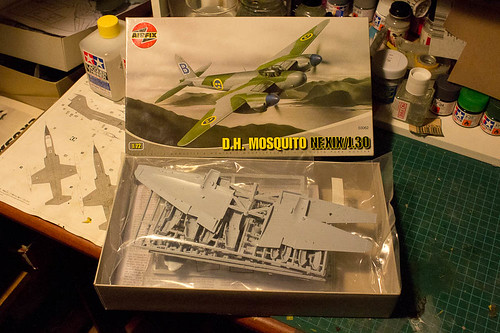 Airfix Mosquito NF.XIX 1/72
 by
mawz_models, on Flickr
I've started work on the wings so far, should have more pics to follow now that I can upload pics again.
Ontario, Canada
Joined: November 14, 2009
KitMaker: 270 posts
AeroScale: 264 posts
Posted: Wednesday, March 09, 2011 - 10:39 AM UTC
Quoted Text
Sounds like your describing the Airfix 1/72 Ju-88 I just built. A nightmare in a cardboard box. Fun times, fun times.
Or the Airfix MOssy I'm starting, test fitting the fuselage has been 'interesting'.
Queensland, Australia
Joined: August 13, 2010
KitMaker: 188 posts
AeroScale: 62 posts
Posted: Friday, March 11, 2011 - 12:12 AM UTC
Hi guys, gettin there got the fuse all sealed up and wings/engines done.

flaps will stay down .

radar only sittin there for now, as are wings.


seat belts still need paint.

will probably leave one side of gun bay open.

basically waitin for some mr surfacer to dry on a couple of seams, but over all its a nice kit to build fit is pritty good.
i think its one of trumpeters better kits, quick and easy, they give you metal landing gear legs as well as plastic ones, im using the plastic ones as think the the detail is a little crisper plus i dont need the weight i stuck a limp of lead in its snout
cheers,
Graham
if at first you don't succeed try it again
my model page http://s756.photobucket.com/home/Kiwi_Modeller/index
European Union
Joined: August 09, 2009
KitMaker: 1,732 posts
AeroScale: 1,336 posts
Posted: Friday, March 11, 2011 - 08:41 AM UTC
A little update from me. Both cockpits are painted and glued together. Test fitting on the Bf 110 is okay so far. At the moment I'm painting the pilot of the Me 410. Sorry, no pics at the moment. I'm on an expo the whole weekend and can carry on on Monday. Hope that I have something to show you by then.
Happy modelling weekend!
Torsten

My campaigns for 2020:
MiGs - Done !
The Big Three - Done !
65 years Bundeswehr - Done !
40 years Leopard 2 - Done !
Land Lease - Done !
AussieReg
 Associate Editor
#007
Victoria, Australia
Joined: June 09, 2009
KitMaker: 8,156 posts
AeroScale: 3,756 posts
Posted: Friday, March 11, 2011 - 09:08 AM UTC
Graham your 262 is coming along very nicely. I'm hatching a plot for a "Schwalbe" Campaign for next year some time, and you are giving me some more motivation.
Torsten, glad to hear that you are underway also, I'm looking forward to seeing your progress. As for me, I haven't done much more than crack open the kit and a small amount of cutting and cleaning to check the fit of the main assemblies.
Adam, are you going with the Swedish markings ? What issues have you got there with the fuselage fit ?
Cheers, D
ON the bench
Revell 1/24 '53 Corvette (building as '54)
Revell 1/24 BMW 507 Coupe and Cabrio
Italeri 1/48 Me262 B-1a/U1 Nightfighter
Monogram 1/24 '57 Chevy Nomad
Dragon 1/350 USS Frank Knox DD-742
Queensland, Australia
Joined: August 13, 2010
KitMaker: 188 posts
AeroScale: 62 posts
Posted: Friday, March 11, 2011 - 12:14 PM UTC
Hiya Damian yeh gettin there, i hope ya do do aone next year ive always wanted to do a 262 in NMF for something different i always reckoned it would look good in a kind of F86 scheme.
bit of luck it'll be pritty much together by the end of the weekend.
cheers,
Graham
if at first you don't succeed try it again
my model page http://s756.photobucket.com/home/Kiwi_Modeller/index
Texas, United States
Joined: February 22, 2008
KitMaker: 5,026 posts
AeroScale: 2,811 posts
Posted: Friday, March 11, 2011 - 01:35 PM UTC
@ Adam: is your kit flash free or abundant in extra plastic. I cant wait to see the camo on the finished build.
@ Graham: I must have missed your post regarding the scale (1/48 or 1/32) of this Me 262. From the photos it looks big.
Bob
If it aint broke dont fix it.
Ontario, Canada
Joined: January 24, 2011
KitMaker: 470 posts
AeroScale: 99 posts
Posted: Friday, March 11, 2011 - 02:07 PM UTC
Working on the cockpit. I tend to do them subdued, but am finding that it is cool on a 1/48 but on the smaller 1/72 it just doesn't show. So this cockpit is a little brighter than I normally do. Hope to get a pic up this weekend. March break here in Canada which means those small critters that get into everything called kids will be home.
Queensland, Australia
Joined: August 13, 2010
KitMaker: 188 posts
AeroScale: 62 posts
Posted: Friday, March 11, 2011 - 10:30 PM UTC
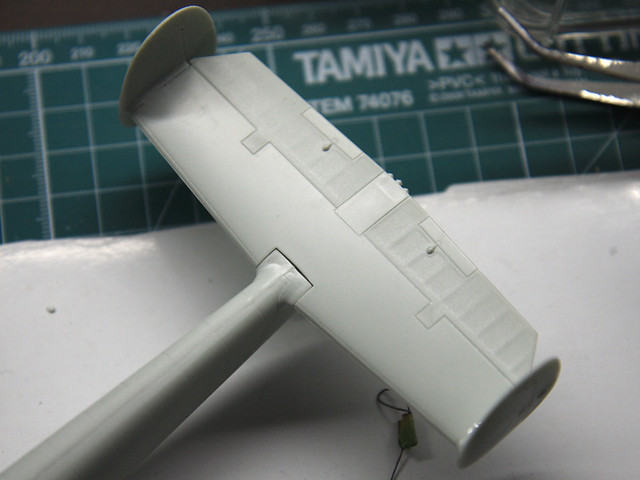
yeh its 32nd Rob, its a nice size but i wish someone would do a good 24th scale 262 i'd love a big one, i got the seat belts painted an pit pritty much finished.
the whole plane is together now will stick gear on after paint, just trying to find good ref pic of night fighter the sheet Trumpy give you say its rlm76 blue but the color sheet looks more lightish grey than blue, with left over bits of the origanal camo (grey + brown violet) and flat black underneath.
Torsten where r ya when i need a German expert
cheers,
Graham
if at first you don't succeed try it again
my model page http://s756.photobucket.com/home/Kiwi_Modeller/index
Ontario, Canada
Joined: November 14, 2009
KitMaker: 270 posts
AeroScale: 264 posts
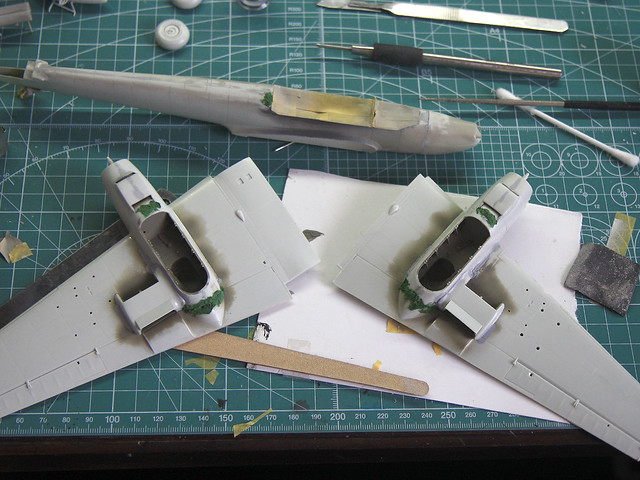
Posted: Saturday, March 12, 2011 - 03:49 PM UTC
@Bob: Almost flash free, the issue is that the fit of the fuselage halves is extraordinarily poor, I've had to trim the locating pins and will end up using a lot of putty. Good thing this is a Mosquito and there's next to no surface detail to destroy.
Oddly, the wings/nacelles look to fit well.
New South Wales, Australia
Joined: April 15, 2006
KitMaker: 158 posts
AeroScale: 70 posts
Posted: Saturday, March 12, 2011 - 09:31 PM UTC
Hi all,
Well after spending every available moment on this build I have gotten to the point where it is starting to look like a plane. I glued the wings on last night and today I have been attaching all of the seperate resin and PE panels (that will be open on the finished plane) in preparation for an undercoat. I still have a bit of work to go but I am hoping to have the undercoat on by late this week
First a better pic of the Aires cockpit as promised

The plane as it stands

some of the panels that have been blue tacked/ tamiya taped on


Some PE in the engine cowell

Cheers
New South Wales, Australia
Joined: March 09, 2006
KitMaker: 248 posts
AeroScale: 160 posts
Posted: Sunday, March 13, 2011 - 03:21 PM UTC
Anthony,
The UHU is looking good, do you have a pic of the paint scheme you are going to use?
See if you can get some more light for the photo's?
Cheers,
Mark
On the Workbench:
1/48 Academy P-38L (Pin ups II Campaign)
1/35 Dragon King Tiger
#501
Kerala, India / भारत
Joined: August 25, 2009
KitMaker: 292 posts
AeroScale: 194 posts
Posted: Sunday, March 13, 2011 - 09:40 PM UTC
Progress Update :
With all the sanding i've been doing, i can call myself Mr Sandman
I am actually quite surprised that i still have some hair left on my head

And just to think that i chose to build this kit over an Eduard 110 that i had in my stash. Dementia must have come early for me .
The wheel wells have been painted in RLM02. Tried my hand at pre-shading, i think i blew it. Ah well, i'll chalk it up to the learning experience

Putting + sanding + priming in an infinite loop

Queensland, Australia
Joined: August 13, 2010
KitMaker: 188 posts
AeroScale: 62 posts
Posted: Sunday, March 13, 2011 - 09:43 PM UTC
got some paint on it tonight still needs a bit of work but looks the part now.
used some creative licence since i couldnt find a definative scheme the pics i have all differ a little but i figure since there only a dozen or so of these made its probably close enough and its how i would prolly paint at the time.


still gotta put radar forks on , ammo panel on port side stuck on temp for painting it'll be open when finished.

cheers,
Graham
if at first you don't succeed try it again
my model page http://s756.photobucket.com/home/Kiwi_Modeller/index
Ontario, Canada
Joined: November 14, 2009
KitMaker: 270 posts
AeroScale: 264 posts
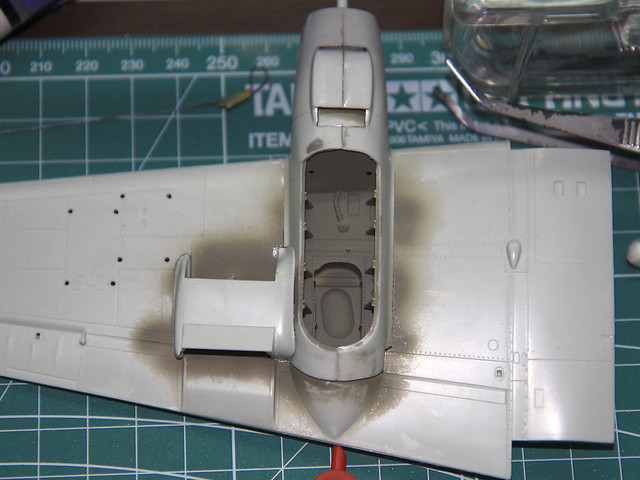
Posted: Monday, March 14, 2011 - 03:45 AM UTC
It's starting to come together:
 Airfix Mosquito NF.XIX 1/72
 by
mawz_models, on Flickr
Next up: Much filing, sanding & filling.
Texas, United States
Joined: February 22, 2008
KitMaker: 5,026 posts
AeroScale: 2,811 posts
Posted: Monday, March 14, 2011 - 06:39 AM UTC
Raj, I am watching your posts to help me with my Revell 110, After each I wonder if I should just go and purchase that Eduard kit also

Bob
If it aint broke dont fix it.
#501
Kerala, India / भारत
Joined: August 25, 2009
KitMaker: 292 posts
AeroScale: 194 posts
Posted: Monday, March 14, 2011 - 08:16 AM UTC
Quoted Text
Raj, I am watching your posts to help me with my Revell 110, After each I wonder if I should just go and purchase that Eduard kit also
Bob
Well the kit has a few fitting problems. But i found that by deviating slightly from the instructions one can have acceptable fit. For eg for the nacelles, i found out that by following the kit instructions one ends up in having a gap at the top. What i did instead was glue one half of the nacelle at a time. This lead to an acceptable fit at the top while the lower fit was not too bad. But i guess i will have to wait till i prime the whole plane to know how good was the end result

European Union
Joined: August 09, 2009
KitMaker: 1,732 posts
AeroScale: 1,336 posts
Posted: Monday, March 14, 2011 - 08:50 AM UTC
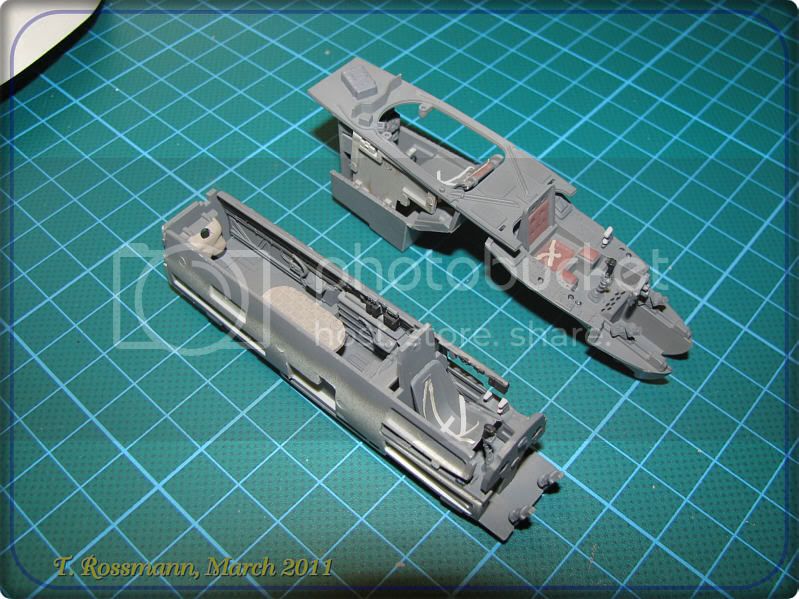
As usual I'm pretty slow at the start. Maybe because assambling cockpits isn't my favourite past time .....
But here are some pics of my builds. On the right is the Me 410 cockpit and on the left is the one of the Bf 110. Though I'm still painting the pilot of the 410 I call them ready to install.
As I have the same 110 kit on my bench as you, Raj, I will watch your progress to avoid some troubles with the fitting ....

Happy modelling from the northern HQ
Torsten

Btw: Graham, I'm not an expert if it comes to german WW 2 aircraft (maybe a "little" expert with japanese) but as far as I know the standard camo on german night fighters was RLM 76 (Light Grey) over all with RLM 75 (Medium Grey) patches or stripes (have a look at photos of the Bf 110 G-4 night fighter in the RAF Museum). Oh, and your "Two-Sixty-Two" looks really fine!
My campaigns for 2020:
MiGs - Done !
The Big Three - Done !
65 years Bundeswehr - Done !
40 years Leopard 2 - Done !
Land Lease - Done !
Queensland, Australia
Joined: August 13, 2010
KitMaker: 188 posts
AeroScale: 62 posts
Posted: Monday, March 14, 2011 - 08:11 PM UTC
thems lookin good Torsten, oh bugga hes me thinkin you bieng German you should know LOL, yeh all the pics i have and have seen say light blue on top an sides an black underneath, nut like u say the color profile trumpy gives u say blue it looks grey ( go figure) well tis done now i aint changin it that camo is sod to do but it looks good.
cheers,
Graham
if at first you don't succeed try it again
my model page http://s756.photobucket.com/home/Kiwi_Modeller/index


