Air Campaigns
Want to start or join a group build? This is where to start.
Want to start or join a group build? This is where to start.
Hosted by Frederick Boucher, Michael Satin
OFFICIAL: "Zerstorer!" Campaign Thread
611_sqd

Joined: January 24, 2011
KitMaker: 470 posts
AeroScale: 99 posts

Posted: Tuesday, August 02, 2011 - 04:17 AM UTC
Waiting on the paint to arrive in the post. Then I can get back to the 410. Dark Brown and really light green are not colours I often see with Luft birds.
Posted: Tuesday, August 02, 2011 - 10:06 AM UTC
Well the decals are on a oil panel wash done. Need to get the legs, wheels and doors on not to mention the antanne on the front end then just need to matt it down  I think I might get this finished within the next week barring anything else that crops up
 I think I might get this finished within the next week barring anything else that crops up
wespe66

Joined: June 27, 2011
KitMaker: 122 posts
AeroScale: 121 posts

Posted: Sunday, August 07, 2011 - 01:30 AM UTC
Hi all,
I have finished painting the cockpit parts on my Dragon Messerschmitt Bf110C-7 1/32. See my updated build thread here:
my build thread
Cheers,
Kenneth
I have finished painting the cockpit parts on my Dragon Messerschmitt Bf110C-7 1/32. See my updated build thread here:
my build thread
Cheers,
Kenneth

warreni

Joined: August 14, 2007
KitMaker: 5,926 posts
AeroScale: 2,201 posts

Posted: Sunday, August 07, 2011 - 03:37 PM UTC
I have been waiting since May for a set of barrels for my Bf-110 but none have turned up. I think three months is long enough so I am getting back into the build as soon as I finish my other builds.. not sure if I will make it or not..
wespe66

Joined: June 27, 2011
KitMaker: 122 posts
AeroScale: 121 posts

Posted: Tuesday, August 09, 2011 - 08:13 AM UTC
Posted: Saturday, August 13, 2011 - 10:13 AM UTC
Wooooo I am calling this finished 


Posted: Saturday, August 13, 2011 - 05:27 PM UTC
Nice build, Sam. You did a good job on the night figther scheme.
Thanks for participating
Thanks for participating

Posted: Saturday, August 13, 2011 - 07:58 PM UTC
1) Would you look at the size of that thing!!!

2) Absolutely awesome work, as good a cockpit as I have ever seen.
vanize

Joined: January 30, 2006
KitMaker: 1,954 posts
AeroScale: 1,163 posts

Posted: Thursday, August 18, 2011 - 07:53 AM UTC
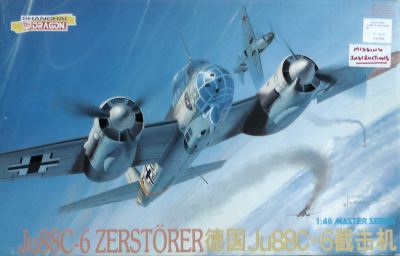
I have finally started on my build, which will be the Dragon 1/48 Ju 88C-6. The box actually says "Zerstörer", in case there was any doubt this aircraft is qualified for the campaign!
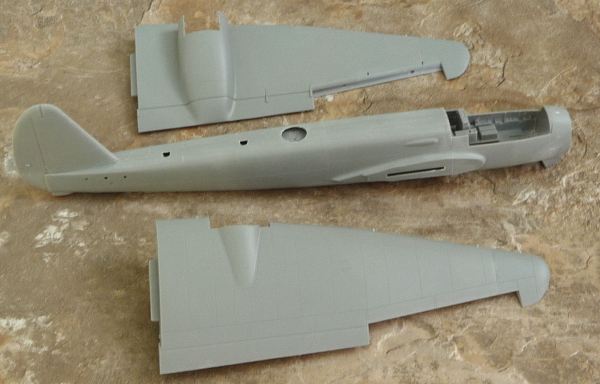
Haven't gotten far yet. avoided the classic fit problems of the wing tips by attaching the the the wing halves first instead after wing main assembly as the instructions dictate
Anyone know of a good reference showing the front of the C-6 cockpit area? I think at least one of the cannons protruded into the crew area, but not really sure.

Haven't gotten far yet. avoided the classic fit problems of the wing tips by attaching the the the wing halves first instead after wing main assembly as the instructions dictate

Anyone know of a good reference showing the front of the C-6 cockpit area? I think at least one of the cannons protruded into the crew area, but not really sure.
rochaped

Joined: August 27, 2010
KitMaker: 679 posts
AeroScale: 669 posts

Posted: Thursday, August 18, 2011 - 08:21 AM UTC
Huumm, i think so also, but not necesserly a cannon, most probably the MGs.
Time to rainsack the books
Great choice by the way!
If you're considering any aftermarket stuff, i can recommend without doubts Quickboost spinners and also CMKs new set on those seats...both vast improvements
Cheers
Pedro
Time to rainsack the books

Great choice by the way!
If you're considering any aftermarket stuff, i can recommend without doubts Quickboost spinners and also CMKs new set on those seats...both vast improvements
Cheers
Pedro
vanize

Joined: January 30, 2006
KitMaker: 1,954 posts
AeroScale: 1,163 posts

Posted: Thursday, August 18, 2011 - 08:50 AM UTC
Quoted Text
Huumm, i think so also, but not necesserly a cannon, most probably the MGs.
Time to rainsack the books
Great choice by the way!
If you're considering any aftermarket stuff, i can recommend without doubts Quickboost spinners and also CMKs new set on those seats...both vast improvements
Cheers
Pedro
thanks Pedro!
Posted: Thursday, August 18, 2011 - 03:36 PM UTC
Hi all, time for an update.
Kenneth, I've been following your build thread, beautiful work on the big 110, very impressive interior.
Sam, congrats on finishing a really nice little Uhu, the camo (sorry) came up very nice indeed.
Vance, welcome aboard sir, and thanks for joining in. I'm looking forward to watching your progress on the '88.
I have updated the Roll Call and Build Status log on page 1. Please take a look at the overview of the campaign so far, it's very impressive (except for yours truly )
)
Keep up the great work and lots of progress pics please !
Cheers, D
Kenneth, I've been following your build thread, beautiful work on the big 110, very impressive interior.
Sam, congrats on finishing a really nice little Uhu, the camo (sorry) came up very nice indeed.
Vance, welcome aboard sir, and thanks for joining in. I'm looking forward to watching your progress on the '88.
I have updated the Roll Call and Build Status log on page 1. Please take a look at the overview of the campaign so far, it's very impressive (except for yours truly
 )
)Keep up the great work and lots of progress pics please !
Cheers, D
Posted: Friday, August 19, 2011 - 10:05 AM UTC
My Pics are in the gallery, really enjoyed this campaign. There is some excellent work. Great job folks.
Posted: Friday, August 19, 2011 - 01:38 PM UTC
Quoted Text
My Pics are in the gallery, really enjoyed this campaign. There is some excellent work. Great job folks.
Congrats on getting finished Kevin, and what a great build as well ! The mottling came up really well and the weathering finishes things off perfectly. Those exhaust stains are really nicely done, what paint mix did you use ?
Thanks for joining in and sharing your work.
Cheers, D
Posted: Friday, August 19, 2011 - 01:58 PM UTC
Thanks. The exhaust stains were done using MM Acryl Black, MM Acryl Matt Clear, and Testor Airbrush thinner, all in about equal amounts, then airbrush at low air pressure. After initial coat, I added a little medium grey and when over it again.
I have to say I am very impressed by all the work done in this campaign, there are a lot of GREAT looking builds.
I have to say I am very impressed by all the work done in this campaign, there are a lot of GREAT looking builds.
mykroft

Joined: November 14, 2009
KitMaker: 270 posts
AeroScale: 264 posts

Posted: Sunday, August 21, 2011 - 04:25 AM UTC
Well, after a 2 month 'Vacation' from building and 2 weeks of no camera, thiings are moving and I've got an update. Painting has begun on the mossie and I'll probably shoot the DG tonight.

Airfix Mosquito Mk XIX 1/72 by mawz_models, on Flickr

Airfix Mosquito Mk XIX 1/72 by mawz_models, on Flickr
rochaped

Joined: August 27, 2010
KitMaker: 679 posts
AeroScale: 669 posts

Posted: Wednesday, August 24, 2011 - 08:04 AM UTC
Hello everybody!
Finally managed some time on the workbench and also to take some photos.
So here goes an update of both Bf 110...

Sem título por rochaped38
The G-2 is in a late stage construction. The pre-shading

Sem título por rochaped38
Main upper camouflage (still to be softened on those edges)

Sem título por rochaped38
Current SoC

Sem título por rochaped38

Sem título por rochaped38
The C version lags behind, but then again I started it latter...

Sem título por rochaped38
Tks for watching, comments & feedback are welcome
Cheers
Pedro
Finally managed some time on the workbench and also to take some photos.
So here goes an update of both Bf 110...

Sem título por rochaped38
The G-2 is in a late stage construction. The pre-shading

Sem título por rochaped38
Main upper camouflage (still to be softened on those edges)

Sem título por rochaped38
Current SoC

Sem título por rochaped38

Sem título por rochaped38
The C version lags behind, but then again I started it latter...

Sem título por rochaped38
Tks for watching, comments & feedback are welcome

Cheers
Pedro
mykroft

Joined: November 14, 2009
KitMaker: 270 posts
AeroScale: 264 posts

Posted: Saturday, August 27, 2011 - 02:25 PM UTC
Pedro, those 110's are coming along nicely.
Over here in Mossie land, I discovered I'd oopsed on the paint, that Ocean Grey should be Medium Sea Grey. Thankfully I hadn't shot the Dark Green yet, so it's off to the spray booth again to shoot some MSG over the OG.
Over here in Mossie land, I discovered I'd oopsed on the paint, that Ocean Grey should be Medium Sea Grey. Thankfully I hadn't shot the Dark Green yet, so it's off to the spray booth again to shoot some MSG over the OG.
Posted: Sunday, August 28, 2011 - 06:39 AM UTC
Hey Pedro 
Stunning 110's my friend
Adam,love the mossie mate
Keep going boys
Andy


Stunning 110's my friend
Adam,love the mossie mate

Keep going boys
Andy


Posted: Sunday, August 28, 2011 - 11:08 AM UTC
I've finished the Gekko, but I kept forgetting to do update posts so here's a brief highlights of the updates. so this will be a picture heavy post 
work started on the rusty exhausts. I borrowed a technique from Sam (who borrowed it from the armour guys) and hoped that it would work for this scale first you need the parts to be rusted.

The the following. Black oil paint, Mig Pigments Standard Rust and Soot, a brush, something to collect the pigments in and some thinners for cleaning up afterwards.

next paint the parts for rusting with the black oil paint. don't thin it as wee need some of the roughness.

Then dust on the Mig pigments, I added a little bit of the soot to the rust to darken it down.

and I added more soot to the exhaust apertures

the exhausts, cowling and fuel tanks were added and the masking removed after a coat of dull coat was applied


Salt weathering was done to the props, the bombs painted, and the undercarriage legs had some brake lines added.and al were give an oil wash of Paynes Grey


and last but not least the final touches were added and canopies and door put in place.


work started on the rusty exhausts. I borrowed a technique from Sam (who borrowed it from the armour guys) and hoped that it would work for this scale first you need the parts to be rusted.

The the following. Black oil paint, Mig Pigments Standard Rust and Soot, a brush, something to collect the pigments in and some thinners for cleaning up afterwards.

next paint the parts for rusting with the black oil paint. don't thin it as wee need some of the roughness.

Then dust on the Mig pigments, I added a little bit of the soot to the rust to darken it down.

and I added more soot to the exhaust apertures

the exhausts, cowling and fuel tanks were added and the masking removed after a coat of dull coat was applied


Salt weathering was done to the props, the bombs painted, and the undercarriage legs had some brake lines added.and al were give an oil wash of Paynes Grey


and last but not least the final touches were added and canopies and door put in place.

Posted: Sunday, August 28, 2011 - 11:15 AM UTC
And finally pictures of the finished plane

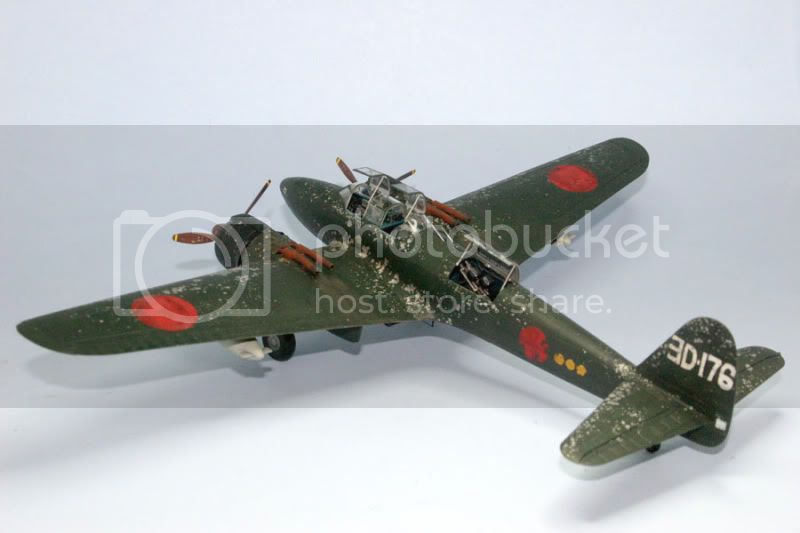


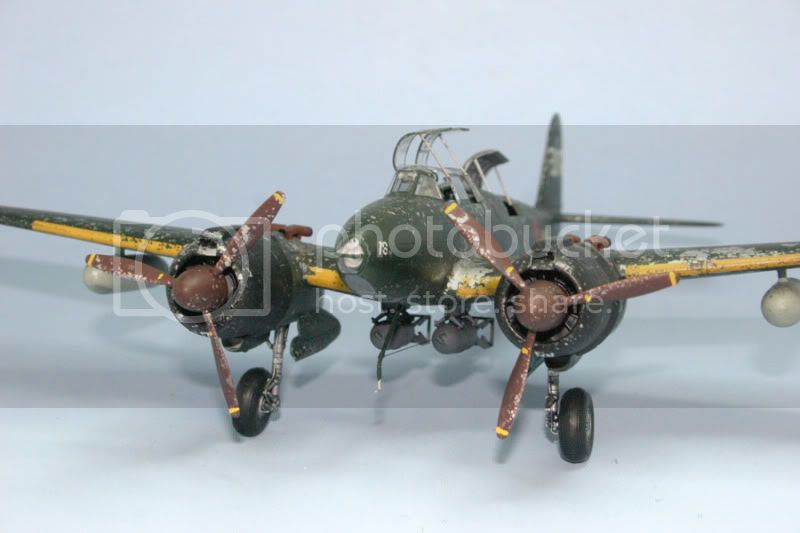
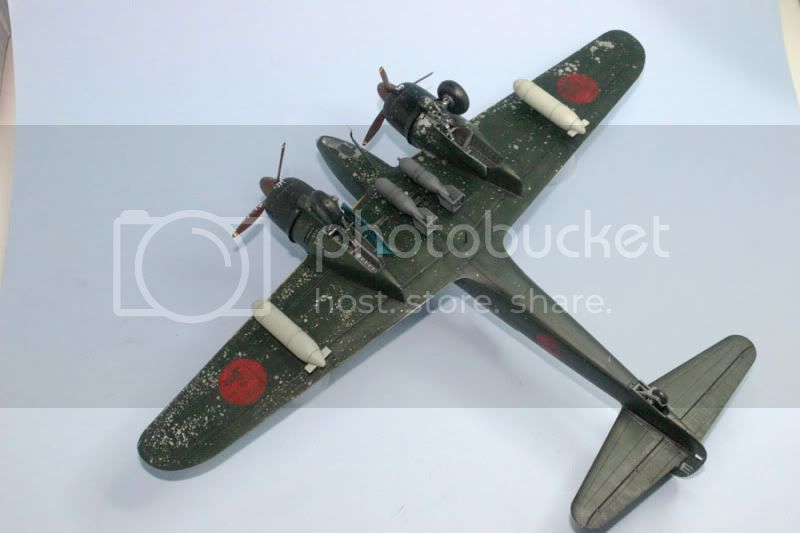
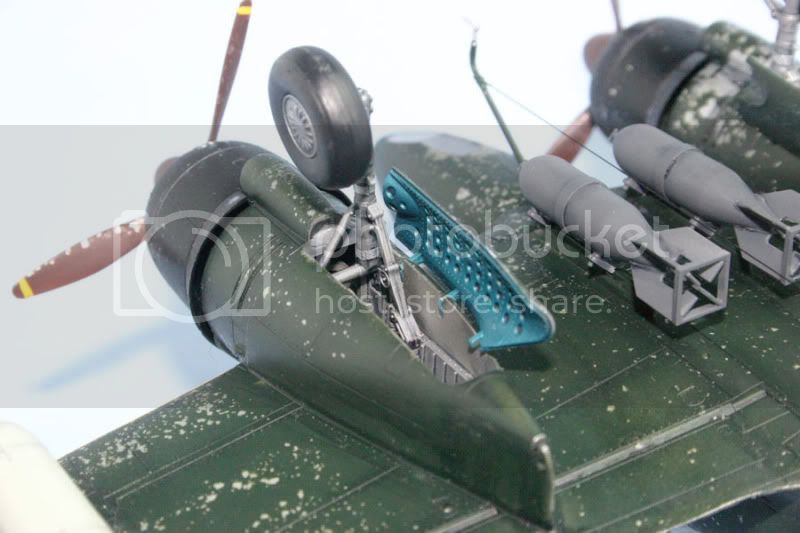


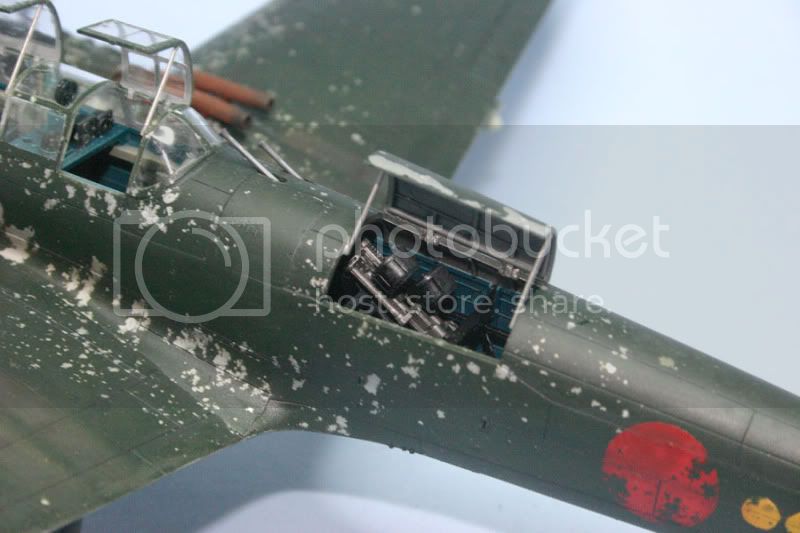

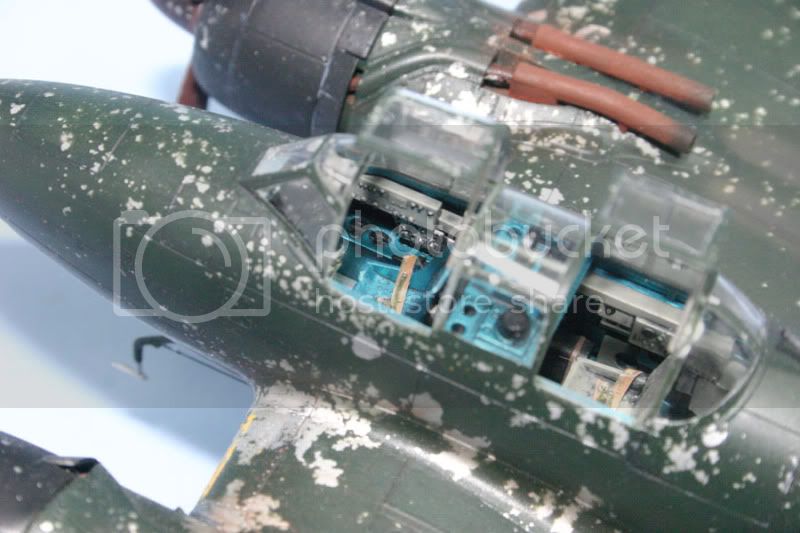
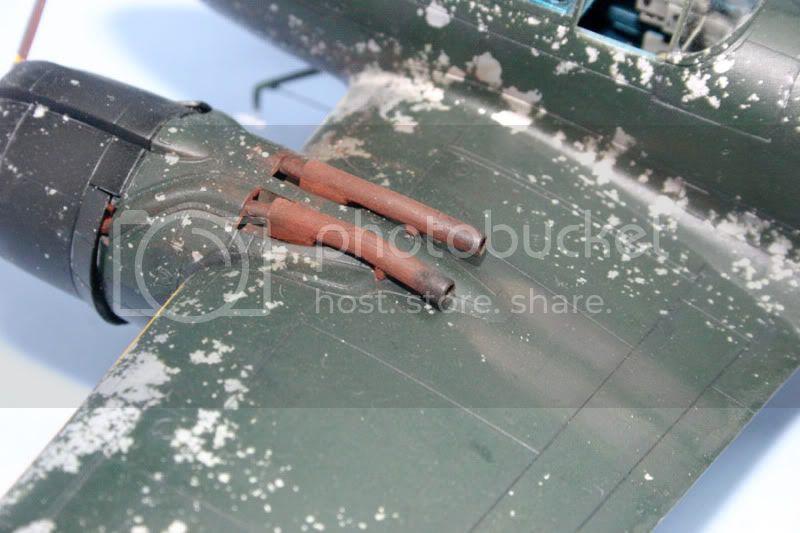
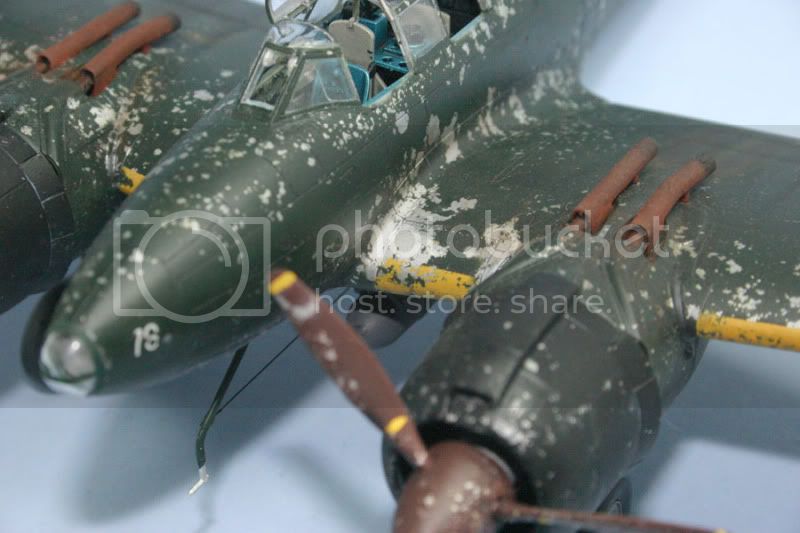
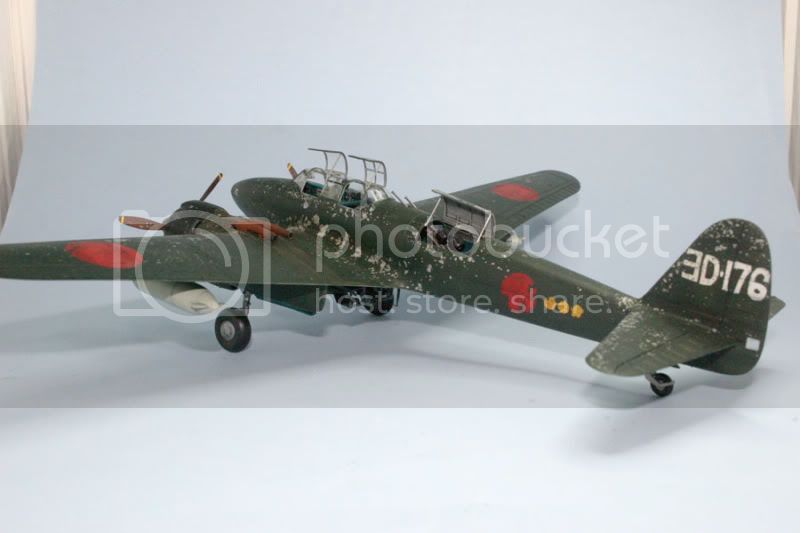
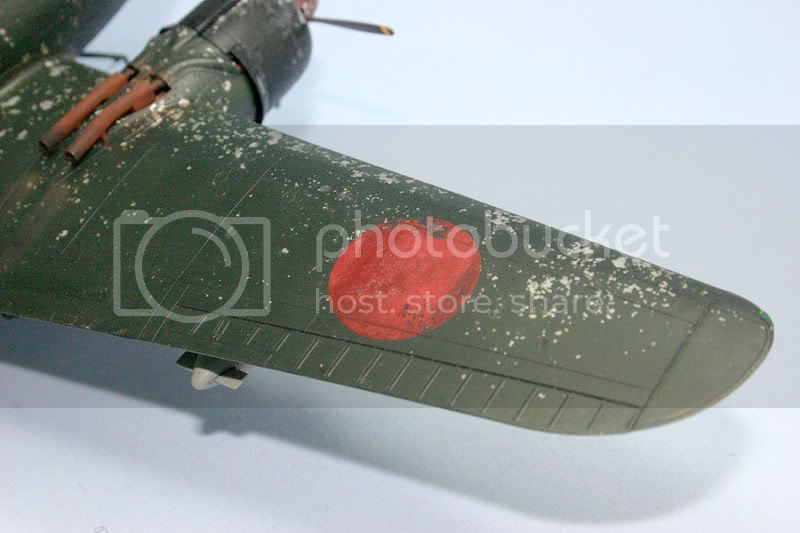
As always comments, suggestions and critique is always welcomed
I really enjoyed this campaign and I learnt several new techniques along the way. Thanks for a great campaign but now I must leave and move onto the next one


As always comments, suggestions and critique is always welcomed

I really enjoyed this campaign and I learnt several new techniques along the way. Thanks for a great campaign but now I must leave and move onto the next one

Posted: Monday, August 29, 2011 - 12:32 AM UTC
Awesome job Allen. You should be proud of your finished build, and thanks for sharing your methods with the salt-chipping and exhausts. They are both really clear and informative.
Congrats, and thanks for joining in.
Cheers, D
Congrats, and thanks for joining in.
Cheers, D
rochaped

Joined: August 27, 2010
KitMaker: 679 posts
AeroScale: 669 posts

Posted: Monday, August 29, 2011 - 05:14 AM UTC
Thanks for your encouragement Andy and Adam!
Really hope that any of these 110 can at least stand proud next to your Mossies
Cheers
Pedro
Really hope that any of these 110 can at least stand proud next to your Mossies

Cheers
Pedro
Posted: Monday, August 29, 2011 - 07:54 PM UTC
What a beautifully battered Gekko 

611_sqd

Joined: January 24, 2011
KitMaker: 470 posts
AeroScale: 99 posts

Posted: Thursday, September 01, 2011 - 06:10 AM UTC
Finally got the underside painted on the 410. Has taken forever. Truth be told I have always struggled with airbrushes. I paint with them fine, not great but fine, but always seem to have problems with them. Nearly always to do with paint flow. The PSI is fine but no where near enough paint comes out. At full back which is max air and paint a fair amount should be coming. I have to do that to get enough paint to come and even then the 410 took 10 minutes to do. Which is a acceptable time but not on a max air max paint position. Must be a blockage or something else going on. I stripped it down and its soaking at the moment.
 |


