Hi All,
Although not entirely finished, the main job is done!
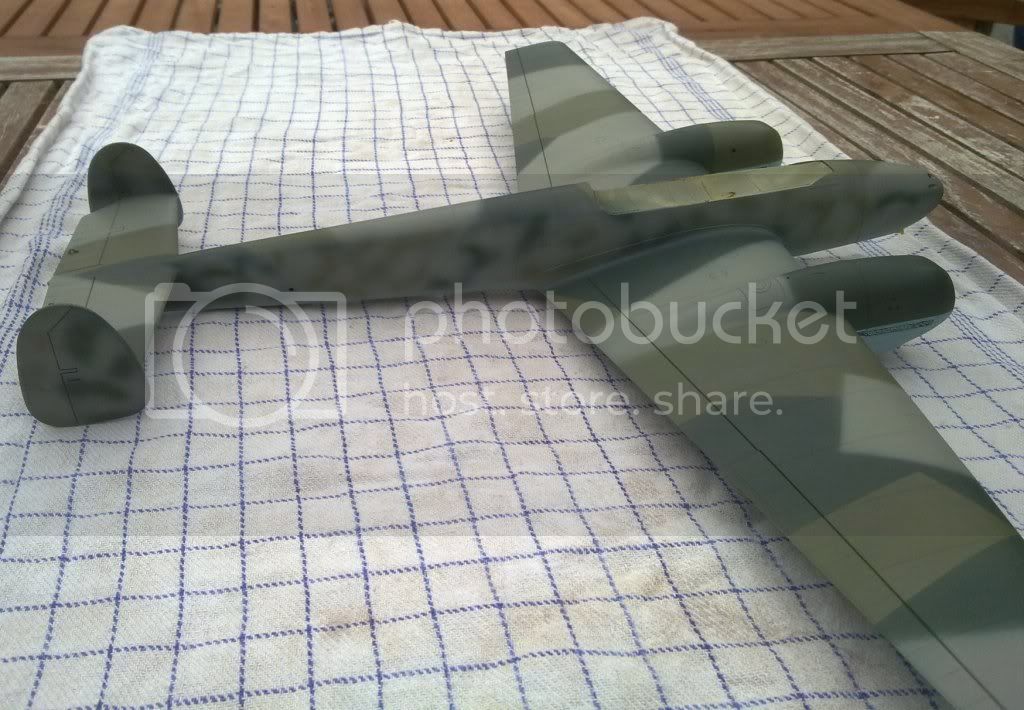
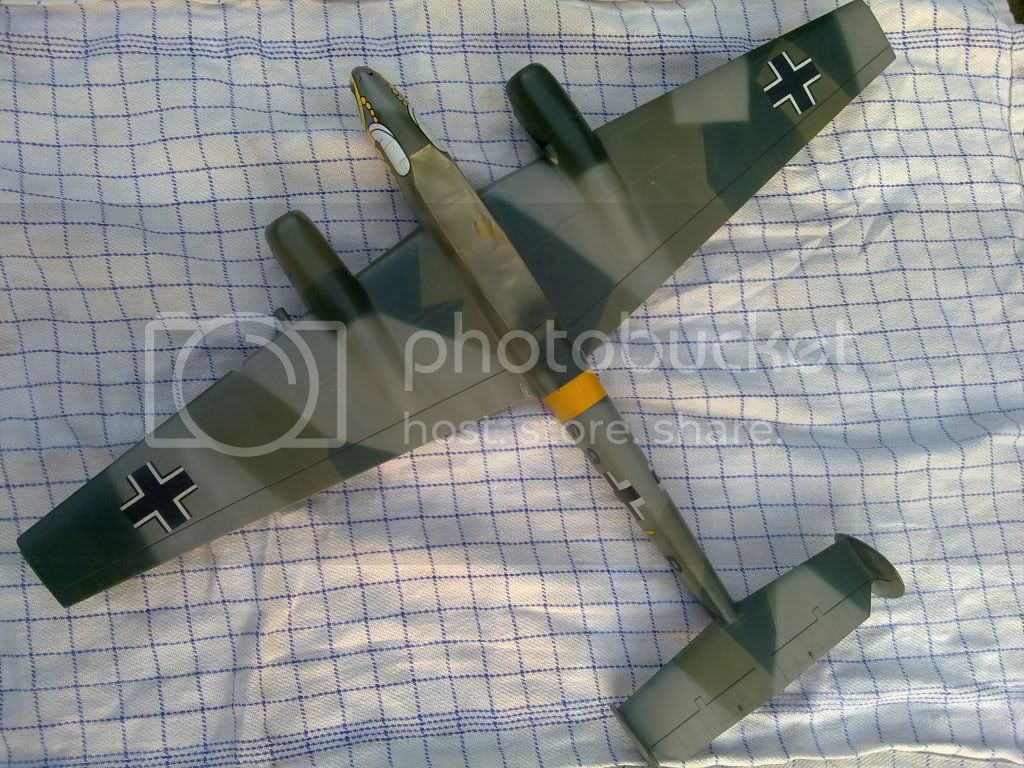
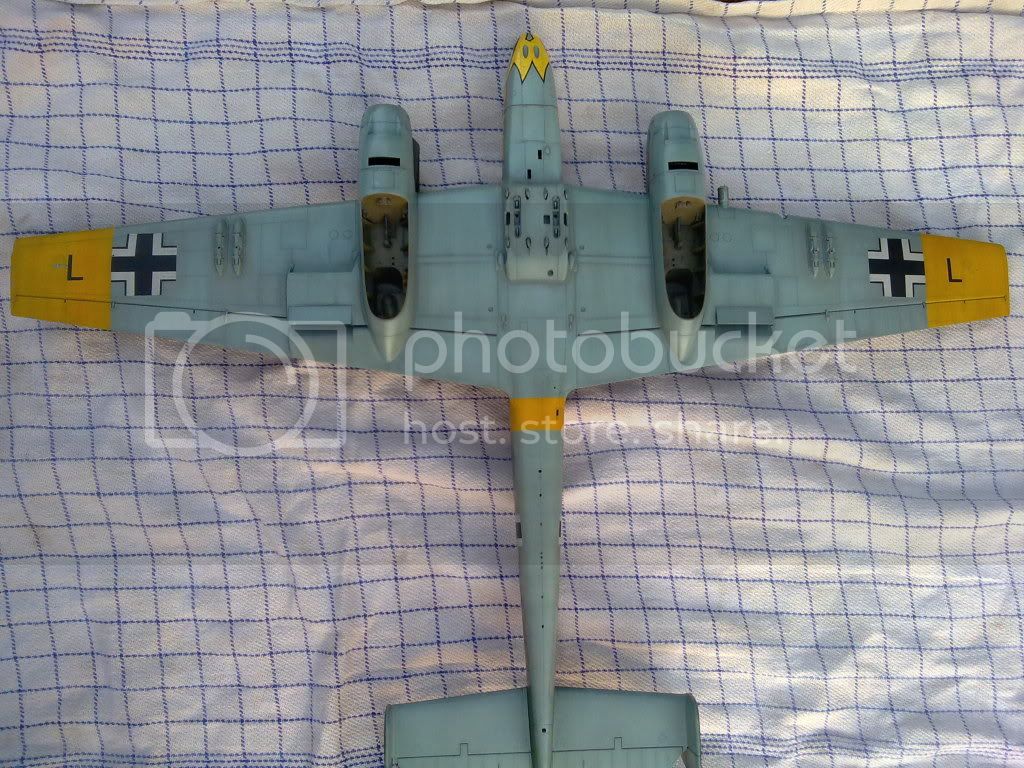
Still awaiting weathering, A/C stencils and Propos/Wheels & Guns, here are 2 snapshots from my Bf.110 G-2 from 4.ZG/26, early 1944.
[url=http://www.flickr.com/people/rochinhas4/]rochaped38
[url=http://www.flickr.com/people/rochinhas4/]rochaped38
Apologize the poor photo quality (taken from my Ipad) really don´t make justice to the model
Hope to post the finished model, this time with some decent photos!
Cheers
Pedro
Air Campaigns
Want to start or join a group build? This is where to start.
Hosted by Frederick Boucher, Michael Satin
OFFICIAL: "Zerstorer!" Campaign Thread
rochaped
Lisboa, Portugal
Joined: August 27, 2010
KitMaker: 679 posts
AeroScale: 669 posts
Joined: August 27, 2010
KitMaker: 679 posts
AeroScale: 669 posts
Posted: Friday, September 02, 2011 - 07:46 AM UTC
Posted: Saturday, September 03, 2011 - 01:01 AM UTC
Hi chums
there are some stunning builds on here
Allen,I love that Geko that salt mask works a treat,but what has stood out is the way you've chipped the markings a thing not often seen,I've seen superb weathered Jap A/C with pristeen red discs (unless they had a secret chip proof red paint!!!) and it just dont look right.
A bit more on the monster moz
ID lights added
and a bit of a Dzus fastener frenzy
I also added the spark plug and fuel pump cooling ducts as well as scribing extra panel lines and cutting slots for the exhaust manifold flange cooling ducts.
I've decided to change the landing gear from the kit parts(assembeled left) which I think are a bit fragile/flimsey for the weight of the model,for the scalemodelcraft conversions white metal set.
This means I now have to scratch build the rollers for the door retraction cables and the door fenders as the kit ones are early style and I need the later ones.
More pics soon
Andy
wespe66
Frederiksborg, Denmark
Joined: June 27, 2011
KitMaker: 122 posts
AeroScale: 121 posts
Joined: June 27, 2011
KitMaker: 122 posts
AeroScale: 121 posts
Posted: Sunday, September 04, 2011 - 05:13 AM UTC
Pedro: Very nice work on your Zerstörer!
Ok, the last few weeks work. Basic camouflage is done:
More pictures in my build thread here:
my build thread
Cheers
Ok, the last few weeks work. Basic camouflage is done:
More pictures in my build thread here:
my build thread
Cheers
JayShack
Victoria, Australia
Joined: August 11, 2011
KitMaker: 42 posts
AeroScale: 30 posts
Joined: August 11, 2011
KitMaker: 42 posts
AeroScale: 30 posts
Posted: Tuesday, September 06, 2011 - 06:01 PM UTC
wow im starting late to this one, just purchased my kitdragon 110 D/E (throught i would be different and spice the campaign up with one of these rare badboys ) 10 minutes ago, should arrive next week at some point, (time for me to hopefully finish my 1/32 109) then then a furious few weeks to churn this monster out, gosh how i love juggling acts
cheers
jay
cheers
jay
mykroft
Ontario, Canada
Joined: November 14, 2009
KitMaker: 270 posts
AeroScale: 264 posts
Joined: November 14, 2009
KitMaker: 270 posts
AeroScale: 264 posts
Posted: Wednesday, September 07, 2011 - 02:25 AM UTC
Pedro & Kenneth: Those Bf110's are coming along very nicely. Looks like I'm going to have to scramble to keep up.
Posted: Wednesday, September 07, 2011 - 06:44 AM UTC
Hi all
Managed to do one half of the landing gear today.
the early style kit door fender on the left and a modded/scratch built one on the right.
I used part ot the kit fenders removed from the built up kit U/C the rest I scratch built using 0.71mm solder.
I'll do the other one tomorrow
More soon
Andy
Managed to do one half of the landing gear today.
the early style kit door fender on the left and a modded/scratch built one on the right.
I used part ot the kit fenders removed from the built up kit U/C the rest I scratch built using 0.71mm solder.
I'll do the other one tomorrow
More soon
Andy
rochaped
Lisboa, Portugal
Joined: August 27, 2010
KitMaker: 679 posts
AeroScale: 669 posts
Joined: August 27, 2010
KitMaker: 679 posts
AeroScale: 669 posts
Posted: Sunday, September 11, 2011 - 04:16 AM UTC
Hi,
Just a quick update on the bench work
@Kenneth and Adam: thanks a lot for your feedback, keep your 110 and Mossie going!
[url=http://www.flickr.com/people/rochinhas4/]rochaped38
[url=http://www.flickr.com/people/rochinhas4/]rochaped38
[url=http://www.flickr.com/people/rochinhas4/]rochaped38
[url=http://www.flickr.com/people/rochinhas4/]rochaped38
Still a few things to go but the ending is near... to be continued soon
Cheers
emroglan
Istanbul, Turkey / Türkçe
Joined: December 16, 2004
KitMaker: 1,163 posts
AeroScale: 255 posts
Joined: December 16, 2004
KitMaker: 1,163 posts
AeroScale: 255 posts
Posted: Sunday, September 11, 2011 - 08:12 AM UTC
Pedro, it looks brilliant... wish I did not leave mine aside, I got so frustrated with it...
rochaped
Lisboa, Portugal
Joined: August 27, 2010
KitMaker: 679 posts
AeroScale: 669 posts
Joined: August 27, 2010
KitMaker: 679 posts
AeroScale: 669 posts
Posted: Sunday, September 11, 2011 - 11:32 AM UTC
Hello Emre,
Don't tell me you've "shelved" your 110?!?
I really was hoping to see your build sooner than later.
Come on, give it another try. Trust me the end result is very pleasing and sends all those dreadfull moments you experienced to oblivion.
Best
Pedro
Don't tell me you've "shelved" your 110?!?
I really was hoping to see your build sooner than later.
Come on, give it another try. Trust me the end result is very pleasing and sends all those dreadfull moments you experienced to oblivion.
Best
Pedro
emroglan
Istanbul, Turkey / Türkçe
Joined: December 16, 2004
KitMaker: 1,163 posts
AeroScale: 255 posts
Joined: December 16, 2004
KitMaker: 1,163 posts
AeroScale: 255 posts
Posted: Sunday, September 11, 2011 - 08:49 PM UTC
At the moment it is unfortunately shelved. I was frustrated so much that I began completing other half projects I have shelved previously
I was thinking whether I should abandon the project completely and start a Corsair kit for the Corsairs campaign, but seeing how well your builds turned out I might give my zerstörer just another try.
emroglan
Istanbul, Turkey / Türkçe
Joined: December 16, 2004
KitMaker: 1,163 posts
AeroScale: 255 posts
Joined: December 16, 2004
KitMaker: 1,163 posts
AeroScale: 255 posts
Posted: Sunday, September 18, 2011 - 09:52 AM UTC
Sorry to say, but I'm pulling out from this campaign. My Eduard Bf 110D crashed into the waste bin due to mechanical, structural and spiritual failures. I don't think I will be building any Eduard kits for some time. Since I don't have any other two-engined kits in my stash nor the time to build one this campaign is over for me.
Keep up the good work guys and gals.
Posted: Sunday, September 18, 2011 - 10:03 PM UTC
Update time.
Emre, I'm devastated that you're build took a dive my friend, I have really enjoyed watching your work ! I hope that your other Campaign builds go much more smoothly for you.
Pedro, stunning work ! Thanks for sharing your progress so far.
Torchy, did you model that landing gear after the Eiffel Tower mate? Man there's a lot of structure there. Excellent work, looking really good so far !
Jay, nothing like leaving things to the last minute, good luck with your speed build fella.
Kenneth, great job on the camo of your 110, it's coming along very nicely indded.
Aaron, good to hear that you have some colour applied, I hope your airbrush issues get resolved. Any chance of some pics of the 410? They are an elegant aircraft and I love seeing them being built.
I have updated the Roll Call/Build Status post on page 1, please take a peek and check who's doing what and where and why.
Cheers, D
mykroft
Ontario, Canada
Joined: November 14, 2009
KitMaker: 270 posts
AeroScale: 264 posts
Joined: November 14, 2009
KitMaker: 270 posts
AeroScale: 264 posts
Posted: Tuesday, September 20, 2011 - 03:56 PM UTC
ANd now the upper base coat is the correct colour
Airfix Mosquito NF.XIX 1/72 by mawz_models, on Flickr
Next up is masking & laying the Dark green, then some Night.
Airfix Mosquito NF.XIX 1/72 by mawz_models, on Flickr
Next up is masking & laying the Dark green, then some Night.
rochaped
Lisboa, Portugal
Joined: August 27, 2010
KitMaker: 679 posts
AeroScale: 669 posts
Joined: August 27, 2010
KitMaker: 679 posts
AeroScale: 669 posts
Posted: Wednesday, September 21, 2011 - 05:33 AM UTC
Hello everyone,
final touches on the bird, and as it will attend an exhibition this weekend, will definitely be finished late, very late a.m. friday
As usual feedback is welcome
Sem título rochaped38
Just a thought, If you think placing those U/C legs is just a matter of dry fitting... you're wrong! It really is mere guessing
Cheers
Pedro
611_sqd
Ontario, Canada
Joined: January 24, 2011
KitMaker: 470 posts
AeroScale: 99 posts
Joined: January 24, 2011
KitMaker: 470 posts
AeroScale: 99 posts
Posted: Wednesday, September 21, 2011 - 01:33 PM UTC
@Damian Yes and no on the airbrush. I fixed one issue but it turns itself on and off with a great deal of frequency and that can't be good. Ideally one day I'll get a compressor with the tank which will be cool.
Future was sprayed on it last night and i took a pic. Tonight the decals go on and weathering. Then its the canopy with probably will be a pain as its a 4 piece job and a matt coat and I think she will be done.
Got the wrong green for it. So its Kermit the Frogs Me-410. We thought we had the right colour, we got the one we ordered but light green in this case was Kermit green. So when you look at this build you need to picture Kermit the Frog in a black german uniform, cigarette in his mouth and a eye patch.
Blueheeler
New South Wales, Australia
Joined: March 18, 2008
KitMaker: 347 posts
AeroScale: 223 posts
Joined: March 18, 2008
KitMaker: 347 posts
AeroScale: 223 posts
Posted: Wednesday, September 21, 2011 - 07:54 PM UTC
That looks great Pedro! Have been able to get some paint on mine, just need to finish off the green and onto the home straight.
Cheers,
Nick.
Cheers,
Nick.
JayShack
Victoria, Australia
Joined: August 11, 2011
KitMaker: 42 posts
AeroScale: 30 posts
Joined: August 11, 2011
KitMaker: 42 posts
AeroScale: 30 posts
Posted: Thursday, September 22, 2011 - 09:42 PM UTC
it finally arrived, damn it big, now for a frantic month ahead, tonight is spent contemplating the colours schemes (black or black by the sounds of things) or whether i should buy some custom decals for a different 110, decisions decisions...
liberator
Luzon, Philippines
Joined: May 15, 2004
KitMaker: 1,086 posts
AeroScale: 38 posts
Joined: May 15, 2004
KitMaker: 1,086 posts
AeroScale: 38 posts
Posted: Thursday, September 22, 2011 - 10:20 PM UTC
hi guys..just came in late..here's a brief run down on my progress...
a hit or miss on the application of a nose art. difficult to achieve a perfect fit.
cracks and gaps on the bug's head.
quick solution..i chopped of the head and pencil drawn a new one..
..taking it of portion by portion then slowly progress on the outline and coloring..
..done..!
part of the wings and body were also damaged and reconstructed. next step is to align and fit the lines.. will post some more pictures.
wespe66
Frederiksborg, Denmark
Joined: June 27, 2011
KitMaker: 122 posts
AeroScale: 121 posts
Joined: June 27, 2011
KitMaker: 122 posts
AeroScale: 121 posts
Posted: Friday, September 23, 2011 - 06:56 AM UTC
Hi there,
Ed: I am building the same kit in the same markings as you, and I have had the same kind of problems with the big wasp. I think that you solved the problem really nice. Keep up the good work!
Update:
I have now painted the markings, applied the first decals and the first layer of weathering:
It has not been without trouble. Please see my build thread here:
my build thread
By the way, I just noted that this campaign runs for another month - I thought that it ended in a week! A cloud of stress just vanished
Cheers
611_sqd
Ontario, Canada
Joined: January 24, 2011
KitMaker: 470 posts
AeroScale: 99 posts
Joined: January 24, 2011
KitMaker: 470 posts
AeroScale: 99 posts
Posted: Friday, September 23, 2011 - 01:29 PM UTC
liberator
Luzon, Philippines
Joined: May 15, 2004
KitMaker: 1,086 posts
AeroScale: 38 posts
Joined: May 15, 2004
KitMaker: 1,086 posts
AeroScale: 38 posts
Posted: Friday, September 23, 2011 - 02:21 PM UTC
great build Kenneth..i like the weathering and markings...and nice reference too. will post some pictures i soon as i'm done with details. yes..a month to go. enough time to finish the kit. thanks all.
Posted: Saturday, September 24, 2011 - 03:23 PM UTC
Hi all
Its 3 am here and its my day off work, sodding body clock
Hey D ,thanks for the comments on the landing gear,hell of a job to do I've spent more time on them than anything thing else,next time I'll break out the Meccano set
Ken and Ed thats a fine pair of 110's fellas,and Ed ,well saved on the nose art,great job
Nick the mossies looking good mate,I'm going to have a crack at that pre shade on mine.
Aaron ,got to love that Kermit 410 are you sure its not a Kawasaki !!
Heres a wee update on the big bird
Stripes done,wings are dry fitted at the moment just for ease of handling the monster,the thing is such a paint and masking tape eater.
I've had a tinker with the "salt masking" on the spinners (thanks Allen)
its really very very easy to do and very quick aswell, mine only took about 10 mins to dry before I painted.
What do you think? are they over done for an RAF aircraft? I can't find any pics of weathered props,so I may use a little artistic license.
More soon
Andy
Its 3 am here and its my day off work, sodding body clock
Hey D ,thanks for the comments on the landing gear,hell of a job to do I've spent more time on them than anything thing else,next time I'll break out the Meccano set
Ken and Ed thats a fine pair of 110's fellas,and Ed ,well saved on the nose art,great job
Nick the mossies looking good mate,I'm going to have a crack at that pre shade on mine.
Aaron ,got to love that Kermit 410 are you sure its not a Kawasaki !!
Heres a wee update on the big bird
Stripes done,wings are dry fitted at the moment just for ease of handling the monster,the thing is such a paint and masking tape eater.
I've had a tinker with the "salt masking" on the spinners (thanks Allen)
its really very very easy to do and very quick aswell, mine only took about 10 mins to dry before I painted.
What do you think? are they over done for an RAF aircraft? I can't find any pics of weathered props,so I may use a little artistic license.
More soon
Andy
611_sqd
Ontario, Canada
Joined: January 24, 2011
KitMaker: 470 posts
AeroScale: 99 posts
Joined: January 24, 2011
KitMaker: 470 posts
AeroScale: 99 posts
Posted: Saturday, September 24, 2011 - 03:37 PM UTC
@Andy lol yeah its a bright bird. Japanese with a little English instruction led to forgetting that Luftwaffe light green is very different to other light green. Its ok this one is going to my kids and they are not as worried. I might have to do a FW-190 for Miss Piggy to act as fighter escort
What works best for the salt. Under-coat then small grained salt. Airbrush new colour over the top? How is the best way to remove it? I've never tried it but it looks like it is quite effective.
Posted: Saturday, September 24, 2011 - 04:44 PM UTC
Quoted Text
@Andy lol yeah its a bright bird. Japanese with a little English instruction led to forgetting that Luftwaffe light green is very different to other light green. Its ok this one is going to my kids and they are not as worried. I might have to do a FW-190 for Miss Piggy to act as fighter escort
What works best for the salt. Under-coat then small grained salt. Airbrush new colour over the top? How is the best way to remove it? I've never tried it but it looks like it is quite effective.
Hi Aaron,
I used table salt over a base of Tamiya flat aluminum then Tamiya flat red overall ,waited for the top coat to dry then removed the salt by lightly brushing with a flat brush or finger tip.
Allen gives a more in depth how to here......
https://aeroscale.kitmaker.net/forums/181074&page=1
HTH
Andy
p.s
I see you have master Yoda over looking your build, I have the Fett!!!
611_sqd
Ontario, Canada
Joined: January 24, 2011
KitMaker: 470 posts
AeroScale: 99 posts
Joined: January 24, 2011
KitMaker: 470 posts
AeroScale: 99 posts
Posted: Sunday, September 25, 2011 - 01:15 PM UTC
@Andy That's a cool collection you have there of the Galaxies coolest Bounty Hunter. I have the old and new action figure. The statue of him landing on one leg is that the Kotobukiya one? They always do cool stuff. I painted up a 72mm Boba Fett figure and got third for him at a painting comp. That was cool. Yeah I have Yoda looking over Luke's should at the build. Its rather annoying really as he won't shut up. Keeps saying do or do not there is no try, or my 410 "camouflage greener it is, than my skin hmmm, accurate I think, it is not. But he's a meanlittle bugger sometimes as well. Everytime I go to the kits box to get something he starts up with "Domain of evil it is, your tools, you will not need them, as crap you are." I hope to work on a Tie pilot soon.
Decals are on the 410. I took a pic and have to upload it to the image host. Its on to weathering now and the final part of the canopy. I don't know why this one has taken me so long. I finished a 1/72 FW-190D and a 1/48 Val in the same time.