Air Campaigns
Want to start or join a group build? This is where to start.
OFFICIAL: "Zerstorer!" Campaign Thread
611_sqd
_VISITCOMMUNITY
Ontario, Canada
Joined: January 24, 2011
KitMaker: 470 posts
AeroScale: 99 posts
Posted: Tuesday, March 15, 2011 - 03:32 AM UTC
I really REALLY wanted to like Special Hobby. They make so many aircraft that no one else does. But...I can't. They just make life difficult and I don't really see a need for it other than bad engineering. The cockpit went together fine, it was all resin and to be honest that's a gimmick. I have seen some great resin items released but resin is meant to add detail that is either missing from the box or to just take it to the next level. The resin for the cockpit is fine but I don't think it was beyond normal injection molding and as they also come attached to great blocks of left over resin that have to be sawed off rather than just trimmed and super glue instead of plastic cement. So it automatically raises the question. Now that there is extra work does it equal the effort? In this case no it doesn't. Taking a 1/48 corsair to the next level with resin and photo etched if thats your thing I would say yes it would be worth it. But not on this. You hardly see inside anyway and it is worse with the canopy on. I would rather have seen Special Hobby work on basic engineering and build design rather than go all crazy. Its kind of like putting fancy rims on a Lada. Its still a Lada. I guess its just a case of running before they can walk.

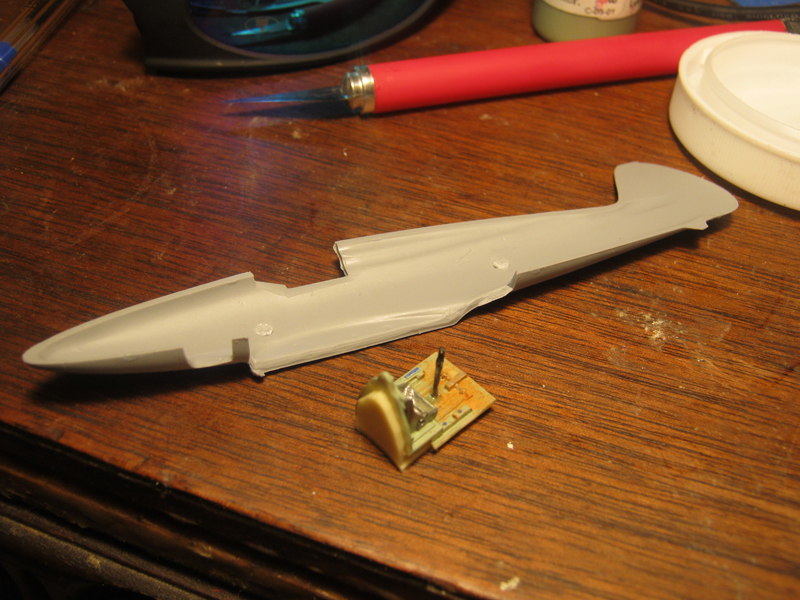
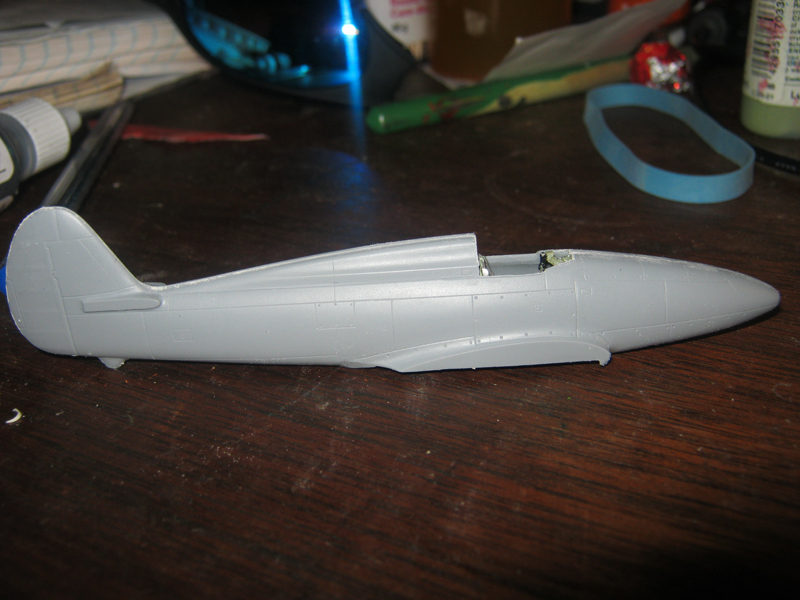
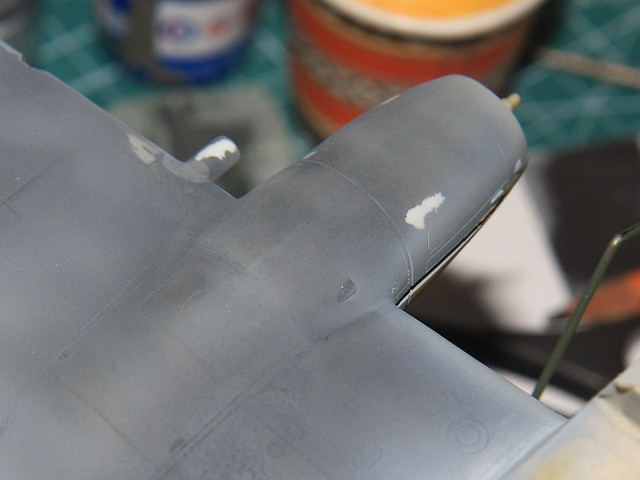
Ok so what do I mean bad engineering. If you look at the pic with the cockpit (over did the dirt I know. Was trying to make it show more on the little 1/72) you can see one side of the fuselage. There are no guides whatsoever for the cockpit to go, or for the control panel. There is a vague arrow in the instructions that points to area. Dry fitting? almost impossible as there is nothing to hold the piece in place as you test. Is the control panel in place properly? No idea. I had to guess. As these were both resin you also have to use super glue so I had 1 freaking shot only to get it right. I's amazed to have got it as close as I did.

Some sanding to smooth it out a little. Might have escaped using putty so far. Have to add a glass panel underneath which doesn't quite fit.

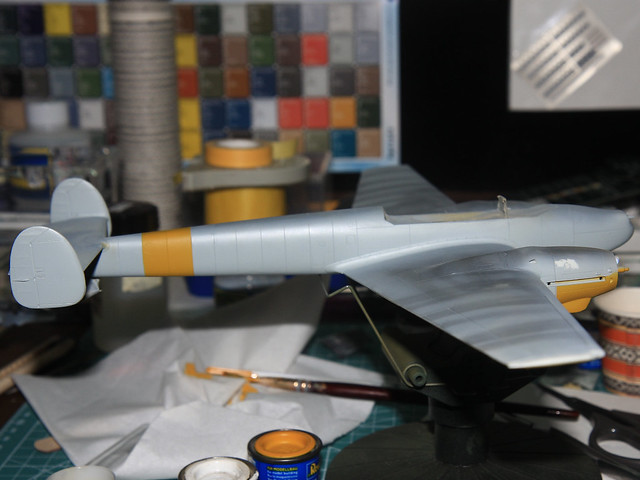
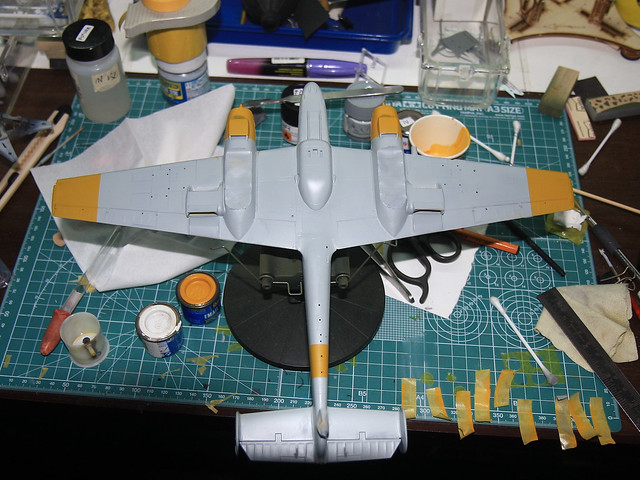
As much as I like the subject matter Special Hobby does its hard to recommend. The basic annoyances that could be eliminated with a bit more care on their part and the cost make it hard to recommend it.


611_sqd
_VISITCOMMUNITY
Ontario, Canada
Joined: January 24, 2011
KitMaker: 470 posts
AeroScale: 99 posts
Posted: Tuesday, March 15, 2011 - 02:29 PM UTC
There seems to have been very little thought gone in to using resin with the rest of the kit and this is where it all falls apart. This is a front pic of the engine and the cowling. I have tried both on the off chance I was doing them in reverse and both are as bad. Like most planes the center spike is where the propeller will go and it should be centered and protruding a little. Its well out of position and there is a slot for the cowling to fit to the wing and it does. So the cowling is where it is meant to be. I am at a loss as to how to fix this and its like it for both engines.


I'm going to work on my Oscar while I think about this dilema.
Bigrip74
_VISITCOMMUNITY
Texas, United States
Joined: February 22, 2008
KitMaker: 5,026 posts
AeroScale: 2,811 posts
Posted: Tuesday, March 15, 2011 - 04:56 PM UTC
Aaron,
That is a neat looking a/c, I wonder if it was any good in its intended role.

Bob
Emeritus
_VISITCOMMUNITY
Uusimaa, Finland
Joined: March 30, 2004
KitMaker: 2,845 posts
AeroScale: 1,564 posts
Posted: Tuesday, March 15, 2011 - 08:55 PM UTC

Quoted Text

There seems to have been very little thought gone in to using resin with the rest of the kit and this is where it all falls apart. This is a front pic of the engine and the cowling. I have tried both on the off chance I was doing them in reverse and both are as bad. Like most planes the center spike is where the propeller will go and it should be centered and protruding a little. Its well out of position and there is a slot for the cowling to fit to the wing and it does. So the cowling is where it is meant to be. I am at a loss as to how to fix this and its like it for both engines.


Looks like you haven't removed the pour plugs from the resin cowlings yet. This pic's of the 1:48 scale version parts, but they're cast the same way: --click--
Also, looking at reviews of the kit, the propeller shafts on the engines look short, so you may have to replace them in order to get the propellers sitting properly. I have no first-hand experience of that kit, but it wouldn't be first time for a limited-run kit to have quirks like this.
611_sqd
_VISITCOMMUNITY
Ontario, Canada
Joined: January 24, 2011
KitMaker: 470 posts
AeroScale: 99 posts
Posted: Wednesday, March 16, 2011 - 03:43 AM UTC
@Bob Unfortunately no it wasn't. Or maybe fortunately as it was an Axis fighter. It suffered from all the standard problems often associated with the Destroyer aircraft. It just didn't have the power, armament and could not stand against single engined fighters. Not that many were build. I dig the design and it reminded me of something that might have appeared in a Tin Tin comic or other 1930's adventure kind of story. The shape just appealed to me a lot.

@Eetu Mein Gott I am a idiot lol. I kept looking at the cowling thinking there was something different but couldn't put it my finger on it. That might solve some of the problem. Though I think you are right that they are going to be short. The pin in the engine and the pin in the connector for the propeller don't fit so I have to file one or both of those.
611_sqd
_VISITCOMMUNITY
Ontario, Canada
Joined: January 24, 2011
KitMaker: 470 posts
AeroScale: 99 posts
Posted: Thursday, March 17, 2011 - 03:48 AM UTC
Sanding, sanding and more sanding. Fuse and wings attached. Engines in and nacels on. Will need some putty on the underside where the fuse joins the wings and more sanding.

SGTJKJ
#041
_VISITCOMMUNITY
Kobenhavn, Denmark
Joined: July 20, 2006
KitMaker: 10,069 posts
AeroScale: 3,788 posts
Posted: Thursday, March 17, 2011 - 08:00 AM UTC
Nice progress, Graham. The camouflage came on very nicely. Great that the cockpit details are clearly visible through the cockpit glazing.

Looking forward to see more.
Kiwi_Modeller
_VISITCOMMUNITY
Queensland, Australia
Joined: August 13, 2010
KitMaker: 188 posts
AeroScale: 62 posts
Posted: Thursday, March 17, 2011 - 09:45 PM UTC
thanks Jesper, got a little done last couple of days.
decals on and first wash , still some dirtying up and stains to add then radar antenna.


trumpy decals aint to flash on this one they break up very easily worst ive seen from them.
cheers,
Graham
emroglan
_VISITCOMMUNITY
Istanbul, Turkey / Türkçe
Joined: December 16, 2004
KitMaker: 1,163 posts
AeroScale: 255 posts
Posted: Thursday, March 17, 2011 - 09:55 PM UTC
Graham, am I mistaken, or is the swastika on the right side of the tail is backwards? The arms are pointing the wrong way.
SgtRam
Staff MemberEditor-at-Large
AEROSCALE
#197
_VISITCOMMUNITY
Ontario, Canada
Joined: March 06, 2011
KitMaker: 3,971 posts
AeroScale: 511 posts
Posted: Friday, March 18, 2011 - 11:19 AM UTC
Hello

Just joined this campaign and looking forward to it. I will be building a Dragon Bf110D-3, and I hope to start real soon.
Kiwi_Modeller
_VISITCOMMUNITY
Queensland, Australia
Joined: August 13, 2010
KitMaker: 188 posts
AeroScale: 62 posts
Posted: Friday, March 18, 2011 - 10:56 PM UTC
yeh Emre ya not mistakin i somehow got both em on back to front lucky i got some spares lol, i must have flipped em or they were wrong on the decal sheet i thought they looked funny after i got em on.
cheers,
Graham
AussieReg
Staff MemberAssociate Editor
AUTOMODELER
#007
_VISITCOMMUNITY
Victoria, Australia
Joined: June 09, 2009
KitMaker: 8,156 posts
AeroScale: 3,756 posts
Posted: Saturday, March 19, 2011 - 12:56 AM UTC
Raj, great work so far, you are doing well dealing with the fit issues that you have described.

Anthony, really good progress on the Uhu, the PE and resin are superb !

Aaron, I'm still loving the look of that IMAM, the Italians sure had a flair for designing some beautiful aircraft. Nice work so far.

Graham your Schwalbe is looking great, a quick fix on the "oops" and you're almost there mate !!

Kevin, welcome to Aeroscale and thanks for joining the party here. I have added your name and build to the Roll Call, and I'm looking forward to seeing your work progress.

My friends I must humbly apologise for my lack of attention here lately, work has been crazy and bench time limited. I promise I will get my build underway shortly.

I have trawled through the thread so far and updated all of the builds in the Roll Call/Build Status post (page 1, post 1 of this thread), so please go back for a look if you want a summary of where we are at.

Keep up the great work, D
Snorri23
_VISITCOMMUNITY
Ontario, Canada
Joined: March 25, 2010
KitMaker: 514 posts
AeroScale: 244 posts
Posted: Saturday, March 19, 2011 - 04:46 AM UTC
Here is the start of my Fujimi Bf 110 D-3 where in which I shall be borrowing from a Eduard kit the large fuel tanks, more accurate, True Details interior kit, Ultra Cast props and spinner. Be using the Superscale Iraqi decals for the Kommando 'Junck'
Photobucket
Photobucket

Kiwi_Modeller
_VISITCOMMUNITY
Queensland, Australia
Joined: August 13, 2010
KitMaker: 188 posts
AeroScale: 62 posts
Posted: Saturday, March 19, 2011 - 03:51 PM UTC
well think she pritty much done, just needs flat coat and i'll take some decent pics when weather clears (damn rain)
least oops is fixed


cheers,
Graham
drizzt73
_VISITCOMMUNITY
New South Wales, Australia
Joined: April 15, 2006
KitMaker: 158 posts
AeroScale: 70 posts
Posted: Saturday, March 19, 2011 - 04:39 PM UTC
Looks really good Graham!

I manged to get some paint on my he219 despite the torrential rain we have had this weekend in Sydney!


Cheers all
mpatman
_VISITCOMMUNITY
New South Wales, Australia
Joined: March 09, 2006
KitMaker: 248 posts
AeroScale: 160 posts
Posted: Saturday, March 19, 2011 - 04:47 PM UTC
Missed a spot!


Just joking, the paint scheme looks great. must have taken you a few minutes to do that????????

Mark
Kiwi_Modeller
_VISITCOMMUNITY
Queensland, Australia
Joined: August 13, 2010
KitMaker: 188 posts
AeroScale: 62 posts
Posted: Saturday, March 19, 2011 - 05:20 PM UTC
nice one Anthony that looks real good, those schemes take ages huh but there worth it.
cheers,
Graham
drizzt73
_VISITCOMMUNITY
New South Wales, Australia
Joined: April 15, 2006
KitMaker: 158 posts
AeroScale: 70 posts
Posted: Saturday, March 19, 2011 - 05:24 PM UTC
Thanks guys, yes it was about 2 hrs of non stop airbrushing for the camo alone- it was literally painfulI. I will gloss coat tonight and then start on the decals.

Cheers
iflytb20
#501
_VISITCOMMUNITY
Kerala, India / भारत
Joined: August 25, 2009
KitMaker: 292 posts
AeroScale: 194 posts
Posted: Sunday, March 20, 2011 - 01:07 AM UTC
Progress Update:
I was out of town for a week and as a result got a break from the kit [thank goodness for that . ] Any way, i managed to get the underside 76 painted and also added yellow theater markings on. She will be finished as 2N+FN of 5./ZG 76 deployed in RV duties during the winter of '44.


I almost sanded out my fingerprints while trying to get the fit right here


Next step would be the RLM 74/75 splinter pattern and then the dreaded mottling
emroglan
_VISITCOMMUNITY
Istanbul, Turkey / Türkçe
Joined: December 16, 2004
KitMaker: 1,163 posts
AeroScale: 255 posts
Posted: Sunday, March 20, 2011 - 03:02 AM UTC
You people down and under surely work fast and well!

Raj, was that Revell's kit?
BlackWidow
_VISITCOMMUNITY
European Union
Joined: August 09, 2009
KitMaker: 1,732 posts
AeroScale: 1,336 posts
Posted: Sunday, March 20, 2011 - 04:00 AM UTC
@Graham
Your nightfighting stormbird looks really great. Now the "evil cross" is in correct position. As we don't get it here in Germany with the kits (forbidden by law) I don't have to care if right or left If the cross comes with the decals I stick it on the kit, if not, then I don't. I really don't care .....

@Antony
Same about your night owl (Uhu = eagle owl) my friend! That mottling looks amazing! Though it shouldn't be painted over the black sides. Maybe you can still mend that. I know what it means to airbrush mottling for hours as I have build a Ki-45 in 2009 .....

@ Raj
I'm not even half that way with my Bf 110. Just spent the weekend with filling and sanding the nacelles to the wings .... This morning I glued the wings to the fuselage and surprisingly the fitting is close to perfect! Next step will be masking the canopy and glueing it to the cockpit as I want it closed. Afterwards I will work on the other Zerstörer, my Me 410, So still a long way to go before throwing paint on them. Btw, on last wekends expo I got the brandnew Eduard Bf 110 G-2/R-1 with 37 mm Flak 18 canon under the fuselage for only 19 Euros (= 27 USD). What a bargain! That ship looks really dangerous with that fire power but surely was a welcomed prey for a speedy Spit or a Mustang .....

@Emre
Yes, Raj's "Hundred Ten" is that fun bringing Revell kit. We build the same kits, though mine will become the "3U + GT" from III./ZG 26 with white "Reichsverteidingungsband" (white "Defense of the Reich" fuselage band). How is it going with your "110"? Did you hear anything from Eduard yet?
emroglan
_VISITCOMMUNITY
Istanbul, Turkey / Türkçe
Joined: December 16, 2004
KitMaker: 1,163 posts
AeroScale: 255 posts
Posted: Sunday, March 20, 2011 - 06:11 AM UTC
Hello Torsten,

To my surprise, I received a very polite e-mail from Eduard stating that they were sorry for what happened and asking for my address to send a replacement part. It's been some time and I'm waiting, let's see what happens. If that fails, I'll build my MOM present, Dragon's nachtjaeger Bf 110D. However, first I'm trying to complete my P-40 build. I found out that whenever I'm attempting to build two different kits I get distracted and can't complete any of them.
iflytb20
#501
_VISITCOMMUNITY
Kerala, India / भारत
Joined: August 25, 2009
KitMaker: 292 posts
AeroScale: 194 posts
Posted: Sunday, March 20, 2011 - 06:53 AM UTC

Quoted Text

@ Raj
I'm not even half that way with my Bf 110. Just spent the weekend with filling and sanding the nacelles to the wings .... This morning I glued the wings to the fuselage and surprisingly the fitting is close to perfect! Next step will be masking the canopy and glueing it to the cockpit as I want it closed. Afterwards I will work on the other Zerstörer, my Me 410, So still a long way to go before throwing paint on them. Btw, on last wekends expo I got the brandnew Eduard Bf 110 G-2/R-1 with 37 mm Flak 18 canon under the fuselage for only 19 Euros (= 27 USD). What a bargain! That ship looks really dangerous with that fire power but surely was a welcomed prey for a speedy Spit or a Mustang .....


That was the saving grace - the wing's fit. The fit of the upper wing was perfect. I had slight problems with the lower one as the cockpit tub kept getting in the way. At the end, i sanded the bottom of the tub to get a better fit. As i am building this kit for a friend, i will be leaving the cockpit open. He wants it that way.
BTW i have that exact same eduard kit in my stash. God know what was i high on when i decided to build the Revell one instead
Kiwi_Modeller
_VISITCOMMUNITY
Queensland, Australia
Joined: August 13, 2010
KitMaker: 188 posts
AeroScale: 62 posts
Posted: Sunday, March 20, 2011 - 06:01 PM UTC
LOL Torsten yeh i knew the swastika was illegal in Germany which i can understand i just like to have since they were on the real planes it looks bare without em,
i noticed on the 1/32 scale JU88 i have they done even give em to you but since revell is german i know why its no big deal i'll paint em on if i cant get some, im waiting for the big HE111 there doing i always wanted a decent size one of them.

I got the flat coat on the 262 and some weathering done i should get some pics in the next day or two.
I'll take a pic of it with its piston engined cousin too (32nd BF110) i built a few months ago.
cheers,
Graham
Kiwi_Modeller
_VISITCOMMUNITY
Queensland, Australia
Joined: August 13, 2010
KitMaker: 188 posts
AeroScale: 62 posts
Posted: Sunday, March 20, 2011 - 10:28 PM UTC
finally the damn sun came out so here it is all done.


A pic of it and the 110.

hope ya like it, nice campaign D was good fun as usual thanks mate.
cheers,
Graham