Air Campaigns
Want to start or join a group build? This is where to start.
OFFICIAL: "Zerstorer!" Campaign Thread
iflytb20
#501
_VISITCOMMUNITY
Kerala, India / भारत
Joined: August 25, 2009
KitMaker: 292 posts
AeroScale: 194 posts
Posted: Sunday, March 27, 2011 - 09:45 PM UTC
While test fitting the landing gear i found out a mistake of mine. I managed to stick the bracing struts to the opposite gear strut Now i had to break it off and re-attach it. Let me see what all boo boos i made so far
611_sqd
_VISITCOMMUNITY
Ontario, Canada
Joined: January 24, 2011
KitMaker: 470 posts
AeroScale: 99 posts
Posted: Monday, March 28, 2011 - 05:24 PM UTC
Construction done. A couple of little things to work on before painting. I did the wheels up as the gear was amazingly flimsy. Might be better on the 1/48 but I didnt think it would hold the kits weight. Spent the day working out the kinks with my new genuine chinese knockoff airbrush. might be able to get the painting done tomorrow.

Naseby
_VISITCOMMUNITY
Slovakia
Joined: October 15, 2010
KitMaker: 825 posts
AeroScale: 476 posts
Posted: Tuesday, March 29, 2011 - 01:30 AM UTC
@Aaron: Shortrunn kits are most of the time like this, but in the end You get something no one else has. I for example buit the Polikarpov R-Z Natasha, and now I can say I have something that is preaty scarce.
611_sqd
_VISITCOMMUNITY
Ontario, Canada
Joined: January 24, 2011
KitMaker: 470 posts
AeroScale: 99 posts
Posted: Tuesday, March 29, 2011 - 04:15 AM UTC
@naseby Yeah I like a lot of the topics that Special Hobby chose and in some areas it was easier than the Airfix Ju-88 kit I did. What I haven't liked is the guesswork involved in this kit. With no guides in the fuse for the cockpit you have to guess. Granted you can make a educated guess. But as its resin you have to use superglue so the margin for error is much smaller than on a regular kit.
warreni
_VISITCOMMUNITY
South Australia, Australia
Joined: August 14, 2007
KitMaker: 5,926 posts
AeroScale: 2,201 posts
Posted: Tuesday, March 29, 2011 - 08:47 AM UTC

Quoted Text

Construction done. A couple of little things to work on before painting. I did the wheels up as the gear was amazingly flimsy. Might be better on the 1/48 but I didnt think it would hold the kits weight. Spent the day working out the kinks with my new genuine chinese knockoff airbrush. might be able to get the painting done tomorrow.


Nothing wrong with those genuine chinese knock off airbrushes if you chose a decent one.. And they are such good value that if you get a pretty average one first go you can buy four more to try before you are even close to the price of a normal one.
611_sqd
_VISITCOMMUNITY
Ontario, Canada
Joined: January 24, 2011
KitMaker: 470 posts
AeroScale: 99 posts
Posted: Wednesday, March 30, 2011 - 04:25 AM UTC
I think its based on the Iwato the one I got. You have to be smart to use it. Comes with a pressure adjustment just under the nose for limiting the amount of air coming through if doing fine work. Northstar Hobbies where I go here in Toronto does a basic airbrush class. I think i'm going to take it. I do ok but I am totally self taught and trial and error. I know there are some tricks I could pick up.
611_sqd
_VISITCOMMUNITY
Ontario, Canada
Joined: January 24, 2011
KitMaker: 470 posts
AeroScale: 99 posts
Posted: Wednesday, March 30, 2011 - 01:14 PM UTC
Got the green on now. Underside tomorrow along with the basecoat on my massive 1/48 YF-19 coat of future tomorrow night and this puppy is just about done.
iflytb20
#501
_VISITCOMMUNITY
Kerala, India / भारत
Joined: August 25, 2009
KitMaker: 292 posts
AeroScale: 194 posts
Posted: Friday, April 01, 2011 - 09:40 PM UTC
In the final assembly stage now. The canopy will have to wait a bit as i am still waiting for the masks to be delivered by the postie.

The various sub assemblies painted and futured.


I know the nose 108s should not be there, but a zerstorer is SUPPOSED to have teeth isn't it
Naseby
_VISITCOMMUNITY
Slovakia
Joined: October 15, 2010
KitMaker: 825 posts
AeroScale: 476 posts
Posted: Saturday, April 02, 2011 - 05:15 AM UTC
@ Raj: The more cannons the better

I finnaly completed the Churchil Crocodile on Armorama and between 5 other hobbys managed to start on the Dornier. First I had to rescribe the fuselage and wings. I hate rescribing but it had to be done. I finished the cockpit today. Its preaty much sci-fi with RLM02 Interioru colour to give a nice contrast to dark (maybe black ?) camouflage im considering.


mpatman
_VISITCOMMUNITY
New South Wales, Australia
Joined: March 09, 2006
KitMaker: 248 posts
AeroScale: 160 posts
Posted: Saturday, April 02, 2011 - 09:59 AM UTC
Naesby, the RLM02 looks great, nice work on the panel lines too!

Mark
BlackWidow
_VISITCOMMUNITY
European Union
Joined: August 09, 2009
KitMaker: 1,732 posts
AeroScale: 1,336 posts
Posted: Sunday, April 03, 2011 - 04:11 AM UTC
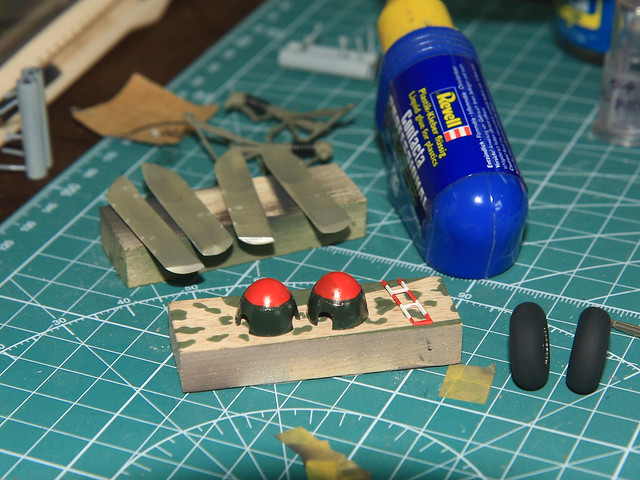
After 2 expos within 3 weeks, I had only little time for my builds but here I have some progrees pics to show. 
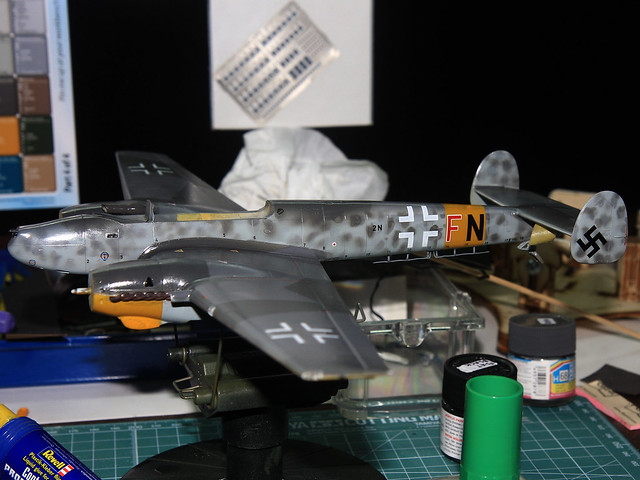
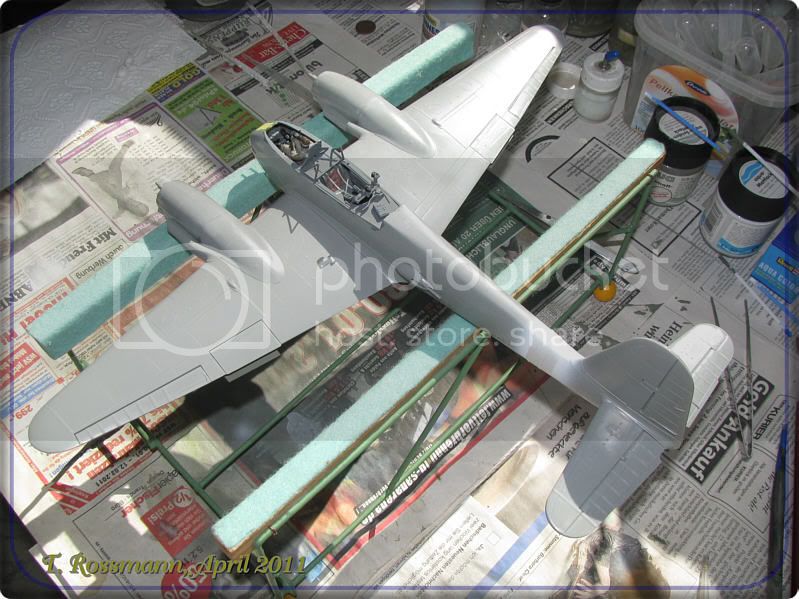
Both Zerstörer are more or less completed and wait now for the guy with the big paint pot .... The 110 needed a lot of filler to get this far ....


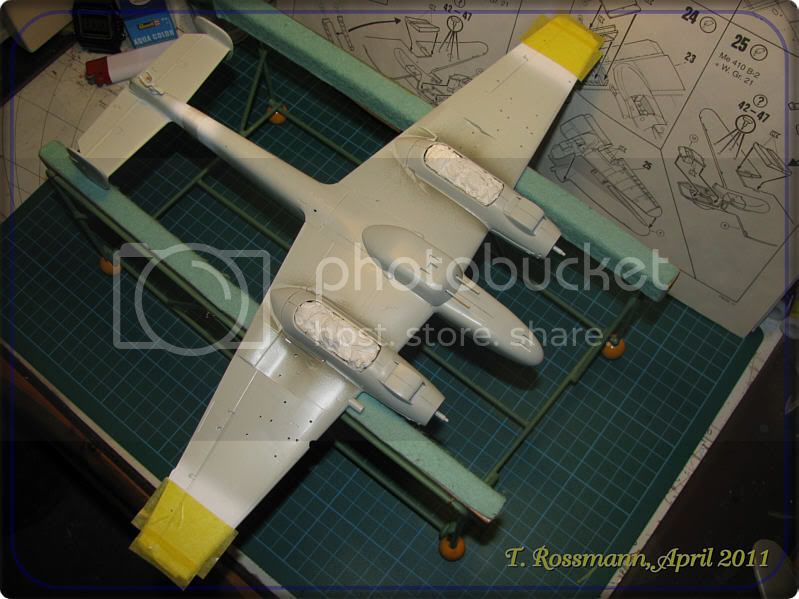
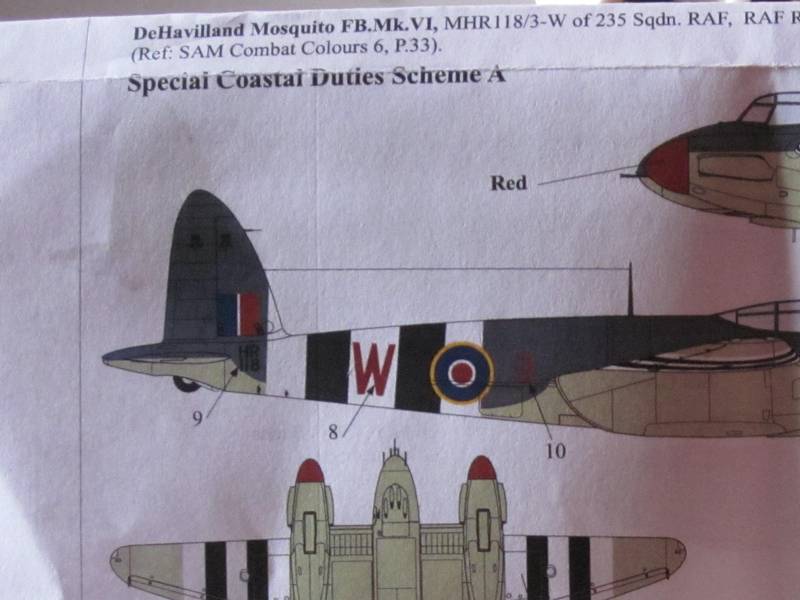
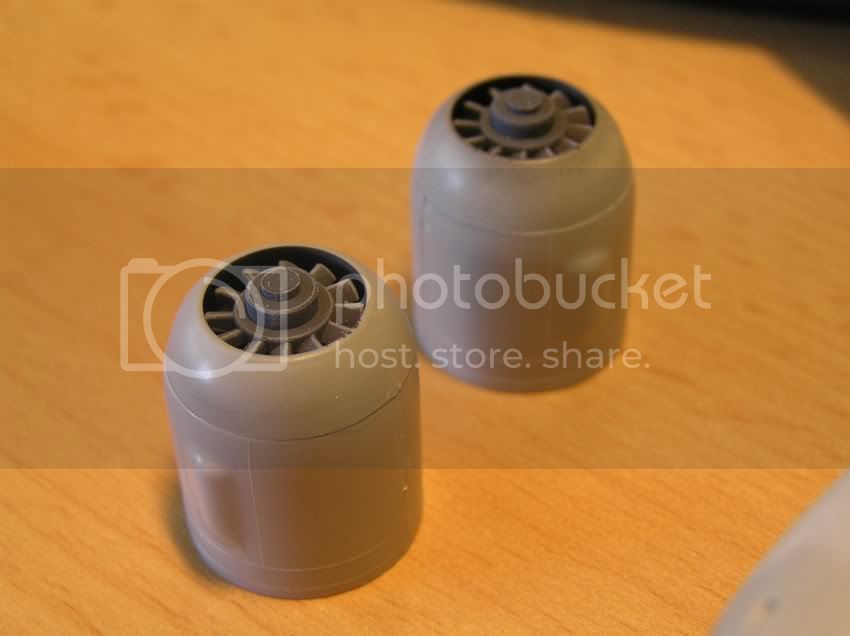
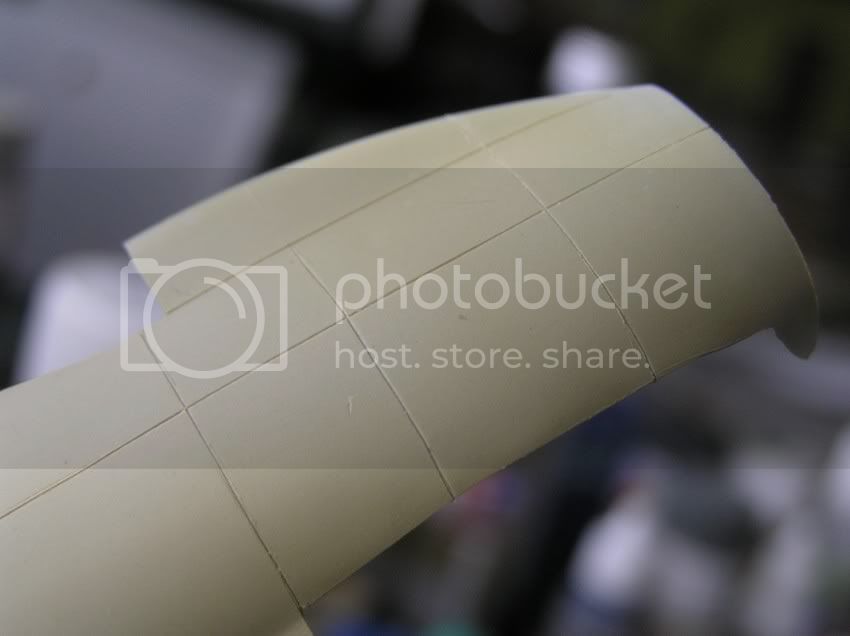
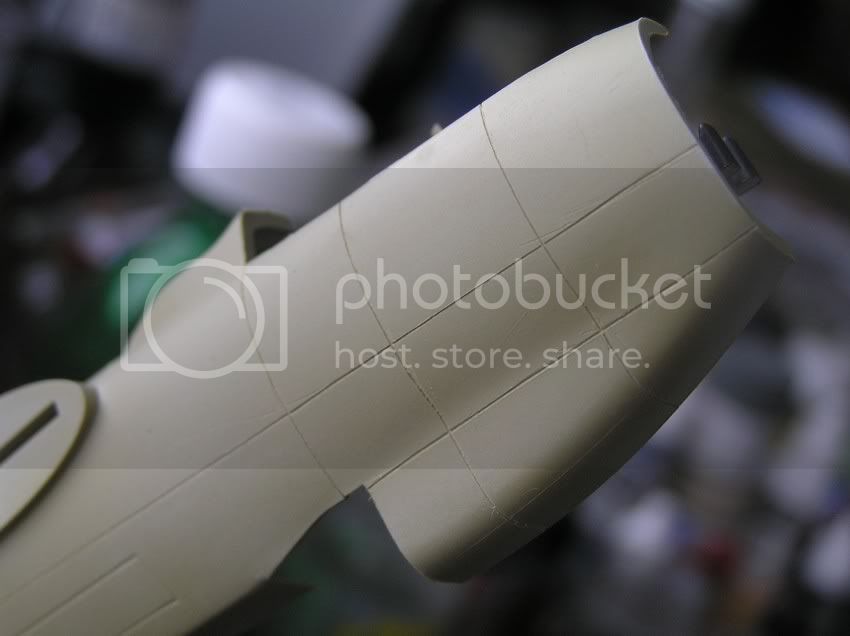
She doesn't have yellow wing tips, that's just the masking tape. Wing tips and fuselage band are white, as it's an aircraft for ZG 26. In the meantime I've sprayed RLM 76 nearly all over. The coolers are still missing.
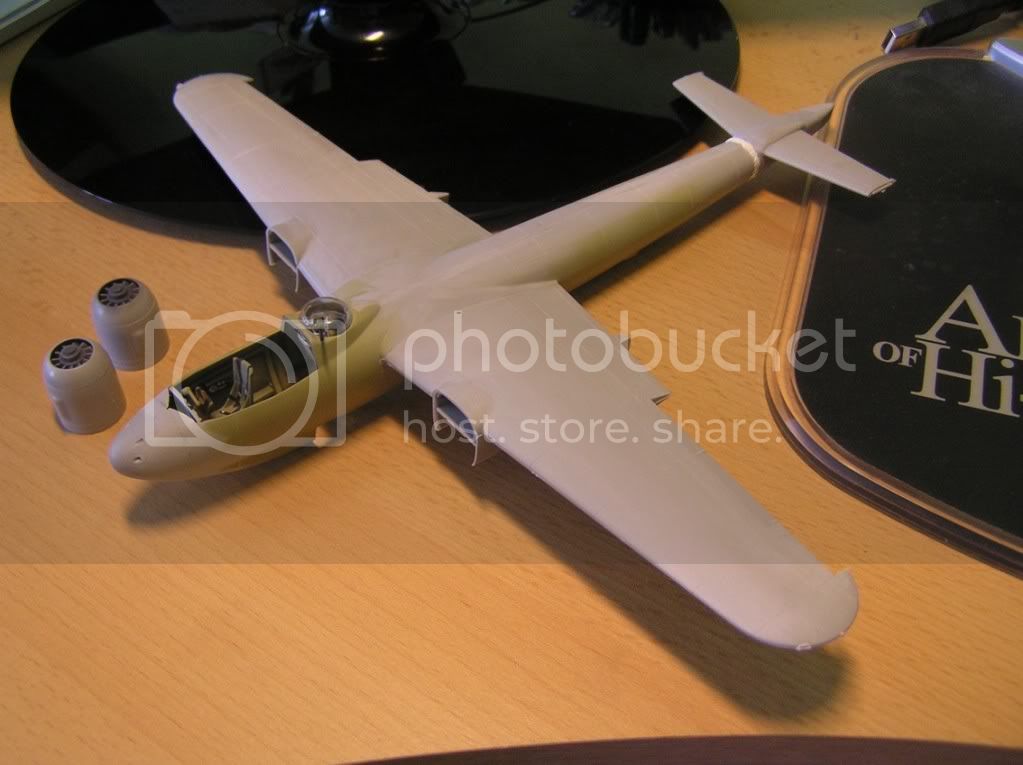
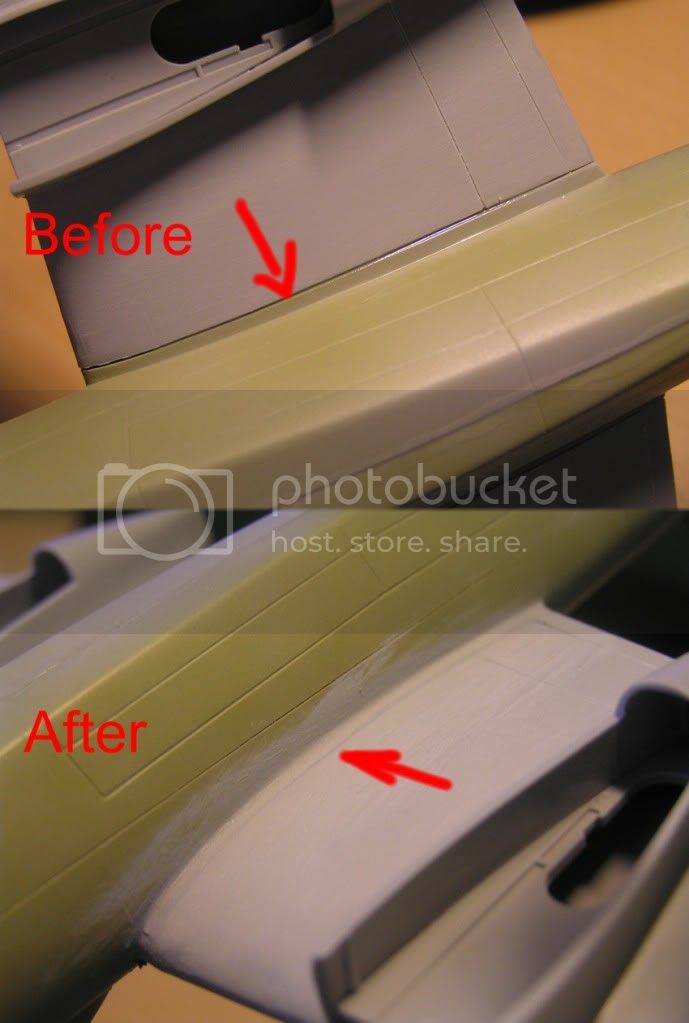
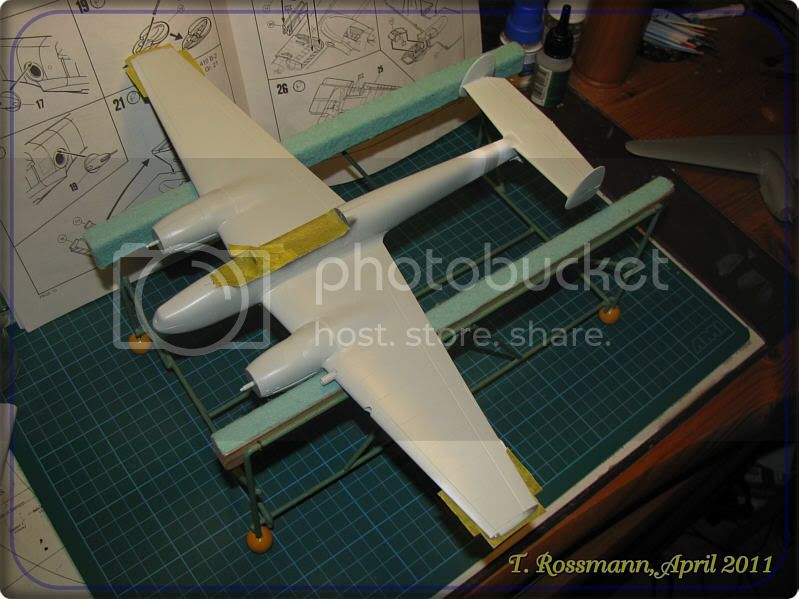
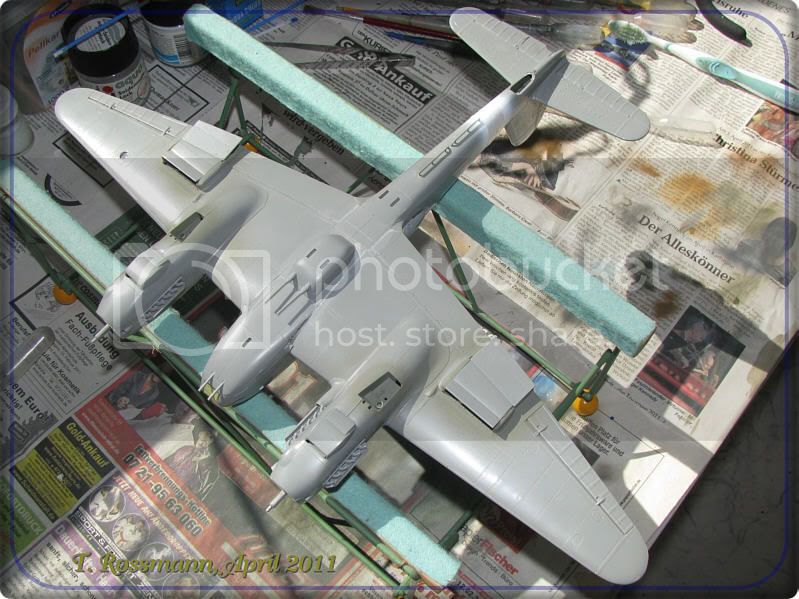
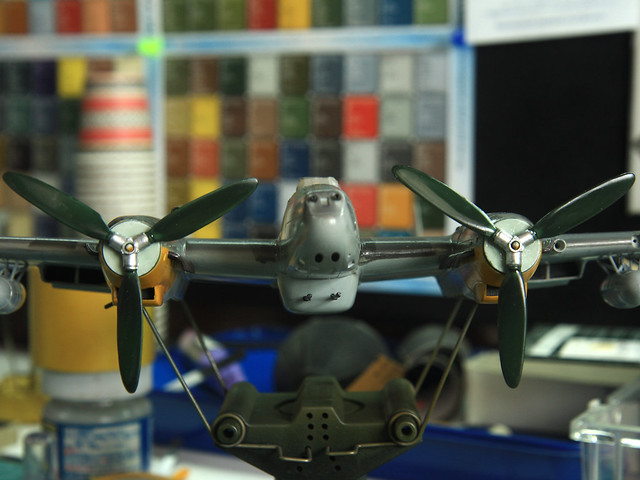
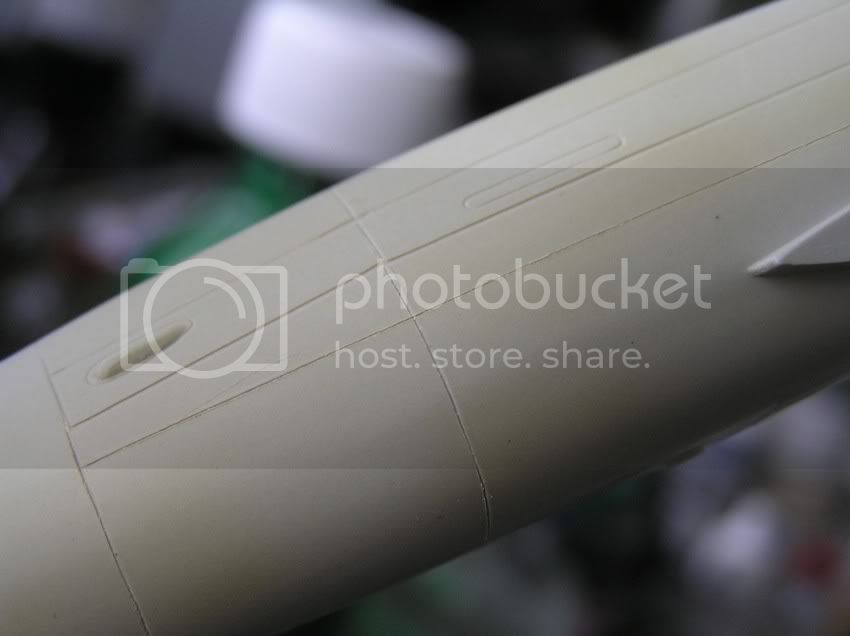
My other build is the Me 410, which goes together pretty well. Only very little filler was needed on the underside between wings and fuselage. I noticed a few days ago, that the 410 also belonged to the ZG 26 but a different group, so also a white fuselage band ....


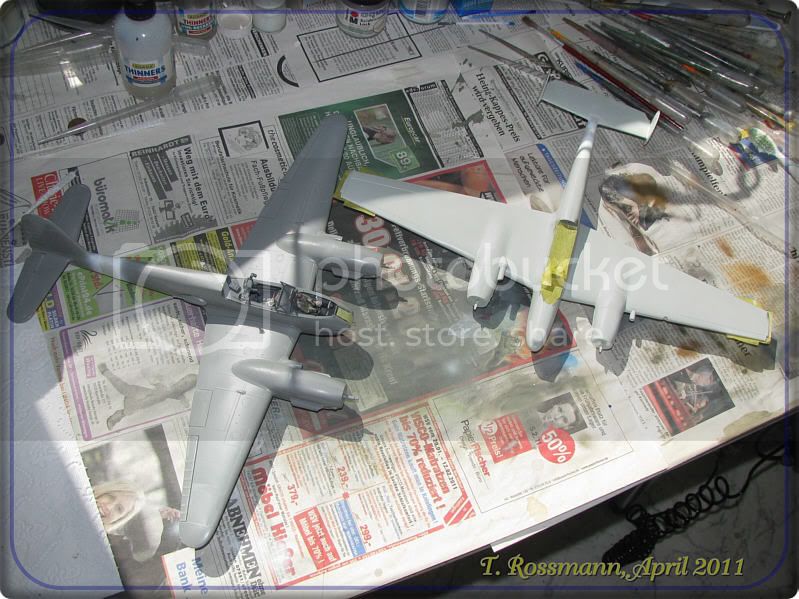
Here are both waiting for some paint, which will come in the next days ....

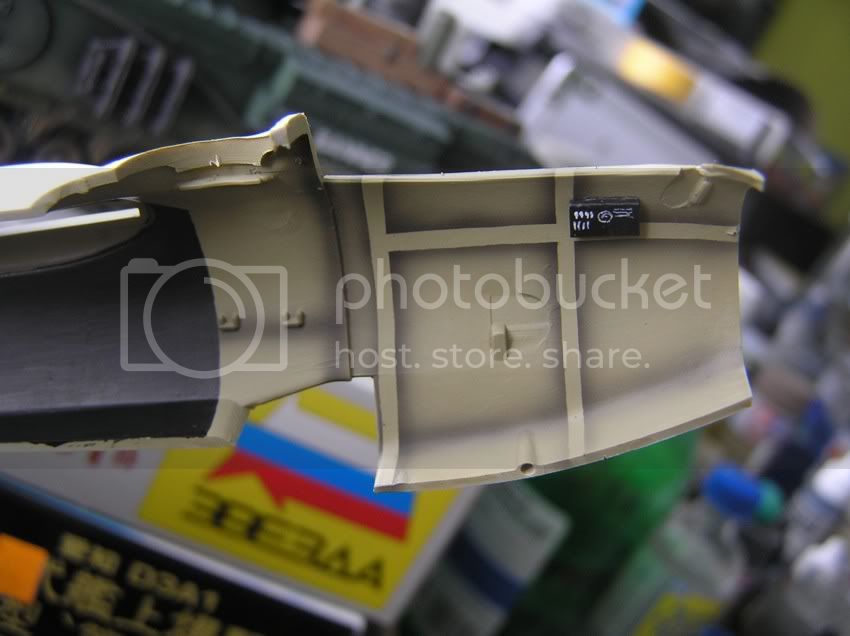
Masking the canopy of the 410 was a catastrophy as nearly no mask really fits. So I cut some masking tape. At the moment it seems as if the fitting of the canopy to the fuselage is the only bigger problem. But I won! 
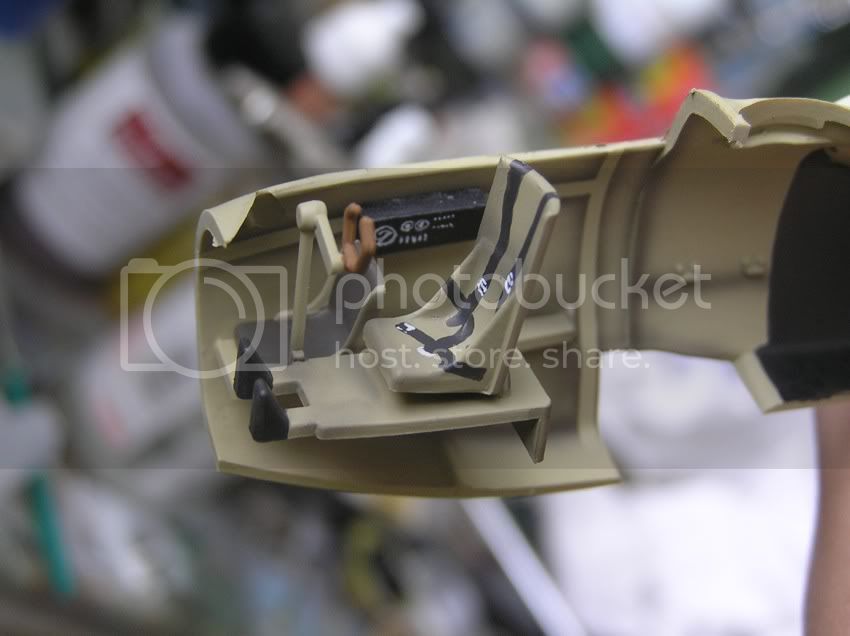
I will leave it closed in the end, so you can see the unusual shape of the canopy this way ...


@Raj
Your 110 looks really great, but with the gun nose and also guns in the belly plus rockets and fuel tanks under the wings this baby will have problems to take off. And it will be pretty slow! Easy prey for Spits and Mustangs .....

Happy modelling!
Torsten
warreni
_VISITCOMMUNITY
South Australia, Australia
Joined: August 14, 2007
KitMaker: 5,926 posts
AeroScale: 2,201 posts
Posted: Sunday, April 03, 2011 - 07:26 AM UTC

Quoted Text

Graham, am I mistaken, or is the swastika on the right side of the tail is backwards? The arms are pointing the wrong way.


I concur Emre....
iflytb20
#501
_VISITCOMMUNITY
Kerala, India / भारत
Joined: August 25, 2009
KitMaker: 292 posts
AeroScale: 194 posts
Posted: Sunday, April 03, 2011 - 09:53 PM UTC

Quoted Text


@Raj
Your 110 looks really great, but with the gun nose and also guns in the belly plus rockets and fuel tanks under the wings this baby will have problems to take off. And it will be pretty slow! Easy prey for Spits and Mustangs .....

Happy modelling!
Torsten


I know 
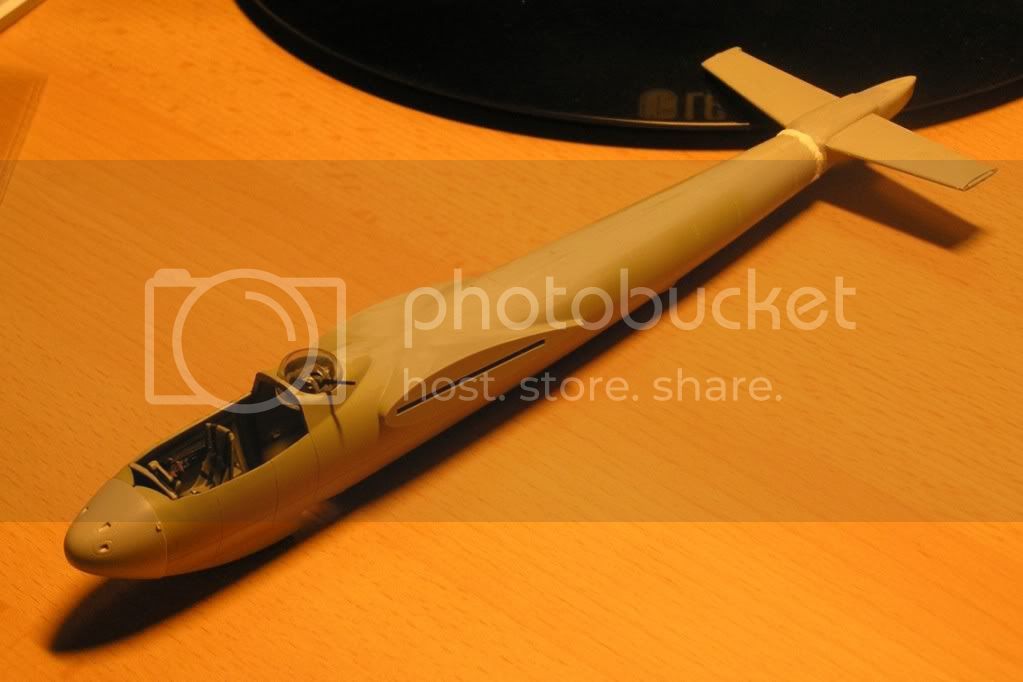
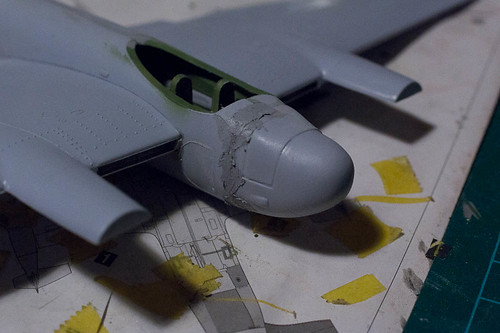
But i had no other choice as the other nose was not properly moulded - it looked more like a lava flow than a moulded plastic. So i just used my artistic license
Naseby
_VISITCOMMUNITY
Slovakia
Joined: October 15, 2010
KitMaker: 825 posts
AeroScale: 476 posts
Posted: Tuesday, April 05, 2011 - 09:02 AM UTC
A little progress to report. The fuselage is together and the wings will come next. The MG turret is so thick its screaming for replacement, but I havent found anything to replace it with and I lack the skill to do a replacement by myself. Interesting is, the front part of the fuselage, with the guns and radar has engraved panel lines. As I remember it, the J/N variants of this kit were made 15 years after the original version came out.

SUNDON
_VISITCOMMUNITY
England - South East, United Kingdom
Joined: January 19, 2009
KitMaker: 158 posts
AeroScale: 155 posts
Posted: Thursday, April 07, 2011 - 12:43 AM UTC
I've enlisted with a BF110 from Eduard but not to sure of the markings or model as yet. Possibly an E but might be a C or D as I belive all are possible with the kit I have.


Martin
611_sqd
_VISITCOMMUNITY
Ontario, Canada
Joined: January 24, 2011
KitMaker: 470 posts
AeroScale: 99 posts
Posted: Thursday, April 07, 2011 - 02:29 AM UTC
Future coat is on. Just going to do the decals and some weathering.
Torchy
#047
_VISITCOMMUNITY
England - East Anglia, United Kingdom
Joined: September 13, 2005
KitMaker: 2,016 posts
AeroScale: 475 posts
Posted: Thursday, April 07, 2011 - 03:22 AM UTC
Ta Da
Right, lets get this monster mossie going!
I was going to back out of this campaign as the wife is none too well,but (bless her ) shes told to get on with it as she knows how much I want to build this baby.
Most of the am goodys are here(waiting for the Cammett intake screens)


I wont bore you with a shed load of spure shots ,here are the main ones with a beer can(spent) for size,and the cat watching over things!!


I'm going to do the Special coastal duties ,extra dark sea gray over sky with full D Day stripes and red spinners for that dash of colour.


£21 on paint for this today
Lets scare some plastic!!!
Andy
KrisMax
_VISITCOMMUNITY
Queensland, Australia
Joined: January 23, 2010
KitMaker: 156 posts
AeroScale: 139 posts
Posted: Friday, April 08, 2011 - 12:11 AM UTC
Andy, It looks like you're gonna have some serious fun with all that kit. Let's have plenty of updates throughout the build.

Simon
Naseby
_VISITCOMMUNITY
Slovakia
Joined: October 15, 2010
KitMaker: 825 posts
AeroScale: 476 posts
Posted: Friday, April 08, 2011 - 09:36 PM UTC
Wow, the Mossie will be interesting, thats sure.

Made some progress, the wings and fuselage are done. There was a lot of filling and sanding needed on the underside but its done now. The kit is junk, nothing fitts together. The engines dont fitt together at all and I also discovered the cockpit canopy has the wrong shape.


SgtRam
Staff MemberEditor-at-Large
AEROSCALE
#197
_VISITCOMMUNITY
Ontario, Canada
Joined: March 06, 2011
KitMaker: 3,971 posts
AeroScale: 511 posts
Posted: Saturday, April 09, 2011 - 03:23 PM UTC
Well work is underway on my Cyber Hobby (dragon) Bf110. Work is progressing slower then I have wanted, just can't find the time right now, but I am over the cockpit hurdle and the rest should go smoothly. I am find a few fit issues with the kit, nothing a little planning, taping and clamping won't fix.

I have put more detail on my blog.

iflytb20
#501
_VISITCOMMUNITY
Kerala, India / भारत
Joined: August 25, 2009
KitMaker: 292 posts
AeroScale: 194 posts
Posted: Saturday, April 09, 2011 - 08:12 PM UTC
Progress Update:
Finished with the decals. Waiting for the postie to deliver the Canopy masks so that i can paint the canopy. Will be attaching the gear post weathering.


Decals all finished. Needs a coat of future before the weathering. Will be trying for a flat finish in the end.


Trying my hand with some scratch building. Adding some brake lines here.


As i managed to break off the antennae during assembly, i tried to build it using some lead wire and paper pins. Hope it looks like the real thing.
Torchy
#047
_VISITCOMMUNITY
England - East Anglia, United Kingdom
Joined: September 13, 2005
KitMaker: 2,016 posts
AeroScale: 475 posts
Posted: Saturday, April 09, 2011 - 10:04 PM UTC
Raj,, That is stunning mate,them uc legs look fantastic,and as for that paint job........Outstanding
iflytb20
#501
_VISITCOMMUNITY
Kerala, India / भारत
Joined: August 25, 2009
KitMaker: 292 posts
AeroScale: 194 posts
Posted: Sunday, April 10, 2011 - 05:14 AM UTC

Quoted Text

Raj,, That is stunning mate,them uc legs look fantastic,and as for that paint job........Outstanding


Thanks mate
mykroft
_VISITCOMMUNITY
Ontario, Canada
Joined: November 14, 2009
KitMaker: 270 posts
AeroScale: 264 posts
Posted: Sunday, April 10, 2011 - 02:54 PM UTC
The massive gap in the nose has been filled with styrene strip and putty


DSC04167 by mawz_models, on Flickr


Airfix Mosquito NF.XIX 1/72 by mawz_models, on Flickr

Now for some sanding...
AussieReg
Staff MemberAssociate Editor
AUTOMODELER
#007
_VISITCOMMUNITY
Victoria, Australia
Joined: June 09, 2009
KitMaker: 8,156 posts
AeroScale: 3,756 posts
Posted: Sunday, April 10, 2011 - 05:03 PM UTC
Well folks I will officially declare myself to be the worst Campaign Leader in the history of Campaign Leaders !!

I haven't posted here since March 22, and as far as my build is concerned, I opened the box, cut a few parts from the sprues and put it back on the shelf.

Work has been killing me lately and spare time at home a scarce commodity, but I am determined to get back to the bench over easter and scare the #$@% out of some styrene.

You guys are doing some awesome work, I'm extremely jealous, and I have some serious catching up to do both with my build and with my admin duties.

Carry on, I will be back in a few days with something tangible (hopefully !!)

Cheers, D