Corsair's the Sky Pirates Campaign
Cordoba, Argentina
Joined: January 27, 2011
KitMaker: 268 posts
AeroScale: 264 posts
Posted: Friday, September 23, 2011 - 01:10 PM UTC
It's Done...!!! Thanks..!

I´ll share something on Sunday... I'm learning how to post a pic...

Bye

Istanbul, Turkey / Türkçe
Joined: December 16, 2004
KitMaker: 1,163 posts
AeroScale: 255 posts
Posted: Friday, September 23, 2011 - 09:20 PM UTC
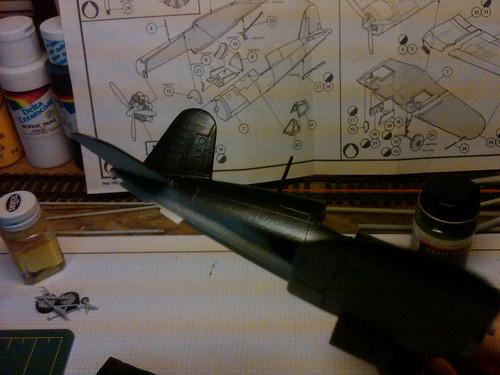
Progress from yesterday. Fuselage is completed and the wings attached, then everything sanded to proper fit. The kit goes together well to my relief.
Okay, now a question, as I think my ignorance is getting the better of me. Is the tail on these Corsairs located off-center? The tail in this kit doesn't align with the central axis. If you look at it from forward, the tail sits a little to the right. Can this be a problem with molding (although it doesn't look like it) or it is how a Corsair was designed?
Proud Supporter of Armorama Campaigns
Ontario, Canada
Joined: November 14, 2009
KitMaker: 270 posts
AeroScale: 264 posts
Posted: Saturday, September 24, 2011 - 02:34 AM UTC
Quoted Text
Okay, now a question, as I think my ignorance is getting the better of me. Is the tail on these Corsairs located off-center? The tail in this kit doesn't align with the central axis. If you look at it from forward, the tail sits a little to the right. Can this be a problem with molding (although it doesn't look like it) or it is how a Corsair was designed?
It's a very common feature for high-power aircraft which don't have contra props or twin engines rotating in opposite directions. The offset tail helps counter torque effects.
Istanbul, Turkey / Türkçe
Joined: December 16, 2004
KitMaker: 1,163 posts
AeroScale: 255 posts
Posted: Saturday, September 24, 2011 - 07:07 AM UTC
Thanks Adam! I'm a little bit less ignorant now

Everyday I learn something new about aircraft it seems.
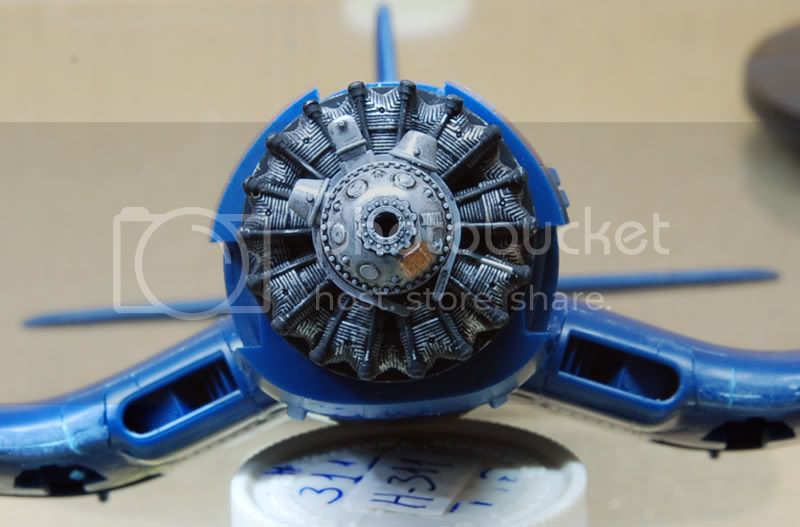
I'm now assembling the engine and got this far.
Buuuuut... I'm stuck! The parts that go onto this are dubbed "Medium Gray" by Revell. Is there a specific engine gray? Or should I just paint a medium gray? Or something like US Neutral Gray?
By the way, I'm too lazy to tackle resin kits, so my resin addiction will only remain at the "a seat here, a wheel there... oh, resin exhausts? must buy!" stage

Proud Supporter of Armorama Campaigns
British Columbia, Canada
Joined: September 03, 2009
KitMaker: 6,965 posts
AeroScale: 6,247 posts
Posted: Saturday, September 24, 2011 - 07:44 AM UTC
US "Engine grey" is FS36118 but any dark grey will do since it could get pretty messy. I often use Neutral grey with a dark wash.
When once you have tasted flight you will walk the Earth with your eyes turned skyward.
For there you have been, and there you will always long to return.
-Leonardo Da Vinci
British Columbia, Canada
Joined: September 03, 2009
KitMaker: 6,965 posts
AeroScale: 6,247 posts
Posted: Saturday, September 24, 2011 - 11:01 AM UTC
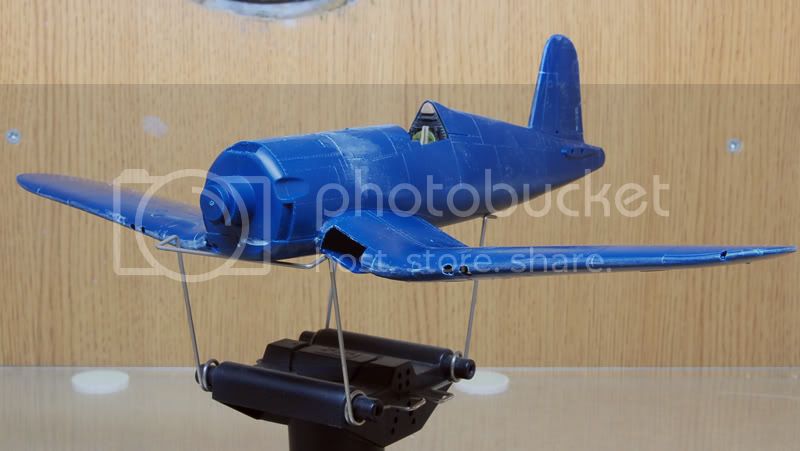
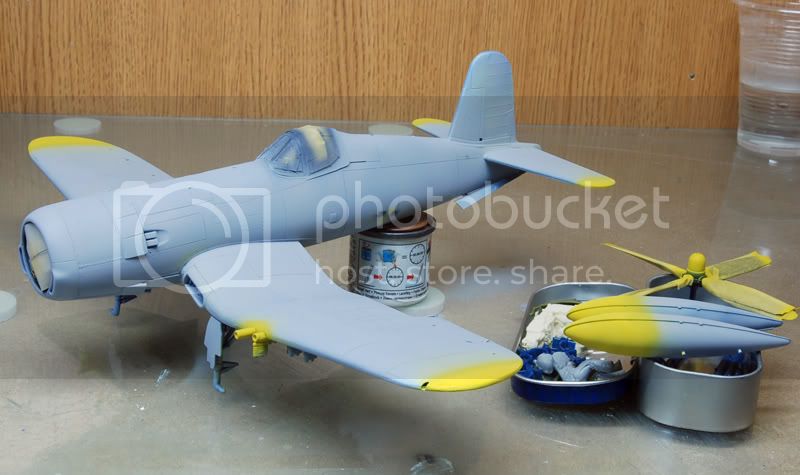
Yellow wings! (And yellow everything else, for that matter.)
How do you do yellow trim on a dark blue airplane? You do the yellow first, of course! I did a quick coat of white over the primer grey, then sprayed yellow over the areas that would have the trim. Since that's every extremity of the airplane, the yellow ended up pretty much everywhere. It's no big deal because the blue will cover it without turning green.


Those of you with sharp eyes will notice a few things missing. I realised that the flash hiders on the cannon barrels would only be used for the night fighter version so off they came. I also knocked off the pitot tube for the final time (I usually knocked it off at least once per day, and glued it back. It became a tradition.) This time the carpet monster got it, so I'll need to scratchbuild a replacement.
When once you have tasted flight you will walk the Earth with your eyes turned skyward.
For there you have been, and there you will always long to return.
-Leonardo Da Vinci
Cordoba, Argentina
Joined: January 27, 2011
KitMaker: 268 posts
AeroScale: 264 posts
Posted: Sunday, September 25, 2011 - 03:22 AM UTC
Hi, Here I´m...! And Here "We" go...!!!
Everybody Knows the box content, so a small reference of my goodies...
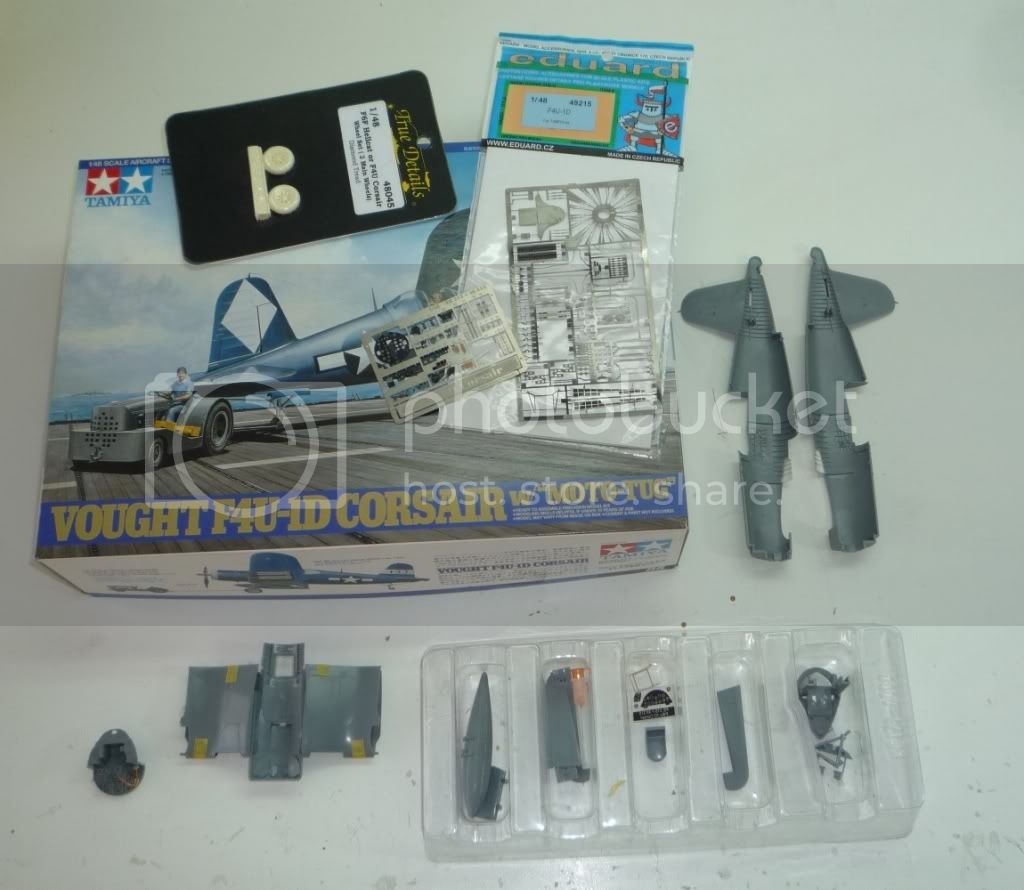
And now some work performed ...
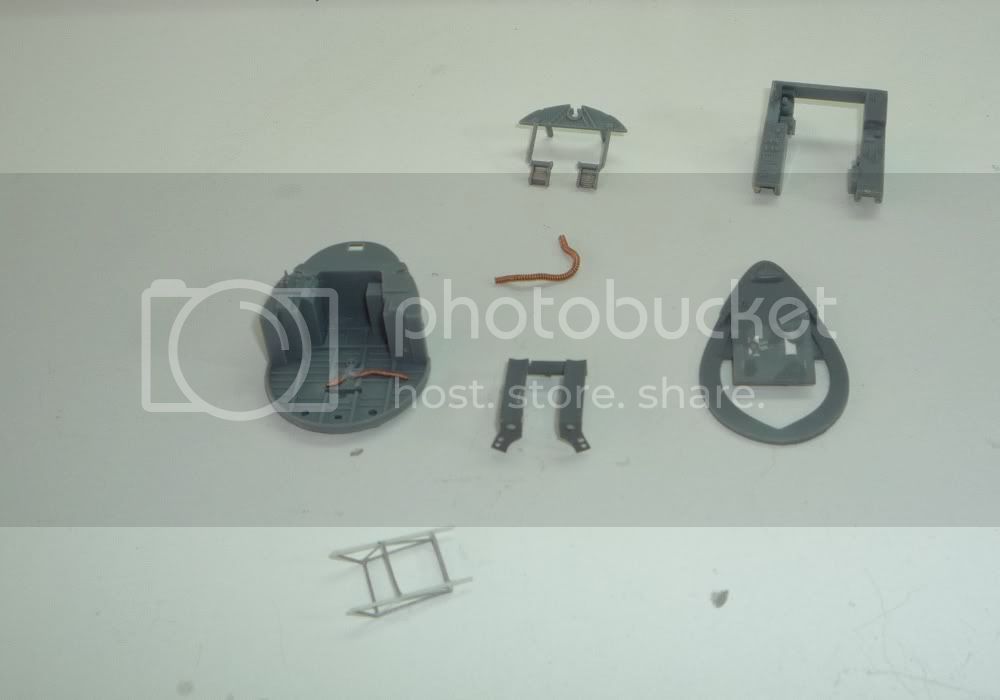
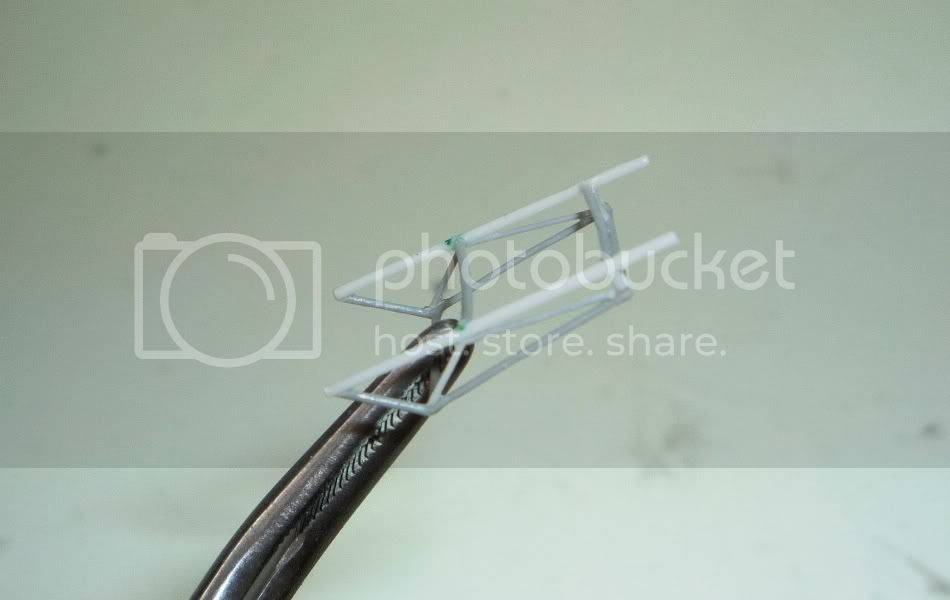
The back of the seat, half way to the end, made from strechet sprue...

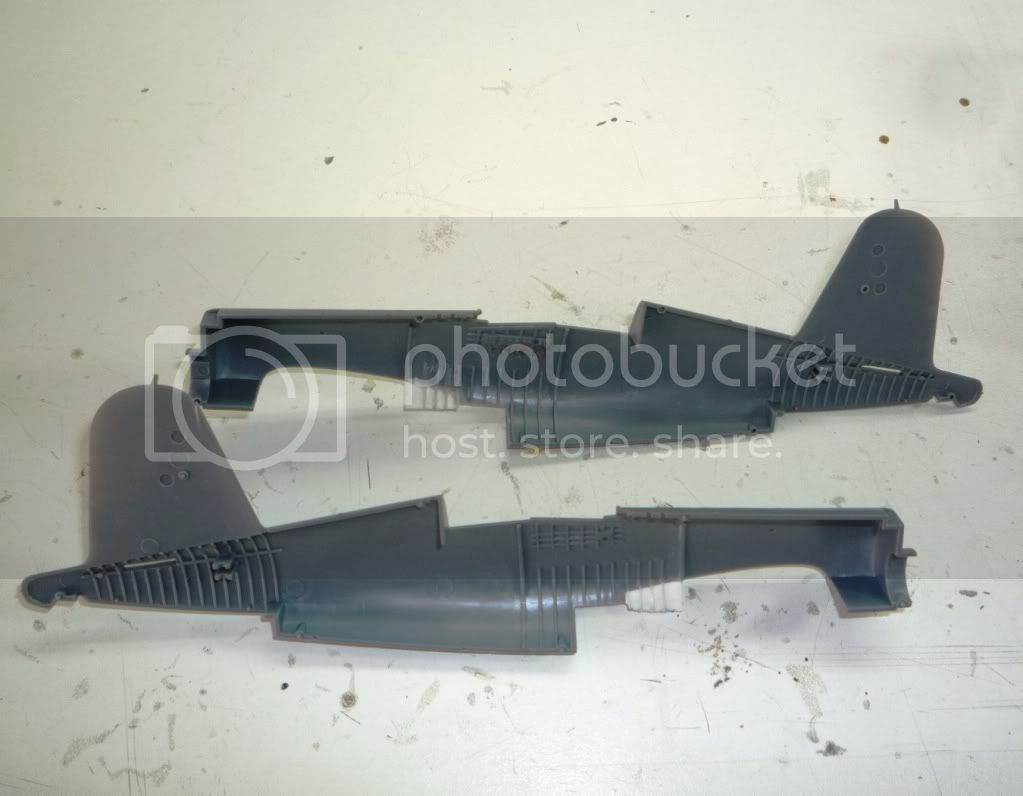
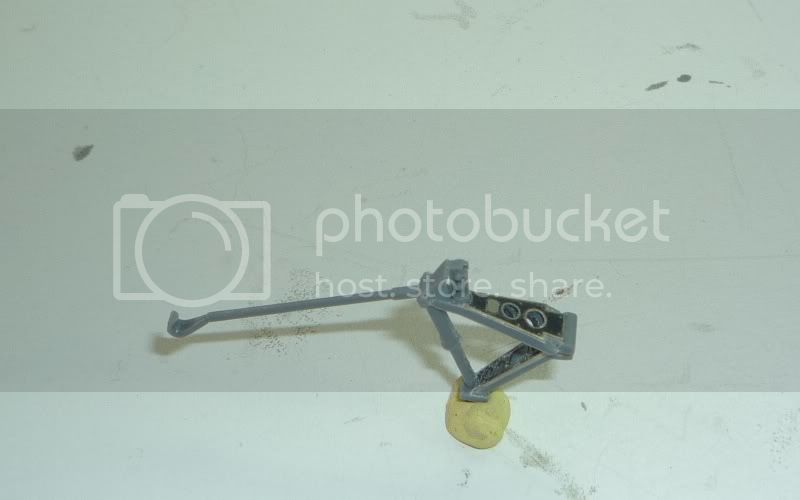
And The fuselage halfs, plus the rear gear...
Well, this is it... My first post... and my little contribution to this "Sky Pirates Campaigns"...

I hope to have more news tomorrow morning...!
Thanks
Bogota, Colombia
Joined: June 17, 2008
KitMaker: 13 posts
AeroScale: 12 posts
Posted: Sunday, September 25, 2011 - 10:15 AM UTC
Istanbul, Turkey / Türkçe
Joined: December 16, 2004
KitMaker: 1,163 posts
AeroScale: 255 posts
Posted: Sunday, September 25, 2011 - 07:54 PM UTC
Javier, that's a masterpiece cockpit!
Proud Supporter of Armorama Campaigns
Hawaii, United States
Joined: February 16, 2009
KitMaker: 43 posts
AeroScale: 15 posts
Posted: Monday, September 26, 2011 - 07:13 PM UTC
My campaign entry: Tamiya F4U-1D OOB with the exception of the decals. Kit decals are severely yellowed, will be using Barracuda Cals F4U-1 Corsair Part 1, White 422, Captain Floyd Kirkpatrick, VMF-441, Okinawa April 1945 "Palpitatin Pauli."

Istanbul, Turkey / Türkçe
Joined: December 16, 2004
KitMaker: 1,163 posts
AeroScale: 255 posts
Posted: Wednesday, September 28, 2011 - 11:54 PM UTC
Question ladies and gentlemen...
If the sidewalls and the rear of my cockpit is black and the floor and lower areas zinc chromate... What color should the interior of the canopy frames for my F4U-5? Black or zinc chromate? I think with all upper parts being black, black is the right choice but am I right?
Proud Supporter of Armorama Campaigns

#439
Washington, United States
Joined: November 05, 2005
KitMaker: 4,950 posts
AeroScale: 3,192 posts
Posted: Thursday, September 29, 2011 - 04:00 AM UTC
Emre, very good question. My last P-40, I did Yellow Zinc Chrimate on the canopy frames then oversprayed with OD on the slider, and black on the wind screen. Don't know why I couldn't have done black on all the frames and then oversprayed the slider with OD......
Best to try to check your references, although at this point, most color photos of Corsairs are going to be restored and might just be painted black.
Hanger Queens in Waiting:
Monogram 1/72 F8F-1
Corsair the Sky Pirate - 1/72 Ace A-7D
Century Series - Airfix 1/72 F-105G
Anti Shipping - Academy 1/72 PBJ-1D
Academy 1/72 F-84E
British Columbia, Canada
Joined: September 03, 2009
KitMaker: 6,965 posts
AeroScale: 6,247 posts
Posted: Thursday, September 29, 2011 - 04:36 AM UTC
My Scientific Wild-ass Guess is black. Logic suggests that they would want to control any reflections, which is done best with black. Mine's going to be black inside.
When once you have tasted flight you will walk the Earth with your eyes turned skyward.
For there you have been, and there you will always long to return.
-Leonardo Da Vinci
Wisconsin, United States
Joined: September 11, 2009
KitMaker: 1,917 posts
AeroScale: 563 posts
Posted: Thursday, September 29, 2011 - 06:17 AM UTC
SIMDON, I'll be doing the same scheme as you, but in 1/72nd scale. I hope mine goes as well as yours has.
Here's the white primer and underneath, then the intermediate blue. The dark sea blue is yet to come.

JessieC, is yours still in overall yellow? Quite an eye-catcher.

jcasilimas, that looks good enough to climb right in! On your 5th and 6th photos though, there's a small fuzz sticking up from the top of the instrument panel-- you should probably throw the whole thing away and start over.
Cheers!
-Sean H.
Current: model railroad layout
Stalled a while ago:
. 1950's Chrome, WW II Twins
Last completed: Police Car
British Columbia, Canada
Joined: September 03, 2009
KitMaker: 6,965 posts
AeroScale: 6,247 posts
Posted: Thursday, September 29, 2011 - 07:13 AM UTC
Quoted Text
JessieC, is yours still in overall yellow? Quite an eye-catcher.
No, it's come down with a severe case of the blues.

When once you have tasted flight you will walk the Earth with your eyes turned skyward.
For there you have been, and there you will always long to return.
-Leonardo Da Vinci
Istanbul, Turkey / Türkçe
Joined: December 16, 2004
KitMaker: 1,163 posts
AeroScale: 255 posts
Posted: Thursday, September 29, 2011 - 08:22 AM UTC
A case of very gloss blues?
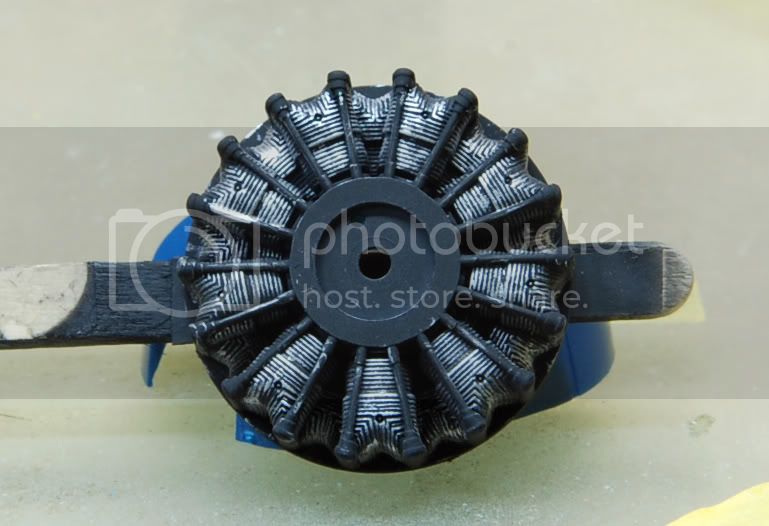
I'm following suit. Here's my completed engine.
Pre-flight checks before primer. Much to my dismay, there was a seam line on the top of the bubble canopy, running all the way in the middle. Had to get rid of that and polish the canopy with Tamiya compound. After that, I sprayed everything with Mr Surfacer 1200.

I'm now one step behind, in a yellow submarine...yellow submarine....
Proud Supporter of Armorama Campaigns
#042
England - North East, United Kingdom
Joined: November 18, 2006
KitMaker: 2,828 posts
AeroScale: 1,720 posts
Posted: Thursday, September 29, 2011 - 09:58 AM UTC
Looking good so far Emre
My build has stalled slightly... I got the intake of the sluff all nicely smoothed and painted gloss white but the fitting to the fuselage was less than desirable which has resulted in lots of filler and sanding being needed. I'll post some photos at the weekend.
Modellers Creed: This is my toolbox. There are many like it, but this one is mine. My toolbox is my best friend. It is my life. I must master it as I must master my life. My toolbox, without me, is useless. Without my toolbox, I am useless.
Bogota, Colombia
Joined: June 17, 2008
KitMaker: 13 posts
AeroScale: 12 posts
Posted: Thursday, September 29, 2011 - 12:56 PM UTC
Looking good Emre, good job!!
Javier
British Columbia, Canada
Joined: September 03, 2009
KitMaker: 6,965 posts
AeroScale: 6,247 posts
Posted: Thursday, September 29, 2011 - 01:15 PM UTC
Masking is off, decals are on.


Still to come are touch-us, canopy and wheels.
When once you have tasted flight you will walk the Earth with your eyes turned skyward.
For there you have been, and there you will always long to return.
-Leonardo Da Vinci
Istanbul, Turkey / Türkçe
Joined: December 16, 2004
KitMaker: 1,163 posts
AeroScale: 255 posts
Posted: Thursday, September 29, 2011 - 07:45 PM UTC
Thanks Allen and Javier! I'm trying to catch up with Jessie, but she sprinted ahead again
Mr Surfacer revealed some areas that will require putty and more attention, so I won't be painting before the weekend I guess.
Jessie, a question since we are building the same group of aircraft (Mine's 410). Revell's instructions are a little vague on the yellow areas. Should I paint the front of the pylon underneath the gun second gun barrel yellow?
Proud Supporter of Armorama Campaigns
Wisconsin, United States
Joined: September 11, 2009
KitMaker: 1,917 posts
AeroScale: 563 posts
Posted: Friday, September 30, 2011 - 01:30 AM UTC
I painted the final of the three camo colors, dark sea blue...
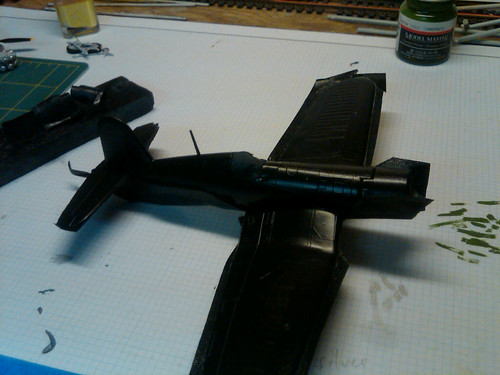
Then for my favorite part of painting-- removing the masking to see how it came out...
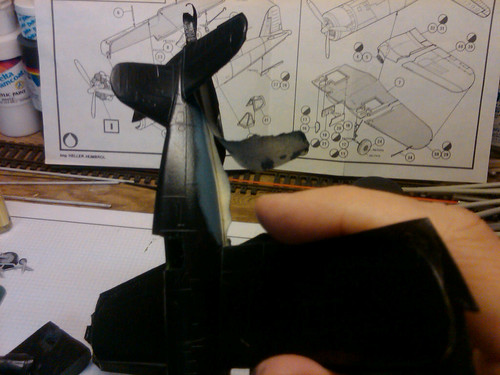
But I flubbed it. My white and dark blue are too close together-- especially on this side, so I'll have to hit the middle color again. That's not the way it's supposed to go, I know.
Nice work, Emri and Jessie, on your yellow-tip 410's.
-Sean H.
Current: model railroad layout
Stalled a while ago:
. 1950's Chrome, WW II Twins
Last completed: Police Car
Istanbul, Turkey / Türkçe
Joined: December 16, 2004
KitMaker: 1,163 posts
AeroScale: 255 posts
Posted: Friday, September 30, 2011 - 01:45 AM UTC
How are you going to fix that Sean?
By the way, I made a typo. My plane will be 401, not 410
Proud Supporter of Armorama Campaigns
Wisconsin, United States
Joined: September 11, 2009
KitMaker: 1,917 posts
AeroScale: 563 posts
Posted: Friday, September 30, 2011 - 02:47 AM UTC
Emre,
I'll have to mask all except the sides and paint the lighter color over the dark-- exactly what they tell you NOT to do.
Wish me luck.
It'll be nice to see 401 and 410 together. Likewise, my kit comes with decals for #3, as opposed to SUNDON's #1 "Big Hog".
thanks,
Sean.
Current: model railroad layout
Stalled a while ago:
. 1950's Chrome, WW II Twins
Last completed: Police Car
British Columbia, Canada
Joined: September 03, 2009
KitMaker: 6,965 posts
AeroScale: 6,247 posts
Posted: Friday, September 30, 2011 - 05:24 AM UTC
Quoted Text
Jessie, a question since we are building the same group of aircraft (Mine's 410). Revell's instructions are a little vague on the yellow areas. Should I paint the front of the pylon underneath the gun second gun barrel yellow?
I don't think they're suposed to be yellow. Mine got hit with the yellow paint because I didn't bother masking. That's one of the areas the blue touch-up is going to go first.
I'm still not certain that I should have done the tips of the stabilisers. the box art on my box doesn't show them (they're conveniently cut off), and the painting guide says they're blue, but the art on your box has them yellow. Whatever, I figured they look better yellow.
When once you have tasted flight you will walk the Earth with your eyes turned skyward.
For there you have been, and there you will always long to return.
-Leonardo Da Vinci
Wisconsin, United States
Joined: September 11, 2009
KitMaker: 1,917 posts
AeroScale: 563 posts
Posted: Friday, September 30, 2011 - 06:39 AM UTC
Not to rain on your parade (especially since it does look good that way), but according to the navy history site,
http://www.history.navy.mil/faqs/faq2-1.htm , as of May 1, 1948:
"distinguishing colors for squadrons of a carrier air group on the propeller spinner and across the top of the vertical fin and rudder". No mention of the rear tip of the fuselage or the horizontal stabilizers-- or even the wingtips for that matter. I assume this history isn't complete and that there were local variations of course.
Also, by the way, yellow T makes yours the 4th Squadron of the USS Tarawa (CV 40). I found this document,
http://www.history.navy.mil/download/va-1-23.pdf , which shows a tiny picture on Pg 6 (of 20) of T corsairs, but no light color is visible, except on the spinner.
Ah, whatever. I can't find more in my quick Google search. I assume the decal makers did a better job researching than I just did.
Cheers!
-Sean.
Current: model railroad layout
Stalled a while ago:
. 1950's Chrome, WW II Twins
Last completed: Police Car