Air Campaigns
Want to start or join a group build? This is where to start.
Want to start or join a group build? This is where to start.
Hosted by Frederick Boucher, Michael Satin
Corsair's the Sky Pirates Campaign

Jessie_C


Joined: September 03, 2009
KitMaker: 6,965 posts
AeroScale: 6,247 posts

Posted: Friday, September 30, 2011 - 07:19 AM UTC
Knowing how sailors like to decorate things, I'll go with my feelings and keep all the yellow trim. Besides, it just looks too cool that way. The Colour Police will never take me alive!

windysean

Joined: September 11, 2009
KitMaker: 1,917 posts
AeroScale: 563 posts

Posted: Friday, September 30, 2011 - 07:59 AM UTC
I'm sure you're right about sailors looking for something to pass the time stuck on a boat during a long cruise.
...and being a U.S. aircraft, "color" is spelled without the "u".
...and being a U.S. aircraft, "color" is spelled without the "u".

emroglan

Joined: December 16, 2004
KitMaker: 1,163 posts
AeroScale: 255 posts

Posted: Friday, September 30, 2011 - 09:01 AM UTC
Quoted Text
I'm still not certain that I should have done the tips of the stabilisers. the box art on my box doesn't show them (they're conveniently cut off), and the painting guide says they're blue, but the art on your box has them yellow. Whatever, I figured they look better yellow.
Revell's instructions call for yellow on the tip of the stabilizers. I'm not sure on the drop tanks though, the instructions show them plain navy blue but the box art had yellow-blue. Guess whom I decided to follow?

I still have to spray yellow to the top of the rudder and the rear of the fuselage, but there were some areas requiring attention first. I also managed to damage the yellow on the spinner, looks like I'll have to strip it completely and repaint it. Doh! Despite being a single colored aircraft this is going to take longer than I assumed.

Jessie_C


Joined: September 03, 2009
KitMaker: 6,965 posts
AeroScale: 6,247 posts

Posted: Friday, September 30, 2011 - 09:26 AM UTC
Quoted Text
I'm sure you're right about sailors looking for something to pass the time stuck on a boat during a long cruise.
...and being a U.S. aircraft, "color" is spelled without the "u".
Does that mean that it's a Voght F-4?

windysean

Joined: September 11, 2009
KitMaker: 1,917 posts
AeroScale: 563 posts

Posted: Friday, September 30, 2011 - 09:30 AM UTC
Quoted Text
Quoted TextI'm sure you're right about sailors looking for something to pass the time stuck on a boat during a long cruise.
...and being a U.S. aircraft, "color" is spelled without the "u".
Does that mean that it's a Voght F-4?
They must keep some "u"s just to confoUnd everyone.


Jessie_C


Joined: September 03, 2009
KitMaker: 6,965 posts
AeroScale: 6,247 posts

Posted: Friday, September 30, 2011 - 09:32 AM UTC
I'm calling this one finished. It's by far the greatest build I've ever done. I put the paint on too thick, and it went orange-peel in several places. Up close and personal you can see all the dings, divots and other hangar rash that I didn't bother to polish out.


Here's a bonus picture illustrating why it may not be a good idea to encourage Vought engineers.


Here's a bonus picture illustrating why it may not be a good idea to encourage Vought engineers.


Jessie_C


Joined: September 03, 2009
KitMaker: 6,965 posts
AeroScale: 6,247 posts

Posted: Friday, September 30, 2011 - 01:32 PM UTC
Quoted Text
It's by far the greatest build I've ever done.
Oh dear, I just noticed that I'm missing the 'not' in there, and it's too late for me to go back into the post and edit it. It's not the greatest build I've ever done. I seem like such an egotist without that 'not' in there and all the complaining I did about the quality of the finish.
It's not great. Did I mention that?
Posted: Friday, September 30, 2011 - 01:53 PM UTC
Well I was wondering about your state of mind when I saw that first post Jessie, I thought that maybe you had a REALLY late night finishing your build and were delirious with exhaustion 
After watching your builds on those multi-engine civvies and especially the Vac Campaign build, this little bent-wing bird would have been a pleasurable distraction. I think it looks great !
Cheers, D

After watching your builds on those multi-engine civvies and especially the Vac Campaign build, this little bent-wing bird would have been a pleasurable distraction. I think it looks great !
Cheers, D
SUNDON

Joined: January 19, 2009
KitMaker: 158 posts
AeroScale: 155 posts

Posted: Friday, September 30, 2011 - 09:31 PM UTC
Got up early this morning to add some finishing touches and to take some pictures.
Built with the addition of some Eduard PE for the cockpit and some line for the antena. In the markings of an aircraft from VF-17 using the box decals.
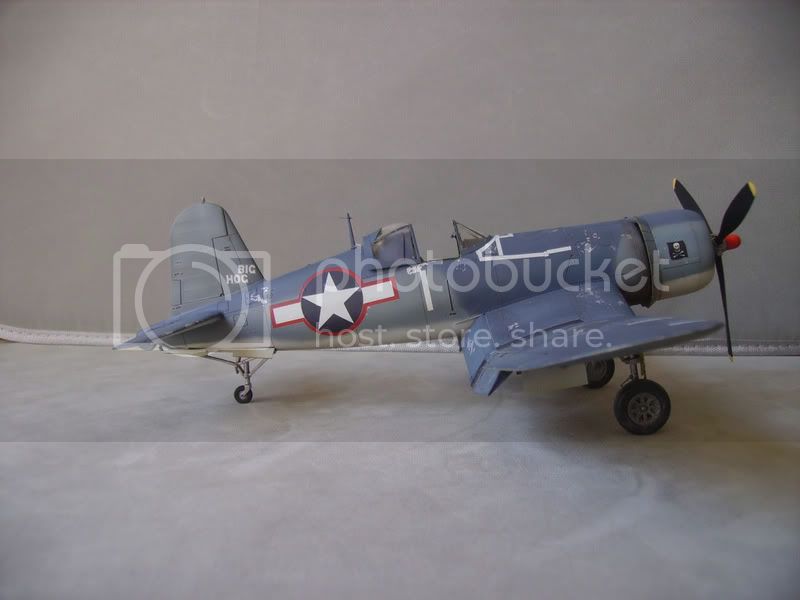
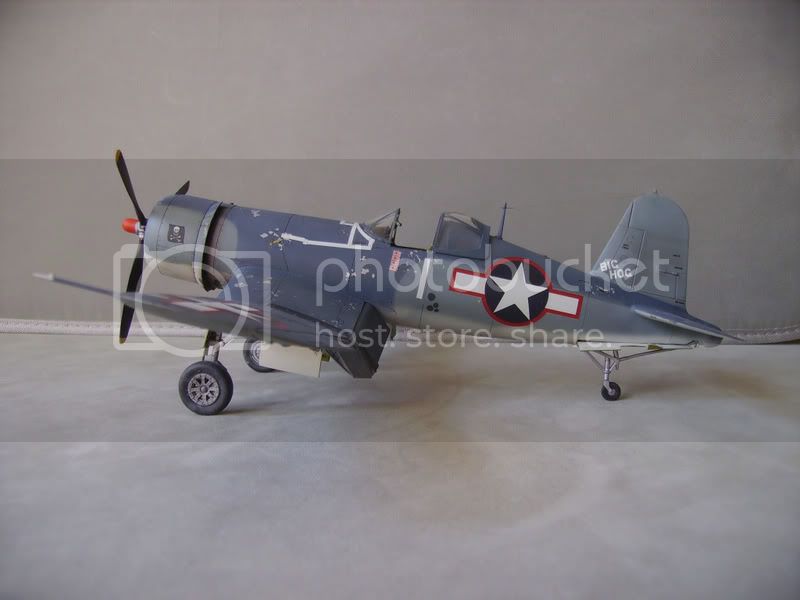
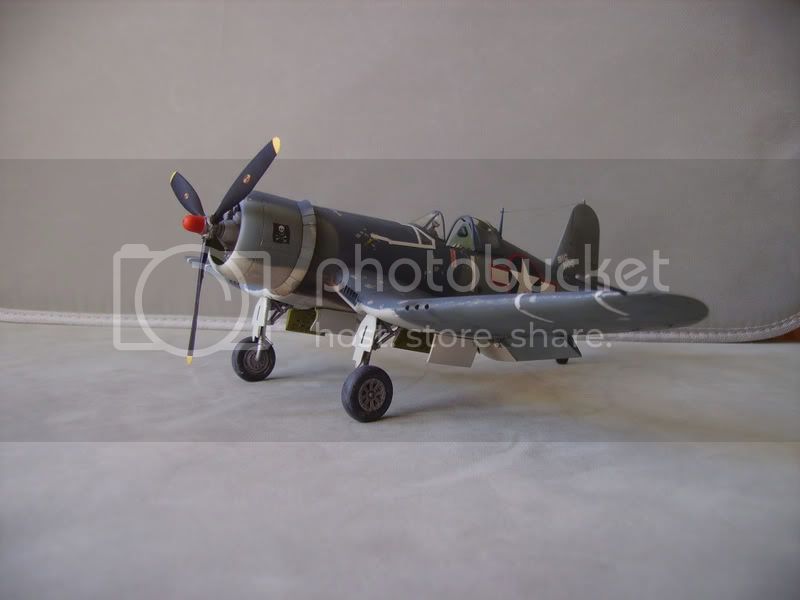
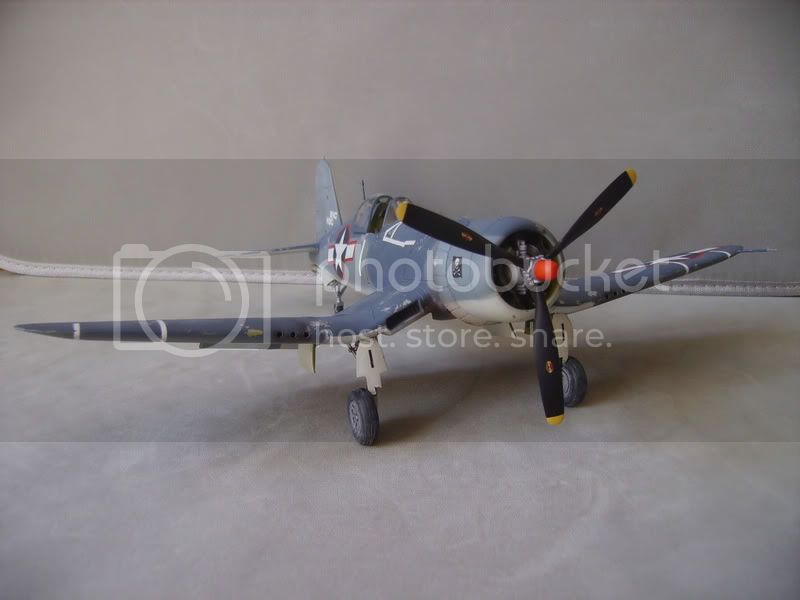
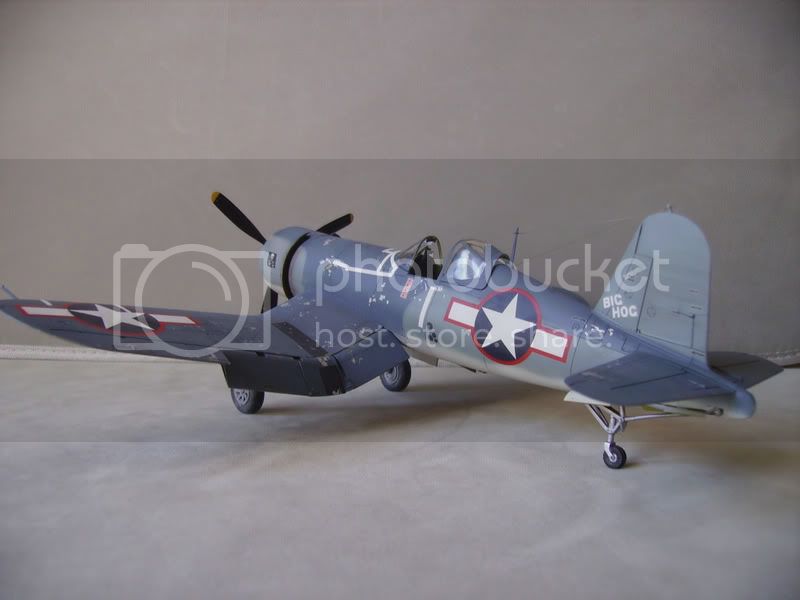

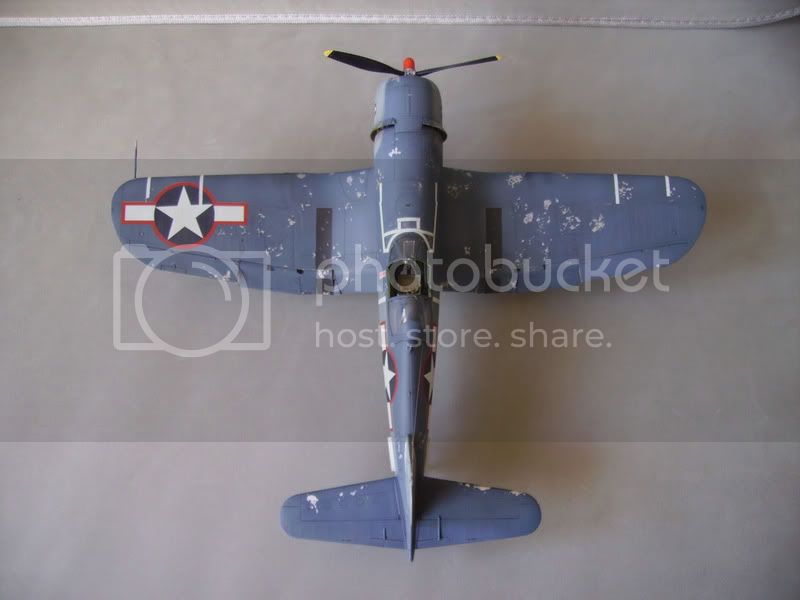

A great kit for a great Campaign.
Thanks
Martin
Built with the addition of some Eduard PE for the cockpit and some line for the antena. In the markings of an aircraft from VF-17 using the box decals.


A great kit for a great Campaign.
Thanks
Martin

GhostHawk

Joined: January 27, 2011
KitMaker: 268 posts
AeroScale: 264 posts

Posted: Sunday, October 02, 2011 - 07:34 AM UTC
Nice Built, Sir...!!! 

Removed by original poster on 10/02/11 - 23:18:29 (GMT).

BlackWidow

Joined: August 09, 2009
KitMaker: 1,732 posts
AeroScale: 1,336 posts

Posted: Monday, October 03, 2011 - 01:33 AM UTC
@Jessie
Well done on your Corsair! Looks really good, though the paint came on a bit too thick for my taste.
@Martin
You did a great job on that Corsair, mate! Congrats! is it the Tamiya kit?
Some more process pics from me as I had some more time to spend for glueing and painting this long weekend .....
Bye-Bye guy .....

....well, I don't know if his name is Guy, but we see eachother again in a few weeks. That's really hardcore survival training for my pilots - no food, no drinks, no air ..... but everyone has survived it so far .....

That's how my Corsairs looked yesterday ....

..... and this is their look after a slight white primer with Revell 05 this morning. The Birdcage will get folded wings, while the RNZAF Corsair will have extended wings
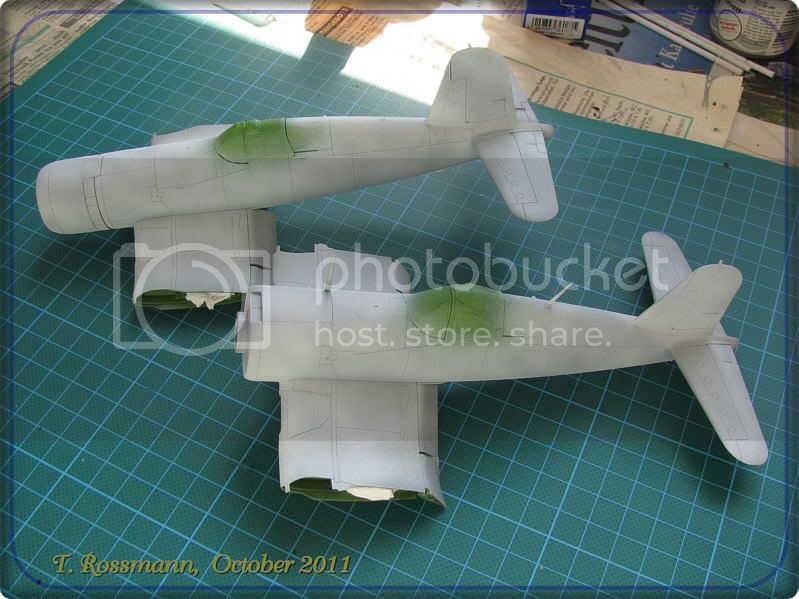
Some more bits and pieces
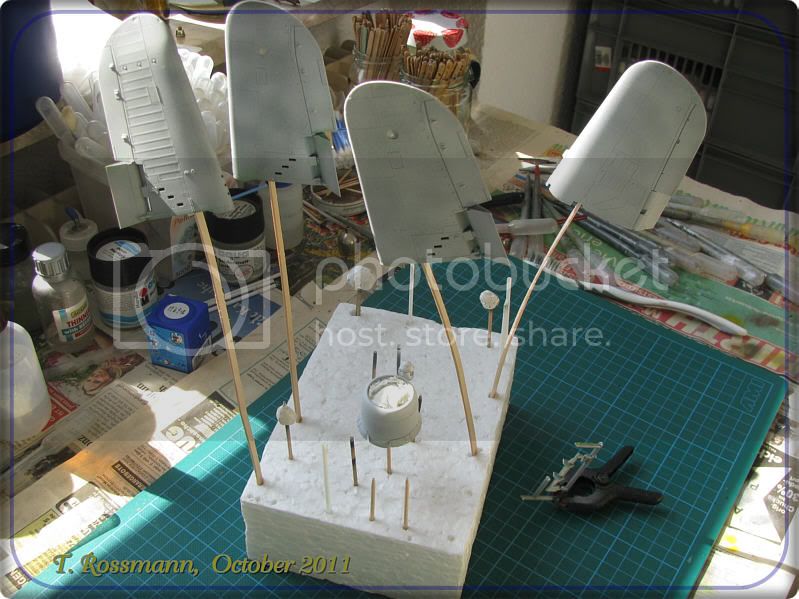
Happy modelling!
Torsten
Well done on your Corsair! Looks really good, though the paint came on a bit too thick for my taste.
@Martin
You did a great job on that Corsair, mate! Congrats! is it the Tamiya kit?
Some more process pics from me as I had some more time to spend for glueing and painting this long weekend .....

Bye-Bye guy .....

....well, I don't know if his name is Guy, but we see eachother again in a few weeks. That's really hardcore survival training for my pilots - no food, no drinks, no air ..... but everyone has survived it so far .....


That's how my Corsairs looked yesterday ....

..... and this is their look after a slight white primer with Revell 05 this morning. The Birdcage will get folded wings, while the RNZAF Corsair will have extended wings

Some more bits and pieces

Happy modelling!
Torsten


windysean

Joined: September 11, 2009
KitMaker: 1,917 posts
AeroScale: 563 posts

Posted: Monday, October 03, 2011 - 02:27 AM UTC
Quoted Text
Quoted Text
I'm still not certain that I should have done the tips of the stabilisers. the box art on my box doesn't show them (they're conveniently cut off), and the painting guide says they're blue, but the art on your box has them yellow. Whatever, I figured they look better yellow.
Revell's instructions call for yellow on the tip of the stabilizers. I'm not sure on the drop tanks though, the instructions show them plain navy blue but the box art had yellow-blue. Guess whom I decided to follow?
I still have to spray yellow to the top of the rudder and the rear of the fuselage, but there were some areas requiring attention first. I also managed to damage the yellow on the spinner, looks like I'll have to strip it completely and repaint it. Doh! Despite being a single colored aircraft this is going to take longer than I assumed.
After my earlier post on the colors of the yellow T Corsairs, I realized my own reference (Squadron/Signal #1029 F4U Corsairs in action) contains this photo (shown here for discussion only!)...
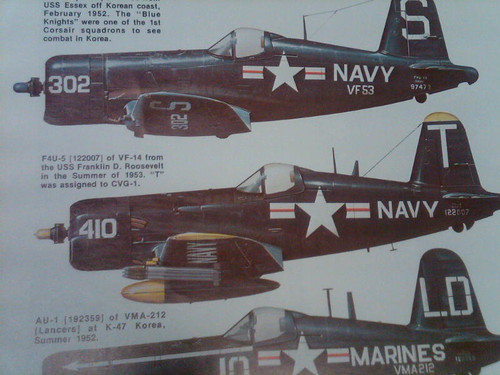
that some authority on the subject must have worked up. (Dang it, I cut the end of the fuselage off too, but I remember it as yellow.) My apologies to anyone I misguided earlier.

Oh, yeah, and I've got paint on and decals to follow soon...
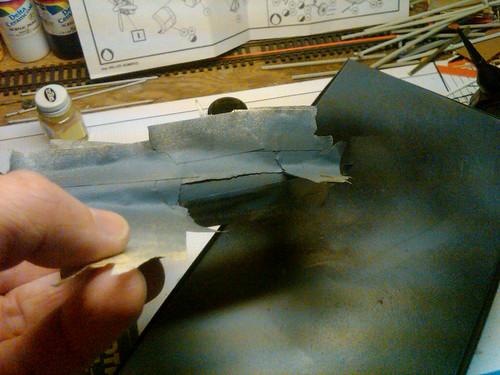
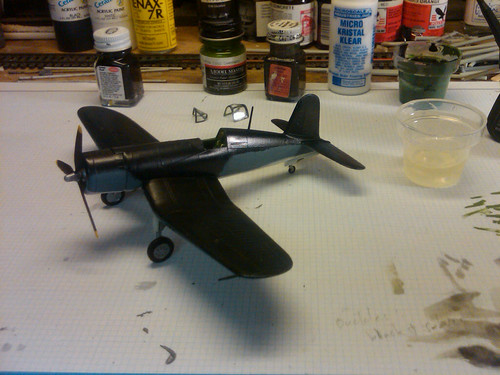
and Martin! That's fantastic work!
Cheers,
-Sean H.


SUNDON

Joined: January 19, 2009
KitMaker: 158 posts
AeroScale: 155 posts

Posted: Monday, October 03, 2011 - 02:52 AM UTC
[quote]
@Martin
You did a great job on that Corsair, mate! Congrats! is it the Tamiya kit?
Thanks
1/48 Tamiya with a Eduard PE cockpit set
Martin
@Martin
You did a great job on that Corsair, mate! Congrats! is it the Tamiya kit?
Thanks
1/48 Tamiya with a Eduard PE cockpit set
Martin

Jessie_C


Joined: September 03, 2009
KitMaker: 6,965 posts
AeroScale: 6,247 posts

Posted: Monday, October 03, 2011 - 03:24 AM UTC
Quoted Text
@Jessie
Well done on your Corsair! Looks really good, though the paint came on a bit too thick for my taste.
And for mine as well. I haven't done a 1/72 fighter-sized kit for years and I find I'm a trifle out of practise at doing something so tiny. I kept getting orange-peel so I just sprayed on more paint to try and level it out.
I did mention that it's not great, right?
Posted: Monday, October 03, 2011 - 05:37 AM UTC
Isn't the rule, any build you can finish and walk away from is a good build? 


Jessie_C


Joined: September 03, 2009
KitMaker: 6,965 posts
AeroScale: 6,247 posts

Posted: Monday, October 03, 2011 - 06:01 AM UTC
Quoted Text
Isn't the rule, any build you can finish and walk away from is a good build?
I'll take that and run with it

Also, in Sean's picture:

I note that Revell got the antenna fit incorrect, they missed the tailwheel protective fairings (or whatever those hookish looking things on the tailwheel doors are) and that I see a yellow glint on the tailplane tips that I'm going to say means that they were painted yellow. That's my story and I'm sticking to it. 410 was the Boss' airplane, so they gave it a little extra distinction. Yeah, that's it!
Emre, note that the tanks are yellow, contrary to Revell's indecisive instructions
vanize

Joined: January 30, 2006
KitMaker: 1,954 posts
AeroScale: 1,163 posts

Posted: Monday, October 03, 2011 - 07:08 AM UTC
Having just finished my P-40E for the P-40 campaign, I am ready to get started on my build for this one.
I'll be doing the 1/48 scale Hasegawa A-7E Corsair II:
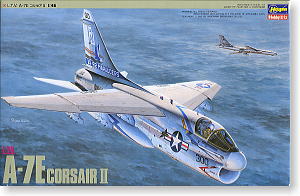
I'll be going mostly OTB except for the bang seat I think. I'll probably even use the kit decals unless I stumble on some set that really makes my mouth water (but nothing has as of yet). Most likely it'll be this scheme as provided in the kit tho:

I assembled the intake trunk last night, but that doesn't really make for an interesting progress picture yet. I'll post when it get further along.
Does anyone know how much weight (if any) i need to cram in the tiny little nose to ensure it is not a tail sitter?
I'll be doing the 1/48 scale Hasegawa A-7E Corsair II:

I'll be going mostly OTB except for the bang seat I think. I'll probably even use the kit decals unless I stumble on some set that really makes my mouth water (but nothing has as of yet). Most likely it'll be this scheme as provided in the kit tho:

I assembled the intake trunk last night, but that doesn't really make for an interesting progress picture yet. I'll post when it get further along.
Does anyone know how much weight (if any) i need to cram in the tiny little nose to ensure it is not a tail sitter?

29Foxtrot

Joined: September 19, 2003
KitMaker: 708 posts
AeroScale: 674 posts

Posted: Monday, October 03, 2011 - 01:26 PM UTC
Some progress on my F4U-Id cockpit, the 'harness' is made from lead foil, the rest is kit parts.
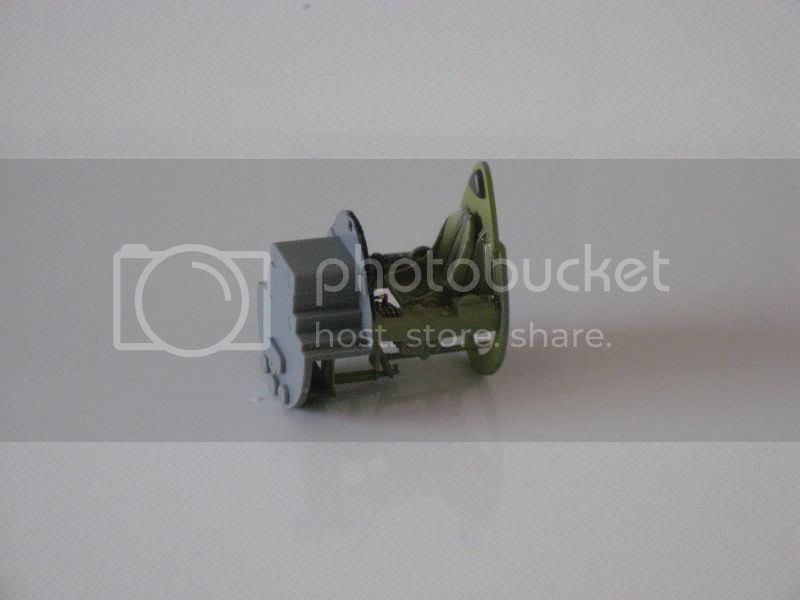
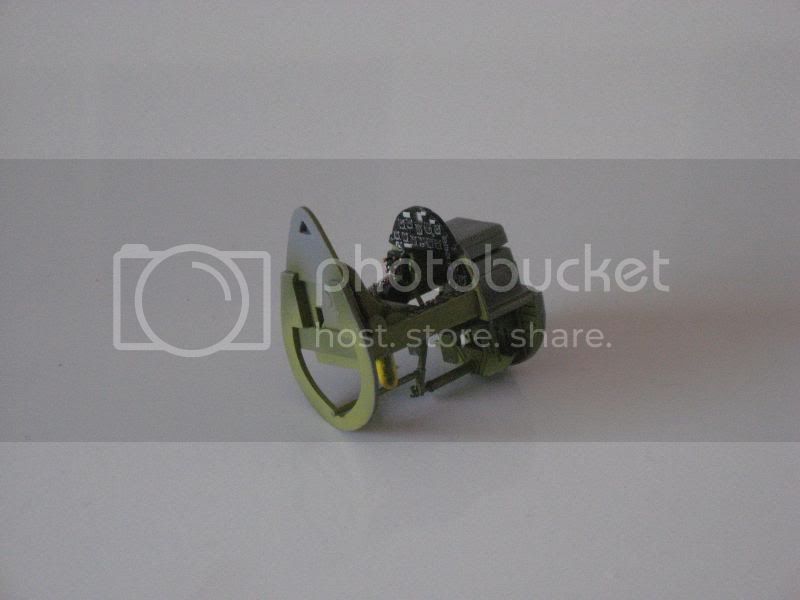


Posted: Monday, October 03, 2011 - 03:48 PM UTC
Vance, Glad to see another SLUFF in the mix. Don't underestimate the interest in that intake trunk. It's one of the most difficult parts of every A-7 & F-8 I've ever run across.
emroglan

Joined: December 16, 2004
KitMaker: 1,163 posts
AeroScale: 255 posts

Posted: Thursday, October 06, 2011 - 10:00 AM UTC
Progress is slower than I would like, but I'm getting there... Had a problem with the Gunze Navy Colors Set. Seems that they are lacquers and their bottle caps somehow don't fit, the "new bottle of" paint was nearly dry inside much to my surprise! I had to struggle with it to make it work. Adding Tamiya lacquer thinner solved the problem.
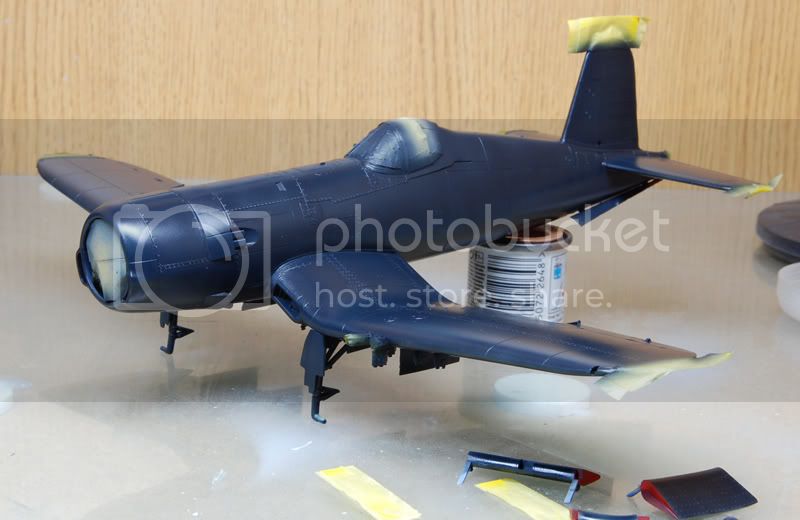
I tried to play around with the color, like I generally do. However, this sea blue is such a color that it literally prevents all my attempts I can't see any different shades and the light is always reflected off the paint somehow. Never happened with grays, browns or greens before. Anyway, here she is before her gloss coat.
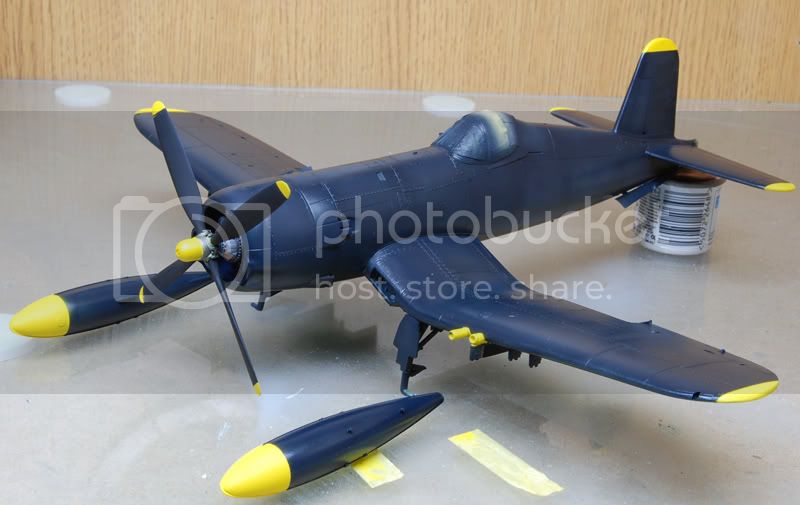
I'll have to rush the rear landing gear, I'm trying to paint the white and black striped part. After that, I'll spray it with gloss coat and apply the decals. After that... hmmm I might try other tricks on that sea blue to make it look a bit more interesting.

I tried to play around with the color, like I generally do. However, this sea blue is such a color that it literally prevents all my attempts
 I can't see any different shades and the light is always reflected off the paint somehow. Never happened with grays, browns or greens before. Anyway, here she is before her gloss coat.
I'll have to rush the rear landing gear, I'm trying to paint the white and black striped part. After that, I'll spray it with gloss coat and apply the decals. After that... hmmm I might try other tricks on that sea blue to make it look a bit more interesting.

Jessie_C


Joined: September 03, 2009
KitMaker: 6,965 posts
AeroScale: 6,247 posts

Posted: Thursday, October 06, 2011 - 10:08 AM UTC
That's turned out so much better than mine did 
What about giving it an overall goat of flat clear, brushing on a thin dusting of white chalk dust to shade some panels and then sealing it with a clear gloss coat?

What about giving it an overall goat of flat clear, brushing on a thin dusting of white chalk dust to shade some panels and then sealing it with a clear gloss coat?
tmccall

Joined: February 16, 2009
KitMaker: 43 posts
AeroScale: 15 posts

Posted: Thursday, October 06, 2011 - 07:28 PM UTC
Realized I needed to get an "in progress" shot in here. As she'll be going to the paint shop this weekend, now would seem an opportune time.
Major assemblies are complete, just need to add the outer wings and flaps and then it's off to paint followed by final assembly. No big surf in the immediate forecast so I may get this one wrapped in the next week or so.

Major assemblies are complete, just need to add the outer wings and flaps and then it's off to paint followed by final assembly. No big surf in the immediate forecast so I may get this one wrapped in the next week or so.
Removed by original poster on 10/07/11 - 06:30:48 (GMT).

windysean

Joined: September 11, 2009
KitMaker: 1,917 posts
AeroScale: 563 posts

Posted: Friday, October 07, 2011 - 01:36 AM UTC
Excellent work here, guys.
I'm coming along with mine, decaled...
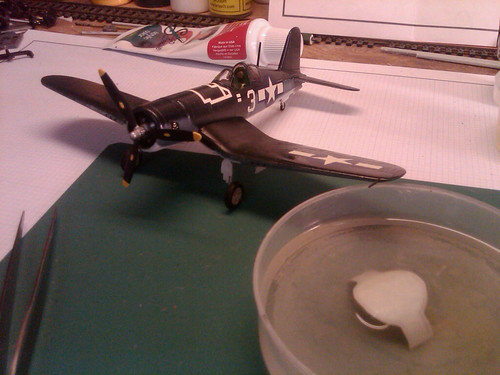
...then painted small details. There were no Hamilton-Standard propeller decals and I made up some kill markings and red tape on the gun ports-- all the red is handpainted -- representational more than accurate at all. Then I masked for Testors Dullcote...
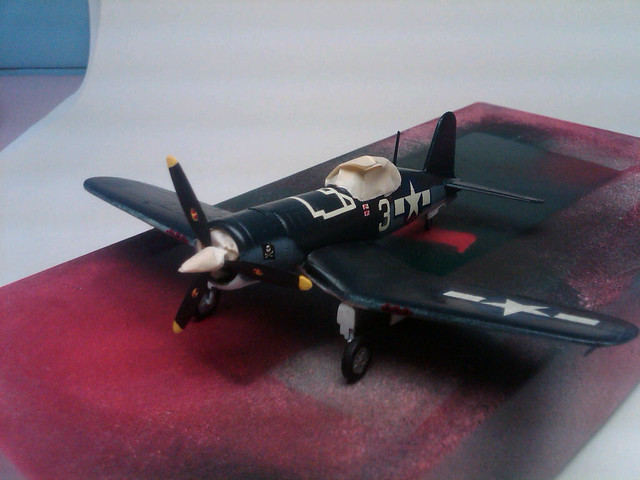
I had brushed on some Future before decalling, and I was pretty generous with it, but now I can't get those areas of the wing to dull down. I had removed the canopy masking to see the overall finish, then disaster struck. I went to mask most of the plane for another hit of Dullcote, and I thoughtlessly laid masking tape over my fuselage decals-- most held, but I have to reapply the white "tape" on the cowling. Luckily I have more than one of these kits, so I can plunder that decal from another.
More updates tonight or tomorrow.
-Sean H.
I'm coming along with mine, decaled...

...then painted small details. There were no Hamilton-Standard propeller decals and I made up some kill markings and red tape on the gun ports-- all the red is handpainted -- representational more than accurate at all. Then I masked for Testors Dullcote...

I had brushed on some Future before decalling, and I was pretty generous with it, but now I can't get those areas of the wing to dull down. I had removed the canopy masking to see the overall finish, then disaster struck. I went to mask most of the plane for another hit of Dullcote, and I thoughtlessly laid masking tape over my fuselage decals-- most held, but I have to reapply the white "tape" on the cowling. Luckily I have more than one of these kits, so I can plunder that decal from another.
More updates tonight or tomorrow.
-Sean H.

 |


