Corsair's the Sky Pirates Campaign
Ontario, Canada
Joined: November 14, 2009
KitMaker: 270 posts
AeroScale: 264 posts
Posted: Thursday, December 15, 2011 - 02:45 AM UTC
Diego: Great job!
On my side, the Hasegawa Birdcage is coming along
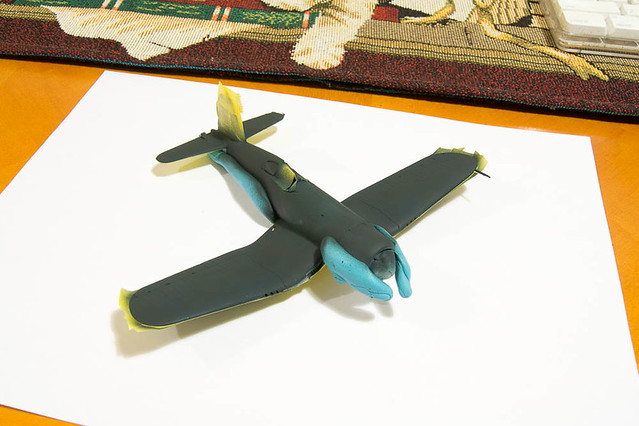 Hasegawa F4U-1 Corsair 1/72
 by
mawz_models, on Flickr
Ontario, Canada
Joined: November 14, 2009
KitMaker: 270 posts
AeroScale: 264 posts
Posted: Thursday, December 15, 2011 - 01:04 PM UTC
Kind of on a roll with the Corsair
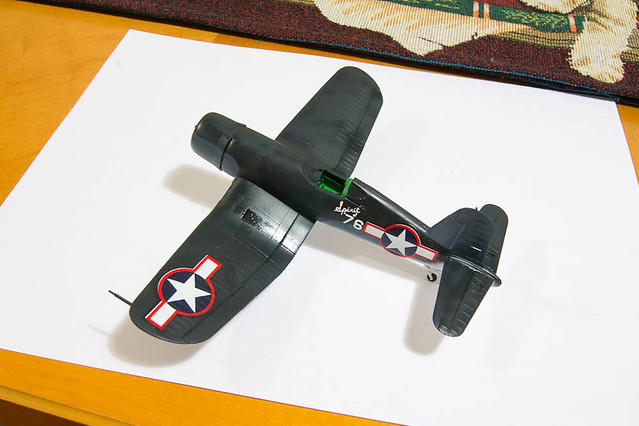 Hasegawa F4U-1 Corsair 1/72
 by
mawz_models, on Flickr
Just need to finish up the wheels & prop, hang the fiddly bits and then shoot some dullcote

#042
England - North East, United Kingdom
Joined: November 18, 2006
KitMaker: 2,828 posts
AeroScale: 1,720 posts
Posted: Thursday, December 15, 2011 - 10:08 PM UTC
Modellers Creed: This is my toolbox. There are many like it, but this one is mine. My toolbox is my best friend. It is my life. I must master it as I must master my life. My toolbox, without me, is useless. Without my toolbox, I am useless.
Wisconsin, United States
Joined: September 11, 2009
KitMaker: 1,917 posts
AeroScale: 563 posts
Posted: Friday, December 16, 2011 - 01:33 AM UTC
Allen, You're right, that gray almost exactly matches the overall color. I can't make out the AE or NAVY, but I can see the "rescue" arrow. Until I read your comment, I didn't know there were any more than the black images.
Either way, your jet looks all business, with no colorful fru-fru.

Nice builds on this thread!
Adam, Really well done on that Birdcage Corsair. I wish the decals were more in register, but that's not you, that's the manufacturer Hasegawa. You've got a really good looking aircraft!
-Sean H.

Current: model railroad layout
Stalled a while ago:
. 1950's Chrome, WW II Twins
Last completed: Police Car
Ontario, Canada
Joined: November 14, 2009
KitMaker: 270 posts
AeroScale: 264 posts
Posted: Friday, December 16, 2011 - 01:50 AM UTC
Allen, Very nice build, the decals problems are a pity though.
Sean, Thanks, I'm actually rather surprised by the decal issues, they're old Hasegawa decals and register is rarely an issue with those. Of course I didn't face the usual old Hase decal issue, fragility, so there was a bright side.
Ontario, Canada
Joined: November 14, 2009
KitMaker: 270 posts
AeroScale: 264 posts
Posted: Sunday, December 18, 2011 - 09:57 AM UTC
And I'm calling her done. F4U-1 Spirit of '76 from VMF-215 in August 1943.
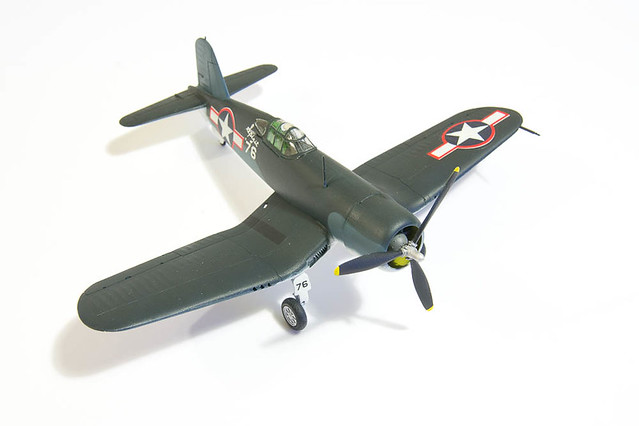 Hasegawa F4U-1 Corsair 1/72
 by
mawz_models, on Flickr
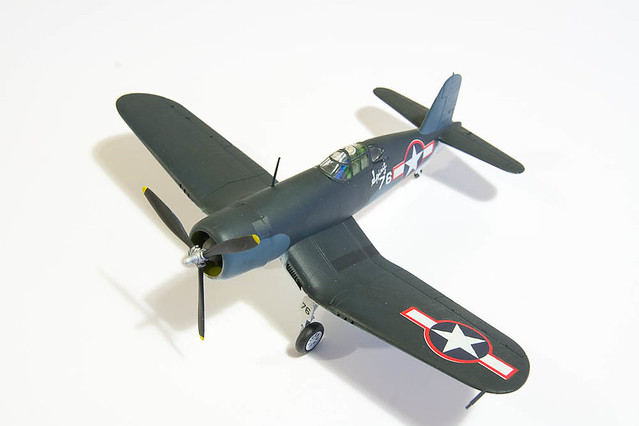 Hasegawa F4U-1 Corsair 1/72
 by
mawz_models, on Flickr
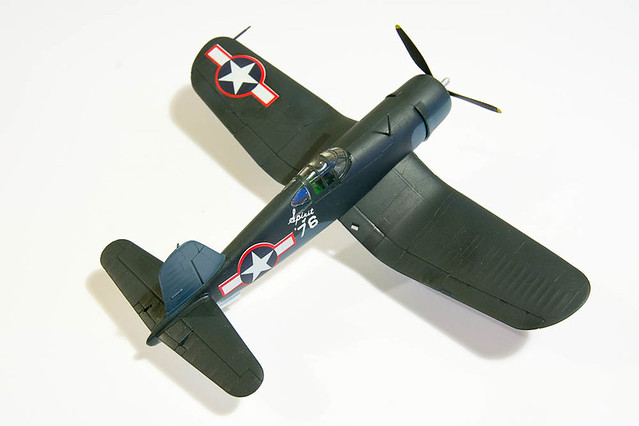 Hasegawa F4U-1 Corsair 1/72
 by
mawz_models, on Flickr
Bogota, Colombia
Joined: June 17, 2008
KitMaker: 13 posts
AeroScale: 12 posts
Posted: Sunday, December 18, 2011 - 02:30 PM UTC

#041
Kobenhavn, Denmark
Joined: July 20, 2006
KitMaker: 10,069 posts
AeroScale: 3,788 posts
Posted: Sunday, December 18, 2011 - 04:22 PM UTC
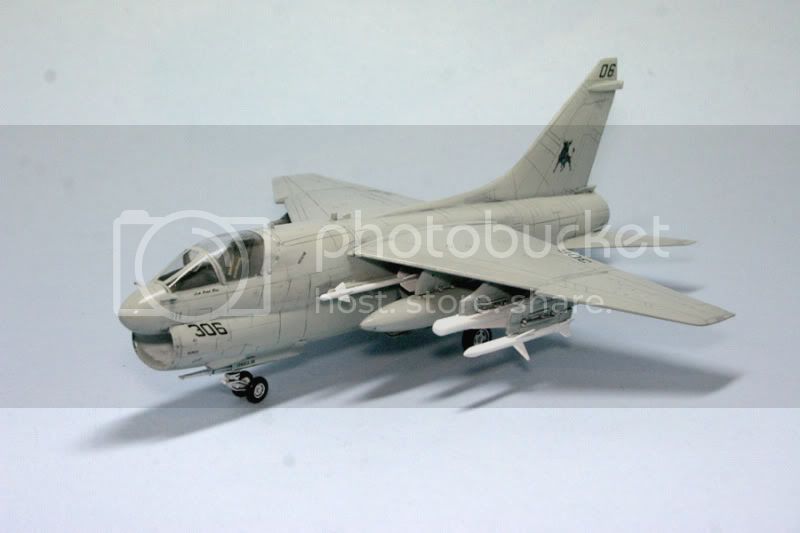
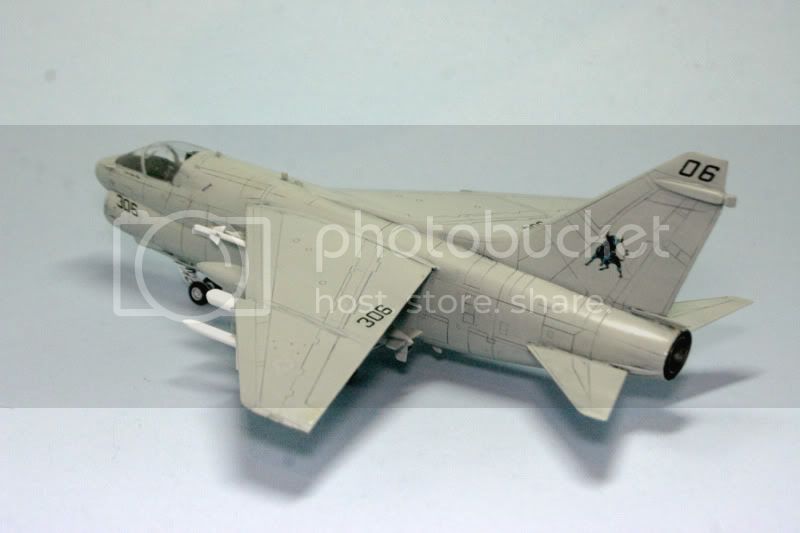
What a complex camo scheme, Allen

Seriously, very nice build. It is a tough looking plane.
Nice build, Adam!
Cool detail, Javier. Looking forward to see more as your build progresses.
Campaign'oholic - 252+ campaigns completed

#259
Massachusetts, United States
Joined: October 23, 2011
KitMaker: 2,265 posts
AeroScale: 1,715 posts
Posted: Sunday, December 25, 2011 - 08:34 PM UTC
Got some decals on this guy, and the Helldiver as well.
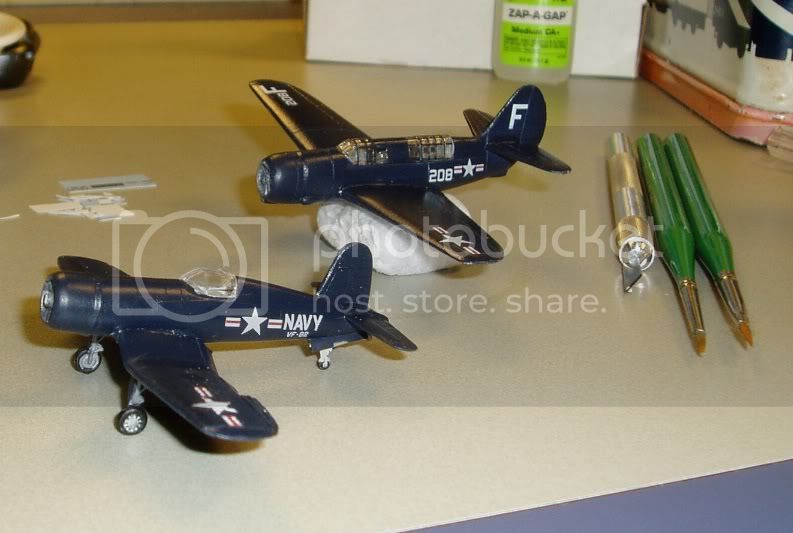
These are extra sets of decals from Miniwings, very nice, but not many alphanumerics to choose from, so now waiting for some decal lettering sets.

#439
Washington, United States
Joined: November 05, 2005
KitMaker: 4,950 posts
AeroScale: 3,192 posts
Posted: Thursday, December 29, 2011 - 06:26 AM UTC
Geeze, You guyz are just flying along. I'm stuck behind a build I'd like to finish this week, then I'm back at it.
Hanger Queens in Waiting:
Monogram 1/72 F8F-1
Corsair the Sky Pirate - 1/72 Ace A-7D
Century Series - Airfix 1/72 F-105G
Anti Shipping - Academy 1/72 PBJ-1D
Academy 1/72 F-84E
Texas, United States
Joined: June 02, 2008
KitMaker: 232 posts
AeroScale: 155 posts
Posted: Wednesday, January 04, 2012 - 04:57 AM UTC
Tomcat31 can't be the only one doing a "modern-ish" Corsair. So last night I (finally) cracked open the ole ESCI 1/72 A-7D box and got to work.
With the exception of decals, she'll be OOB; I'll sticker her up as a Arizona ANG bird. I've looked on-line for paint schemes and my choices are gray on gray or green on gray, I like the latter, but have paint for the former. So far I've completed the cockpit (pics to follow shortly).
Which one of these has higher coolness factor?


"So it goes"
Kurt Vonnegut
Cork, Ireland
Joined: April 30, 2010
KitMaker: 232 posts
AeroScale: 66 posts
Posted: Wednesday, January 04, 2012 - 11:58 AM UTC
@ Javier- great detailing. What kit are you using?
Eoin
You don't learn nothing unless you make mistakes
Texas, United States
Joined: January 30, 2006
KitMaker: 1,954 posts
AeroScale: 1,163 posts
Posted: Wednesday, January 04, 2012 - 04:03 PM UTC
Quoted Text
Tomcat31 can't be the only one doing a "modern-ish" Corsair. So last night I (finally) cracked open the ole ESCI 1/72 A-7D box and got to work.
he's not - i am too!
Texas, United States
Joined: June 02, 2008
KitMaker: 232 posts
AeroScale: 155 posts
Posted: Thursday, January 05, 2012 - 04:23 PM UTC
Quoted Text
Quoted Text
Tomcat31 can't be the only one doing a "modern-ish" Corsair. So last night I (finally) cracked open the ole ESCI 1/72 A-7D box and got to work.
he's not - i am too!
My Apy-poly-logies Vance, I didn't see yours in the thread.
Here's mine, so far. ESCI decided to mold this kit w/o a nose gear well. So I built a version of one out of plastic card, various shapes and some wire.


"So it goes"
Kurt Vonnegut
AussieReg
 Associate Editor
#007
Victoria, Australia
Joined: June 09, 2009
KitMaker: 8,156 posts
AeroScale: 3,756 posts
Posted: Saturday, January 07, 2012 - 01:04 AM UTC
I spent a couple of hours decalling a P-47 last night, so tonight I'm going to do some assembly. Time to get back on track with this build.

Cheers, D
ON the bench
Revell 1/24 '53 Corvette (building as '54)
Revell 1/24 BMW 507 Coupe and Cabrio
Italeri 1/48 Me262 B-1a/U1 Nightfighter
Monogram 1/24 '57 Chevy Nomad
Dragon 1/350 USS Frank Knox DD-742

#259
Massachusetts, United States
Joined: October 23, 2011
KitMaker: 2,265 posts
AeroScale: 1,715 posts
Posted: Saturday, January 07, 2012 - 11:20 AM UTC
Quoted Text
Here's mine, so far. ESCI decided to mold this kit w/o a nose gear well. So I built a version of one out of plastic card, various shapes and some wire.

thats a nice bit of scratch up right there.
have you decided on the camo colors?
Victoria, Australia
Joined: September 19, 2003
KitMaker: 708 posts
AeroScale: 674 posts
Posted: Sunday, January 08, 2012 - 03:33 AM UTC
Hi All,
My F4U 1d Corsair is ready for it's clear coat and decal application.
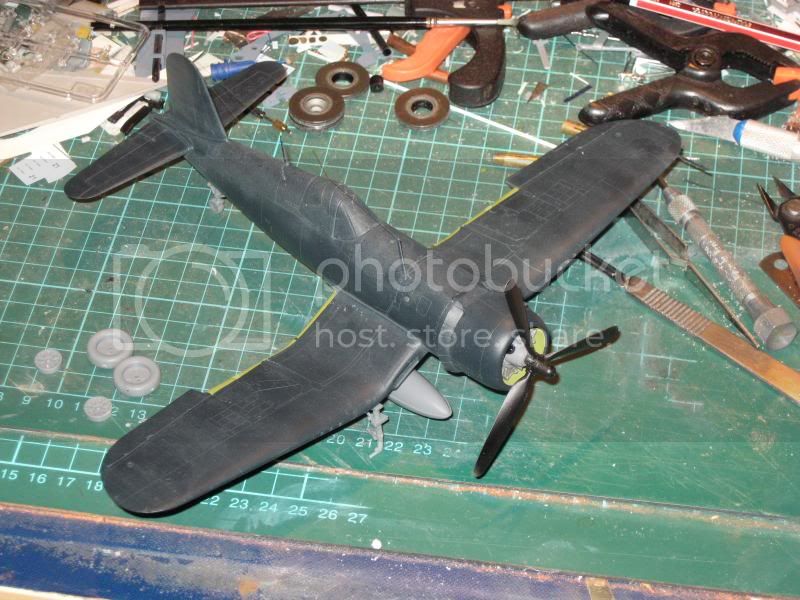
The decal option that I will use on this bird is that from the USS Franklin.
More to follow later.
President:- Southern Model Club.
Those who never learn from history will always repeat it.
"When you go home tell them of us and say.
For your tomorrow we gave our today."
AussieReg
 Associate Editor
#007
Victoria, Australia
Joined: June 09, 2009
KitMaker: 8,156 posts
AeroScale: 3,756 posts
Posted: Friday, January 13, 2012 - 10:38 AM UTC
Basic assemly complete, a couple of hours worth of filling and sanding and rescribing done.

Cheers, D
ON the bench
Revell 1/24 '53 Corvette (building as '54)
Revell 1/24 BMW 507 Coupe and Cabrio
Italeri 1/48 Me262 B-1a/U1 Nightfighter
Monogram 1/24 '57 Chevy Nomad
Dragon 1/350 USS Frank Knox DD-742

#439
Washington, United States
Joined: November 05, 2005
KitMaker: 4,950 posts
AeroScale: 3,192 posts
Posted: Friday, January 13, 2012 - 05:31 PM UTC
Hey Grenadier, that SLUFF looks very familiar. The sprues look a lot the the ones in my Ace kit. Same lack of NLG bay. I wondered who the Koreans knocked off. The box art calls it a NAVY A-7D and they included Navy decals along with the AF ones.

Hanger Queens in Waiting:
Monogram 1/72 F8F-1
Corsair the Sky Pirate - 1/72 Ace A-7D
Century Series - Airfix 1/72 F-105G
Anti Shipping - Academy 1/72 PBJ-1D
Academy 1/72 F-84E
Cork, Ireland
Joined: April 30, 2010
KitMaker: 232 posts
AeroScale: 66 posts
Posted: Saturday, January 14, 2012 - 02:31 AM UTC
I've just about built my radial engine and cockpit but my dang computer is acting up and I can't transfer the pics (yet!).
I posted loads of previous pictures on the site fine, but Santa got me this dumb-ass smart phone. I'm sure the phone is smart, pity anbout the user...
I'm building the Tamiya kit which is excellent, just needs a tiny bit of TLC, dry fitting and a bit of filing.
I'll post those pics once I finish the next chapter in 'Computers for Dummies'!
Eoin
You don't learn nothing unless you make mistakes
Victoria, Australia
Joined: March 14, 2006
KitMaker: 1,973 posts
AeroScale: 59 posts
Posted: Sunday, January 15, 2012 - 05:39 PM UTC
Hi Guys !
I'm starting my Tamiya 1/48 F4U-1A tonight, I have Lifecolor paints for the 3 tone Camo, but the build will be OOTB apart for some PE seat belts

Cheers
Paul
Pics in a few Days

OddBall: "It's a wasted trip baby. Nobody said nothing about locking horns with no Tigers"
KIlgore: " I love the smell of napalm in the morning. ...The smell, you know that gasoline smell, the whole hill. Smelled like... victory."
Removed by original poster on 01/16/12 - 11:47:37 (GMT).

#330
Queensland, Australia
Joined: July 15, 2011
KitMaker: 175 posts
AeroScale: 103 posts
Posted: Sunday, January 15, 2012 - 11:50 PM UTC
Almost done!

Wisconsin, United States
Joined: March 17, 2009
KitMaker: 156 posts
AeroScale: 153 posts
Posted: Wednesday, January 18, 2012 - 03:43 PM UTC
Nice builds, all!
I'm hoping to make this campaign deadline with some progress made over the holidays on my Hasegawa F4U-5N. This kit is nominated for an award in the category of "Poorest Execution of Injector Pin Marks on a Modern Injection-Molded Kit." It's like they didn't even think about where to put them...and not just the usual suspects on the gear door interior. "How about we give them 4 marks on each tyre?" "Yes, let's add two on the SIDE of each rocket, too!" "Don't forget the landing gear and every other part that you really wouldn't want to fill and sand." The rest of the kit screams quality, but these pin marks are just dumb. On the plus side, there are no unusual vices in assembly.

Happily, a gentlemen was able to provide me with a picture of the Corsair, "Kleenex," that I am building.

I like the rockets included with the kit, but doing the small bombs like in the photo could also be cool. I also like the mixed centreline load of 1 bomb and 1 tank. May have to do that, too.
Keep modeling-
Regards-
Tom
Wisconsin, USA
On the workbench:
WNW 1/32 Fokker E.II for Canvas Falcons III
Trumpeter 1/32 MiG-21F-13 for 2nd Gen Jets Campaign
Texas, United States
Joined: June 02, 2008
KitMaker: 232 posts
AeroScale: 155 posts
Posted: Thursday, January 19, 2012 - 04:00 PM UTC
My A-7D is almost ready for paint, it's covered in black automotive primer. I'll sand it and spray the two tone green and gray scheme. While I was polishing the canopy I noticed a small crack in it. As far as I know, no one makes a replacement so I coated it in Future to add some strength and hide the crack as much as possible,

"So it goes"
Kurt Vonnegut


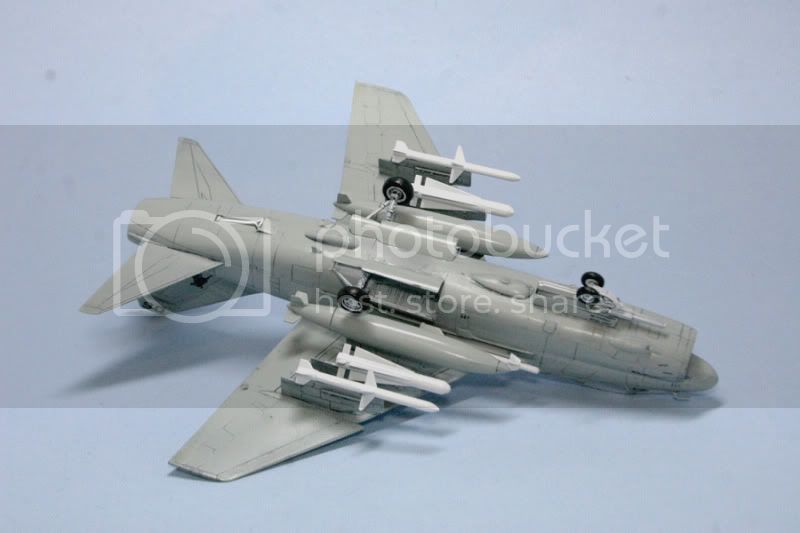
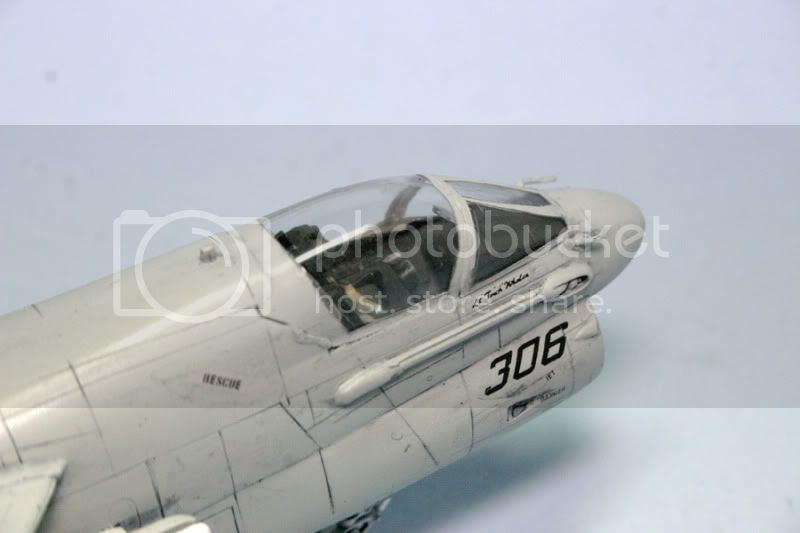
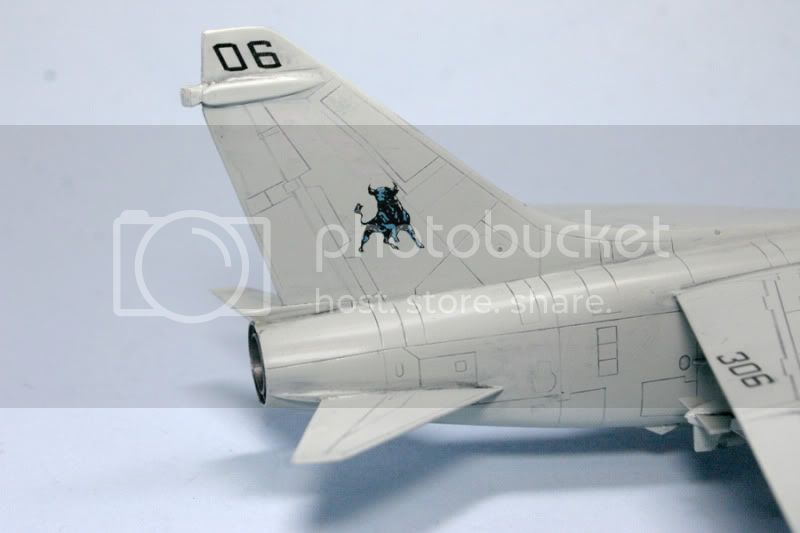
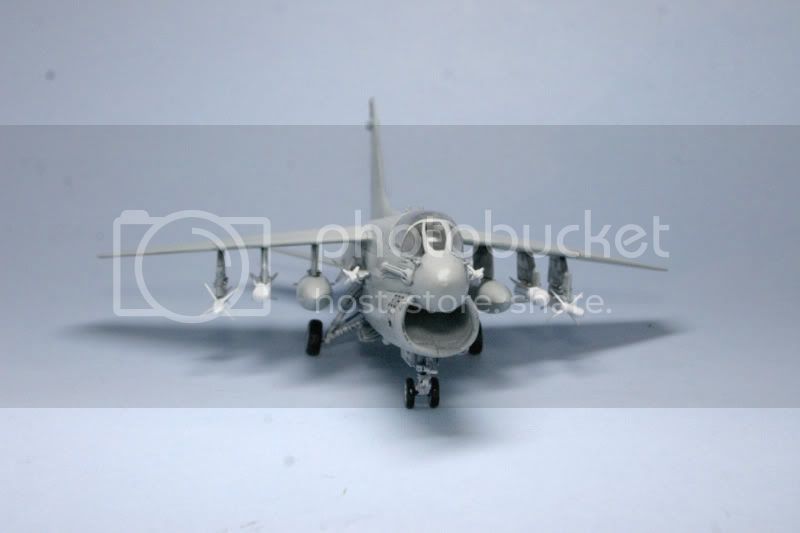


 Seriously, very nice build. It is a tough looking plane.
