Hi Torsten, i have joined in and will follow your perfect rollouts. A pleasure to view.
I have the same problem here in Germany, we are forbidden to show correctly done Wehrmacht stuff in Germany, remember my 1/32 109 G without?
Some weeks ago, i have started my own modelling shop, that means i have to follow german laws to the fullest, or i am with one or both feeds in jail !
By my first order from Eagle Editions i contacted Mrs. Crandall to remove the swastika markings ( only the complete ones) from the sheet.
Happy modelling
Bernd
World War II
Discuss WWII and the era directly before and after the war from 1935-1949.
Hosted by Rowan Baylis
What lately left my assembly line
berndm
Niedersachsen, Germany
Joined: March 26, 2014
KitMaker: 844 posts
AeroScale: 630 posts
Joined: March 26, 2014
KitMaker: 844 posts
AeroScale: 630 posts
Posted: Monday, October 06, 2014 - 11:09 PM UTC
Joel_W
Associate Editor
New York, United States
Joined: December 04, 2010
KitMaker: 11,666 posts
AeroScale: 7,410 posts
Joined: December 04, 2010
KitMaker: 11,666 posts
AeroScale: 7,410 posts
Posted: Tuesday, October 07, 2014 - 05:10 AM UTC
Quoted Text
Hi Torsten, i have joined in and will follow your perfect rollouts. A pleasure to view.
I have the same problem here in Germany, we are forbidden to show correctly done Wehrmacht stuff in Germany, remember my 1/32 109 G without?
Some weeks ago, i have started my own modelling shop, that means i have to follow german laws to the fullest, or i am with one or both feeds in jail !
By my first order from Eagle Editions i contacted Mrs. Crandall to remove the swastika markings ( only the complete ones) from the sheet.
Happy modelling
Bernd
Bernd,
As I've posted before, I do understand the laws you must follow. But why can't the decals be made in two or three sections? Wouldn't that be acceptable? And that way those modelers that want to model as accurately as possible can for their own personal collections.
Joel
berndm
Niedersachsen, Germany
Joined: March 26, 2014
KitMaker: 844 posts
AeroScale: 630 posts
Joined: March 26, 2014
KitMaker: 844 posts
AeroScale: 630 posts
Posted: Tuesday, October 07, 2014 - 10:50 PM UTC
Hi Joel,some companies did this on their decal sheets,Eduard or
the company with the Trumpeter/HobbyBoss labels.
They cut the markings into two halfs, as seen in Darrens review
about the HB Me 262 trainer, it is a very good idea and works well,decals from Trumpy or HB are getting better.
Years ago, i purchased a P-51D Mustang from Hasegawa in 1/32
this was a special edition with very nice decals about 8th A.F aces. At home, after the box was open, i noticed, that the kill marks were cut out and gone, which made sheet almost useless !
All the Best
Bernd
BlackWidow
European Union
Joined: August 09, 2009
KitMaker: 1,732 posts
AeroScale: 1,336 posts
Joined: August 09, 2009
KitMaker: 1,732 posts
AeroScale: 1,336 posts
Posted: Sunday, November 02, 2014 - 07:55 AM UTC
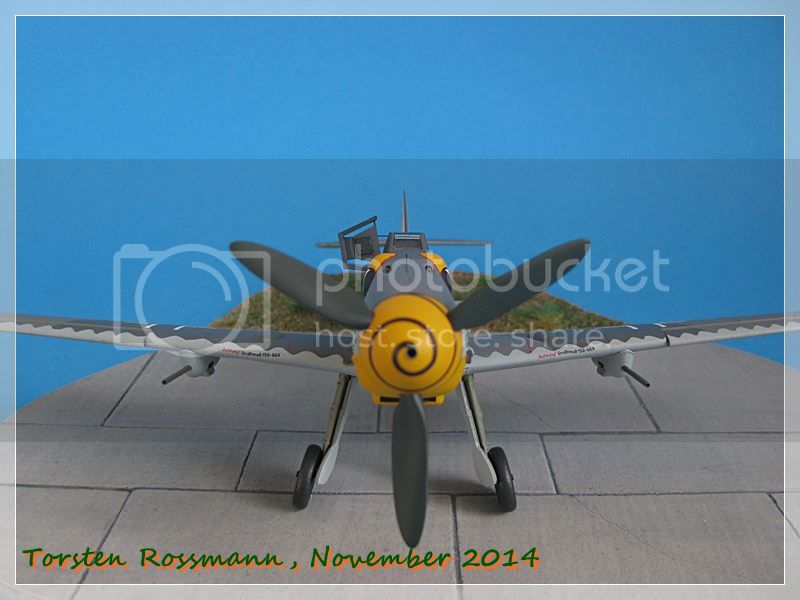
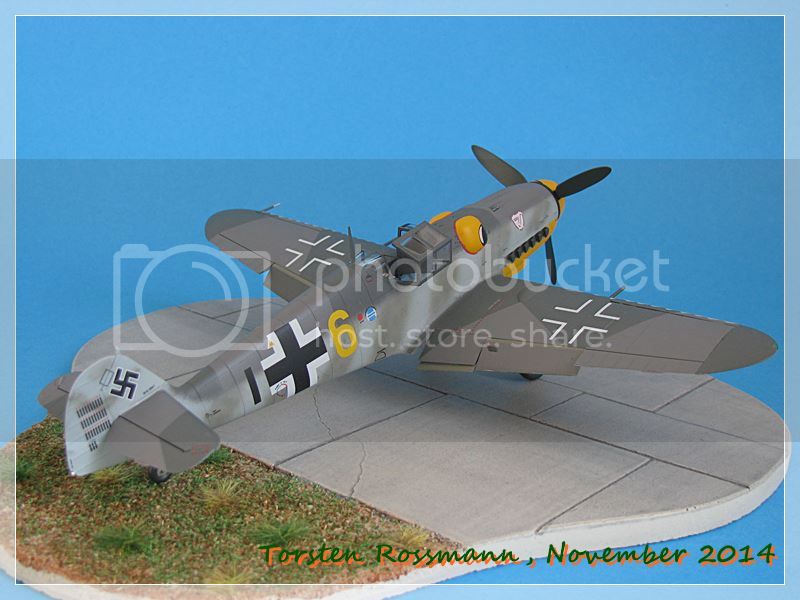
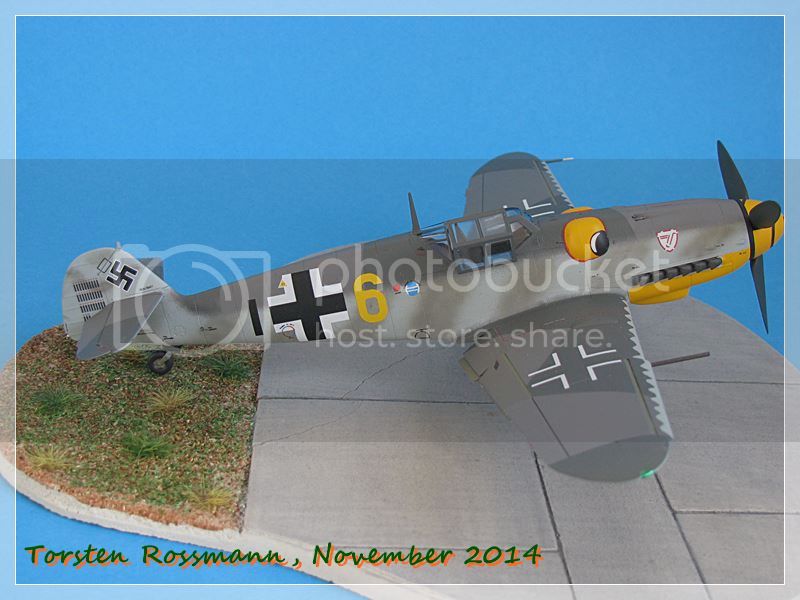
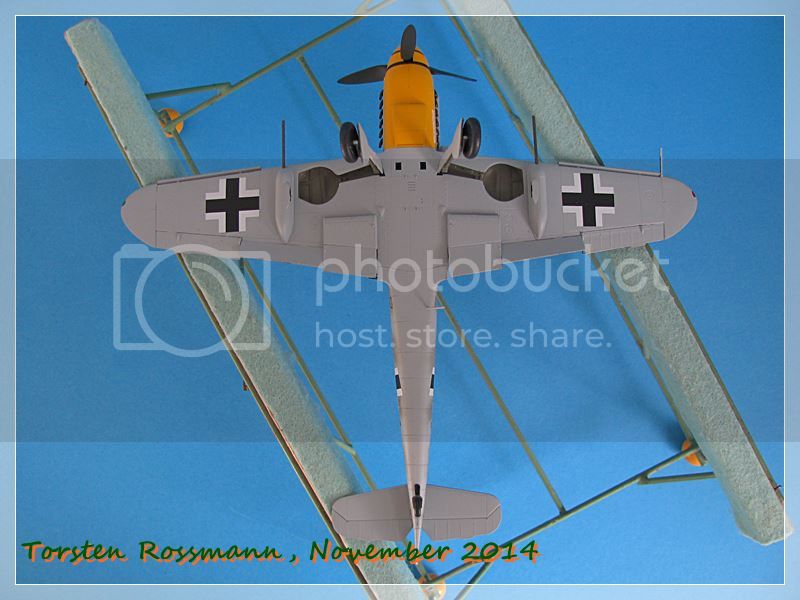
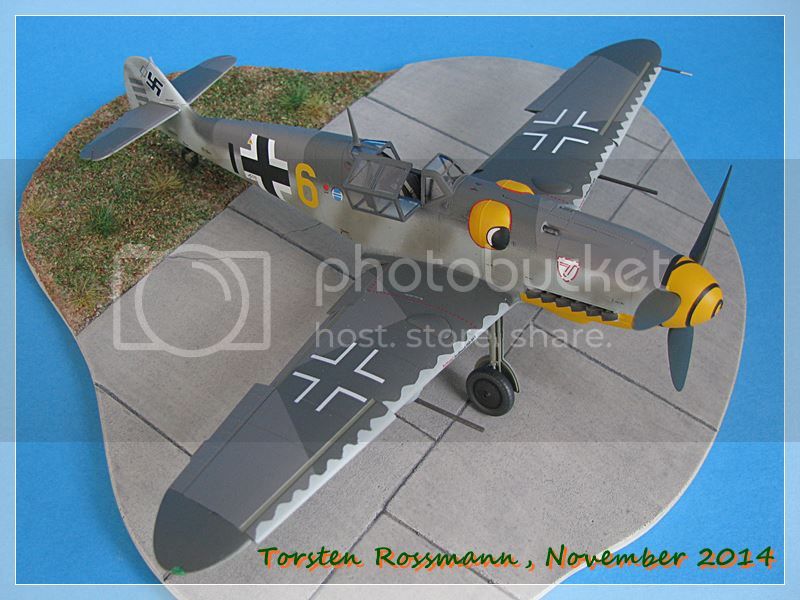
I always wanted a 1-0-9 with eyes and now I have one! Finished on Wednesday I can show you my new Messerschmitt Bf 109 G-6 from Eduard in 1/48 today ....
.... I guess there is no need to write much about this aircraft, as it's one of the iconic fighters of WW 2. If you want to now something about the development, please go back to page 6 and have a look at my Italian G-6 from December last year. First the "Kanonenboot" (gun boat) was not really famous with the Luftwaffe pilots, because with its two additional 20 mm MG 151/20 underwing gondolas the aircraft was about 200 kg heavier, which meant also slower and less manoeuvrable. But when these pilots noticed how devastating a single pass, firing with all 5 weapons, could be for an enemy bomber, they got a different opinion ....
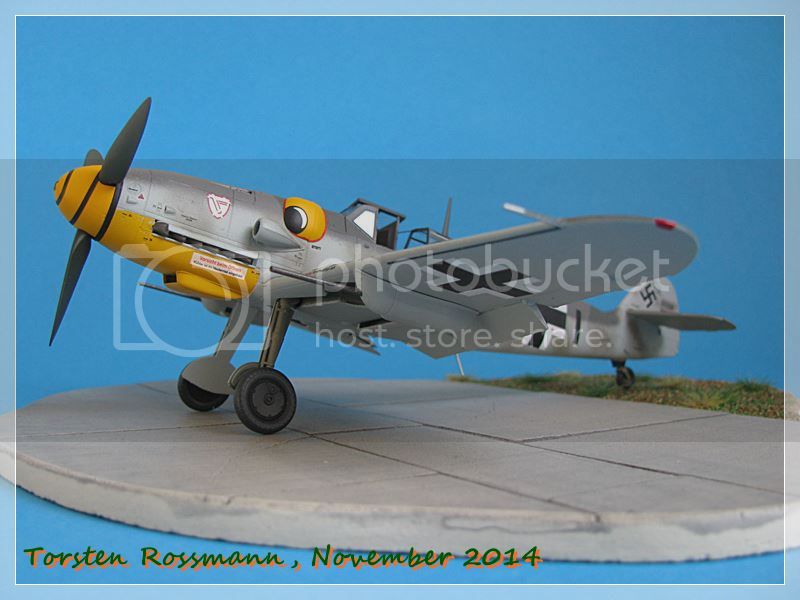
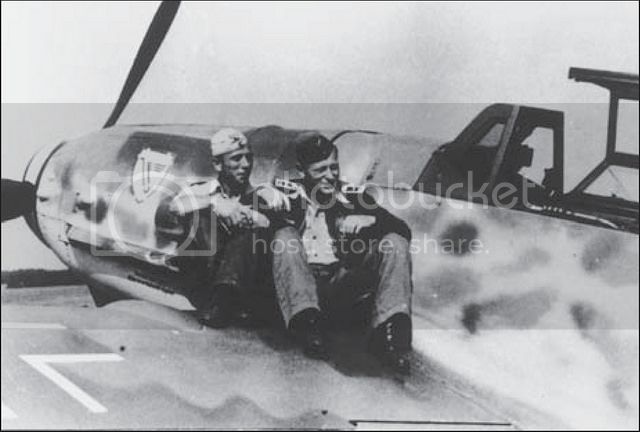
.... in its Profi Pack Eduard offers 5 nice decal versions and when I had a look at them I immediatly decided for the "Yellow 6" from 9./JG 3 with its yellow bulges and the eyes A really striking unit marking. This aircraft was flown by Oberfeldwebel (Sergeant) Alfred Surau (on the right with dark cap). It was not easy to find a photo of him, because I know only that one, where he sits on the left main wheel of his aircraft, which is not really good for using it here. This photo I found on flickr. Surau was an ace with 41 aerial victories on the Eastern Front which he scored between 17. April and 30. July 1943. His most successful day was the 21.07., when he scored 5 times. In August his unit was transfered to the "Reichsverteidigung" (home defense). Between 6. September and 14. October he shot down five B-17, one of them over Swiss territory. His last combat took place on the 14.10.1943 when US bombers attacked Schweinfurt. He succeeded in shooting down a B-17 but his machine was heavily hit by return fire from other bombers. Though Surau was severely wounded, he was still able to bail out of "Yellow 6" but sadly died the same day in the hospital of Wertheim ....
.... this kit is surely the best Bf 109 G-6 in 1/48 to this day. Highly detailed and a perfect fitting. I really enjoyed building it though also this kit is not flawless. Well, which kit is it? The Profi Pack comes with a mask and a PE card, though most of these parts vanish in the cockpit and are never seen again. So I only used a few of them, like the instrument panel and the seat belts. The only negative points I noticed about this kit are 1) the pitot tube is moulded to the wing, which means that it will break off very easily (of course that happened to me .... ) and 2) no position lights made of clear parts. This kit costs about 30 Euros, so I think, I can expect that. Furthermore I think the angle of the main undercarriage is not slant enough. But I am far from being an expert and so that are the only complaints I have about this really great kit ....
.... the paints I used for this kit are from various brands. While RLM 76 comes from Vallejo, for RLM 74 and 75 I took Gunze. For the cockpit interior RLM 66 I used Revell and the stripes camouflage on the fuselage is made with a 50/50 mix of RLM 75 and 02 from Gunze, highly thinned with Isopropanol (at least 200 percent). The propeller blades are painted with RLM 70 from Agama, while RLM 04 for the spinner, bulges and lower cowling comes from Revell again. Finally the clear coat is made with satin varnish from Marabu. Nice to have so many different paints in my stash
As I mentioned earlier, I took the decals from the kit, which are very thin. Made by Cartograph they fit nicely in every panel line with just a minimum of softener. On the sheet are many many stencils and especially the tiny "Zu" stencils ("Closed") for the cowling are really time consuming as there are 11 pieces needed. 6 on the left side and 5 on the right.
I hope that Eduard brings out this fine kit as a Weekend Edition next year as I have many more G-6 decal sets including that new Gerd Barkhorn sheet, which I want to start next year.
Thanks for stepping in and having a look at my new build. I hope you enjoyed walking around.
Happy modelling!
Torsten
.... I guess there is no need to write much about this aircraft, as it's one of the iconic fighters of WW 2. If you want to now something about the development, please go back to page 6 and have a look at my Italian G-6 from December last year. First the "Kanonenboot" (gun boat) was not really famous with the Luftwaffe pilots, because with its two additional 20 mm MG 151/20 underwing gondolas the aircraft was about 200 kg heavier, which meant also slower and less manoeuvrable. But when these pilots noticed how devastating a single pass, firing with all 5 weapons, could be for an enemy bomber, they got a different opinion ....
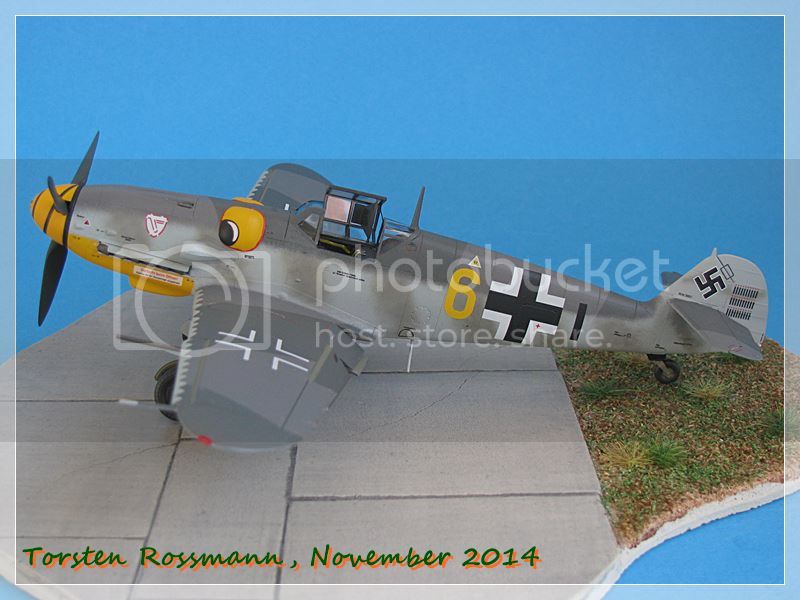
.... in its Profi Pack Eduard offers 5 nice decal versions and when I had a look at them I immediatly decided for the "Yellow 6" from 9./JG 3 with its yellow bulges and the eyes A really striking unit marking. This aircraft was flown by Oberfeldwebel (Sergeant) Alfred Surau (on the right with dark cap). It was not easy to find a photo of him, because I know only that one, where he sits on the left main wheel of his aircraft, which is not really good for using it here. This photo I found on flickr. Surau was an ace with 41 aerial victories on the Eastern Front which he scored between 17. April and 30. July 1943. His most successful day was the 21.07., when he scored 5 times. In August his unit was transfered to the "Reichsverteidigung" (home defense). Between 6. September and 14. October he shot down five B-17, one of them over Swiss territory. His last combat took place on the 14.10.1943 when US bombers attacked Schweinfurt. He succeeded in shooting down a B-17 but his machine was heavily hit by return fire from other bombers. Though Surau was severely wounded, he was still able to bail out of "Yellow 6" but sadly died the same day in the hospital of Wertheim ....
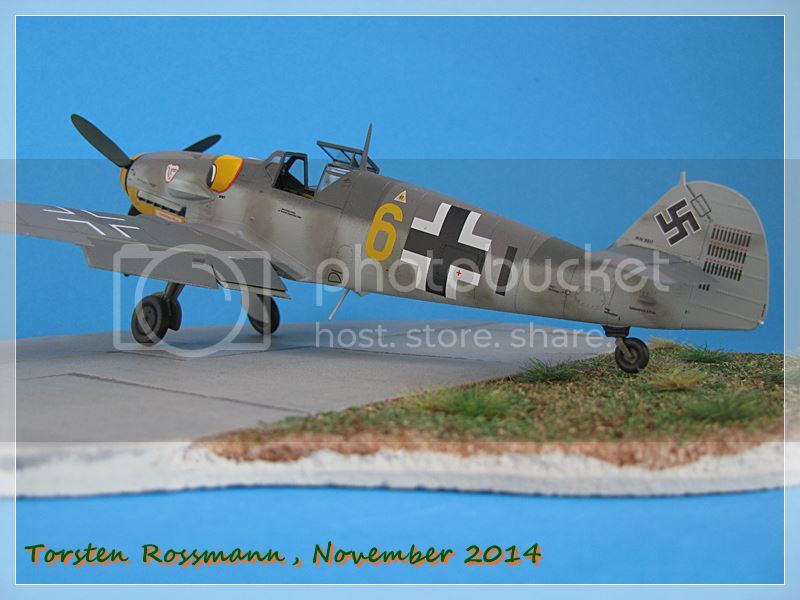
.... this kit is surely the best Bf 109 G-6 in 1/48 to this day. Highly detailed and a perfect fitting. I really enjoyed building it though also this kit is not flawless. Well, which kit is it? The Profi Pack comes with a mask and a PE card, though most of these parts vanish in the cockpit and are never seen again. So I only used a few of them, like the instrument panel and the seat belts. The only negative points I noticed about this kit are 1) the pitot tube is moulded to the wing, which means that it will break off very easily (of course that happened to me .... ) and 2) no position lights made of clear parts. This kit costs about 30 Euros, so I think, I can expect that. Furthermore I think the angle of the main undercarriage is not slant enough. But I am far from being an expert and so that are the only complaints I have about this really great kit ....
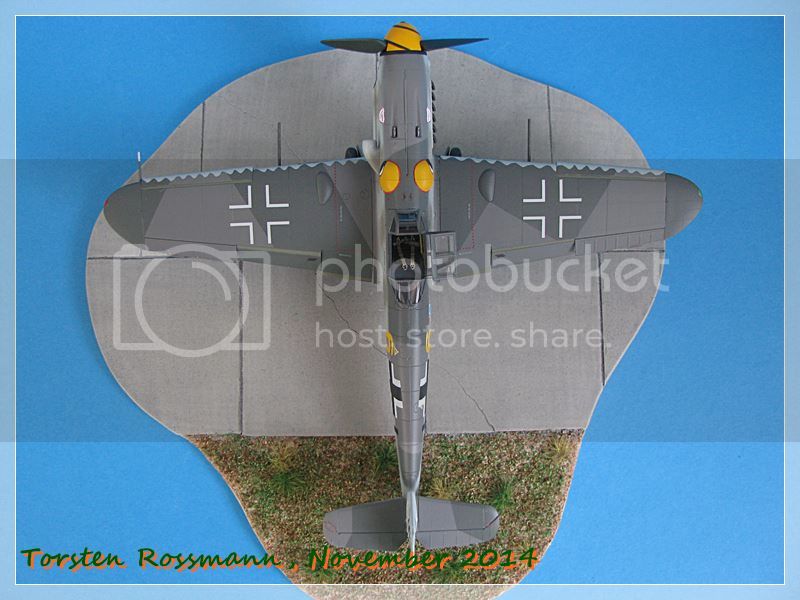
.... the paints I used for this kit are from various brands. While RLM 76 comes from Vallejo, for RLM 74 and 75 I took Gunze. For the cockpit interior RLM 66 I used Revell and the stripes camouflage on the fuselage is made with a 50/50 mix of RLM 75 and 02 from Gunze, highly thinned with Isopropanol (at least 200 percent). The propeller blades are painted with RLM 70 from Agama, while RLM 04 for the spinner, bulges and lower cowling comes from Revell again. Finally the clear coat is made with satin varnish from Marabu. Nice to have so many different paints in my stash
As I mentioned earlier, I took the decals from the kit, which are very thin. Made by Cartograph they fit nicely in every panel line with just a minimum of softener. On the sheet are many many stencils and especially the tiny "Zu" stencils ("Closed") for the cowling are really time consuming as there are 11 pieces needed. 6 on the left side and 5 on the right.
I hope that Eduard brings out this fine kit as a Weekend Edition next year as I have many more G-6 decal sets including that new Gerd Barkhorn sheet, which I want to start next year.
Thanks for stepping in and having a look at my new build. I hope you enjoyed walking around.
Happy modelling!
Torsten
Joel_W
Associate Editor
New York, United States
Joined: December 04, 2010
KitMaker: 11,666 posts
AeroScale: 7,410 posts
Joined: December 04, 2010
KitMaker: 11,666 posts
AeroScale: 7,410 posts
Posted: Sunday, November 02, 2014 - 12:32 PM UTC
Torsten,
Another museum masterpiece. A perfect build, coupled with outstanding painting and decaling. Your choice of the #6 certainly is an unusual scheme, but none the less, it's visual interest is a main focus of your build. I also noticed in the B&W photograph, the narrow black band on the yellow spinner which you duplicated perfectly. Not an easy feat.
As for the forward rake of the landing gear, it's been mentioned in a few builds here, but isn't that noticeable as ones focus in on the overall look of the aircraft.
Well done my friend.
Joel
berndm
Niedersachsen, Germany
Joined: March 26, 2014
KitMaker: 844 posts
AeroScale: 630 posts
Joined: March 26, 2014
KitMaker: 844 posts
AeroScale: 630 posts
Posted: Sunday, November 02, 2014 - 07:12 PM UTC
A very nice 109 Torsten, Alfred Surau would be proud of it !
You nailed the fuselage camo very well.
Gustavs with eyes painted on look very special, did a JG 51 bird some times ago.Posted here as well
You nailed the fuselage camo very well.
Gustavs with eyes painted on look very special, did a JG 51 bird some times ago.Posted here as well
BlackWidow
European Union
Joined: August 09, 2009
KitMaker: 1,732 posts
AeroScale: 1,336 posts
Joined: August 09, 2009
KitMaker: 1,732 posts
AeroScale: 1,336 posts
Posted: Monday, November 03, 2014 - 07:46 AM UTC
Thanks for your comments, guys!
Joel, thanks for your kind words. Spinner spiral decals are never my friend. There always happens something nasty, like on the Italian G-6, where the spiral broke into pieces and was useless. Also this spiral is not perfect - better than before but not perfect. Meanwhile I have got a set of Eduard masks for that, which I will try sooner or later. One always finds something not so well done on his own works, right? Though I must say, this is the best of my eight 109s so far. A bit more than I have Spitfires and Warhawks. But the next Spit is already approaching to my work bench ....
Bernd, I did a lot of test spraying to find the right mix ratio between paint and thinner (and compressor pressure) before applying the camo on the fuselage sides. And I'm really pleased with the result. Surprisingly the aircraft of Surau is well documented but it's not easy to find some informations about the pilot. Maybe it's because he was "one of the many". I also find it interesting that there are only 33 kill marks on the rudder. My model shows the aircraft as it looked like in September 1943, a few weeks before it crashed. So Surau had at least 41 victories from Russia at that time ....
Torsten
Posted: Monday, November 03, 2014 - 12:15 PM UTC
Torsten,
Beauty! I feel it stalking me!
BlackWidow
European Union
Joined: August 09, 2009
KitMaker: 1,732 posts
AeroScale: 1,336 posts
Joined: August 09, 2009
KitMaker: 1,732 posts
AeroScale: 1,336 posts
Posted: Tuesday, November 04, 2014 - 06:43 AM UTC
Don't worry, Fred, it won't bite you! Just want to play ....
BlackWidow
European Union
Joined: August 09, 2009
KitMaker: 1,732 posts
AeroScale: 1,336 posts
Joined: August 09, 2009
KitMaker: 1,732 posts
AeroScale: 1,336 posts
Posted: Monday, January 26, 2015 - 12:59 AM UTC
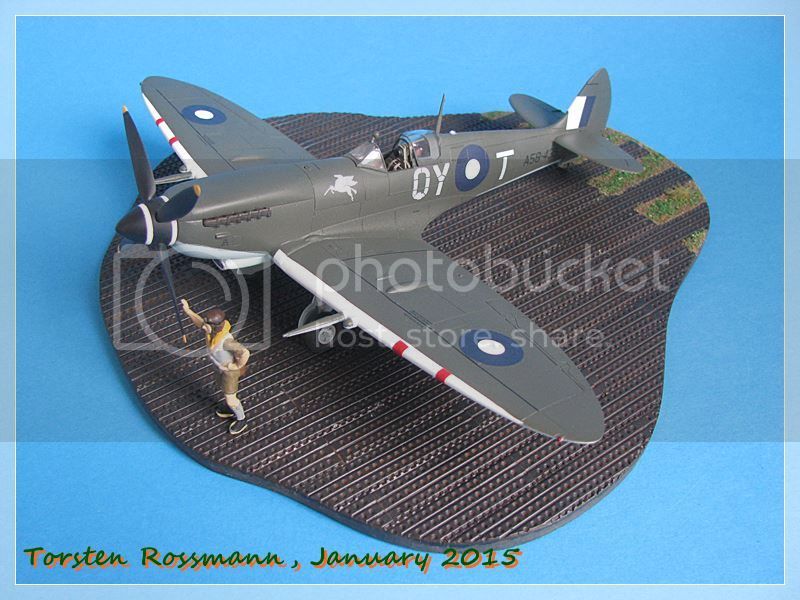
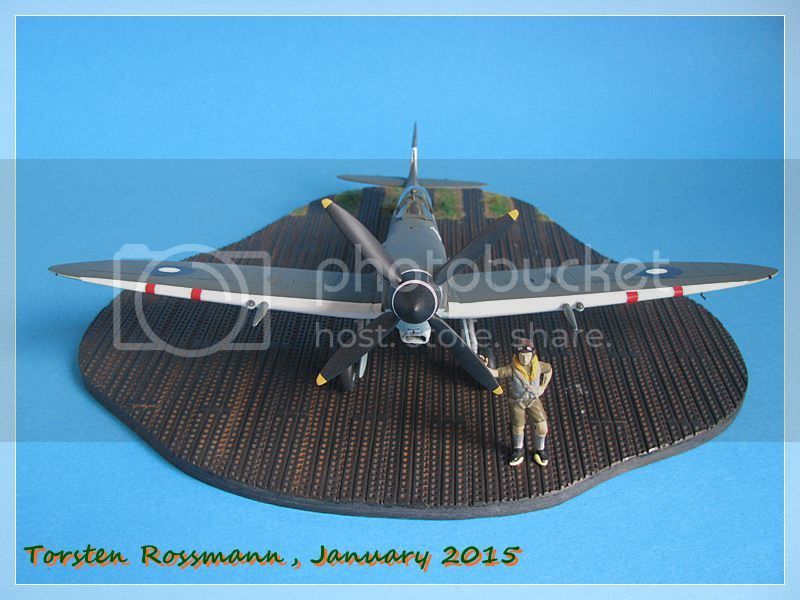
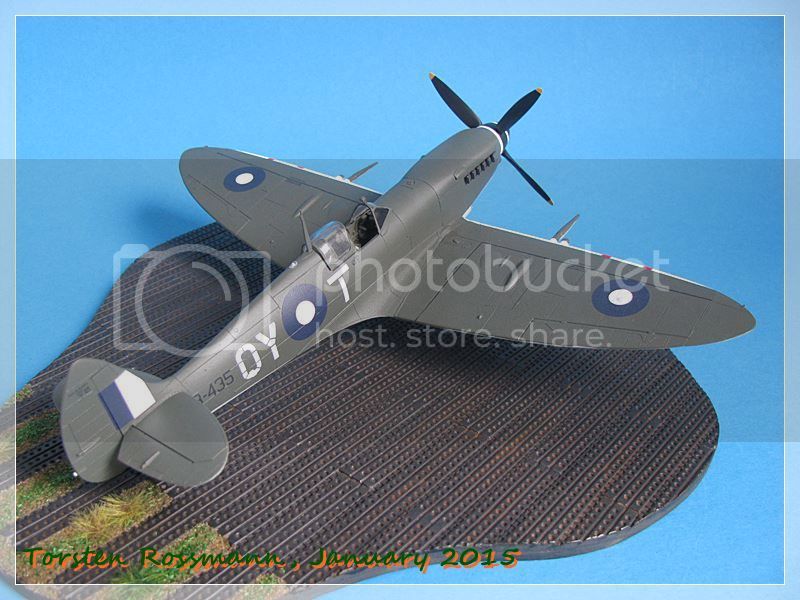
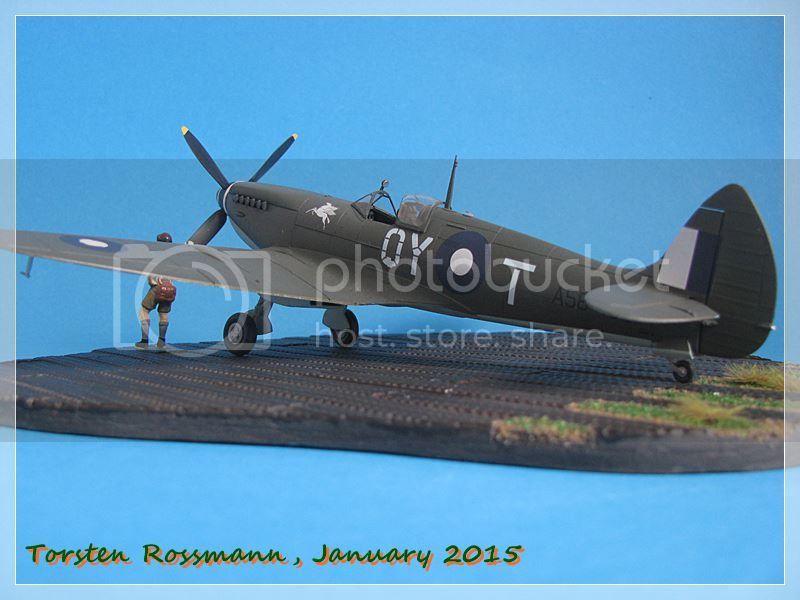
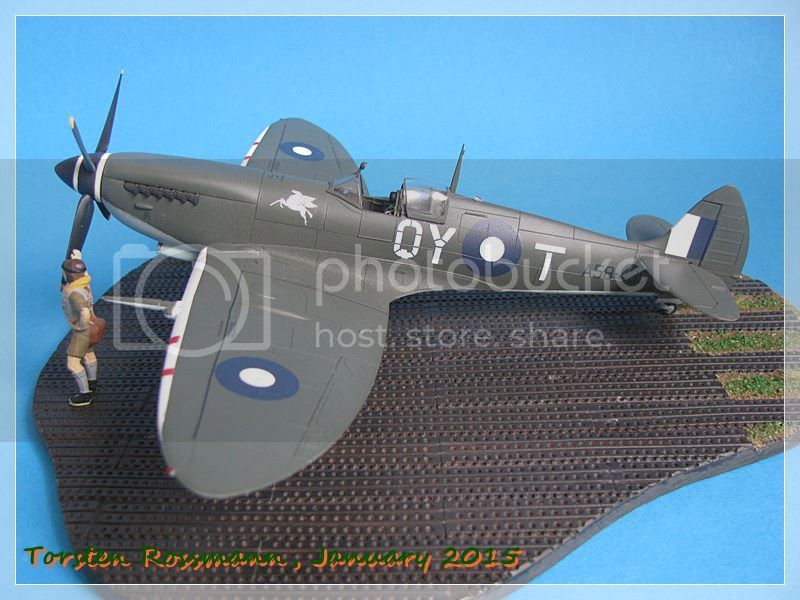
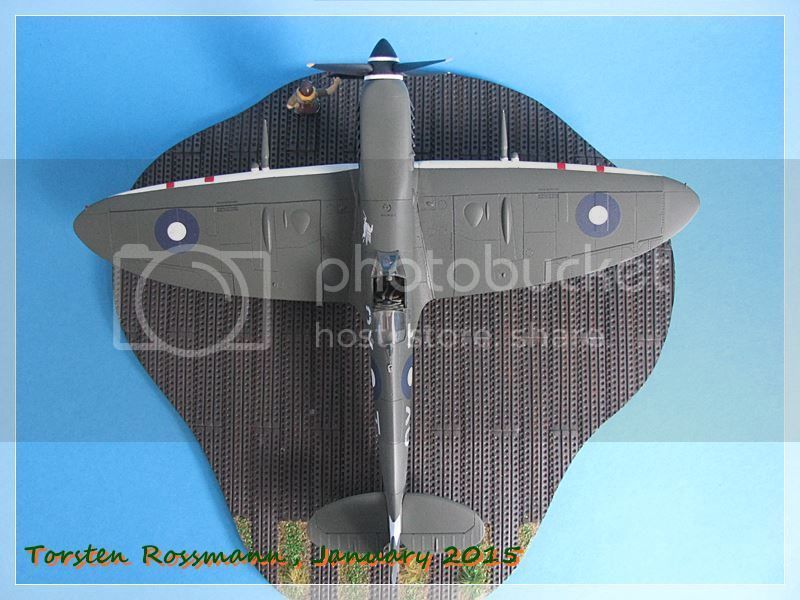
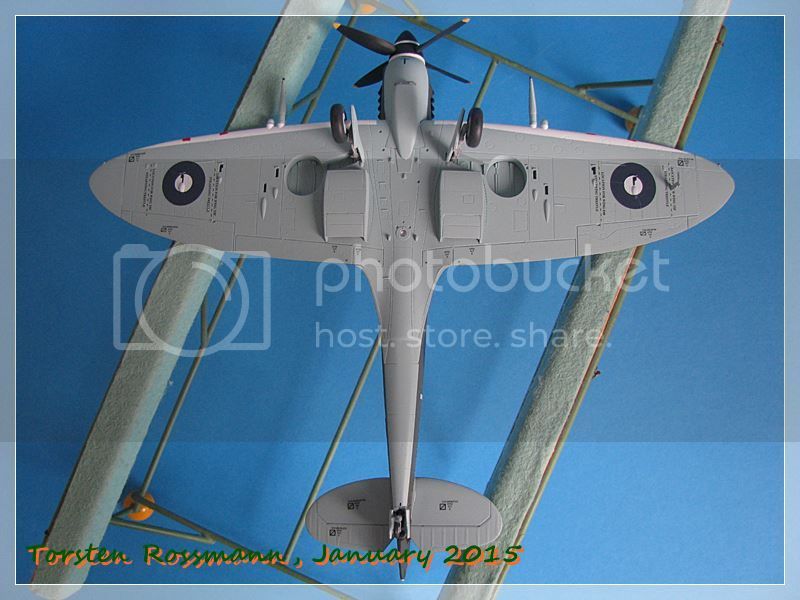
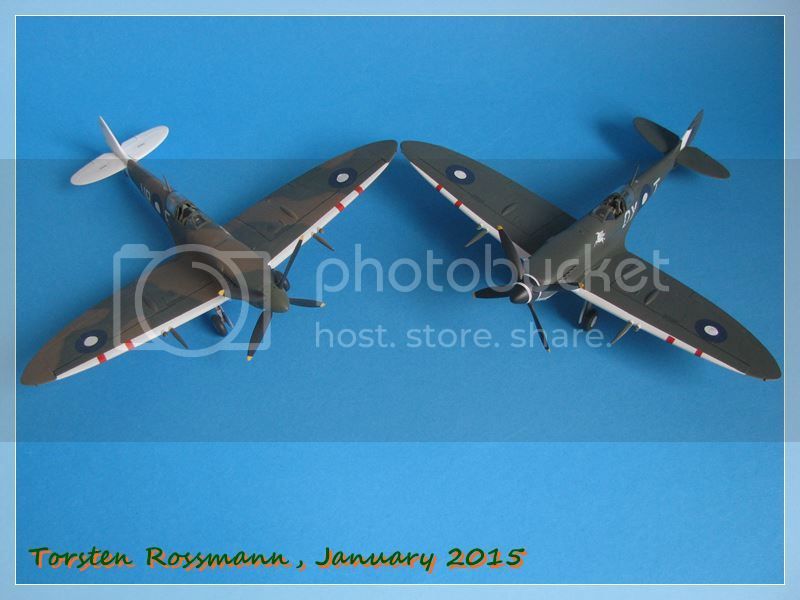
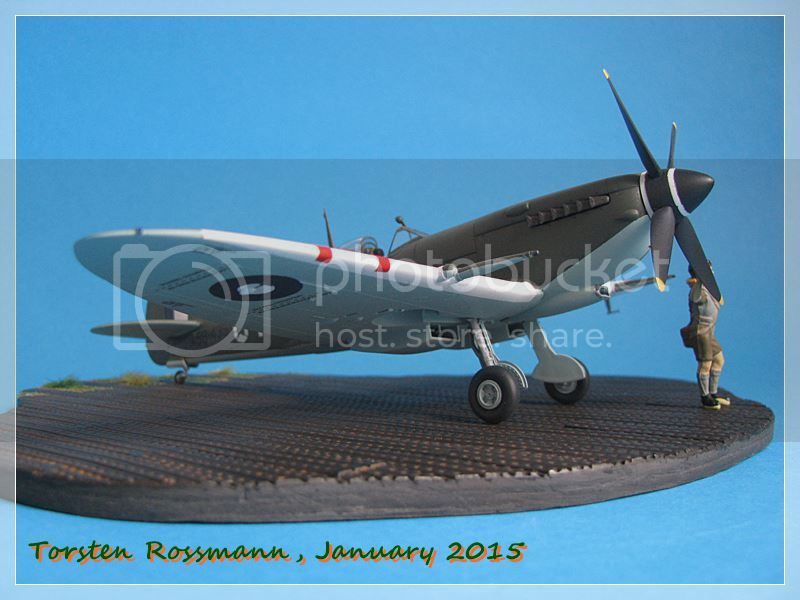
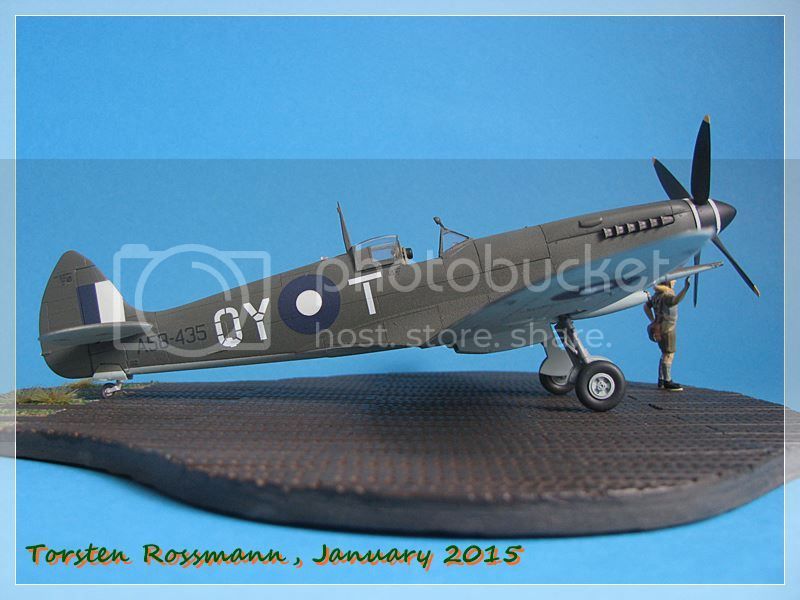
Hi guys! I hope you've all had a good start into the modelling year 2015. In December after 3 months work I finished my new GTK Boxer but now I'm back here with my latest model. For the RAAF Campaign I've built the Spitfire Mk. VIII from Hasegawa in 1/48 which is ready for take off since last week ....
.... the Spitfire Mk. VIII was developed before the Mk. IX, but because of modifications it came into service not before early 1944. So it had a retractable tail wheel, a different side rudder, bigger fuel tanks in the wings and a different radio. The Mk. VIII was mostly used in Southeast Asia and the PTO by the RAF and allied air forces, only a few flew in Southern Europe. It was powered by a Merlin 66 engine with 1580 hp, giving the Spitfire a speed of 650 km/h. The armament was two 20 mm canons and four 7,7 mm machine guns. 1658 Spitfire Mk. VIII were build ....
.... I have build a Spit of No. 452 Sqn, RAAF, Sattler Airfield, Northern Territory, Australia, mid 1944.
By the time he joined No. 452 Sqn in his homeland Australia in 1943, 21 year old Ron Cundy was a much decorated desert ace. Initially serving as an instructor, he returned to operations in October 1943 as a flight commander with No. 452 Sqn. Although he was scrambled several times against the last Japanese incursions, he failed to add to his victory tally. In mid 1944 Cundy was allocated Spitfire Mk.VIII A58-435 as his personal aircraft and he had it adorned with a personal pegasus motif. The fighter is thought to have been camouflaged in just foliage green and sky blue and it was kept well polished by his groundcrew to increase speed. When Cundy eventually transfered out of the unit, he left A58-435 behind with considerable regret. The fighter was lost in a collision with a B-24 D during a fighter affiliation exercise near Melville Island on 18. September 1944 (text taken from Osprey Publishing) ....
.... I found it surprising that this kit needed (or needs) quite a lot of sanding. Especially when the fuselage halves were glued together it gave my some happy sanding hours. Furthermore there was also a lot of filler needed when I glued the wings to the fuselage to fill the gaps on both sides. More happy sanding .... But the rest went easy and so the whole thing was a work of about 4 weeks. I have another 6 of these kits, as Revell brought the MK.VIII/IX out a few years ago for a cheaper price than Hasegawa ....
.... the paints I used this time come more or less all from Agama. It was not easy to find a near equivalent to RAAF Foliage Green and Sky Blue, so I hope, my choice is not too bad. The other paints are from Revell. The stecils are taken from the box sheet, the special RAAF decals come from Aussie Spitfires Part 4 from AeroMaster (No. 48-780). For the canopy I have taken the Eduard mask EX013. The covers for the machine guns are made of Tamiya Tape and painted in red ....
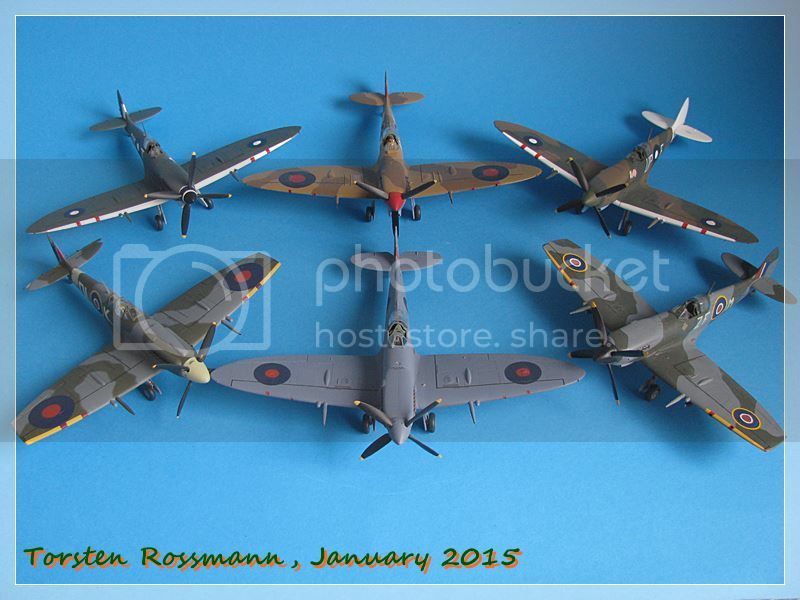
.... in the upper photo you can see my other RAAF Spitfire. This time it's the Revell kit and the decals are taken from the same AeroMaster sheet. Built in 2007, it's already an expo veteran. And in the last photo you can see the whole bunch of my Spitfires so far. Six of them is not too bad, isn't it? That equals them with my finished Fw 190 kits but they are still a bit behind the Warhawk and the Bf 109.
Well, I say thanks for looking and hope you've enjoyed walking around my new Skippy.
Happy modelling!
Torsten
Posted: Monday, January 26, 2015 - 02:50 AM UTC
Another very nice entry into LuftRossmann, and great to see more Aussie flavour as well.
Beautiful build and a really good informative post both on the kit and the subject.
Cheers, D
Beautiful build and a really good informative post both on the kit and the subject.
Cheers, D
Joel_W
Associate Editor
New York, United States
Joined: December 04, 2010
KitMaker: 11,666 posts
AeroScale: 7,410 posts
Joined: December 04, 2010
KitMaker: 11,666 posts
AeroScale: 7,410 posts
Posted: Monday, January 26, 2015 - 03:27 AM UTC
Torsten,
Nice to see another completed model coming down the assembly line. And certainly an interesting subject with unusual markings for you.
The Spitfire Mk. VIII from Hasegawa in 1/48 sounds like it had it's issues, but it's the final results that count, and it's another one of your outstanding museum builds.
Joel
GhostHawk
Cordoba, Argentina
Joined: January 27, 2011
KitMaker: 268 posts
AeroScale: 264 posts
Joined: January 27, 2011
KitMaker: 268 posts
AeroScale: 264 posts
Posted: Monday, January 26, 2015 - 03:54 AM UTC
Hello Torsten..!
It's always a pleasure...! Congrats & BTW...!
Bye
It's always a pleasure...! Congrats & BTW...!
Bye
BlackWidow
European Union
Joined: August 09, 2009
KitMaker: 1,732 posts
AeroScale: 1,336 posts
Joined: August 09, 2009
KitMaker: 1,732 posts
AeroScale: 1,336 posts
Posted: Tuesday, January 27, 2015 - 01:42 AM UTC
Thanks for your comments, guys!
Damian, I knew you would like this After 2 New Zealanders in the past I thought it would be time for their big neighbour in the west. And the RAAF Campaign was a welcomed opportunity for that. Another ribbon to my chest.
Joel, first I hope the Blizzard hasn't hit you too hard. I've seen it on TV. Here we have no snow right now and can count the flakes that fall ....
You're right, this kit has its issues, especially the seam on the cowling gave me some work. And the gaps between the wings and the fuselage (also on the underside) meant a lot of filler and sanding. But in the end it was worth the extra work. Meanwhile I have the Eduard Spit Mk. IX in my stash. So I wonder how that kit will be? Well, maybe next year ....
Diego, great to see you back here. Glad you still enjoy looking at my models (me too .... ) so stay tuned for my next roll out, which will be 2 famous jet fighters btw. So I will show them not here but in my little jet collection, probably in the end of February.
Torsten
Joel_W
Associate Editor
New York, United States
Joined: December 04, 2010
KitMaker: 11,666 posts
AeroScale: 7,410 posts
Joined: December 04, 2010
KitMaker: 11,666 posts
AeroScale: 7,410 posts
Posted: Tuesday, January 27, 2015 - 04:37 AM UTC
We got really clobbered on Long Island. I live out near th east end which took the full force of the storm. 2 1/2 ft by morning, and almost another 4 inches plus by the afternoon. Roads were closed last night so that the big county and state plows could do their thing.
With my heart, I need a snowblower, and my current one was more then up to the task. More snow is predicted for Friday night and Sunday night. 1st we've had almost no snow all winter, then in a space of 1 day, we're setting records. Come on spring get here sooner then later.
Joel
With my heart, I need a snowblower, and my current one was more then up to the task. More snow is predicted for Friday night and Sunday night. 1st we've had almost no snow all winter, then in a space of 1 day, we're setting records. Come on spring get here sooner then later.
Joel
BlackWidow
European Union
Joined: August 09, 2009
KitMaker: 1,732 posts
AeroScale: 1,336 posts
Joined: August 09, 2009
KitMaker: 1,732 posts
AeroScale: 1,336 posts
Posted: Wednesday, January 28, 2015 - 01:20 AM UTC
Hmm, 2 1/2 ft are about 75 cm and 4 in about 10 cm. That's a lot for one day. Better stay at home if you can and enjoy our hobby.
As I mentioned before we have no snow here in my area but cold wind, that's all. Lots of snow I had during my vacations around New Years Eve in Helsinki including bitter cold temperatures in some days. But I wanted that challenge and enjoyed my stay in this great city.
Take care, Joel!
Torsten
As I mentioned before we have no snow here in my area but cold wind, that's all. Lots of snow I had during my vacations around New Years Eve in Helsinki including bitter cold temperatures in some days. But I wanted that challenge and enjoyed my stay in this great city.
Take care, Joel!
Torsten
Joel_W
Associate Editor
New York, United States
Joined: December 04, 2010
KitMaker: 11,666 posts
AeroScale: 7,410 posts
Joined: December 04, 2010
KitMaker: 11,666 posts
AeroScale: 7,410 posts
Posted: Wednesday, January 28, 2015 - 06:41 AM UTC
Quoted Text
Hmm, 2 1/2 ft are about 75 cm and 4 in about 10 cm. That's a lot for one day. Better stay at home if you can and enjoy our hobby.
As I mentioned before we have no snow here in my area but cold wind, that's all. Lots of snow I had during my vacations around New Years Eve in Helsinki including bitter cold temperatures in some days. But I wanted that challenge and enjoyed my stay in this great city.
Take care, Joel!
Torsten
Will do my friend.
Joel
Posted: Wednesday, January 28, 2015 - 10:23 AM UTC
Torsten,
Another quality model!
Is that the pilot from Tamiya's Brewster Buffalo?
Another quality model!
Is that the pilot from Tamiya's Brewster Buffalo?
greif8
Bayern, Germany
Joined: January 17, 2006
KitMaker: 673 posts
AeroScale: 492 posts
Joined: January 17, 2006
KitMaker: 673 posts
AeroScale: 492 posts
Posted: Wednesday, January 28, 2015 - 06:27 PM UTC
Torsten, you have some very beautiful and well built models in this thread. Truely excellent craftmanship!
BlackWidow
European Union
Joined: August 09, 2009
KitMaker: 1,732 posts
AeroScale: 1,336 posts
Joined: August 09, 2009
KitMaker: 1,732 posts
AeroScale: 1,336 posts
Posted: Thursday, January 29, 2015 - 12:45 AM UTC
Thanks Fred! Actually I can't remember if this guy flies also Buffalos or Beaufighters .... But he sure is from Tamiya.
Ernest, thanks also to you! I'm glad you like what leaves my work bench. So wait for the next update. At the moment I work on 2 Saab Draken from Hasegawa, one will be from Svenska Flygvapnet and the other one from Suomen Ilmavoimat. Should be ready by end of February.
Torsten
Ernest, thanks also to you! I'm glad you like what leaves my work bench. So wait for the next update. At the moment I work on 2 Saab Draken from Hasegawa, one will be from Svenska Flygvapnet and the other one from Suomen Ilmavoimat. Should be ready by end of February.
Torsten
BlackWidow
European Union
Joined: August 09, 2009
KitMaker: 1,732 posts
AeroScale: 1,336 posts
Joined: August 09, 2009
KitMaker: 1,732 posts
AeroScale: 1,336 posts
Posted: Sunday, April 19, 2015 - 12:23 AM UTC
Some of you may wonder where I have been last month. As I've mentioned above I finished my Saab Draken. Have a look if you like.
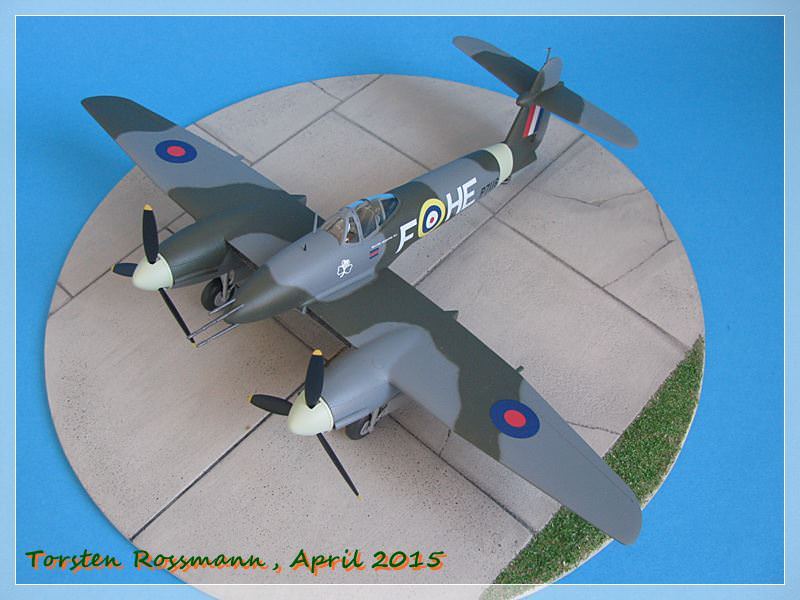
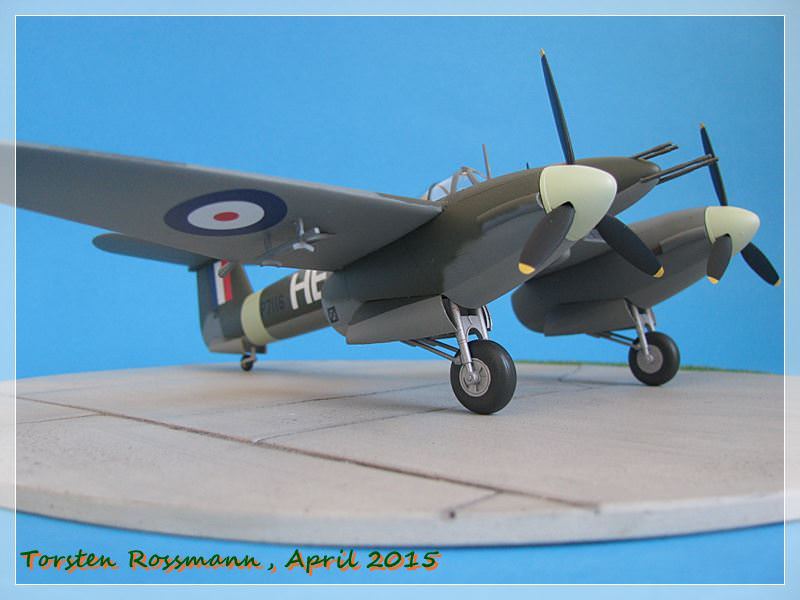
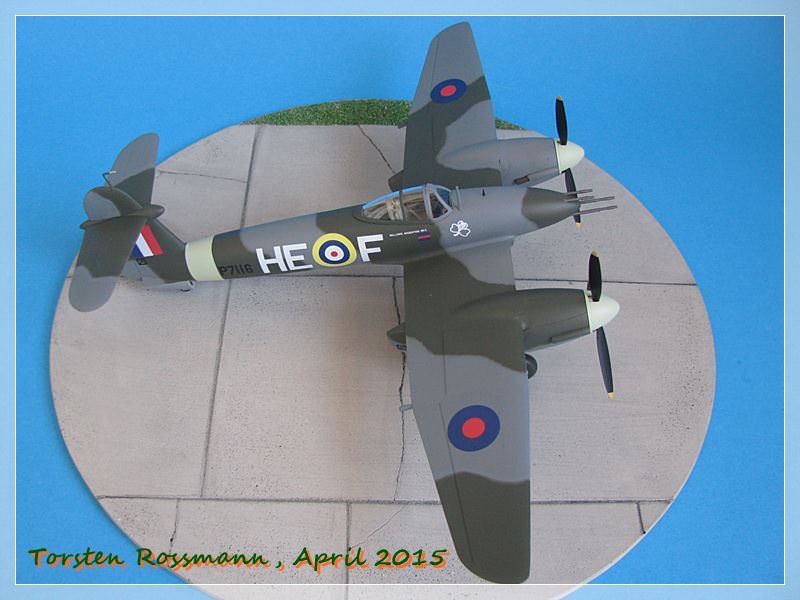
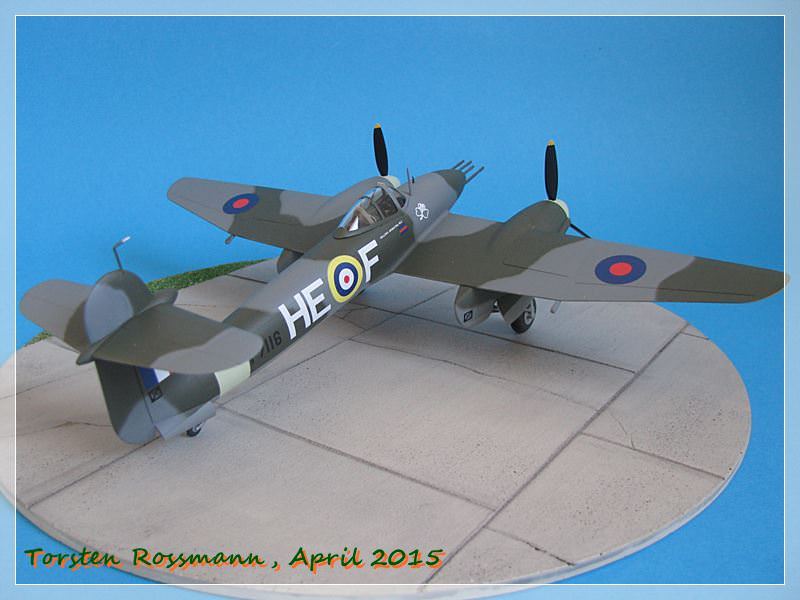
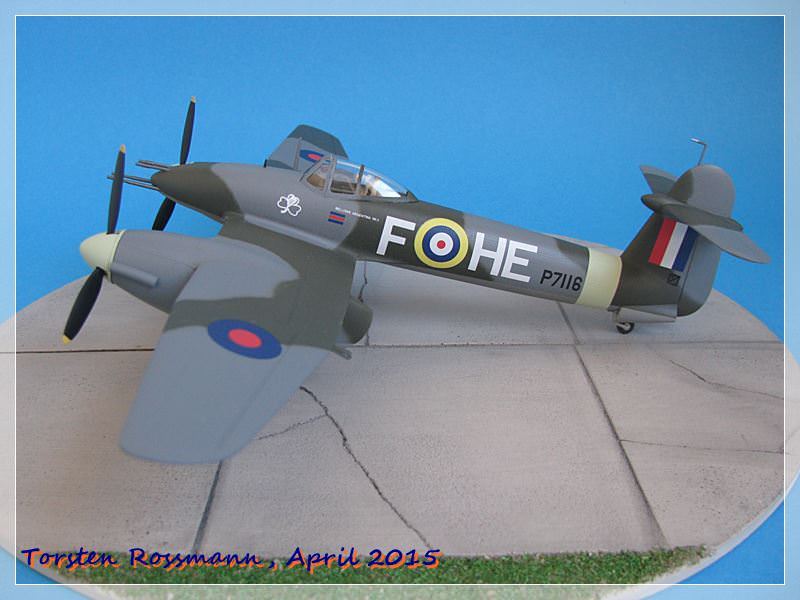
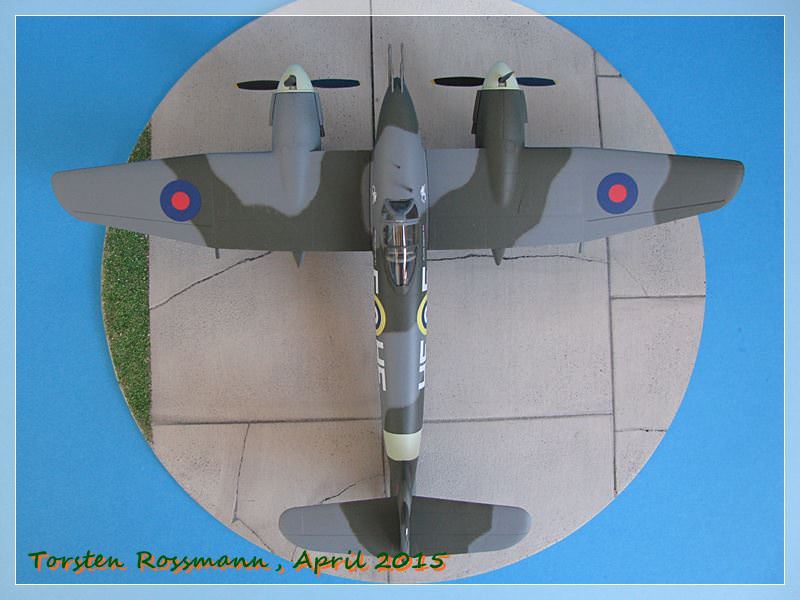
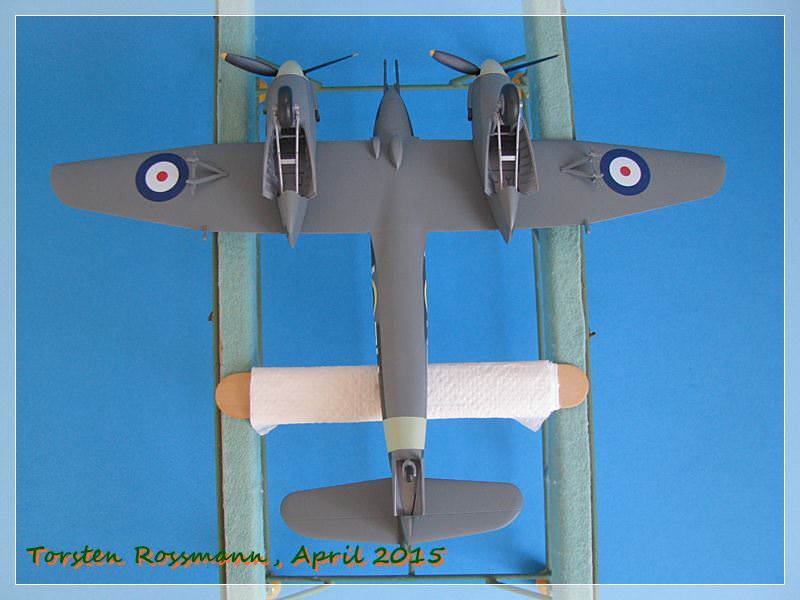
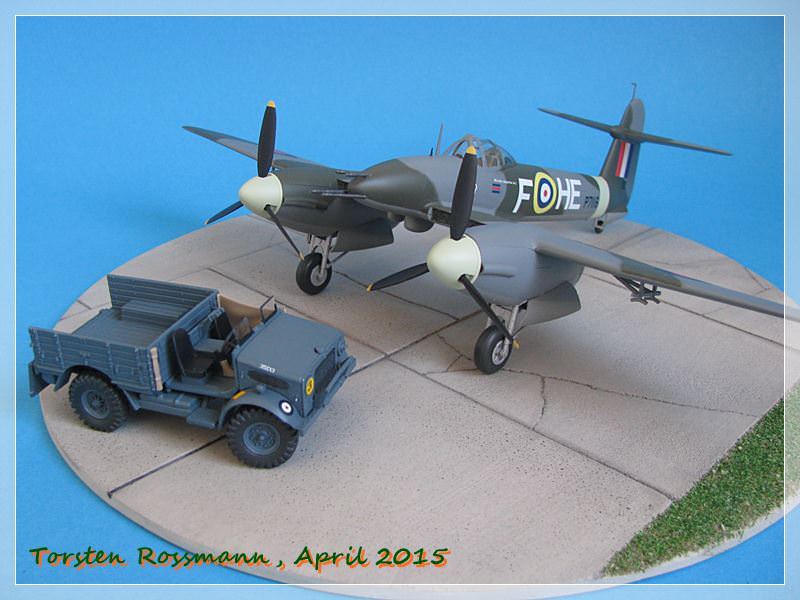
It seems as if there's a secret Royal Air Force Campaign running at the moment with all the Spitfires and Hurricanes leaving the workbenches (Terri, Steffen, Joel, Mal ....). I will join that gang and want to show you my latest model, Trumpeter's new Westland Whirlwind Mk. I in 1/48, which I finished on Thursday ....
.... the first prototype of the Whirlwind flew in October 1938 and in January 1939 a production contract for 200 aircraft was given to Westland. The new type was interesting on several accounts. It was the RAF's first twin engined fighter and had a better low altitude performance than any other contemporary single seat fighter. The firepower of its four 20 mm nose-mounted cannons was enormous. Deliveries began in July 1940 to No. 263 Sqn and the squadron settled down to eliminate the inevitable bugs in the airframe and engines, the Rolls Royce Peregrine. As a result of a shortage of engines, deliveries were slow and only 8 Whirlwinds were received by the end of 1940. It had become obvious that the Whirlwind had its drawbacks, like the unreliable engines and a high landing speed, which restricted the number of airfields it could use. So the initial order of 200 aircraft was cut to 112 and another order was cancelled. The last Whirlwind left the production line in January 1942. The last aircraft was taken out of service by late 1943. The Whirlwind was only used by two squadrons, No. 263 and No. 137. The former changed to Hawker Typhoons while the latter was re-equipped with Hawker Hurricanes. But the Whirlwinds proved useful as fighter bombers and in fighter sweeps against german E-boats in the Channel ....
.... I have built a Whirlwind of No. 263 Sqn at RAF Colerne in February 1942, though this is not mentioned in the instructions ....
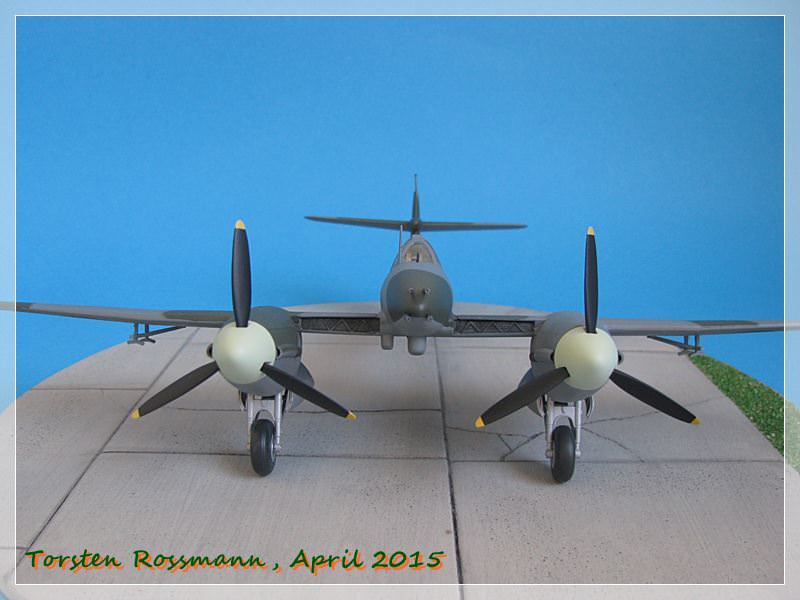
.... though the kit is brandnew (from 2014), it has some quite annoying issues. The kit consists officially of only 73 parts but what I first noticed was the missing of part No. 74 - the gun sight! Oh no, not again! Okay, that problem was quickly solved and the gun sight was proudly sponsored by a left over from a Hasegawa Spitfire The fitting of such a new kit can only be described as bad. There is far to much filler needed at places where it should not be necessary. When I glued the engine nacelles to the wings I noticed big gaps which had to be filled and sanded. The same on the underside where the wings meet the fuselage and in some other place I have forgotten in the meantime .... In my opinion the engineering of this kit is quick chinese crap and not worth the 29 Euros I've paid for it. Fortunatly I don't have many Trumpeter kits in my stash ....
.... the painting instruction is also a good laughter. The fuselage ring should be painted in a not specified grey tone. Why don't they try Sky, as I did? Same colour on the spinners. For the other colours I trusted my old but reliable RAF paints Medium Sea Grey, Ocean Grey and Dark Green from czech manufacturer Agama, Sky 59 and Interior Grey Green 45 come from Revell. The wheel wells are painted in Aluminium 99, also from Revell. Dark Green was airbrushed free hand and as usual the kit is not weathered ....
.... in the last photo you can see the new nice little Bedford MWD from Airfix together with my Whirlwind. They fit nicely together. I quickly pressed the Bedford together for the Hot out of the mould Campaign. A really nice kit and well engineered like all of Airfix's new kits. For painting it I have used Medium Blue XF-18 from Tamiya. I have already ordered another Bedford at my LHS to build also the late version. Now I need to paint my RAF personal from ICM to bring some life into the scene. But right now the pilot and his crew chief are having a cup of Earl Grey in the canteen ....
So I thank you for walking around my new Whirlwind, which in the end didn't turn out that bad as the kit is. Both will be seen on future expos.
Happy modelling!
Torsten
Jessie_C
British Columbia, Canada
Joined: September 03, 2009
KitMaker: 6,965 posts
AeroScale: 6,247 posts
Joined: September 03, 2009
KitMaker: 6,965 posts
AeroScale: 6,247 posts
Posted: Sunday, April 19, 2015 - 12:33 AM UTC
This is the first I've heard of a Trumpeter kit being difficult to build. Usually they're not so hot in terms of accuracy and even basic shapes (Vampire, for instance), but most of the time they're pretty darned easy to build. It sounds like I ought to keep my Cooper Details vac kit...
Joel_W
Associate Editor
New York, United States
Joined: December 04, 2010
KitMaker: 11,666 posts
AeroScale: 7,410 posts
Joined: December 04, 2010
KitMaker: 11,666 posts
AeroScale: 7,410 posts
Posted: Sunday, April 19, 2015 - 03:01 AM UTC
Torsten,
That's one very impressive build. As usual it's built to your museum quality standards, with a perfect camo paint scheme and flawless decaling. One would have never guessed that the kit had fit issues by the way your build came out.
Joel
That's one very impressive build. As usual it's built to your museum quality standards, with a perfect camo paint scheme and flawless decaling. One would have never guessed that the kit had fit issues by the way your build came out.
Joel
BlackWidow
European Union
Joined: August 09, 2009
KitMaker: 1,732 posts
AeroScale: 1,336 posts
Joined: August 09, 2009
KitMaker: 1,732 posts
AeroScale: 1,336 posts
Posted: Monday, April 20, 2015 - 12:47 AM UTC
Jessie, the majority of the parts do fit well, but some of the more important, that means visible, parts don't. And that is what makes me annoyed. I mean, today the companies have all opportunities to produce well engineered kits. They just have to take money in hand. But that's what they don't want to. And be patient and don't throw a half-baked kit on the market. But especially the Trumpeter guys are impatient. This is my 3. Trumpeter kit (MiG 3 and Tomahawk before) and all have their issues and missing parts. Or am I just allergic against chinese plastic? Well, those Hobbyboss kits I've done so far (Wildcat, Me 262, Bearcat) went together well with some minor problems. At the moment I work on a Leopard 1 in 1/35 from Revell, the kit is from 1997. Considering the kit is nearly 20 years old, the fitting is just perfect ....
Joel, also thanks for your feedback. Indeed, I am quite satisfied with the result after all the troubles. But believe me, I can still see, where I had to use filler and sandpaper. The decals are again veeeery thin and I had to be very carefull not to destroy them. And there are no stencils coming with the decals.
Oh, btw, I silently follow your Spitfire build. What a pity that you had to strip off the paint again. But I hope that it will work this time. And what about your Thunderbolt? Is she still "on ice"? I might also go for a P-47 this year.
Torsten
Joel_W
Associate Editor
New York, United States
Joined: December 04, 2010
KitMaker: 11,666 posts
AeroScale: 7,410 posts
Joined: December 04, 2010
KitMaker: 11,666 posts
AeroScale: 7,410 posts
Posted: Monday, April 20, 2015 - 02:23 AM UTC
Quoted Text
...Oh, btw, I silently follow your Spitfire build. What a pity that you had to strip off the paint again. But I hope that it will work this time. And what about your Thunderbolt? Is she still "on ice"? I might also go for a P-47 this year.
Torsten
Torsten,
As you saw, the Spitfire made it through the paint stripping just fine once I got a coat of Primer on. I've had issues with the Eclipse double action air brush for large areas that required rubbing out to get the surface smooth enough for the next coat. I finally decided that it just wasn't what I wanted to paint with. So I bought the new Iwata internal single action M-1 which should be here
Tomorrow afternoon.
Mal has been more then generous and sent me two sets of the correct masks. So the Spitfire is on hold till they arrive. Hopefully sooner then later.
The Academy Jug is just on my shelf of Doom. Since the Spit is on hold for a few more days, I started working on the cockpit of the Tamiya 1/48 scale P-47D-25 Bubble. I also have the Razorback in my stash that I'm looking forward to building. Just gotta love those Tamiya kits.
Joel