

Air Campaigns
Want to start or join a group build? This is where to start.
Want to start or join a group build? This is where to start.
Hosted by Frederick Boucher, Michael Satin
OFFICIAL: Small is Beautiful Campaign

usethermite

Joined: February 14, 2012
KitMaker: 252 posts
AeroScale: 209 posts
Posted: Saturday, May 26, 2012 - 09:59 AM UTC
Hi, Jessica. You make me smile. The Harrier's that old, eh? Is there anyway you can tell how old a kit is before you open it? Usually I don't care how old a kit is if it's a subject I want to do. My only concern is does the kit protray the subject in a reasonable manner? I turned my mini-maglite in a long, long time ago. And, Jessica, thanks again for all your help in getting me to post my pics. All the best. JT

Jessie_C


Joined: September 03, 2009
KitMaker: 6,965 posts
AeroScale: 6,247 posts

Posted: Saturday, May 26, 2012 - 12:20 PM UTC
The best way to tell how the age of a kit is to remember when it was first issued. That and look at the reviews on this and other sites; most often kits are reviewed when they first came out, so if the review is dated 1997 you know that it's not a new issue. Our members have decades worth of experience so you should be able to fairly quickly find out whether a kit is new or not just by asking 
TheDiggs
Joined: April 25, 2008
KitMaker: 338 posts
AeroScale: 20 posts

Posted: Sunday, May 27, 2012 - 01:02 PM UTC
She's painted, detailed, and decaled. All I need to do is make a couple of touch ups in the wheel wells, attached the landing gear, and dullcoat this little lady.
The only panel lines on this model are on the tail fins and the bomb bay. You can probably make out one of the tail fin's panel lines.

The only panel lines on this model are on the tail fins and the bomb bay. You can probably make out one of the tail fin's panel lines.

Middle_Franconian

Joined: January 02, 2011
KitMaker: 279 posts
AeroScale: 239 posts

Posted: Sunday, May 27, 2012 - 04:58 PM UTC
Hi all,
I call this Starfighter done:
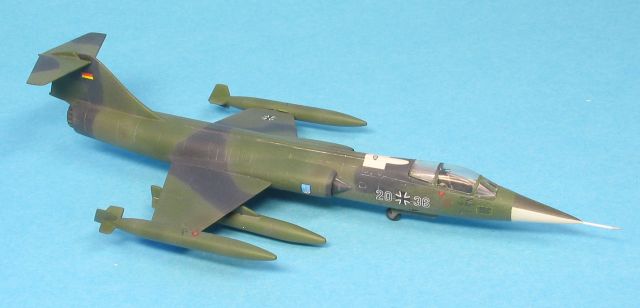

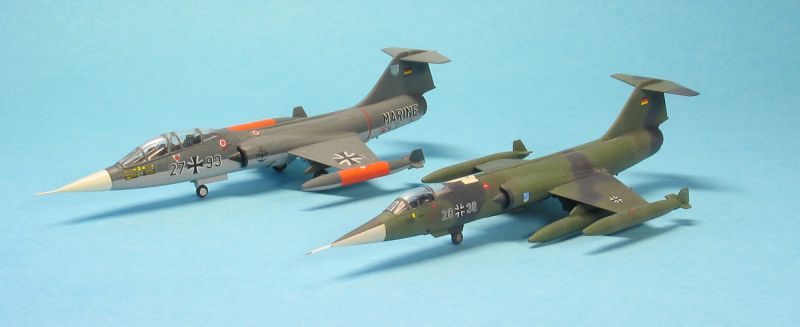
Questions and comments welcome!
Regards,
Sebastian
I call this Starfighter done:
Questions and comments welcome!
Regards,
Sebastian

V2Phantom
Joined: December 26, 2008
KitMaker: 288 posts
AeroScale: 195 posts
Posted: Monday, May 28, 2012 - 02:13 AM UTC
I just managed to cross my (personal) finish line with this build! Here are the photos of my completed F-15J in the 201 SQ Anniversary markings.
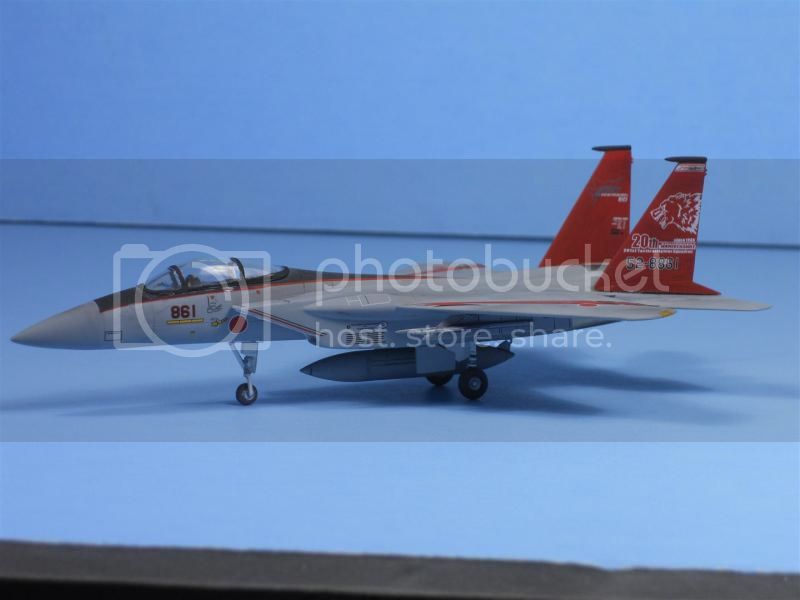
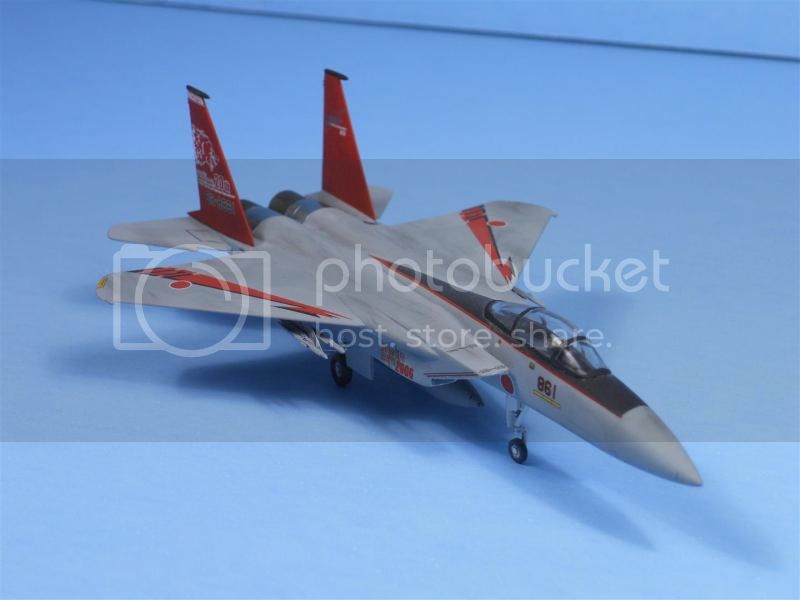
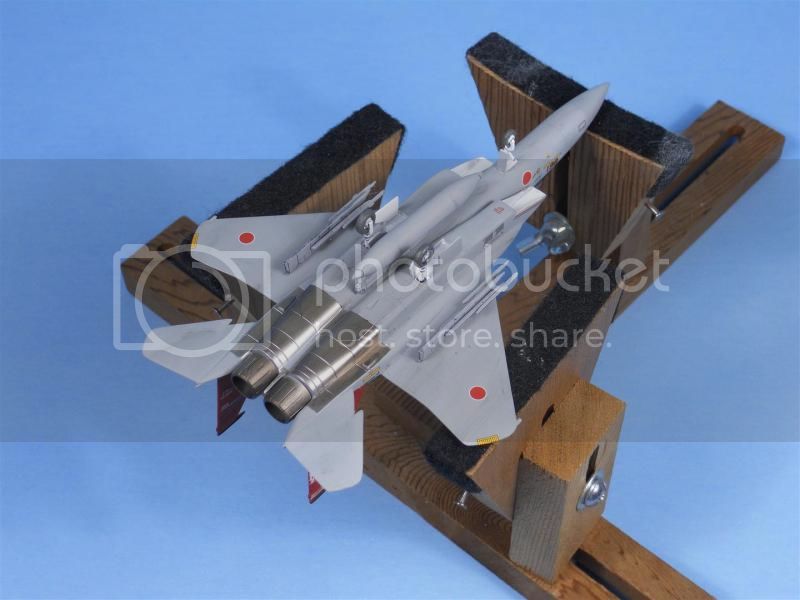
Like any good GB, I learned a LOT of good tips and model reviews for the great builds in this thread. I definitely enjoyed this GB and am looking towards my next 1/144 build. Hopefully, I wont have to build my own cockpit for that build!
Is there a final location for us to post our finished builds or is this thread OK to get credit?
Have fun modeling!
Mike
Jessie_C
Joined: September 03, 2009
KitMaker: 6,965 posts
AeroScale: 6,247 posts
Posted: Monday, May 28, 2012 - 03:17 AM UTC
Quoted Text
Is there a final location for us to post our finished builds or is this thread OK to get credit?
You need to post it in the gallery. Click PHOTOS at the top of your screen, then follow the directories to AeroScale » Aeroscale Campaigns » 2012 Aeroscale Campaigns » Small Is Beautiful. Sometimes the system will log you out when you switch to the gallery so make sure that you're logged in, then click Upload Photos at the top right of your screen.
Middle_Franconian
Joined: January 02, 2011
KitMaker: 279 posts
AeroScale: 239 posts
Posted: Monday, May 28, 2012 - 08:31 AM UTC
@ Mike: Nice F-15! Congratulations!
TheDiggs
Joined: April 25, 2008
KitMaker: 338 posts
AeroScale: 20 posts
Posted: Monday, May 28, 2012 - 01:14 PM UTC
All done, I couldn't get the wings to attach as smoothly as I would have liked, but overall this kit went together very well. It was obviously an old kit, but I think it was a perfect start into the 1/144 world.
I think I will leave the tail fins off until the very end next time I build a plane that has two of them. It was a little awkward painting the panel lines and dullcoating the canted tail fins while they were attached to the plane.

I think I will leave the tail fins off until the very end next time I build a plane that has two of them. It was a little awkward painting the panel lines and dullcoating the canted tail fins while they were attached to the plane.
TheDiggs
Joined: April 25, 2008
KitMaker: 338 posts
AeroScale: 20 posts
Posted: Monday, May 28, 2012 - 01:18 PM UTC
I have a spot on my F-117A that was made cloudy and ugly by the dullcoat. I also have another area where I whiped away some excess dullcoat and that part looks shiny and streaky.
These parts aren't too obvious, but is there a way to fix them?
These parts aren't too obvious, but is there a way to fix them?
Jessie_C
Joined: September 03, 2009
KitMaker: 6,965 posts
AeroScale: 6,247 posts
Posted: Monday, May 28, 2012 - 01:50 PM UTC
Carefully sand away the ruined dullcoat without going through the paint underneath, then give it another coat.
V2Phantom
Joined: December 26, 2008
KitMaker: 288 posts
AeroScale: 195 posts
Posted: Tuesday, May 29, 2012 - 02:04 AM UTC
Thanks Jessie! I did not know about the gallery so I really appreciate you pointing me to it. The gallery is very cool! I like the fact that you can see all of the completed builds together.
Thanks again for helping this newbie through his first Aeroscale GB!
Have fun modeling!
Mike
Thanks again for helping this newbie through his first Aeroscale GB!
Have fun modeling!
Mike
Quoted Text
You need to post it in the gallery. Click PHOTOS at the top of your screen, then follow the directories to AeroScale » Aeroscale Campaigns » 2012 Aeroscale Campaigns » Small Is Beautiful. Sometimes the system will log you out when you switch to the gallery so make sure that you're logged in, then click Upload Photos at the top right of your screen.
V2Phantom
Joined: December 26, 2008
KitMaker: 288 posts
AeroScale: 195 posts
Posted: Tuesday, May 29, 2012 - 02:07 AM UTC
Thanks Sebastian! I also think you did a fantastic job on your Starfighters. I am really impresed with your paint scheme in this scale. It looks like a much larger build than something in 1/144, well done!
Have fun modeling!
Mike
Have fun modeling!
Mike
Quoted Text
@ Mike: Nice F-15! Congratulations!
tread_geek
Joined: March 23, 2008
KitMaker: 2,847 posts
AeroScale: 144 posts
Posted: Tuesday, May 29, 2012 - 07:51 AM UTC
@usethermite - Thanks for your thoughts and I'm only put off about ever buying another 1/144 Dragon Aircraft. My exposure to the company has mostly been with Braille scale armour and I guess I wrongly expected their flying things to be on a par.
@Jessie_C
Trust me Jessie, I always research a build and I am surprised to say that I could find little about the Harrier kit except for a few people pointing out that it had problems and buy a Revell version instead. There weren't even any pictures of the completed kit let alone a build log. Wonder why? I also had the misimpression that this should be a quicker build. Cleaning of the flash alone is becoming a pain and don't even get me started on mould seams, instruction vagueness and 2X4 thick sprue connecting points.
This build was a request from an acquaintance who offered to pay for any materials and a small remuneration for my trouble. I've dealt with problematic kits before but this one was a shock. He'll just have to be happy with what he gets. :-)
----------------------------------------------------------
On a more positive and encouraging note, it's inspirational to see all the builds being successfully completed in this thread. The jets on this page and the F-4 on the previous one look great and even thought the Harrier is small I hate to think about how small the Zero on page 8 is! Keep up the great work everyone.
I hope to have more pictures of progress in a day or so after I quit beating the main wings into submission.
Cheers,
Jan
@Jessie_C
Quoted Text
One must keep in mind that Dragon's Harrier is at least 15 years old if not older. It's certainly not state of the art like the Vulcan is. All of Dragon's 1/144 kits of that vintage need a generous helping of "Some modelling skills required" to do them justice.
Trust me Jessie, I always research a build and I am surprised to say that I could find little about the Harrier kit except for a few people pointing out that it had problems and buy a Revell version instead. There weren't even any pictures of the completed kit let alone a build log. Wonder why? I also had the misimpression that this should be a quicker build. Cleaning of the flash alone is becoming a pain and don't even get me started on mould seams, instruction vagueness and 2X4 thick sprue connecting points.
This build was a request from an acquaintance who offered to pay for any materials and a small remuneration for my trouble. I've dealt with problematic kits before but this one was a shock. He'll just have to be happy with what he gets. :-)
----------------------------------------------------------
On a more positive and encouraging note, it's inspirational to see all the builds being successfully completed in this thread.
The jets on this page and the F-4 on the previous one look great and even thought the Harrier is small I hate to think about how small the Zero on page 8 is! Keep up the great work everyone. I hope to have more pictures of progress in a day or so after I quit beating the main wings into submission.
Cheers,
Jan
Jessie_C
Joined: September 03, 2009
KitMaker: 6,965 posts
AeroScale: 6,247 posts
Posted: Tuesday, May 29, 2012 - 08:08 AM UTC
I really doubt that Dragon aircraft were designed by the same people who do the armour; there's that big a difference between the buildability of the kits. Each line is good, but the tanks go together so well that it's always a surprise that we wingy-thingy builders have to exercise our skills so much more.
Their more recent issues under the Cyberhobby banner are a different matter, as are their space kits. Those ones are more nearly parallel to the armour kits.
Their more recent issues under the Cyberhobby banner are a different matter, as are their space kits. Those ones are more nearly parallel to the armour kits.
usethermite
Joined: February 14, 2012
KitMaker: 252 posts
AeroScale: 209 posts
Posted: Tuesday, May 29, 2012 - 09:58 AM UTC
Hi, Jan
Jessica is right about the Dragon/Cyber-Hobby kits. My Vulcan is very neatly done up. Not too much to nick on. Also give some of the Platz 1/144 kits a look-see. Not all kits, even from the same company, are equal. Just ask around here at Aeroscale. Oh, and if it don't work at all, just make some kind of diorama out of it. All the best.
Happy gluing, JT
Jessica is right about the Dragon/Cyber-Hobby kits. My Vulcan is very neatly done up. Not too much to nick on. Also give some of the Platz 1/144 kits a look-see. Not all kits, even from the same company, are equal. Just ask around here at Aeroscale. Oh, and if it don't work at all, just make some kind of diorama out of it.
All the best.Happy gluing, JT
Middle_Franconian
Joined: January 02, 2011
KitMaker: 279 posts
AeroScale: 239 posts
Posted: Saturday, June 02, 2012 - 04:12 AM UTC
@ JT: Nice to hear that the Vulcan is a good kit. Planning to do the Falkland version. Looking forward to seeing your done.
tread_geek
Joined: March 23, 2008
KitMaker: 2,847 posts
AeroScale: 144 posts
Posted: Saturday, June 02, 2012 - 04:45 AM UTC
@usethermite - Unfortunately the hobby shops within 50 miles of my location aren't exactly keen on 1/144 aircraft and I'm lucky to find any and then they are mostly older Revell and the occasional Dragon. Platz, never heard of them let alone seen one. Oh, and I am not comfortable with mail order.
---------------------------------------------------------------------------
Well, best laid plans and all that...or perhaps the nightmare continues!
I got the main centreline landing gear on (that was fun, NOT), holes too small, pegs too big, legs warped and the main wings attached. The right wing fit perfectly but the left one not so good (filler, sand, filler, sand...). The wing root extensions were a pain in the posterior. They just didn't want to fit right and you guessed it, more filler and gap filling CA to get them somewhat presentable.

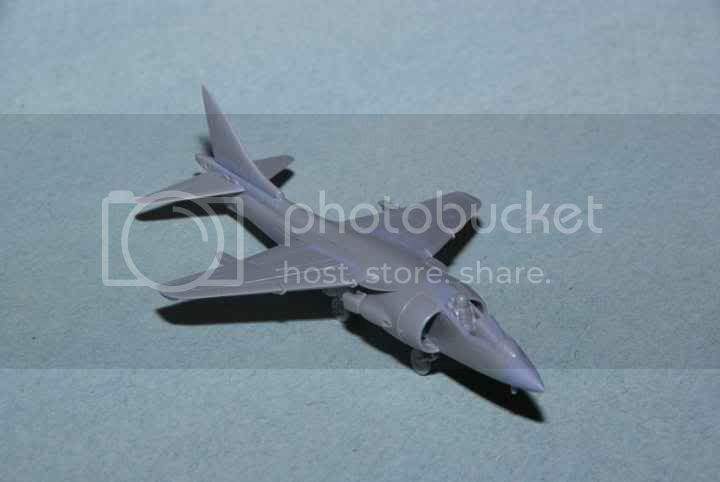
Next up was the stores pylons and surprise, surprise, they actually fit well! Problems with the refuelling probe, the curve of the thing didn't match the curve of the fuselage. The outrigger landing gear are too long so they'll need a bit of trimming but fit not too bad. For the pictures they are just press-fit on.

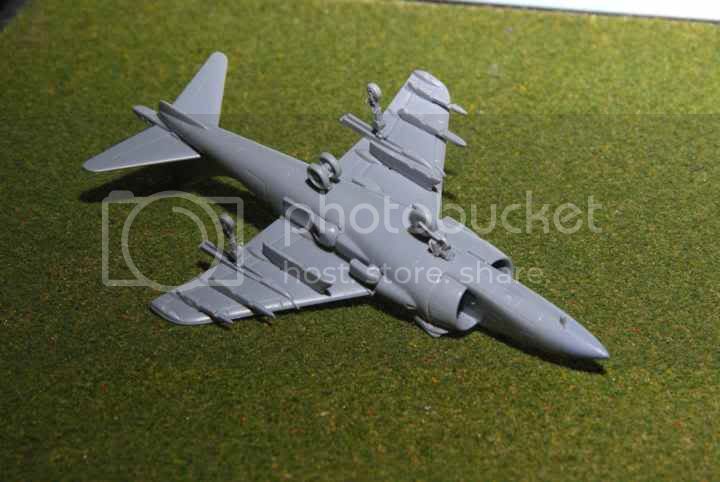
Next up will be the gun pods and preparing the ordnance. I'm doing this puppy loaded for bear! The one great thing about this kit is that they give you a ton of weapons to choose from and that actually look quite good!
Cheers,
Jan 
---------------------------------------------------------------------------
Well, best laid plans and all that...or perhaps the nightmare continues!
I got the main centreline landing gear on (that was fun, NOT), holes too small, pegs too big, legs warped and the main wings attached. The right wing fit perfectly but the left one not so good (filler, sand, filler, sand...). The wing root extensions were a pain in the posterior. They just didn't want to fit right and you guessed it, more filler and gap filling CA to get them somewhat presentable.
Next up was the stores pylons and surprise, surprise, they actually fit well!
Problems with the refuelling probe, the curve of the thing didn't match the curve of the fuselage. The outrigger landing gear are too long so they'll need a bit of trimming but fit not too bad. For the pictures they are just press-fit on.Next up will be the gun pods and preparing the ordnance. I'm doing this puppy loaded for bear!
The one great thing about this kit is that they give you a ton of weapons to choose from and that actually look quite good!Cheers,
Jan
Jessie_C
Joined: September 03, 2009
KitMaker: 6,965 posts
AeroScale: 6,247 posts
Posted: Saturday, June 02, 2012 - 06:06 AM UTC
The fun thing about kits like that is the feeling of accomplishmnt you get after concquering it
Once you've done a few going back to a Tamafujigawa wunderkit doesn't seem to give you the same thrill.
In any case you're certainly beating this one into submission. It's going to look great.
J
Once you've done a few going back to a Tamafujigawa wunderkit doesn't seem to give you the same thrill.
In any case you're certainly beating this one into submission. It's going to look great.
J
ludwig113

Joined: February 05, 2008
KitMaker: 1,381 posts
AeroScale: 1,110 posts

Posted: Monday, June 04, 2012 - 06:25 AM UTC
hi all,
this is mine done...
the sweet kits are really well made but it doesn't make the build or painting easy


glad to see everyone doing some great builds, remember there is now less than 1 month to go !
all the best paul
this is mine done...
the sweet kits are really well made but it doesn't make the build or painting easy
glad to see everyone doing some great builds, remember there is now less than 1 month to go !
all the best paul
tread_geek
Joined: March 23, 2008
KitMaker: 2,847 posts
AeroScale: 144 posts
Posted: Tuesday, June 05, 2012 - 09:21 AM UTC
Quoted Text
The fun thing about kits like that is the feeling of accomplishmnt you get after concquering it
Once you've done a few going back to a Tamafujigawa wunderkit doesn't seem to give you the same thrill.
In any case you're certainly beating this one into submission. It's going to look great.
Jessie, thanks for the "encouragement" but I doubt that there are that many winderkits out there in small scale. Each one has its monsters just waiting to raise their ugly, tooth filled heads.
As far as beating into submission...that's about what it's taking. @Paul - That's a cute little Hurricane and I just wish it was something like that that I was building.
--------------------------------------------------
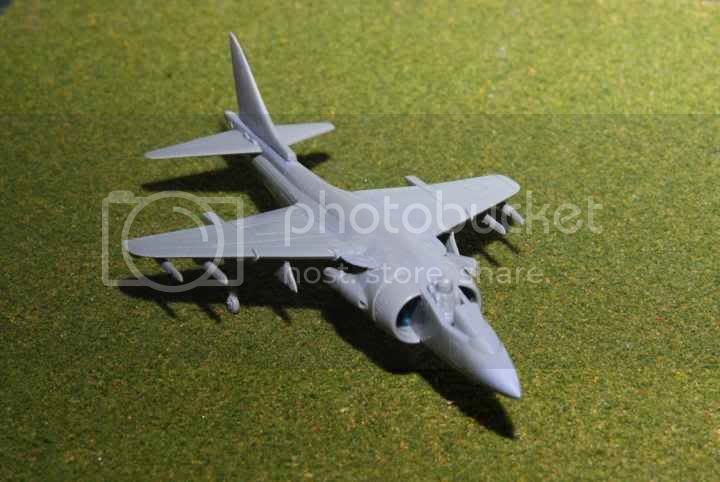
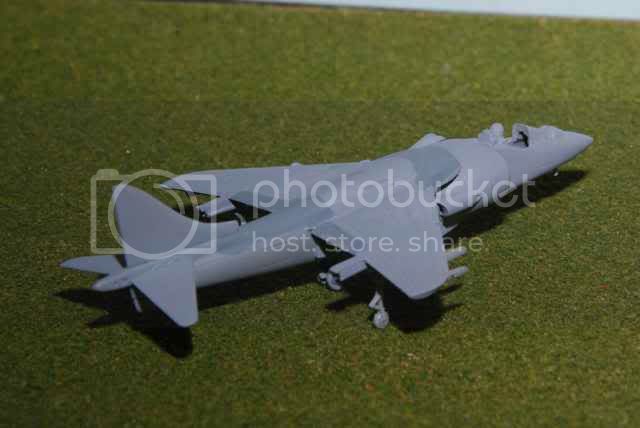
Progress is progress no matter how long it takes. All the underside parts are now done except for the stores. They are proving quite a challenge (time consuming) to clean up. They look beautiful but the sprue attachment points are far too numerous and in some cases HUGE. The outrigger wheel doors were all one piece and had to be cut into their three corresponding sections to have the gear down. That was interesting. I bored out the muzzles on the cannon pods just to prove to myself that I could.

Sprayed the entire plane with primer and went looking for flaws. Underside wasn't bad but the top side is requiring quite a bit of gentle and judicious sanding. Most of it is done at the point of these pictures but still needs a bit more. Once that's done I hope to get the initial grey base colour on tomorrow.

Cheers,
Jan

Middle_Franconian
Joined: January 02, 2011
KitMaker: 279 posts
AeroScale: 239 posts
Posted: Friday, June 08, 2012 - 08:07 AM UTC
@ Paul: Nice Hurricane! Looks great!
@ Jan: I think I had the same kit approx. 20 years ago... I remember a Gulf War one. But you are on the right way! Jessie is right: you will feel a lot better when this little Harrier is standing on yout table
Regards,
Sebastian
@ Jan: I think I had the same kit approx. 20 years ago... I remember a Gulf War one. But you are on the right way! Jessie is right: you will feel a lot better when this little Harrier is standing on yout table
Regards,
Sebastian
ludwig113
Joined: February 05, 2008
KitMaker: 1,381 posts
AeroScale: 1,110 posts
Posted: Saturday, June 09, 2012 - 08:23 PM UTC
morning all,
well done to everyone so far.... remember there are only 20 days left !
when you've finished please put your finished pictures into the gallery section.
paul
well done to everyone so far.... remember there are only 20 days left !
when you've finished please put your finished pictures into the gallery section.
paul
tread_geek
Joined: March 23, 2008
KitMaker: 2,847 posts
AeroScale: 144 posts
Posted: Wednesday, June 13, 2012 - 05:23 AM UTC
@Middle_Franconian - Thanks for the comment Sebastian but if I had known what that these Dragon kits were that old I would have thought twice about agreeing to build one. This is only my second flying thing since returning to the hobby and in no way is endearing me to build more of them.
----------------------------------------------------------------------
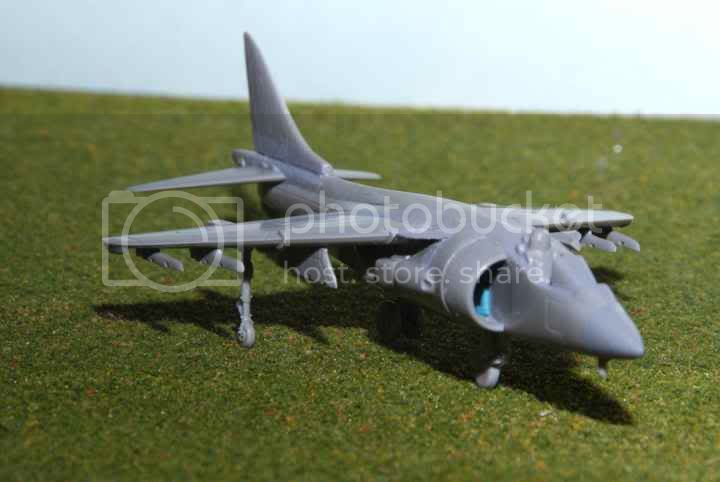
Back to the build! The instructions are turning out to be amongst the worst that I've seen from Dragon, and that after having reviewed more than a dozen Dragon vehicle kits. I've had to look at hundreds of pictures just to figure out where parts should go, including those that they left out of the instructions. As for colours, I finally found a couple of Blogs on the Internet that interpret what Dragon means when they refer to three separate greys as "Light Grey."
Anyway, enough complaining! I think that there is actually a small, tiny, dull light shining at the end of a very long tunnel. :-) I hope I have all the unlisted (in the instructions) parts fitted, have the final pylon pieces attached and have started on the ordnance. After that I can finish some of the base painting and touch-ups and apply the dark grey pattern.

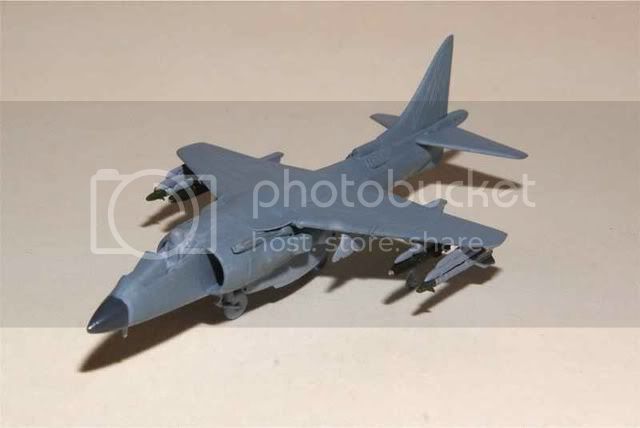

I'm glad that they give you plenty of ordnance because getting some of the pieces off is causing damage due to all the sprue attachment points and delicate nature of the parts. The Sidewinder missiles alone have SIX!
Cheers,
Jan
----------------------------------------------------------------------
Back to the build! The instructions are turning out to be amongst the worst that I've seen from Dragon, and that after having reviewed more than a dozen Dragon vehicle kits. I've had to look at hundreds of pictures just to figure out where parts should go, including those that they left out of the instructions. As for colours, I finally found a couple of Blogs on the Internet that interpret what Dragon means when they refer to three separate greys as "Light Grey."
Anyway, enough complaining! I think that there is actually a small, tiny, dull light shining at the end of a very long tunnel. :-) I hope I have all the unlisted (in the instructions) parts fitted, have the final pylon pieces attached and have started on the ordnance. After that I can finish some of the base painting and touch-ups and apply the dark grey pattern.
I'm glad that they give you plenty of ordnance because getting some of the pieces off is causing damage due to all the sprue attachment points and delicate nature of the parts. The Sidewinder missiles alone have SIX!
Cheers,
Jan
Jessie_C
Joined: September 03, 2009
KitMaker: 6,965 posts
AeroScale: 6,247 posts
Posted: Wednesday, June 13, 2012 - 06:12 AM UTC
Jan don't let that kit scare you away from wingy thingies.
It's sad that you got a difficult kit this time round, but there are much better ones out there which are not scary
In this scale, try anything from Sweet, Platz or Revell that's been released within the last 10 years. You'll find them much superior to the one you've been fighting.
It's sad that you got a difficult kit this time round, but there are much better ones out there which are not scary
In this scale, try anything from Sweet, Platz or Revell that's been released within the last 10 years. You'll find them much superior to the one you've been fighting.
tread_geek
Joined: March 23, 2008
KitMaker: 2,847 posts
AeroScale: 144 posts
Posted: Wednesday, June 13, 2012 - 07:35 AM UTC
@Jessie_C - I think that part of the issue is a matter of familiarity with more modern vehicle kits and remembering what now are ancient kits. When I was growing up I used to do all manor of kits and as aircraft were the most prominent, I did my share of them. Mostly 1/72 Airfix, Hawk, Revell, Matchbox, ESCI and I think a Hasegawa or two. There might have been others but the last few before I "dropped out" of the hobby, if I recall, were Hobbycraft and they were almost as bad as this kit. I believe that those are still tucked away in boxes partially built (Hangar Queen candidates) as I got frustrated with them requiring more sanding and putty than there was plastic in them plastic. :-)
I built a 1/144 Revell F-14D for a campaign here (even did instruction and sprue shots for a review) and that was quite an experience. It was a real learning experience but the kit was a dream when compared to this one.


Amusingly, I bought an 1/144 Revell Apache Longbow around the same time as the F-14 and thought about entering it in the helicopter campaign you had here not that long ago. Vehicle review samples distracted me so it never happened. I thought about entering it in this campaign but when I was asked to do this kit I figured the Harrier would be a simpler build. You live and you learn!
Cheers,
Jan
I built a 1/144 Revell F-14D for a campaign here (even did instruction and sprue shots for a review) and that was quite an experience. It was a real learning experience but the kit was a dream when compared to this one.
Amusingly, I bought an 1/144 Revell Apache Longbow around the same time as the F-14 and thought about entering it in the helicopter campaign you had here not that long ago. Vehicle review samples distracted me so it never happened.
I thought about entering it in this campaign but when I was asked to do this kit I figured the Harrier would be a simpler build. You live and you learn! Cheers,
Jan
 |

WEB HOSTING BY


Copyright ©2021 AeroScale and Kitmaker Network, a subsidiary of Silver Star Enterprises
All Rights Reserved. Please read our Conditions of Use and Privacy Policy.
All Rights Reserved. Please read our Conditions of Use and Privacy Policy.